みなさん、お菓子のオレオは好きですか?
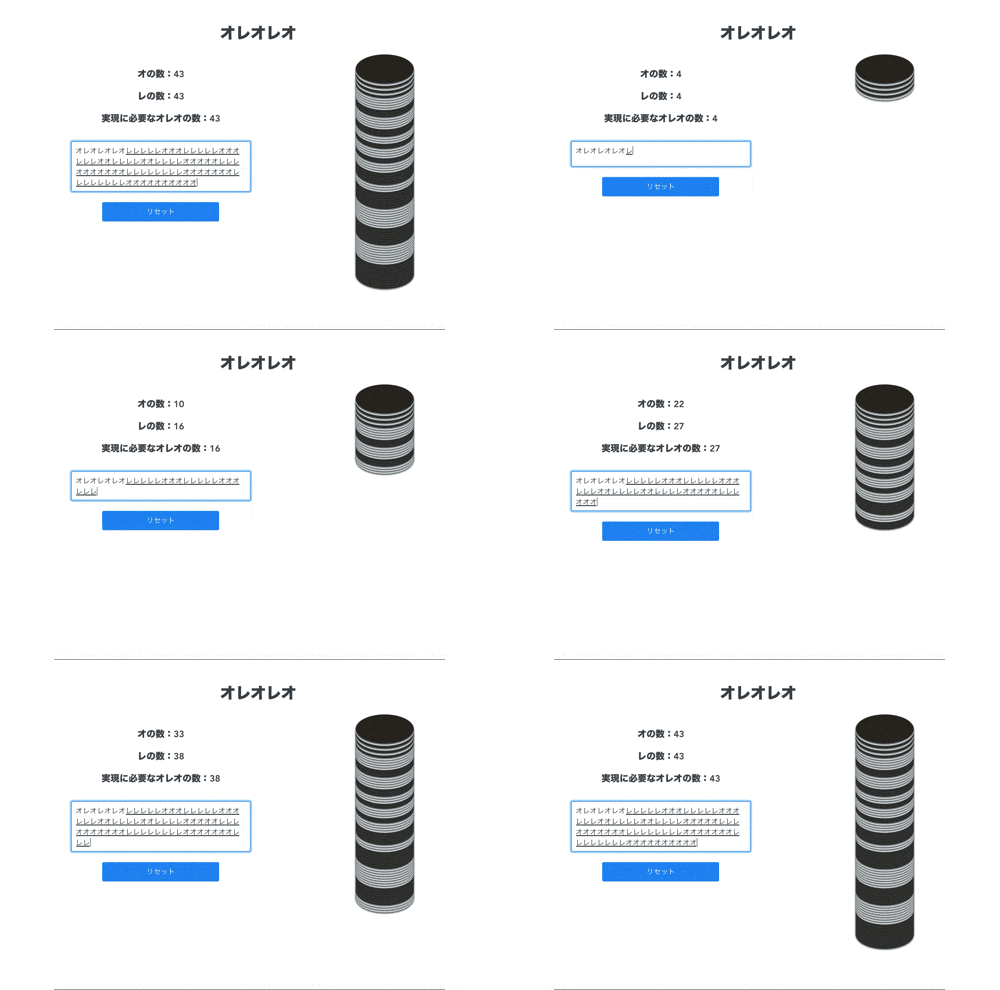
オレオは「オ」と「レ」に分割して、自分が好きなように積み上げることができます。
参考:https://twitter.com/773O3/status/1079573992254537733
1度ぐらいは自分が思い描いたオレオタワーを作ってみたいです
そんな願いをかなえるべく、しょーもないものを作ってみました
作ったもの
「オ」か「レ」の入力に応じてオレオが積み上がっていくク◯アプリ
https://tomoshiozawa.github.io/oreoreo/

やったこと
Vueで作ってGitHub Pagesにホストすることにしました。
まずはアプリを作る
Vue 3(vue-cliを使いました)で作成することにして、
UIにはPrimeVueというのを利用しました。
まずはオレオの「オ」から作ります。
CSSでそれっぽくします。
また、「レ」は色を白くするだけです。
See the Pen LYRNWEO by shiotomo (@tomoshiozawa) on CodePen.
オレオのCSSはできので、あとはうまいこと表示させるだけです。
下記のようなオレオ表示用のコンポーネントを作って、
そのコンポーネントに「オ」と「レ」のリストを渡して表示させるようにしています。
ポイントはstyleを動的に設定するようにしている部分です。
オレオパーツが少しずつずれて表示されるようにして、積み上がっている感をだします。
<template>
  <div class="oreo-stack">
    <div
      v-for="(item, index) in oreoStack"
      :key="index"
      class="p-text-center"
      :class="{ o: item == 'オ', re: item == 'レ' }"
      :style="style(index)"
    />
  </div>
</template>

<script>
export default {
  name: 'OreoStack',
  props: {
    oreoStack: {
      type: Array,
      required: true,
      default() {
        return [];
      },
    },
  },
  methods: {
    style(index) {
      return {
        top: `${index * 5}px`,
        'z-index': this.oreoStack.length - index,
      };
    },
  },
};
</script>
<style scoped>
.oreo-stack {
  position: relative;
}

.o {
  width: 120px;
  height: 60px;
  left: 50%;
  background: #343028;
  border-radius: 50%;
  box-shadow: 0px 2px 3px;
  position: absolute;
}

.re {
  width: 120px;
  height: 60px;
  left: 50%;
  background: #eef2f0;
  border-radius: 50%;
  box-shadow: 0px 2px 3px;
  position: absolute;
}
</style>
他の部分は特に大したことはしていないので説明しませんが、ソースを追えばわかるかと思います
ソースはこちら
vue.config.jsを作成
GitHub Pagesにホストする時のために、vue.config.jsを作成します。
publicPathを設定しておく必要があります。
pagesは任意です。
module.exports = {
  publicPath: '/oreoreo/',
  pages: {
    index: {
      title: 'Oreoreo',
      entry: './src/main.js',
    },
  },
};
GitHub Actionsでデプロイする
実装ができたらデプロイします
mainブランチへのpushをトリガにして、ビルドしてGitHub Pagesにデプロイするようなアクションを作成します。
actions/cache@v2を使って、モジュールをキャッシュします。
利用しているモジュールに変更がなければ、yarn installをせずにビルドを開始するようにします(node_modulesのディレクトリをキャッシュしてます)
GitHub Pagesへのデプロイにはpeaceiris/actions-gh-pagesを使います。
ビルドされたソースをGitHub Pages用のブランチにpushしてくれます
この辺りは各アクションのドキュメントが参考になります
https://github.com/actions/cache
https://github.com/peaceiris/actions-gh-pages
name: deploy to github pages

on:
  push:
    branches:
      - main

jobs:
  deploy:
    runs-on: ubuntu-18.04
    steps:
      - uses: actions/checkout@v2

      - name: Setup Node
        uses: actions/setup-node@v2.1.2
        with:
          node-version: '12.x'

      - name: Cache dependencies
        uses: actions/cache@v2
        id: yarn-cache
        with:
          path: '**/node_modules'
          key: ${{ runner.os }}-modules-${{ hashFiles('**/yarn.lock') }}
          restore-keys: |
            ${{ runner.os }}-modules-

      - name: Install dependencies
        if: steps.yarn-cache.outputs.cache-hit != 'true'
        run: yarn install

      - name: Build
        run: yarn build

      - name: Deploy
        uses: peaceiris/actions-gh-pages@v3
        with:
          github_token: ${{ secrets.GITHUB_TOKEN }}
          publish_dir: ./dist
これでmainブランチにpushすることで、自動でビルドされたものがgh-pagesというブランチによしなにpushされるようになります。
あとはGitHub Pagesの設定をして完了です。
終わりに
書くネタがなくてこんな記事になっちゃいました
「オ」と「レ」以外の文字が入力された時の挙動とかは何も考えていないので、気が向いたら更新しようと思います
参考
-
vue.config.jsについて
-
GitHub Actions 各アクション