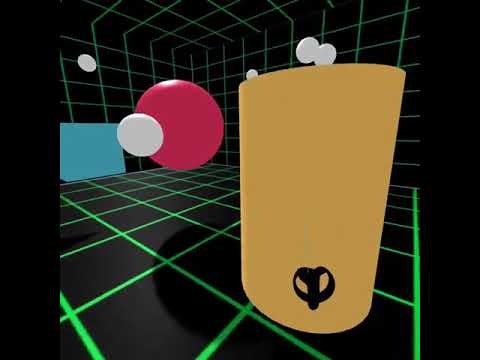
A-Frameで手っ取り早くOculus Questの入力を取得するサンプルです。
本記事では、getElementByIdで各コントローラの情報を取得したあとに入力イベントを追加する方法(sample1)と、AFRAME.registerComponentを使って入力情報を取得するコンポーネントを自作する方法(sample2)の2通りを掲載しています。どちらも同じような結果が得られますので、わかりやすい方を参考にしてください。
なおsample1のコードの概要はこちらのブログ[LINK]にて解説しています。
また、公式サイト[LINK]でsampl2で用いているcomponent追加方法の詳細が記載されています。
詳しいことを知りたい方ははぜひこれらをご一読ください。
#1. 体験
Oculus Questを装着しWebブラウザでご覧ください。
https://quest-test.glitch.me
#2. サンプルコード
##sample1
getElementByIdでコントローラを取得してアクションリスナを追加。
<!DOCTYPE html>
<html>
  <head>
    <meta charset="utf-8">
    <title>Oculus Quest Input</title>
    <meta name="description" content="Oculus Quest Input">
    <script src="https://aframe.io/releases/0.9.2/aframe.min.js"></script>
  </head>
  <body>
    <a-scene background="color: #FAFAFA">
      <a-box position="-1 0.5 -3" rotation="0 45 0" color="#4CC3D9" shadow></a-box>
      <a-sphere position="0 1.25 -5" radius="1.25" color="#EF2D5E" shadow></a-sphere>
      <a-cylinder position="1 0.75 -3" radius="0.5" height="1.5" color="#FFC65D" shadow></a-cylinder>
      <a-plane position="0 0 -4" rotation="-90 0 0" width="4" height="4" color="#7BC8A4" shadow></a-plane>
      <a-entity id="ctlL" laser-controls="hand: left"></a-entity>
      <a-entity id="ctlR" laser-controls="hand: right"></a-entity>
      <a-entity camera look-controls position="0 1.6 0">
        <a-text id="txt" value="" position="0 0 -1" scale="0.4 0.4 0.4" align="center" color="#000000"></a-text>
        <a-text id="txt2" value="" position="0 -0.15 -1" scale="0.4 0.4 0.4" align="center" color="#000000"></a-text>
      </a-entity>
    </a-scene>

    <script>
      const ctlL = document.getElementById("ctlL");
      const ctlR = document.getElementById("ctlR");
      const txt = document.getElementById("txt");
      const txt2 = document.getElementById("txt2");

      //Getting Position of Right Controller.
      const timer = setInterval(() => {
        var p=ctlR.object3D.position;
        txt2.setAttribute("value","R-Position: "+ p.x.toFixed(2)+", "+p.y.toFixed(2)+", "+p.z.toFixed(2));
      }, 100);

      //Stick Moved
      ctlL.addEventListener('axismove',function(event){
        txt.setAttribute("value", "L Stick  x:"+event.detail.axis[0].toFixed(2)+", y:"+event.detail.axis[1].toFixed(2));
      });
      ctlR.addEventListener('axismove',function(event){
        txt.setAttribute("value", "R Stick  x:"+event.detail.axis[0].toFixed(2)+", y:"+event.detail.axis[1].toFixed(2));
      });

      //Trigger Touch Started
      ctlL.addEventListener('triggertouchstart', function (event) {
        txt.setAttribute("value","Left touch started ");
      });
      ctlR.addEventListener('triggertouchstart', function (event) {
        txt.setAttribute("value","Right touch started");
      });

      //Trigger Touch Ended
      ctlL.addEventListener('triggertouchend', function (event) {
        txt.setAttribute("value","Left touch ended ");
      });
      ctlR.addEventListener('triggertouchend', function (event) {
        txt.setAttribute("value","Right touch ended");
      });

      //Trigger Pressed
      ctlL.addEventListener('triggerdown', function (event) {
        txt.setAttribute("value","Left trigger down");
      });

      ctlR.addEventListener('triggerdown', function (event) {
        txt.setAttribute("value","Right trigger down");
      });

      //Trigger Released
      ctlL.addEventListener('triggerup', function (event) {
        txt.setAttribute("value","Left trigger up");
      });
      ctlR.addEventListener('triggerup', function (event) {
        txt.setAttribute("value","Right trigger up");
      });

      //Grip Pressed
      ctlL.addEventListener('gripdown', function (event) {
        txt.setAttribute("value","Left gripdown down");
      });
      ctlR.addEventListener('gripdown', function (event) {
        txt.setAttribute("value","Right gripdown down");
      });

      //Grip Released
      ctlL.addEventListener('gripup', function (event) {
        txt.setAttribute("value","Left gripdown up");
      });
      ctlR.addEventListener('gripup', function (event) {
        txt.setAttribute("value","Right gripdown up");
      });


      //A-buttorn Pressed
      ctlR.addEventListener('abuttondown', function (event) {
        txt.setAttribute("value","Right A-button down");
      });

      //A-buttorn Released
      ctlR.addEventListener('abuttonup', function (event) {
        txt.setAttribute("value","Right A-button up");
      });

      //B-buttorn Pressed
      ctlR.addEventListener('bbuttondown', function (event) {
        txt.setAttribute("value","Right B-button down");
      });

      //B-buttorn Released
      ctlR.addEventListener('bbuttonup', function (event) {
        txt.setAttribute("value","Right B-button up");
      });

      //Y-buttorn Pressed
      ctlL.addEventListener('ybuttondown', function (event) {
        txt.setAttribute("value","Left Y-button down");
      });

      //Y-buttorn Released
      ctlL.addEventListener('ybuttonup', function (event) {
        txt.setAttribute("value","Left Y-button up");
      });

      //X-buttorn Pressed
      ctlL.addEventListener('xbuttondown', function (event) {
        txt.setAttribute("value","Left X-button down");
      });

      //X-buttorn Released
      ctlL.addEventListener('xbuttonup', function (event) {
        txt.setAttribute("value","Left X-button up");
      });
    </script>
  </body>
</html>
##sample2
コントローラにinput-listenerコンポーネントを追加。
<!DOCTYPE html>
<html>
  <!--https://github.com/TakashiYoshinaga/Oculus-Quest-Input-Sample-->
  <head>
    <meta charset="utf-8">
    <title>Oculus Quest Input</title>
    <meta name="description" content="Oculus Quest Input">
    <script src="https://aframe.io/releases/0.9.2/aframe.min.js"></script>
  </head>
  <body>
    <script>
      AFRAME.registerComponent('input-listener', {
        //Definition of right or left hand as a controller's property.
        schema: {
            hand: { type: "string", default: "" }
        },
        //Initialization
        init:function () {
          this.el.txt = document.getElementById("txt");
          this.el.txt2 = document.getElementById("txt2");
          //Stick Moved
          this.el.addEventListener('axismove',function(event){
            this.txt.setAttribute("value", "Stick  x:"+event.detail.axis[0].toFixed(2)+", y:"+event.detail.axis[1].toFixed(2));
          });
          //Trigger Touch Started
          this.el.addEventListener('triggertouchstart', function (event) {
            this.txt.setAttribute("value","Trigger touch started ");
          });
          //Trigger Touch Ended
          this.el.addEventListener('triggertouchend', function (event) {
            this.txt.setAttribute("value","Trigger touch ended");
          });
          //Trigger Pressed
          this.el.addEventListener('triggerdown', function (event) {
            this.txt.setAttribute("value","Trigger down");
          });
          //Trigger Released
          this.el.addEventListener('triggerup', function (event) {
            this.txt.setAttribute("value","Trigger up");
          });
          //Grip Pressed
          this.el.addEventListener('gripdown', function (event) {
            this.txt.setAttribute("value","Gipdown down");
          });
          //Grip Released
          this.el.addEventListener('gripup', function (event) {
            this.txt.setAttribute("value","Gripdown up");
          });
          //A-buttorn Pressed
          this.el.addEventListener('abuttondown', function (event) {
            this.txt.setAttribute("value","A-button down");
          });
          //A-buttorn Released
          this.el.addEventListener('abuttonup', function (event) {
            this.txt.setAttribute("value","A-button up");
          });
          //B-buttorn Pressed
          this.el.addEventListener('bbuttondown', function (event) {
            this.txt.setAttribute("value","B-button down");
          });
          //B-buttorn Released
          this.el.addEventListener('bbuttonup', function (event) {
            this.txt.setAttribute("value","B-button up");
          });
          //Y-buttorn Pressed
          this.el.addEventListener('ybuttondown', function (event) {
            this.txt.setAttribute("value","Y-button down");
          });
          //Y-buttorn Released
          this.el.addEventListener('ybuttonup', function (event) {
            this.txt.setAttribute("value","Y-button up");
          });
          //X-buttorn Pressed
          this.el.addEventListener('xbuttondown', function (event) {
            this.txt.setAttribute("value","X-button down");
          });
          //X-buttorn Released
          this.el.addEventListener('xbuttonup', function (event) {
            this.txt.setAttribute("value","X-button up");
          });
        },
        //called evry frame
        tick: function () {
          //Position of righ-hand controller is shown in real-time.
          if(this.data.hand=="right"){
            var p=this.el.object3D.position;
            this.el.txt2.setAttribute("value","R-Position: "+ p.x.toFixed(2)+", "+p.y.toFixed(2)+", "+p.z.toFixed(2));
          }
        }
    });

</script>

    <a-scene background="color: #FAFAFA">
      <a-box position="-1 0.5 -3" rotation="0 45 0" color="#4CC3D9" shadow></a-box>
      <a-sphere position="0 1.25 -5" radius="1.25" color="#EF2D5E" shadow></a-sphere>
      <a-cylinder position="1 0.75 -3" radius="0.5" height="1.5" color="#FFC65D" shadow></a-cylinder>
      <a-plane position="0 0 -4" rotation="-90 0 0" width="4" height="4" color="#7BC8A4" shadow></a-plane>
      <a-entity id="ctlL" laser-controls="hand: left" input-listener="hand: left"></a-entity>
      <a-entity id="ctlR" laser-controls="hand: right" input-listener="hand: right"></a-entity>
      <a-entity camera look-controls position="0 1.6 0">
        <a-text id="txt" value="" position="0 0 -1" scale="0.4 0.4 0.4" align="center" color="#000000"></a-text>
        <a-text id="txt2" value="" position="0 -0.15 -1" scale="0.4 0.4 0.4" align="center" color="#000000"></a-text>
      </a-entity>
    </a-scene>
  </body>
</html>
#3. CGとのインタラクション
コントローラを用いてテレポートやマニピュレーション、弾の発射、物理演算の適用などVRに必要そうな要素を盛り込んだサンプルをGitHubやGlitchで公開しています。ご興味があれば是非こちらもご活用ください。
Qiita
https://qiita.com/Tks_Yoshinaga/items/bd7f85a2eada4f6a9113
GitHub
https://github.com/TakashiYoshinaga/Oculus-Quest-Interaction-Sample

