初めに
今回は、Android(Java)でTensorFlowLiteを使って、画像分類をしようと思います!
もし、コード等に間違え、改善点があれば、教えてください!
TensorFlowLiteとは
TensorFlowLiteのガイドによると、、、
TensorFlowLiteはスマートフォンやIotデバイスなどでTensorFlowモデルを使用するためのツールセットです。
TensorFlow Liteのインタプリタ携帯電話、組み込みLinuxデバイス、およびマイクロコントローラを含む多くの異なるハードウェアの種類、に特別に最適化されたモデルを実行します。
TensorFlowライトコンバータインタプリタによって使用するための効率的な形式にTensorFlowモデルを変換し、バイナリサイズとパフォーマンスを向上させるために最適化を導入することができます。
⇒つまり、PCだけじゃなくて、スマートフォンやIotデバイスなどでも簡単に実行できる、TensorFlowの軽量版的なやつか!
将来的には、スマートフォンだけで学習までできるとか!
すごい!
TensorFlowLiteを使用した開発手順
1.TensorFlowモデルを用意する
TensorFlowで学習済みのモデルを用意します。
今回は、ホストされたモデルを使用するので、割愛します!
2.TensorFlowのモデルを変換する
TensorFlowLiteではTensorFlowのモデルをそのまま使用することができないので、専用の形式(tflite)に変換します。
変換方法等はこちらの記事がわかりやすいので、参考にしてください。
記事が削除されていたので、私の書いた記事と、公式の記事を張っておきます。
モデルの変換方法
公式記事
3.組み込む!
今回は、Android(Java)の組み込み方法を解説します!
組み込む!
新規プロジェクトの作成
プロジェクト名等は任意の名前にしてください!
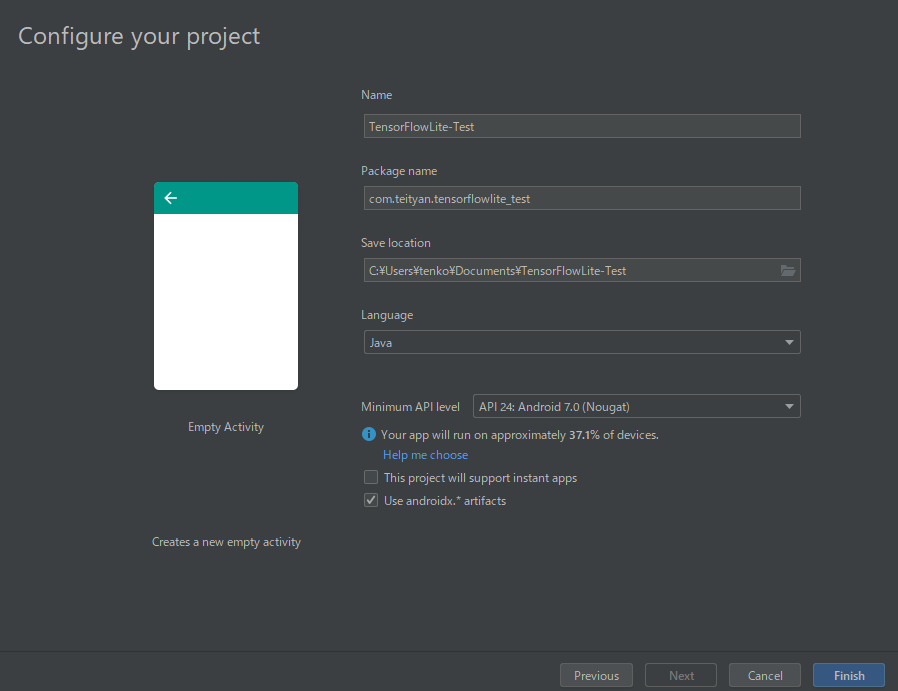
今回は、AndroidXを使用します。
「Use androidx.* artifacts」にチェックすれば、OKです。
AndroidXの使用については任意なので、使わなくても大丈夫です。
依存関係の追加
appディレクトリ下のbuild.gradleに
dependencies {
    implementation 'org.tensorflow:tensorflow-lite:0.0.0-nightly'
    implementation 'org.tensorflow:tensorflow-lite-gpu:0.0.0-nightly'
}
を追加します。
このままだと、すべてのCPUと命令セット用のABIが含まれていますが、「armeab-v7a」と「arm64-v8a」が含まれていれば、ほとんどのAndroidデバイスをカバーできるので、ほかのABIは含めいないように設定します。
含まれていても問題はないですが、アプリのサイズが減るので、おすすめです。
android {
    defaultConfig {
        ndk {
            abiFilters 'armeabi-v7a', 'arm64-v8a'
        }
    }
}
ABIについてはこちらの記事がわかりやすいので参考にしてください。
Androidではassetフォルダーに入れられたものを圧縮してしまうので、モデルをassetフォルダーに入れると、圧縮されて読み込むことができなくなってしまいます。そこで、tfliteファイルを圧縮しないように指定してあげます。
android {
    defaultConfig {
        aaptOptions {
            noCompress "tflite"
        }
    }
}
モデルの設置
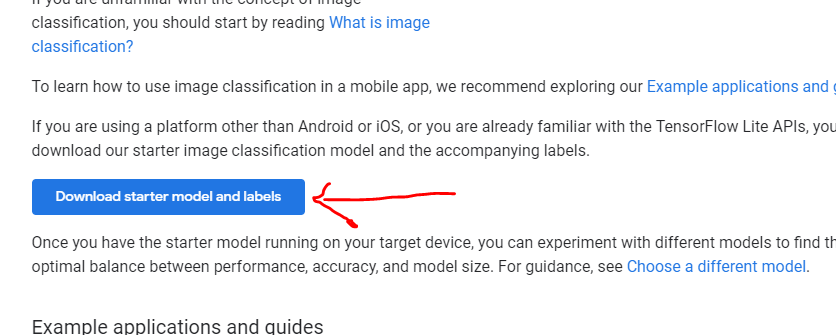
モデルとlabel_textをassetフォルダーに設置します。
こちらよりモデルをダウンロードしてください。
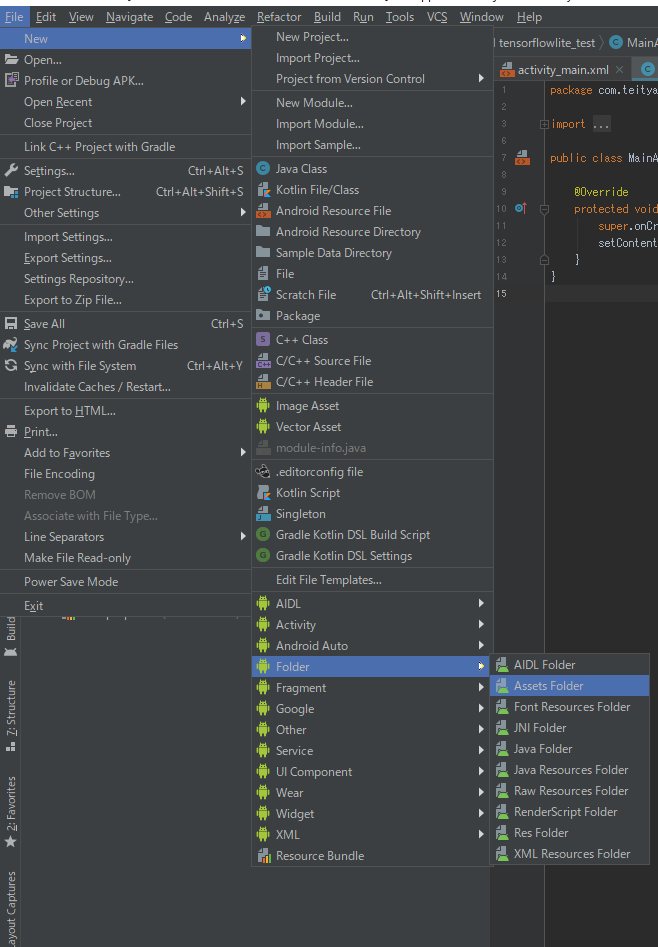
まずは、assetフォルダーフォルダーを作成します。
解凍したフォルダの中から、ファイルをコピーします。
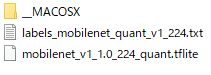
コピーしたら、名前を「model.tflite」と「labels.txt」に変更します。
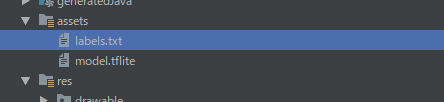
これでモデルの設置は完了です。
クラスのコピー&カスタマイズ
TensorFlowLiteのAndroidSampleの3つのクラスと、こちらのLogger.javaをコピーします。

コピーしただけだと、エラーが発生します。
Classifier.javaでLoggerクラスのインポート先を書き換えます。
import org.tensorflow.lite.Interpreter;
//ここを削除するimport org.tensorflow.lite.examples.classification.env.Logger;
import org.tensorflow.lite.gpu.GpuDelegate;

/** A classifier specialized to label images using TensorFlow Lite. */
public abstract class Classifier {
    private static final Logger LOGGER = new Logger();
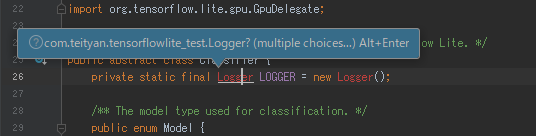
削除すると、AndroidStudioがこんなことを聞いてくるので、「Alt+Enter」を押せば、自動でインポートしてくれます。
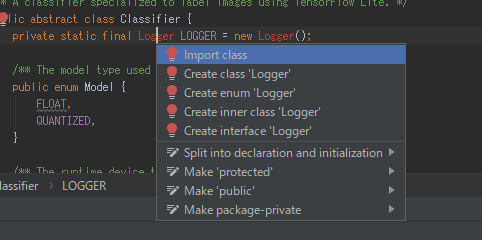
インポートする際に、
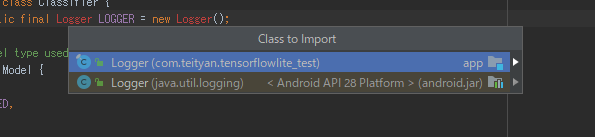
2種類出てくると思いますので、(android.jar)と書かれていないほうを選択します。
これで、エラーがすべて消えたと思います。
モデルの読み込み
ClassifierFloatMobileNet.java
ClassifierQuantizedMobileNet.java
の2つに共通しているモデルの読み込み部分を変更
元
  @Override
  protected String getModelPath() {
    // you can download this file from
    // see build.gradle for where to obtain this file. It should be auto
    // downloaded into assets.
    return "mobilenet_v1_1.0_224.tflite";
  }
変更後
  @Override
  protected String getModelPath() {
    // you can download this file from
    // see build.gradle for where to obtain this file. It should be auto
    // downloaded into assets.
    return "model.tflite";
  }
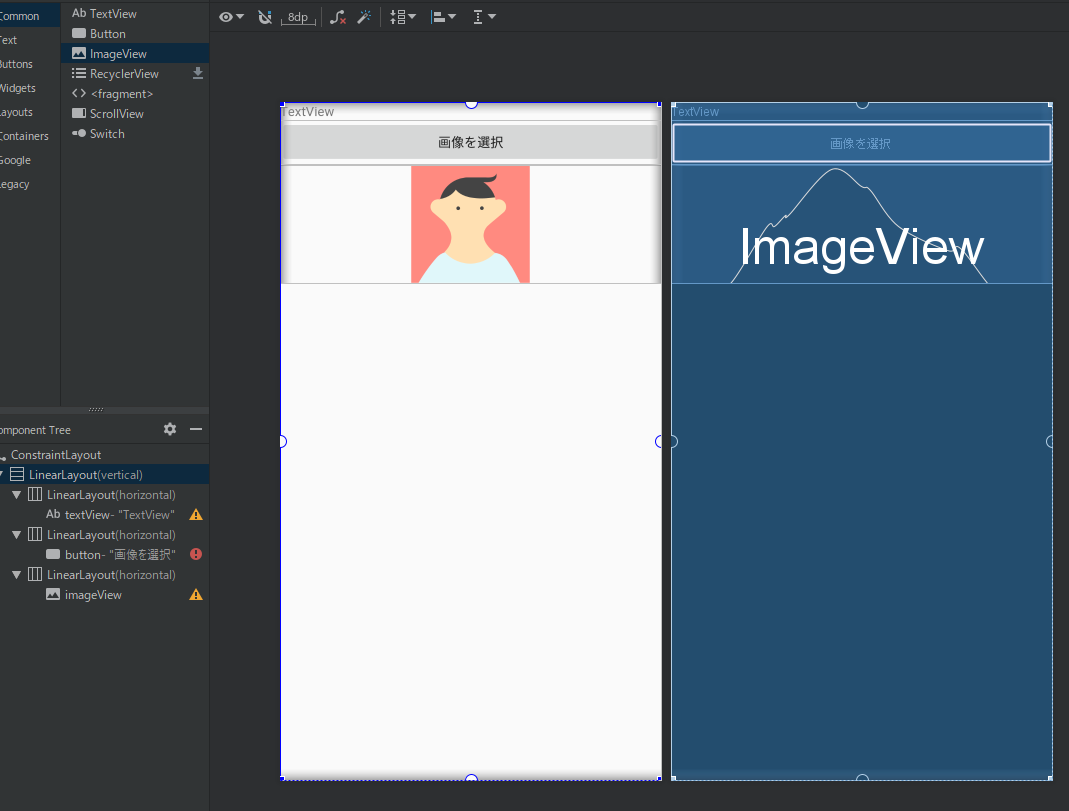
Viewの配置
こんな感じにTextView,Button,ImageViewを配置します。
ButtonにはonClickを設定押しておきます。
↑ onClickを設定する方法ってリスナーのほうがいいのかな。詳しい人おしえてくださいな
<?xml version="1.0" encoding="utf-8"?>
<androidx.constraintlayout.widget.ConstraintLayout xmlns:android="http://schemas.android.com/apk/res/android"
    xmlns:app="http://schemas.android.com/apk/res-auto"
    xmlns:tools="http://schemas.android.com/tools"
    android:layout_width="match_parent"
    android:layout_height="match_parent"
    tools:context=".MainActivity">

    <LinearLayout
        android:layout_width="match_parent"
        android:layout_height="match_parent"
        android:orientation="vertical">

        <LinearLayout
            android:layout_width="match_parent"
            android:layout_height="wrap_content"
            android:orientation="horizontal">

            <TextView
                android:id="@+id/textView"
                android:layout_width="wrap_content"
                android:layout_height="wrap_content"
                android:layout_weight="1"
                android:text="TextView" />
        </LinearLayout>

        <LinearLayout
            android:layout_width="match_parent"
            android:layout_height="wrap_content"
            android:orientation="horizontal">

            <Button
                android:id="@+id/button"
                android:layout_width="wrap_content"
                android:layout_height="wrap_content"
                android:layout_weight="1"
                android:onClick="select"
                android:text="画像を選択" />
        </LinearLayout>

        <LinearLayout
            android:layout_width="match_parent"
            android:layout_height="wrap_content"
            android:orientation="horizontal">

            <ImageView
                android:id="@+id/imageView"
                android:layout_width="wrap_content"
                android:layout_height="wrap_content"
                android:layout_weight="1"
                tools:srcCompat="@tools:sample/avatars" />
        </LinearLayout>
    </LinearLayout>
</androidx.constraintlayout.widget.ConstraintLayout>
コードを書く
まず、使用する変数を宣言しましょう!
    ImageView imageView;
    TextView textView;
    Classifier classifier;
    private static final int RESULT_IMAGEFILE = 1001;  //画像取得時に使用するリクエストコード
onCreate内でtextview,ImageViewの紐づけを行います。
        imageView = findViewById(R.id.imageView);
        textView = findViewById(R.id.textView);
次に、Classfierの呼び出しを行います。
        try {
            classifier = Classifier.create(this,QUANTIZED,CPU,2);
        } catch (IOException e) {
            e.printStackTrace();
        }
引数は、Acritivy、Modelの種類、演算に使用するデバイスの指定、使用するスレッド数を指定します。
基本はこの設定で動くと思いますが、臨機応変に変更しましょう。
ボタンの動作を書く
ボタンを押したら、ギャラリーを開いて画像が選択できるようにIntentを飛ばします。
public void image(View V){
        Intent intent = new Intent(Intent.ACTION_OPEN_DOCUMENT);
        intent.addCategory(Intent.CATEGORY_OPENABLE);
        intent.setType("image/*");
        startActivityForResult(intent, RESULT_IMAGEFILE);
}
これについて詳しくはこちら
ギャラリーから戻ってきてからの処理
ギャラリーから戻て来たら、画像を取得して、処理します。
    @Override
    public void onActivityResult(int requestCode, int resultCode, Intent resultData) {
        super.onActivityResult(requestCode, resultCode, resultData);
        if (requestCode == RESULT_IMAGEFILE && resultCode == Activity.RESULT_OK) {
            if (resultData.getData() != null) {
                ParcelFileDescriptor pfDescriptor = null;
                try {
                    Uri uri = resultData.getData();
                    pfDescriptor = getContentResolver().openFileDescriptor(uri, "r");
                    if (pfDescriptor != null) {
                        FileDescriptor fileDescriptor = pfDescriptor.getFileDescriptor();
                        Bitmap bmp = BitmapFactory.decodeFileDescriptor(fileDescriptor);
                        pfDescriptor.close();
                        int height = bmp.getHeight();
                        int width = bmp.getWidth();
                        while (true) {
                            int i = 2;
                            if (width < 500 && height < 500) {
                                break;
                            } else {
                                if (width > 500 || height > 500) {
                                    width = width / i;
                                    height = height / i;
                                } else {
                                    break;
                                }
                                i++;
                            }
                        }

                        Bitmap croppedBitmap = Bitmap.createScaledBitmap(bmp, width, height, false);
                        imageView.setImageBitmap(croppedBitmap);
                        List<Classifier.Recognition> results = classifier.recognizeImage(croppedBitmap,classfier);
                        String text;
                        for (Classifier.Recognition result : results) {
                            RectF location = result.getLocation();
                            Float conf = result.getConfidence();
                            String title = result.getTitle();
                            text += title + "\n";
                        }
                         textView.setText(text);
                    }
                } catch (IOException e) {
                    e.printStackTrace();
                } finally {
                    try {
                        if (pfDescriptor != null) {
                            pfDescriptor.close();
                        }
                    } catch (Exception e) {
                        e.printStackTrace();
                    }
                }

            }
        }
    }
長いので、区切って説明します。
このコードは、アクティビティに戻ってきたときに呼ばれ、戻ってきたのが、ギャラリーからのものかを判定しています。
   @Override
    public void onActivityResult(int requestCode, int resultCode, Intent resultData) {
        super.onActivityResult(requestCode, resultCode, resultData);
        if (requestCode == RESULT_IMAGEFILE && resultCode == Activity.RESULT_OK) {
        }
    }
このコードは、戻り値からURIを取得し、ParceFileDescriptorでファイルデータをとっています。
こんなURI「content://com.android.providers.media.documents/document/image%3A325268」が取得できるので、ここから画像を取得しています。
            if (resultData.getData() != null) {
                ParcelFileDescriptor pfDescriptor = null;
                try {
                    Uri uri = resultData.getData();
                    pfDescriptor = getContentResolver().openFileDescriptor(uri, "r");
                    if (pfDescriptor != null) {
                        FileDescriptor fileDescriptor = pfDescriptor.getFileDescriptor();
このコードは先ほど取得した画像をbitmapに変換し、画像のサイズを300より小さくなるようにしています。
300よりでかい画像だと、正常に判定することができず、エラーで落ちてしまいます。
Caused by: java.lang.ArrayIndexOutOfBoundsException
そのため、縦横比を維持しつつ、縦横が300以内に収まるようにしています。
                        Bitmap bmp = BitmapFactory.decodeFileDescriptor(fileDescriptor);
                        pfDescriptor.close();

                        if (!bmp.isMutable()) {
                            bmp = bmp.copy(Bitmap.Config.ARGB_8888, true);
                        }
                        int height = bmp.getHeight();
                        int width = bmp.getWidth();
                        while (true) {
                            int i = 2;
                            if (width < 300 && height < 300) {
                                break;
                            } else {
                                if (width > 300 || height > 300) {
                                    width = width / i;
                                    height = height / i;
                                } else {
                                    break;
                                }
                                i++;
                            }
                        }
                        Bitmap croppedBitmap = Bitmap.createScaledBitmap(bmp, width, height, false);
いよいよ判別です。
このコードでは、加工した画像で判別をし、独自のリストで受け取っています。
そして、リストをforで回して、結果を取得し、textViewに表示させています。
今回は、判別された品目名のみ出力していますが、品目である可能性がどれくらいかなども取得することができます。
                        List<Classifier.Recognition> results = classifier.recognizeImage(croppedBitmap);
                        String text="";
                        for (Classifier.Recognition result : results) {
                            /*
                            RectF location = result.getLocation();
                            Float conf = result.getConfidence();
                            */
                            String title = result.getTitle();
                            text += title + "\n";
                        }
                        textView.setText(text);
以上で完成です!!
実際に動かしてみる
それでは、実際に動かしてみたいと思います!
まずは、犬の画像
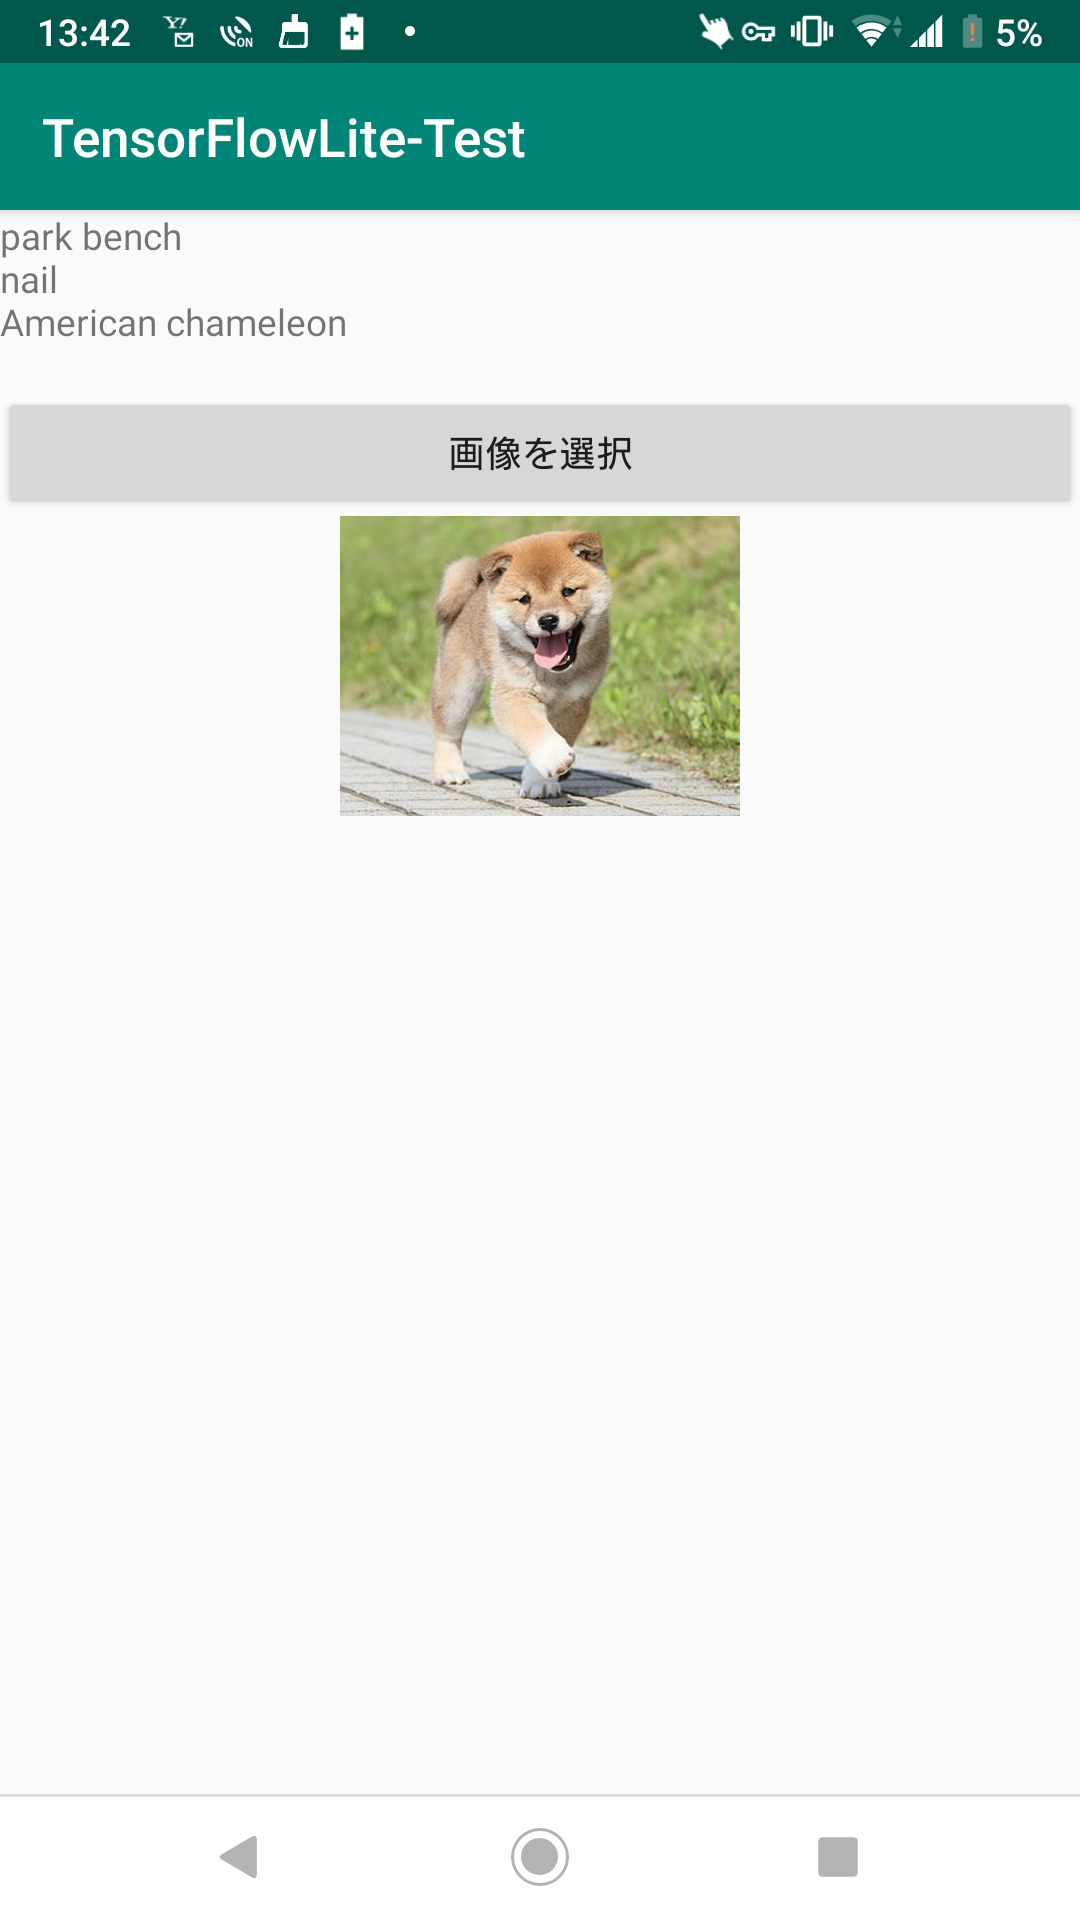
公園のベンチ、、
爪、、、
アメリカンカメレオン、、、
んー
精度は微妙ですね
次は、美しい景色の画像。
デルフトの街並みです
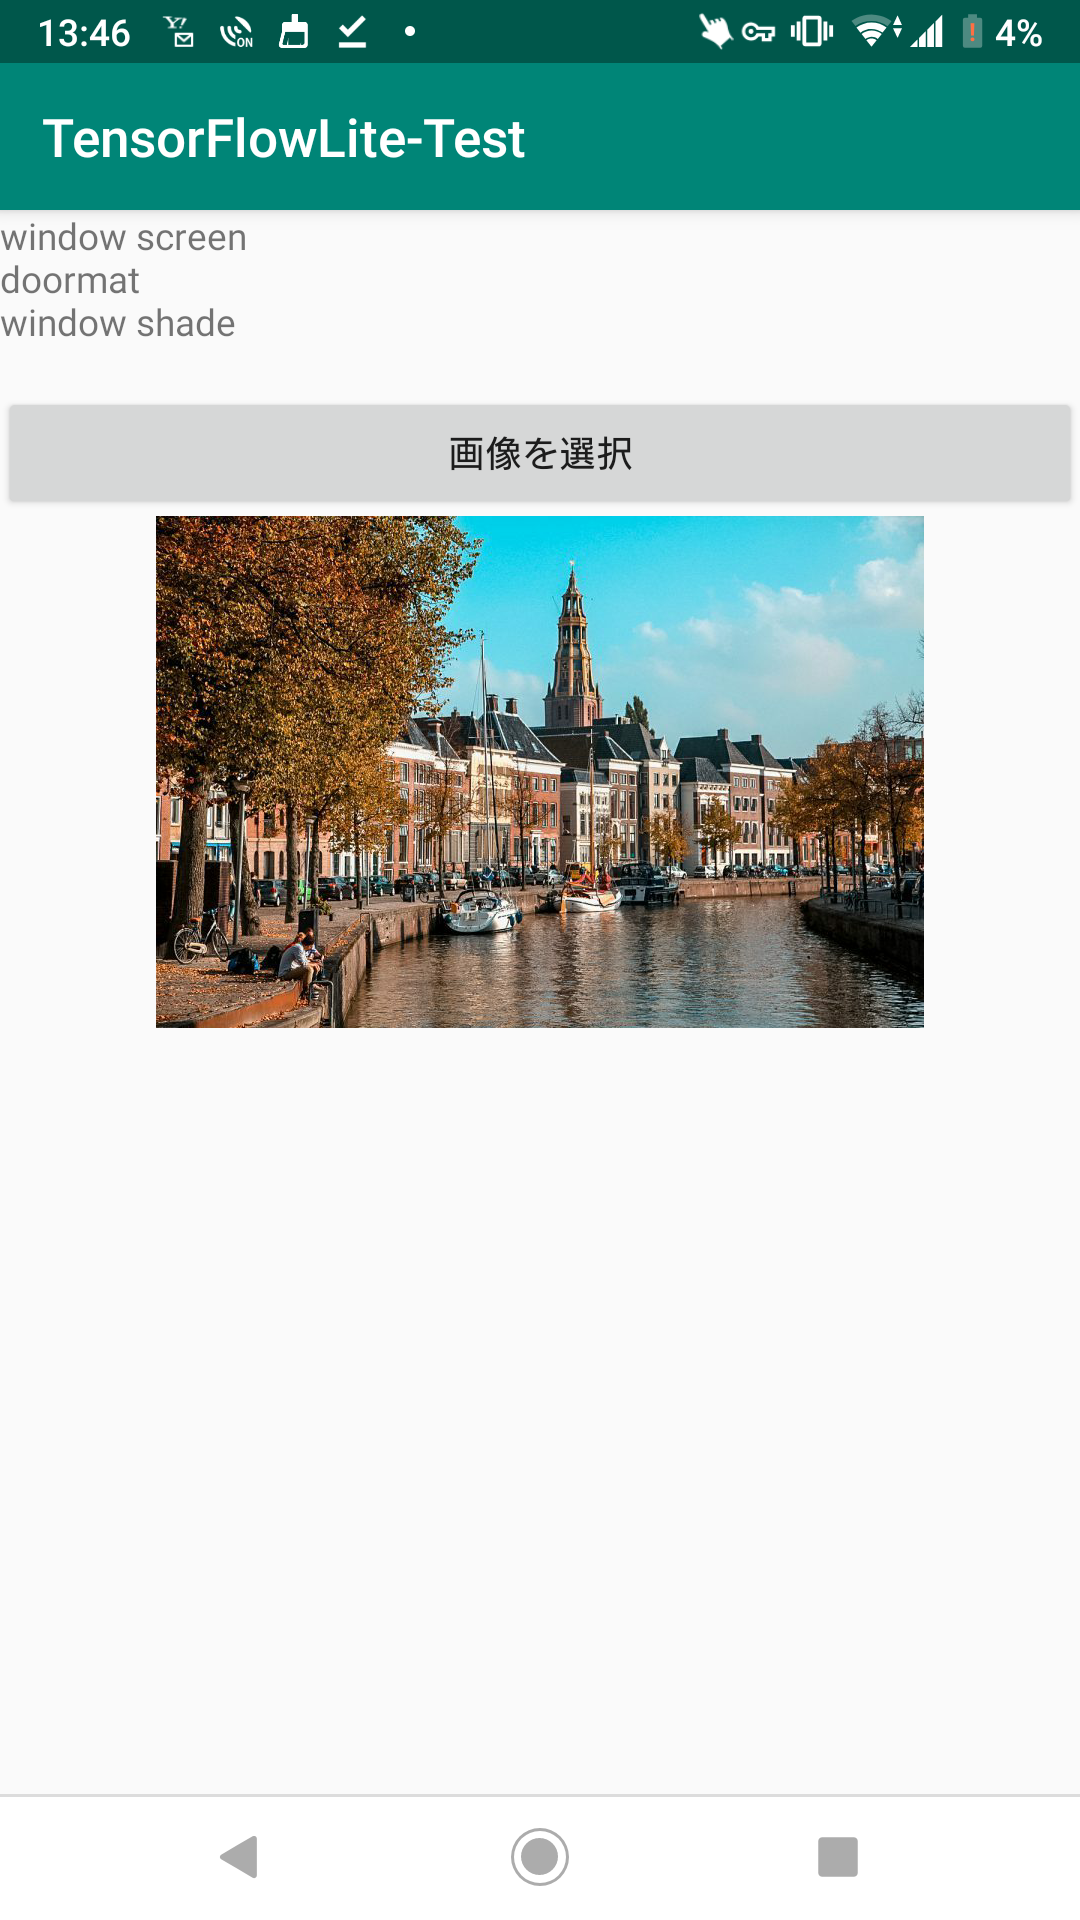
ウィンドウスクリーン、、、
ドアマット、、、
ブラインド、、、
んー
ダメやん!
まとめ
精度は微妙でしたが、うまく?画像を分類することができました!
今度は、リアルタイムで分類をしてみたいと思います!
ではでは!
追記
これでは、TensorFlowLiteのみを使用しましたが、併用して
MlKitを使うと簡単にできますので、おすすめです~
ぜひ使ってみてくださいー