追記 2023/10/12
Xcode 15 で swift-create-xcframeworkに不具合がありました。
https://github.com/unsignedapps/swift-create-xcframework/pull/93
以下の keijiro さんのメモの手順をやってみたところ動いたため以下推奨です!
(Bundleのプロジェクト作らなくていいし)
https://github.com/keijiro/Memo/blob/main/Pages/UnityNativePlugin.md
細かい手順はまた別の記事を書こうと思います
追記 2023/12/21
細かい手順はまた別の記事を書こうと思います
ビルド方法について書きました。
SwiftPackage から dylib を生成するため、本記事の Bundle 生成のためのプロジェクト生成の手順は不要です!
本記事について
ネイティブプラグインを初めて自作し、 iOS の Health Kit から歩数取得して表示するという実装ができた。その過程で得られたプラグインの作り方に関する知見を踏まえて、
知識0 の状態から NativePlugin を作れるまで手順をまとめる。
筆者はXcodeでの開発はほぼ初めて。
対象
Unity 開発経験あり
iOS 開発未経験
Makefile を使ったことがある
環境
Unity 2021.3.20f1
macOS Venture 13.3 (M2)
Xcode 14.3
(GitHub Copilot 慣れてない言語扱うときはおすすめ)
NativePlugin が開発できるまでのステップ
- Xcode, Swift の基礎を学ぶ
- macOS で HelloWorld!
- テスト用のアプリと macOS用のプラグインを作る
- iOS で HelloWorld!
準備
NativePlugin を作るためにある程度 Xcode や Swift に慣れた方が良い。
そのため何かしらの初心者向けの iOS アプリ開発の本を1冊やる。
筆者は以下の本をやった。
SwiftUI対応 たった2日でマスターできる iPhoneアプリ開発集中講座 Xcode 14/iOS 16/Swift 5.7対応
だいたい以下ができれば良いと思う。
- 新規プロジェクトを作る
- プロジェクトの設定方法がわかる
- Swift の基本的な書き方がわかる
- SwiftUI で画面作れる
- 実機ビルドができる
- ログの見方がわかる。
macOS で HelloWorld
Native Plugin で使える拡張子について
Documentation / Import and configure plug-ins
ここに使える拡張子が載っている。が、特に使い分けは書かれていないためここに載っているものは使えるんだなぁぐらいの認識で良い。
以下の公式ドキュメントに macOS の NativePlugin について書かれている
Documentation / Building plug-ins for desktop platforms
ポイントを以下に示す。
You can deploy macOS plug-ins as bundles
=> 拡張子は.bundle
For example:
[DllImport ("PluginName")] private static extern float ExamplePluginFunction ();
こんな感じでC#から使う
Note: PluginName should not include the library prefix or file extension (for example, the actual name of the plug-in file is PluginName.dll on Windows and libPluginName.so on Linux).
PluginName に拡張子不要
つまり、Xcode で .bundle を作成し、Unityにインポートした上でC#から呼び出せば良いということ。
ということでまずは .bundle を作成する
.bundle の作成
Unityの公式ドキュメント、Apple Developerのドキュメントを見てもBundleの作り方の記事が見当たらなかったため、本章では試してできた作り方を紹介。
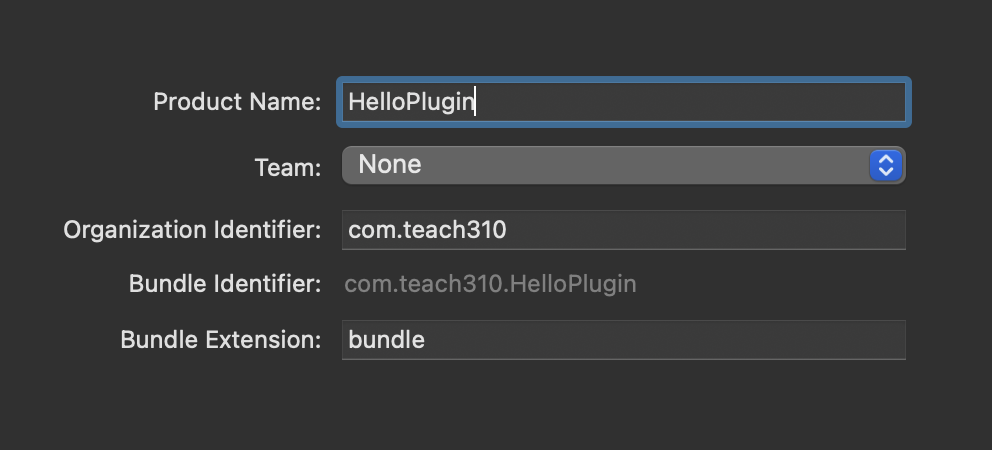
macOS > Bundle でプロジェクトを作成
Organization Identifier はユニークであればいいため、com.(GitHubのアカウント)が無難なのではないかなと思っている。
ProductName は HelloPlugin にした(なんでも良い)。
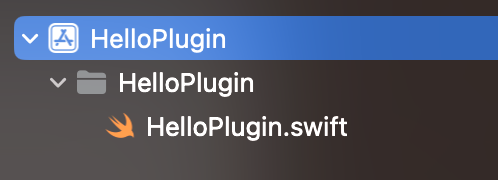
最初はくプロジェクトしかない状態。ここからファイルを以下のように作成する。
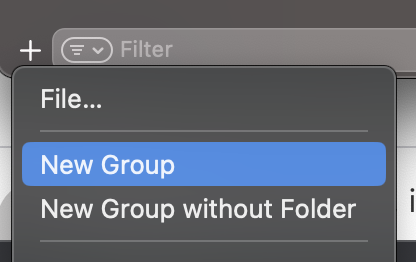
左下のプラスボタンから New Group で HelloPluginフォルダを作成
その下にHelloPlugin.swiftを作成
その際に上のようなポップアップがでた場合、特に必要なさそうなため Don't Create。
次に、HelloPlugin.swiftに処理を記述
import Foundation

@_cdecl("hello_plugin_helloworld")
public func hello_plugin_helloworld() -> Int32 {
    print("Hello World!")
    return 2
}
Command + B でビルド。
Product > Show Build Folder in Finder
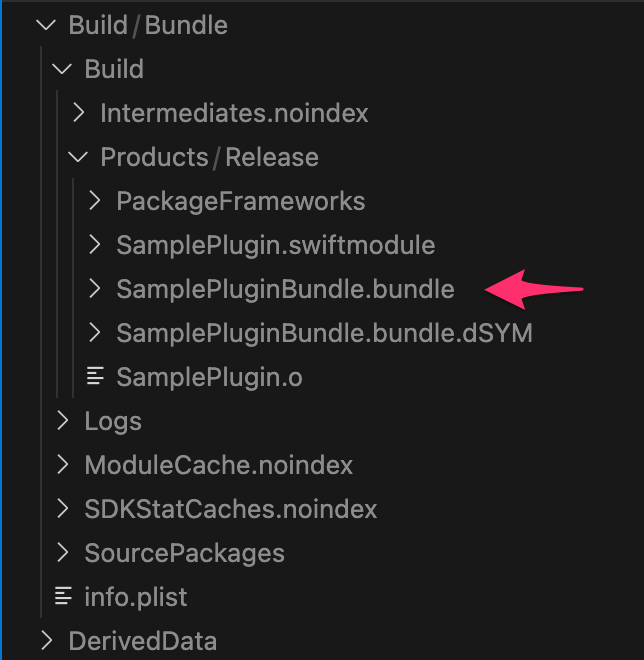
ここに拡張子 .bundle のファイルが作られている。
このファイルをUnity側に持っていく
参考
Unity .bundleを読み込んで実行
プロジェクト名 MyPlugin (なんでもいい) で3Dの空のプロジェクト作成。
まず、プラグインを呼び出すための準備を行う。
| 画面 | project |
|---|---|
 |
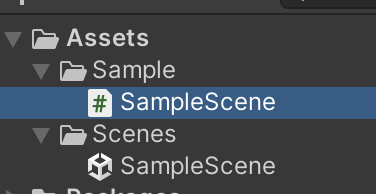 |
ボタンを押してログ出すだけのsceneをつくっておく。
public class SampleScene : MonoBehaviour
{
    public void OnClick()
    {
        Debug.Log("ここでプラグインを使う");
    }
}
これで準備OK
ボタンを押したら先ほど作った.bundleの hello_plugin_helloworld を呼び出すようにしていく。
| project | inspector |
|---|---|
 |
 |
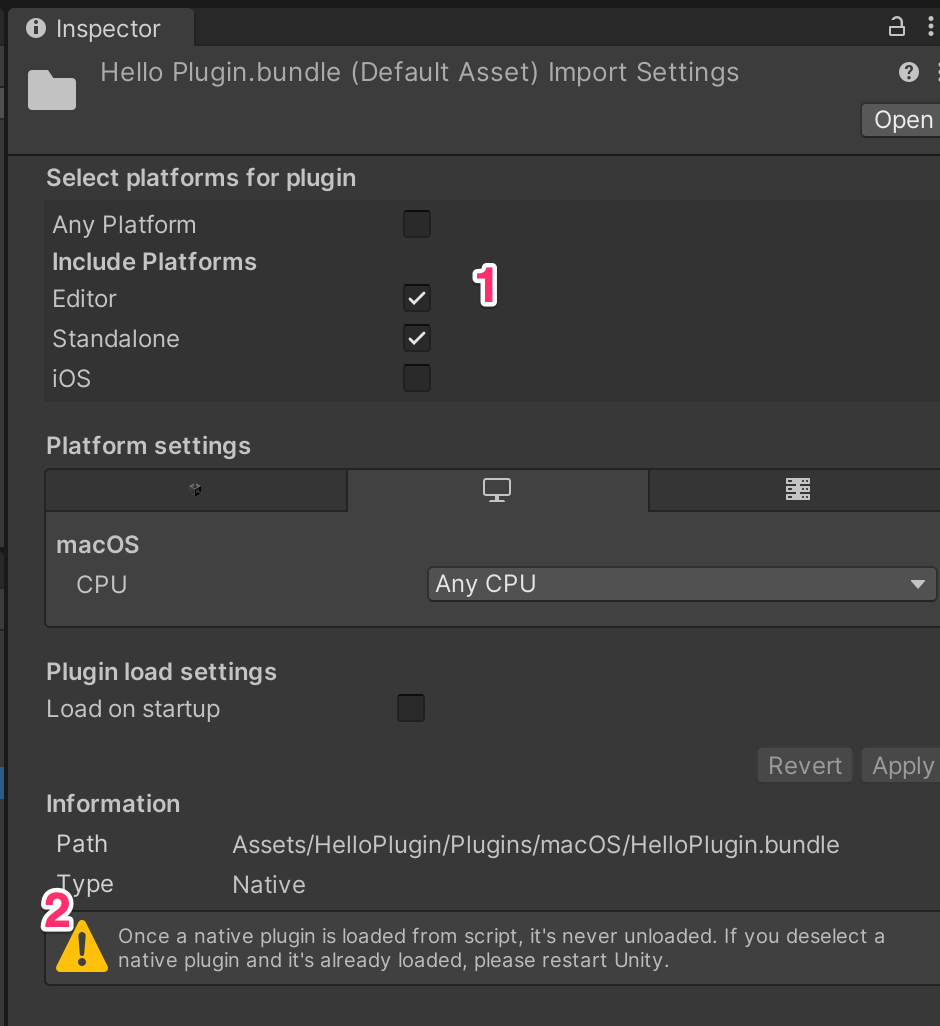
Include Platforms の Editor にチェックがついていることを確認すること。ついてなかったら上と同様の設定にする。
projectに 追加すると HelloPlugin.bundle は上記のように設定されているはず。
この配置フォルダや、inspector については後でポイントを説明する。
続いて、NativeMethods.cs と HelloPlugin.cs の2つを作成
using System.Collections;
using System.Collections.Generic;
using UnityEngine;
using System.Runtime.InteropServices;

namespace Sample
{
#if UNITY_EDITOR_OSX
    internal static partial class NativeMethods
    {
        const string DLL_NAME = "HelloPlugin";

        [DllImport(DLL_NAME, CallingConvention = CallingConvention.Cdecl)]
        internal static extern int hello_plugin_helloworld();
    }
#else
    internal static partial class NativeMethods
    {
        internal static int hello_plugin_helloworld() => 0;
    }
#endif
}
using System.Collections;
using System.Collections.Generic;
using UnityEngine;

namespace Sample
{
    public class HelloPlugin
    {
        public static int HelloWorld()
        {
            return NativeMethods.hello_plugin_helloworld();
        }
    }
}
これで NativePlugin を使えるようになった。
using Sample;
...

    public void OnClick()
    {
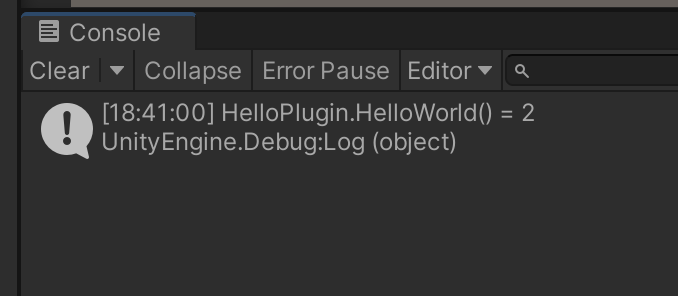
        Debug.Log("HelloPlugin.HelloWorld() = " + HelloPlugin.HelloWorld());
    }
}
実行するとswift側で返した 2という数字が出力される。
swift側で書いた print("Hello World!")についてはUnityのコンソールには出力されない。
.bundle作成のポイント
@_cdeclとは何か
we've had an undocumented attribute @_cdecl that exposes a Swift function to C.
これ公式のドキュメントなく、いつ消えてもおかしくないattributeっぽい。
以下のフォーラムで議論されている。
上記のフォーラムの中にあったUnityで@_cdeclを使用する例
swiftのリポジトリにも使われている箇所があるため、もし使えなくなったら上記フォーラムか、該当コードが修正されるPRを覗けば良さそう。
突然使えなくなることを回避するために、公開部分に関してはあえて@_cdeclを使わずObjC++で実装するのもありだと思う。
実例として、toio/ble-plugin-unity ではObjC++ で公開しているよう。(ObjC++に関してはあまり触ってないので詳しくはわからない)
`
Int ではなく Int32 を使う理由
csharp の int は符号付き 32 ビット整数。ドキュメント
それに対して、swift の Int は platform によって 32bit か 64bitどちらかとして扱われる。 ドキュメント
数値型を同じbit数として扱うために、swift 側では Int32 を使うことでbit数を固定する。
関数名の命名規則
swiftの命名規則ではメソッド名は lowerCamelCase。 ドキュメント
ただしここではあえてこれを無視している。
背景として、公開するメソッド名の頭にプラグイン名をつけたいからというのがある。
iOSビルドするときにはプラグインのメソッドを呼び出す際にプラグインの名前を指定しない(全部__Internal)。
=> メソッド名は全プラグインでユニークにしたい
=> プラグイン名を prefix にしよう。
helloPluginHelloworldでもいいのだが、lowerCamel は関数名長いと見づらいと思う。
cdecl で c言語として公開するのであれば swiftの命名規則ではなくc言語らしく宣言してもいいのでは?
=> スネークケースにしよう!
という判断。
.bundleのインポートのポイント
配置するフォルダについて
ここのPlug-in default settingsに フォルダのパスのパターンが書かれている。
が、これは無視すべきだと考えている。詳しくは以下の記事で丁寧に説明されている。
Assets/Plugins に置くことは避け、Assets/(プラグイン名)/Plugins/(Platform)/Pluginそのもののようにプラグイン専用のフォルダに置くのが良いと思う。
設定はInspectorでできる。
Plugin Inspector
.bundleの inspector でみるべき点は2つある。
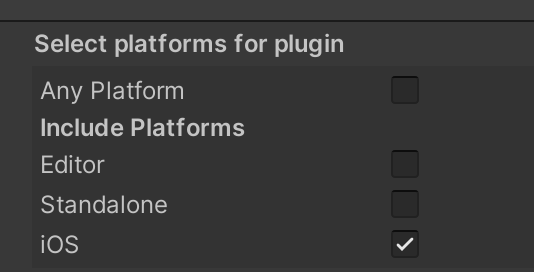
1つ目は Include Platforms
ここでチェックしたところにのみ含まれる。今回は Editor で使うため Editor へのチェックが必須。
2つ目は注意書きの部分
Once a native plugin is loaded from script. it's never unloaded. if you deselect a native plugin and it's already loaded. please restart Unity.
これは同じファイル名だと2回ロードされないということを意味する。
つまり、swiftのコード修正して再度インポートするときに同じ名前でファイル更新すると変更が反映されないということ。
従って、開発中は HelloPlugin1.bundle のように適当に連番で rename してインポートすることによって回避する。
(手間でしかないため、将来的に改善されてほしい)
Native Plugin 実行のポイント
NativeMethods クラス
DLLImport を使用するクラス名は XX にしようっていうお作法があるらしい。
これに従わなくてもとくに問題はないけれど、Plugin との境界はわかりやすい方がコード探しやすいと思う。
したがって DLLImpor を使うクラスは NativeMethods にしている。
CallingConventionについて
[DllImport(DLL_NAME, CallingConvention = CallingConvention.Cdecl)]
DllImportにはいくつかのフィールドがあり、そのうちの一つが Calling Convention。
他はわからないが、この呼び出し規則に関しては常に明示的に示すのが良さそう。(なくてもバグらないけどUnityのPluginの記事の体感半数以上は指定している)
今回は swift 側で@_cdeclを使用しているため、Unity側でもcdeclを指定。
テスト用のアプリ と macOS用のプラグインを作る
NativePlugin を開発するときに試行が Xcode だけで完結したほうが作業捗る。
そのため、テスト用のアプリ と macOS用のプラグインを作る。
ここでは上で作った HelloPlugin とは別に Xcode のプロジェクトを作っていく。
ここから本番。
Swift Package の作成
Xcode の上部メニューから File > New > Workspace
名前は SamplePlugin にする。
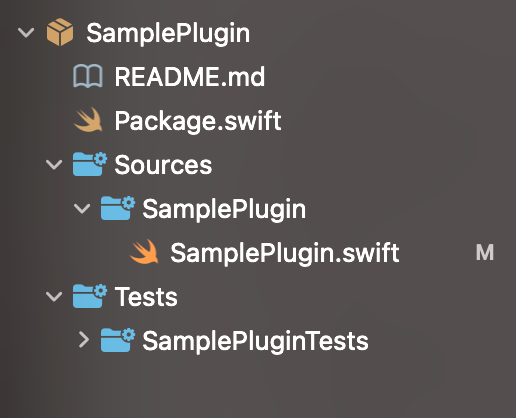
続けてXcode の上部メニューから File > New > Package
一度 Xcode を閉じて xcworkspace を Package のフォルダの中へ移動
xcworkspace を開くとSamplePluginの文字が赤くなっている。
これで workspace の中にPackageが入った状態になる。
(もっとスマートなプロジェクト作成方法はあると思う)
HelloPlugin.swift と同様にとりあえず helloworld するコードを書く。
名前と数字を少しだけ変えている。
import Foundation

@_cdecl("sample_plugin_helloworld")
public func sample_plugin_helloworld() -> Int32 {
    print("Hello World!")
    return 3
}
テスト用のアプリを作成
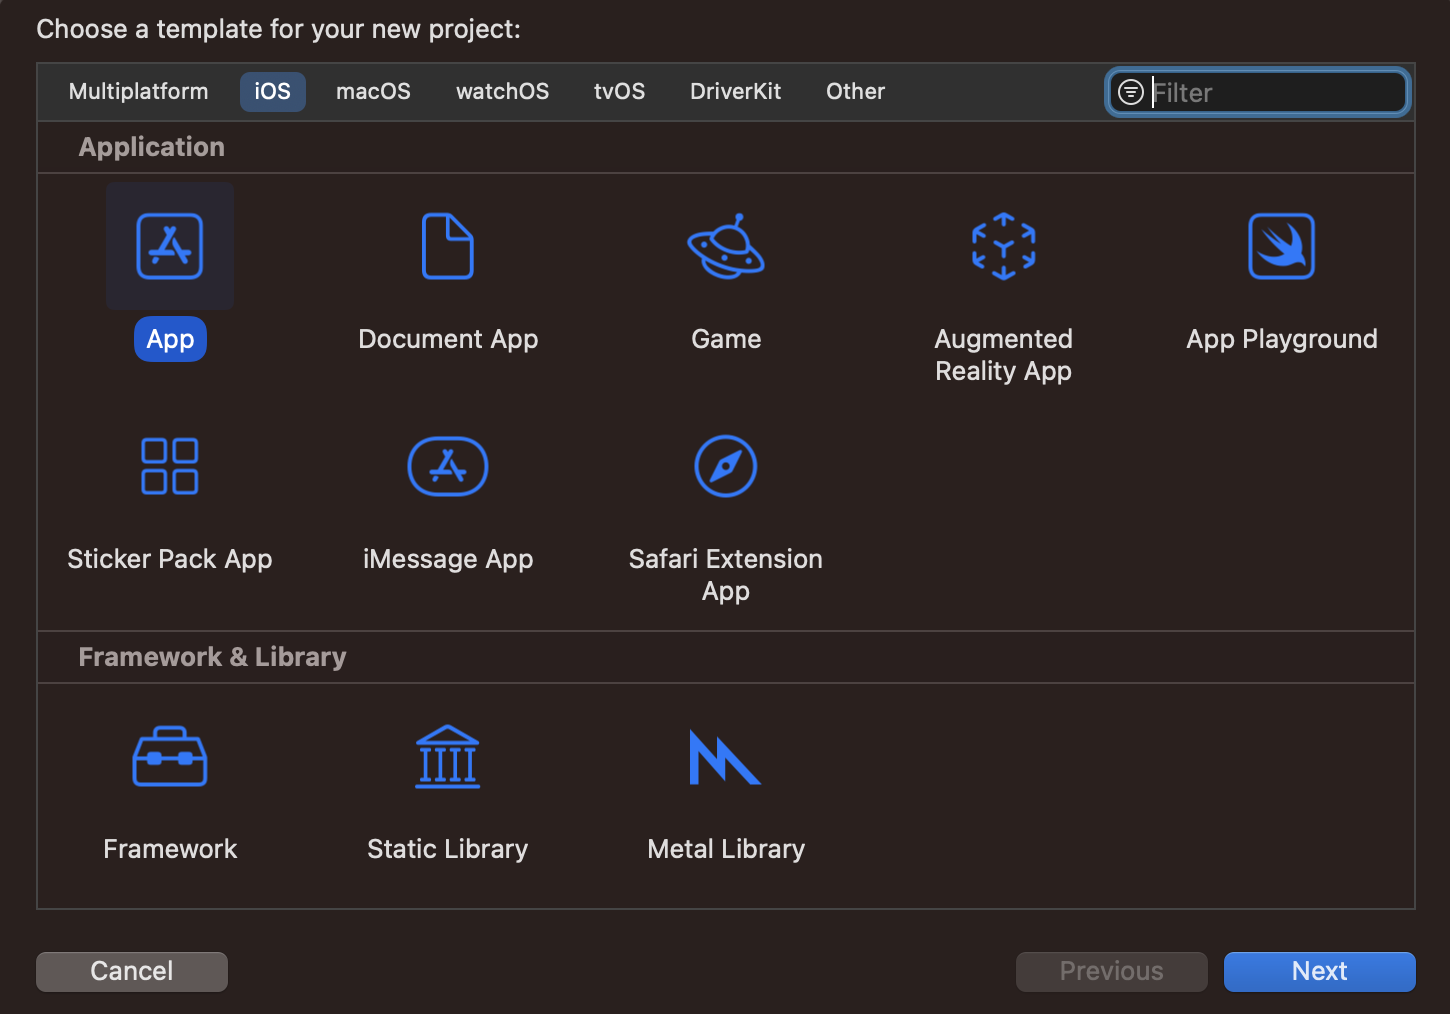
File > New > Project
名前は SamplePluginApp とした。
| option | 場所 |
|---|---|
 |
 |
この状態だと SwiftPackage の中に SamplePluginApp がある。
これを消すために、空の Package.swift を作る。追加はvscodeでやった。
// swift-tools-version: 5.8
// The swift-tools-version declares the minimum version of Swift required to build this package.

import PackageDescription

let package = Package(
  name: "empty",
  products: [],
  targets: []
)
workspace を開き直すと消えてる。
これでアプリ作成準備OK。
テスト用アプリからSamplePluginを呼び出す。
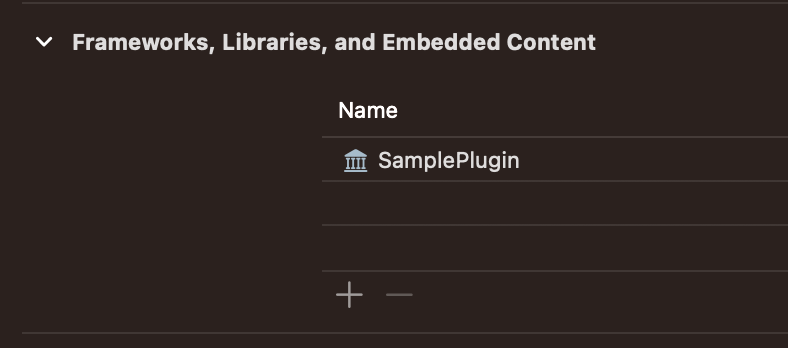
SamplePluginAppのTARGET > General > Frameworks の +ボタンで SamplePluginを追加
ContentView を記述。ほぼ GitHub Copilot に生成してもらった。
import SwiftUI
import SamplePlugin

struct ContentView: View {
    @State var number = 0

    var body: some View {
        VStack {
            Text("\(number)")
                .font(.largeTitle)
                .fontWeight(.bold)
                .foregroundColor(.accentColor)


            Button(action: {
                number = Int(sample_plugin_helloworld())
            }) {
                Text("Tap me!")
                    .font(.title)
                    .fontWeight(.bold)
                    .foregroundColor(.white)
                    .padding()
                    .background(Color.accentColor)
                    .cornerRadius(10)
            }
        }
        .padding()
    }
}
Canvas で ボタンをタップしたら SwiftPlugin から渡ってきた3という数字が表示されることを確認。
また、print した結果が console に表示されることを確認。
これで Unity を開かずに動作テストができた。
.bundle用の Project 作成
File > New > Project
macOS > Bundle
名前は SamplePluginBundle とした。
option や場所は SamplePluginApp と同様

SamplePlugin の追加もする。
左下の + から New Group で SamplePluginBundleのフォルダを作成

右クリック > New File から pchファイルを作成
@import SamplePlugin を追加
#ifndef PrefixHeader_pch
#define PrefixHeader_pch

// Include any system framework and library headers here that should be included in all compilation units.
// You will also need to set the Prefix Header build setting of one or more of your targets to reference this file.

@import SamplePlugin

#endif /* PrefixHeader_pch */
続いて .bundleを作成するが、Unityへのコピーまで一気にやるために今回は Makefile を使う。
BUILD_DIR := Build
BASE_NAME := SamplePlugin
WORKSPACE := $(BASE_NAME).xcworkspace
BUNDLE_NAME := $(BASE_NAME)Bundle

.PHONY: clean
clean:
	rm -rf $(BUILD_DIR)
	rm -rf .build

.PHONY: bundle/build
bundle/build:
	xcodebuild -workspace $(WORKSPACE) -scheme $(BUNDLE_NAME) -destination 'platform=macOS,arch=arm64' -configuration Release -derivedDataPath ./$(BUILD_DIR)/Bundle build
...
.netrc
+/Build
これで以下のように .bundle を生成できる
$ make bundle/build
xcodebuild -workspace SamplePlugin.xcworkspace -scheme SamplePluginBundle -destination 'platform=macOS,arch=arm64' -configuration Release -derivedDataPath ./Build/Bundle build
2023-06-07 15:07:01.944 xcodebuild[40621:7874424] DVTCoreDeviceEnabledState:

...

Resolve Package Graph
** BUILD SUCCEEDED **
Unityのフォルダにコピーまでするコマンドを用意しておくと楽。
include .env

...

.PHONY: bundle/cp
bundle/cp:
	cp -r $(BUILD_DIR)/Bundle/Build/Products/Release/$(BUNDLE_NAME).bundle $(UNITY_PLUGIN_MACOS_DIR)/$(BUNDLE_NAME).bundle

.PHONY: bundle
bundle: clean bundle/build bundle/cp
私の場合は以下のパス。(後で使うiosのパスもいれちゃう)
UNITY_PLUGIN_MACOS_DIR=~/UnityProjects/SampleProjects/MyPlugin/Assets/SamplePlugin/Plugins/macOS
UNITY_PLUGIN_IOS_DIR=~/UnityProjects/SampleProjects/MyPlugin/Assets/SamplePlugin/Plugins/iOS
参考
Unity側で .bundle を使う
プロジェクトは HelloPlugin の時と同じ MyPlugin という名前の UnityProject を使用。
呼び方は HelloPlugin のときとほぼ同様なためPRだけはる。
名前空間同じにしたら DLL_NAME という名前が使えなかったためSAMPLE_PLUGINという名前で定義した。
(DLL_NAMEよりこっちのほうがいいかもしれない)
    internal static partial class NativeMethods
    {
        const string SAMPLE_PLUGIN = "SamplePluginBundle";

        [DllImport(SAMPLE_PLUGIN, CallingConvention = CallingConvention.Cdecl)]
        internal static extern int sample_plugin_helloworld();
Swift Package の作成のポイント
Swift Package を使う理由
使わない場合
NativePluginのコード1 -> macOS用プラグイン
NativePluginのコード2 -> テスト用ダミーアプリ
使う場合
SwiftPackage -> macOS用プラグイン
            -> テスト用ダミーアプリ
共通化できるのが良い。
構造について
TOP が SwiftPackage でその中に App とか入れるのは割と一般的らしい
全然こだわりはないため動けばなんでもいいとは思う。
.bundle 用の Project 作成のポイント
.bundle の作り方の一次情報は見つからなかったため参考に記載したURLのやり方そのまま真似しています。
ので、もとURL見ていただければ!
(fujiki さんの記事は大変参考になっています。ありがとうございます)
テスト用のアプリのポイント
そもそもこの作業は必要なのか
必要ではない。
が、テスト用アプリを作った方が動作テストが楽。
@_cdeclをつけたメソッドを swift から呼んでいるがそれは良いのか
本記事では呼んでしまっているが、あまり良くないと思う。
理由は swift から c を呼ぶ時のトラブルにぶつかるから。
例えば以下のような。(どういう時に出るのかとかは重要ではないため省略。これを修正するのは大変そうだな感が伝わればOK)
A C function pointer cannot be formed from a closure that captures context
SwiftPackageの関数(c) <- Appから呼ぶ(Swift)
ではなく、以下のほうが楽そう。
SwiftPackageの関数・クラス(Swift) <- Appから呼ぶ(Swift)
AppでテストしたいのはUnityと連携するインタフェースの部分ではなくロジックの部分のため、そのロジックの部分をpublicにして直接とってきてしまえばいいと思う。
なお、Swiftのデフォルトのアクセス修飾子はinternalのため、コンストラクタを含めて明示的にpublicにする必要がある。
Makefileのポイント
bundle/build
$ xcodebuild -h
で使い方がある程度出る。
$ xcodebuild -h
...

xcodebuild -workspace <workspacename> -scheme <schemeName> [-destination <destinationspecifier>]... [-configuration <configurationname>] [-arch <architecture>]... [-sdk [<sdkname>|<sdkpath>]] [-showBuildSettings] [-showdestinations] [<buildsetting>=<value>]... [<buildaction>]...

...

Options:
...

    -workspace NAME                                          build the workspace NAME
    -scheme NAME                                             build the scheme NAME
    -configuration NAME                                      use the build configuration NAME for building each target
...
    -destination DESTINATIONSPECIFIER                        use the destination described by DESTINATIONSPECIFIER (a comma-separated set of key=value pairs describing the destination to use)
...
    -derivedDataPath PATH                                    specifies the directory where build products and other derived data will go
は cleanとかbuildとか。
clean は Makefile のコマンドにしてるため build のみ指定した。
指定の場所に、.bundleを生成できればいい。他のやり方もあると思う。(.bundle以外の余計なファイル作られすぎてる)
destinationsは以下のコマンドでそれっぽいのが出てきて、上のhelpでカンマ区切りで記述と書いてあったためそれに従った。
$ xcodebuild -showdestinations -scheme SamplePluginBundle
...

        Available destinations for the "SamplePluginBundle" scheme:
                { platform:macOS, arch:arm64, id:00008112-001A10243E45401E }
                { platform:macOS, name:Any Mac }
iOS で HelloWorld!
framework の出力
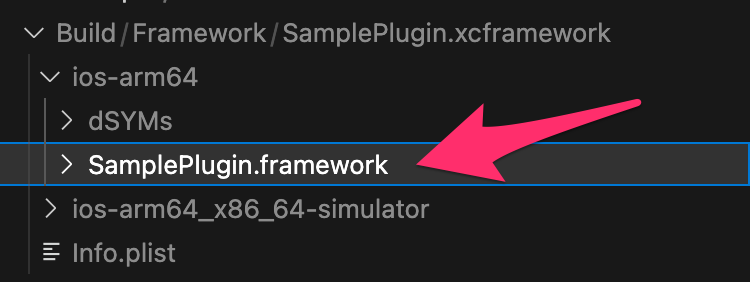
framework は SwiftPackage を元に以下のツールから出力する。
私は brew で mint を入れ、mint を使って swift-create-xcframework をインストールした。
Mintfileを作成
unsignedapps/swift-create-xcframework@v2.3.0
$mint bootstrap
これでインストールできた。
.PHONY: framework/build
framework/build:
	mint run swift-create-xcframework --output ./$(BUILD_DIR)/Framework --platform ios --configuration release
Makefileに上記を追記し、実行するとエラーがでる。
error: package 'sampleplugin' is using Swift tools version 5.8.0 but the installed version is 5.7.0
Error: fatalError
make: *** [framework/build] Error 1
$ swift --version
swift-driver version: 1.75.2 Apple Swift version 5.8 (swiftlang-5.8.0.124.2 clang-1403.0.22.11.100)
Target: arm64-apple-macosx13.0
swift 5.8 install されているのになぜこのエラーがでるのかは謎。
応急処置的に以下で対応。
$ swift package tools-version --set 5.7.0
これでビルドできるようになる。
コピー用のコマンドも bundle と同様に追加しておく
参考
Unity で iOSビルド
iOS フォルダを作成し、その中に先ほど作成した framework を移動
また、framework を読み込めるようにコードを修正
namespace Sample
{
#if UNITY_EDITOR_OSX || UNITY_IOS
    internal static partial class NativeMethods
    {
#if UNITY_IOS
        const string SAMPLE_PLUGIN = "__Internal";
#else
        const string SAMPLE_PLUGIN = "SamplePluginBundle";
#endif
Player Settingsを Signing Team ID
Team ID の調べ方については本記事では省略。
次に ビルドのポストプロセスを記述する。
using System;
using UnityEditor;
using UnityEditor.Build;
using UnityEditor.Build.Reporting;
using UnityEditor.iOS.Xcode;
using UnityEngine;

namespace PluginSampleEditor
{
    public class BuildPostprocessor : IPostprocessBuildWithReport
    {
        public int callbackOrder { get { return 1; } }

        public void OnPostprocessBuild(BuildReport report)
        {
            var buildTarget = report.summary.platform;
            if (buildTarget == BuildTarget.iOS)
            {
                ProcessForiOS(report);
            }

            Debug.Log("BuildPostprocessor.OnPostprocessBuild for target " + report.summary.platform + " at path " + report.summary.outputPath);
        }

        void ProcessForiOS(BuildReport report)
        {
            var buildOutputPath = report.summary.outputPath;
            UpdatePBXProject(buildOutputPath, project =>
            {
                DisableBitcode(project);
            });
        }

        void UpdatePBXProject(string buildOutputPath, Action<PBXProject> action)
        {
            var pbxProjectPath = PBXProject.GetPBXProjectPath(buildOutputPath);
            var project = new PBXProject();
            project.ReadFromFile(pbxProjectPath);
            action(project);
            project.WriteToFile(pbxProjectPath);
        }

        // ENABLE_BITCODE は非推奨のパラメータのためNOにする
        void DisableBitcode(PBXProject project)
        {
            var mainTargetGuid = project.GetUnityMainTargetGuid();
            project.SetBuildProperty(mainTargetGuid, "ENABLE_BITCODE", "NO");

            var unityFrameworkTargetGuid = project.GetUnityFrameworkTargetGuid();
            project.SetBuildProperty(unityFrameworkTargetGuid, "ENABLE_BITCODE", "NO");
        }
    }
}
これやらないとエラーが出てしまう。
iPhone接続して、ビルド実行
実機アプリのボタンを押すと、Plugin の print と Unity の Debug.Log が両方 Xcode のコンソールに出力されることが確認できる。
これで Hello World 完了!
本章でやったことの PR
framework 作成のポイント
swift-create-xcframework の使い方
$ mint run swift-create-xcframework --help
で確認できる
generate-xcodeproj を使わない理由
swift 5.8 でコマンドが削除されているから。
PluginInspector による frameworkの設定のポイント
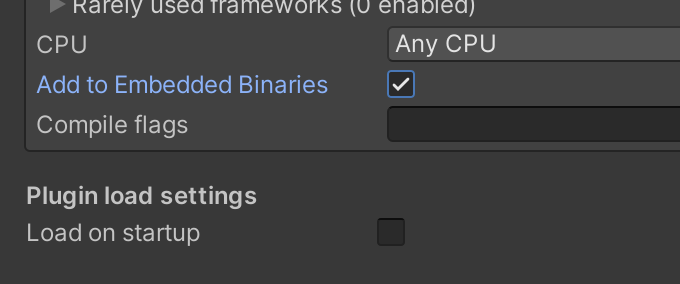
Add to Embedded Binaries について
設定はここに書いてある。
When you select Add to Embedded Binaries option, Unity sets the Xcode project options to copy the plug-in file into the final application package. Do this for:
• Dynamically loaded libraries.
Dynamically loaded libraries のときに使って とのことなのでチェックしてる。
framework 読み込みのポイント
Platform 依存コンパイルについて
ここに書いてある。 UNITY_IPHONE は非推奨のため使わないこと。
__Internal について
ここの Example に書いてある。
On iOS plugins are statically linked into
the executable, so we have to use __Internal as the library name.
[DllImport ("__Internal")]
Unity ビルド
Bitcode enabled を NO にする理由
.../SamplePlugin/Plugins/iOS/SamplePlugin.framework/SamplePlugin' does not contain bitcode. You must rebuild it with bitcode enabled (Xcode setting ENABLE_BITCODE), obtain an updated library from the vendor, or disable bitcode for this target. file ...
やらないと Xcode でエラーが出る。
将来的には Unity ビルド時に bitcode が enable に勝手にならなくなると思う。
IPostprocessBuildWithReport について
ENABLE_BITCODE を NO にするために多くの記事では PostProcessBuildAttribute が使われているが、本記事では使っていない。
とくに大きな理由はなく、IPostprocessBuildWithReportのほうが新しそうだからこちらを使用した。
おわりに
Unity の Native Plugin は Hello World するだけでとても大変!
本記事が Native Plugin を使いたいと思っている方の助けになれば幸いです。


