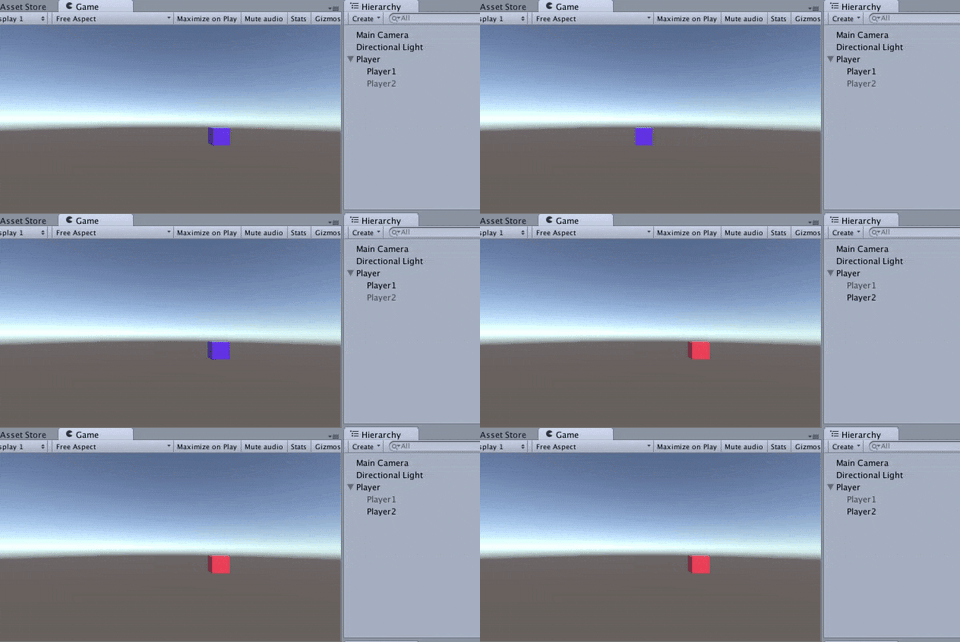
状態によってオブジェクトを切り替える.
今回作るもの
- 青いCubeの時は横移動できる.
- 赤いCubeの時はうごけない.
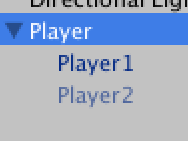
Playerの親子構造
- Player // 本体. スクリプトをつけるやつ
- Player1 //赤いCube
- Player2 //青いCube
前提
StateMachineの理論が分かり,if文を使って実装できること.
多分これが一番簡単なStateMachineだと思います.
1. 状態を変えられるようにする.
まずは,前回と同じように,状態を切り替える部分をつくります.
手順
- 状態をintで宣言.
- if文で各状態での行うことを分ける.
- 状態変更を書く.
using UnityEngine;
using System.Collections;

public class PlayerScript : MonoBehaviour {

	int currentState = 0; // 0: Blue    1: Red

	void Update () {

		// state: Blue
		if (currentState == 0) {
			Debug.Log ("Blue");

			// 状態変更
			if (Input.GetKeyDown (KeyCode.R)) {
				currentState = 1;
			}
		}

		// state: Red
		if (currentState == 1) {
			Debug.Log ("Red");

			if(Input.GetKeyDown(KeyCode.B)){
				currentState = 0;
			}
		}
	}
}
2. プレイヤー作る
今回は非常に簡単です.
手順
- Cubeを二つ作る.
- それぞれにマテリアルをつけ,青と赤にする.名前はPlayer1, Player2とでもしましょう.
- 親子関係を図のようにする.
3. オブジェクトの切り替え
手順
- 切り替える対象を変数に格納
- 現在のオブジェクトを宣言
- 切り替える関数を作る.
- 状態が変わるときに関数を呼び出す.
3.1 切り替える対象を変数に格納
public GameObject blueObject;
public GameObject redObject;
3.2 現在のオブジェクトを宣言
プレイヤーの今でてる状態(オブジェクト)を表す,currentObjectを宣言します.
private GameObject currentObject;
3.3 切り替える関数を作る.
手順
引数に切り変える対象オブジェクトを入れ,
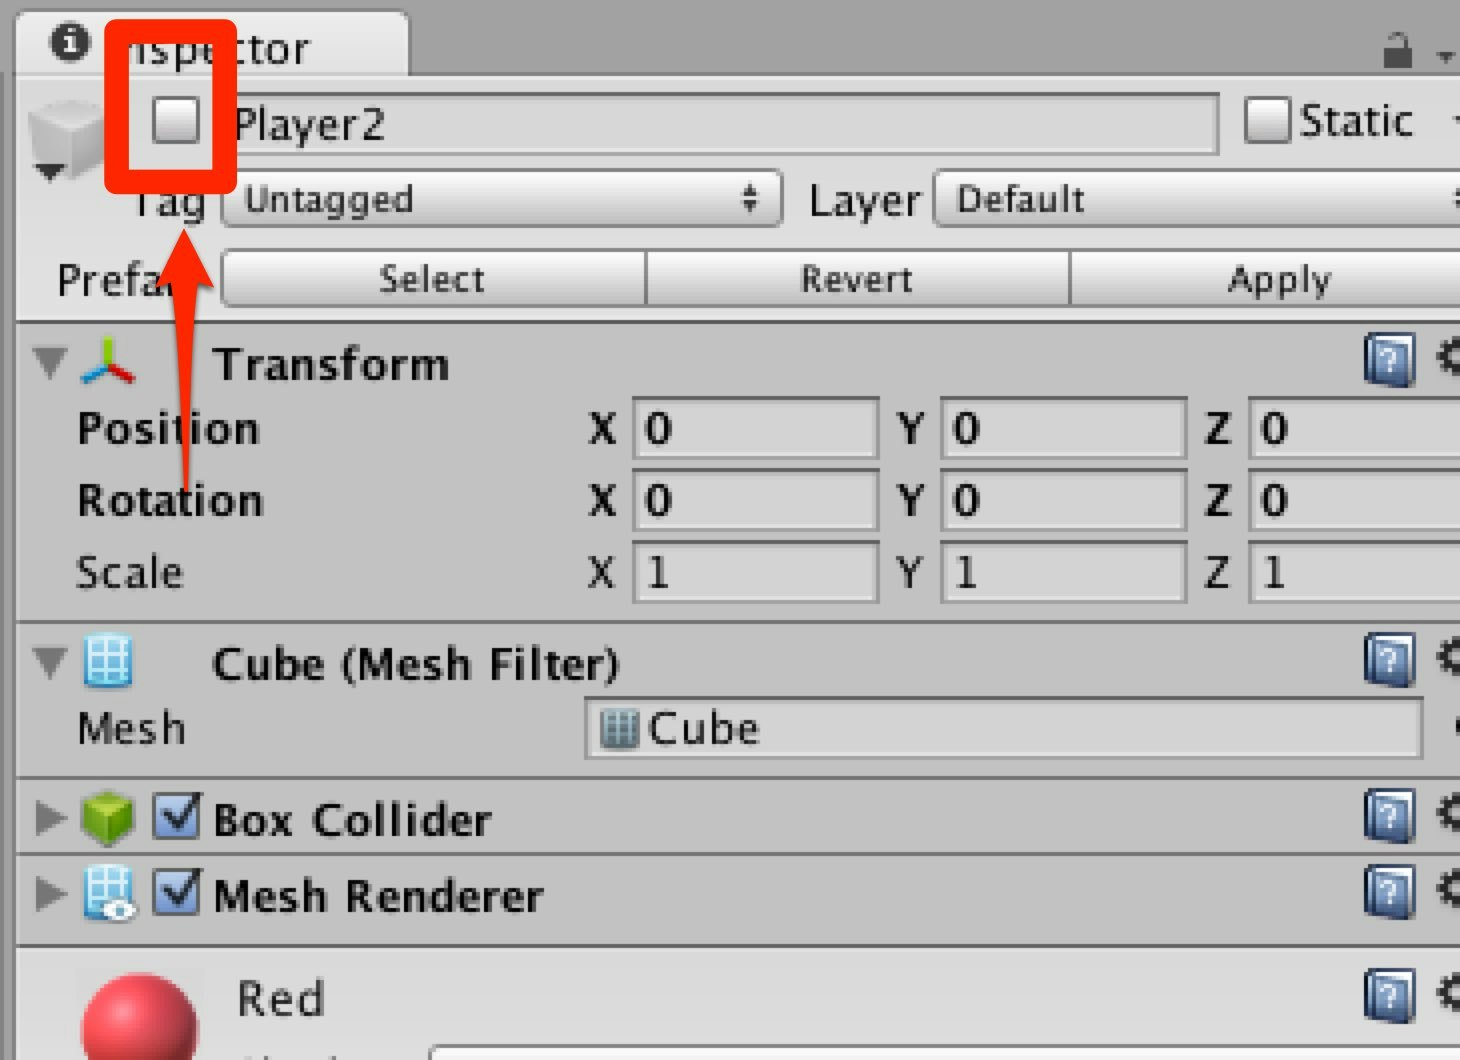
- 現在のオブジェクトを非アクティブにする.
- 次のオブジェクトを
currentObjectに代入 - アクティブにする.
スクリプトは以下のようになります.
void ChangeMode(GameObject obj){
	currentObject.SetActive(false);
	currentObject = obj;
	currentObject.SetActive (true);
}
3. 移動機能
以下のスクリプトをcurrentStateが0のときに行います.
// 移動
if (Input.GetKey (KeyCode.RightArrow)) {
	this.transform.position += Vector3.right * Time.deltaTime * 5f;
}

if (Input.GetKey (KeyCode.LeftArrow)) {
	this.transform.position += Vector3.right * (-1) * Time.deltaTime * 5f;
}
完成
- Playerにスクリプトアタッチ
- inspectorビューでPlayer1とPlayer2でアタッチ
- 実行
PlayerScript.cs
using UnityEngine;
using System.Collections;

public class PlayerScript : MonoBehaviour {

	public GameObject blueObject;
	public GameObject redObject;

	private GameObject currentObject;

	int currentState = 0; // 0: Blue    1: Red

	void Start () {
		currentObject = blueObject;
	}

	void Update () {

		// state: Blue
		if (currentState == 0) {
			Debug.Log ("Blue");

			// 移動
			if (Input.GetKey (KeyCode.RightArrow)) {
				this.transform.position += Vector3.right * Time.deltaTime * 5f;
			}

			if (Input.GetKey (KeyCode.LeftArrow)) {
				this.transform.position += Vector3.right * (-1) * Time.deltaTime * 5f;
			}

			// 状態変更
			if (Input.GetKeyDown (KeyCode.R)) {
				currentState = 1;
				ChangeMode (redObject);
			}
		}

		// state: Red
		if (currentState == 1) {
			Debug.Log ("Red");

			if(Input.GetKeyDown(KeyCode.B)){
				currentState = 0;
				ChangeMode (blueObject);
			}
		}
	}

	void ChangeMode(GameObject obj){
		currentObject.SetActive(false);
		currentObject = obj;
		currentObject.SetActive (true);
	}
}
練習問題
問題1
青 -> 赤 -> 緑 で変化するようにせよ.
問題2
緑のときだけ,Y軸で回転するようにせよ.
ヒント
this.tranform.Rotate(Vector3.up * rotateSpeed * Time.deltaTime, Space.World);
問題3
問題2でできたスクリプトを,下の「最後に」のように,きれいなコードでかけ.
最後に コードをきれいにする.
if文を使った実装では,
- 状態遷移を切り替えるためのキーを同じキーにできない.
- ぱっと見わかりにくい
という欠点があります.
そこで,switch文を使うことでそれらの問題を解決することができます.
また,他をいろいろきれいにします.(雑
後で別の記事つくります.
PlayerScript.cs
using UnityEngine;
using System.Collections;

public class PlayerScript : MonoBehaviour {

	//切り替わるオブジェクト
	public GameObject blueObject;
	public GameObject redObject;

	//現在のオブジェクト
	private GameObject currentObject;

	//状態を定義
	public enum PlayerState
	{
		BLUE,
		RED
	}

	//現在の状態
	private PlayerState _currentState;

	void Start () {
		InitState ();
	}

	void Update () {
		switch (_currentState) {
		case PlayerState.BLUE:
			UpdateBlue ();
			break;
		case PlayerState.RED:
			UpdateRed ();
			break;
		default:
			break;
		}
		Debug.Log (_currentState);
	}

	//状態の初期化
	void InitState(){
		_currentState = PlayerState.BLUE;
		currentObject = blueObject;
	}

	//状態がBlueのときにやること
	void UpdateBlue(){
		if (Input.GetKey (KeyCode.RightArrow)) {
			this.transform.position += Vector3.right * Time.deltaTime * 5f;
		}

		if (Input.GetKey (KeyCode.LeftArrow)) {
			this.transform.position += Vector3.right * (-1) * Time.deltaTime * 5f;
		}

		if (Input.GetKeyDown (KeyCode.C)) {
			_currentState = PlayerState.RED;
			ChangeMode (redObject);
		}
	}

	//状態がRedのときにやること
	void UpdateRed(){
		if (Input.GetKeyDown (KeyCode.C)) {
			_currentState = PlayerState.BLUE;
			ChangeMode (blueObject);
		}
	}

	//オブジェクトの切り替え
	void ChangeMode(GameObject obj){
		currentObject.SetActive(false);
		currentObject = obj;
		currentObject.SetActive (true);
	}
}


