本記事について
HealthKit を用いた歩数取得を通じて NativePlugin の開発方法 についての知見をまとめるための記事
HealthKit のコンセプトや使い方については深くは触れない。
前提
【Unity】Swift 経験0から iOS と macOS のNativePluginを作る
ここで作ったプロジェクトを拡張する形で進める。(Unityプロジェクト、Nativeアプリ、SwiftPackageの元がある状態)
Native アプリで歩数を取得

Native アプリの画面にはボタンとテキストがすでにある。
このボタンを押したら、HealthKit から歩数を取得してテキストに表示するようにする。
まずいきなりだが、 HealthKit を扱うクラスを作成する。
必要なのは以下2つの機能。
- HealthKit から歩数を取得するためにユーザーの許可をもらう
- 今日の日付を取得する
SamplePlugin/Sources/SamplePlugin/HealthKitData.swift
import Foundation
import HealthKit

public class HealthKitData {
    public init() {}

    // HealthKitのデータにアクセスするためにユーザーの許可を求める。
    // 複数回呼び出しても構わない。(すでに許可済みの場合にはcompletionでtrueが渡される)
    public func authorize(completion: @escaping (Bool) -> Void) {
        guard HKHealthStore.isHealthDataAvailable() else {
            print("is not health data available")
            completion(false)
            return
        }

        let typesToRead = Set([HKObjectType.quantityType(forIdentifier: .stepCount)!])

        HKHealthStore().requestAuthorization(toShare: nil, read: typesToRead) { (success, error) in
            if let error {
                print("requestAuthorization failed. error: \(error.localizedDescription)")
                completion(false)
                return
            }
            // successはリクエストが成功したかどうか。
            // ユーザーが許可したことを示す値ではない。
            completion(success)
        }
    }

    public func getStepsToday(completion: @escaping (Int) -> Void) {
        let now = Date()
        let startOfDay = Calendar.current.startOfDay(for: now)
        let type = HKSampleType.quantityType(forIdentifier: .stepCount)!
        let predicate = HKQuery.predicateForSamples(withStart: startOfDay, end: now)
        let query = HKStatisticsQuery(quantityType: type, quantitySamplePredicate: predicate, options: .cumulativeSum) { (query, statistics, error) in
            // The results come back on an anonymous background queue.
            DispatchQueue.main.async {
                guard let statistics else {
                    print("getStepsToday failed. error: \(error?.localizedDescription ?? "nil")")
                    completion(0)
                    return
                }

                let sum = statistics.sumQuantity()
                let steps = sum?.doubleValue(for: HKUnit.count())
                completion(Int(steps ?? 0))
            }
        }
        HKHealthStore().execute(query)
    }
}
本クラスの中身である HealthKit の使い方は本記事の主旨ではない省略。後に示すPRに書く。
これらのメソッドをNative アプリ側から呼び出す。
import SwiftUI
import SamplePlugin

struct ContentView: View {
    @State var steps = 0

    var body: some View {
        VStack {
            Text("\(steps)")
                .font(.largeTitle)
                .fontWeight(.bold)
                .foregroundColor(.accentColor)

            Button(action: {
                HealthKitData().getStepsToday { steps in
                    self.steps = steps
                }
            }) {
...
            }
        }
        .padding()
        .onAppear {
            HealthKitData().authorize { success in
                print("authorize: \(success)")
            }
        }
    }
}

...
ここからは実機で実行するための設定。
HealthKit のプロパティを追加
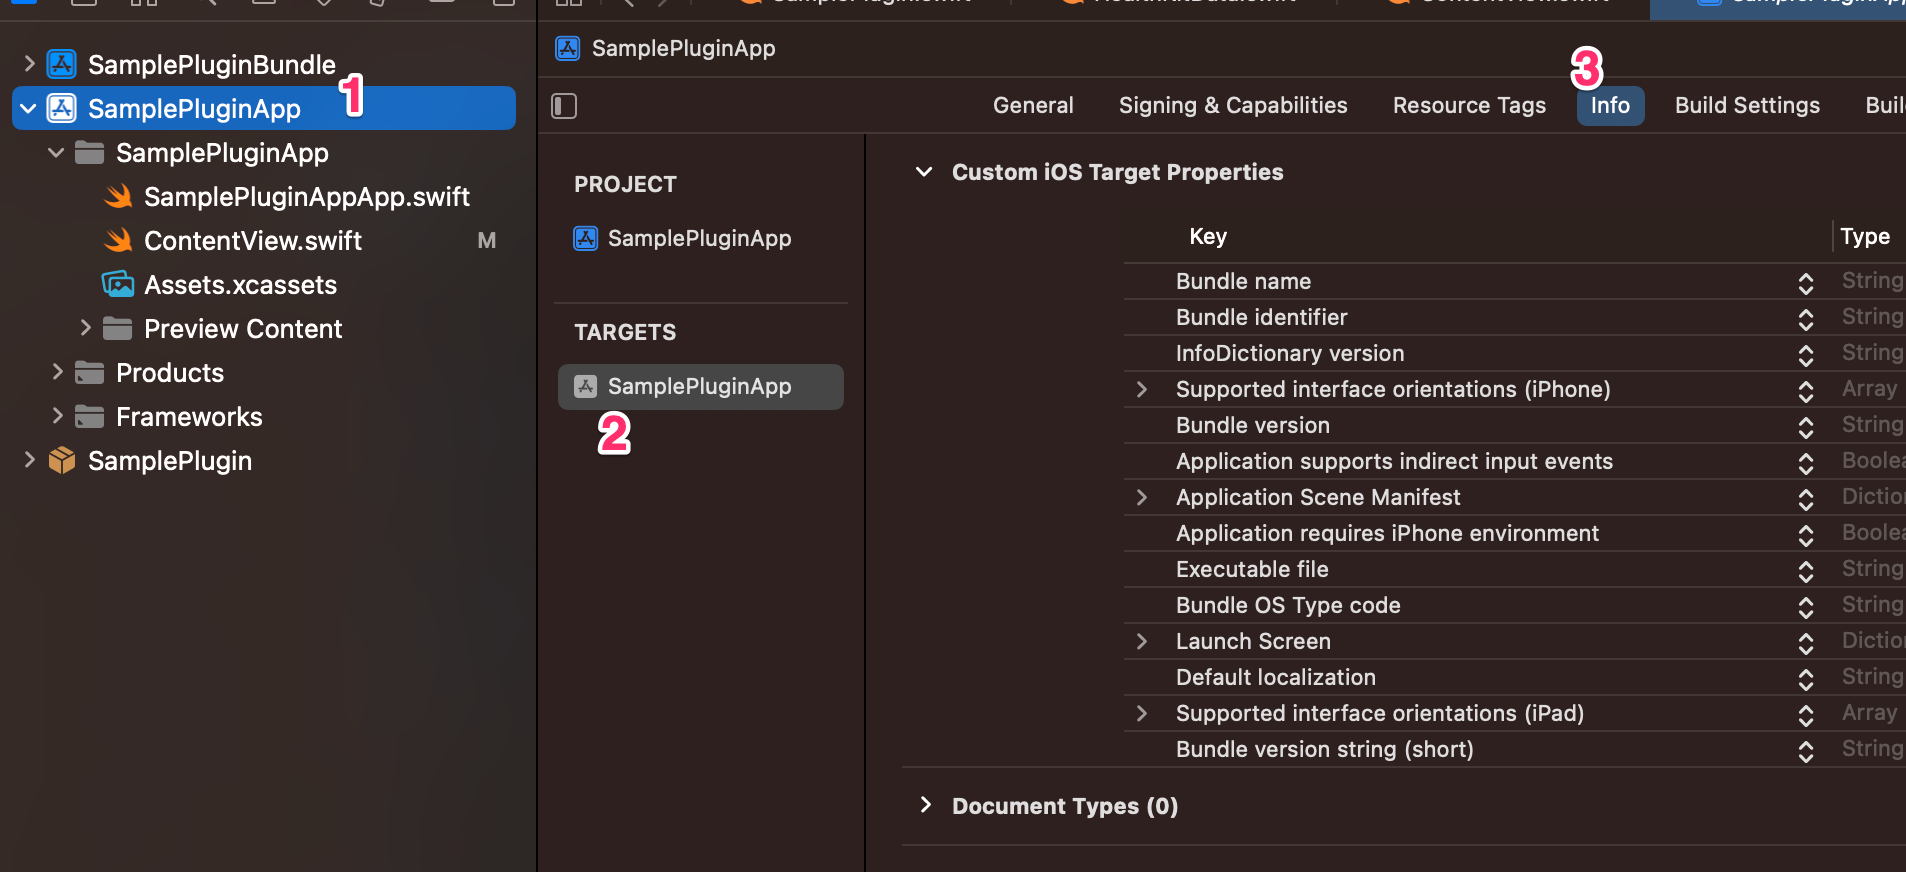
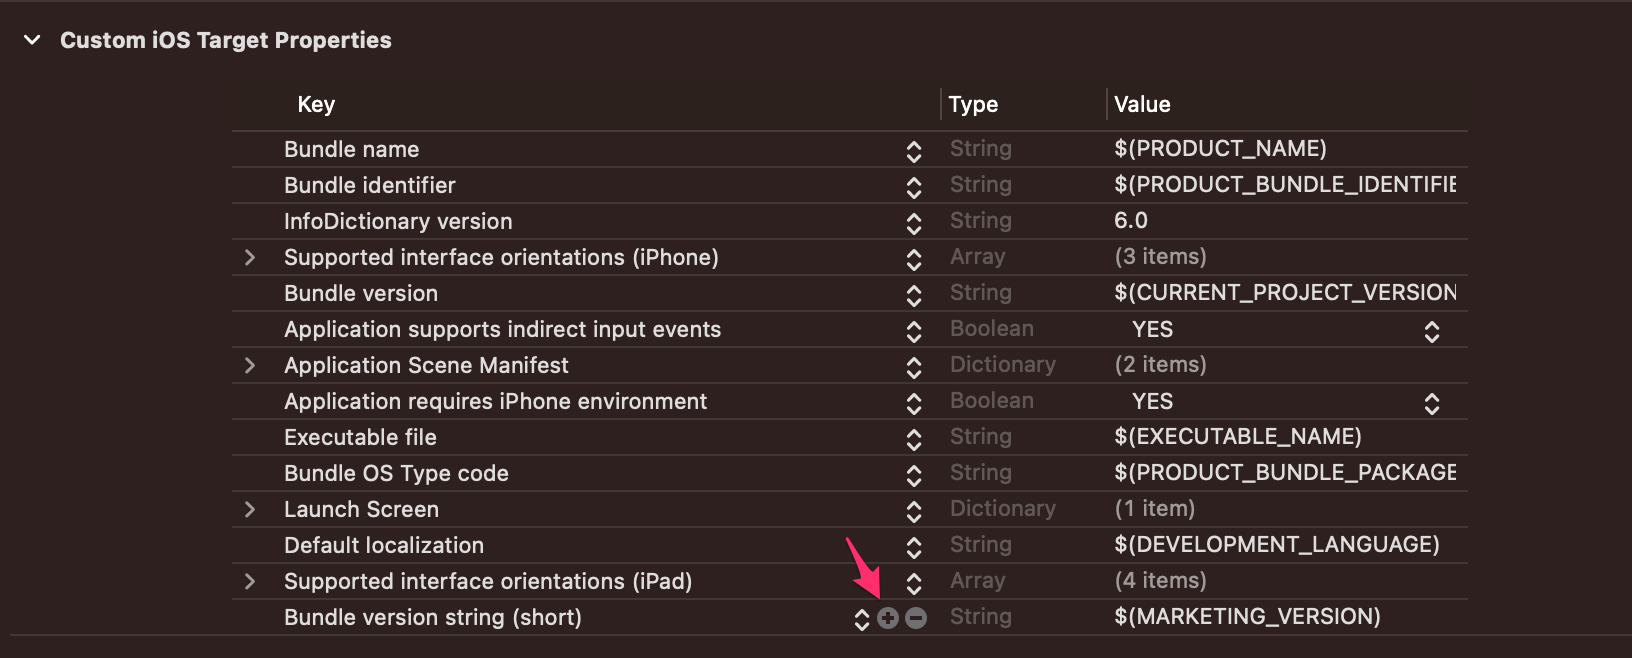
ここの +ボタンを押して新しい行を追加。
こんな感じで適当に記述

Health 「Share」 Usage Description。間違えやすいので注意。
次に Entitlements の設定

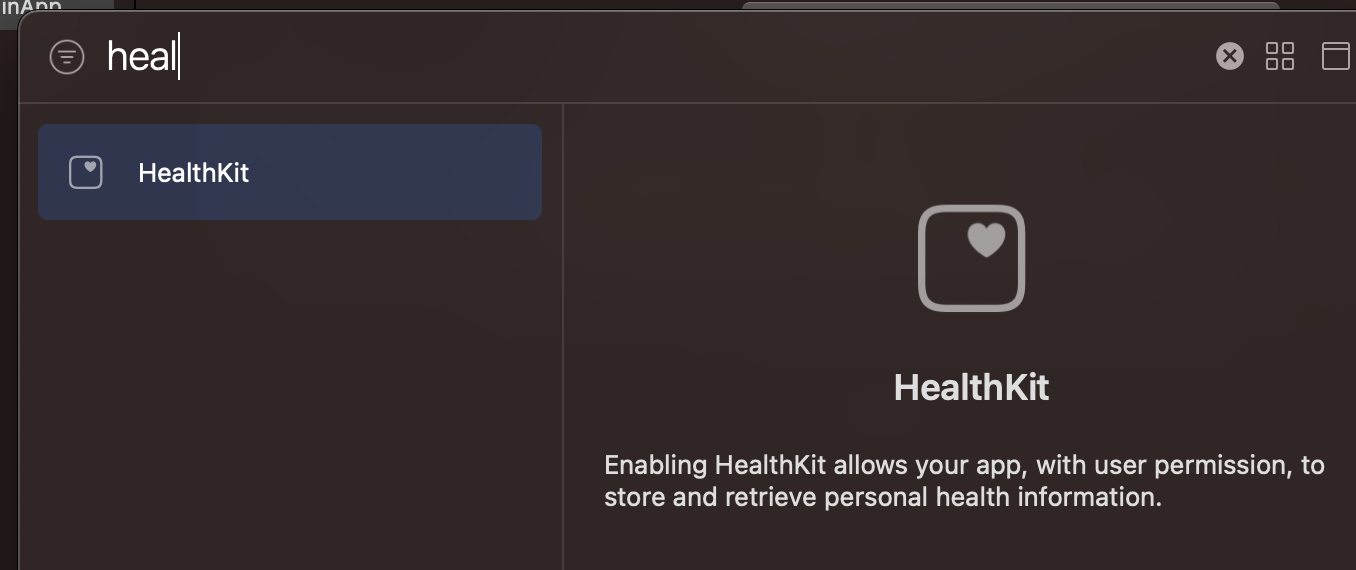
HealthKit が追加される。チェックは不要

この操作によってアプリ名.entitlementsが作成される。
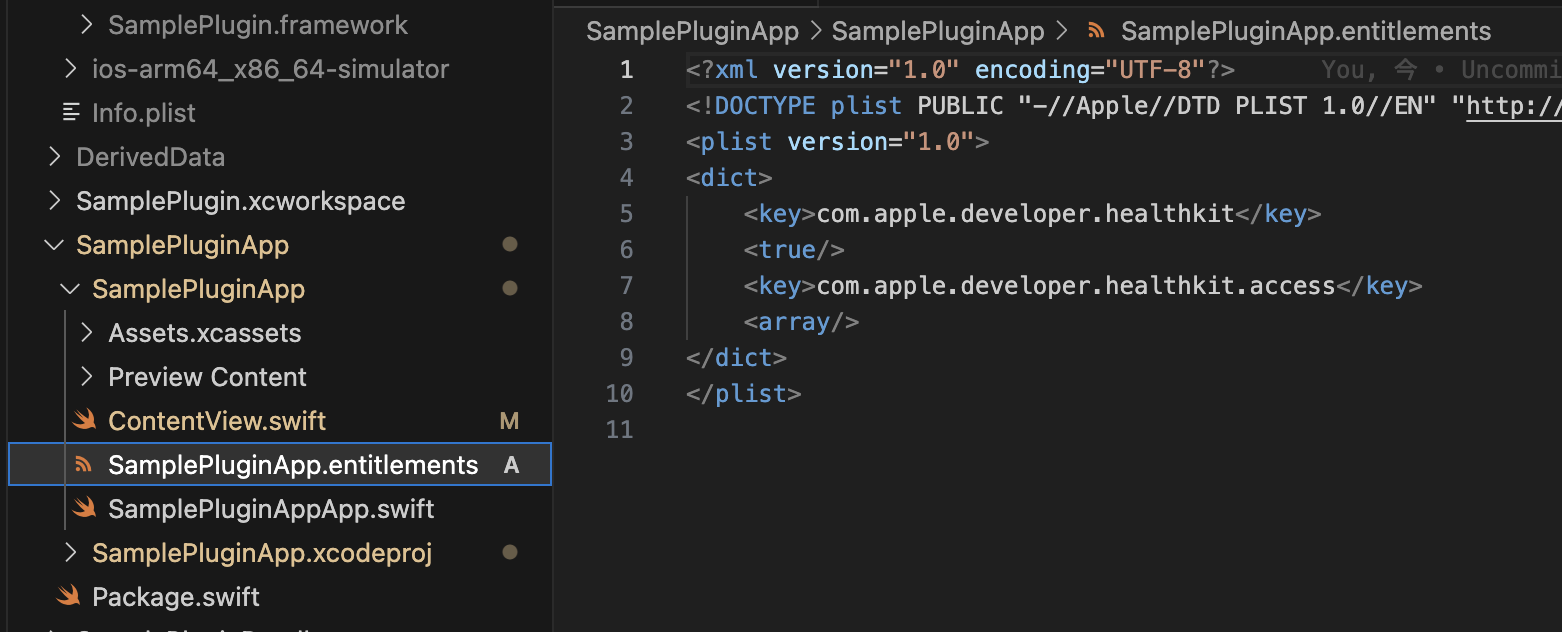
また、BuildSettingsに以下が追加されていることが差分から確認できる
CODE_SIGN_ENTITLEMENTS = SamplePluginApp/SamplePluginApp.entitlements;`
HealthKit を使用する iOS の最小バージョンを Package.swift に設定しておく
import PackageDescription

let package = Package(
    name: "SamplePlugin",
+   platforms: [
+       .iOS(.v15)
+   ],
8以上なら大丈夫だと思うけれど、適当に15と指定。
Xcode で Run。
歩数にチェックして許可。ボタンを押すと本日の歩数が取得できる。
| 許可画面 | 歩数取得 |
|---|---|
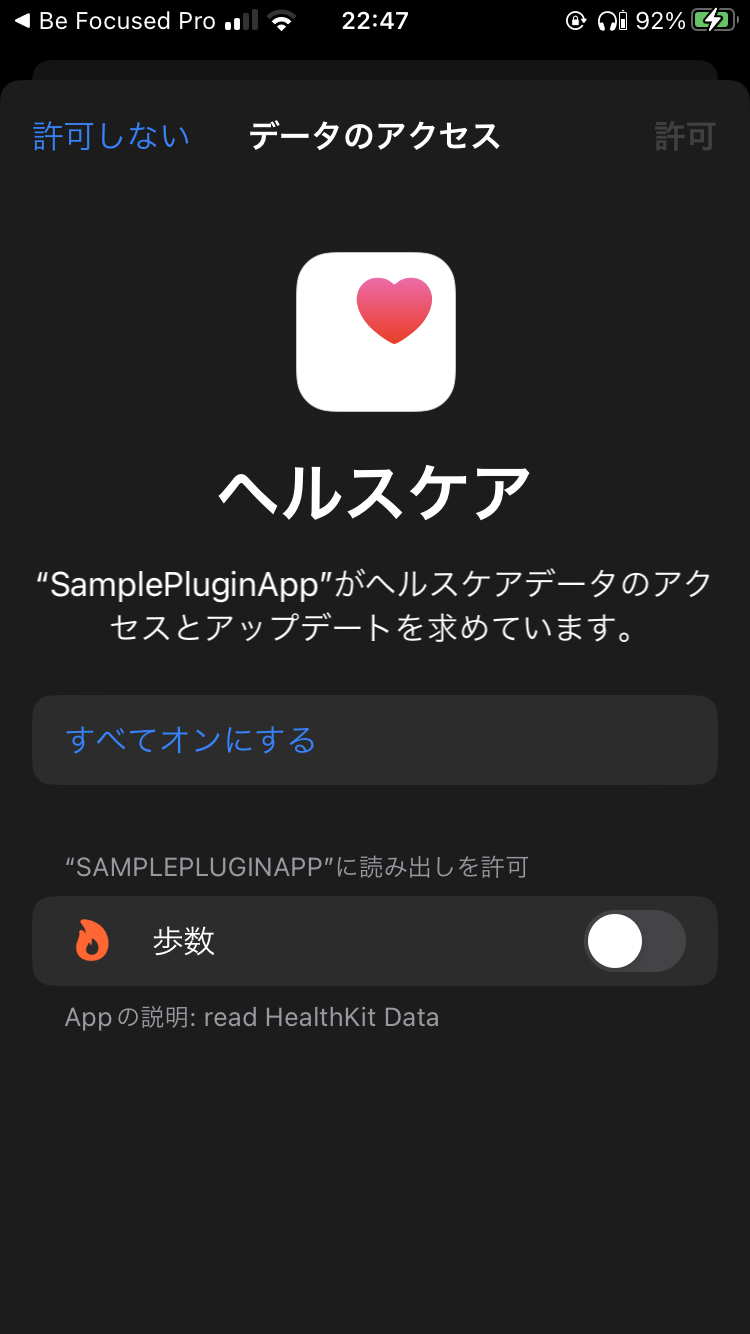 |
 |
これでNativeアプリによる歩数取得の確認はOK。
本章の変更は以下のPRで確認可能。
HealthKitData クラスのポイント
アクセス修飾子について
Swift のデフォルトのアクセス修飾子はinternal。
何もつけないと Native アプリからアクセスできないためpublicをつけた。
プロパティーと Entitlements について
必要なものは以下のページに書いてある
参考
Unity で機能作成
作るものはボタンを押したら歩数をテキストに表示するというもの。
以下の手順で作っていく
- UIを作る。
- C# から呼び出すメソッドをプラグイン側で定義
- プラグインを呼び出す部分作成
- UIに反映
UIを作る

このstepって書いてあるところに歩数を入れる。
ここの解説は省略。
C# から呼び出すメソッドをプラグイン側で定義
以下を追記
#if os(iOS)
public typealias SamplePluginAuthorizeCompletion = @convention(c) (Bool) -> Void

@_cdecl("sample_plugin_authorize")
public func sample_plugin_authorize(_ completion: @escaping SamplePluginAuthorizeCompletion) {
    HealthKitData().authorize(completion: completion)
}

public typealias SamplePluginGetStepsTodayCompletion = @convention(c) (Int32) -> Void

@_cdecl("sample_plugin_get_steps_today")
public func sample_plugin_get_steps_today(_ completion: @escaping SamplePluginGetStepsTodayCompletion) {
    HealthKitData().getStepsToday { steps in
        completion(Int32(steps))
    }
}
#endif
HealthKit は iOSでないと呼び出せないため iOS でのみコンパイルするようにしている
参考
プラグインを呼び出す部分作成
まずはframework をビルドして Unity 側にコピー。
Inspector から Add to Embedded binariesのチェックをつけることを忘れないように注意。
...
    internal static partial class NativeMethods
    {
#if UNITY_IOS
        const string SAMPLE_PLUGIN = "__Internal";
#else
        const string SAMPLE_PLUGIN = "SamplePluginBundle";
#endif

...

#if UNITY_IOS && !UNITY_EDITOR
        [UnmanagedFunctionPointer(CallingConvention.Cdecl)]
        internal delegate void SamplePluginAuthorizeCompletion(bool requestSuccess);

        [DllImport(SAMPLE_PLUGIN, CallingConvention = CallingConvention.Cdecl)]
        internal static extern void sample_plugin_authorize(SamplePluginAuthorizeCompletion completion);

        [UnmanagedFunctionPointer(CallingConvention.Cdecl)]
        internal delegate void SamplePluginGetStepsTodayCompletion(int steps);

        [DllImport(SAMPLE_PLUGIN, CallingConvention = CallingConvention.Cdecl)]
        internal static extern void sample_plugin_get_steps_today(SamplePluginGetStepsTodayCompletion completion);
#endif
    }
...
}
...
    public class SamplePlugin
    {
...
#if UNITY_IOS && !UNITY_EDITOR
        static Action<bool> authorizeCompletion = null;

        [AOT.MonoPInvokeCallback(typeof(NativeMethods.SamplePluginAuthorizeCompletion))]
        static void OnAuthorizeCompleted(bool requestSuccess)
        {
            authorizeCompletion?.Invoke(requestSuccess);
            authorizeCompletion = null;
        }

        public static void Authorize(Action<bool> completion)
        {
            authorizeCompletion = completion;
            NativeMethods.sample_plugin_authorize(OnAuthorizeCompleted);
        }

        static Action<int> getStepsTodayCompletion = null;

        [AOT.MonoPInvokeCallback(typeof(NativeMethods.SamplePluginGetStepsTodayCompletion))]
        static void OnGetStepsTodayCompleted(int steps)
        {
            getStepsTodayCompletion?.Invoke(steps);
            getStepsTodayCompletion = null;
        }

        public static void GetStepsToday(Action<int> completion)
        {
            getStepsTodayCompletion = completion;
            NativeMethods.sample_plugin_get_steps_today(OnGetStepsTodayCompleted);
        }
#else
        public static void Authorize(Action<bool> completion)
        {
            completion?.Invoke(true);
        }

        public static void GetStepsToday(Action<int> completion)
        {
            completion?.Invoke(0);
        }
#endif
    }
}
エディタでは HealthKit 使えないため、ダミーの結果を返すようにしている。
コンパイル条件が複雑すぎるため、もうちょっとシンプルにしたほうが良さそうではある。
参考
https://neue.cc/2023/03/09-csbindgen.html
UI に反映
using System.Collections;
using System.Collections.Generic;
using Sample;
using UnityEngine;
using UnityEngine.UI;

public class SampleScene : MonoBehaviour
{
    [SerializeField] Text label;
    bool isAuthorized = false;
    bool isProcessing = false;

    public void OnClick()
    {
        if (isProcessing)
        {
            return;
        }

        isProcessing = true;

        if (isAuthorized)
        {
            SamplePlugin.GetStepsToday(steps =>
            {
                label.text = steps.ToString();
                isProcessing = false;
            });
        }
        else
        {
            SamplePlugin.Authorize(requestSuccess =>
            {
                isAuthorized = requestSuccess;
                if (isAuthorized)
                {
                    SamplePlugin.GetStepsToday(steps =>
                    {
                        label.text = steps.ToString();
                        isProcessing = false;
                    });
                }
                else
                {
                    label.text = "Not authorized";
                    isProcessing = false;
                }
            });
        }
    }
}
authorizeのタイミングはボタンを押した時にしている。
Startとかでauthorizeしても特に問題はない。
コールバック地獄なので読みづらいが、書く時は Copilot がよしなに書いてくれるため割と楽。
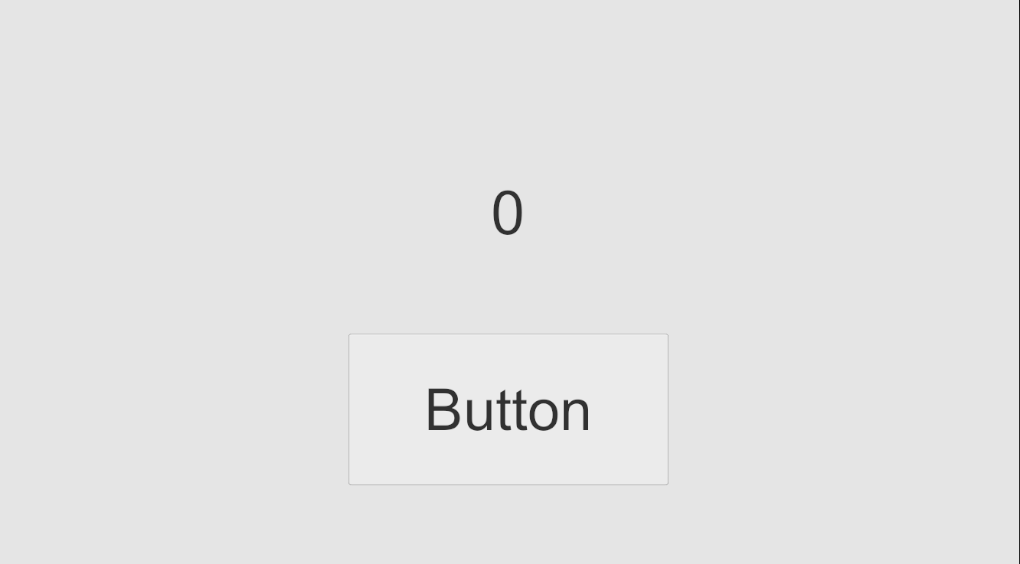
ここまでできたらエディタでボタンを押して0が表示されるか確認して完了
Unity で iOS ビルド
ここが本記事のメイン。(一番つまったところ)
「Native アプリ」の xcproject で手動で設定したことを整理すると以下。
- プロパティリストに Privacy - Health Share Usage Description を追加
- Capabilityの追加 (entitlementsファイルの設定、CODE_SIGN_ENTITLEMENTS の設定)
これを Unity から iOS ビルド後に、毎回手動で設定するのは避けたい。
だから自動化する。
BuildPostprocessor.cs に機能を追加していく。
プロパティリストに Privacy - Health Share Usage Description を追加
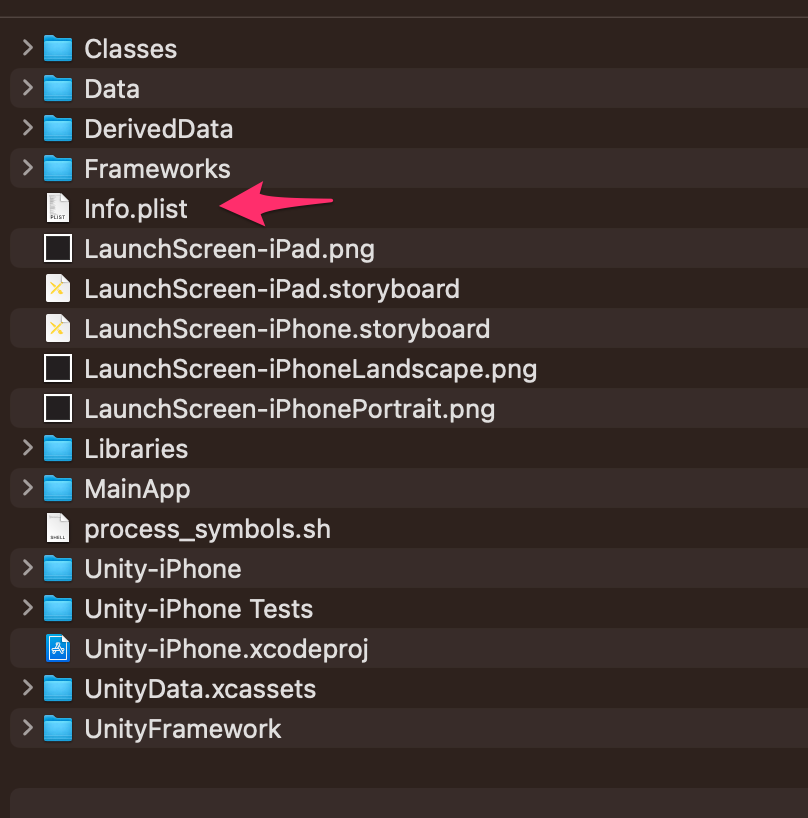
Unity で iOS ビルドを行うと以下に Info.plist が現れる。これを編集する。
        void UpdateInfoPlist(string buildOutputPath, Dictionary<string, string> plistData)
        {
            var plistPath = Path.Combine(buildOutputPath, "Info.plist");
            var plist = new PlistDocument();
            plist.ReadFromFile(plistPath);
            var rootDict = plist.root;
            foreach (var kvp in plistData)
            {
                rootDict.SetString(kvp.Key, kvp.Value);
            }
            plist.WriteToFile(plistPath);
        }

        Dictionary<string, string> InfoPlistData()
        {
            return new Dictionary<string, string>()
            {
                { "NSHealthShareUsageDescription", "read HealthKit Data" }
            };
        }
Capability の追加
Native アプリを手動で生成された entitlements をそのまま使う。これ
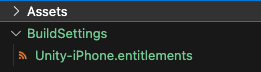
Assets と同じ階層に BuildSettings フォルダを作成(この名前はなんでもいい)
その下に entitlements ファイルをコピーして Unity-iPhone という名前に rename
次に、PlayerSettings > Other Settings > Configuration > Automatically add capabilities を確認

チェックがついていたらこれを外す
(いい感じに設定してくれないため、自分で設定する)
あとは以下のように iOS ビルド後に設定する。
        // PBXProjectクラスによってentitlementsに「com.apple.developer.healthkit.access」を追加することができなかったため、手動で作ったものをコピーする
        void AddEntitlementsFile(string buildOutputPath, PBXProject pbxProject)
        {
            string baseEntitlementsFilePath = "BuildSettings/Unity-iPhone.entitlements";
            string entitlementsFileRelativePath = "Unity-iPhone/Unity-iPhone.entitlements";
            var entitlementsFilePath = Path.Combine(buildOutputPath, entitlementsFileRelativePath);
            File.Copy(baseEntitlementsFilePath, entitlementsFilePath);
            // Xcodeプロジェクトが読み込むentitlementsのパスを指定する
            // 競合させないために PlayerSettings > Other Settings > Configuration > Automatically add capabilities はオフにする
            pbxProject.AddBuildProperty(pbxProject.GetUnityMainTargetGuid(), "CODE_SIGN_ENTITLEMENTS", entitlementsFileRelativePath);

            // Xcodeプロジェクトを開いたときにNavigation Areaにentitlementsファイルが表示されるようにする
            string entitlementsFileProjectPath = Path.GetFileName(entitlementsFileRelativePath);
            pbxProject.AddFile(entitlementsFileRelativePath, entitlementsFileProjectPath, PBXSourceTree.Source);
        }
最後の pbxProject.AddFile は必須ではないが、これやっておかないと xcode 側のファイル欄にentitlementsが出ない。
最終的にBuildPostprocessor.csは以下のようになる。
using System;
using System.Collections.Generic;
using System.IO;
using UnityEditor;
using UnityEditor.Build;
using UnityEditor.Build.Reporting;
using UnityEditor.iOS.Xcode;
using UnityEngine;

namespace PluginSampleEditor
{
    public class BuildPostprocessor : IPostprocessBuildWithReport
    {
        public int callbackOrder { get { return 1; } }

        public void OnPostprocessBuild(BuildReport report)
        {
            var buildTarget = report.summary.platform;
            if (buildTarget == BuildTarget.iOS)
            {
                ProcessForiOS(report);
            }

            Debug.Log("BuildPostprocessor.OnPostprocessBuild for target " + report.summary.platform + " at path " + report.summary.outputPath);
        }

        void ProcessForiOS(BuildReport report)
        {
            var buildOutputPath = report.summary.outputPath;
            UpdateInfoPlist(buildOutputPath, InfoPlistData());
            UpdatePBXProject(buildOutputPath, project =>
            {
                AddEntitlementsFile(buildOutputPath, project);
                DisableBitcode(project);
            });
        }

        void UpdateInfoPlist(string buildOutputPath, Dictionary<string, string> plistData)
        {
            var plistPath = Path.Combine(buildOutputPath, "Info.plist");
            var plist = new PlistDocument();
            plist.ReadFromFile(plistPath);
            var rootDict = plist.root;
            foreach (var kvp in plistData)
            {
                rootDict.SetString(kvp.Key, kvp.Value);
            }
            plist.WriteToFile(plistPath);
        }

        Dictionary<string, string> InfoPlistData()
        {
            return new Dictionary<string, string>()
            {
                { "NSHealthShareUsageDescription", "read HealthKit Data" }
            };
        }

        void UpdatePBXProject(string buildOutputPath, Action<PBXProject> action)
        {
            var pbxProjectPath = PBXProject.GetPBXProjectPath(buildOutputPath);
            var project = new PBXProject();
            project.ReadFromFile(pbxProjectPath);
            action(project);
            project.WriteToFile(pbxProjectPath);
        }

        // PBXProjectクラスによってentitlementsに「com.apple.developer.healthkit.access」を追加することができなかったため、手動で作ったものをコピーする
        void AddEntitlementsFile(string buildOutputPath, PBXProject pbxProject)
        {
            string baseEntitlementsFilePath = "BuildSettings/Unity-iPhone.entitlements";
            string entitlementsFileRelativePath = "Unity-iPhone/Unity-iPhone.entitlements";
            var entitlementsFilePath = Path.Combine(buildOutputPath, entitlementsFileRelativePath);
            File.Copy(baseEntitlementsFilePath, entitlementsFilePath);
            // Xcodeプロジェクトが読み込むentitlementsのパスを指定する
            // 競合させないために PlayerSettings > Other Settings > Configuration > Automatically add capabilities はオフにする
            pbxProject.AddBuildProperty(pbxProject.GetUnityMainTargetGuid(), "CODE_SIGN_ENTITLEMENTS", entitlementsFileRelativePath);

            // Xcodeプロジェクトを開いたときにNavigation Areaにentitlementsファイルが表示されるようにする
            string entitlementsFileProjectPath = Path.GetFileName(entitlementsFileRelativePath);
            pbxProject.AddFile(entitlementsFileRelativePath, entitlementsFileProjectPath, PBXSourceTree.Source);
        }

        // ENABLE_BITCODE は非推奨のパラメータのためNOにする
        void DisableBitcode(PBXProject project)
        {
            var mainTargetGuid = project.GetUnityMainTargetGuid();
            project.SetBuildProperty(mainTargetGuid, "ENABLE_BITCODE", "NO");

            var unityFrameworkTargetGuid = project.GetUnityFrameworkTargetGuid();
            project.SetBuildProperty(unityFrameworkTargetGuid, "ENABLE_BITCODE", "NO");
        }
    }
}
これで実機で歩数取得ができる。
| 許可画面 | 歩数取得 |
|---|---|
 |
 |
補足
Plugin Inspector について

...
ここの HealthKit にチェックつけなくていいのか?
=> 良い。
framework からしか使っていない場合にはdependencyに追加する必要ないっぽい。
PBXProject.AddCapability を使用しない理由
Unity 2021.3.20f1では、
PBXProject.AddCapability は呼んでも何も起こらない。
ProjectCapabilityManager.AddHealthKitで生成される entitlements は期待と異なる (足りない)から。
おわりに
entitlements まわりが、Unity, Xcode ともに良い資料が見つからず手探りで探しました。
従って、これが本当に正しい手法かに関してはあまり自信ないため、もしより良いやりかたあったら教えていただけると助かります!