Unity上でTensorFlowのCNNを動かす。
この記事でTensorFLowSharpは導入済みであると仮定している.
ここを記事を見て、手持ちの環境に合わせてTensorFlowSharpをビルドしておく。
unityの導入
文法的にC#6でないと動かないと所があるので、ここからから最新版(Unity 2017.1以上)を落としておく。
https://store.unity.com/download?ref=personal
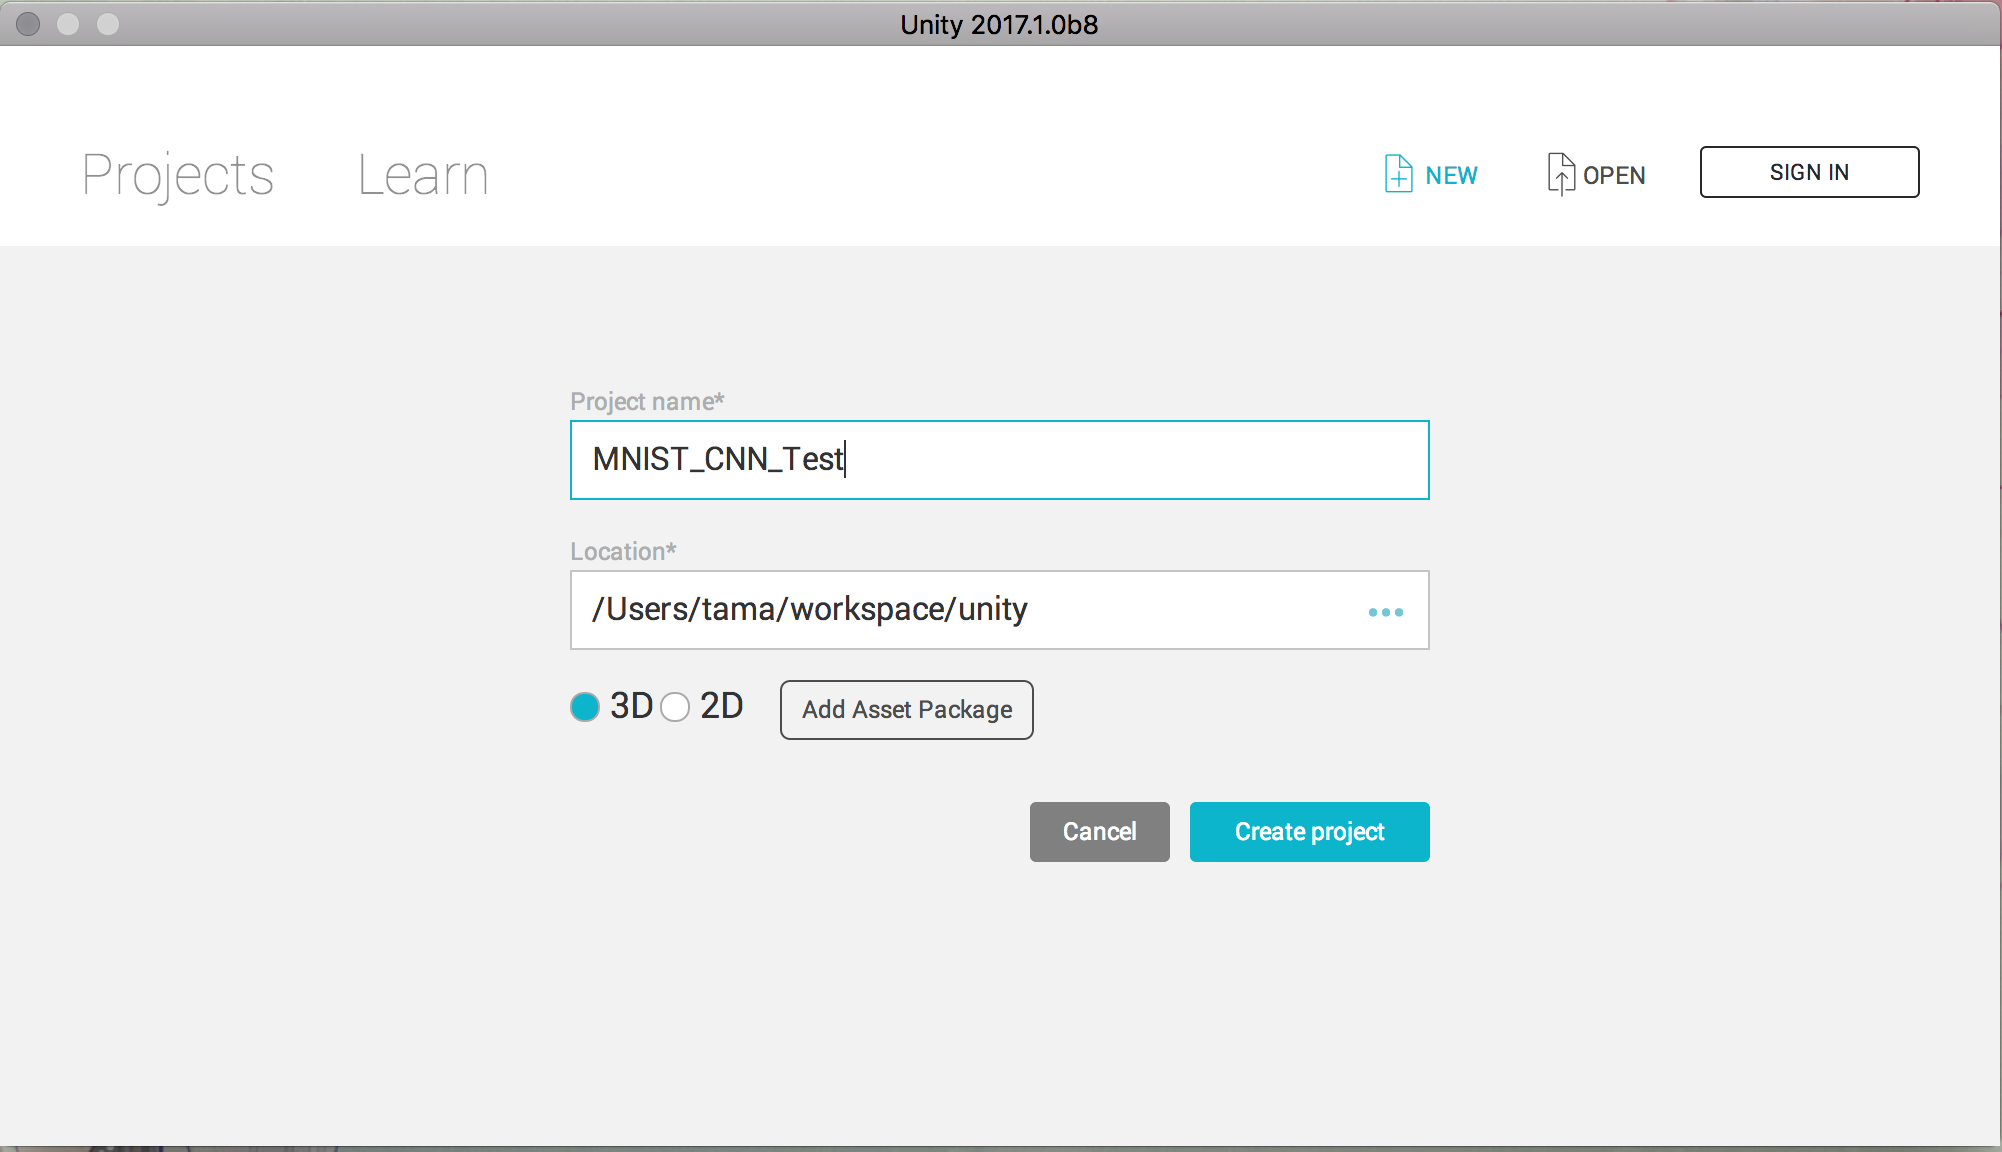
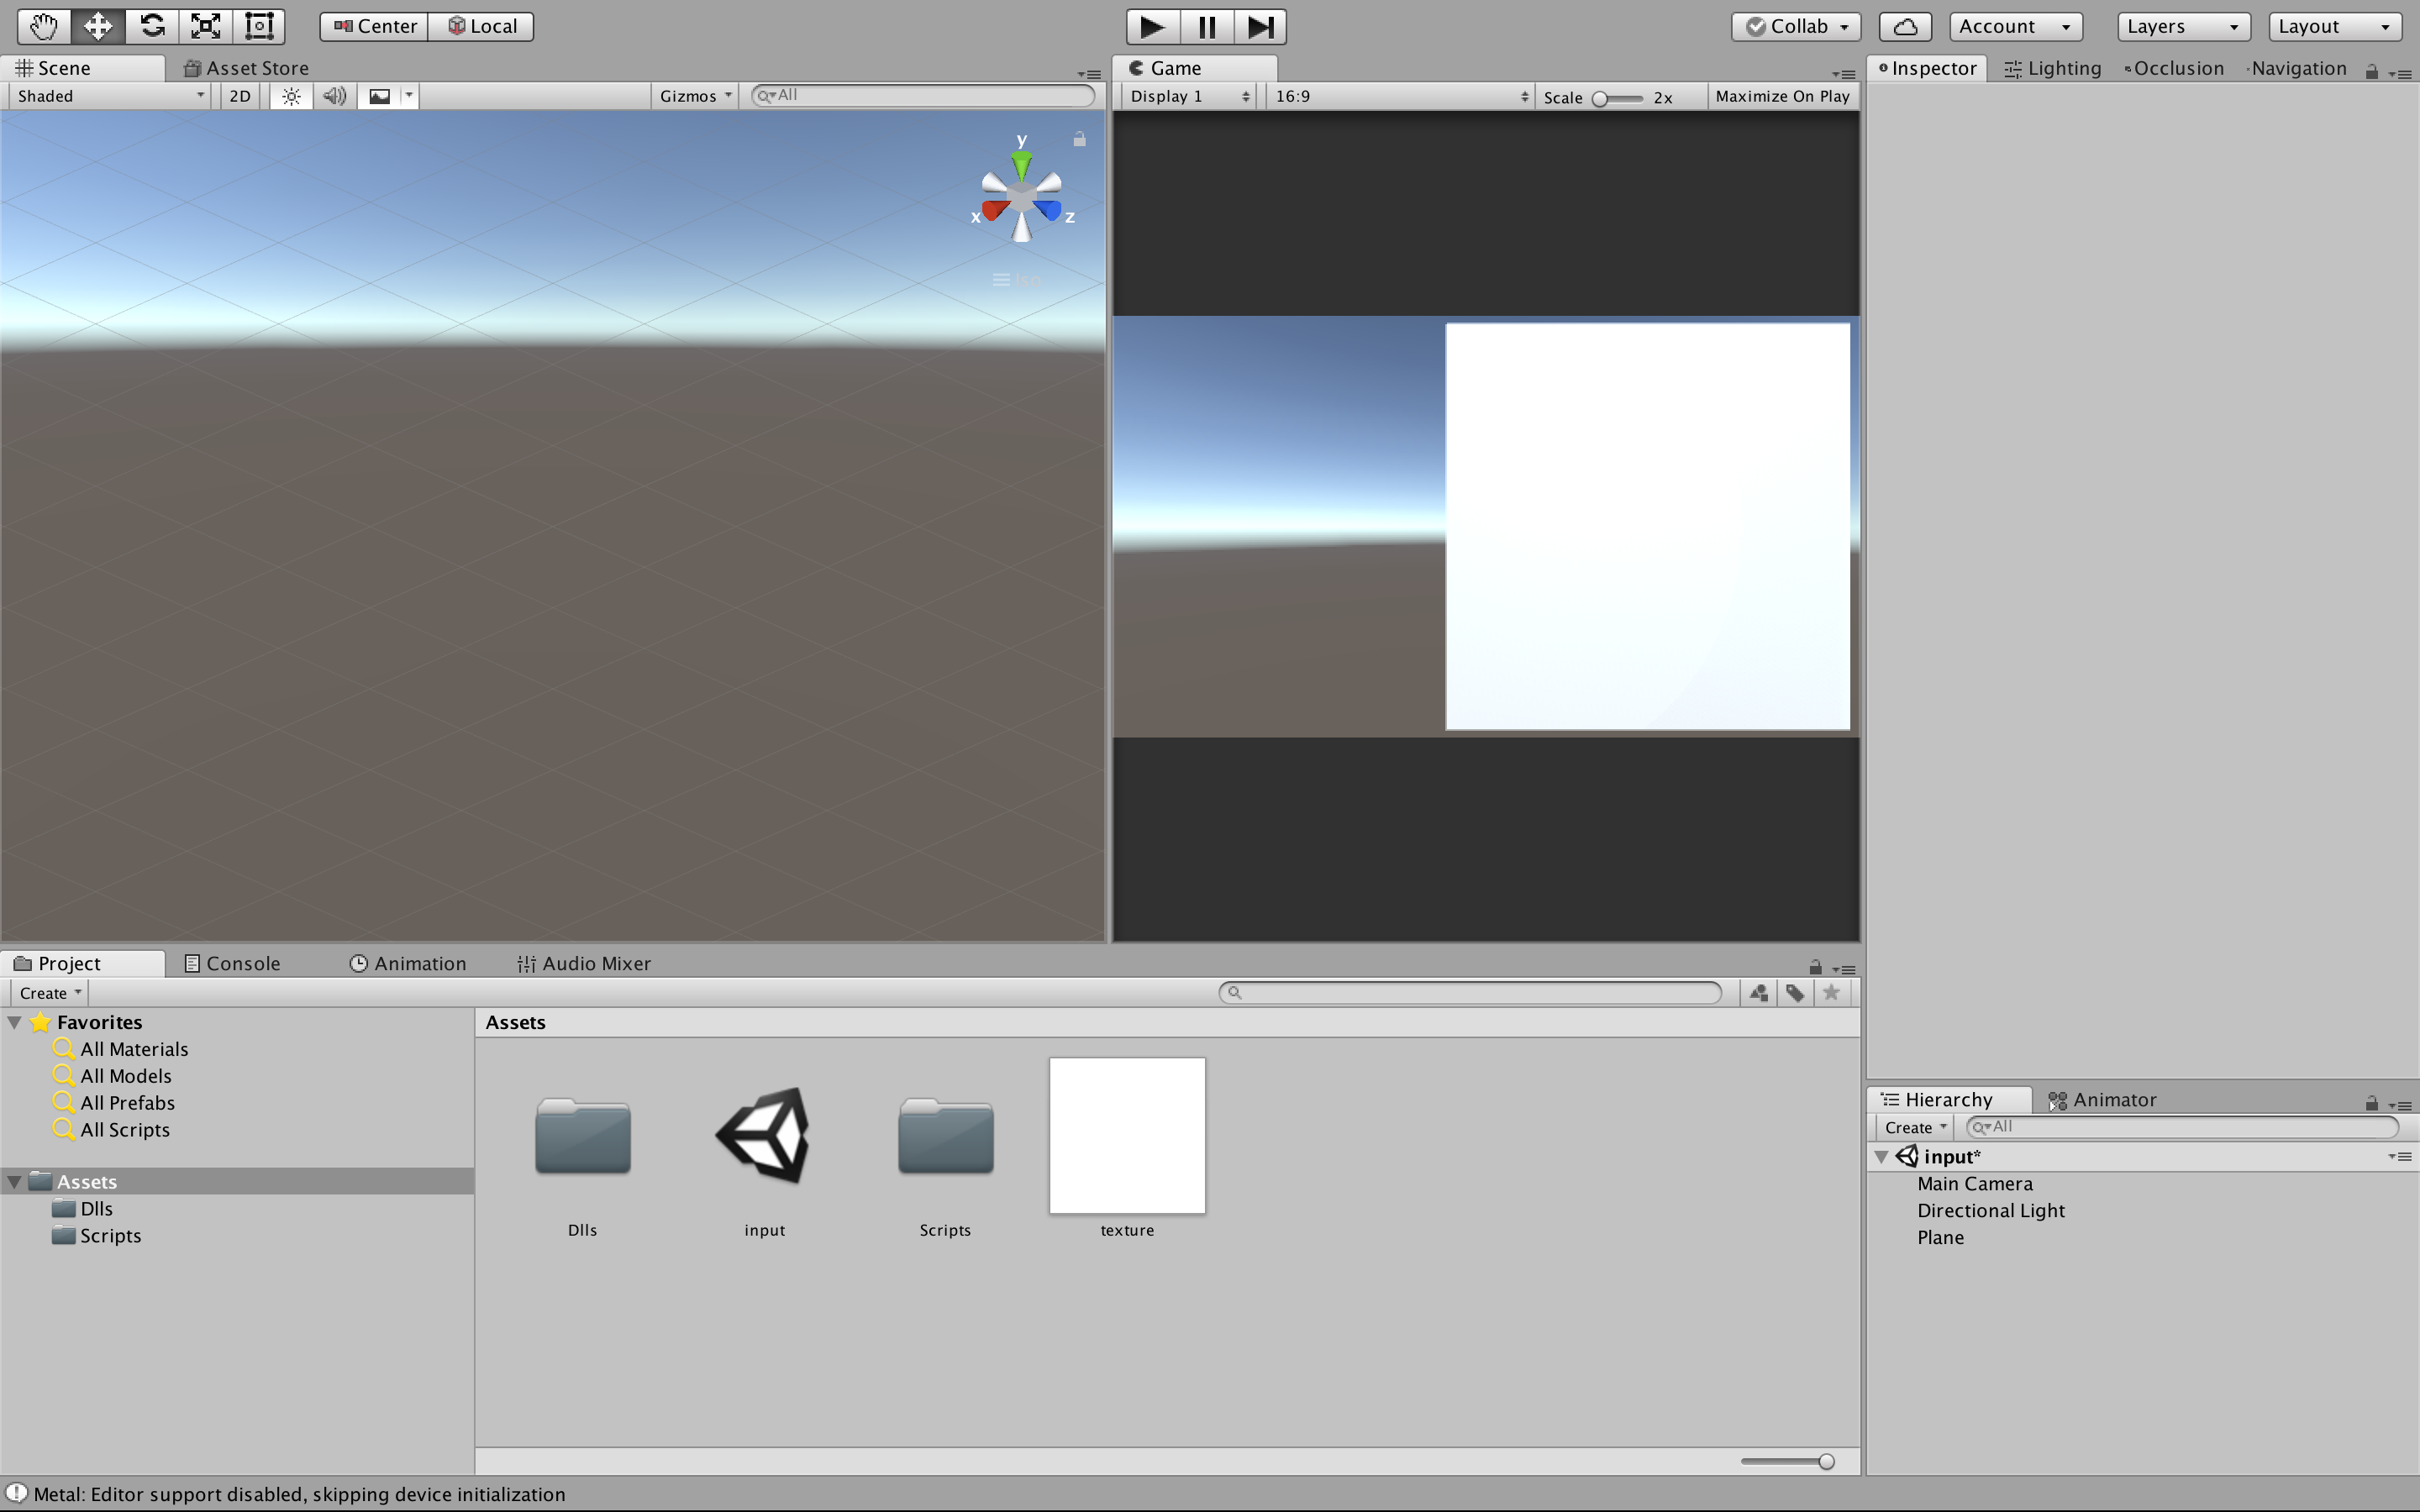
プロジェクトの作成及び準備
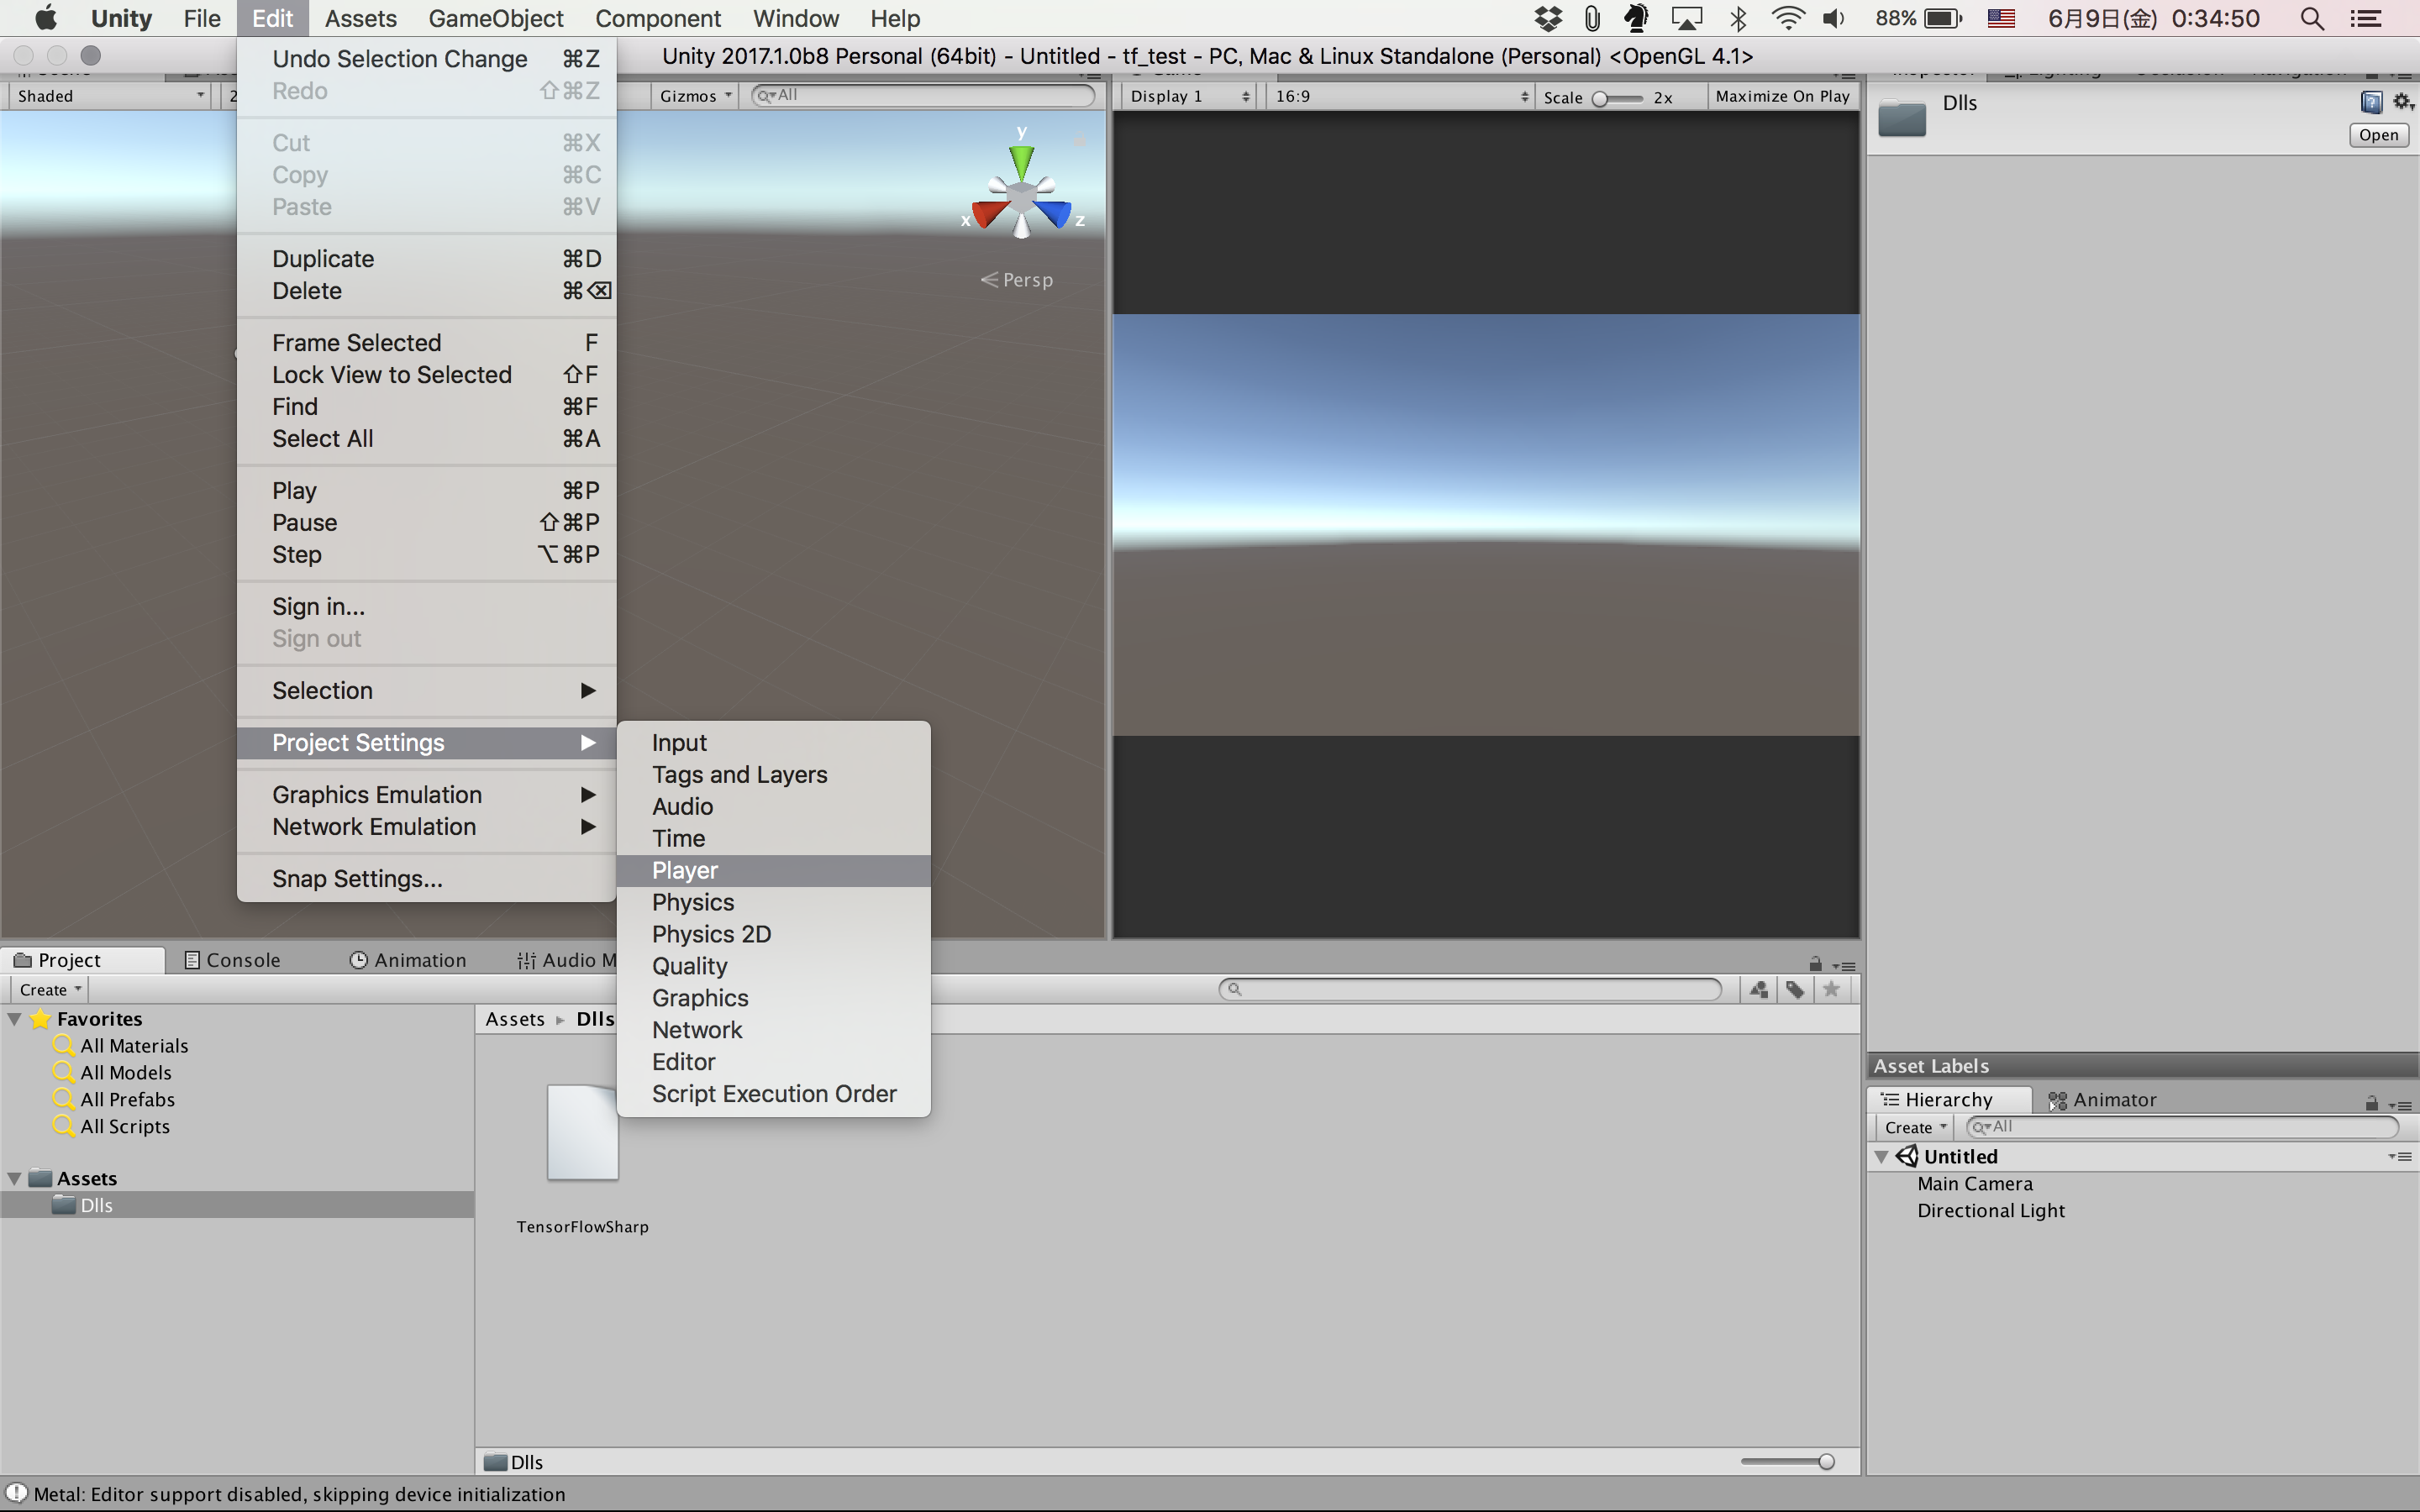
プロジェクトを作成後は、Assetsの下にDllsというフォルダを作り、TensorFlowSharp\TensorFlowSharp\bin\Debug の下のTensorFlowSharp.dllとSystem.ValueTuple.dllをコピーしておく。
Scripting Runtime VersionをExperiental(.NET4.6 Equvalent)に変更する
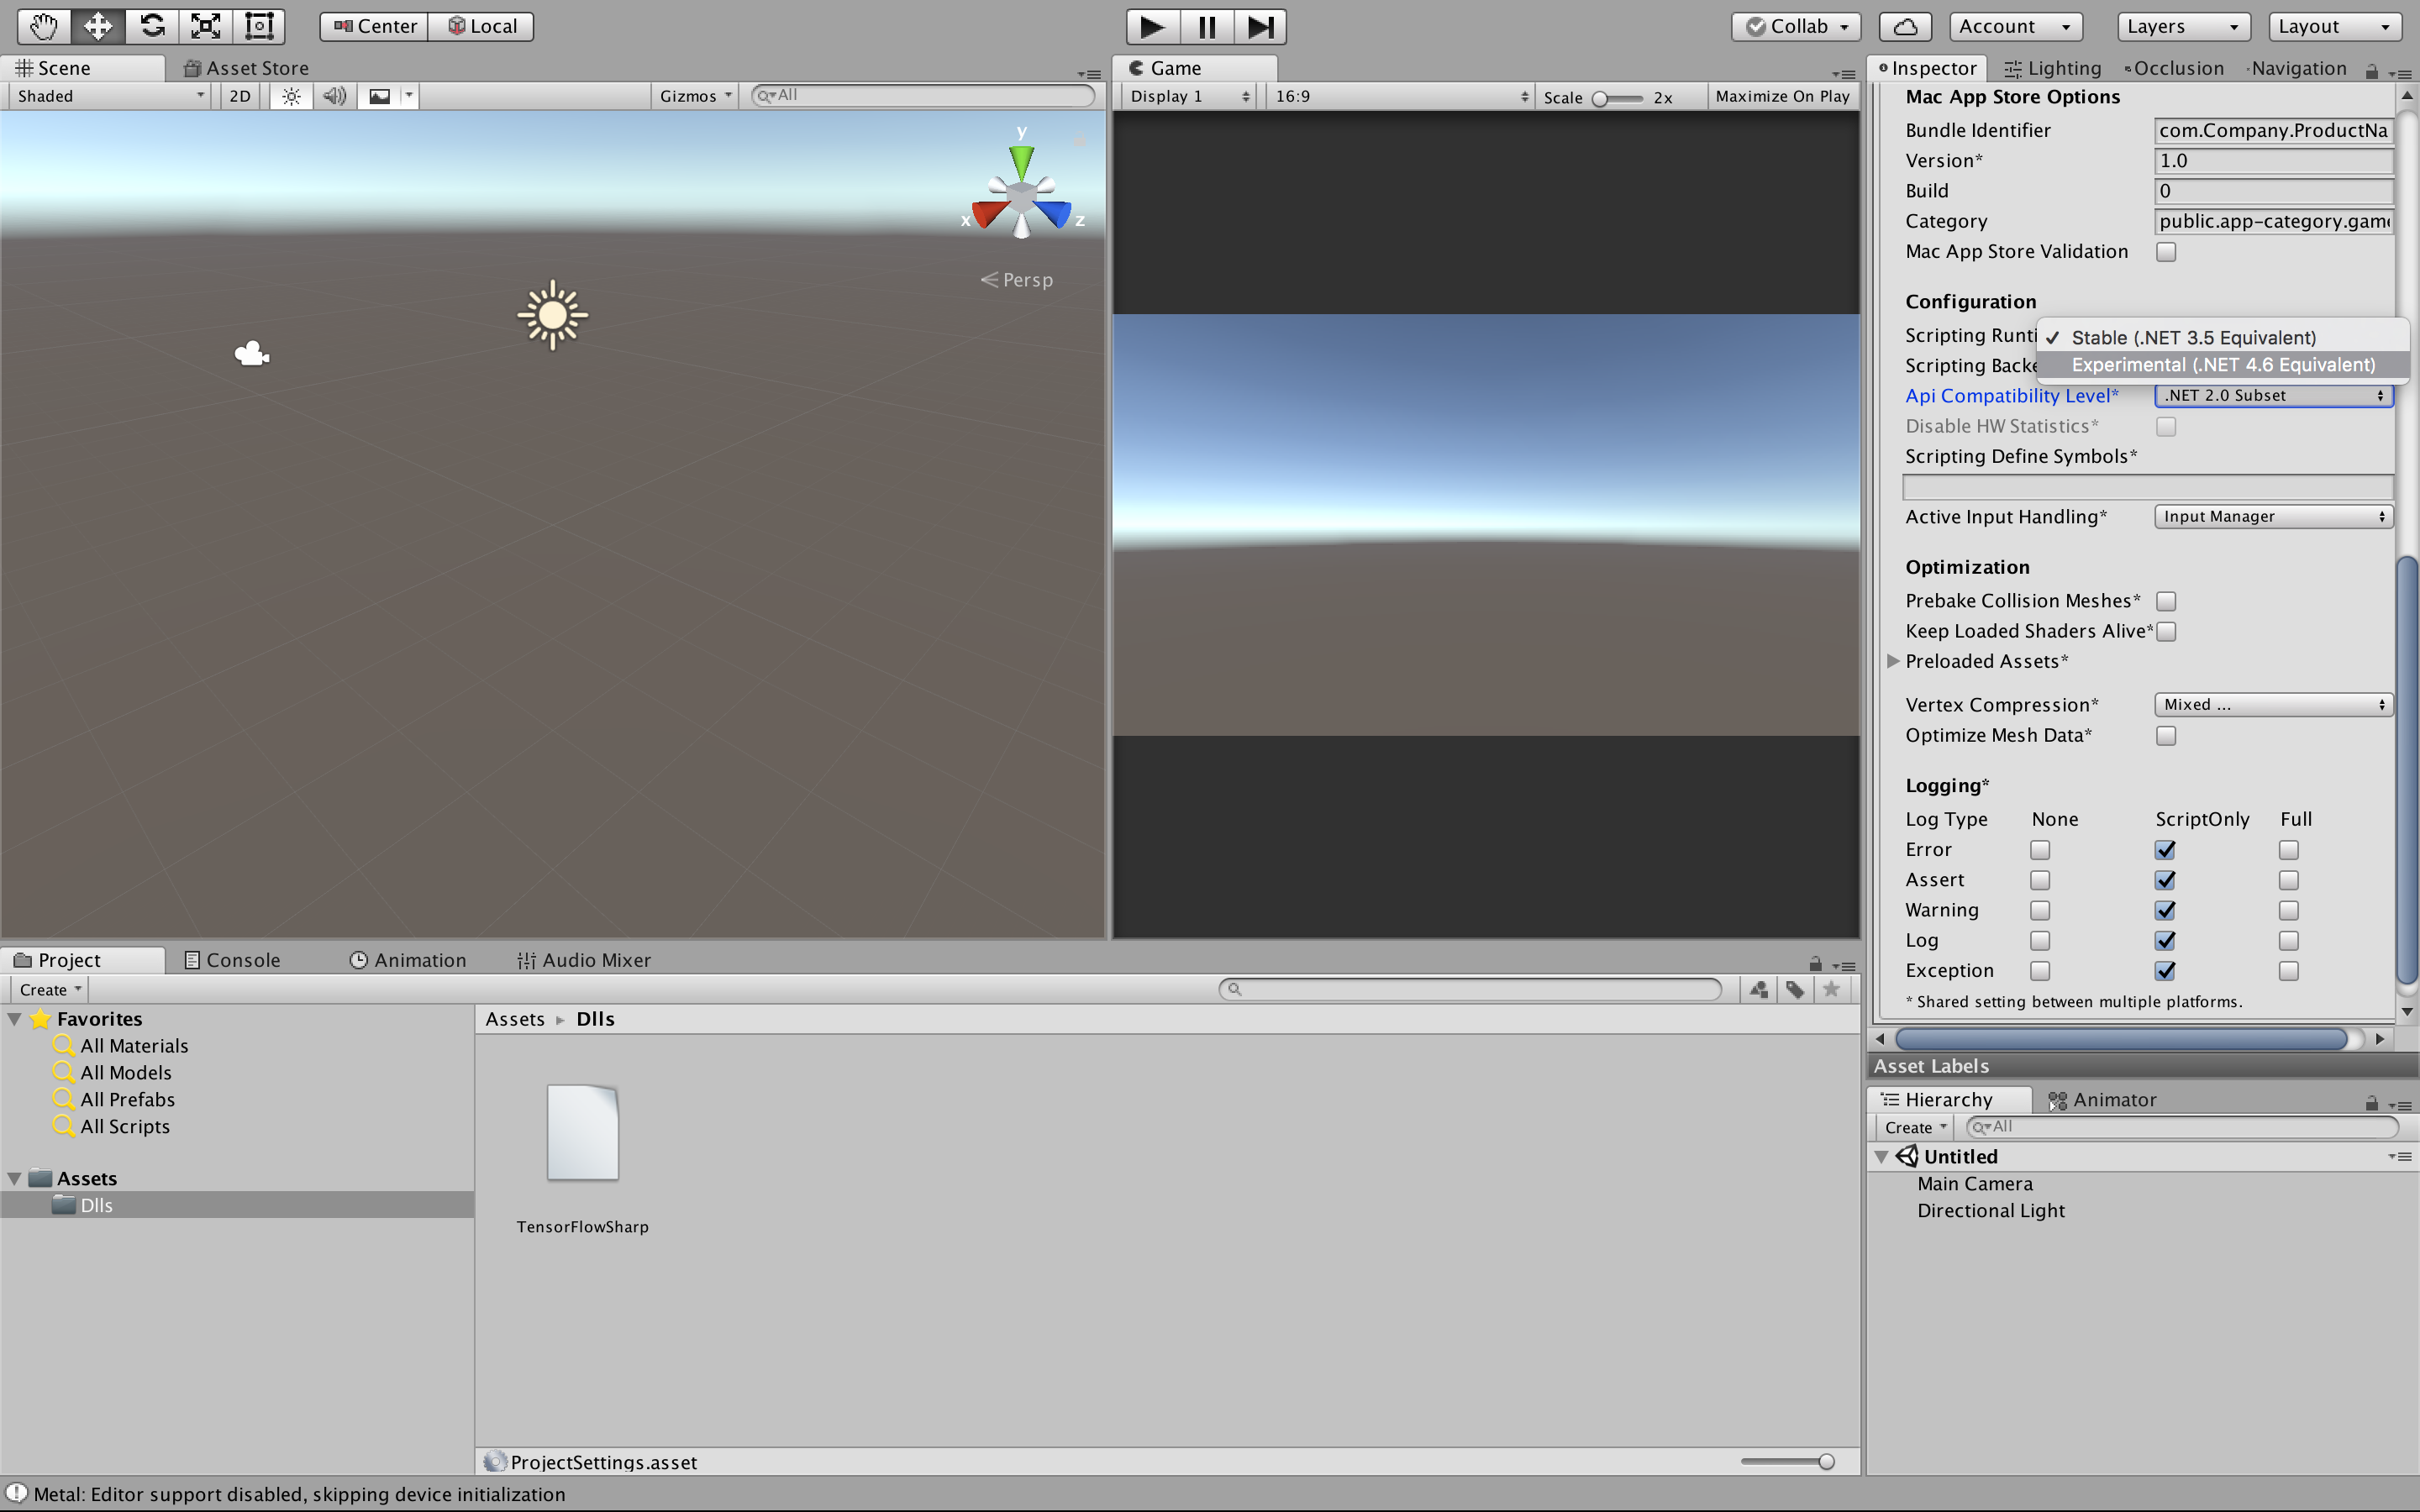
変更後、unityの再起動する。
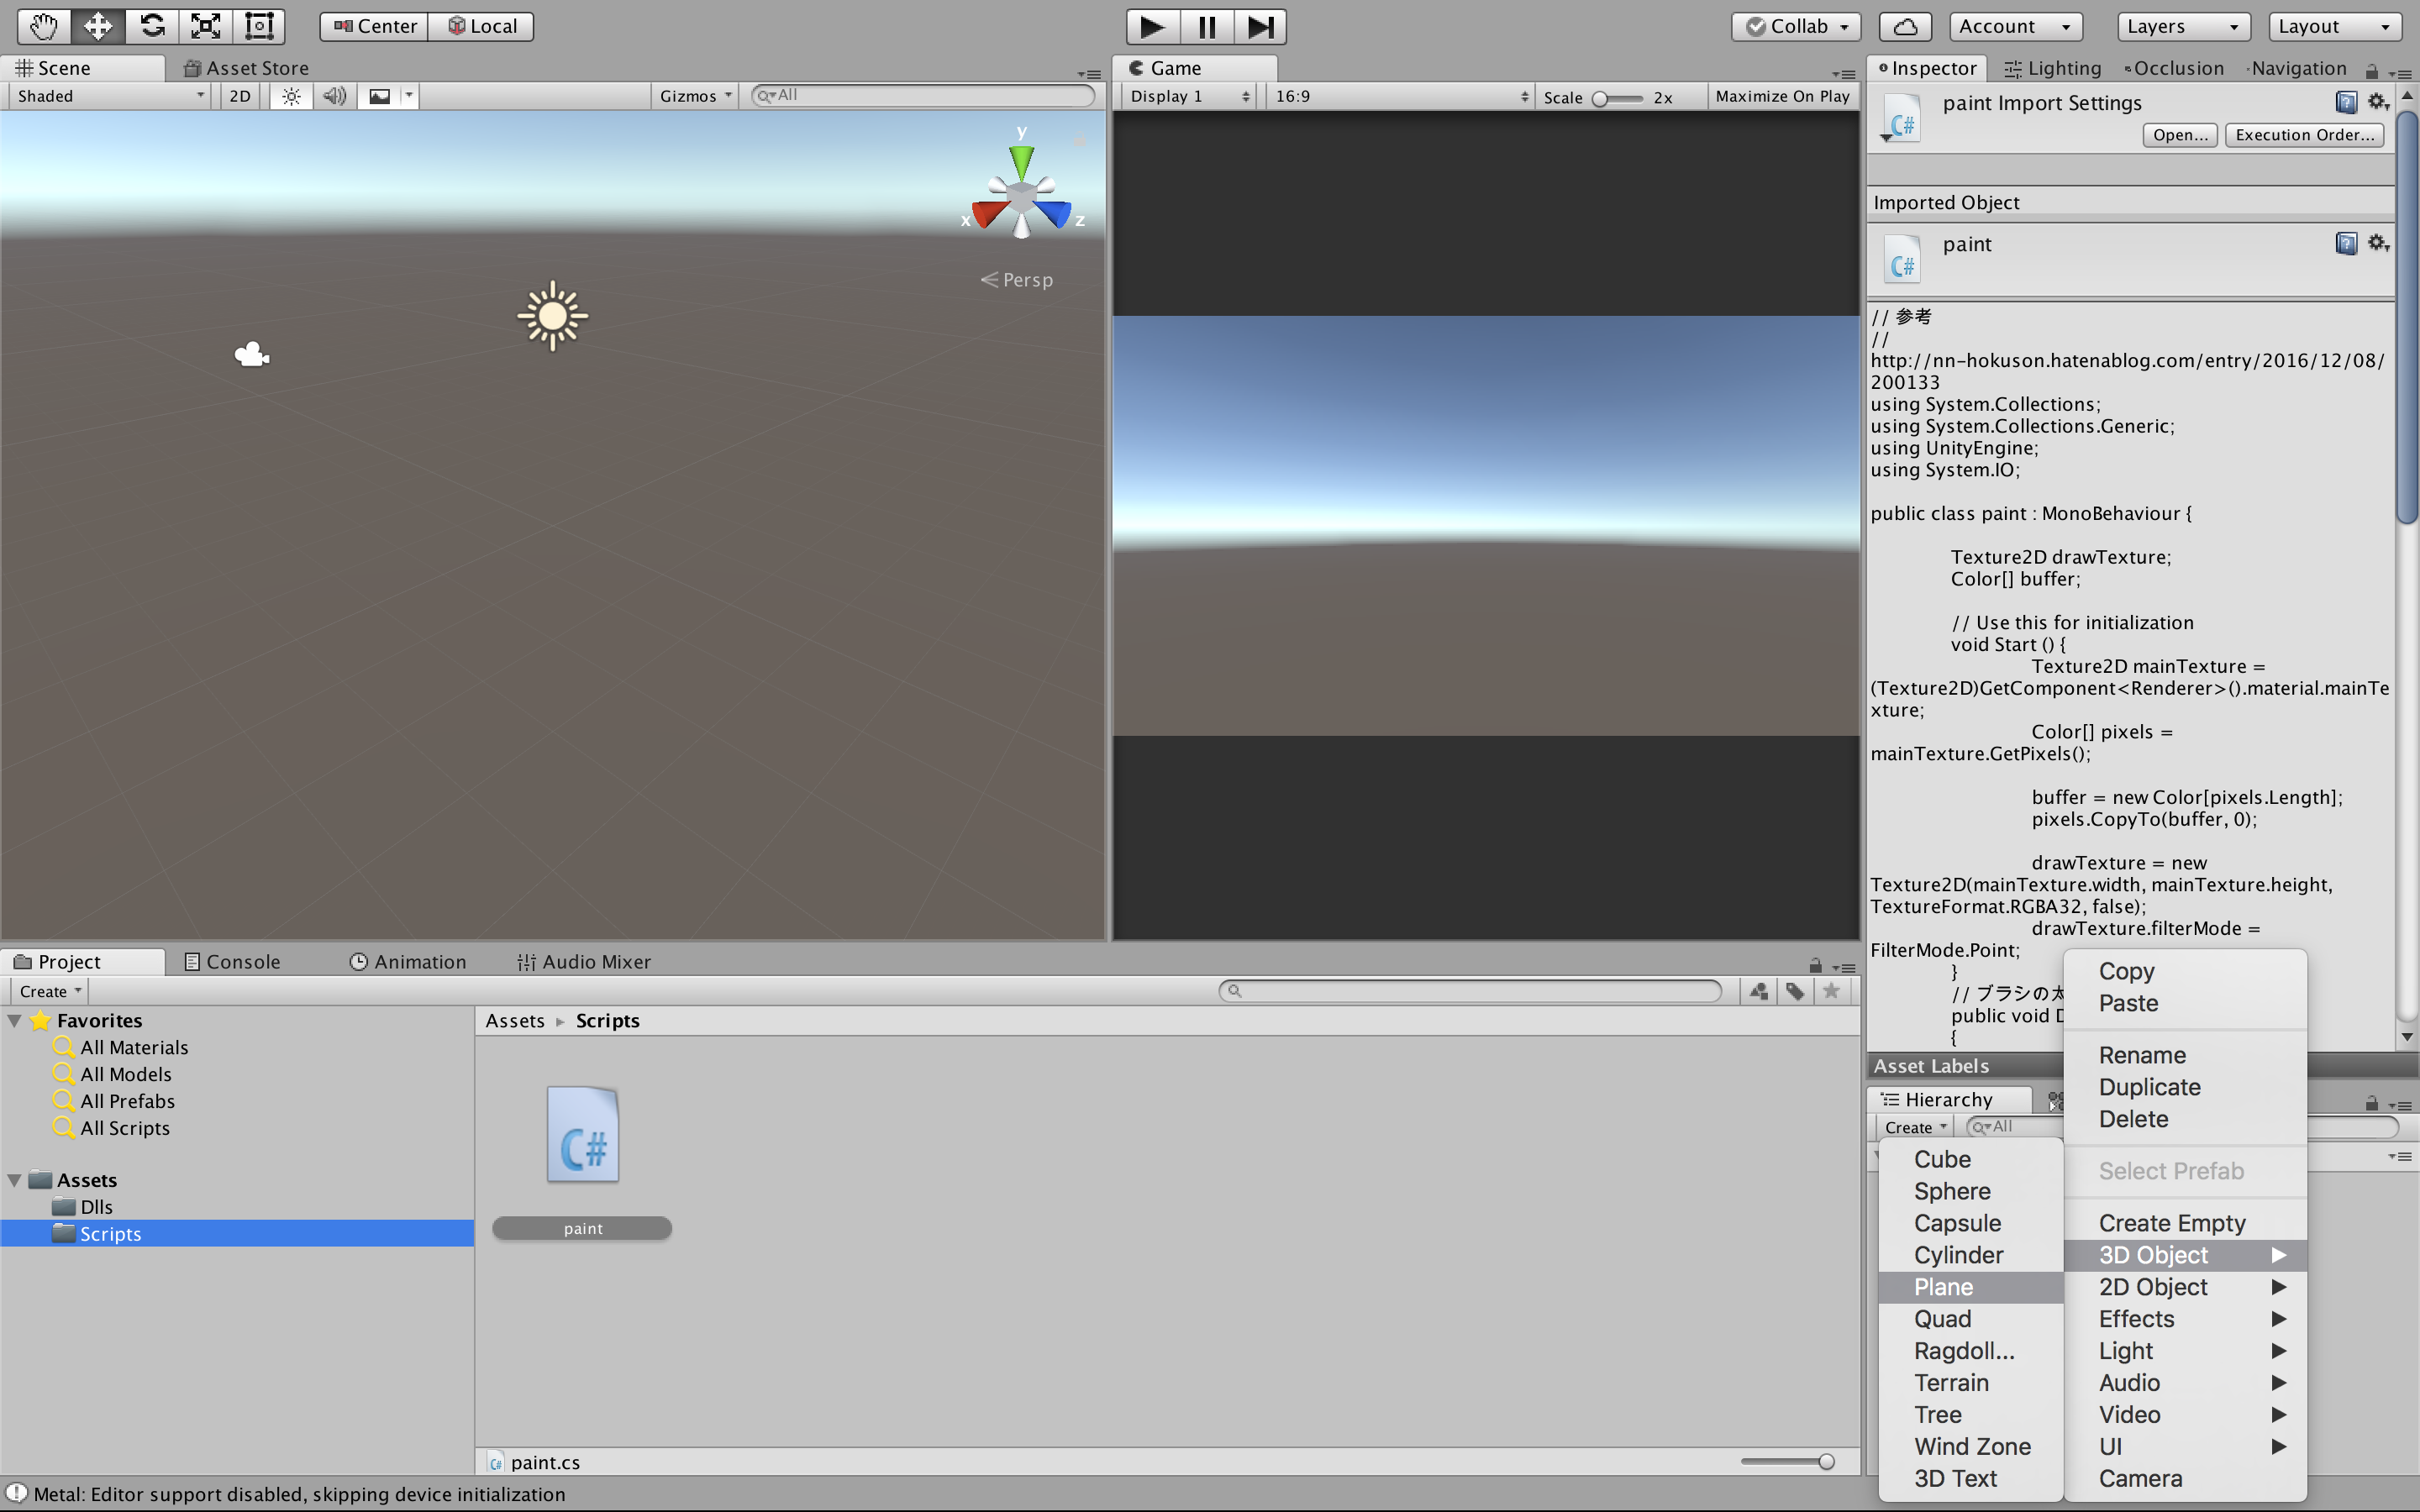
数字の入力用のパッドを作成する
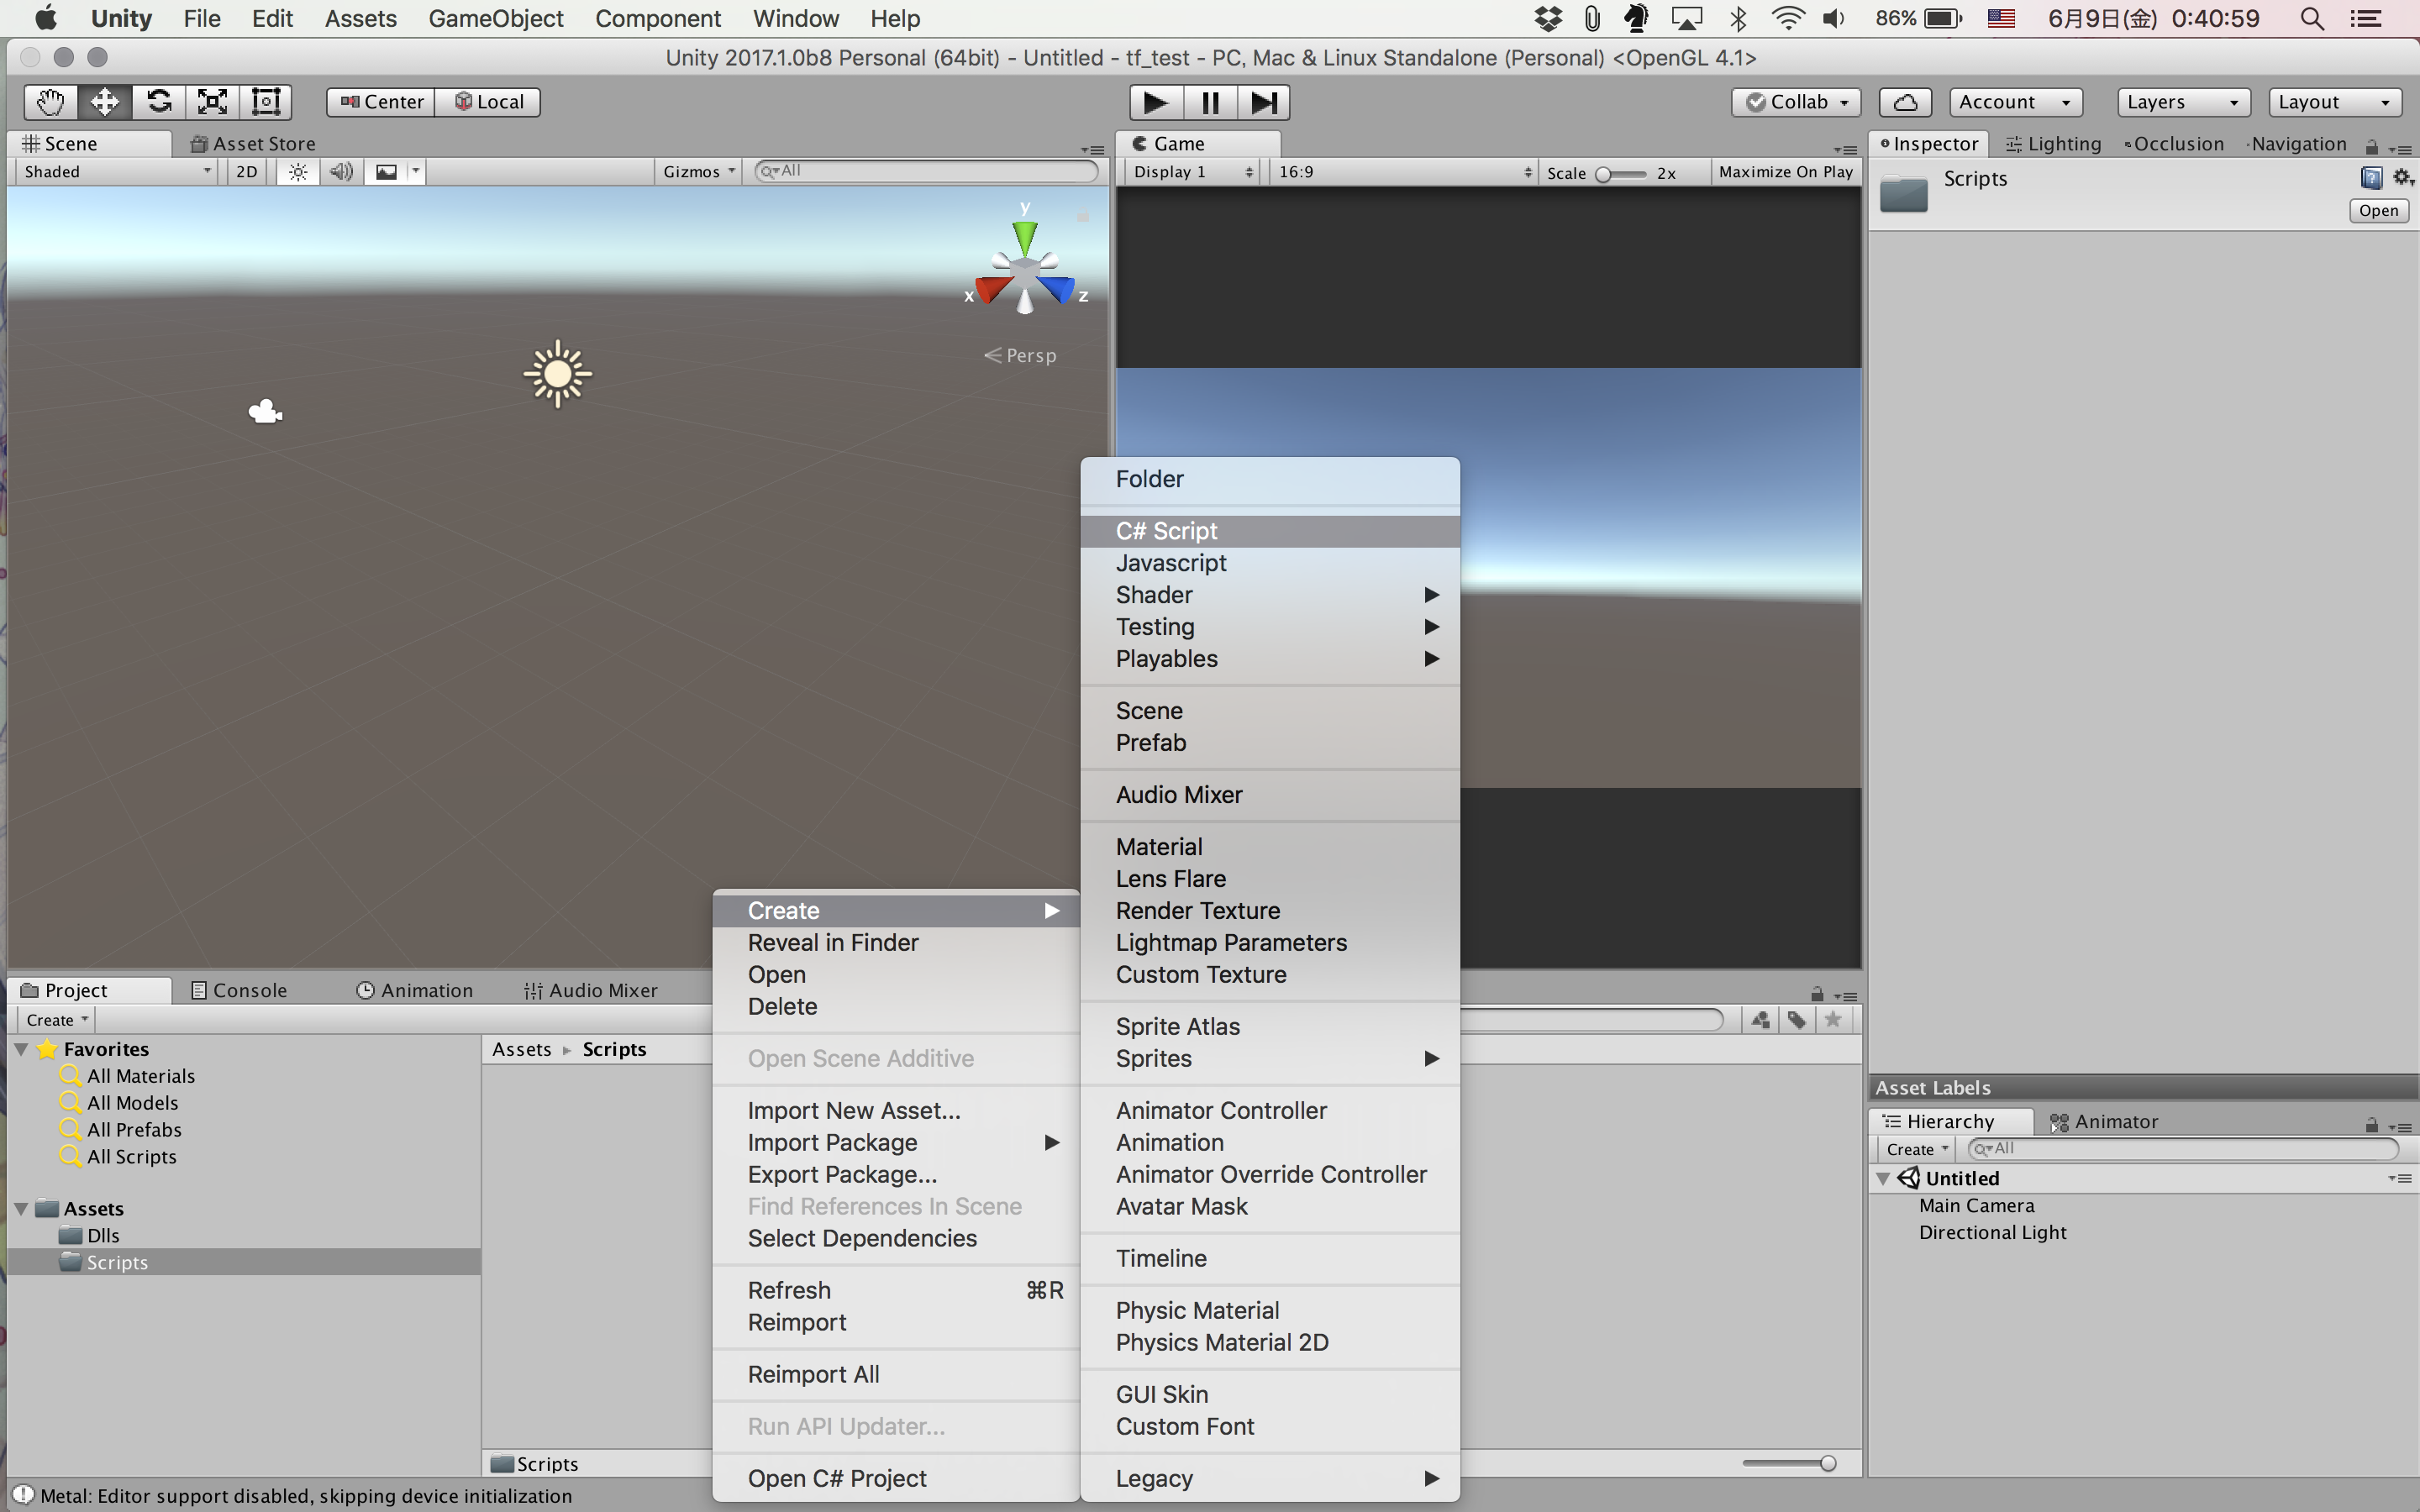
Scriptsを作って、paint.csを作成する。
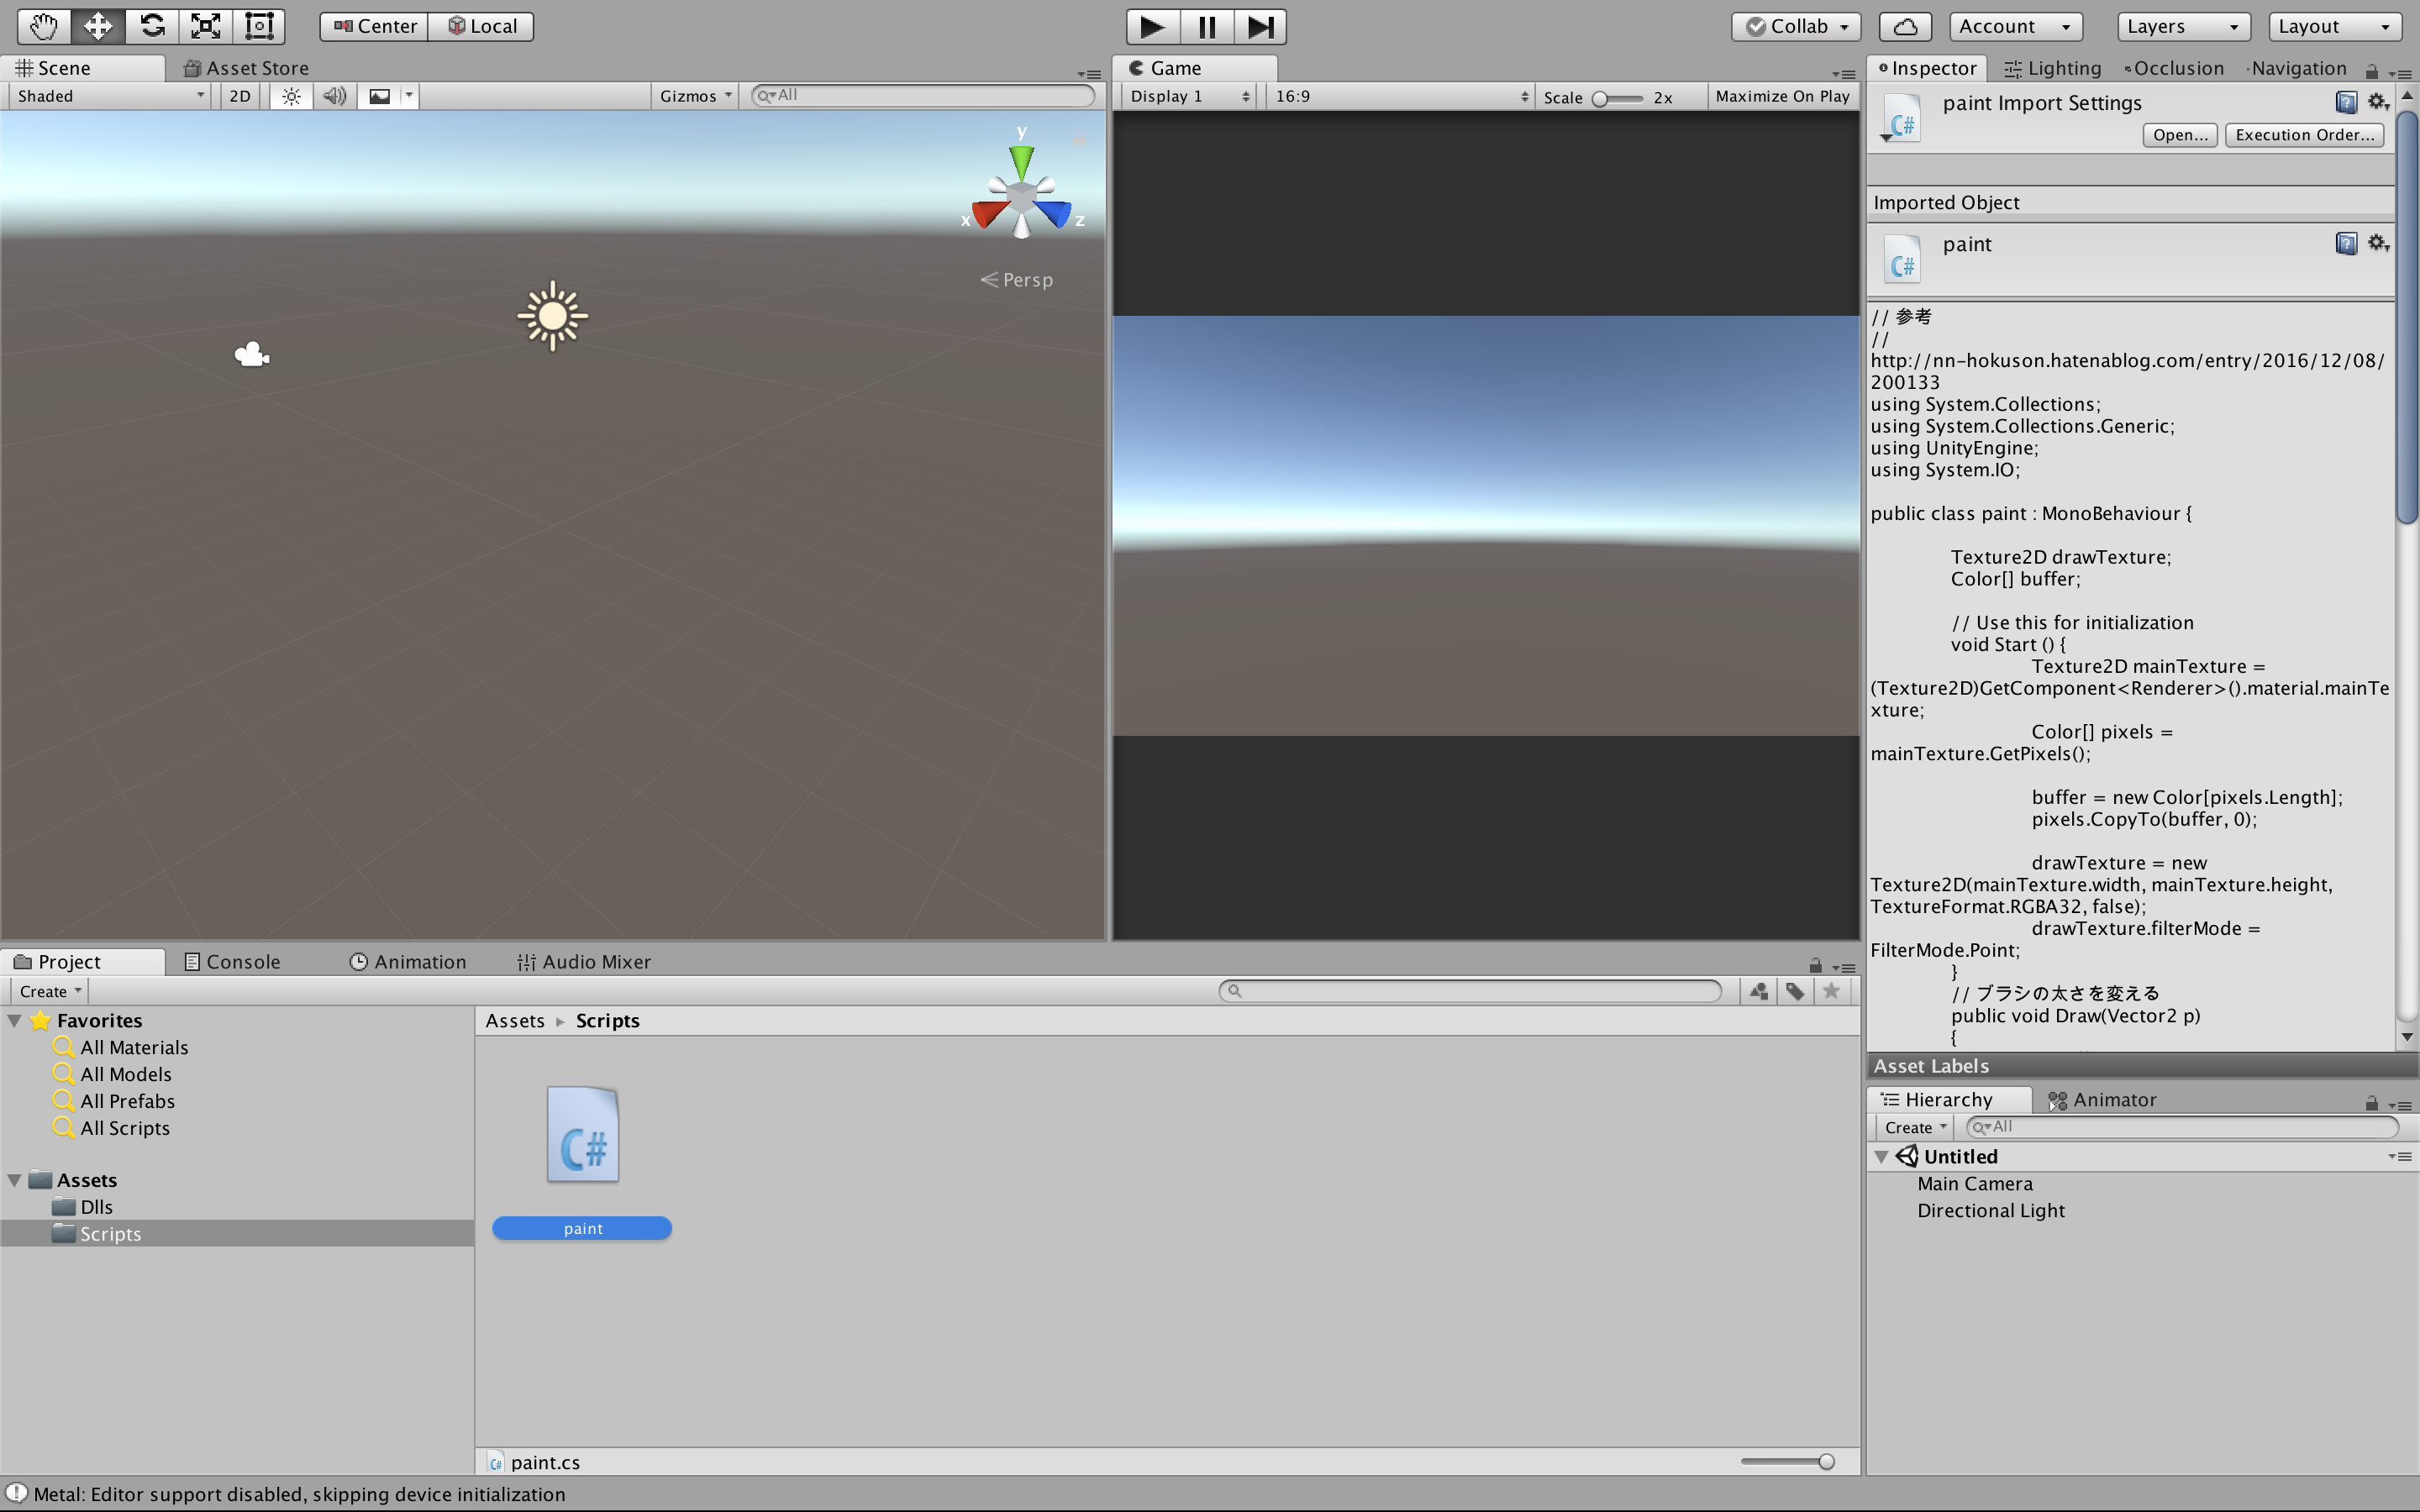
// 参考
// http://nn-hokuson.hatenablog.com/entry/2016/12/08/200133
using System.Collections;
using System.Collections.Generic;
using UnityEngine;
using System.IO;

public class paint : MonoBehaviour {

	Texture2D drawTexture;
	Color[] buffer;

	// Use this for initialization
	void Start () {
		Texture2D mainTexture = (Texture2D)GetComponent<Renderer>().material.mainTexture;
		Color[] pixels = mainTexture.GetPixels();

		buffer = new Color[pixels.Length];
		pixels.CopyTo(buffer, 0);

		drawTexture = new Texture2D(mainTexture.width, mainTexture.height, TextureFormat.RGBA32, false);
		drawTexture.filterMode = FilterMode.Point;
	}
	// ブラシの太さを変える
	public void Draw(Vector2 p)
	{
		//buffer.SetValue(Color.black, (int)p.x + 256 * (int)p.y);

		//太字
		for (int x = 0; x < 256; x++)
		{
			for (int y = 0; y < 256; y++)
			{
				if ((p - new Vector2(x, y)).magnitude < 5)
				{
					buffer.SetValue(Color.black, x + 256 * y);
				}
			}
		}
	}

	// 毎フレーム、テクスチャ上のすべてのピクセルをチェックして、マウスが乗っている座標からの距離が8以下なら黒く塗りつぶします。
	void Update () {
		if (Input.GetMouseButton(0))
		{
			Ray ray = Camera.main.ScreenPointToRay(Input.mousePosition);
			RaycastHit hit;
			if (Physics.Raycast(ray, out hit, 100.0f))
			{
				Draw(hit.textureCoord * 256);
			}

			drawTexture.SetPixels(buffer);
			drawTexture.Apply();
			GetComponent<Renderer>().material.mainTexture = drawTexture;
		}
	}
        // テクスチャをjpgとして保存
	public void SaveTexture()
	{
		byte[] data = drawTexture.EncodeToJPG();
		File.WriteAllBytes(Application.dataPath + "/saveImage.jpg", data);
	}
}
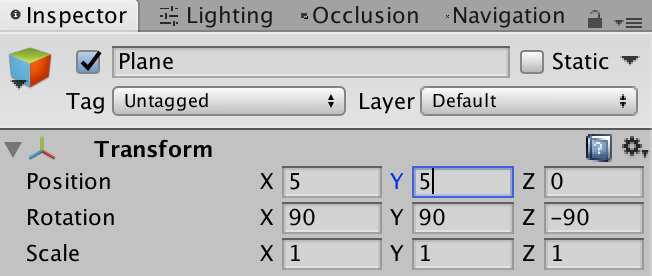
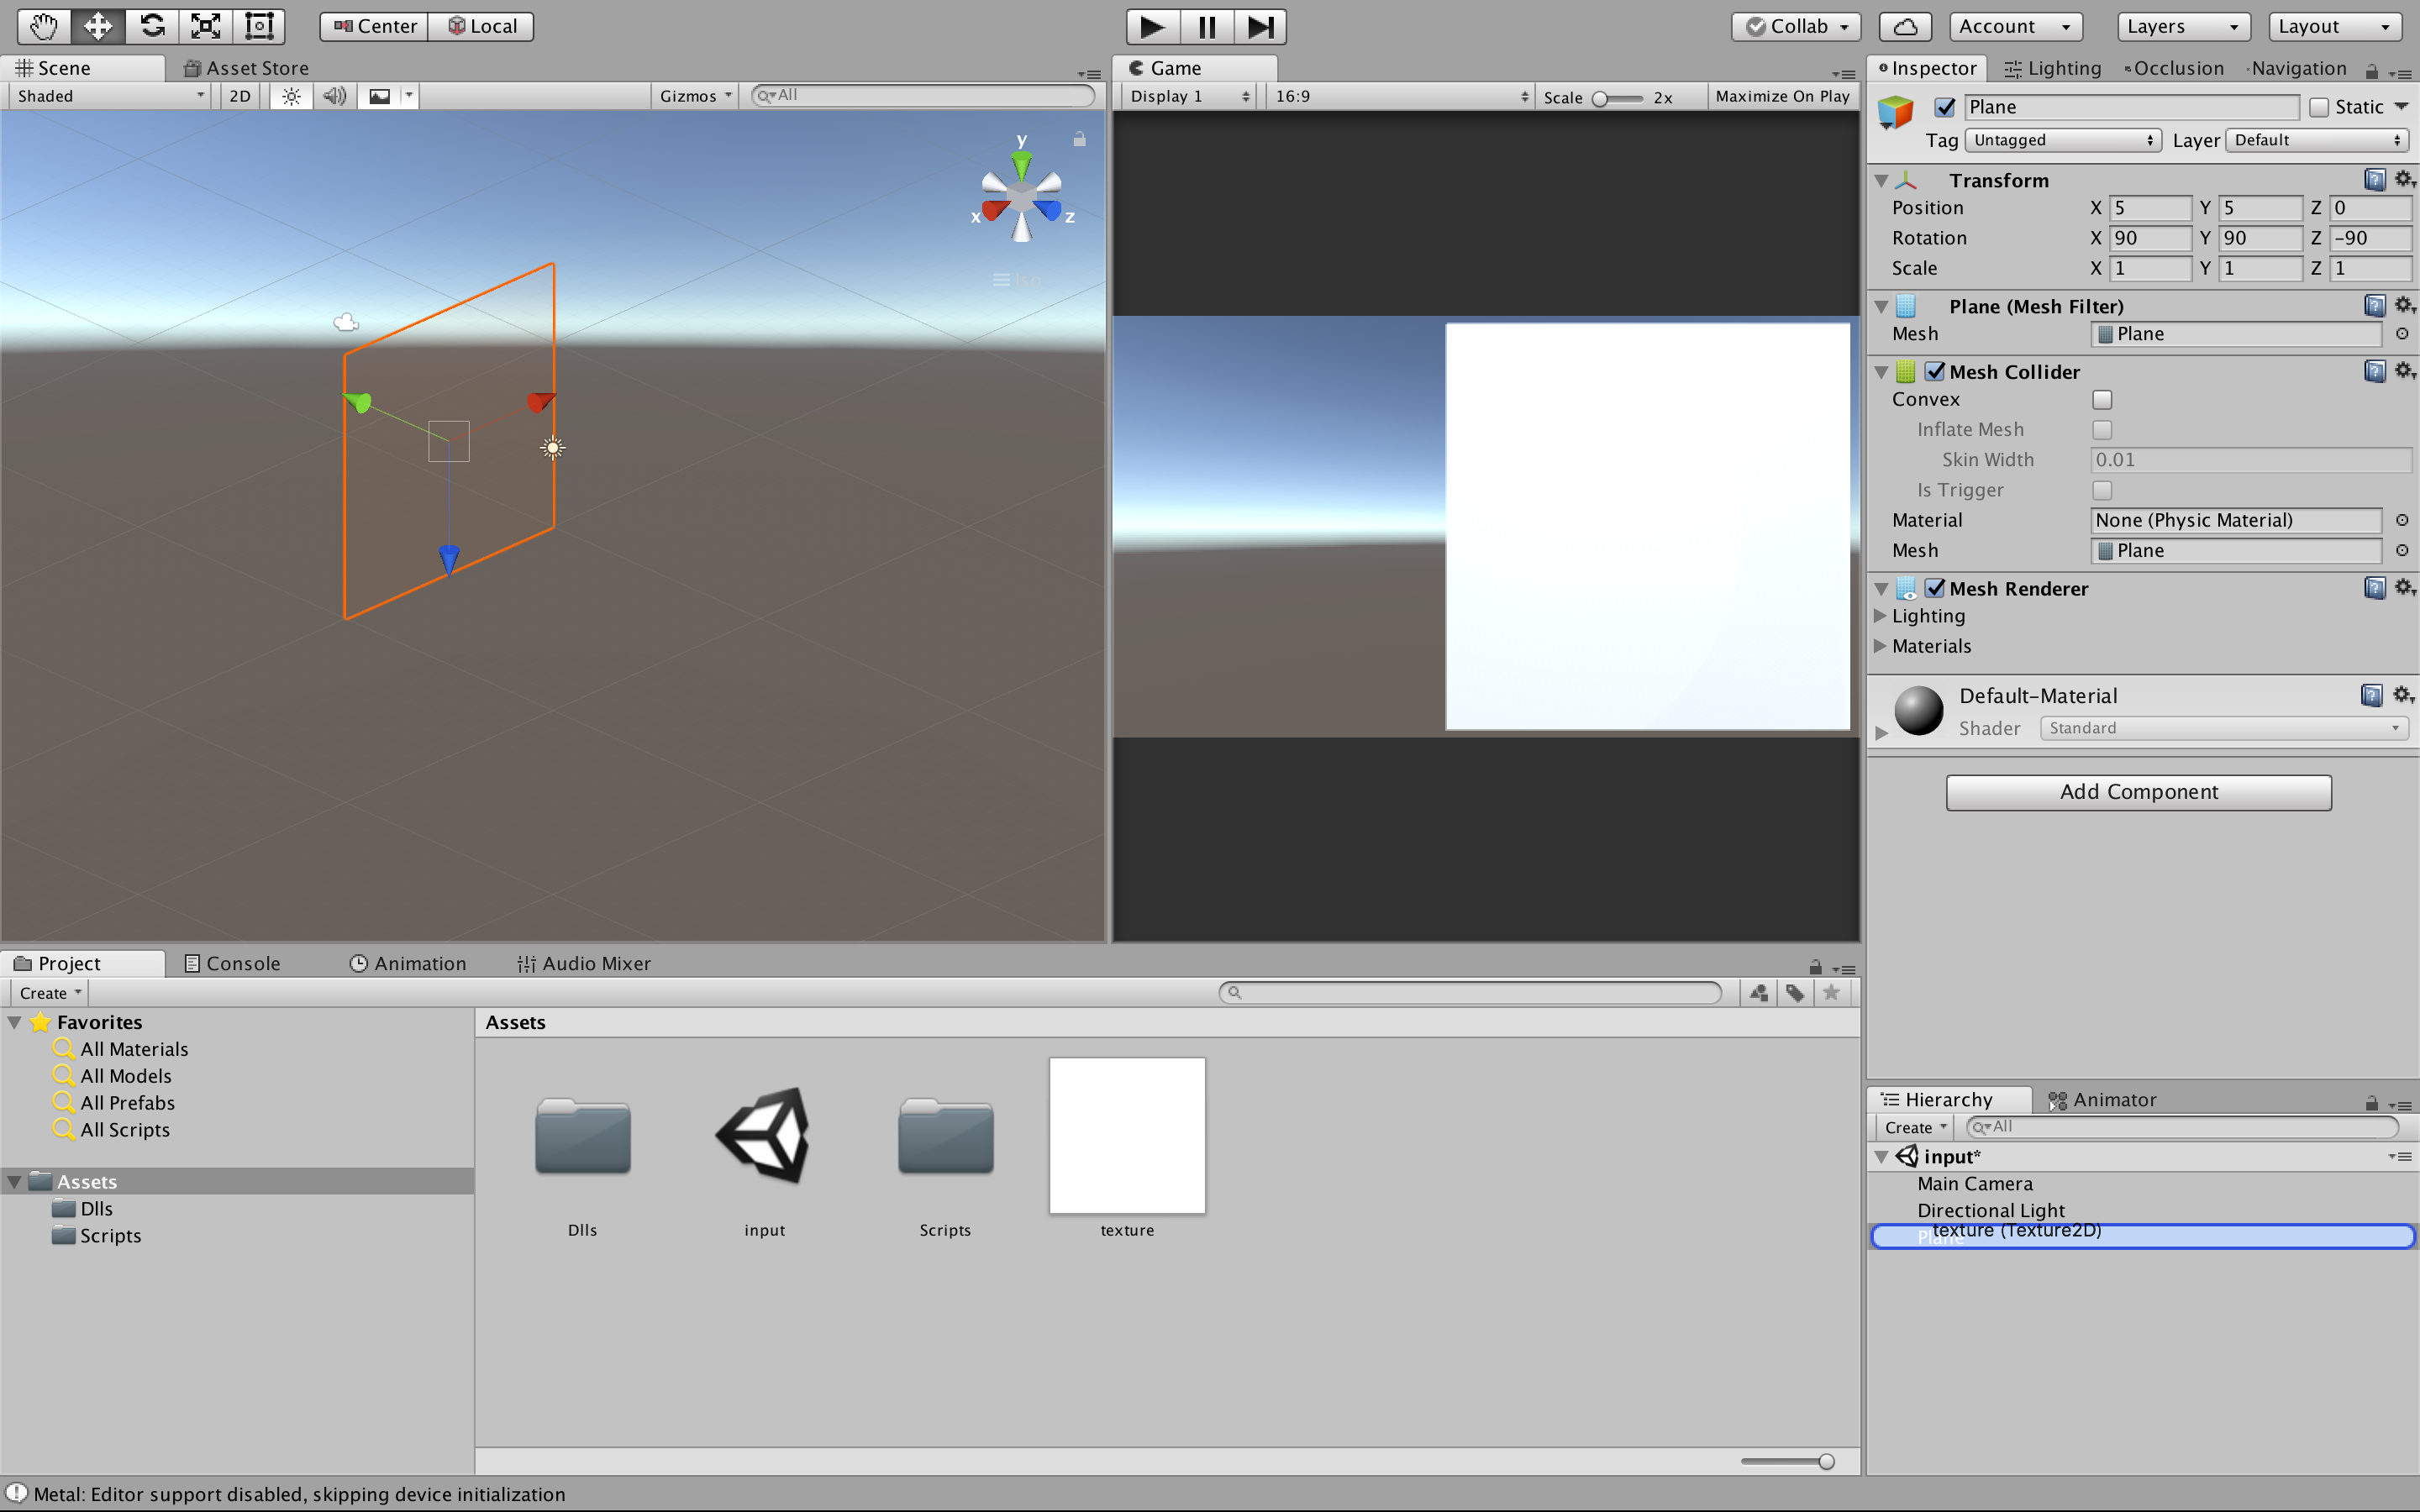
入力パッドとなるplaneを追加する。

planeの位置を以下のように変更する。
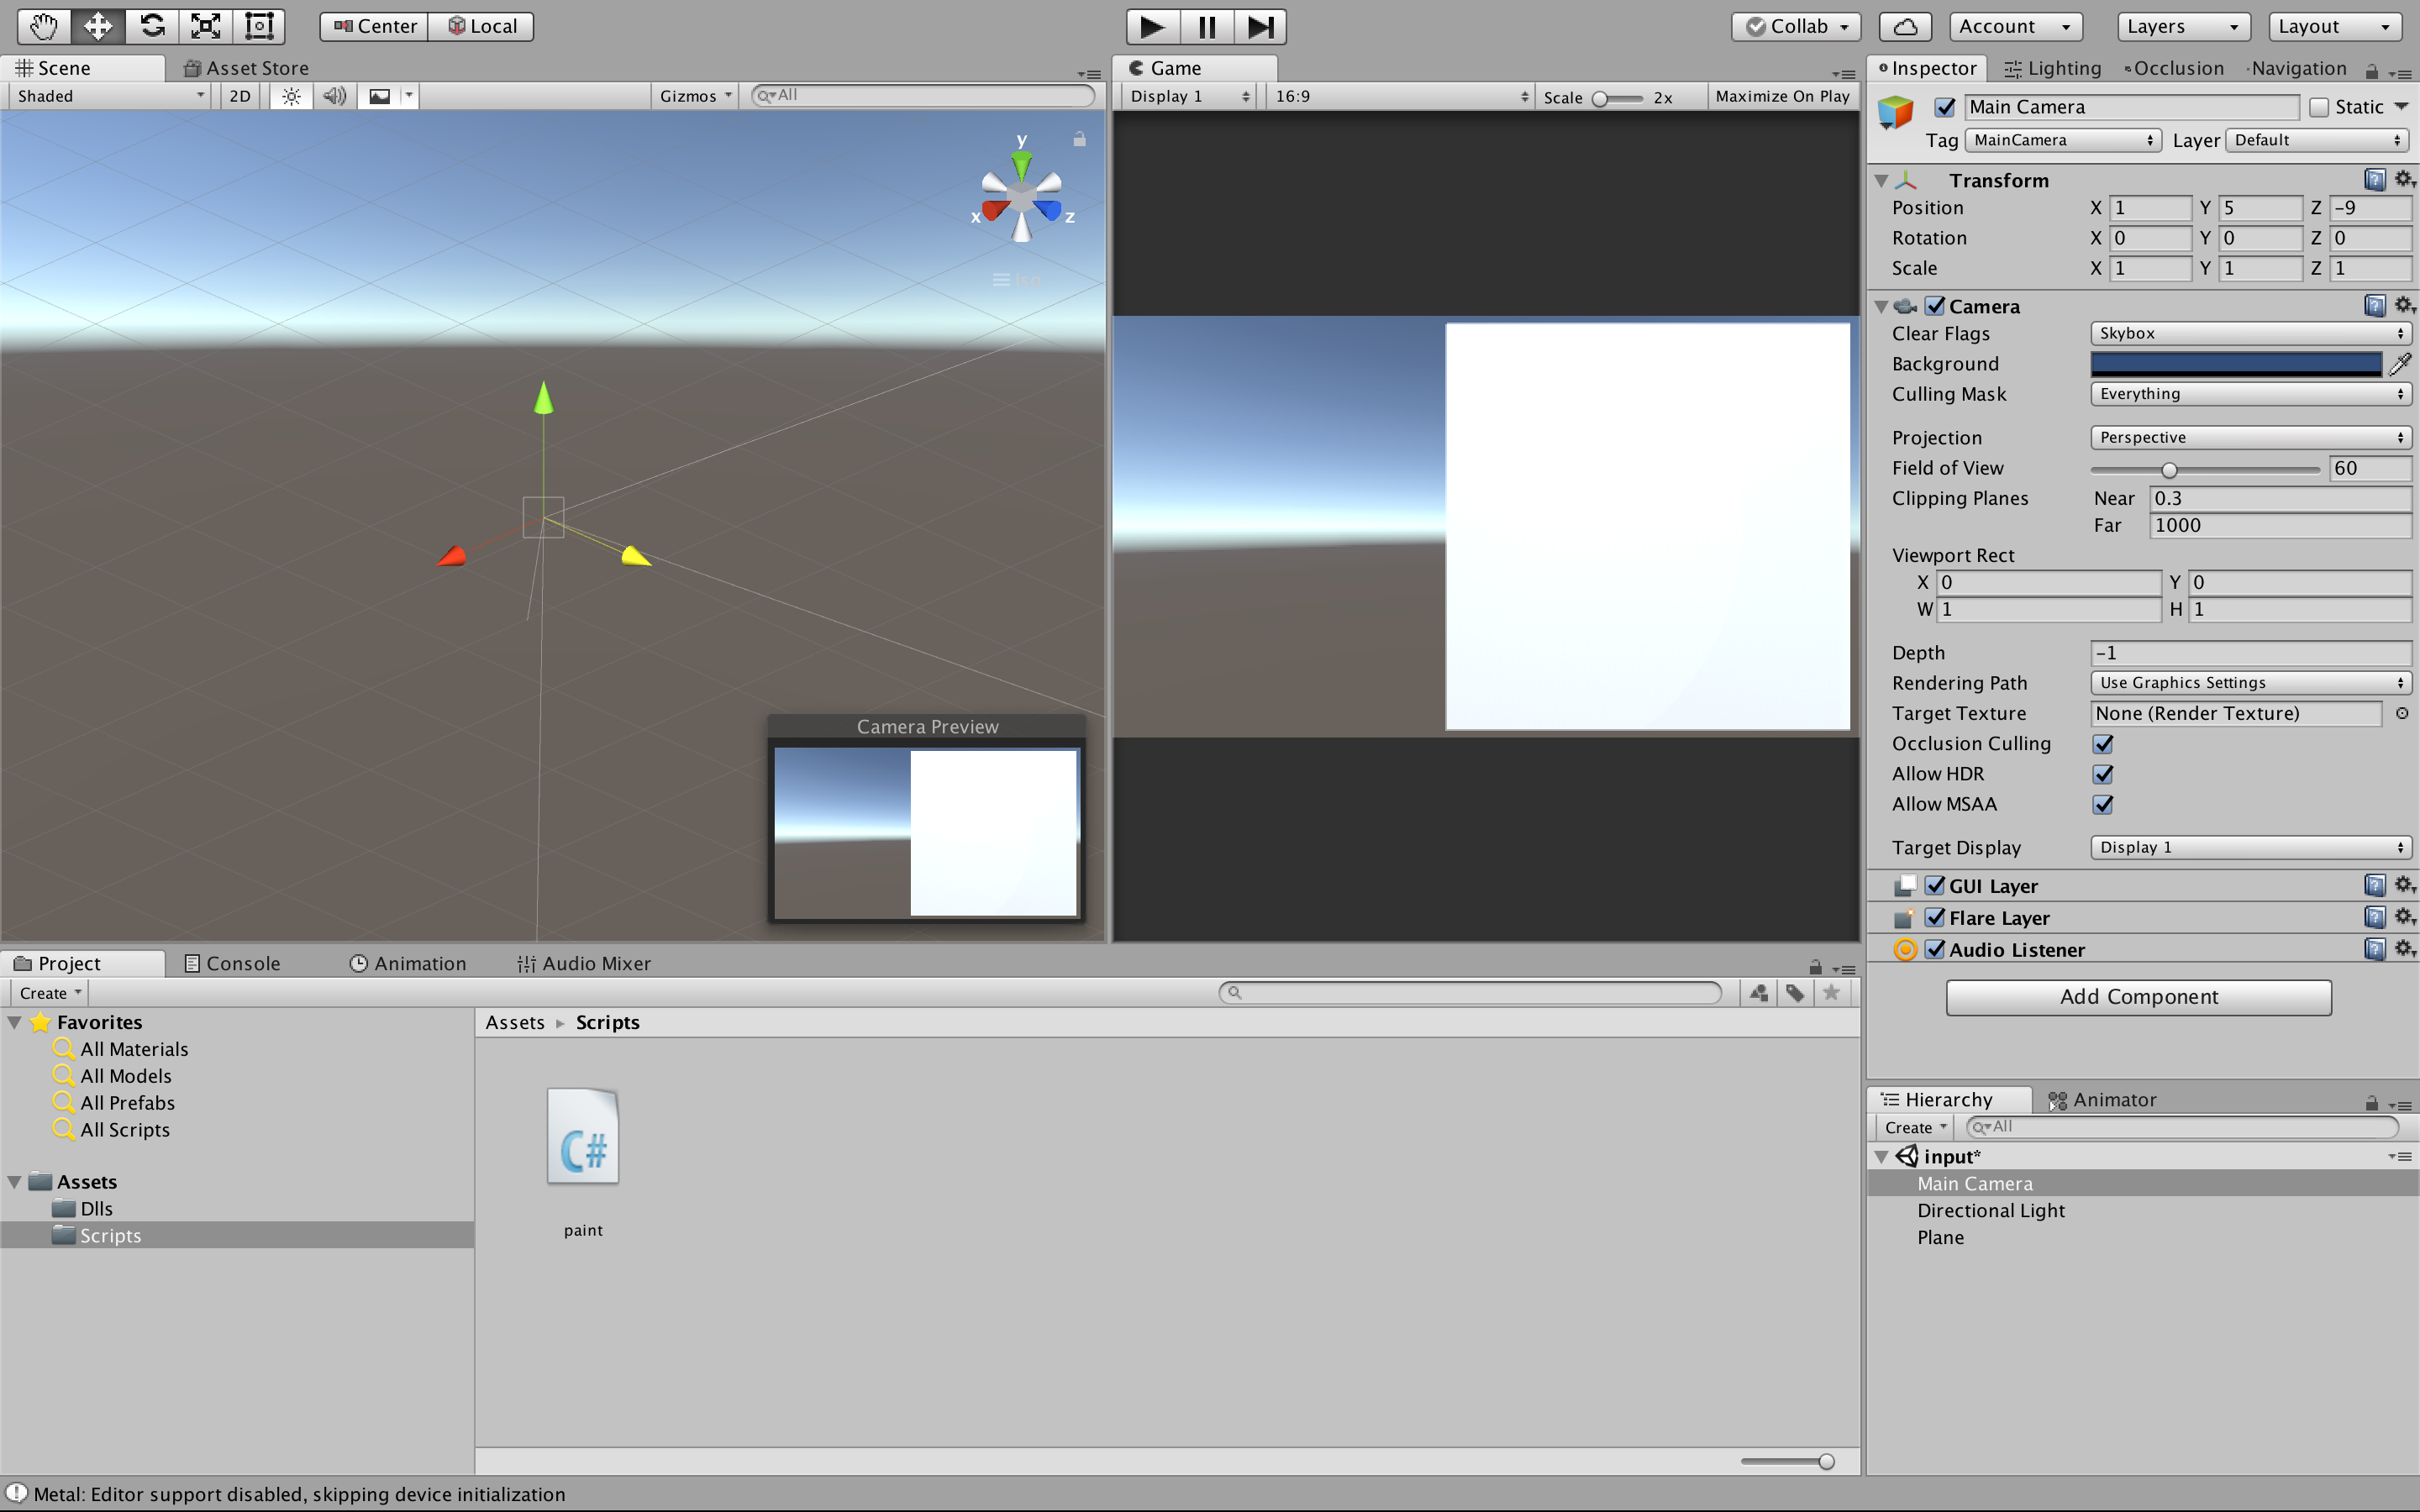
Main cameraを操作する。
x:1, y:5, z:-9 がちょうどいい
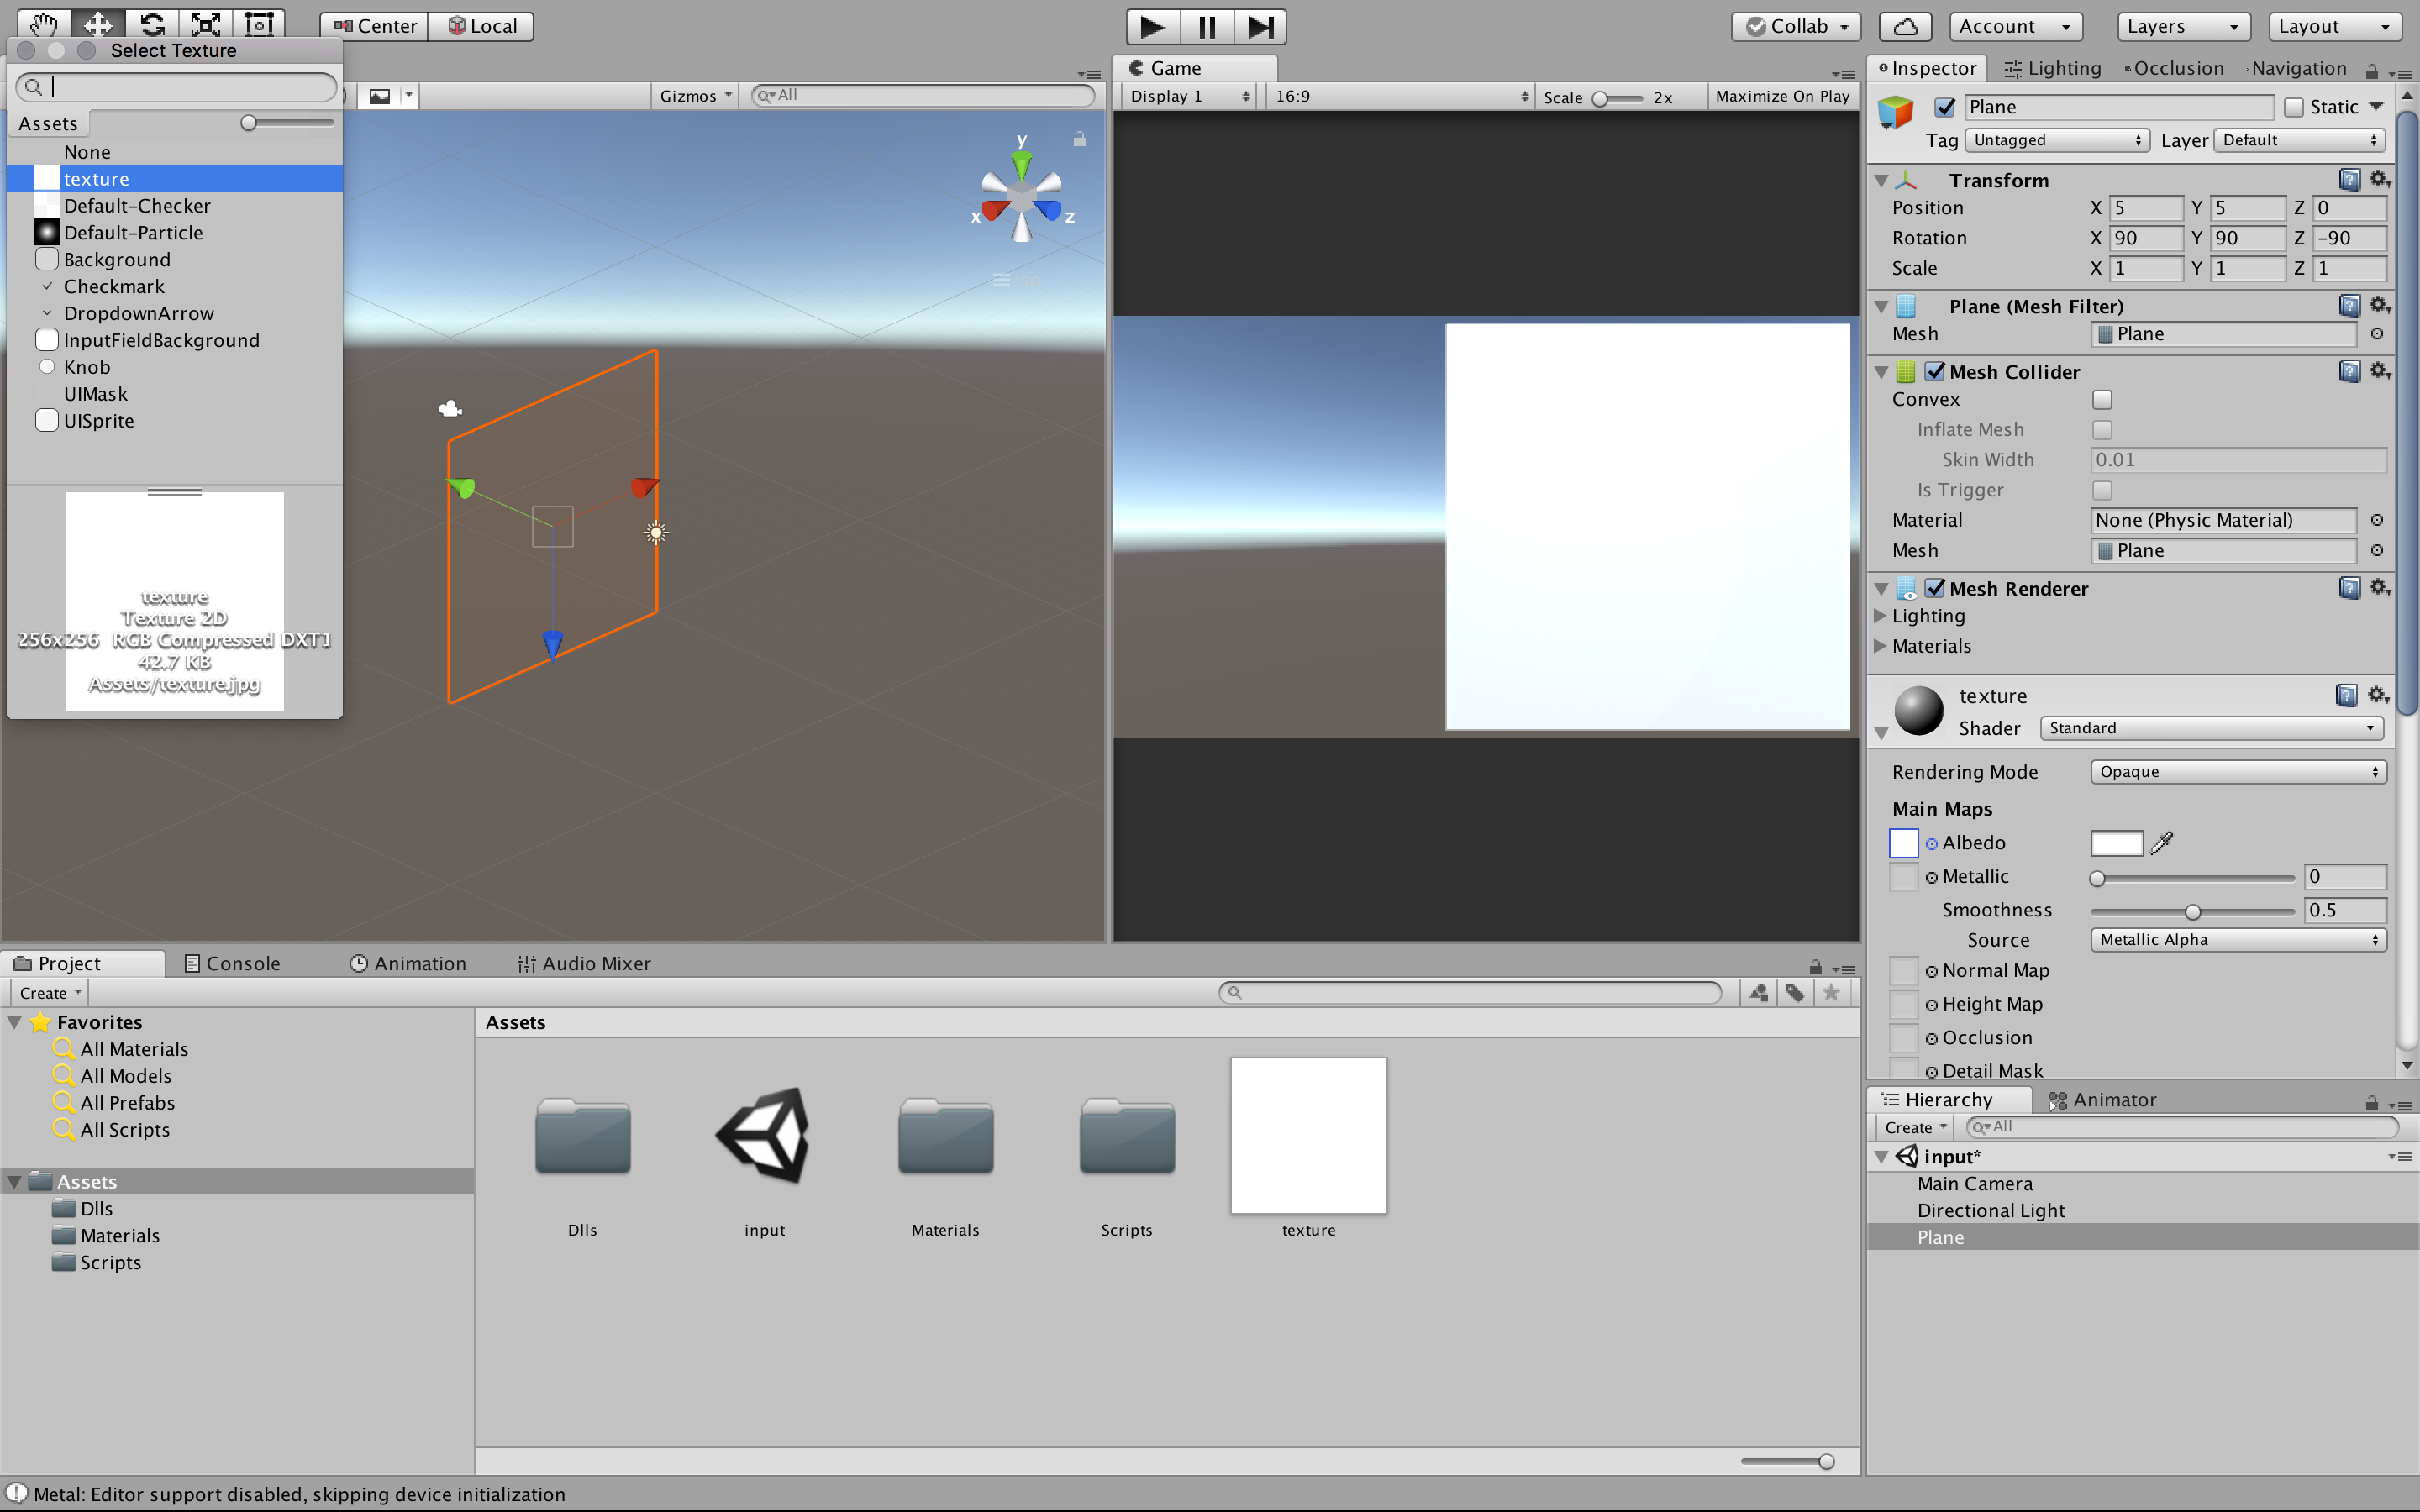
↓テクスチャ画像

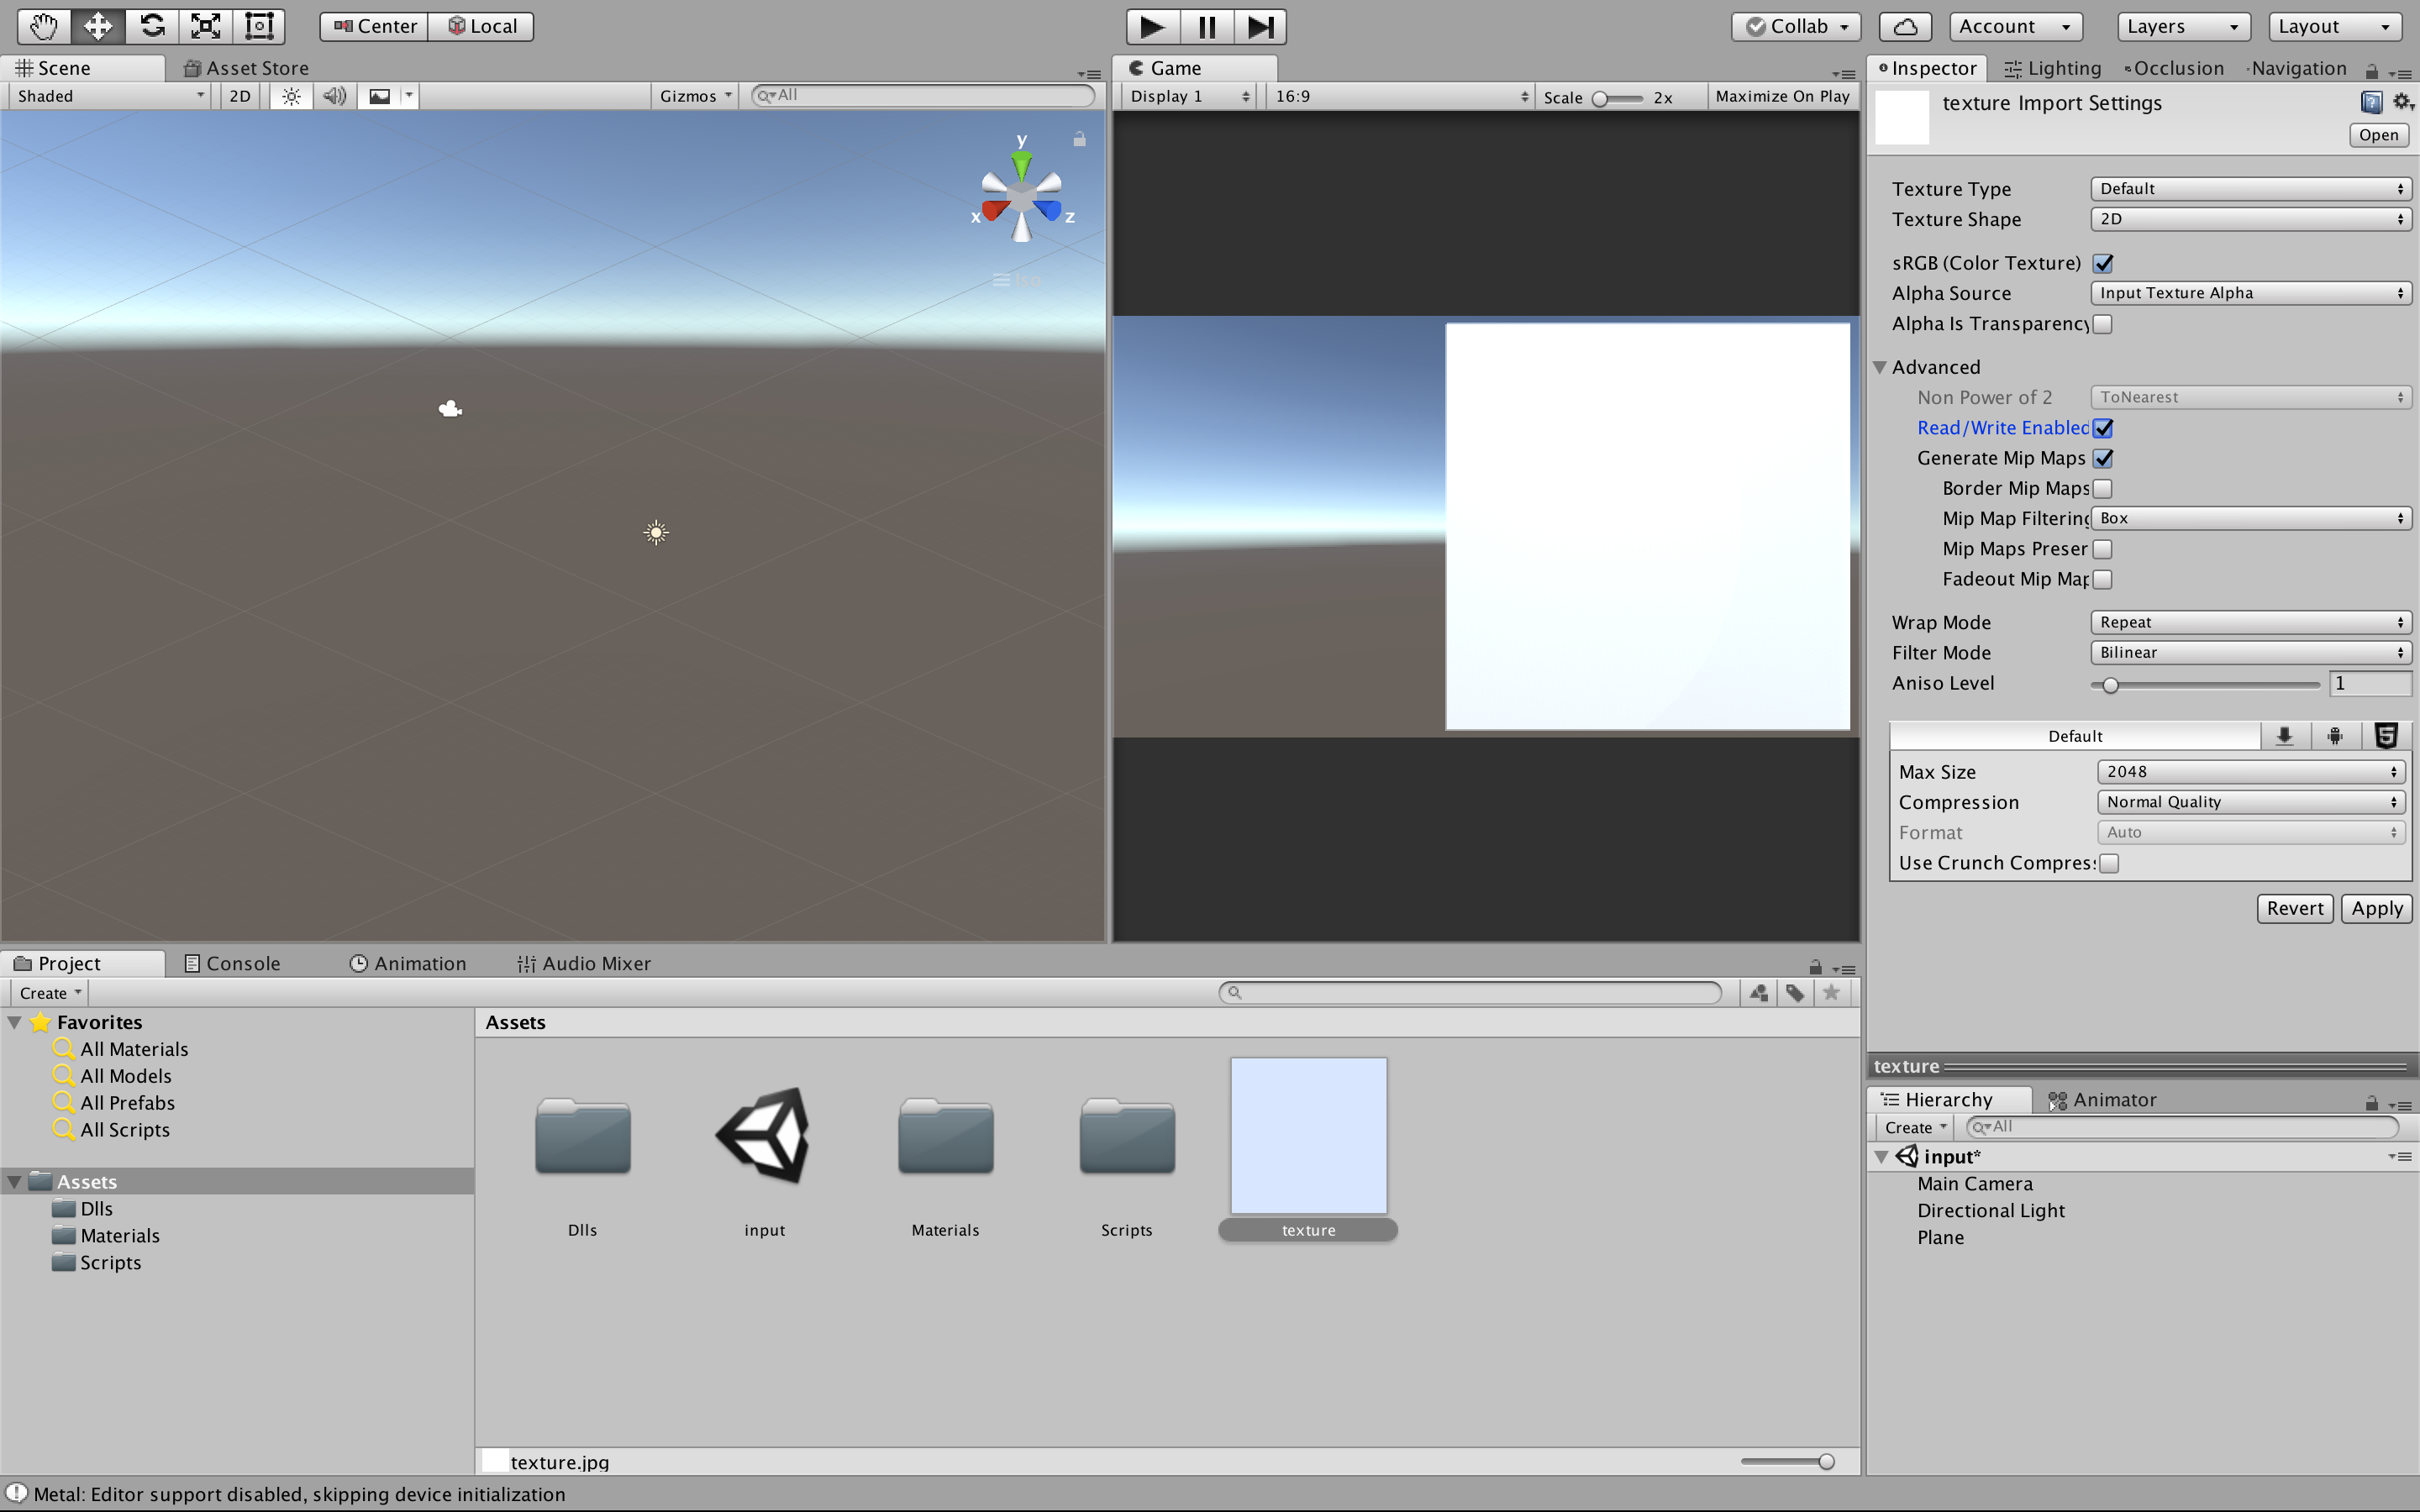
Assetsの直下にtexture.jpgを配置する。
texture.jpgをplaneにドラッグアンドドロップして、アタッチする。
Albedoをクリックすると、texture.jpgがアタッチされていることが確認できる
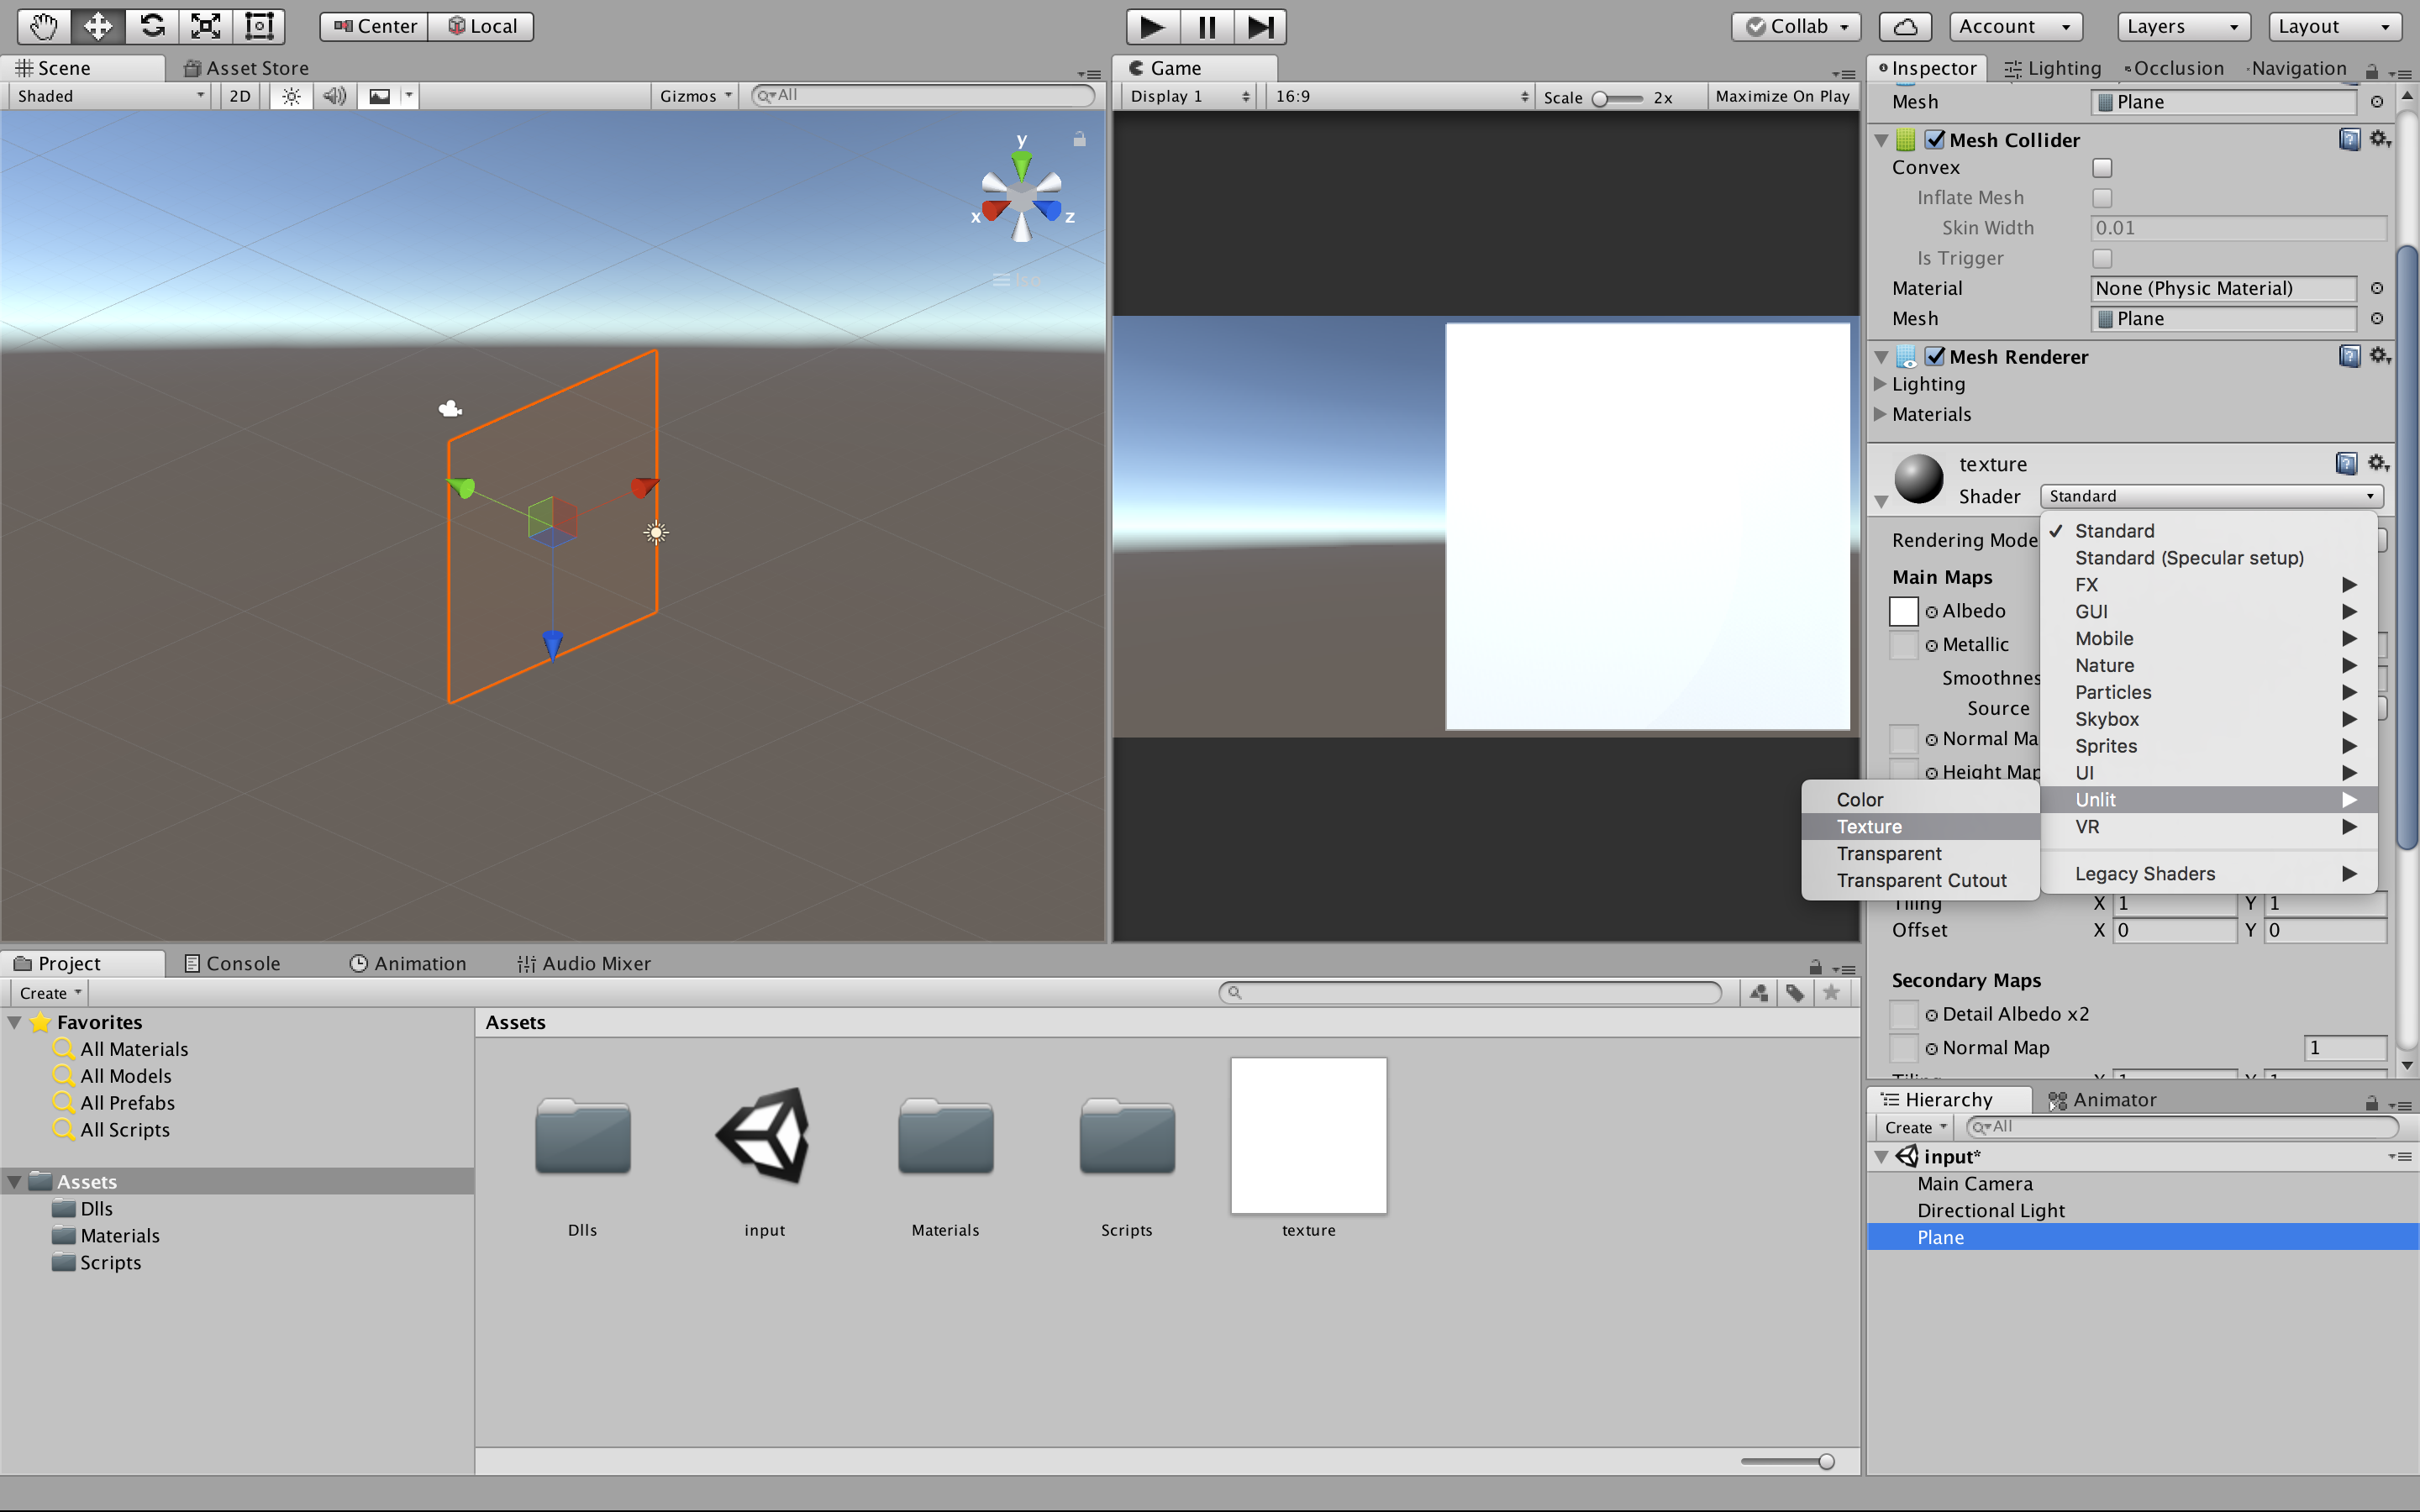
Shader をStandard から Unit->Textureに変更する
次にtexture.jpgを選択して、Read/Write Enabledにチェックを入れる。
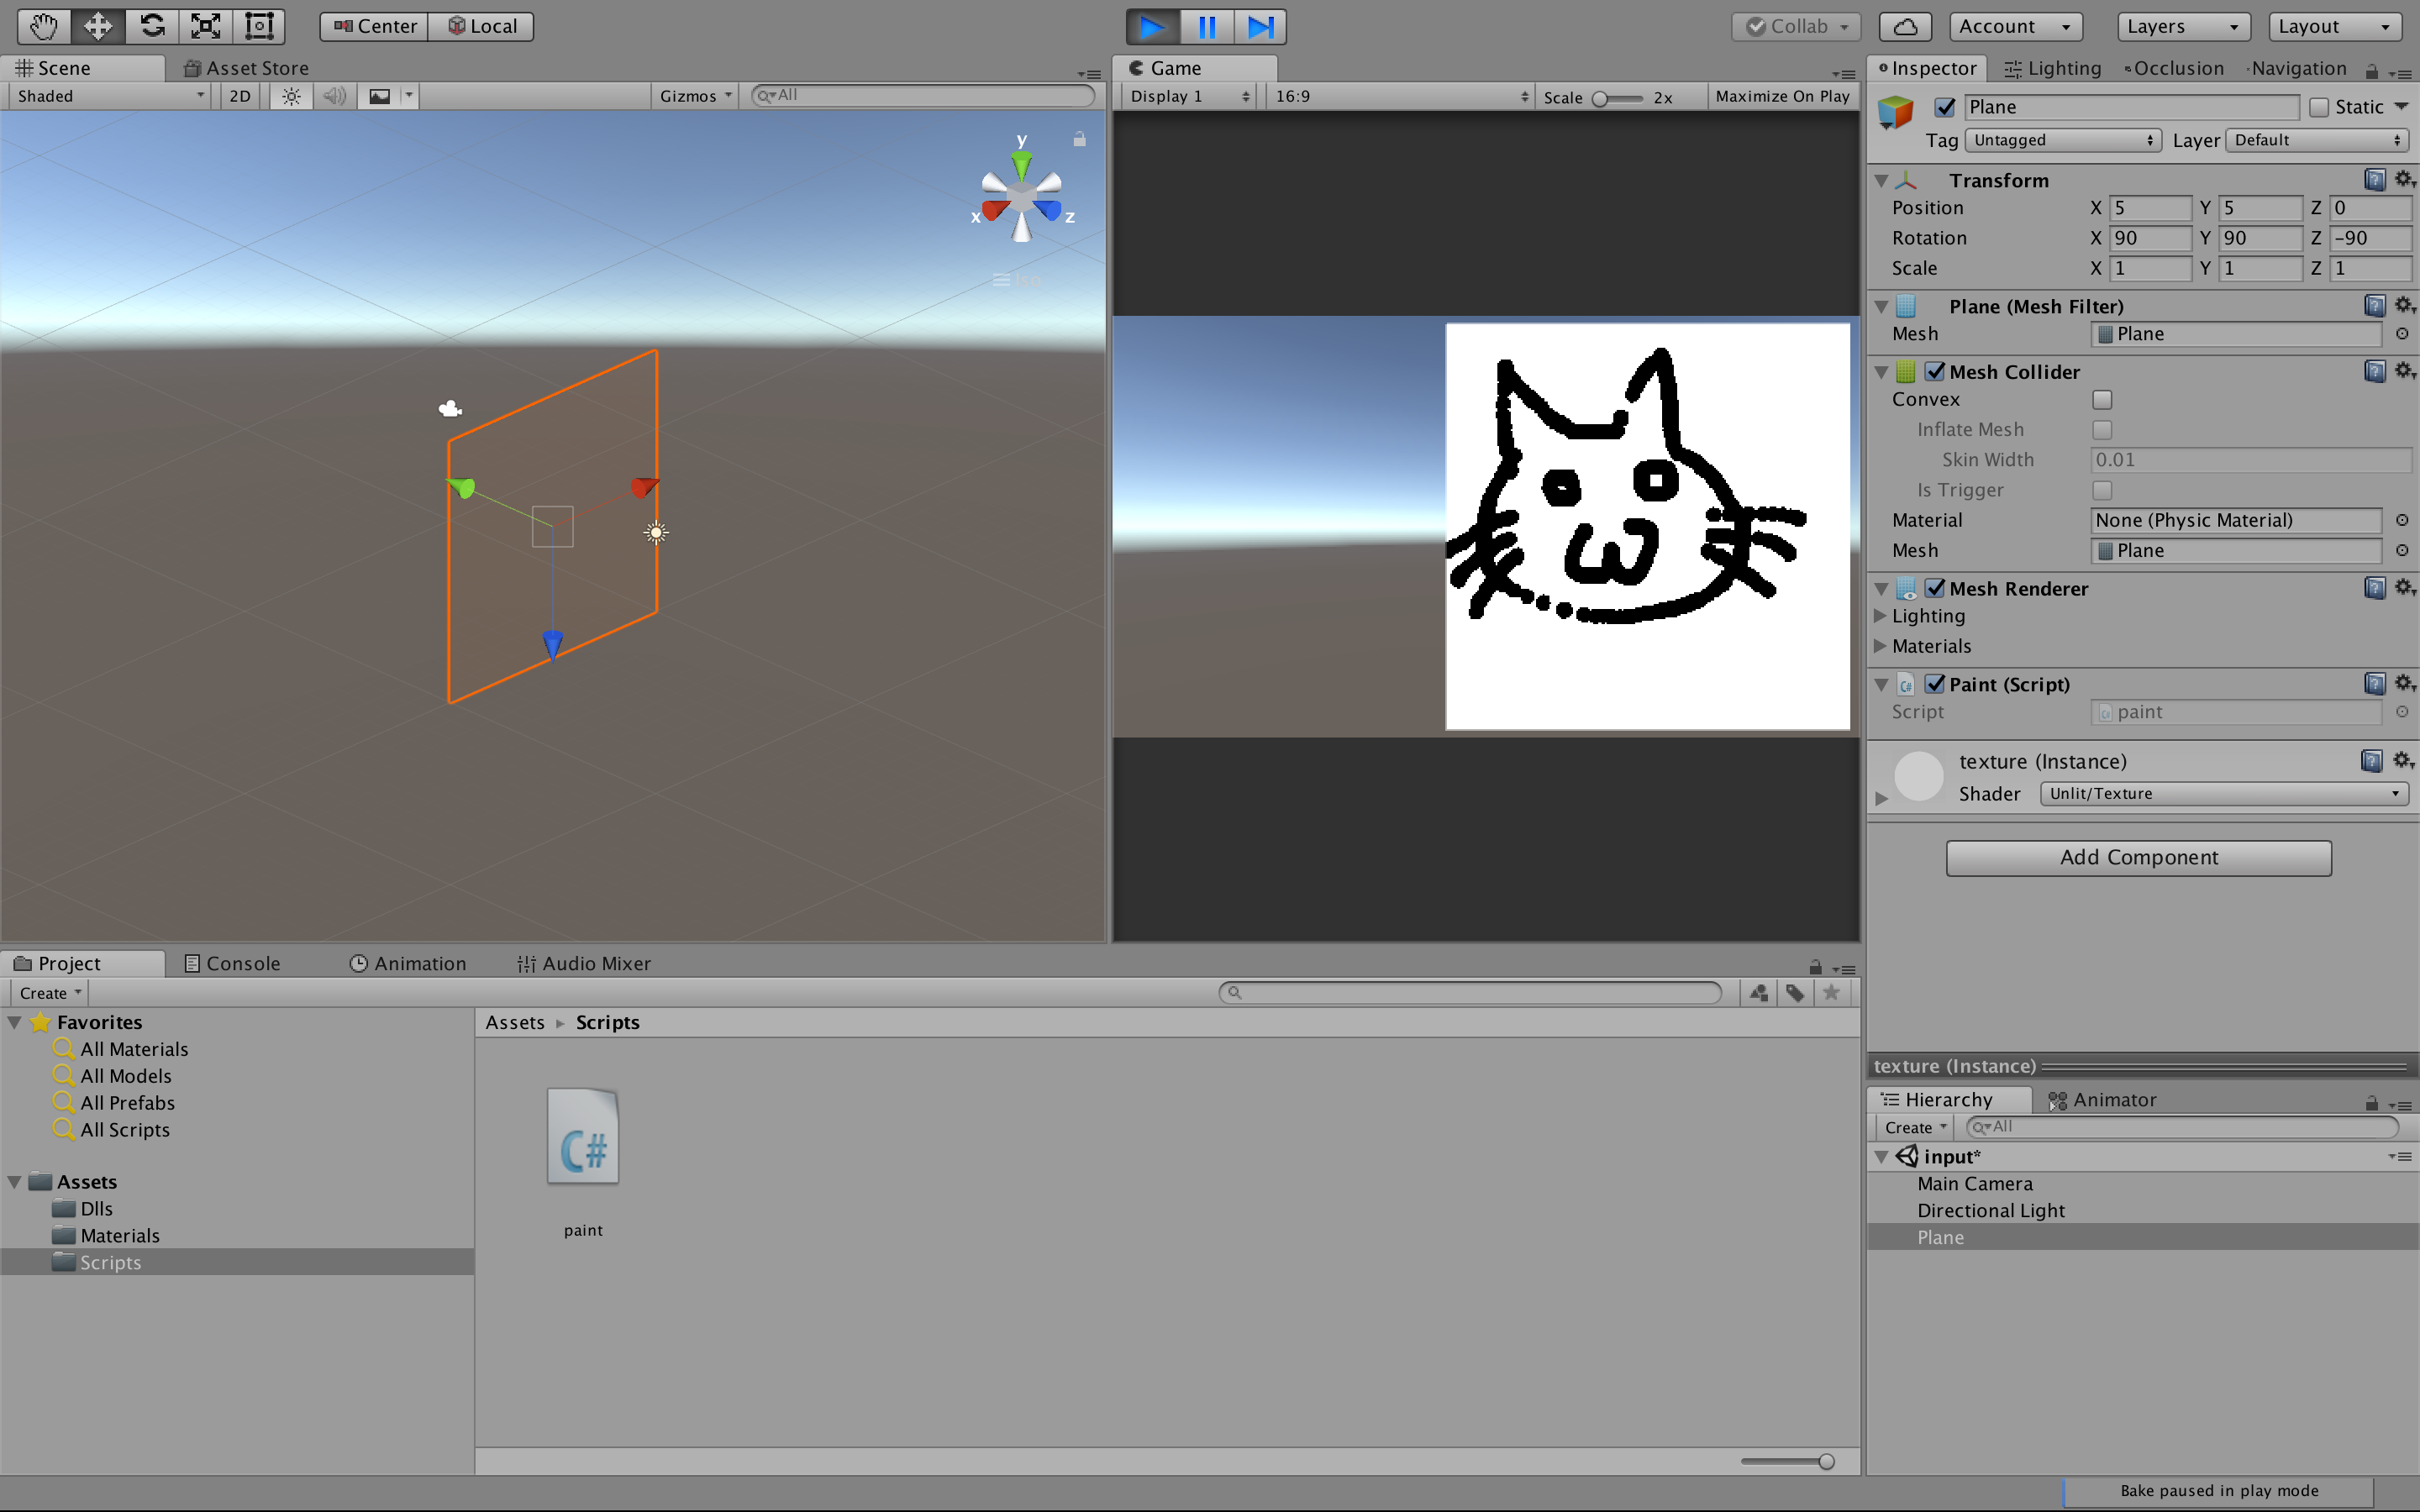
planeにpaint.csをアタッチする

すると、planeに書き込めるようになる
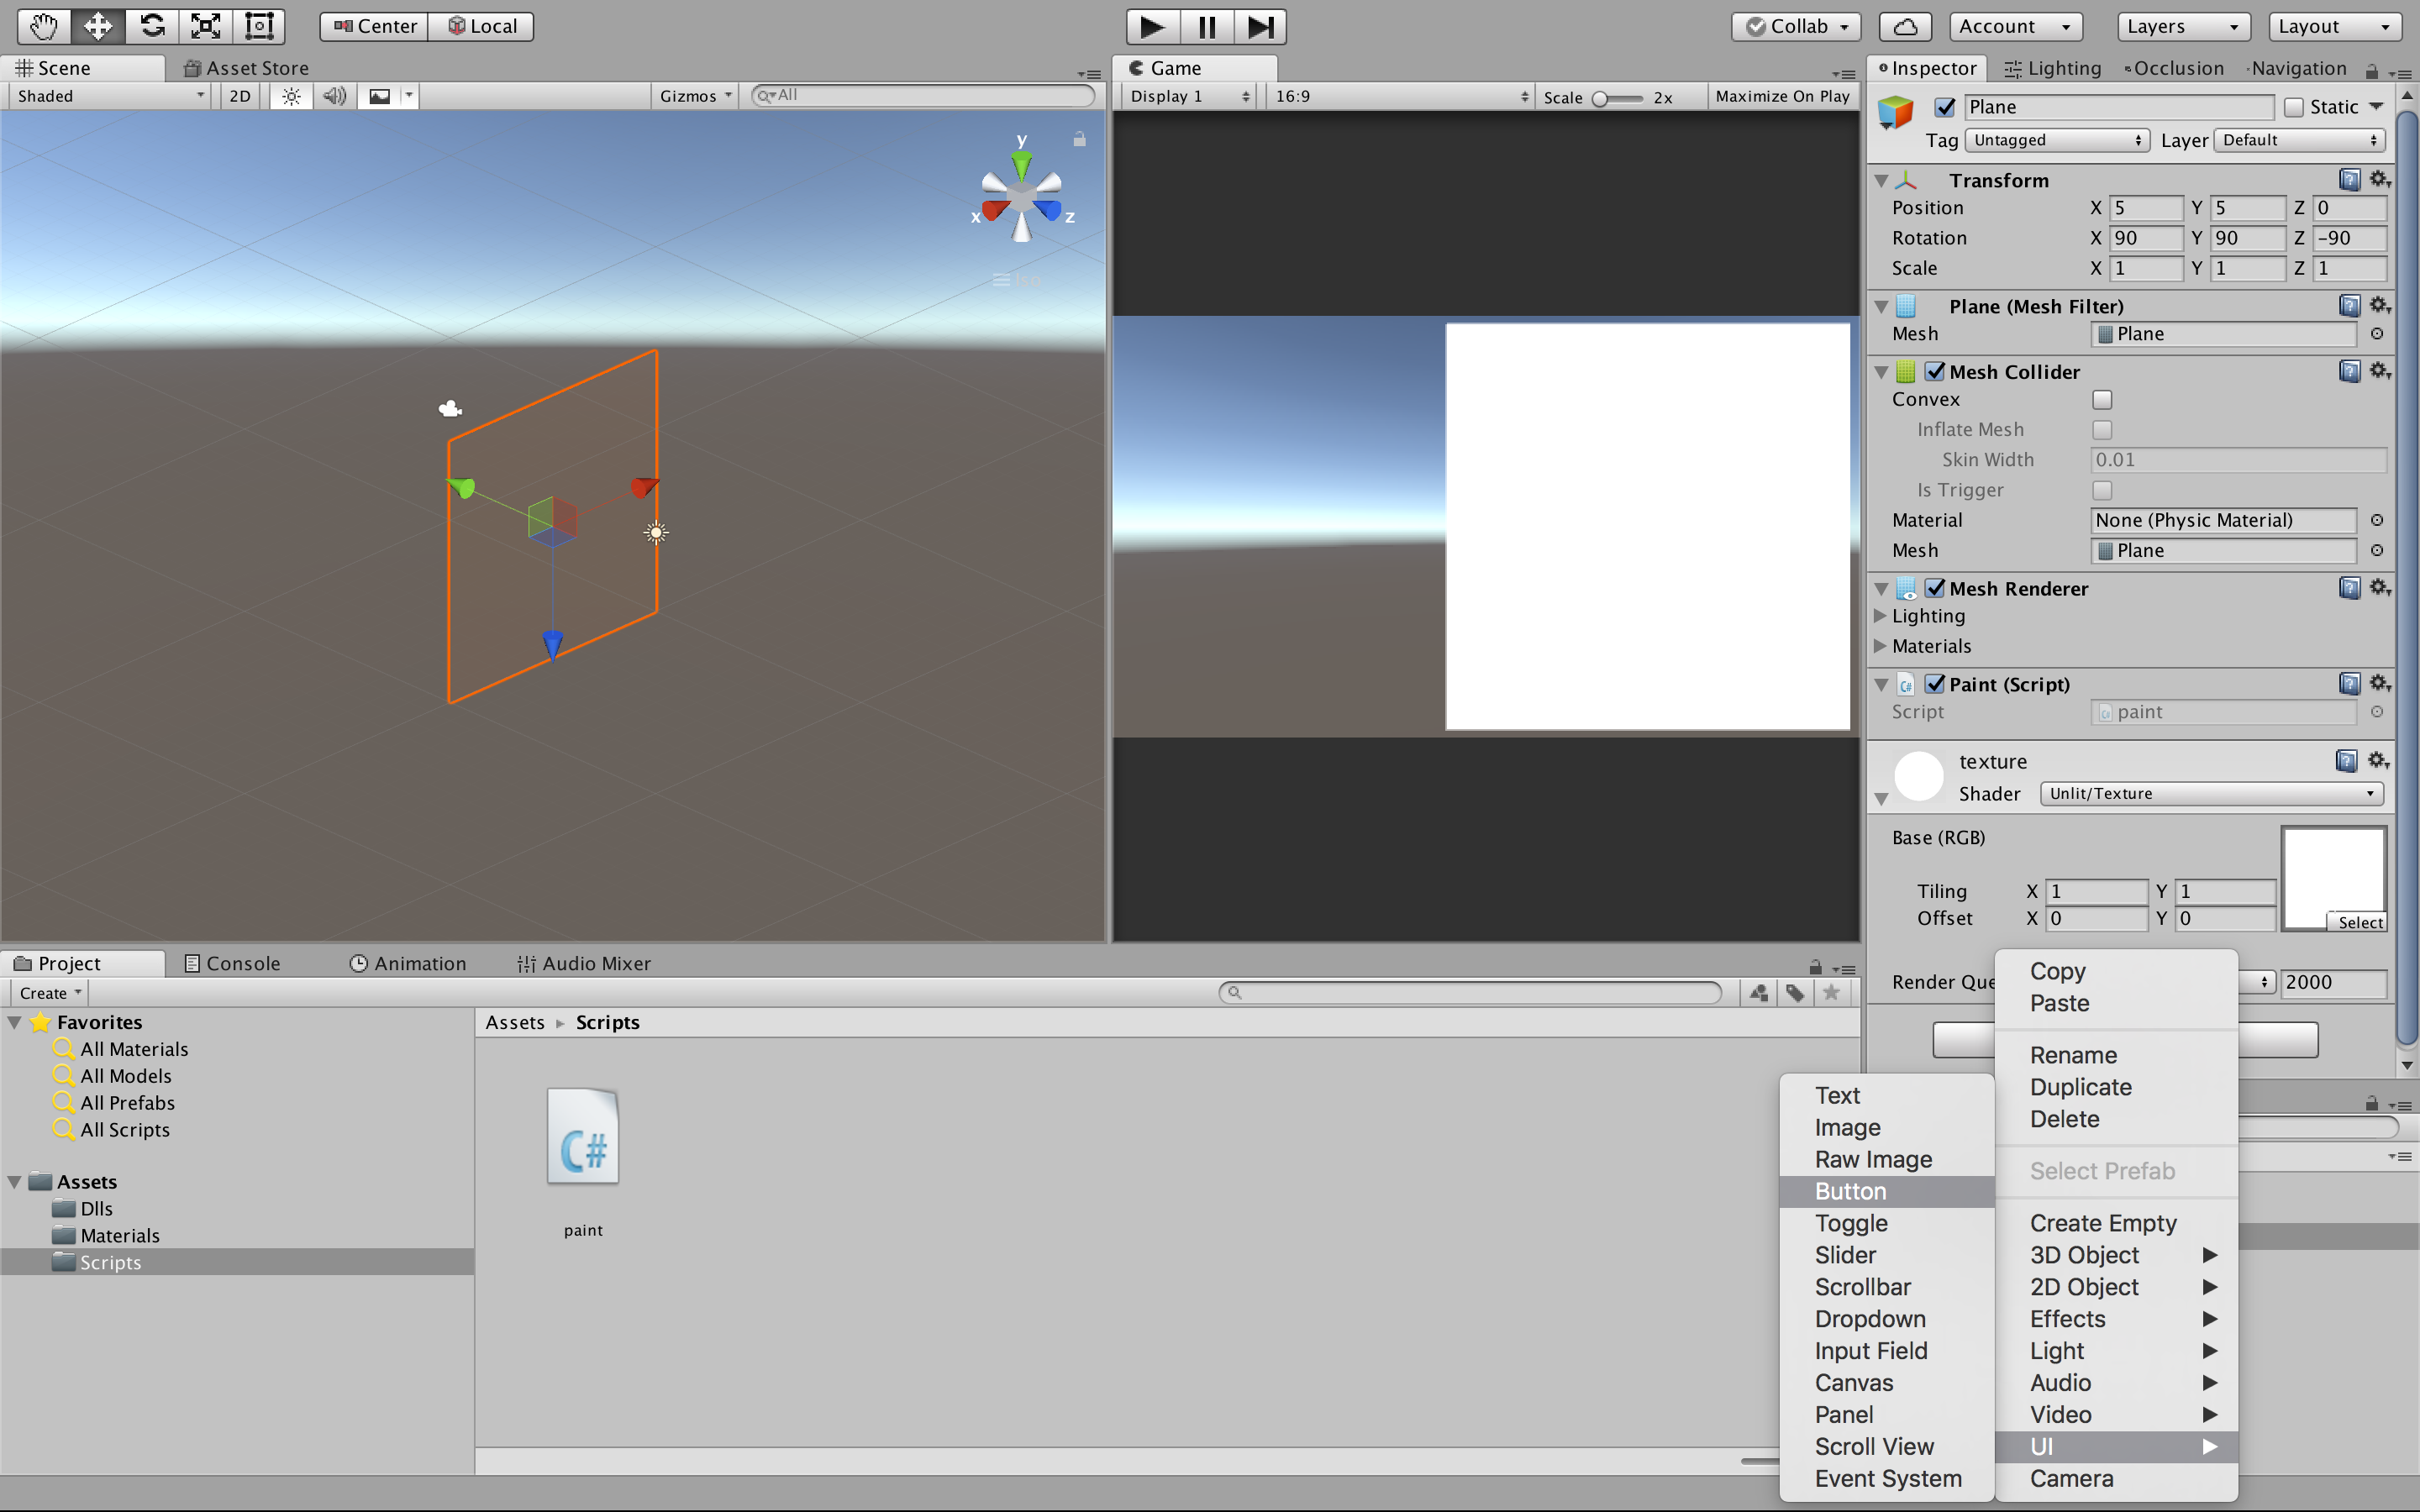
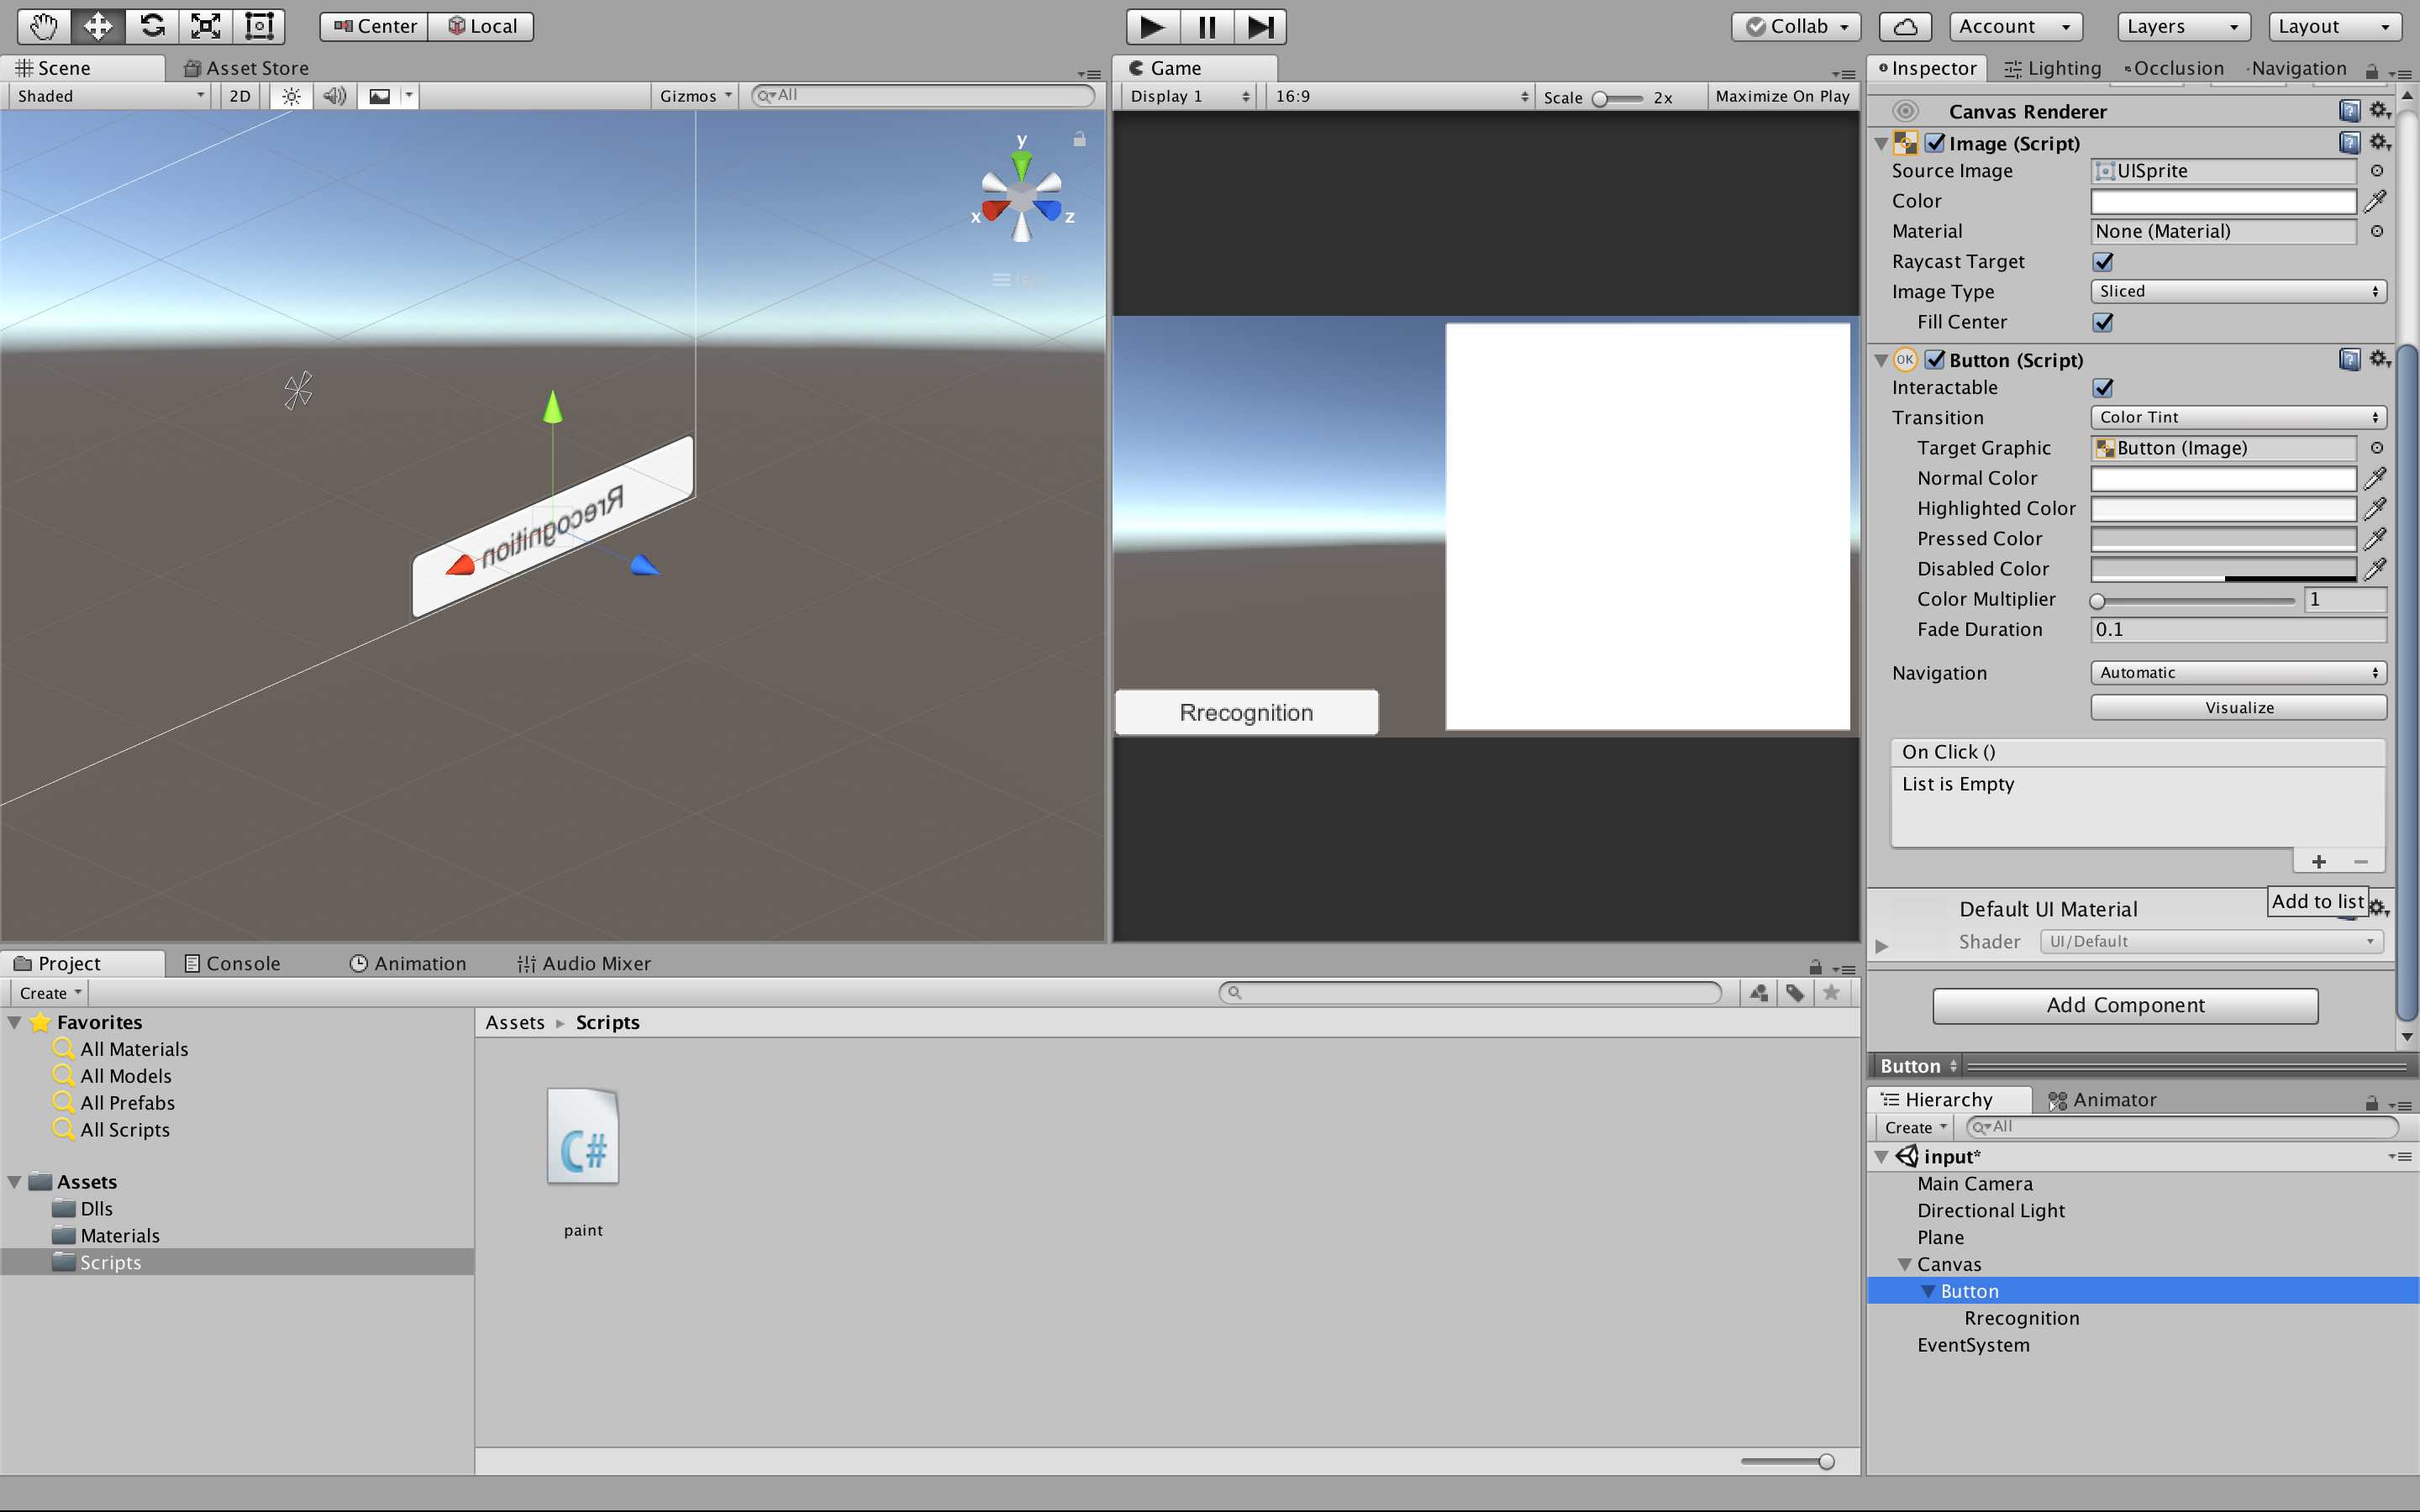
入力された数字画像の保存と認識をするためのボタンを作成する
次はボタンを追加する。
ボタンのtextをRrecognitionにする
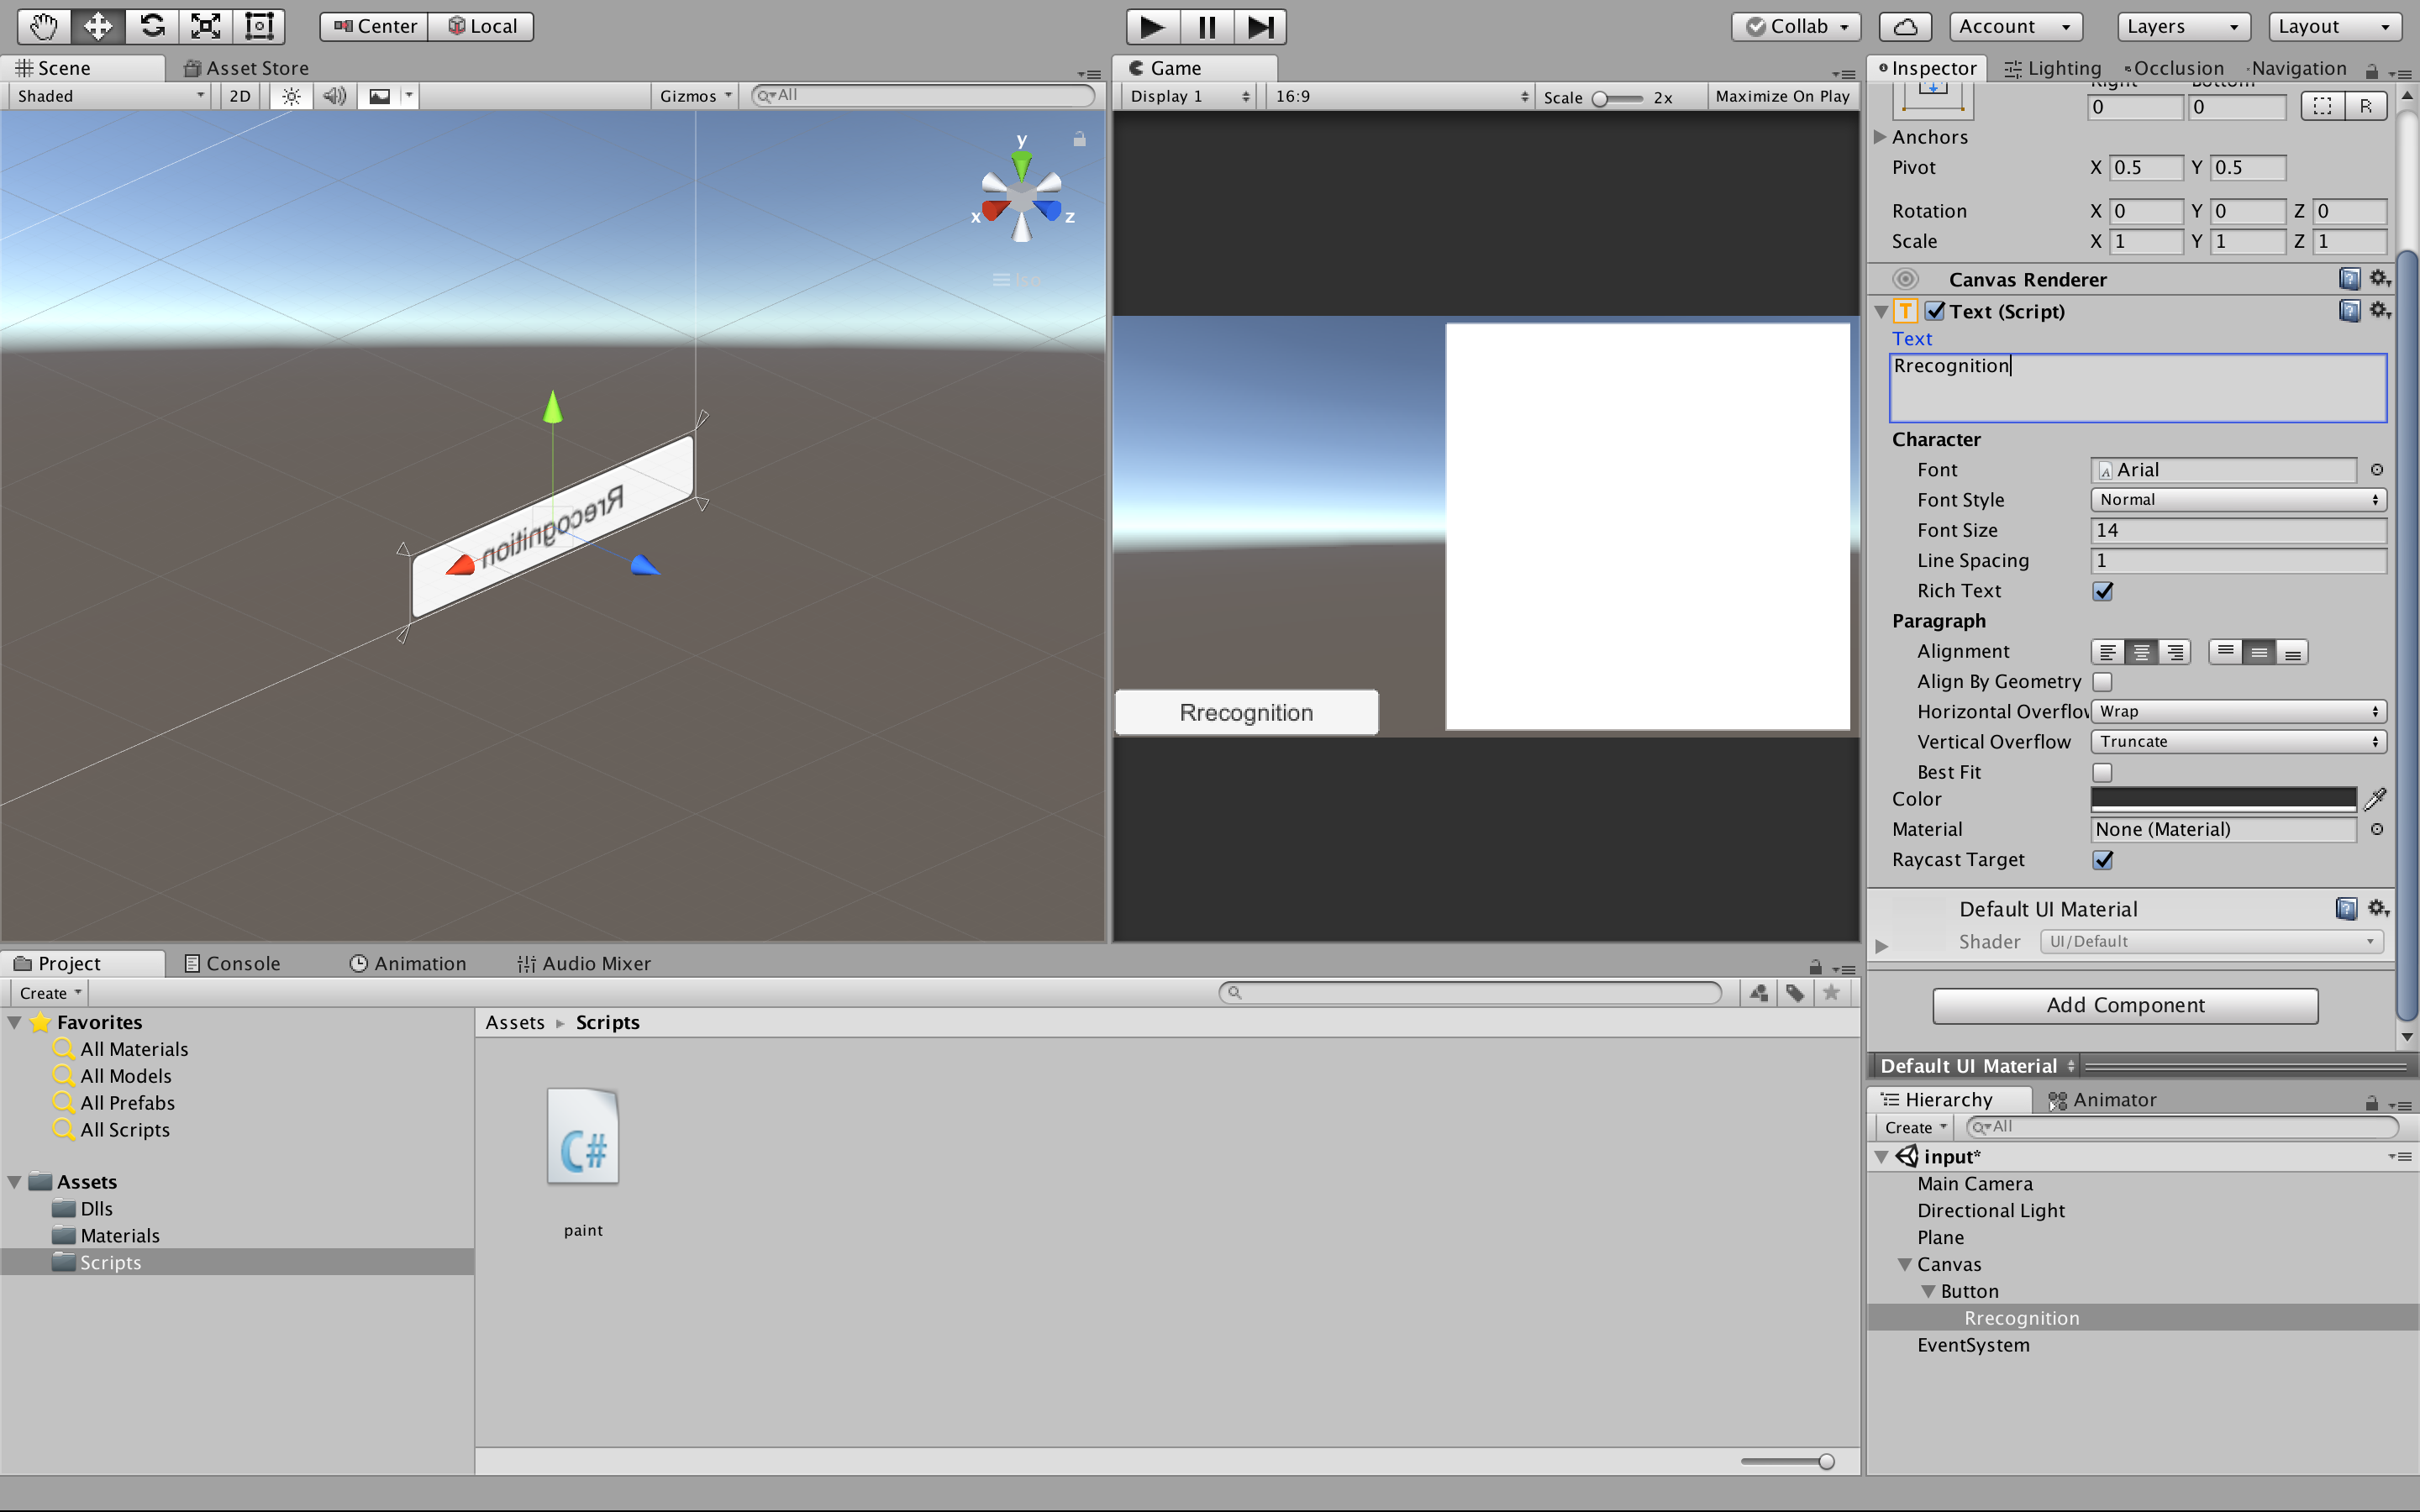
ボタンのonclickの設定を行う。
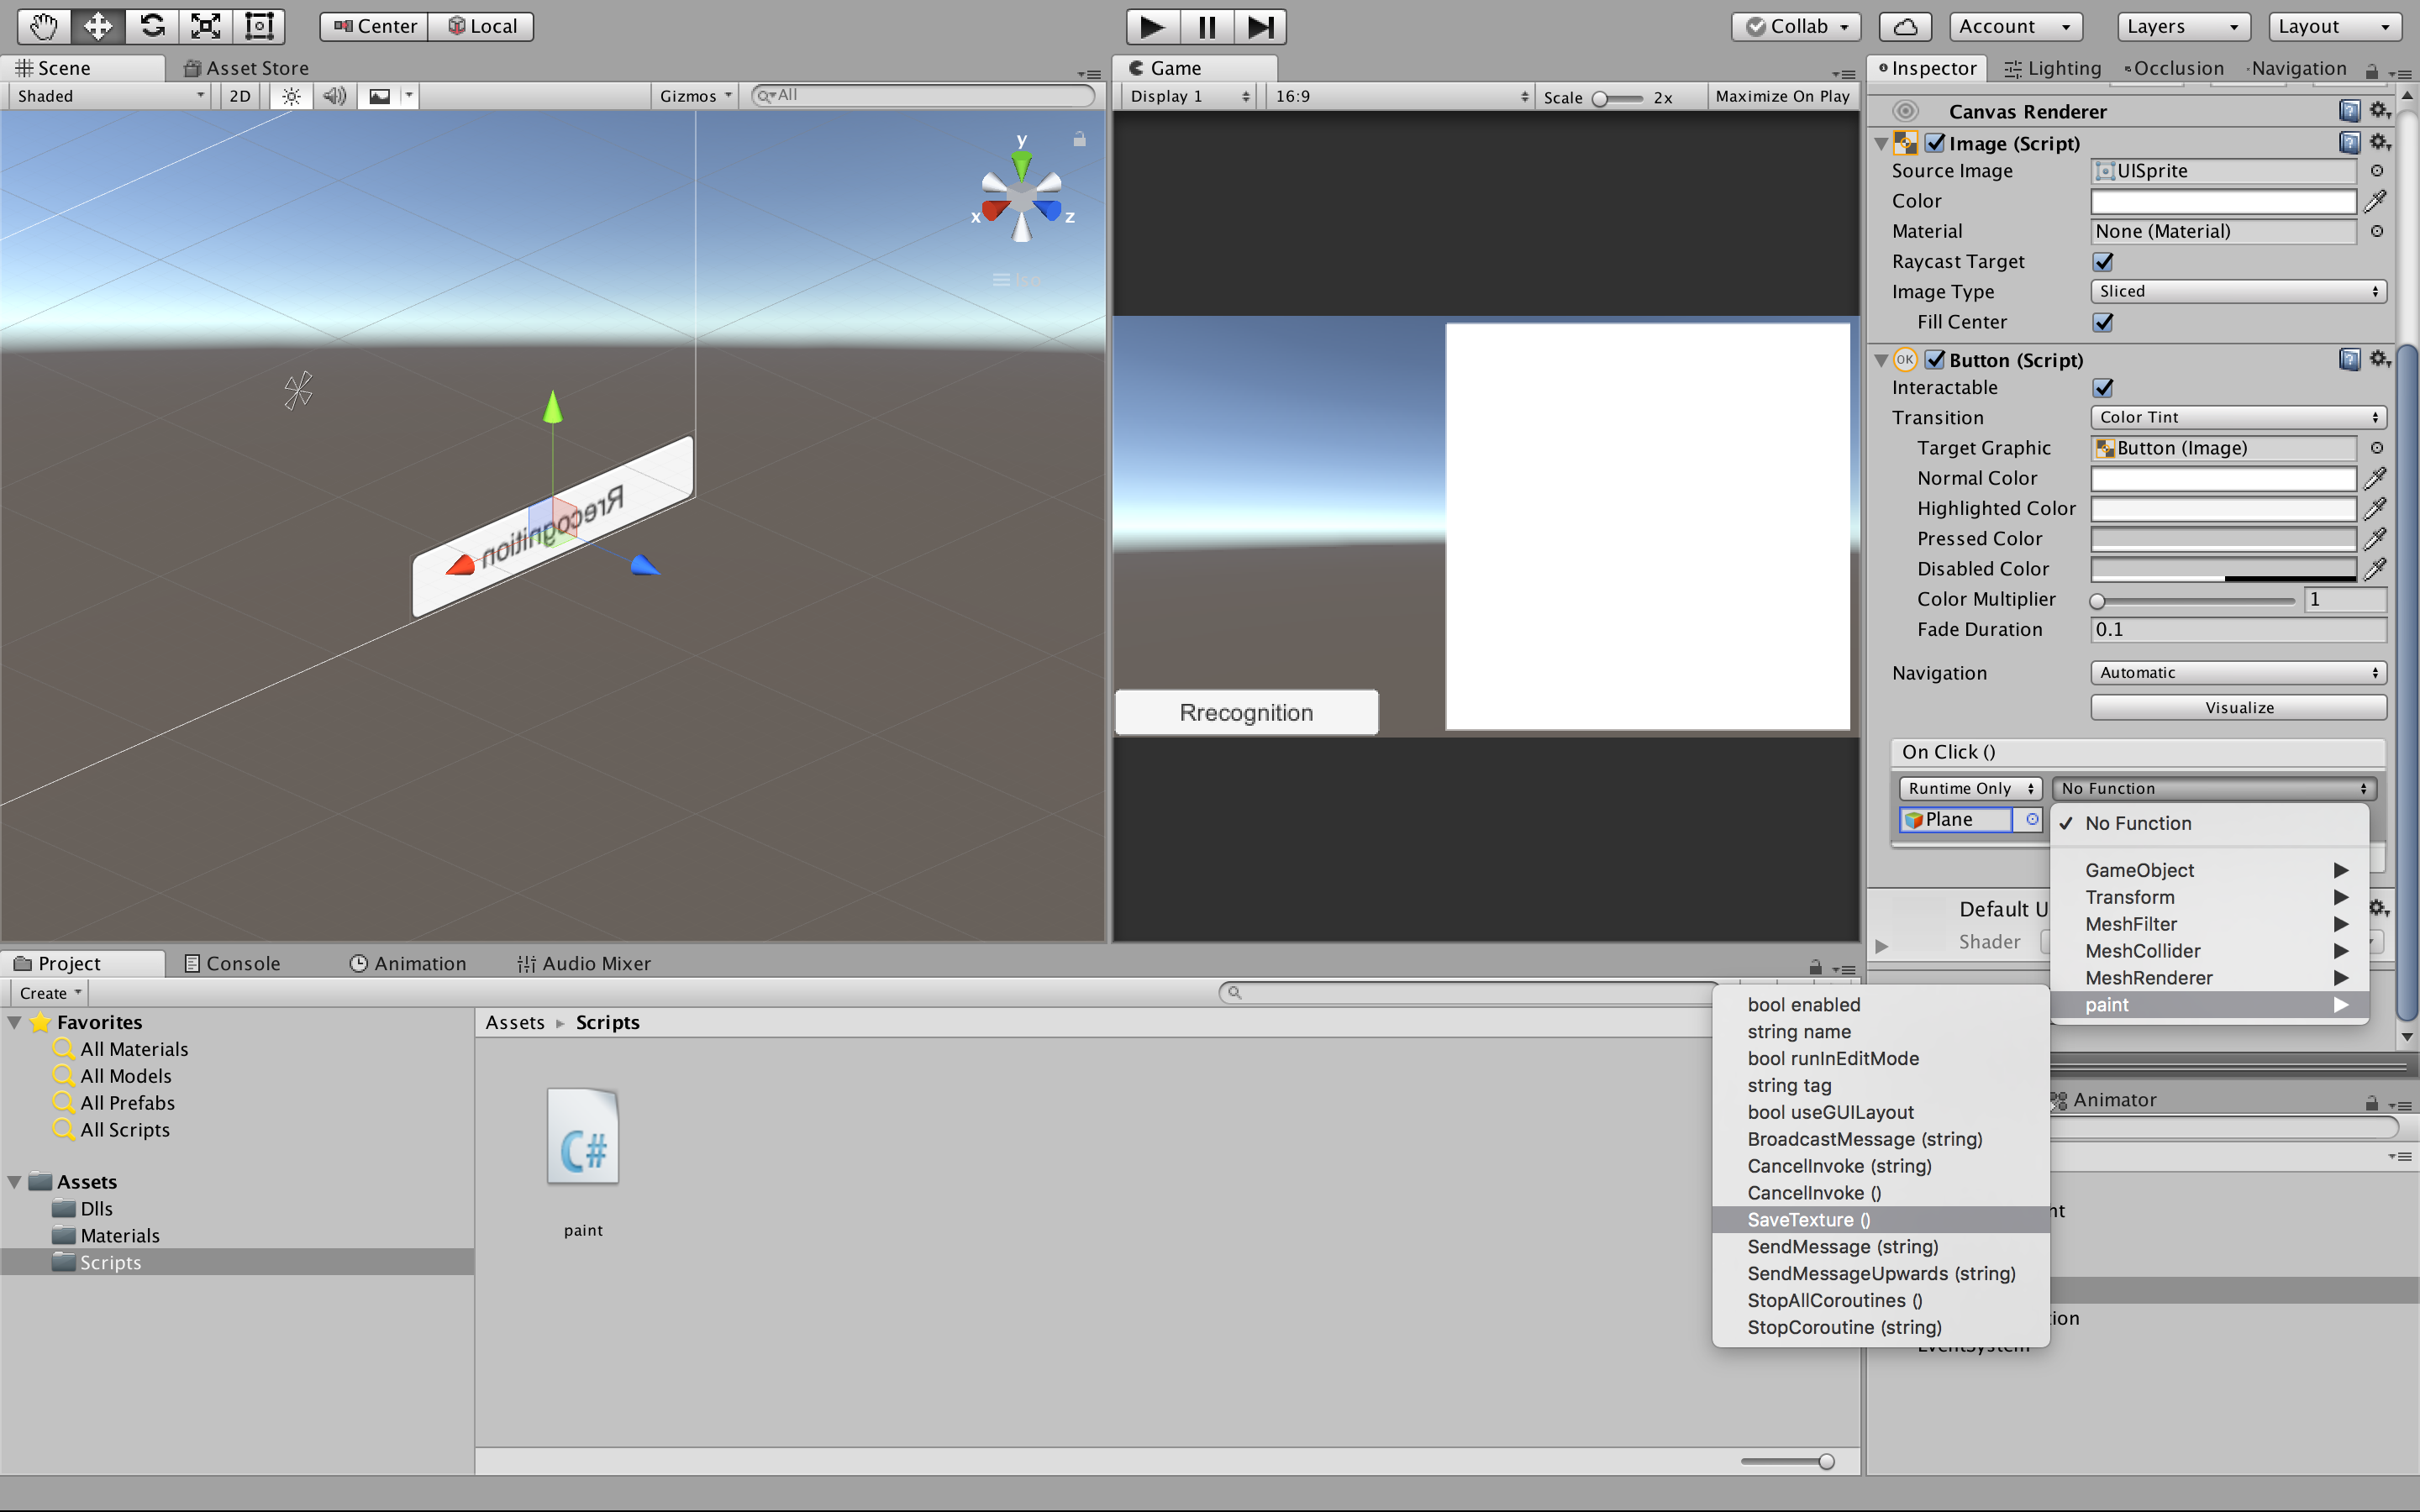
Inspectorの on Click()の[+]を押して、リスナーのメソッドを追加する。paint.SaveTexture()を追加する。
paint.csはplaneにアタッチしてあるので、planeを選択する。
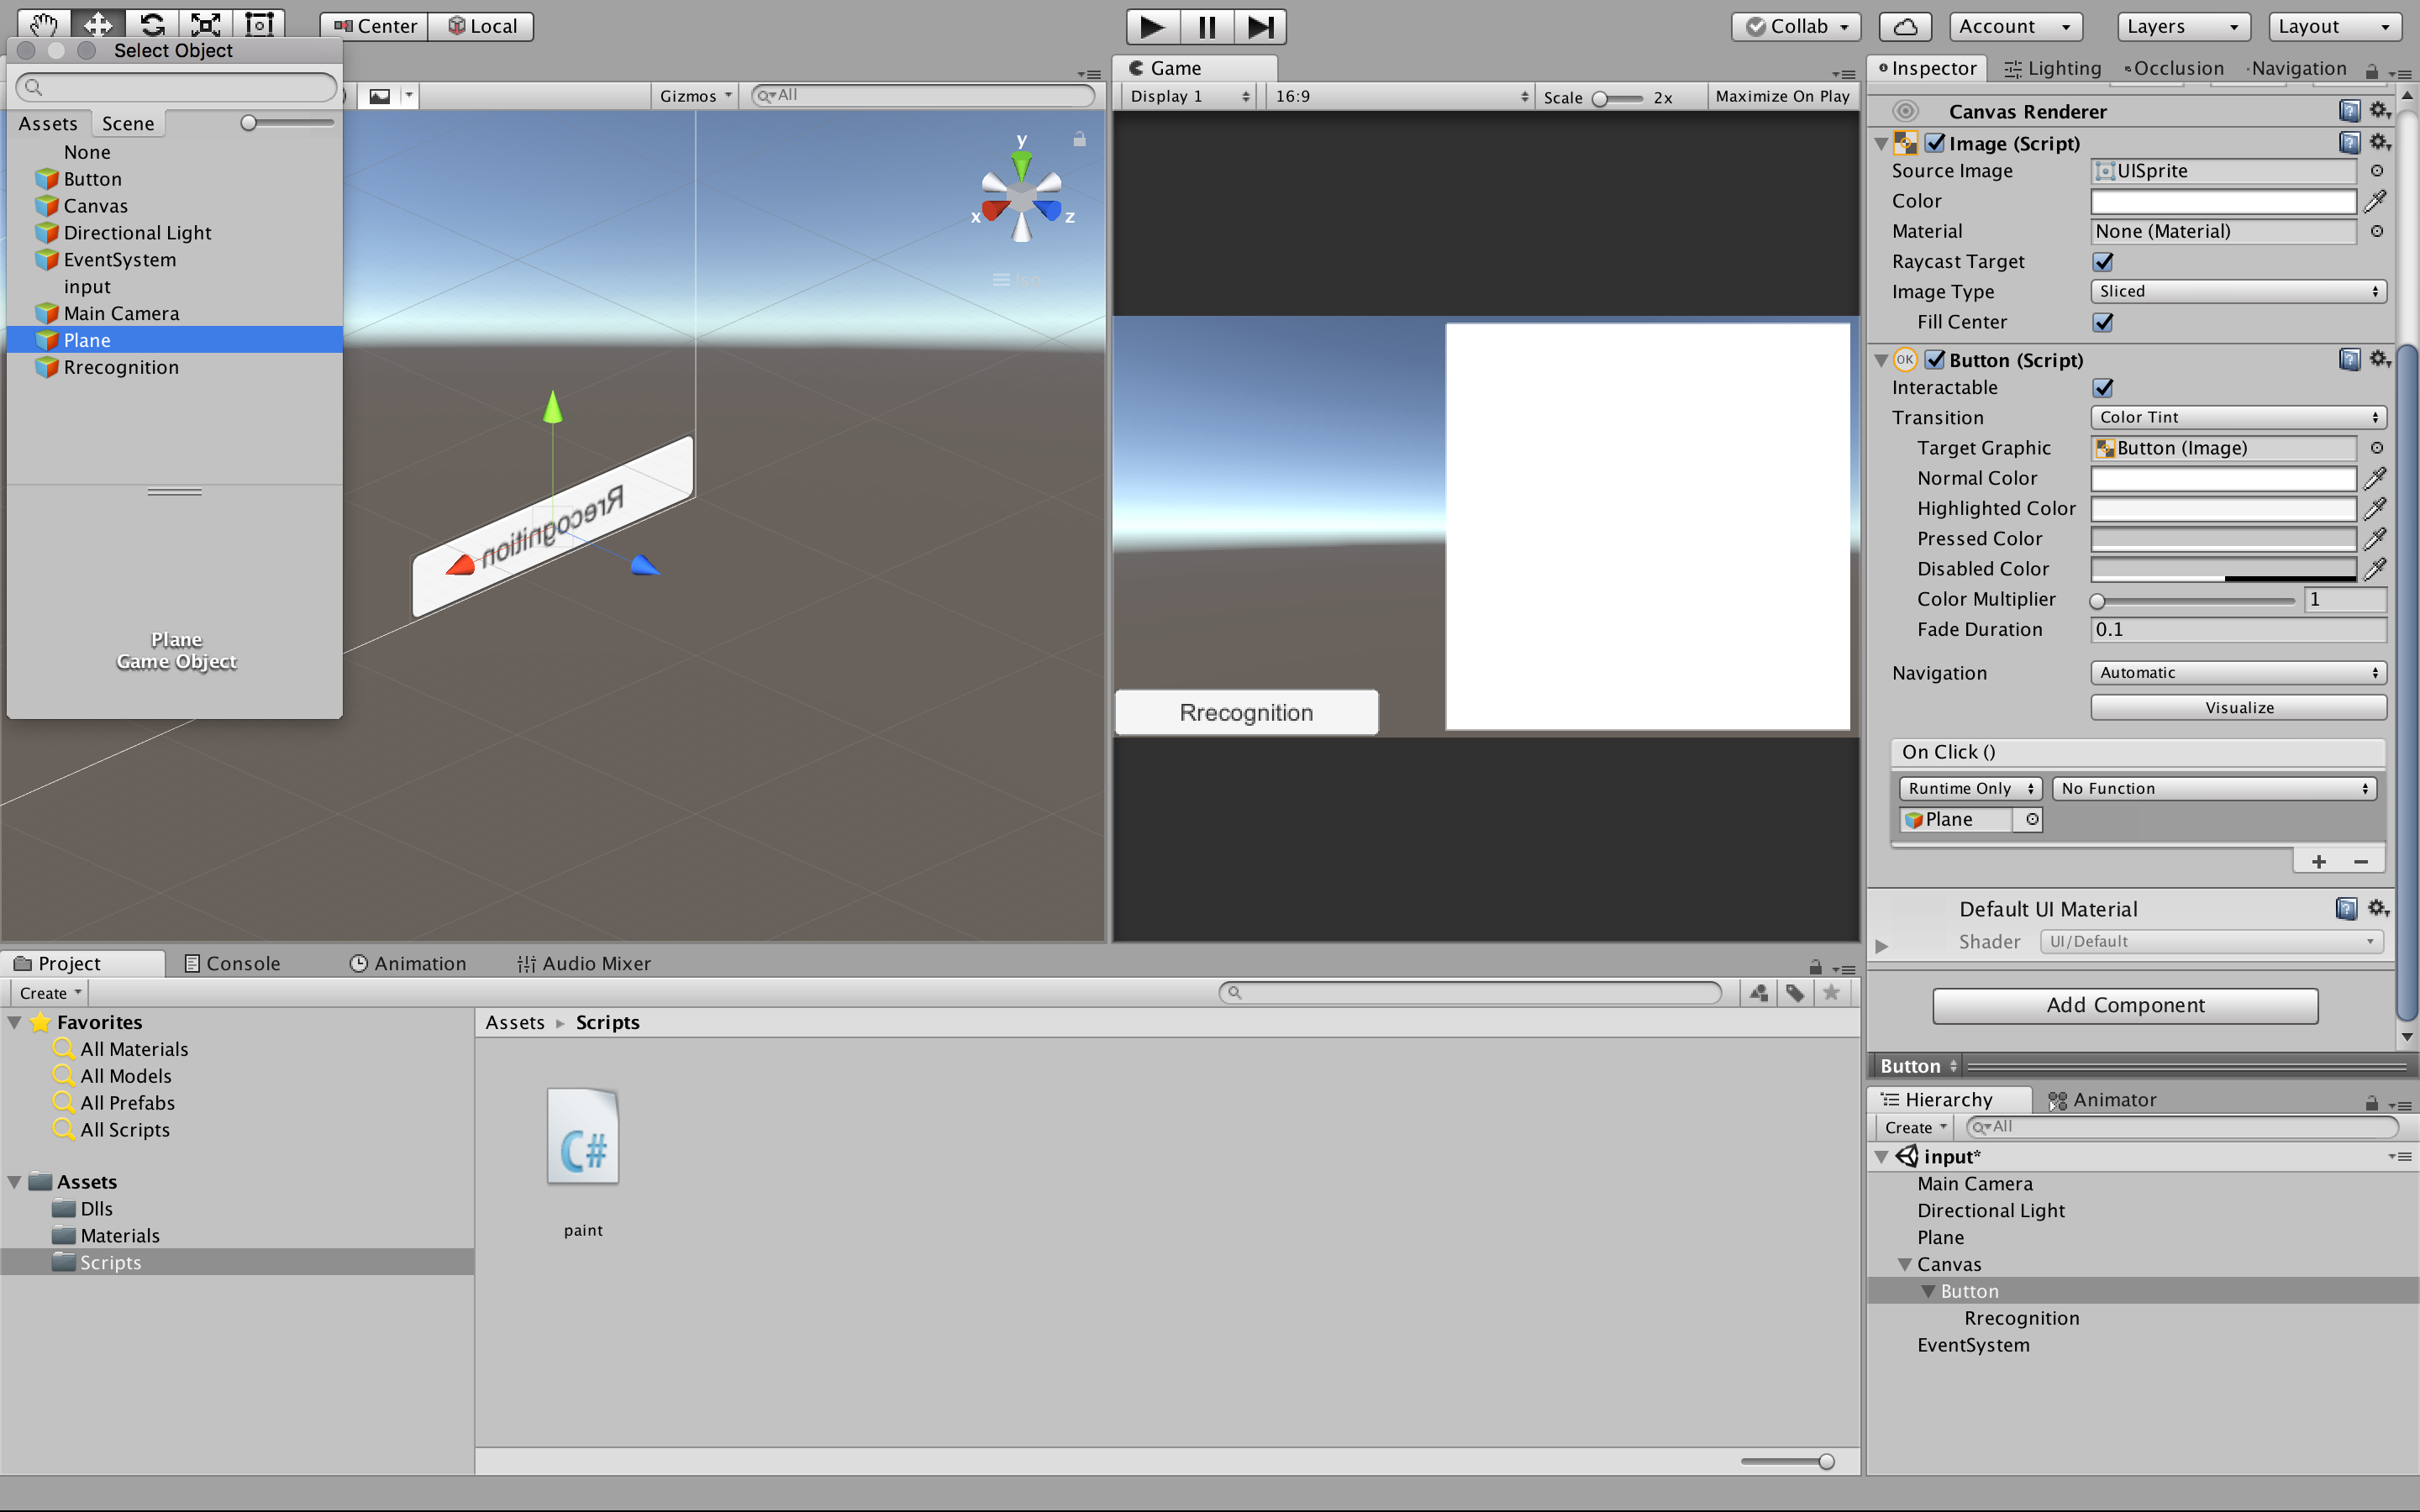
メソッドは paint -> SaveTexture() を選択する。
そして、planeに何かを書き込み後、ボタンを押すとAssetsの直下に画像が保存される。
数字の認識のための準備を行う。
paint.csにコードを加筆する。
public void SaveTexture()
{
	・・・
	Debug.Log("Environment.CurrentDirectory");
	Debug.Log("TensorFlow version: " + TFCore.Version);

	var t = new SampleTest.MainClass();
	t.MNSIT_read_model();
}
このような構成にして、スクリプトや学習モデルを配置する。学習モデルは、前回作成したものを使用する。
Assets
├── Scripts
│ ├── DataConverter.cs
│ ├── Datasets
│ │ ├── Helper.cs
│ │ └── MNIST.cs
│ ├── SampleTest.cs
│ └── paint.cs
└── models
├── Auto_model.pb
└── labels.txt
Assetsの直下にmodelsを作成して、中に前回の記事で作成したAuto_model.pbとlabels.txtを入れる。
TensorFlowSharpのLearnの中のDataConverter.csとDatasets/Helper.cs, Datasets/MNIST.csをScriptsの下に配置する。
using System.Collections;
using System;
using System.Runtime.CompilerServices;
using System.Runtime.InteropServices;
using TensorFlow;
using System.IO;
using System.Collections.Generic;
using Learn.Mnist;
using System.Linq;
using UnityEngine;
namespace SampleTest
{
class MainClass
{
// Convert the image in filename to a Tensor suitable as input to the Inception model.
static TFTensor CreateTensorFromImageFile(string file)
{
var contents = File.ReadAllBytes(file);
// DecodeJpeg uses a scalar String-valued tensor as input.
var tensor = TFTensor.CreateString(contents);
TFGraph graph;
TFOutput input, output;
// Construct a graph to normalize the image
ConstructGraphToNormalizeImage(out graph, out input, out output);
// Execute that graph to normalize this one image
using (var session = new TFSession(graph))
{
var normalized = session.Run(
inputs: new[] { input },
inputValues: new[] { tensor },
outputs: new[] { output });
return normalized[0];
}
}
//開始モデルは、非常に特定の正規化されたフォーマット(特定の画像サイズ、入力テンソルの形状、正規化されたピクセル値など)
//でテンソルによって記述された画像を入力として取ります。
//このファンクションは、入力としてJPEGでエンコードされた文字列を取り込み、
//入力モデルとしての入力として適したテンソルを戻すTensorFlow操作のグラフを作成します。
static void ConstructGraphToNormalizeImage(out TFGraph graph, out TFOutput input, out TFOutput output)
{
// - モデルは28x28ピクセルにスケーリングされた画像で訓練されました。
// - モノクロなので表される色は1色のみ。(値 - 平均)/ スケールを使用してfloatに変換して使用する。
// 画素値を0-255 から 0-1 の範囲にするので、変換値 = (Mean - 画素値) / Scale の式から,
// Mean = 255, Scale = 255 となる。
const int W = 28;
const int H = 28;
const float Mean = 255;
const float Scale = 255;
const int channels = 1;
graph = new TFGraph();
input = graph.Placeholder(TFDataType.String);
output = graph.Div(
x: graph.Sub(
x: graph.Const(Mean, "mean"),
y: graph.ResizeBilinear(
images: graph.ExpandDims(
input: graph.Cast(graph.DecodeJpeg(contents: input, channels: channels), DstT: TFDataType.Float),
dim: graph.Const(0, "make_batch")),
size: graph.Const(new int[] { W, H }, "size"))),
y: graph.Const(Scale, "scale"));
}
// pythonで作成したモデルの読込を行う
public void MNSIT_read_model()
{
var graph = new TFGraph();
//var model = File.ReadAllBytes("tensorflow_inception_graph.pb");
// シリアル化されたGraphDefをファイルからロードします。
var model = File.ReadAllBytes(Application.dataPath + "/models/Auto_model.pb");
graph.Import(model, "");
using (var session = new TFSession(graph))
{
var labels = File.ReadAllLines(Application.dataPath + "/models/labels.txt");
var file = Application.dataPath + "/saveImage.jpg";
//画像ファイルに対して推論を実行する
//複数のイメージの場合、session.Run()はループで(同時に)呼び出すことができます。
//あるいは、モデルが画像データのバッチを入力として受け入れるので、画像をバッチ処理することができる。
var tensor = CreateTensorFromImageFile(file);
var runner = session.GetRunner();
// 学習モデルのグラフを指定する。
// 入出力テンソルの名前をsessionに登録する
// 手動で変換したモデルの読込のときは、.AddInput(graph["dropout"][0], 0.5f)はいらない。
runner.AddInput(graph["input"][0], tensor).AddInput(graph["dropout"][0], 0.5f).Fetch(graph["output"][0]);
var output = runner.Run();
// output[0].Value()は、「バッチ」内の各画像のラベルの確率を含むベクトルです。 バッチサイズは1であった。
//最も可能性の高いラベルインデックスを見つけます。
var result = output[0];
var rshape = result.Shape;
if (result.NumDims != 2 || rshape[0] != 1)
{
var shape = "";
foreach (var d in rshape)
{
shape += $"{d} ";
}
shape = shape.Trim();
Debug.Log($"Error: expected to produce a [1 N] shaped tensor where N is the number of labels, instead it produced one with shape [{shape}]");
Environment.Exit(1);
}
var bestIdx = 0;
float best = 0;
// 尤も確率が高いものを調べて表示する
var probabilities = ((float[][])result.GetValue(true))[0];
for (int i = 0; i < probabilities.Length; i++)
{
if (probabilities[i] > best)
{
bestIdx = i;
best = probabilities[i];
}
}
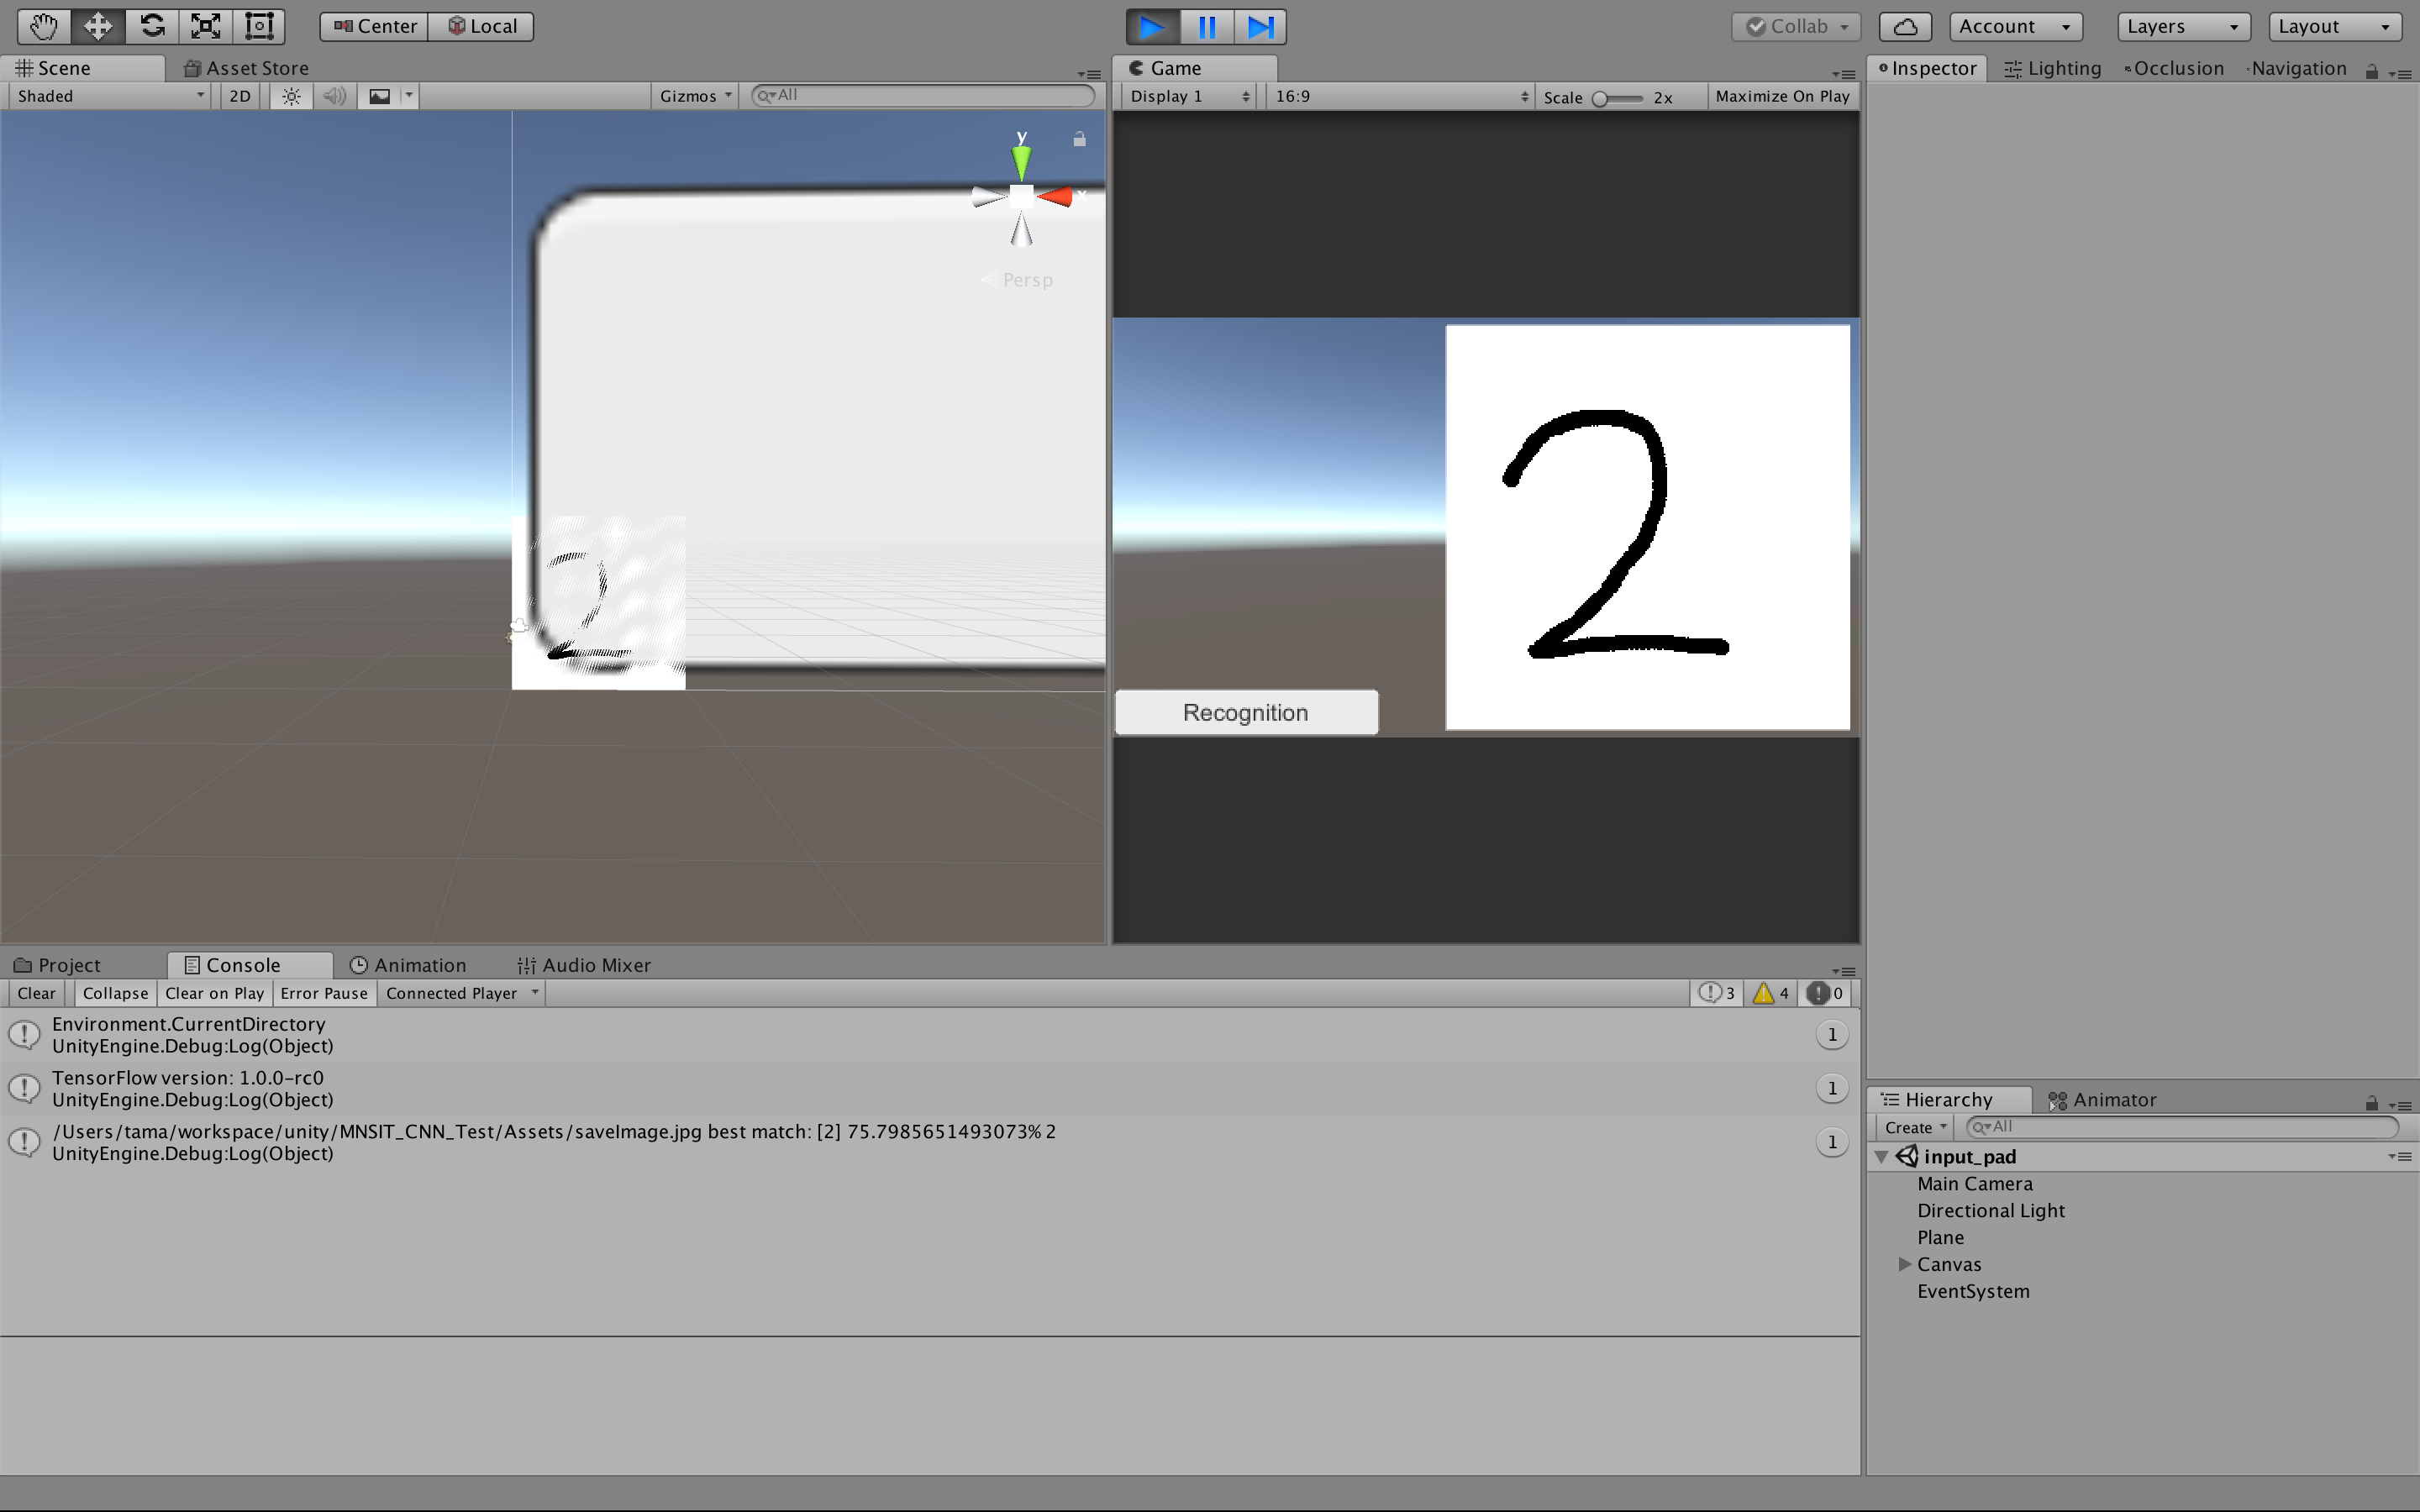
Debug.Log($"{file} best match: [{bestIdx}] {best * 100.0}% {labels[bestIdx]}");
}
}
}
}
実行する
△の90°傾けたボタンを押し、入力パッドに数字を入力後、Rrecognitionボタンを押すと、結果が表示される。
実行画面

プロジェクトを上げておく。
https://github.com/MaruTama/tensorflow_for_unity