[Swift][NSOpenGLView]SwiftでNSOpenGLViewを使う
SwiftでCocoaアプリケーションを開発する際の、NSOpenGLView使用法についてメモ代わりにまとめました。
毎度のことですが、殴り書きご容赦ください。
私はObjective-Cの経験が無く、NSOpenGLViewのSwiftでの実装方法に四苦八苦しました。
NSOpenGLViewを使うメリットは、やはり描写の速さでしょうか。
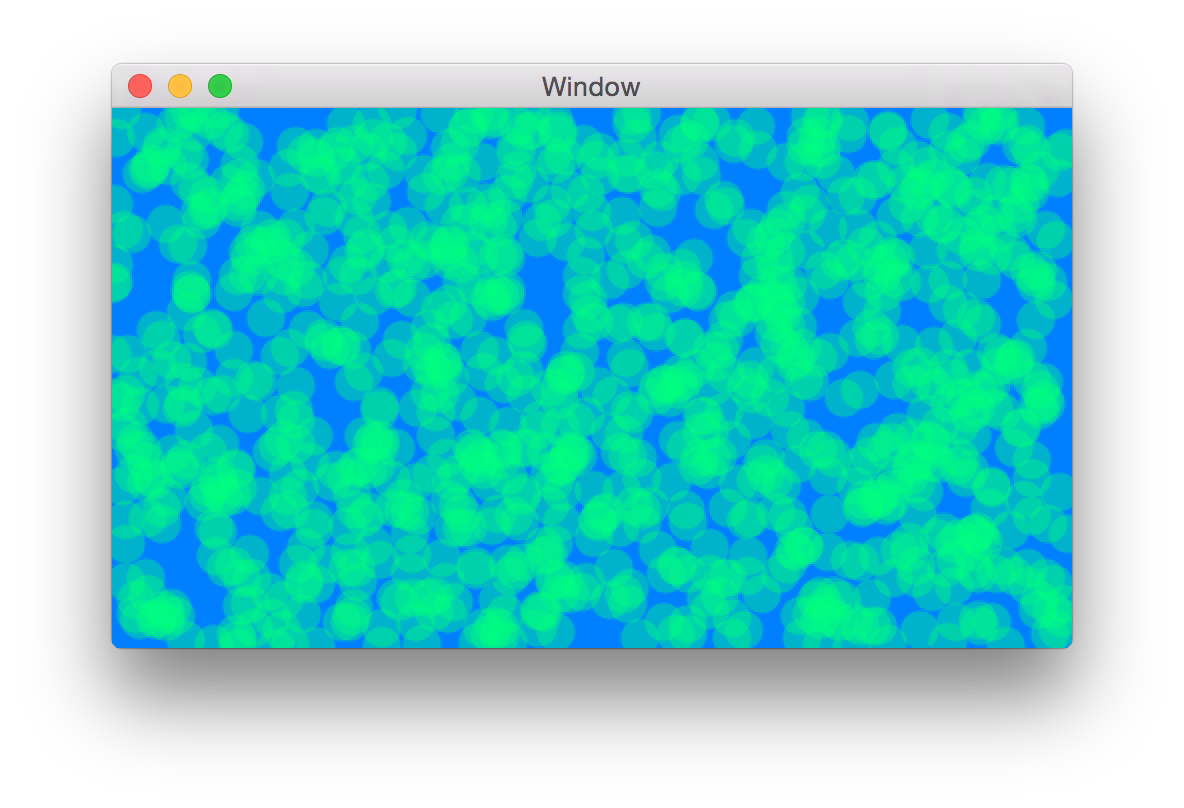
このサンプルコードでは1000個の点を描写しています。
ViewController
まずはViewControllerのコードです。
import Cocoa

class ViewController: NSViewController {

    var OpenGLView:NSOpenGLView!
    var OpenGLContents:OpenGLContentsDraw!


    override func mouseDown(theEvent: NSEvent) {
        self.OpenGLContents.updateScene()
    }

    override func viewDidLoad() {
        super.viewDidLoad()

        self.OpenGLView = NSOpenGLView(frame:CGRectMake(0,0,self.view.bounds.width,self.view.bounds.height))
        self.OpenGLContents = OpenGLContentsDraw(frame:CGRectMake(0,0,self.view.bounds.width,self.view.bounds.height),PointSize:GLfloat(20.0))

        self.OpenGLView.addSubview(self.OpenGLContents)
        self.view.addSubview(self.OpenGLView)


        // Do any additional setup after loading the view.
    }

    override var representedObject: AnyObject? {
        didSet {
        // Update the view, if already loaded.
        }
    }

}
今回は、stroyboardを使用せず、オブジェクトもコードで生成します。
**override func viewDisLoad()**は、viewのロードが完了した際に呼ばれる関数です。
ここで、NSOpenGLViewオブジェクトを生成します。生成方法は、window上の位置とオブジェクトのサイズをCGRectMakeで指定するのみです。
self.OpenGLView = NSOpenGLView(frame:CGRectMake(0,0,self.view.bounds.width,self.view.bounds.height))
実際にwindowに追加するには、以下のようにします。
self.view.addSubview(self.OpenGLView)
これで何も描写されていないNSOpenGLViewがWindow上に生成されるかと思います。
描写内容を生成し、NSOpenGLViewに描写するためにはcontentsを生成し、NSOpenGLViewに追加します。
ここで、新規ファイルを作成し、OpenGLContentsDraw.swiftをプロジェクトに追加します。
少し長いですが、以下のようにコードを書きます。
描写部分
import Foundation
import Cocoa
import OpenGL
import GLKit
import GLUT


class OpenGLContentsDraw:NSOpenGLView{

    var width:GLsizei
    var height:GLsizei
    var PointSize:GLfloat

    init?(frame:NSRect, PointSize:GLfloat) {

        //set size of this view
        self.width = GLsizei(frame.size.width)
        self.height = GLsizei(frame.size.height)
        self.PointSize = PointSize

        //setup pixelFormatAttributes
        let pixelFormatAttributes:[NSOpenGLPixelFormatAttribute] = [
            UInt32(NSOpenGLPFAAccelerated),
            UInt32(NSOpenGLPFADoubleBuffer),
            UInt32(NSOpenGLPFADepthSize), UInt32(32),
            UInt32(NSOpenGLPFAColorSize), UInt32(48),
            UInt32(NSOpenGLPFAAlphaSize), UInt32(16),
            UInt32(NSOpenGLPFAMultisample),
            UInt32(NSOpenGLPFASampleBuffers), UInt32(1),
            UInt32(NSOpenGLPFASamples), UInt32(4),
            UInt32(NSOpenGLPFAMinimumPolicy),
            UInt32(0)
        ]

        let glPixelFormat = NSOpenGLPixelFormat(attributes:pixelFormatAttributes)
        super.init(frame:frame,pixelFormat:glPixelFormat)
    }

    required init?(coder: NSCoder) {
        fatalError("init(coder:) has not been implemented")
    }

    func updateScene(){

        self.needsDisplay = true
        self.update()
    }

    // draw something...
    override func drawRect(dirtyRect:NSRect) {

        Clear()

        //draw something

        //blend for PointSmooth
        glBlendFunc(GLenum(GL_SRC_ALPHA), GLenum(GL_ONE_MINUS_SRC_ALPHA))
        glEnable(GLenum(GL_BLEND))
        glEnable(GLenum(GL_POINT_SMOOTH))

        glPointSize(PointSize)
        glColor4f(0.0, 1.0, 0.5,0.4)

        for i in 0..<1000{
            //generate random values
            let x:GLfloat = GLfloat(arc4random_uniform(UInt32(self.width)))
            let y:GLfloat = GLfloat(arc4random_uniform(UInt32(self.height)))

            //draw
            glBegin(GLenum(GL_POINTS))
            glVertex2f(x, y)
            glEnd()
        }

        glDisable(GLenum(GL_BLEND))

        //flush
        glFlush()

    }

    //when window is reshaped
    override func reshape() {

        glViewport(0,0,self.width,self.height)
        glMatrixMode(GLenum(GL_PROJECTION))
        glLoadIdentity()
        glOrtho(0.0,GLdouble(width),0.0,GLdouble(height),-1.0,1.0);
        glMatrixMode(GLenum(GL_MODELVIEW))
        glLoadIdentity()
    }

    //clear buffer
    func Clear()
    {
        glClearColor(0.0, 0.5, 1.0, 1.0)
        glClear(GLenum(GL_COLOR_BUFFER_BIT) | GLenum(GL_DEPTH_BUFFER_BIT));

        glViewport(0,0,width,height)
        glMatrixMode(GLenum(GL_PROJECTION))
        glLoadIdentity()
        glOrtho(0.0,GLdouble(width),0.0,GLdouble(height),-1.0,1.0);
        glMatrixMode(GLenum(GL_MODELVIEW))
        glLoadIdentity()


    }

}
上から順に説明すると、
init?(frame:NSRect, PointSize:GLfloat) {

        //set size of this view
        self.width = GLsizei(frame.size.width)
        self.height = GLsizei(frame.size.height)
        self.PointSize = PointSize

        //setup pixelFormatAttributes
        let pixelFormatAttributes:[NSOpenGLPixelFormatAttribute] = [
            UInt32(NSOpenGLPFAAccelerated),
            UInt32(NSOpenGLPFADoubleBuffer),
            UInt32(NSOpenGLPFADepthSize), UInt32(32),
            UInt32(NSOpenGLPFAColorSize), UInt32(48),
            UInt32(NSOpenGLPFAAlphaSize), UInt32(16),
            UInt32(NSOpenGLPFAMultisample),
            UInt32(NSOpenGLPFASampleBuffers), UInt32(1),
            UInt32(NSOpenGLPFASamples), UInt32(4),
            UInt32(NSOpenGLPFAMinimumPolicy),
            UInt32(0)
        ]

        let glPixelFormat = NSOpenGLPixelFormat(attributes:pixelFormatAttributes)
        super.init(frame:frame,pixelFormat:glPixelFormat)
 }

     required init?(coder: NSCoder) {
        fatalError("init(coder:) has not been implemented")
    }
初期化部分です。必須項目で、ここでNSOpenGLViewのpixelFormatを設定します。DoubleBufferやDepthtestなどなど
また、OpenGLDrawContentsに渡す引数もここで設定します。
上では、GLfloat型のPointSizeを渡しています。
この引数は、ViewControllerから渡すようになっています。
func updateScene(){

        self.needsDisplay = true
        self.update()
    }
描写のアップデートを司る関数です。
NSOpenGLViewの描写をアップデートするために、update()が用意されていますが、これを単純に呼ぶだけでは描写は更新されません。
その前に、needsDisplayをtrueにする必要があります。
override func drawRect(dirtyRect:NSRect) {
//ここに描写内容を書く
}
drawRectはロード時、windowのreshape時、また、update()がコールされた時に実行されます。
OpenGLの描写内容はここで書きます。
    //when window is reshaped
    override func reshape() {

        glViewport(0,0,self.width,self.height)
        glMatrixMode(GLenum(GL_PROJECTION))
        glLoadIdentity()
        glOrtho(0.0,GLdouble(width),0.0,GLdouble(height),-1.0,1.0);
        glMatrixMode(GLenum(GL_MODELVIEW))
        glLoadIdentity()
    }
windowがreshapeされた時に呼ばれます。
windowサイズが変更された時のため、glViewportをwindowサイズに合わせています。
これくらいでしょうか。
実装
ViewControllerに戻りまして、
OpenGLDrawContentsを生成し、NSOpenGLViewに追加するには以下のようにします。
	OpenGLContentsDraw(frame:CGRectMake(0,0,self.view.bounds.width,self.view.bounds.height),
						 PointSize:GLfloat(20.0))

    self.OpenGLView.addSubview(self.OpenGLContents)
アップデート
マウスで画面をクリックすると、描写をアップデートするようにしました。
	override func mouseDown(theEvent: NSEvent) {
        self.OpenGLContents.updateScene()
   }
今回はテストのために、マウスダウンで描写を更新するようにしましたが、アニメーションを作る際は、NSTimerを使うようです。
参考
