この記事はカスタム投稿タイプでコラム記事を作るの続編です
今回は、下記のような階層、パーマリンクになるように設定していきたいと思います。
▼コラム一覧
http://localhost/wp/column/
▼コラム カテゴリ別一覧
http://localhost/wp/column/knowledge/
▼コラム カテゴリ別詳細
http://localhost/wp/column/knowledge/test/
※ 「/wp」の部分はいらないので削除してスッキリさせていただいて大丈夫です
カスタムタクソノミーとは
タクソノミーとは「カテゴリ」や「タグ」のようなWordPressの投稿データをグループ分けするための「分類」の事です。
カスタムタクソノミーは、カテゴリのように階層を持たせる場合と、タグのように階層を持たせない2つの形式がありますが、
今回は、コラム記事をカテゴリ別に階層を持たせたいので階層有りのパターンで認識しておいてください。
1). functions.phpでカスタムタクソノミーを設定する
/Users/ユーザー名/Desktop/qiita/wp/wp-content/themes/テーマ名/functions.php
のカスタム投稿タイプの記述の下あたりにカスタムタクソノミーの設定をします。
/**
 * カスタムタクソノミー(コラム記事カテゴリ)
 */
function add_taxonomy() {
  register_taxonomy(
  'qiita-column',
  'column',
  array(
    'label' => 'コラム記事カテゴリ',
    'singular_label' => 'コラム記事カテゴリ',
    'labels' => array(
      'all_items' => 'コラム記事カテゴリ一覧',
      'add_new_item' => 'コラム記事カテゴリを追加'
    ),
    'public' => true,
    'show_ui' => true,
    'show_in_nav_menus' => true,
    'rewrite' => true
    )
  );
}
add_action( 'init', 'add_taxonomy' );
2). カテゴリ設定
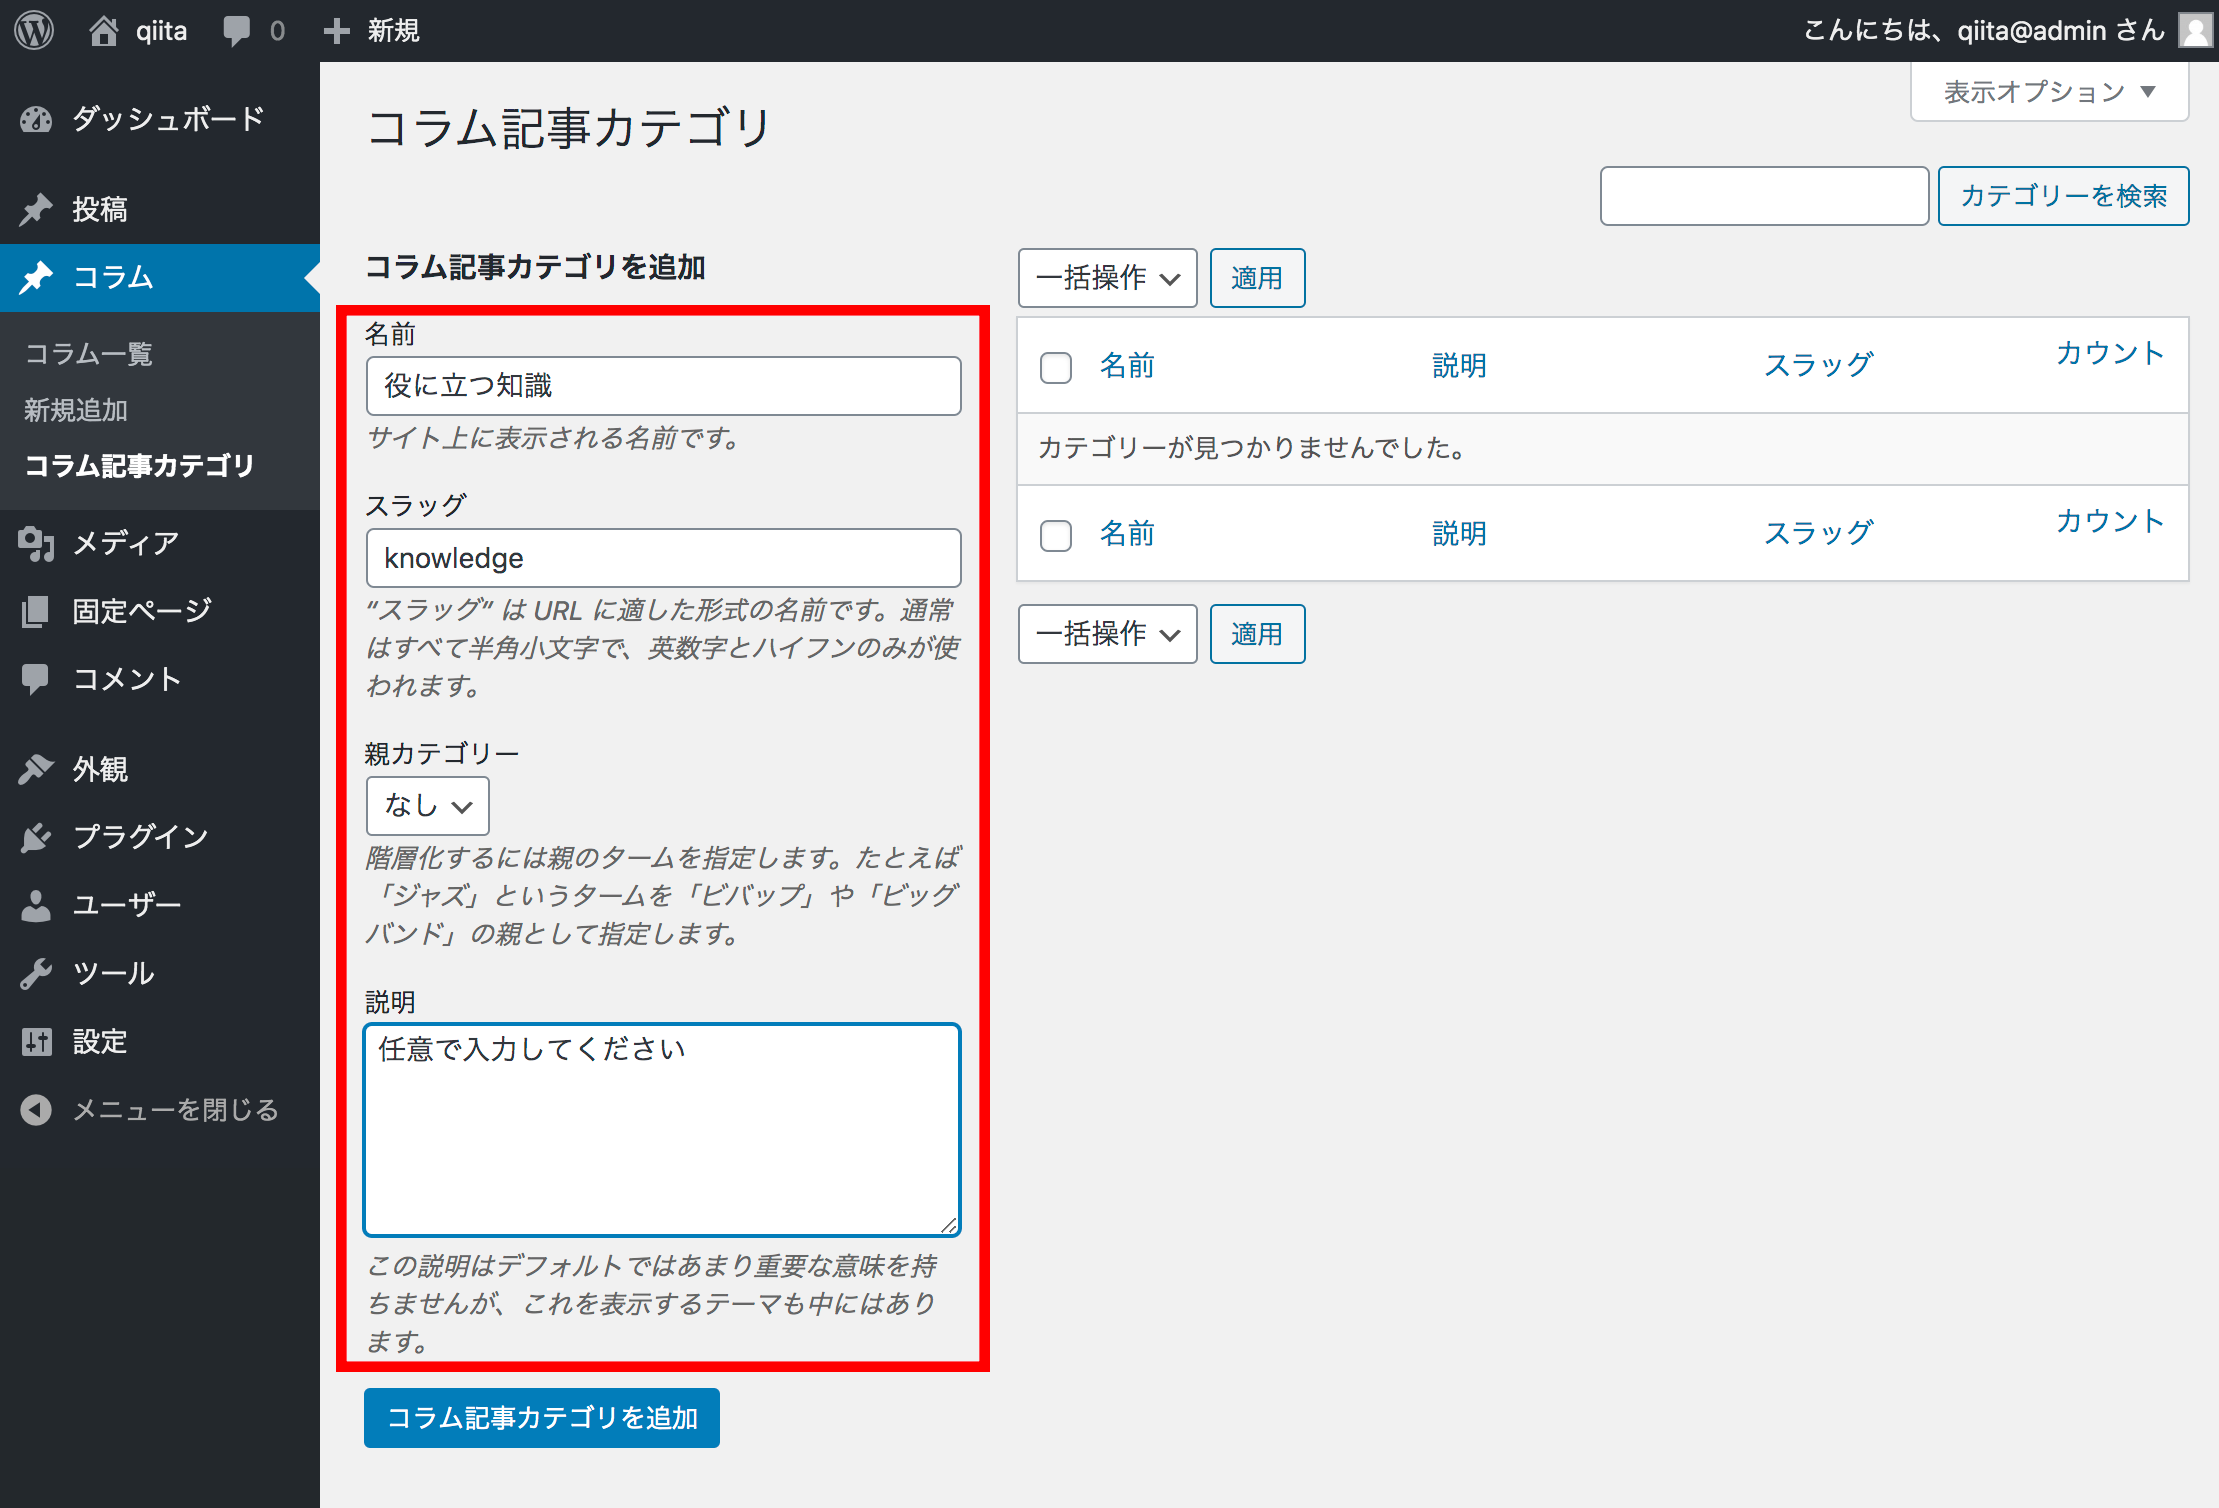
次は管理画面からカスタム投稿タイプのカテゴリ設定をします。
画像の赤枠の通りに入力したら、「コラム記事カテゴリを追加」ボタンをクリックしてください。
カテゴリの追加ができたらテスト投稿した記事の投稿編集画面にいき、先ほど設定したカテゴリを選択して公開します。
すると、
http://localhost/wp/column/
http://localhost/wp/qiita-column/knowledge/
http://localhost/wp/column/test/
のような形式のパーマリンクでそれぞれのページに遷移することができます。
ただ、これだと階層構造がバラバラで汚いですよね。
http://localhost/wp/column/
http://localhost/wp/column/knowledge/
http://localhost/wp/column/knowledge/test/
こんな風に階層構造を綺麗に整えたいです。
3). テンプレートファイルの作成
それでは、カスタム投稿のそれぞれのテンプレートファイルを作成していきます。
・archive-column.php
・taxonomy-qiita-column.php
・single-column.php
を作成してください。
今回は特にカスタマイズしませんが、ページのレイアウトや出力内容などはこれらのファイルで変更することができます。
4). パーマリンクの整形
では、どうやってパーマリンクを整形するか。
今回は「custom Post Type Permalinks」というプラグインを使って実現していきたいと思います。
管理画面から「custom Post Type Permalinks」をインストールしてください。
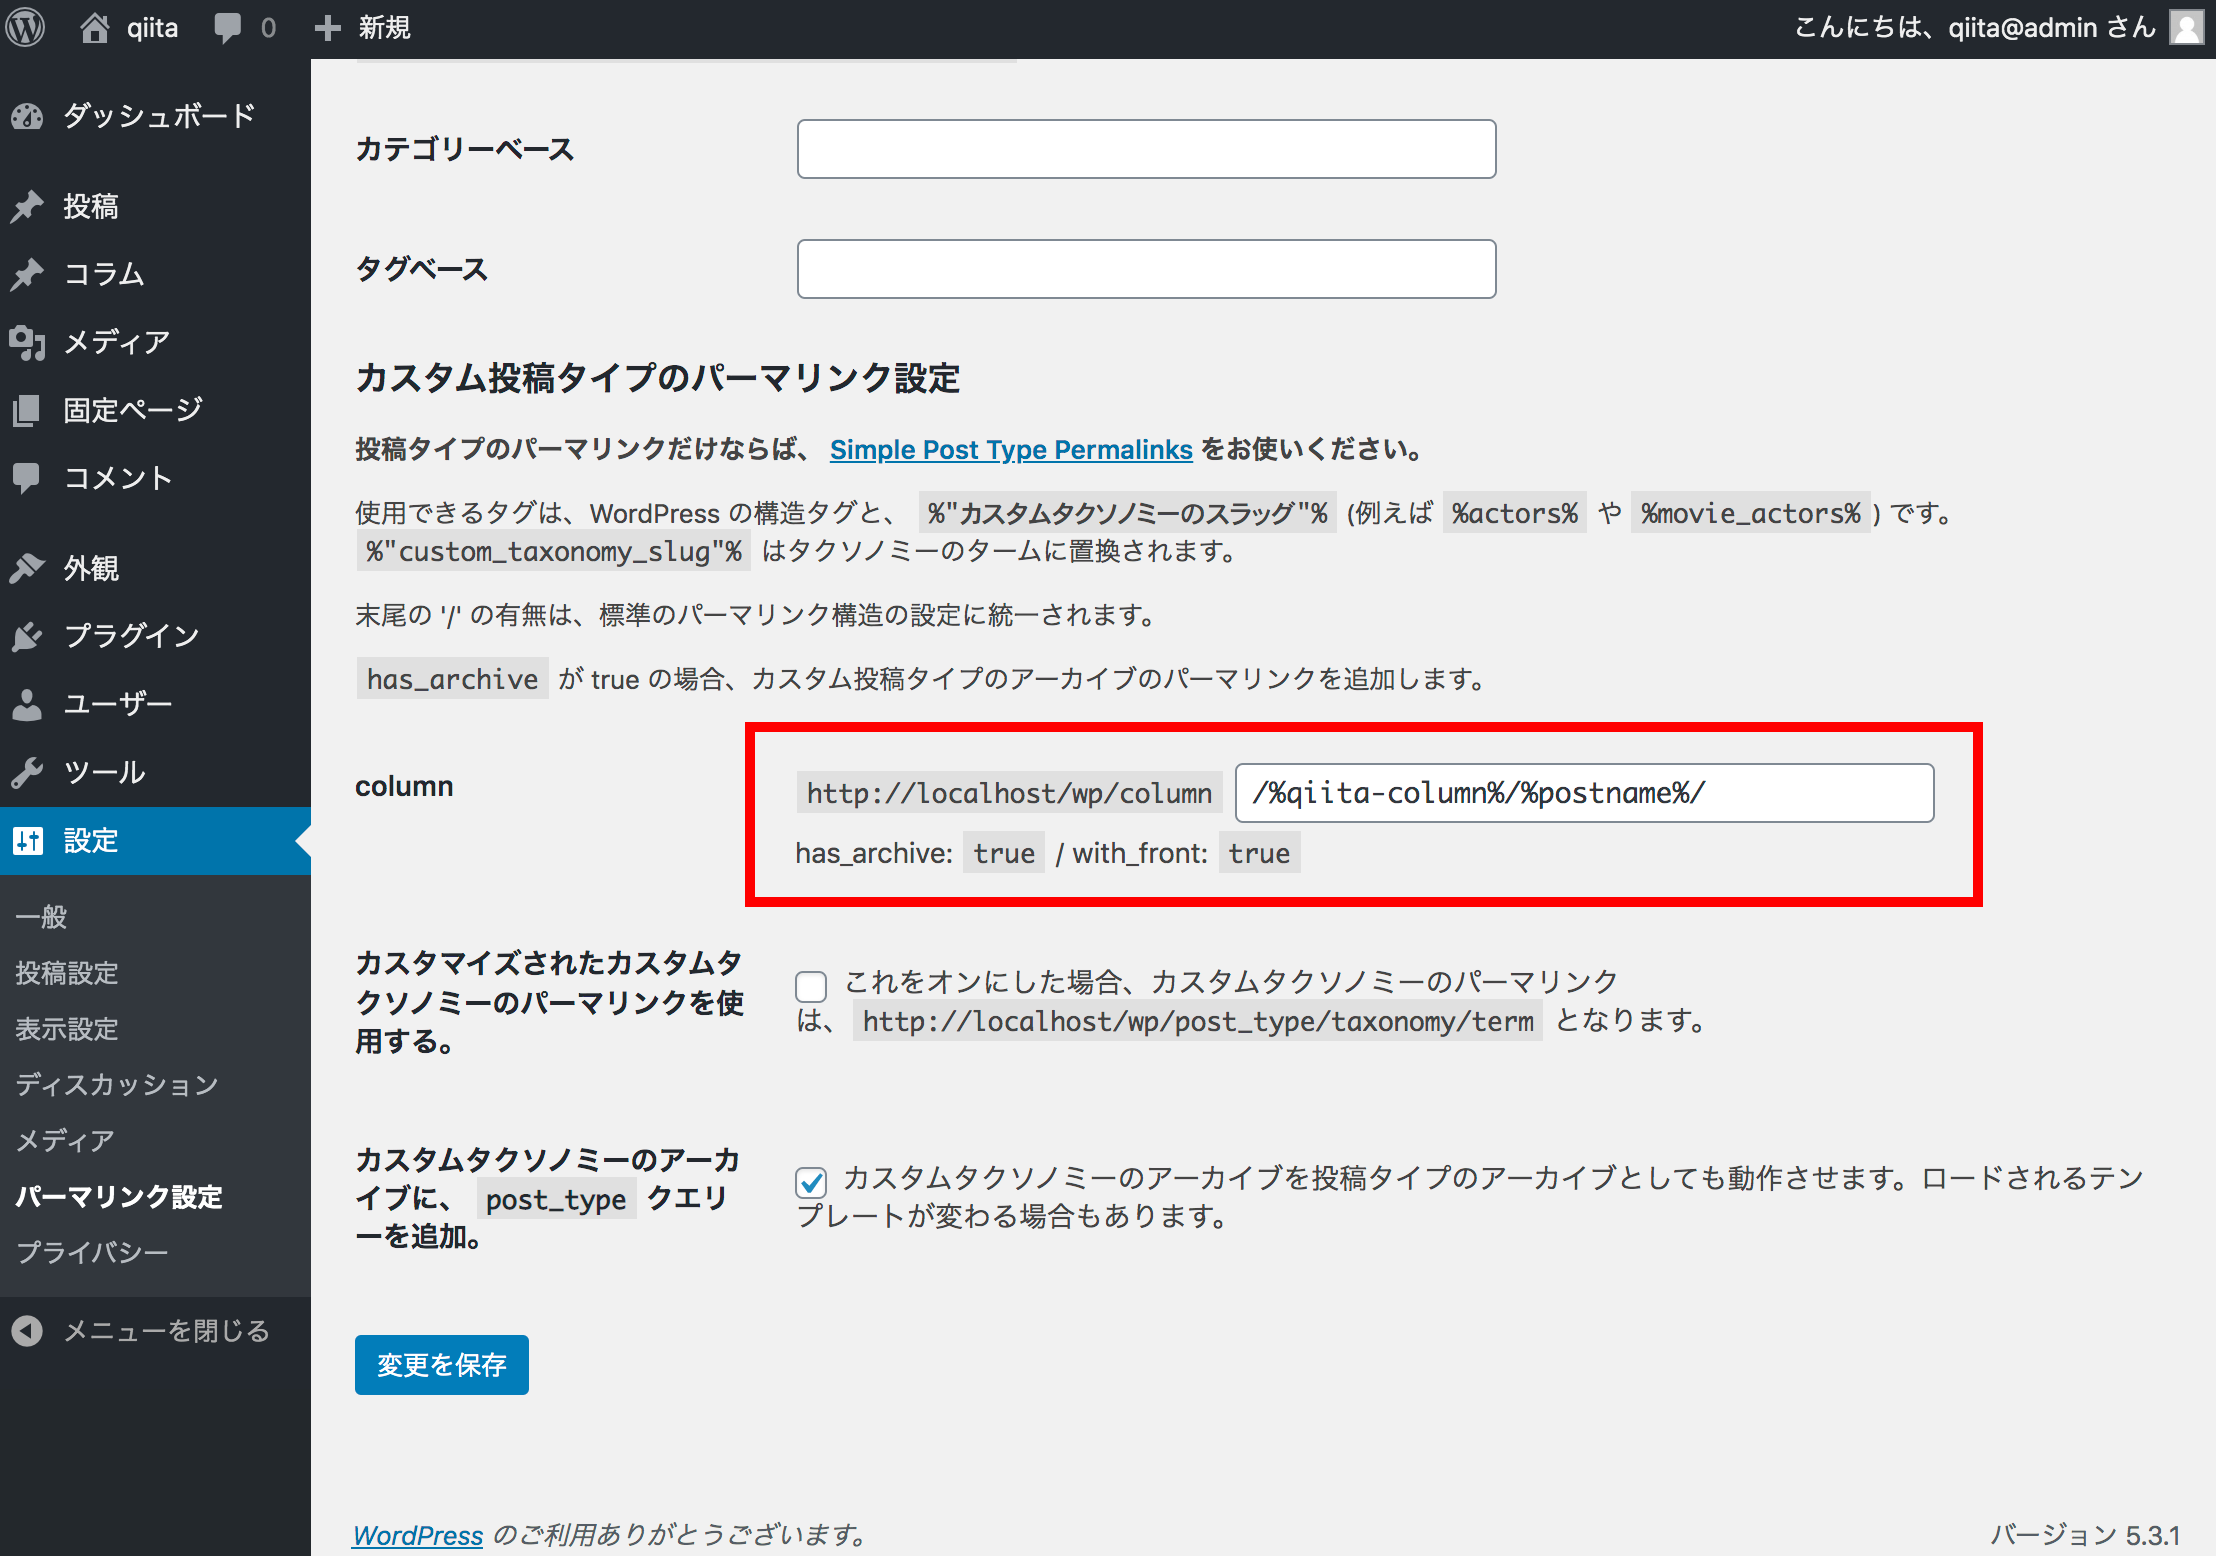
インストールが完了してプラグインを有効化したら、「設定」→「パーマリンク設定」の下の方に
「カスタム投稿タイプのパーマリンク設定」とあるので以下の画像、赤枠と同じように設定しましょう。

これで、いけるはずなのでそれぞれのURLにアクセスして確認してみます。
http://localhost/wp/column/
http://localhost/wp/column/knowledge/
http://localhost/wp/column/knowledge/test/
すると、なんと!!
http://localhost/wp/column/knowledge/
このページだけ見つかりません。。
functions.phpをちょっと書き換えてみましょう。
/**
 * カスタムカスタムタクソノミー(コラム記事カテゴリ)
 */
function add_taxonomy() {
  register_taxonomy(
  'qiita-column',
  'column',
  array(
    'label' => 'コラム記事カテゴリ',
    'singular_label' => 'コラム記事カテゴリ',
    'labels' => array(
      'all_items' => 'コラム記事カテゴリ一覧',
      'add_new_item' => 'コラム記事カテゴリを追加'
    ),
    'public' => true,
    'show_ui' => true,
    'show_in_nav_menus' => true,
    'rewrite' => true,
    'rewrite' => array('slug' => 'column'), /* 追記 */
    'hierarchical' => true /* 追記 */
    )
  );
}
add_action( 'init', 'add_taxonomy' );
追記したのは、「追記」のところです。
再度全てにアクセスしてみると問題なくページが表示されました!
http://localhost/wp/column/
http://localhost/wp/column/knowledge/
http://localhost/wp/column/knowledge/test/
最後に
今回は上手くいきましたが、既存のWordPressサイトに追加する場合など、すでに動いているシステムに組み込む場合は一筋縄でいかないケースもあります。
そんな時は、先駆者たちが投稿してくれている記事を読んで解決策を見つけましょう。
