とある Web APIを触っていたところ
- CORS設定により、ブラウザからのAPIリクエストが許可されていない。
- しかし、ブラウザからの入力値を受け取り、WebAPIへリクエストを送りたい。
- できればJavaScript(Node.js)で構築したい
というユースケースがあり、ちょっと試してみました。
やること
- Webフォームからデータを入力
- Node.jsのサーバーへPOSTで送信
- Node.js サーバーからWebAPIへリクエストを送り、返り値をWebフォームへ送る
実装
- Node.jsでPOST値を受け取るため、Expressでサーバーを立ち上げる
- POSTで送られたデータをrequest モジュールでAPIへ送信
- 返り値をPromiseで待受け、ブラウザへ返す
という流れで実装しました。
「Webフォームから入力した書籍名を、Google Books APIへ問い合わせし、返り値を返す」というシナリオで実装します。
(※Google Books API はブラウザからもリクエストを受け付けますが、参考実装ということで)
開発環境は以下のとおりです。
- OS
- Ubuntu Linux (Windows Subsystem for Linux)
- Node
- v10.16.0
- npm
- 6.9.0
Express とbody-parser のインストールとサーバー起動
最初に Express と body-parser のインストールを行う。インストールはnpmを利用
npm install express --save
npm install body-parser --save
インストール後、Expressの起動スクリプトを記述。ポート番号を3000で待ち受け。「http://127.0.0.1:3000/auth/」 のエンドポイントで、POSTリクエストを待ち受ける。
POSTで送られてきたbodyデータを、console.logで出力。
index.js
const express = require('express')
const app = express()
const bodyParser = require('body-parser')
const port = 3000
app.use(bodyParser.urlencoded({
	extended: true
}));
app.use(bodyParser.json());
app.post('/auth/', (req, res) => {
  console.log(req.body);
  res.send("Received POST Data!");
});
app.listen(port, () => console.log(`Example app listening on port ${port}!`))
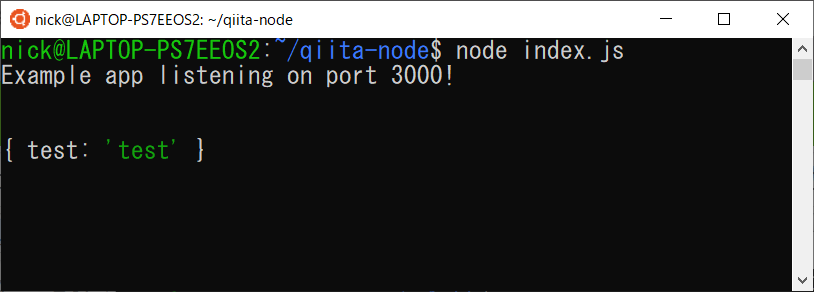
Expressサーバーを起動後、エンドポンイト「auth」にPOSTを送ると、POSTの値が表示される。
curl でPOST送信
curl -X POST -H "Content-Type: application/json" -d '{"test":"test"}' 127.0.0.1:3000/auth
Express サーバーのコンソールに、POSTで送信されたJSON {"test": "test"} が表示されているのがわかる。
POST送信したクライアントには、「Received POST DATA!」という値が返される
requestのインストールとWebAPIへのリクエスト
次に、request を利用した Web APIへのリクエストを実装する。
最初にrequestをインストール。
npm install request --save
次に、requestを利用して、Google Books API へ問い合わせるためのコードを記述。
Google Books API へ、ISBNコードを送信。レスポンスのJSONから、タイトルを表示する。
サンプルデータは、小説家・古川日出男さんの著書「平家物語 犬王の巻」にしてみた。
ISBNコードは
4309025447
となる。
request.js
const request = require('request')
const options = {
	method: 'GET',
	json: true,
	url: "https://www.googleapis.com/books/v1/volumes?q=isbn:4309025447",
}
request(options, function(error, response, body) {
	console.log(body.items[0].volumeInfo.title);
});
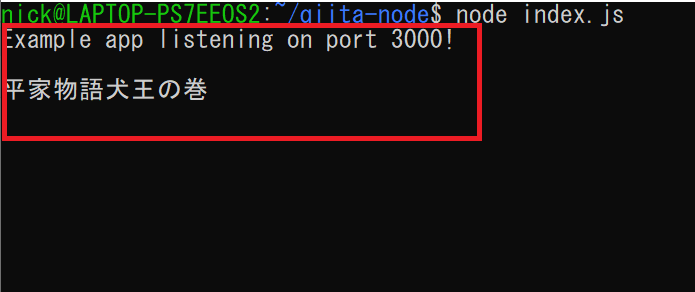
上記のコードを実行すると、Google Books API の返り値からタイトルを取得し、コンソールへ表示を行う。
フォームも含めた実装
上記の2つのコードを統合し、htmlの入力フォームを実装する。
- フォームからISBNコードを入力して、Express サーバーへPOST送信
- Express サーバーがPOSTデータをパースし、Google Books API へリクエスト送信
- Google Books API からのレスポンスからBodyを抽出し、JSONデータとしてhtmlフォームへ返却
- htmlフォーム側の console.log に書籍のタイトルを表示
という流れで実装しました。
Express で静的ファイルをホスティングする
Express では、「express.static」の指定を行うことで、静的ファイルのホスティングパスの指定ができる 。
Express と request のコードをまとめて実装。
index.jsは以下の通り。
「public」ディレクトリを静的ファイルの公開パスと設定。
「/public/index.html」 に保存したhtmlは
で表示されます。
const express = require('express')
const app = express()
const bodyParser = require('body-parser')
const request = require('request')
const port = 3000
app.use('/', express.static('public'));
app.use(bodyParser.urlencoded({
	extended: true
}));
app.use(bodyParser.json());
app.post('/auth/', (req, res) => {
	const options = {
		method: 'GET',
		url: "https://www.googleapis.com/books/v1/volumes?q=isbn:" + req.body.number,
		json: true,
	};
	request(options, function(error, response, body) {
		console.log(body.items[0].volumeInfo.title);
		res.send(body);
	});
});
app.listen(port, () => console.log(`Example app listening on port ${port}!`))
index.html。index.jsで指定した「auth」エンドポイントへ、POSTデータを送信。
<!DOCTYPE html>
<html lang="ja">
<head>
	<meta charset="utf-8">
	<title>Node.js サンプルモック</title>
</head>
<body>
	<div>
		<h2>ISBNコード送信</h2>
		<div>
			<input id="isbn" placeholder="isbn" type="text">
		</div>
		<div>
			<button id="send">送信</button>
		</div>
	</div>
	<script>

	document.getElementById("send").onclick = function() {

	  const isbn = document.getElementById("isbn").value;
	  const json = {"number" : isbn};

	  fetch('http://127.0.0.1:3000/auth/', {

	    method: 'POST',
	    headers: {
	     'content-type': 'application/json',
	    },
	    body: JSON.stringify(json),

	  }).then(response => {

	   return response.json();

	  }).then(res => {

	   console.log(res.items[0].volumeInfo.title);

	     }).catch(error => {

	       console.log(error);
	  });

	};

	</script>
</body>
</html>
Node.js で公開されたindex.htmlに対して、ISBNコード「4309025447」を入力後、送信すると、index.js側でGoogle Books APIに書籍情報を問い合わせ、Express サーバー、index.htmlのコンソールにそれぞれ書籍名が表示されます。


