はじめに
この記事はペライチアドベントカレンダーの23日目の記事です。
20日目の記事に書きましたインフラ構成でnuxtアプリケーションの環境を構築しており、今回はその環境へアプリケーションをデプロイする設定のお話です。
前提
- PRがmainブランチにマージされたら本番環境へ自動でデプロイされるようにしたい。
- デプロイ時にテストを回してすべて合格すること担保したい。
- ciツールはcircleCIを利用する。
- テスト用環境には開発者が指定のブランチをデプロイできるようにしたい。
やったこと
- circleCIの設定ファイル作成
- dotenvの設定
- circleCIへ環境変数の登録
- ローカル環境からのデプロイ
- 本番への自動デプロイ
circleCIの設定ファイル作成
今回このような設定ファイルとしました。
version: 2

defaults: &defaults
  working_directory: ~/build
  docker:
    - image: cimg/python:x.xx.xx-browsers

jobs:
  deploy-production:
    <<: *defaults
    steps:
      - checkout
      - run:
          name: "Node.js と npm の更新"
          command: |
            curl -sSL "https://nodejs.org/dist/vxx.xx.x/node-vxx.xx.x-linux-x64.tar.xz" | sudo tar --strip-components=2 -xJ -C /usr/local/bin/ node-vxx.xx.x-linux-x64/bin/node
            curl https://www.npmjs.com/install.sh | sudo bash
      - run:
          name: 現行バージョンのノードのチェック
          command: node -v
      - run: python -m pip -V
      - run: pip install -U urllib3
      - run: pip install awscli
      - run: npm ci
      - run: npm rebuild node-sass
      - run: npm test
      - run: npm run generate
      - run: aws configure set aws_access_key_id $AWS_PRODUCTION_ACCESS_KEY_ID #key/secretはcircleCIに登録
      - run: aws configure set aws_secret_access_key $AWS_PRODUCTION_SECRET_ACCESS_KEY
      - run: mv .circleci/dotenv/.env.production .env # prd環境用のdotenvをリネームして使う
      - run: source ./.env; aws s3 sync ./dist/ $AWS_BUCKET_URL

  # ローカルから叩く運用を考えるとcicleci CLIだとworkflows使えないのでjobとして一連の処理を登録
  deploy-staging:
    <<: *defaults
    steps:
      - checkout
      - run:
          name: "Node.js と npm の更新"
          command: |
            curl -sSL "https://nodejs.org/dist/vxx.xx.x/node-vxx.xx.x-linux-x64.tar.xz" | sudo tar --strip-components=2 -xJ -C /usr/local/bin/ node-vxx.xx.x-linux-x64/bin/node
            curl https://www.npmjs.com/install.sh | sudo bash
      - run:
          name: 現行バージョンのノードのチェック
          command: node -v
      - run: python -m pip -V
      - run: pip install -U urllib3
      - run: pip install awscli
      - run: npm ci
      - run: npm rebuild node-sass
      - run: npm run generate
      - run: aws configure set aws_access_key_id $AWS_STAGING_ACCESS_KEY_ID #key/secretはコマンドで渡す
      - run: aws configure set aws_secret_access_key $AWS_STAGING_SECRET_ACCESS_KEY
      - run: mv .circleci/dotenv/.env.staging .env # stg環境用のdotenvをリネームして使う
      - run: source ./.env; aws s3 sync ./dist/ $AWS_BUCKET_URL

workflows:
  version: 2
  deploy:
    jobs:
      - hold:
          type: approval
          filters:
            branches:
              only: main
      - deploy-production:
          filters:
            branches:
              only: main
          requires:
            - hold # CircleCI上での承認操作でこのjobを発火する
非常に冗長なコードになっていますが、後述するローカルからのcircleCIのコマンド実行でworkflowが使えないので、大きなジョブを2つドカンと置く記述にしました。(諦めた)
解説
今回nodeのバージョンを個別で指定したかったのでこのような形で個別でnodeをインストールし直しています。
      - run:
          name: "Node.js と npm の更新"
          command: |
            curl -sSL "https://nodejs.org/dist/vxx.xx.x/node-vxx.xx.x-linux-x64.tar.xz" | sudo tar --strip-components=2 -xJ -C /usr/local/bin/ node-vxx.xx.x-linux-x64/bin/node
            curl https://www.npmjs.com/install.sh | sudo bash
AWSのクレデンシャル情報は後述するdotenvには設定せずに、外部から受け取れるようにしています。
      - run: aws configure set aws_access_key_id $AWS_STAGING_ACCESS_KEY_ID #key/secretはコマンドで渡す
      - run: aws configure set aws_secret_access_key $AWS_STAGING_SECRET_ACCESS_KEY
バケットの名前等の環境周りの情報ははdotenvをコピーして切替をしています。
- run: mv .circleci/dotenv/.env.staging .env # stg環境用のdotenvをリネームして使う
mainにマージされたときにジョブを実行する設定です。
一旦は都度確認して本番への反映をさせようと思うので、holdジョブを作成してdeploy-productionでrequiresするようにしました。
  deploy:
    jobs:
      - hold:
          type: approval
          filters:
            branches:
              only: main
      - deploy-production:
          filters:
            branches:
              only: main
          requires:
            - hold # CircleCI上での承認操作でこのjobを発火する
type: approvalをしているとcircleCIのコンソールで一時停止されるので、OKすると後続処理(今回だとdeploy-productionジョブ)が流れる感じになります。

dotenvの設定
デプロイに必要な環境変数をdotenvディレクトリに配置します。
ENVIRONMENT='fugafuga'
AWS_BUCKET_URL='s3://hogehoge'
【再掲】config.ymlで、環境ごとにファイルを用意してcircleCIのジョブの中で環境ごと適切なファイルが設置されるように設定しています。
- run: mv .circleci/dotenv/.env.staging .env # stg環境用のdotenvをリネームして使う
circleCIへ環境変数の登録
AWSのクレデンシャルはリポジトリに保存してはまずいのでcircleCIに直接保存します。
circleCIにログインして、以下のプロジェクトの個別画面にアクセスします。
https://app.circleci.com/pipelines/github/HotStartup/${リポジトリ名}
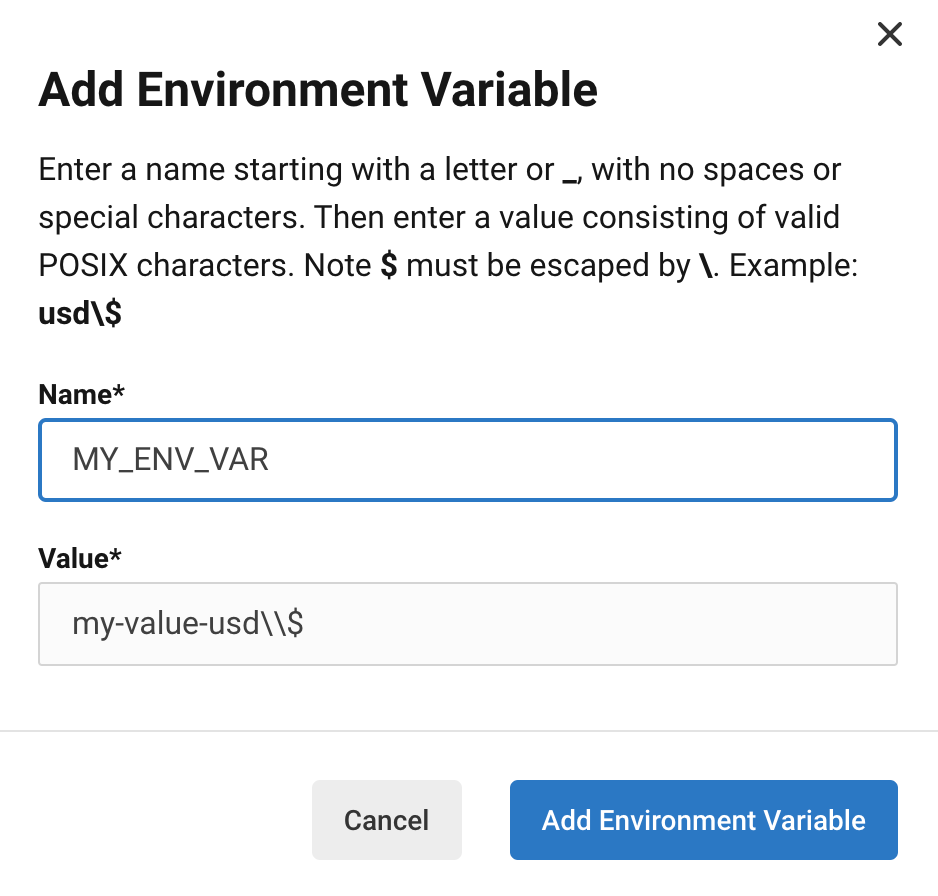
その画面から>Project Settings>Environment Variablesとアクセスし、
Add Environment Variableから必要な環境変数を登録します。
今回は
- AWS_PRODUCTION_ACCESS_KEY_ID
- AWS_PRODUCTION_SECRET_ACCESS_KEY
を登録しました。
ローカル環境からのデプロイ
テスト用環境へのデプロイは開発者が任意のブランチをデプロイできるようにしたいので、circleCIのコマンドをローカルで実行するようにしています。
- まず以下の手順でローカルでcircleCIコマンドが実行できるようにします。
- その後ローカルのPCで該当プロジェクトのルートに移動します。
- ローカルPCのブランチをデプロイしたいものに切り替えます。
- 以下のコマンドを実行することで、config.ymlのdeploy-stagingが実行されデプロイされます。
-
${key}/${secret}は環境に応じたものを指定してください。
-
circleci local execute --job deploy-staging -e AWS_STAGING_ACCESS_KEY_ID=${key} -e AWS_STAGING_SECRET_ACCESS_KEY=${secret}
本番への自動デプロイ
circleCIに設定した内容やconfig.ymlの内容によって、mainブランチにマージが発生した都度deploy-productionジョブが実行され本番環境へのデプロイが実施されるようになっています。
参考記事
https://qiita.com/yushi_koga/items/667d962bff841acc3de1
