今回は
前回の記事(iOSアプリのUIをAndroidライクに作成できるライブラリを作ってみた)
で紹介させていただいたライブラリを使って実際にサンプルアプリを作ってみました。
完成品はこちら
アプリ概要
クライアント: iOS
サーバー: Rails
複数のiOS端末でメッセージチャットが出来る、以上!
サーバー側準備
とりあえずrails newでアプリ作成。
$ rails new chat_test
ActionCableを作成して、
$ rails g channel room chat
ActionCableの設定を修正。
module ChatTest
  class Application < Rails::Application
    config.load_defaults 5.2
    config.action_cable.allowed_request_origins = [/ws:*/]
  end
end
今回は簡単な実装なので全員同じ部屋にぶち込みます。
メッセージが来たら通信が確立されている全端末に届いたメッセージを送信するように設定。
class RoomChannel < ApplicationCable::Channel
  def subscribed
    stream_from "chat_room_channel"
  end

  def chat data
    ActionCable.server.broadcast "chat_room_channel", chat_message: {message: data["message"], uuid: data["uuid"]}
  end
end
あとはサーバーを起動してサーバー側の実装は完了。(ポートはSwiftJsonUIのホットロード機能用に3000と8080を使っているので3100を使用。)
$ rails s -p 3100 -b 0.0.0.0
クライアント側準備
まずはアプリケーションを作成して
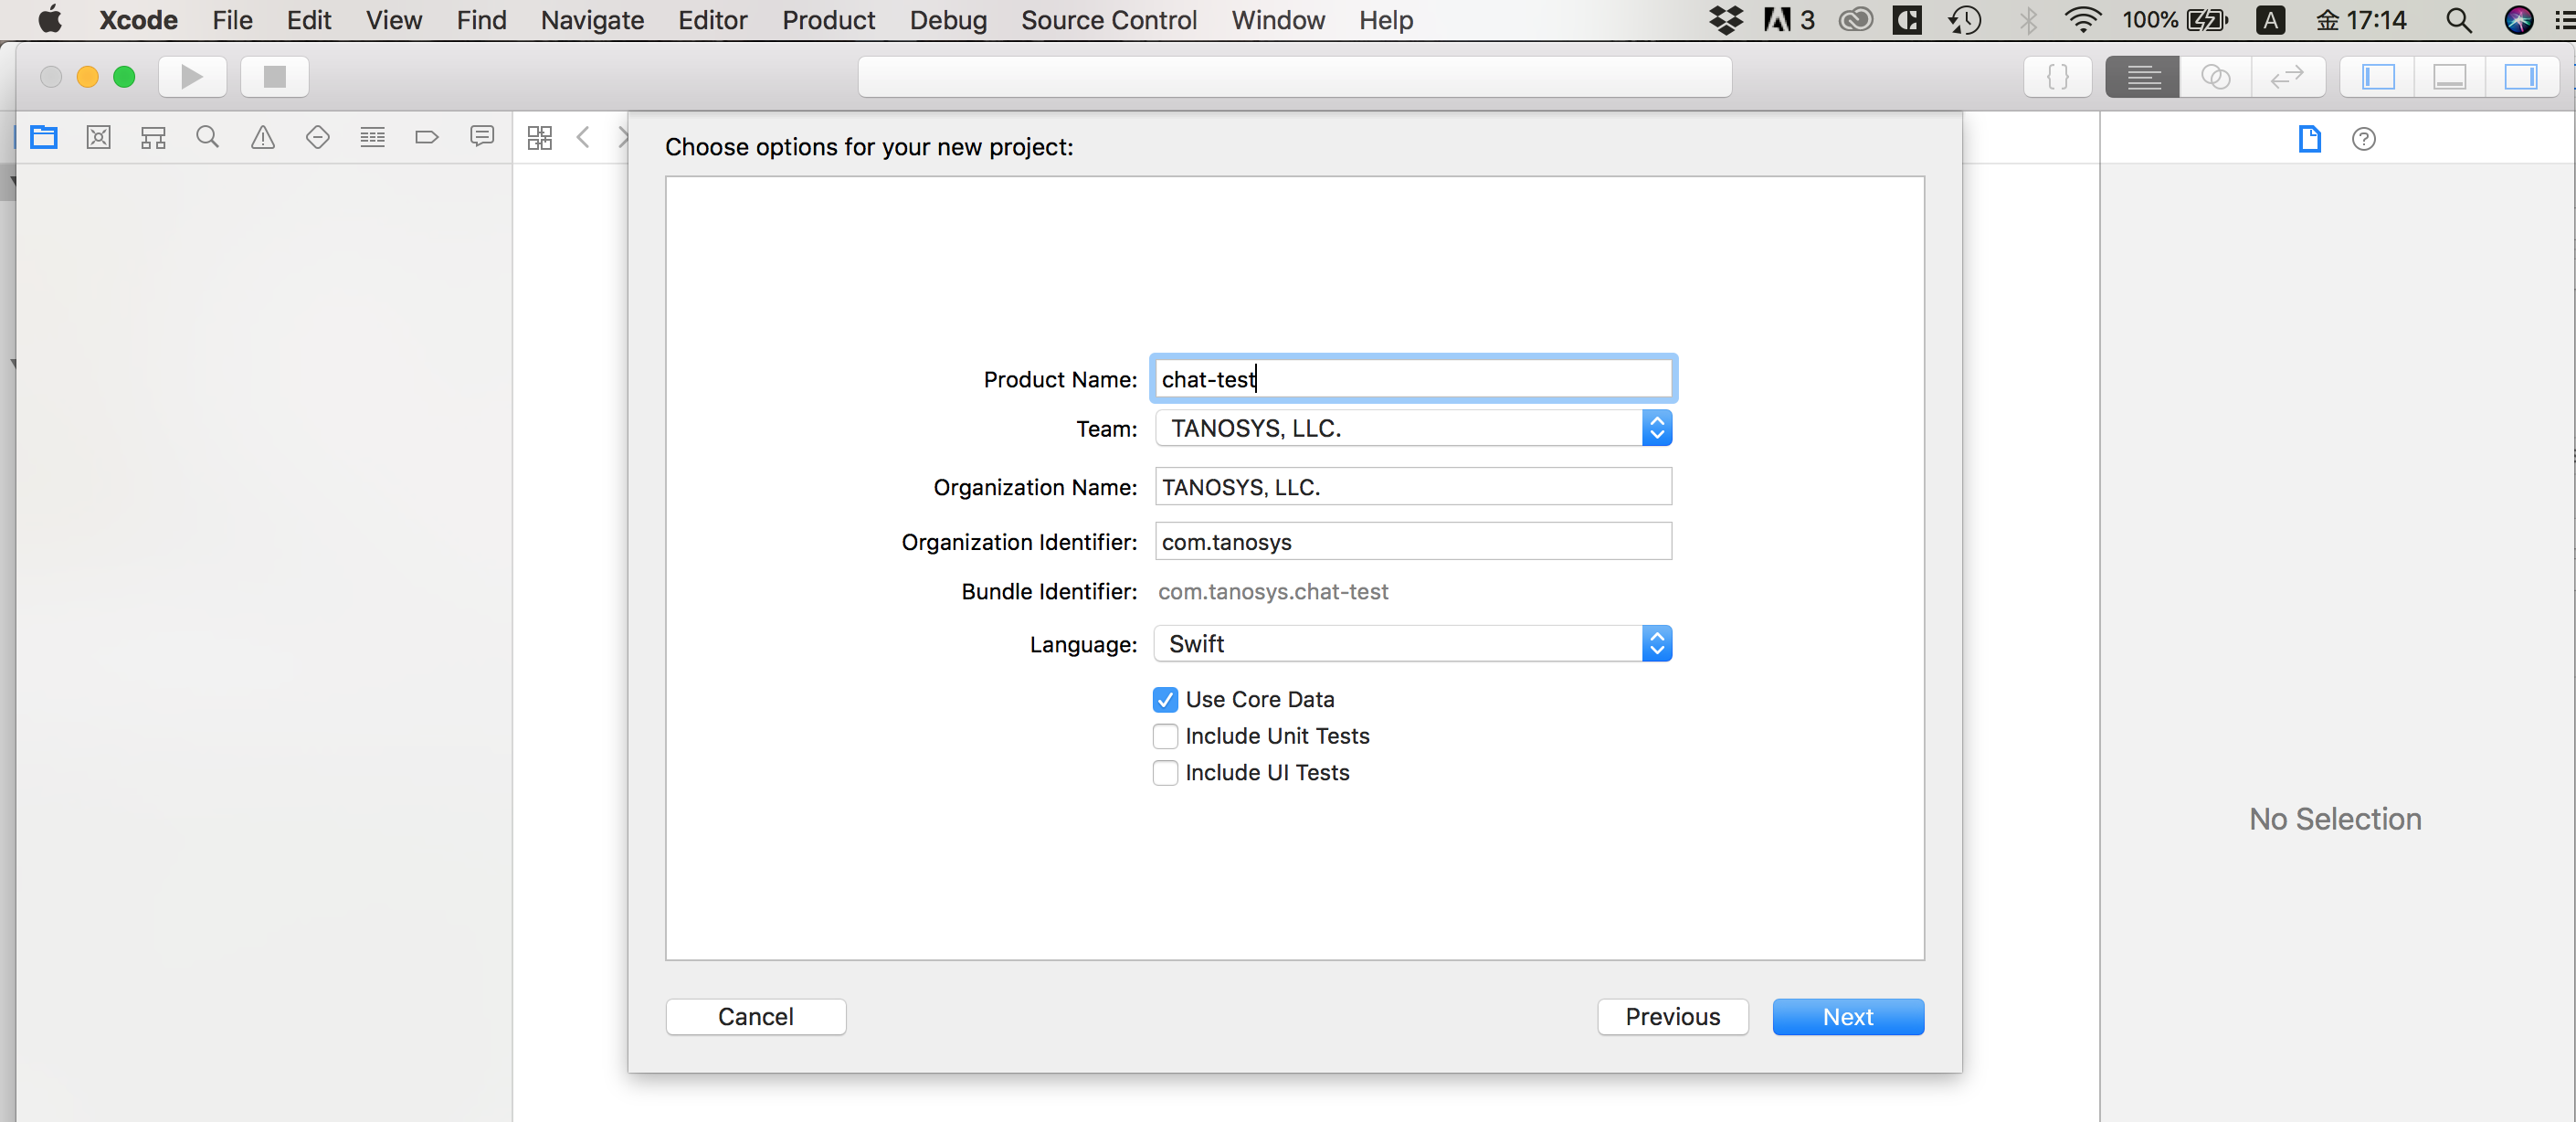
アプリケーションの初期設定でHotLoaderを有効に。詳しくはライブラリのwikiに書いてますのでご確認くださいませ。
    func application(_ application: UIApplication, didFinishLaunchingWithOptions launchOptions: [UIApplication.LaunchOptionsKey: Any]?) -> Bool {
        SJUIViewCreator.copyResourcesToDocuments()
        return true
    }

    func applicationDidBecomeActive(_ application: UIApplication) {
        #if DEBUG
        HotLoader.instance.isHotLoadEnabled = true
        #endif
    }
hot_loaderも微修正して準備完了。
var watcher = chokidar.watch('../chat-test/*/*.json',{
...
}
app.get("/layout_loader", function(req, res, next){
    var filePath = path.join(__dirname, "../chat-test");
チャット用のViewControllerを作成してそれをwindowのrootViewControllerに設定。
StoryBoardは使わないので削除。
チャットのメッセージ用のモデルChatMessageモデル、チャットのWebSocket管理用のクラスChatManager、チャット表示ようのUICollectionViewCellのChatCollectionViewCellを作成して
必要なファイルを揃えた後のプロジェクト構成はこんな感じ。
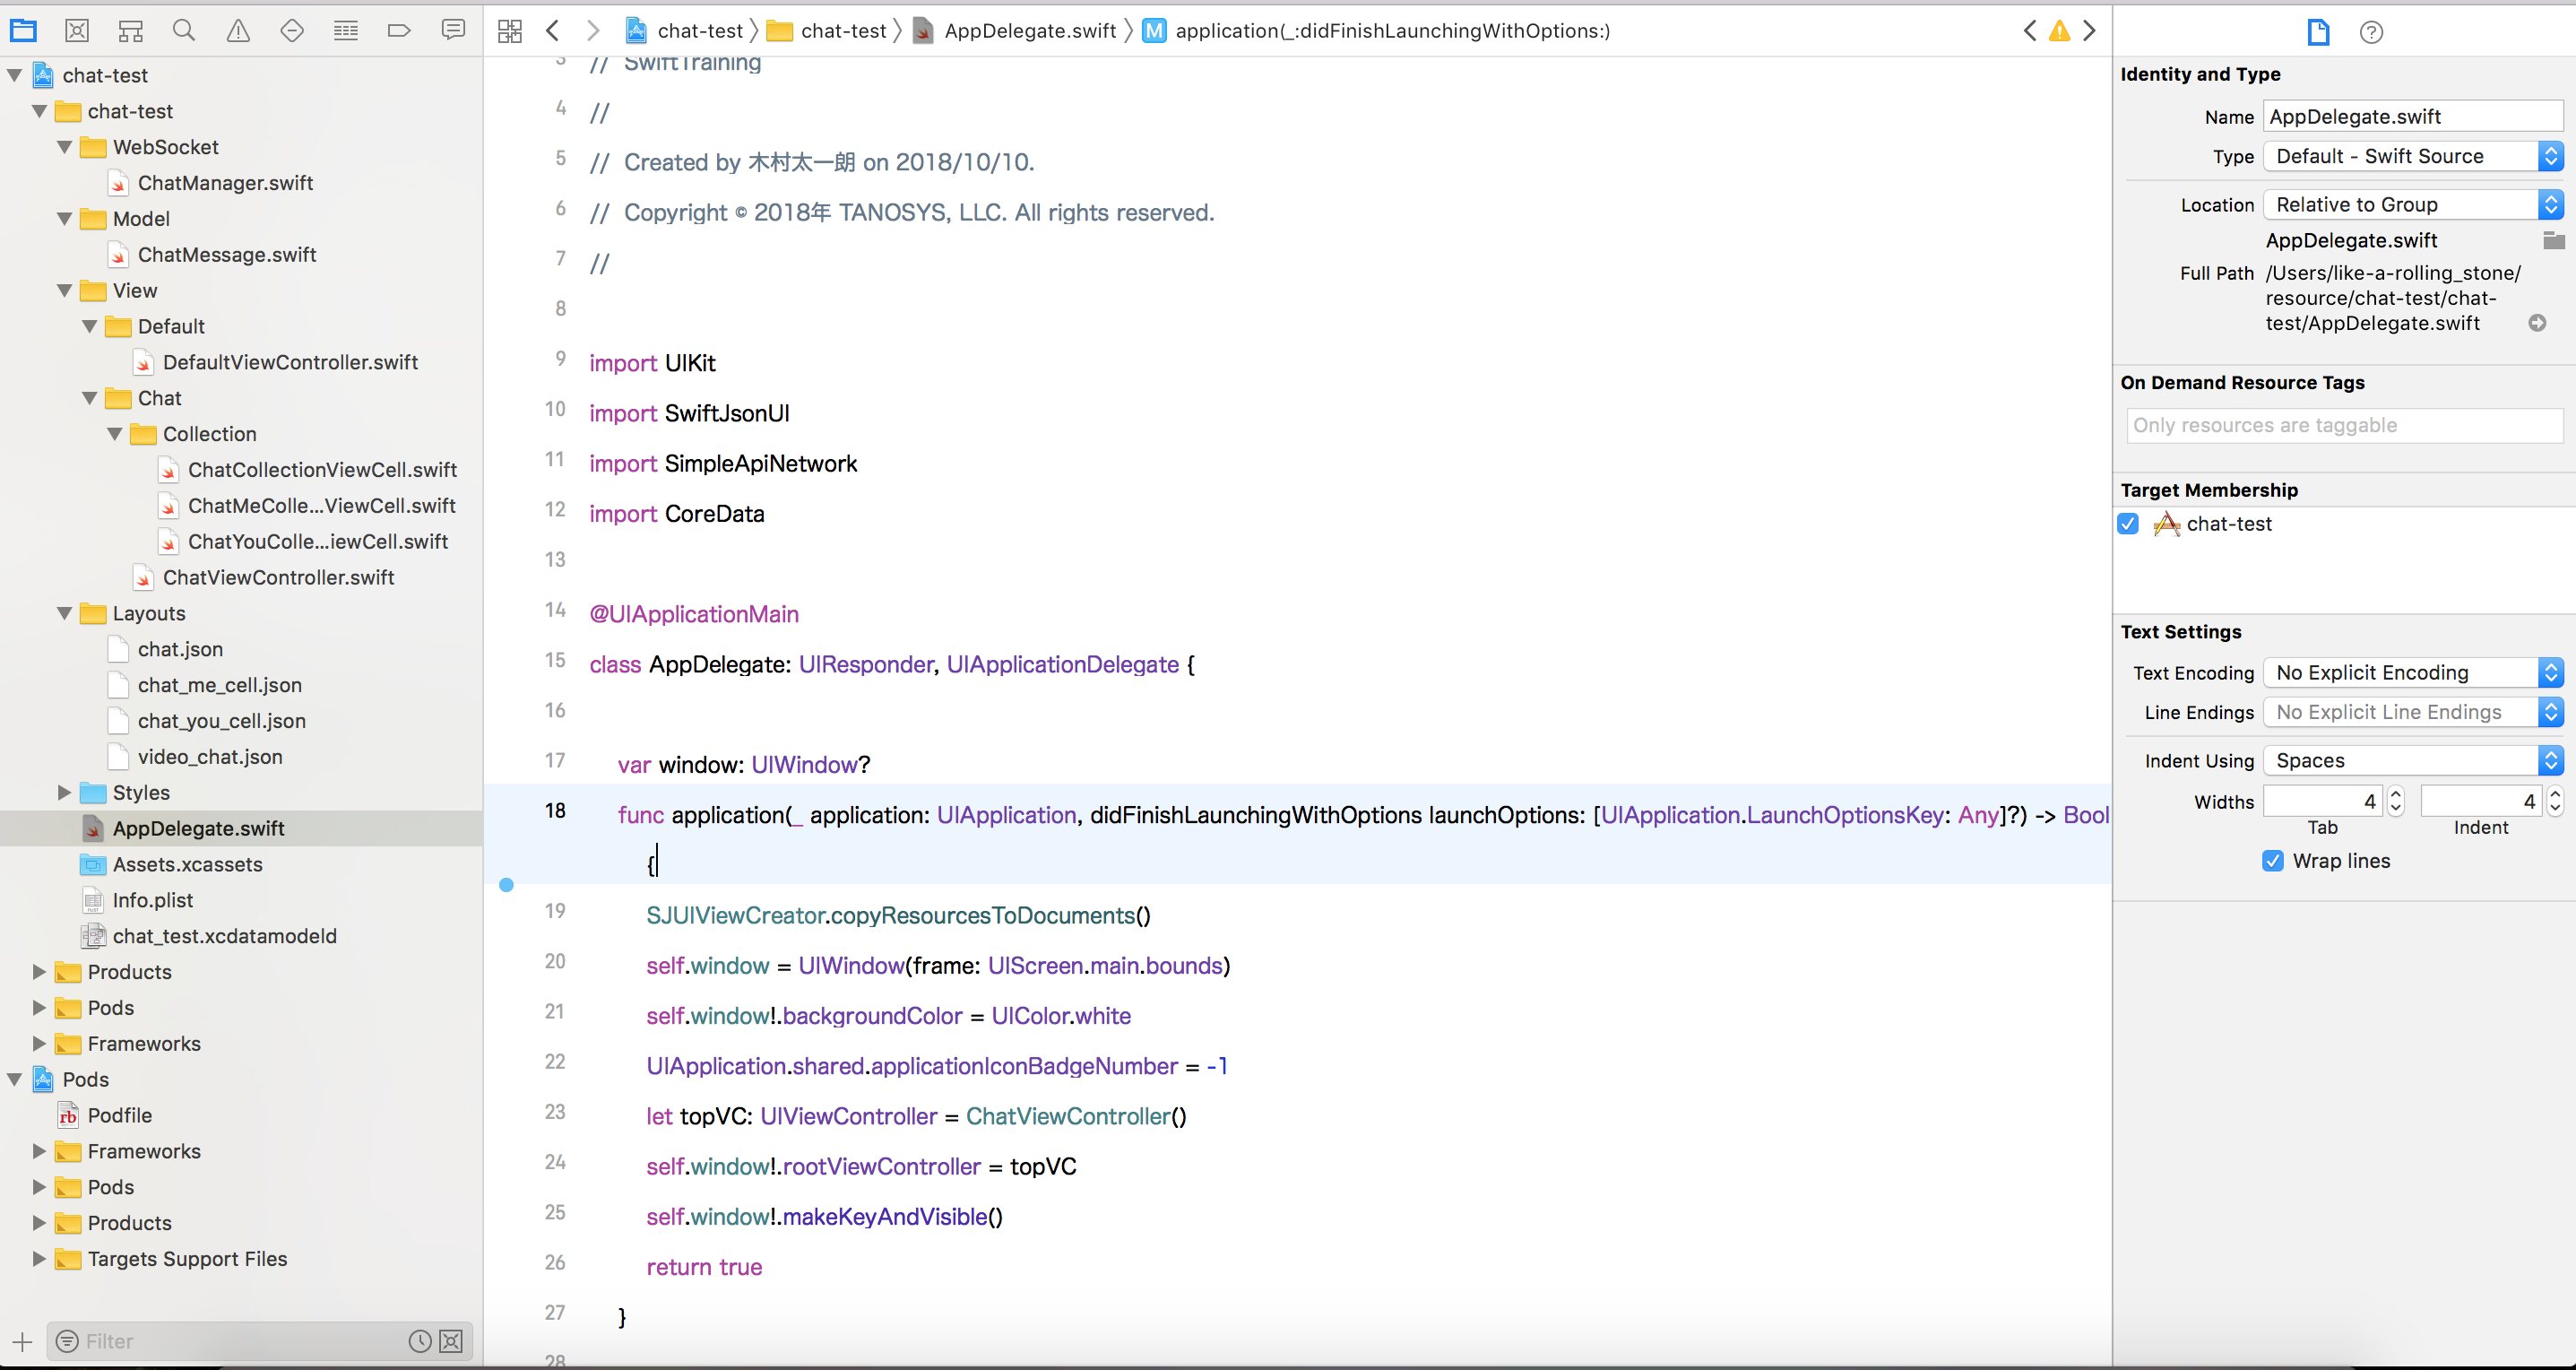
一応今後の拡張も考えて標準ビューコントローラーのDefaultViewControllerも作成。
チャットは自分と自分以外で左右に吹き出しを分けたいのでChatCollectionViewCellの子クラスにChatMeCollectionViewCellとChatYouCollectionViewCellも作成しておきます。
WebSocket通信の管理クラスであるChatManagerクラスはこんな感じ。
今回のメインはSwiftJsonUIのライブラリの使い方なので詳細は省略。
protocol ChatManagerDelegate: class {
    func didConnected()
    func failedToConnect(error: Error)
    func onReceiveMessage(chatMessage: ChatMessage)
    func didSendMessage()
    func failedToSendMessage(error: Error)
}

class ChatManager: WebSocketDelegate {
    private static var Instance = ChatManager()
    public static var instance: ChatManager {
        get {
            return Instance
        }
    }

    public var isChatEnabled: Bool = false
    {
        willSet {
            if newValue != isChatEnabled {
                newValue ? connectToSocket() : disconnectFromSocket()
            }
        }
    }

    weak var delegate: ChatManagerDelegate?

    let uuid = UUID().uuidString

    private lazy var handleQueue: DispatchQueue = DispatchQueue(label: "socket_queue")

    private var _socket: WebSocket?

    private func createSocket() -> WebSocket {
        let socket = WebSocket(url: URL(string: "ws://\((Bundle.main.object(forInfoDictionaryKey: "CurrentIp") as? String) ?? ""):3100/cable/")!)
        socket.delegate = self
        socket.callbackQueue = handleQueue
        return socket
    }

    private func connectToSocket() {
        guard (self._socket == nil || !self._socket!.isConnected) else {
            return
        }
        handleQueue.async(execute: {
            print("connect to server")
            self._socket = self.createSocket()
            self._socket?.connect()
        })
    }

    private func disconnectFromSocket() {
        guard let socket = self._socket, socket.isConnected else {
            return
        }
        handleQueue.async(execute: {
            socket.disconnect()
            self._socket = nil
        })
    }

    func websocketDidConnect(socket: WebSocketClient) {
        handleQueue.async(execute: {
            let time = Date()
            let data = ["action": "subscribed", "data": "\(time)"]
            do {
                let jsonAction = try JSONSerialization.data(withJSONObject: data, options: JSONSerialization.WritingOptions.prettyPrinted)
                let jsonChannel = try JSONSerialization.data(withJSONObject: ["channel": "RoomChannel"], options: JSONSerialization.WritingOptions.prettyPrinted)
                let commandDict = [
                    "command" : "subscribe",
                    "identifier": String(data: jsonChannel, encoding: String.Encoding.utf8)!,
                    "data": String(data: jsonAction, encoding: String.Encoding.utf8)!
                ]
                let jsonData = try JSONSerialization.data(withJSONObject: commandDict, options: JSONSerialization.WritingOptions.prettyPrinted)
                socket.write(string: String(data: jsonData, encoding: String.Encoding.utf8)!)
                DispatchQueue.main.async(execute: {
                    let notification = NSNotification.Name("socketDidConnected")
                    NotificationCenter.default.post(name: notification, object: nil)
                    self.delegate?.didConnected()
                })
            } catch  let error {
                socket.disconnect()
                DispatchQueue.main.async(execute: {
                    self.delegate?.failedToConnect(error: error)
                })
            }
        })
    }

    func websocketDidDisconnect(socket: WebSocketClient, error: Error?) {
        DispatchQueue.main.async(execute: {
            let notification = NSNotification.Name("socketDidDisConnected")
            NotificationCenter.default.post(name: notification, object: nil)
        })
    }

    func websocketDidReceiveMessage(socket: WebSocketClient, text: String) {
        if let data = text.data(using: .utf8) {
            do {
                let json = try JSON(data: data)
                if !json["message"]["chat_message"].isEmpty {
                    DispatchQueue.main.async(execute: {
                        self.delegate?.onReceiveMessage(chatMessage: ChatMessage(json: json["message"]["chat_message"]))
                    })
                }
            } catch let error {
                print("Parse Error: \(error)")
            }
        }
    }

    func websocketDidReceiveData(socket: WebSocketClient, data: Data) {

    }

    func sendMessage(message: String) {
        handleQueue.async(execute: {
            guard let socket = self._socket, socket.isConnected else {
                DispatchQueue.main.async(execute: {
                    let error = NSError(domain: "Socket not connected", code: 500, userInfo: nil)
                    self.delegate?.failedToSendMessage(error: error)
                })
                return
            }
            let data = ["action": "chat", "message": message, "uuid": self.uuid]
            do {
                let jsonAction = try JSONSerialization.data(withJSONObject: data, options: JSONSerialization.WritingOptions.prettyPrinted)
                let jsonChannel = try JSONSerialization.data(withJSONObject: ["channel": "RoomChannel"], options: JSONSerialization.WritingOptions.prettyPrinted)
                let commandDict = [
                    "command" : "message",
                    "identifier": String(data: jsonChannel, encoding: String.Encoding.utf8)!,
                    "data": String(data: jsonAction, encoding: String.Encoding.utf8)!
                ]
                let jsonData = try JSONSerialization.data(withJSONObject: commandDict, options: JSONSerialization.WritingOptions.prettyPrinted)
                socket.write(string: String(data: jsonData, encoding: String.Encoding.utf8)!)
                DispatchQueue.main.async(execute: {
                    self.delegate?.didSendMessage()
                })
            } catch  let error {
                print("Error: \(error)")
                DispatchQueue.main.async(execute: {
                    self.delegate?.failedToSendMessage(error: error)
                })
            }
        })
    }
}
メッセージの送信は
func sendMessage(message: String)
受信周りはWebSocketDelegateで管理。今回は細かい機能はないのでざっくり実装。
ActionCableにリクエスト投げる時のパラメータの構成が独特なのでそこだけ注意。
あとはコントローラーで表示周りの処理を書いていきまーす。
ビューコントローラー実装
とりあえず必要になるプロトコルを全部入れちゃいます。
class ChatViewController: DefaultViewController, UICollectionViewDelegate, UICollectionViewDataSource, ChatManagerDelegate {
アクセスしたいビューたちをBindingに設定
class ChatViewController: DefaultViewController, UICollectionViewDelegate, UICollectionViewDataSource, ChatManagerDelegate {
    private class ViewBinding: Binding {
        weak var rootView: SJUIView!
        weak var collectionView: SJUICollectionView!
        weak var messageArea: SJUIView!
        weak var messageTextView: SJUITextView!
        weak var sendBtn: SJUIButton!
    }
    private lazy var _binding = ViewBinding(viewHolder: self)
ビューのアクティブ、インアクティブのタイミングでチャットの通信の接続/切断
    override func viewWillAppear(_ animated: Bool) {
        super.viewWillAppear(animated)
        ChatManager.instance.delegate = self
        ChatManager.instance.isChatEnabled = true
    }

    override func viewDidDisappear(_ animated: Bool) {
        super.viewDidDisappear(animated)
        ChatManager.instance.isChatEnabled = false
    }
ビューをバインディング&コレクションビューにセルを登録の処理をするメソッドを作成。
iPhoneX系用にsafeAreaのサイズに応じて若干ビューを変更できるように。
   override func initializeView() {
        super.initializeView()
        _binding.collectionView?.constraintInfo?.topMargin = safeAreaInsets.top
        _binding.messageArea?.constraintInfo?.bottomMargin = safeAreaInsets.bottom
        _binding.rootView.resetConstraintInfo()
        _binding.collectionView.delegate = self
        _binding.collectionView.dataSource = self
        _binding.collectionView.register(ChatMeCollectionViewCell.self, forCellWithReuseIdentifier: ChatMeCollectionViewCell.cellIdentifier)
        _binding.collectionView.register(ChatYouCollectionViewCell.self, forCellWithReuseIdentifier: ChatYouCollectionViewCell.cellIdentifier)
    }
こいつをviewDidLoadで呼んであげます。
    override func viewDidLoad() {
        super.viewDidLoad()
        initializeView()
    }
ついでにキーボード表示された時のイベントとかアプリがバックグラウンドに行った時のイベントも登録してあげます。
        let nc = NotificationCenter.default
        nc.addObserver(self, selector: #selector(keyboardWillChangeFrame(_:)), name: UIResponder.keyboardWillChangeFrameNotification, object: nil)
        nc.addObserver(self, selector: #selector(applicationWillEnterForeground), name: NSNotification.Name(rawValue: "applicationWillEnterForeground"), object: nil)
        nc.addObserver(self, selector: #selector(applicationDidBecomeActive), name: NSNotification.Name(rawValue: "applicationDidBecomeActive"), object: nil)
メッセージの送受信系のメソッドも作成。
    func sendMessage() {
        _binding.sendBtn.isEnabled = false
        ChatManager.instance.sendMessage(message: _binding.messageTextView.text)
    }
    func onReceiveMessage(chatMessage: ChatMessage) {
        _chatMessages.append(chatMessage)
        _binding.collectionView.reloadData()
        let lastIndexPath = IndexPath(row: _chatMessages.count - 1, section: 0)
        _binding.collectionView.scrollToItem(at: lastIndexPath, at: .top, animated: true)
    }
    func didSendMessage() {
        _binding.sendBtn.isEnabled = true
        _binding.messageTextView.text = ""
        hideKeyboard()
    }
キーボードが出て来た時の表示管理。
画面のルートビューがキーボードの上部に接地するように。
    override func keyboardWillChangeFrame(_ notification: Foundation.Notification){
        var keyboardFrameEnd: CGRect = ((notification as NSNotification).userInfo![UIResponder.keyboardFrameEndUserInfoKey] as! NSValue).cgRectValue
        keyboardFrameEnd = view.convert(keyboardFrameEnd, to: _binding.rootView)
        let animationDuration: TimeInterval = ((notification as NSNotification).userInfo![UIResponder.keyboardAnimationDurationUserInfoKey] as! NSNumber).doubleValue
        _binding.rootView.constraintInfo?.bottomMargin = keyboardFrameEnd.origin.y >= view.frame.size.height ? 0 : keyboardFrameEnd.size.height - safeAreaInsets.bottom
        view.animateWithConstraintInfo(duration: animationDuration)
    }
あとはコレクションビュー関連のメソッドを実装してしまえば完了。
メッセージのセルのheightをメッセージ量に応じて計算してくれるメソッドはChatCollectionViewCellに実装しておきます。
計算用のcellをプロパティで保持しておいてそれを使って計算。本当は計算結果はキャッシュしておいた方が良いのですが、その辺はやらずに毎回計算。
    func numberOfSections(in collectionView: UICollectionView) -> Int {
        return 1
    }

    func collectionView(_ collectionView: UICollectionView, numberOfItemsInSection section: Int) -> Int {
        return _chatMessages.count
    }

    func collectionView(_ collectionView: UICollectionView, cellForItemAt indexPath: IndexPath) -> UICollectionViewCell {
        let chatMessage = _chatMessages[indexPath.row]
        let cellIdentifier = chatMessage.isMe ? ChatMeCollectionViewCell.cellIdentifier : ChatYouCollectionViewCell.cellIdentifier
        let cell = collectionView.dequeueReusableCell(withReuseIdentifier: cellIdentifier, for: indexPath) as! ChatCollectionViewCell
        cell.applyData(chat: chatMessage)
        return cell
    }

    func collectionView(_ collectionView: UICollectionView, layout collectionViewLayout: UICollectionViewLayout, sizeForItemAtIndexPath indexPath: IndexPath) -> CGSize {
        let height = _demoCell.estimatedHeight(chat: _chatMessages[indexPath.row])
        return CGSize(width: UIScreen.main.bounds.size.width, height: height)
    }
これでビューコントローラー周りは大体完成。
ビュー作成
まずはメインのビューを作成。
{
  "type": "View",
  "id": "root_view",
  "width": "matchParent",
  "height": "matchParent",
  "background": "#dcdcdc",
  "orientation": "vertical",
  "direction": "bottomToTop",
  "canTap": false,
  "onclick": "hideKeyboard",
  "child": [
    {
      "type": "View",
      "id": "message_area",
      "width": "matchParent",
      "height": "wrapContent",
      "orientation": "horizontal",
      "direction": "rightToLeft",
      "paddings": [
        10.0,
        15.0
      ],
      "child": [
        {
          "type": "Button",
          "id": "send_btn",
          "width": 80.0,
          "height": 50.0,
          "centerVertical": true,
          "background": "#01DF01",
          "cornerRadius": 4.0,
          "fontColor": "#ffffff",
          "text": "送信",
          "onclick": "sendMessage"
        },
        {
          "type": "TextView",
          "id": "message_text_view",
          "width": "matchParent",
          "rightMargin": 15.0,
          "minHeight": 50.0,
          "maxHeight": 250.0,
          "flexible": true,
          "background": "#ffffff",
          "cornerRadius": 4.0,
          "containerInset": [
            15.0
          ]
        }
      ]
    },
    {
      "type": "Collection",
      "id": "collection_view",
      "width": "matchParent",
      "height": "matchParent",
      "background": "#f0f0f0"
    }
  ]
}
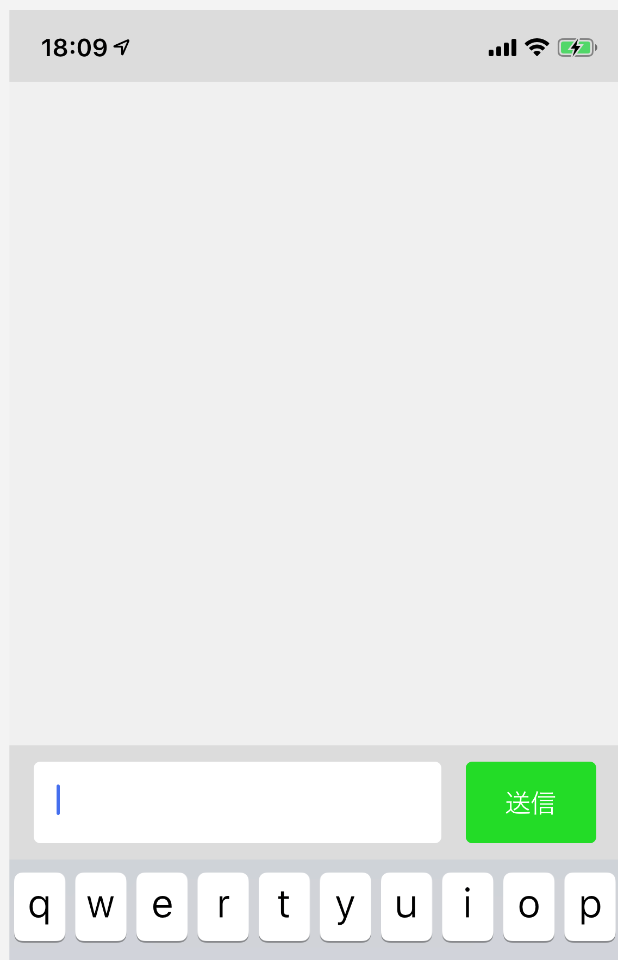
画面表示はこんな感じ。
次に自分側のメッセージを表示するビューを作成。
{
  "type": "View",
  "width": "matchParent",
  "height": "matchParent",
  "paddings": [
    0,
    10.0,
    20.0
  ],
  "child": [
    {
      "type": "Label",
      "id": "message_label",
      "height": "matchParent",
      "alignRight": true,
      "maxWidth": 250.0,
      "edgeInset": [
        15.0,
        20.0
      ],
      "background": "#ffffff",
      "cornerRadius": 4.0,
      "clipToBounds": true,
      "binding": "message"
    }
  ]
}
次は相手側。
{
  "type": "View",
  "width": "matchParent",
  "height": "matchParent",
  "paddings": [
    0,
    10.0
  ],
  "child": [
    {
      "type": "Label",
      "id": "message_label",
      "maxWidth": 250.0,
      "edgeInset": [
        15.0,
        20.0
      ],
      "background": "#ffffff",
      "cornerRadius": 4.0,
      "clipToBounds": true,
      "binding": "message"
    }
  ]
}
これで一通り完成!
実際に動かしてみる。
とりあえず動いていることが確認できたのでオッケー!
今回のサンプルコードはこちらから確認できます。