はじめに
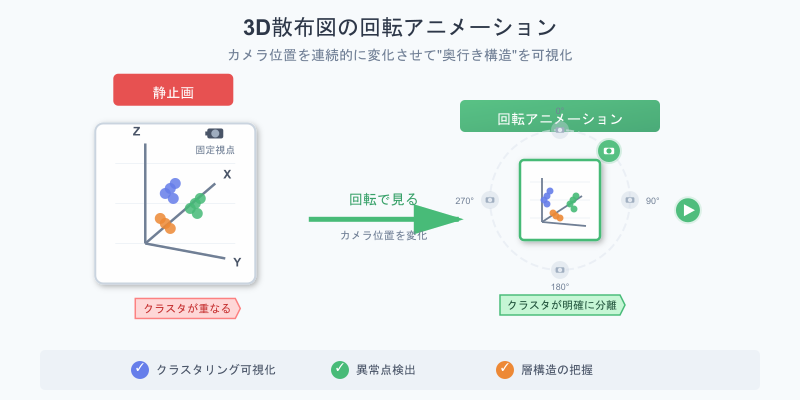
3D散布図は静止画でも情報量は多いですが、
回転アニメーションを付けると"奥行き構造"が飛躍的にわかりやすくなります。
特にクラスタリング可視化・異常点検出・層構造の把握などで効果的。
Plotly ではカメラ位置を時間変化させることで、
3Dグラフに"回転し続けるアニメーション"を簡単に追加できます。
この記事でできること
- 3D散布図に「自動回転アニメーション」を追加
- カメラの角度を時間軸で変化させる
- クラスタ構造・外れ値を"動かして把握"する
- Colabでもそのまま動くコード付き
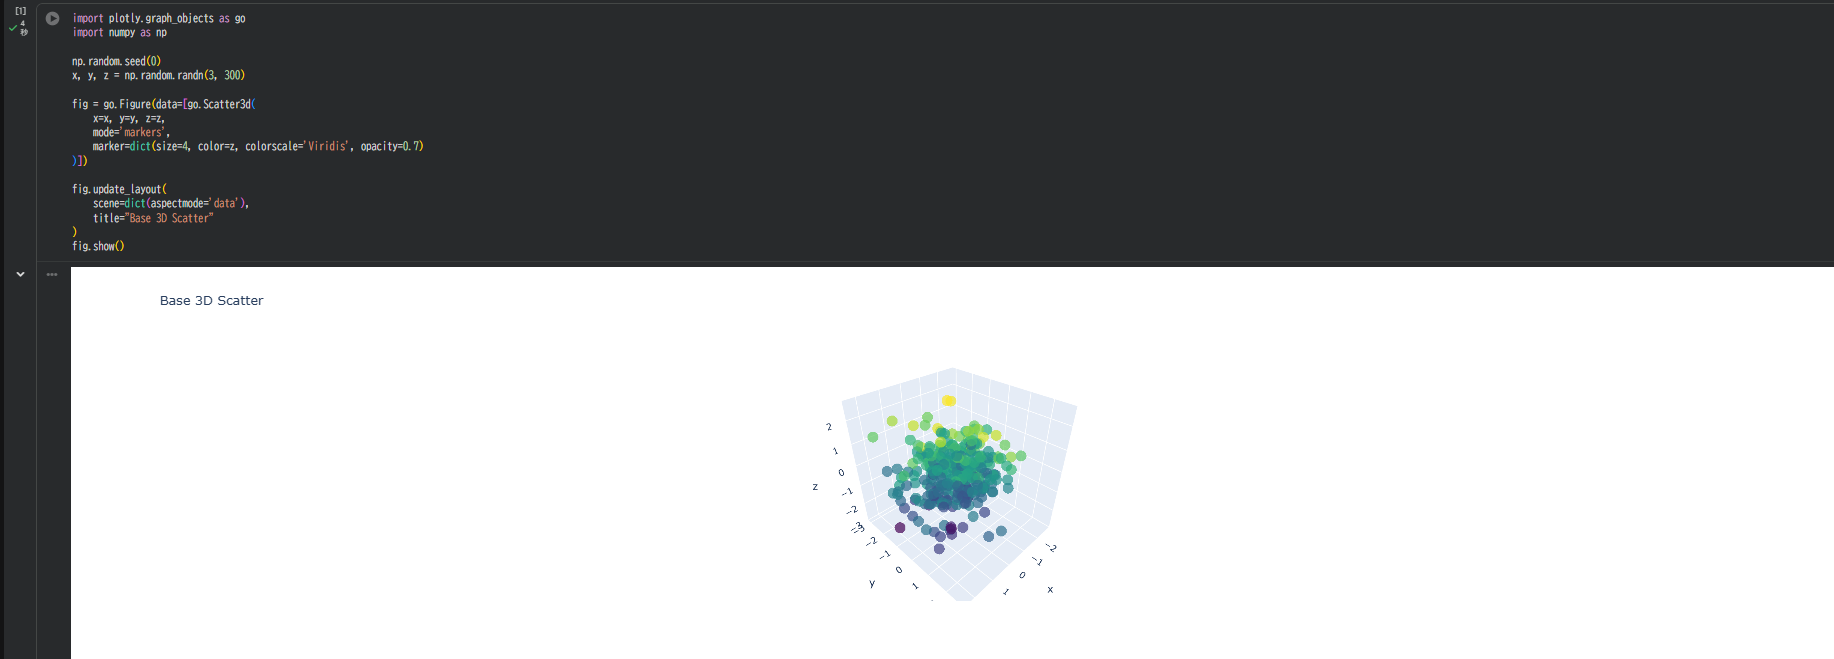
① 基本の3D散布図を作る
まずは動かす対象となる散布図を作成。
import plotly.graph_objects as go
import numpy as np

np.random.seed(0)
x, y, z = np.random.randn(3, 300)

fig = go.Figure(data=[go.Scatter3d(
    x=x, y=y, z=z,
    mode='markers',
    marker=dict(size=4, color=z, colorscale='Viridis', opacity=0.7)
)])

fig.update_layout(
    scene=dict(aspectmode='data'),
    title="Base 3D Scatter"
)
fig.show()
② カメラ角度を変えて "回転" をつくる
Plotlyは カメラ位置(eye) を変化させることで、
3Dグラフを回転させたように見せることができます。
回転フレームを生成する関数
def make_frames():
    frames = []
    for theta in np.linspace(0, 2*np.pi, 60):
        camera = dict(
            eye=dict(
                x=2.0*np.cos(theta),
                y=2.0*np.sin(theta),
                z=1.2
            )
        )
        frames.append(go.Frame(layout=dict(scene_camera=camera)))
    return frames
ポイント:
-
thetaで角度を 0 〜 2π まで変化させる -
np.cos(theta),np.sin(theta)で円周上にカメラを配置 -
z=1.2で視点の高さを固定
③ アニメーションを設定する
frames = make_frames()

fig = go.Figure(
    data=[go.Scatter3d(
        x=x, y=y, z=z,
        mode='markers',
        marker=dict(size=4, color=z, colorscale='Viridis', opacity=0.7)
    )],
    frames=frames
)

fig.update_layout(
    title="Rotating 3D Scatter",
    scene=dict(aspectmode='data'),
    updatemenus=[
        dict(
            type="buttons",
            buttons=[
                dict(
                    label="▶ Rotate",
                    method="animate",
                    args=[
                        None,
                        dict(
                            frame=dict(duration=80, redraw=True),
                            fromcurrent=True,
                            transition=dict(duration=0)
                        )
                    ]
                )
            ]
        )
    ]
)

fig.show()
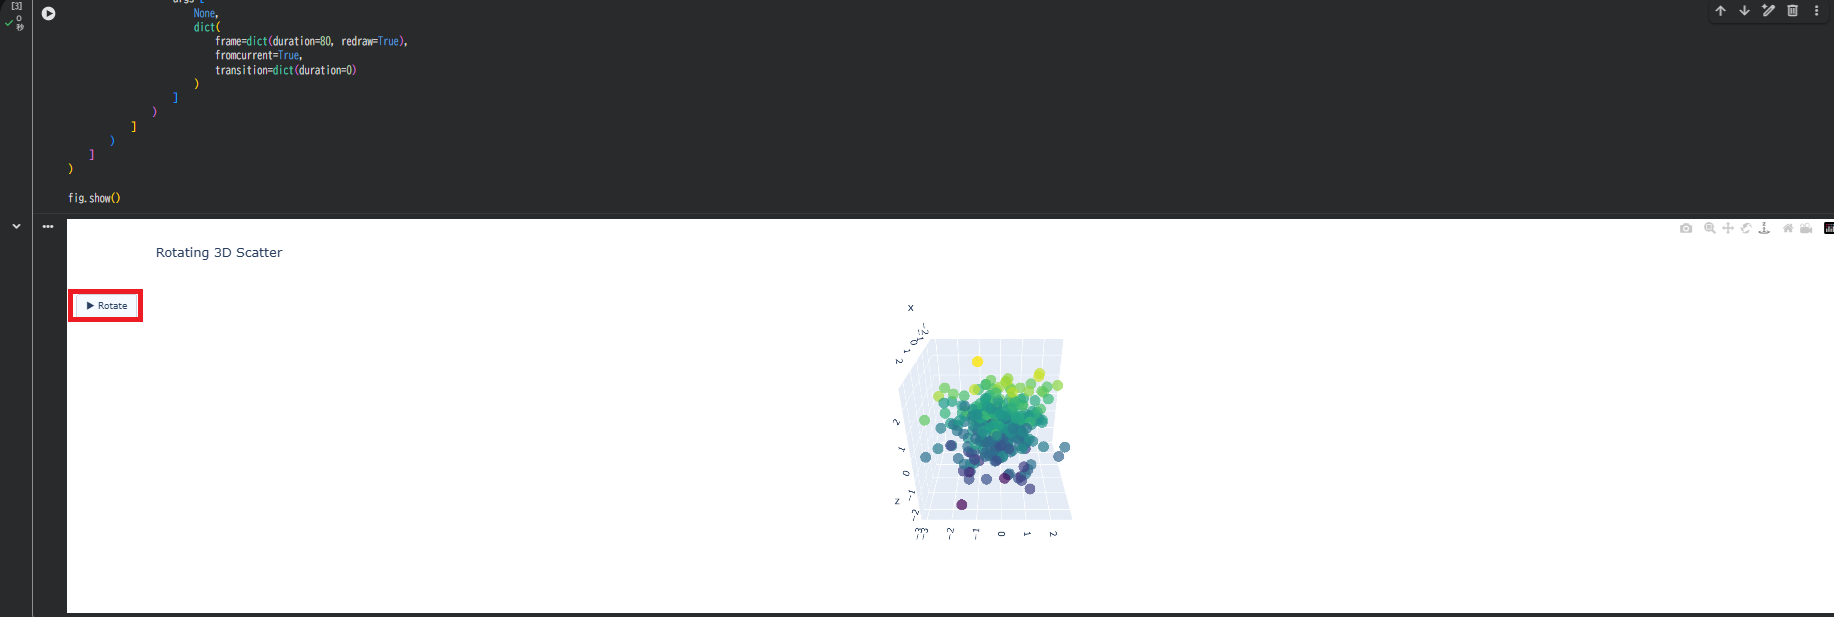
結果
- ▶ Rotate ボタンを押すと、3D散布図がゆっくり回転するアニメーションが再生される
- 動かすことで「どの方向に伸びているか」が一目で把握できる
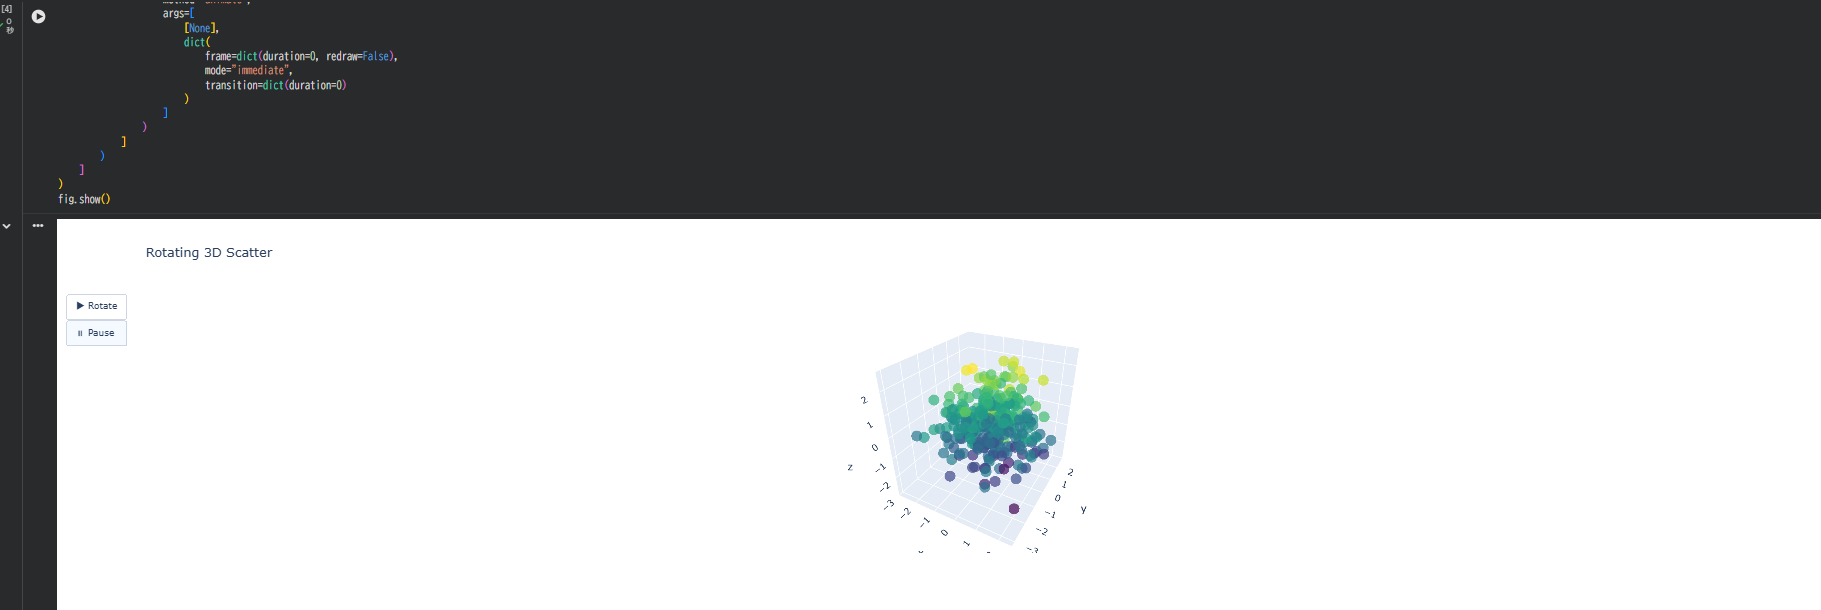
④ 停止・再生ボタンを追加する
fig.update_layout(
    updatemenus=[
        dict(
            type="buttons",
            buttons=[
                dict(
                    label="▶ Play",
                    method="animate",
                    args=[
                        None,
                        dict(
                            frame=dict(duration=80, redraw=True),
                            fromcurrent=True,
                            transition=dict(duration=0),
                            mode='immediate'
                        )
                    ]
                ),
                dict(
                    label="⏸ Pause",
                    method="animate",
                    args=[
                        [None],
                        dict(
                            frame=dict(duration=0, redraw=False),
                            mode="immediate",
                            transition=dict(duration=0)
                        )
                    ]
                )
            ]
        )
    ]
)
fig.show()
ポイント:
- Play/Pause の2つのボタンを用意
- Pause ボタンで
duration=0にして停止 - 見たい角度で止めて詳細を確認できる
⑤ 視点の高さを変える(俯瞰〜仰角)
def make_frames_vertical():
    frames = []
    for phi in np.linspace(-1.5, 1.5, 40):
        camera = dict(eye=dict(x=1.8, y=1.8, z=phi))
        frames.append(go.Frame(layout=dict(scene_camera=camera)))
    return frames

frames_vertical = make_frames_vertical()

fig = go.Figure(
    data=[go.Scatter3d(
        x=x, y=y, z=z,
        mode='markers',
        marker=dict(size=4, color=z, colorscale='Viridis', opacity=0.7)
    )],
    frames=frames_vertical
)

fig.update_layout(
    title="Vertical Camera Movement",
    scene=dict(aspectmode='data'),
    updatemenus=[
        dict(
            type="buttons",
            buttons=[
                dict(
                    label="▶ Up/Down",
                    method="animate",
                    args=[
                        None,
                        dict(frame=dict(duration=100, redraw=True),
                             fromcurrent=True,
                             transition=dict(duration=0))
                    ]
                )
            ]
        )
    ]
)

fig.show()
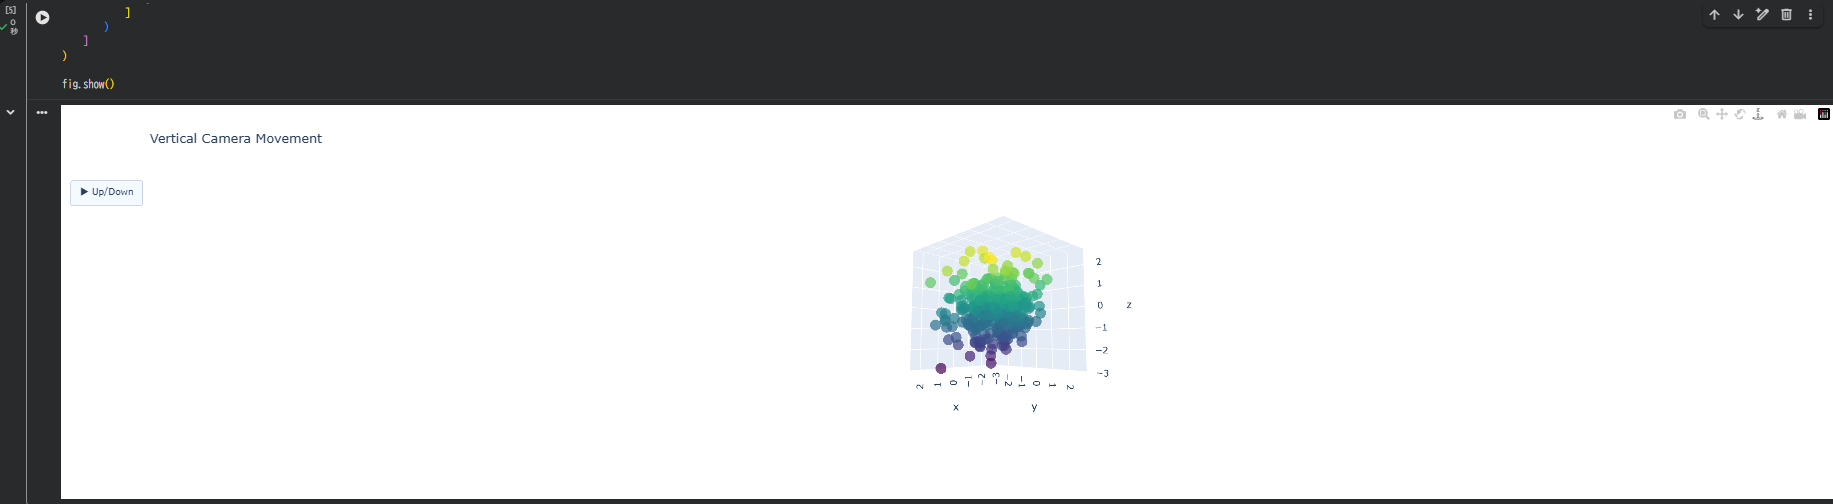
効果:
- 上から・横から・下から…と構造が明確に見える
- クラスタの"高さ方向の偏り"把握に便利
- 注: これは回転ではなく、視点の上下移動です
⑥ 回転+ズームでより立体的に見せる
def make_frames_zoom():
    frames = []
    eye_dist = np.linspace(1.5, 2.5, 60)
    for angle, dist in zip(np.linspace(0, 2*np.pi, 60), eye_dist):
        frames.append(go.Frame(
            layout=dict(
                scene_camera=dict(
                    eye=dict(
                        x=dist*np.cos(angle),
                        y=dist*np.sin(angle),
                        z=1.2
                    )
                )
            )
        ))
    return frames

frames_zoom = make_frames_zoom()

fig = go.Figure(
    data=[go.Scatter3d(
        x=x, y=y, z=z,
        mode='markers',
        marker=dict(size=4, color=z, colorscale='Viridis', opacity=0.7)
    )],
    frames=frames_zoom
)

fig.update_layout(
    title="Rotating + Zooming 3D Scatter",
    scene=dict(aspectmode='data'),
    updatemenus=[
        dict(
            type="buttons",
            buttons=[
                dict(
                    label="▶ Rotate & Zoom",
                    method="animate",
                    args=[
                        None,
                        dict(frame=dict(duration=80, redraw=True),
                             fromcurrent=True,
                             transition=dict(duration=0))
                    ]
                )
            ]
        )
    ]
)

fig.show()
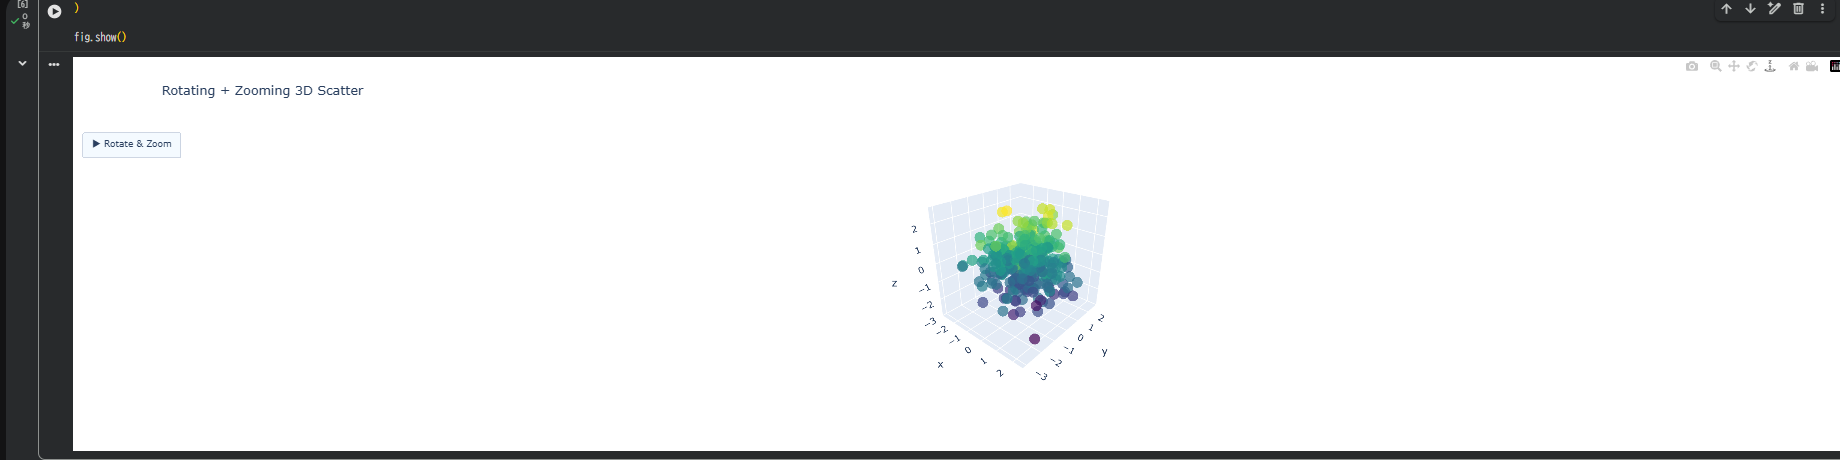
効果:
- 回りながら少しずつズームすると、"立体模型" のような動きになる
- プレゼンや説明資料に最適
⑦ 背景・軸を整えるとアニメーションが見やすくなる
fig.update_layout(
    scene=dict(
        xaxis=dict(
            backgroundcolor='rgb(240,240,240)',
            gridcolor='white',
            showbackground=True
        ),
        yaxis=dict(
            backgroundcolor='rgb(240,240,240)',
            gridcolor='white',
            showbackground=True
        ),
        zaxis=dict(
            backgroundcolor='rgb(248,248,248)',
            gridcolor='white',
            showbackground=True
        ),
        aspectmode='data'
    ),
    title="Enhanced Visual 3D Scatter"
)
ポイント:
- 背景が明るくなると、回転中の点の流れがキレイに見える
- グリッド線を白にすると視認性が向上
トラブルシュート
| 症状 | 原因・対策 |
|---|---|
| Colab で回転が重い | ブラウザ負荷 → 点数を減らす(300→150)、フレーム数を減らす(60→30) |
| 回転が速すぎる |
duration を 80 → 150 へ増やす |
| 回転軸がズレる |
camera.eye の x/y/z 比を調整 |
| もっと滑らかにしたい | frames を 60→120 個に増やす(ただし重くなる) |
| アニメーションが動かない | frames を正しく fig に渡しているか確認 |
まとめ
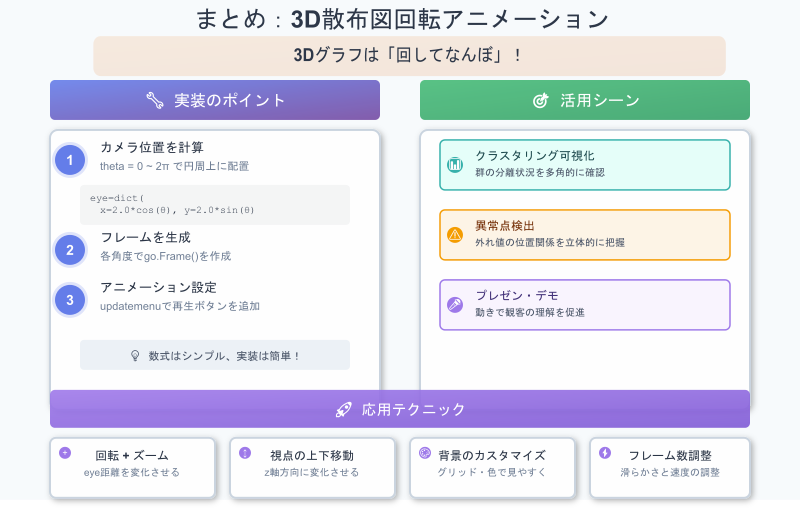
3Dグラフは「回して見る」ことで本領を発揮し、静止画では気づけない構造が一気に見えてきます。
camera.eye を時間変化させれば、回転アニメーションを手軽に実装できます。
クラスタ・外れ値・層構造の違いが立体的に把握しやすくなり、分析の精度も向上します。
ズームや上下移動と組み合わせれば、多角的な視点での可視化が可能です。
プレゼンやデモでも効果的で、理解が深まる見せ方になります。