Shaderを使うと、C#のコーディングで実現できなさそうなUIを簡単にできたりします。今回は写真や動画の縁にぼかしを入れるような仕様でシェーダーを実装してみました。
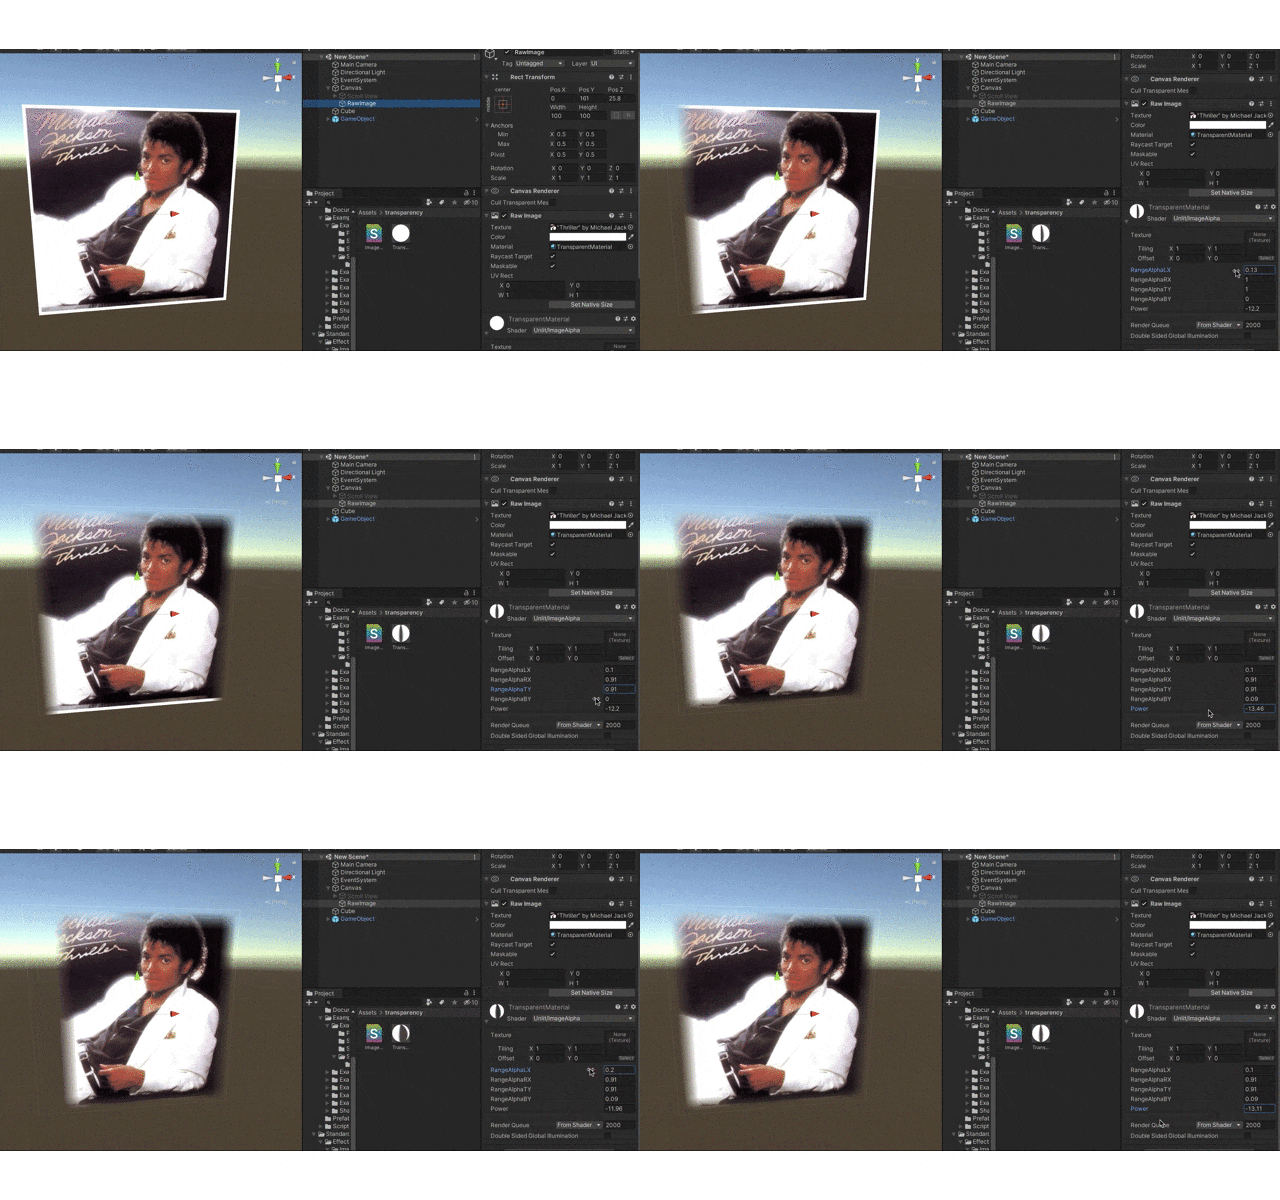
完成図

縁に近いほど透明度が高くなり、漸進的なぼかしを実現しています。ぼかしの強さと全ての方向でぼかしの影響範囲を調整できます。
コード&説明
Shader "Unlit/ImageAlpha"
{
	Properties
	{
		_MainTex ("Texture", 2D) = "white" {}
		_AlphaLX("RangeAlphaLX",Float) = 0
		_AlphaRX("RangeAlphaRX",Float) = 1
		_AlphaTY("RangeAlphaTY",Float) = 1
		_AlphaBY("RangeAlphaBY",Float) = 0
		_AlphaPower("Power",Float) = 0 //ぼかしの強さ
	}
	SubShader
	{
		Tags { "RenderType"="Transparent" }
		Blend SrcAlpha OneMinusSrcAlpha
		Cull Back
		Pass
		{
			CGPROGRAM
			#pragma vertex vert
			#pragma fragment frag

			#include "UnityCG.cginc"

			struct appdata
			{
				float4 vertex : POSITION;
				float2 uv : TEXCOORD0;
			};

			struct v2f
			{
				float2 uv : TEXCOORD0;
				float4 vertex : SV_POSITION;
			};

			sampler2D _MainTex;
			float4 _MainTex_ST;
			float _AlphaPower;
			sampler2D _AlphaTex;
			float _AlphaLX;
			float _AlphaRX;
			float _AlphaTY;
			float _AlphaBY;

			v2f vert (appdata v)
			{
				v2f o;
				o.vertex = UnityObjectToClipPos(v.vertex);
				o.uv = TRANSFORM_TEX(v.uv, _MainTex);
				return o;
			}
			fixed4 SampleSpriteTexture (float2 uv)
			{
				fixed4 color = tex2D (_MainTex, uv);

# if ETC1_EXTERNAL_ALPHA
				// get the color from an external texture (usecase: Alpha support for ETC1 on android)
				color.a = tex2D (_AlphaTex, uv).r;
# endif //ETC1_EXTERNAL_ALPHA

				return color;
			}

			fixed4 frag (v2f i) : SV_Target
			{
				// sample the texture
				fixed4 col = SampleSpriteTexture(i.uv);
				//画素がぼかしの影響範囲内にあるかの判定および画素の透明度の計算
				fixed alphalx = col.a * lerp(1,_AlphaPower,(_AlphaLX-i.uv.x));
				col.a = saturate(lerp(alphalx,col.a,step(_AlphaLX,i.uv.x)));

				fixed alpharx = col.a * lerp(1,_AlphaPower,(i.uv.x-_AlphaRX));
				col.a = saturate(lerp(col.a,alpharx,step(_AlphaRX,i.uv.x)));

				fixed alphaby = col.a * lerp(1,_AlphaPower,(_AlphaBY-i.uv.y));
				col.a = saturate(lerp(alphaby,col.a,step(_AlphaBY,i.uv.y)));

				fixed alphaty = col.a * lerp(1,_AlphaPower,(i.uv.y-_AlphaTY));
				col.a = saturate(lerp(col.a,alphaty,step(_AlphaTY,i.uv.y)));

				return col;
			}
			ENDCG
		}
	}
}
使い方
1、新しいUnlitシェーダーを作成
2、以上のコードをコピペー
3、対象のgameobjectのマテリアルにシェーダーを適用
4、完成図のgifのようにぼかしの強さと影響範囲を調整すれば終わり
さて、コードの肝心な部分だけを簡単に説明します。
Property
Properties
{
    _MainTex ("Texture", 2D) = "white" {}
    _AlphaLX("RangeAlphaLX",Float) = 0
    _AlphaRX("RangeAlphaRX",Float) = 1
    _AlphaTY("RangeAlphaTY",Float) = 1
    _AlphaBY("RangeAlphaBY",Float) = 0
    _AlphaPower("Power",Float) = 0 //ぼかしの強さ
}

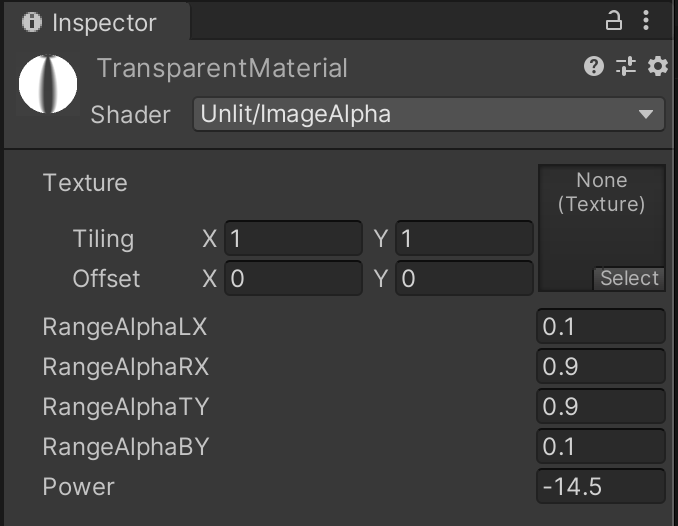
Inspectorから調整できるパラメーターをPropertiesの中に定義しています。
Powerはぼかしの強さを意味していて、マイナス値で設定するべきです。値が小さいほど透明度が高くなり、-100ぐらいにするとぼかしの範囲内がほぼ完全に透明になります。
RangeAlphaは画像の上下左右から画像のどこまでぼかすかの範囲を決めます。例えば、RangeAlphaLX/BYを0.1に設定すると、画像の左/下側の10%の領域にぼかしをかけます。逆にRXとTYを0.9に設定すれば、画像の右/上側の10%の領域にぼかしをかけます。
透明度の計算
fixed4 frag (v2f i) : SV_Target
{
    // sample the texture
    fixed4 col = SampleSpriteTexture(i.uv);
    //画素がぼかしの影響範囲内にあるかの判定および画素の透明度の計算
    fixed alphalx = col.a * lerp(1,_AlphaPower,(_AlphaLX-i.uv.x));
    col.a = saturate(lerp(alphalx,col.a,step(_AlphaLX,i.uv.x)));

    fixed alpharx = col.a * lerp(1,_AlphaPower,(i.uv.x-_AlphaRX));
    col.a = saturate(lerp(col.a,alpharx,step(_AlphaRX,i.uv.x)));

    fixed alphaby = col.a * lerp(1,_AlphaPower,(_AlphaBY-i.uv.y));
    col.a = saturate(lerp(alphaby,col.a,step(_AlphaBY,i.uv.y)));

    fixed alphaty = col.a * lerp(1,_AlphaPower,(i.uv.y-_AlphaTY));
    col.a = saturate(lerp(col.a,alphaty,step(_AlphaTY,i.uv.y)));

    return col;
}
シェーダーを適用したマテリアルの全ての画素に対して、画素を一つずつfrag関数内の処理を経て画素の透明度を計算しています。
それぞれの画素がPropertyで定義したAlphaLX,RX,BY,TYの4つのぼかし領域内にあるかを判定し、もしその領域以内にあれば、col.aでその画素の透明度を計算します。
ちなみに、シェーダー関連の処理はCPUではなく、GPUで計算されているので、if文を書くと処理がかなり遅くなります。条件文を書きたい場合はstep()関数を使うのが一般的と言われています。