前置き
皆様お疲れ様です。
CloudFormation(CFn)使っていますか?
CFnの記事ばかり書いている気がしますが…
本題です。
CFnの記述するうえでほぼ必須ともいえるParametersですが、
どうやって良いのかわからんとなったことはありませんか?
先日SecurityGroupのテンプレートを書いていた際、どうやって書くんや!となったのでその解決策とともにご紹介できればと思います。
困ったこと
下記テンプレートのようにSecurityGroupのIngressやEgressはYAMLで記述するとこのようになります。
NEWSG:
  Condition: CreateSecurityGroup
  Type: AWS::EC2::SecurityGroup
  Properties:
    GroupDescription: !Ref NewSGDescription
    GroupName: !Ref NewSGName
    SecurityGroupEgress:
      - IpProtocol: tcp
        FromPort: 80
        ToPort: 80
        CidrIp: 10.0.0.0/32
    SecurityGroupIngress:
      - IpProtocol: tcp
        FromPort: 80
        ToPort: 80
        CidrIp: 10.0.0.0/32
    VpcId: !Ref VPCID
さあ、皆さんならSecurityGroupEgressとSecurityGroupIngressをどうパラメータ化しますか?
ルールは可変長ですし、dict型とも言い難いこの形式…
サポートに問い合わせたところ、マクロを使ってください~とのことでした…
なるほど…
解決策
マクロ用のLambda関数を作成
まず、マクロってなんぞやという方は、下記リンクをご参照ください。
https://docs.aws.amazon.com/ja_jp/AWSCloudFormation/latest/UserGuide/template-macros.html
https://aws.amazon.com/jp/blogs/news/cloudformation-macros/
実際にマクロを実行するLambda関数を作成します。
下記テンプレートを使用して、スタックを作成しましょう。
AWSTemplateFormatVersion: 2010-09-09
Resources:
  TransformExecutionRole:
    Type: AWS::IAM::Role
    Properties:
      AssumeRolePolicyDocument:
        Version: 2012-10-17
        Statement:
          - Effect: Allow
            Principal:
              Service: [lambda.amazonaws.com]
            Action: ['sts:AssumeRole']
      Path: /
      Policies:
        - PolicyName: root
          PolicyDocument:
            Version: 2012-10-17
            Statement:
              - Effect: Allow
                Action: ['logs:*']
                Resource: 'arn:aws:logs:*:*:*'
  TransformFunction:
    Type: AWS::Lambda::Function
    Properties:
      Code:
        ZipFile: |
          import traceback
          import json
          def obj_iterate(obj, params):
              if isinstance(obj, dict):
                  for k in obj:
                      obj[k] = obj_iterate(obj[k], params)
              elif isinstance(obj, list):
                  for i, v in enumerate(obj):
                      obj[i] = obj_iterate(v, params)
              elif isinstance(obj, str):
                  if obj.startswith("#!PyPlate"):
                      params['output'] = None
                      exec(obj, params)
                      obj = params['output']
              return obj
          def handler(event, context):
              print(json.dumps(event))
              macro_response = {
                  "requestId": event["requestId"],
                  "status": "success"
              }
              try:
                  params = {
                      "params": event["templateParameterValues"],
                      "template": event["fragment"],
                      "account_id": event["accountId"],
                      "region": event["region"]
                  }
                  response = event["fragment"]
                  macro_response["fragment"] = obj_iterate(response, params)
              except Exception as e:
                  traceback.print_exc()
                  macro_response["status"] = "failure"
                  macro_response["errorMessage"] = str(e)
              return macro_response
      Handler: index.handler
      Runtime: python3.6
      Role: !GetAtt TransformExecutionRole.Arn
  TransformFunctionPermissions:
    Type: AWS::Lambda::Permission
    Properties:
      Action: 'lambda:InvokeFunction'
      FunctionName: !GetAtt TransformFunction.Arn
      Principal: 'cloudformation.amazonaws.com'
  Transform:
    Type: AWS::CloudFormation::Macro
    Properties:
      Name: !Sub 'PyPlate'
      Description: Processes inline python in templates
      FunctionName: !GetAtt TransformFunction.Arn
権限周りのリソースと関数本体、AWS::CloudFormation::Macroを作成しています。
関数の中身は、テンプレートを網羅的に確認し、#!PyPlateがあれば、それにくっついてるスクリプトを実行して返す。
のような形です。
(Pythonそんなにがっつり触ってないので解説雑魚ですみません)
続いてSecurityGroupを作成しましょう。
SecurityGroupを含むスタックを作成する
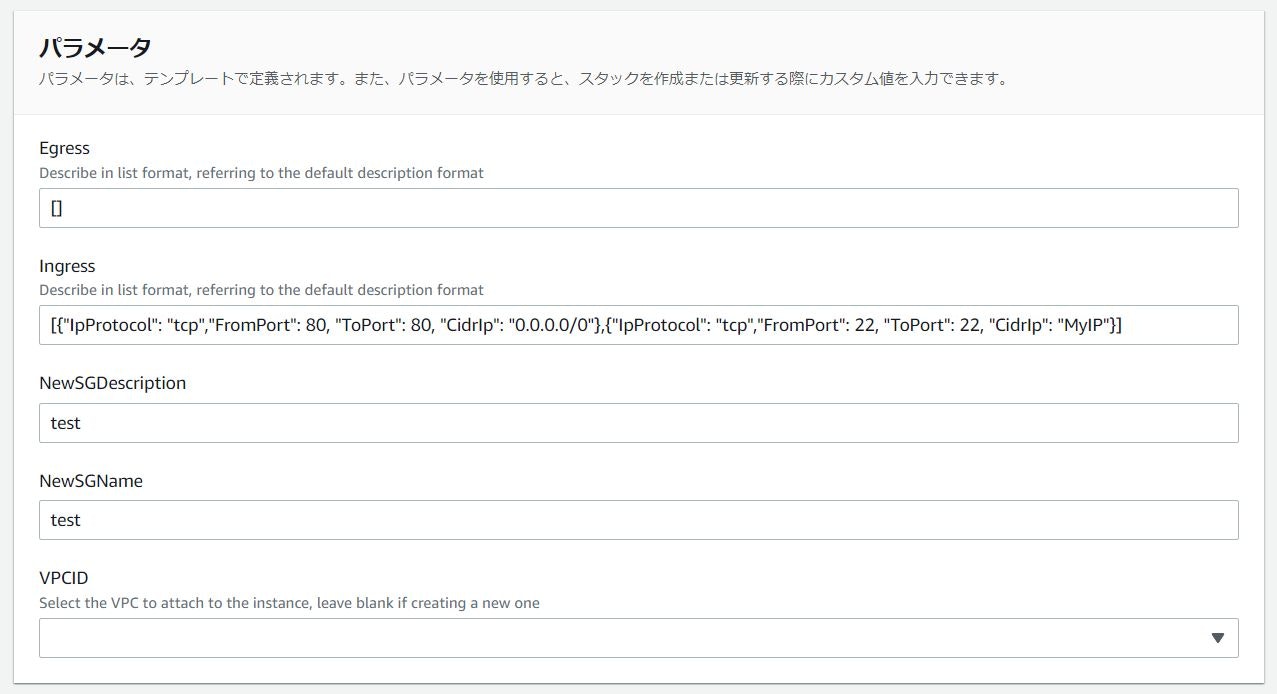
先ほど作成したマクロを呼び出して、ParametersにEgressやIngressを指定できるようにします。
テンプレートは下記の通りです。
AWSTemplateFormatVersion: 2010-09-09

Description: Production Security Group

Parameters:
  Ingress:
    Default: "[{\"IpProtocol\": \"tcp\",\"FromPort\": 80, \"ToPort\": 80, \"CidrIp\": \"0.0.0.0/0\"}]"
    Type: "String"
    Description: Describe in list format, referring to the default description format
  Egress:
    Default: "[{\"IpProtocol\": \"tcp\",\"FromPort\": 80, \"ToPort\": 80, \"CidrIp\": \"0.0.0.0/0\"}]"
    Type: "String"
    Description: Describe in list format, referring to the default description format
  NewSGName:
    Type: String
    MaxLength: 256
    MinLength: 0
  NewSGDescription:
    Type: String
    MaxLength: 256
    MinLength: 1
  VPCID:
    Type: AWS::EC2::VPC::Id
    Description: Select the VPC to attach to the instance, leave blank if creating a new one

Resources:
  InstanceSecurityGroup:
    Type: AWS::EC2::SecurityGroup
    Properties:
      GroupName: !Ref NewSGName
      GroupDescription: Sample
      VpcId: !Ref VPCID
      SecurityGroupEgress: |
        #!PyPlate
        import json
        import socket
        ip = socket.gethostbyname(socket.gethostname())
        myip = "{}/32".format(ip)
        output = json.loads(params['Egress'])
        for rule in output:
          if rule['CidrIp'] == 'MyIP':
            rule['CidrIp'] = myip
      SecurityGroupIngress: |
        #!PyPlate
        import json
        import socket
        ip = socket.gethostbyname(socket.gethostname())
        myip = "{}/32".format(ip)
        output = json.loads(params['Ingress'])
        for rule in output:
          if rule['CidrIp'] == 'MyIP':
            rule['CidrIp'] = myip
Transform: [PyPlate]
ルールの形式は、下記の通りで、list(dict)のような形で記述します。
[{\"IpProtocol\": \"tcp\",\"FromPort\": 80, \"ToPort\": 80, \"CidrIp\": \"0.0.0.0/0\"}]
また、少しアレンジを加えて、CidrIpにMyIPと指定するとローカルIPを入力してくれるようにしています。
(マネコンだと選択できるやつ)
後はスタック作成すれば完了です!
終わりに
今回は、結構同じ悩み抱えている人多そうだな~と思ったので調べたのですが、出てこなかったので記事書いてみました。
Pythonの内容はあまり触ってこなかった私でもわかるくらいの簡単な内容でしたので、マクロか~と毛嫌いせずに挑戦してみてください!
個人的にはめちゃめちゃ感動しましたw
少しでもお役に立てれば幸いです!
