DjangoアプリをAWS EC2にデプロイして社内に公開
ネットワーク環境
AWS VPCと社内ネットワークは、VPN(AWS側はVGW)で接続されていて、それぞれのPCがプライベートIPで認識が可能となっている環境。
開発環境
- AWSリージョン:ap-northeast-1(東京)
- Windows 10(Git Bashインストール済み)
- VS Code
- SSH接続ツール:PowerShell
- Python 3.9.6
- Django 3.2.7
- バージョン管理:AWS CodeCommit
概要
Djangoで作成したアプリケーションをAWSのEC2にデプロイしVPNで社内のみに公開する一連の流れ。
主な作業
- AWS CodeCommitへリポジトリを作成
- ローカル環境で
git clone - Djangoの開発環境を構築
- 機密ファイルの処理
- Djangoアプリケーションを作成
- AWSでEC2(Ubuntu)の作成
- Ubuntuに開発環境と同じバージョンのPythonをインストール
- UbuntuにNginxやPostgreSQLのインストール
- CodeCommitからClone
- 設定ファイルなどの再設定
- Gunicornの設定
- Nginxの設定
- 公開アプリケーションの確認
CodeCommitでリポジトリを新規作成
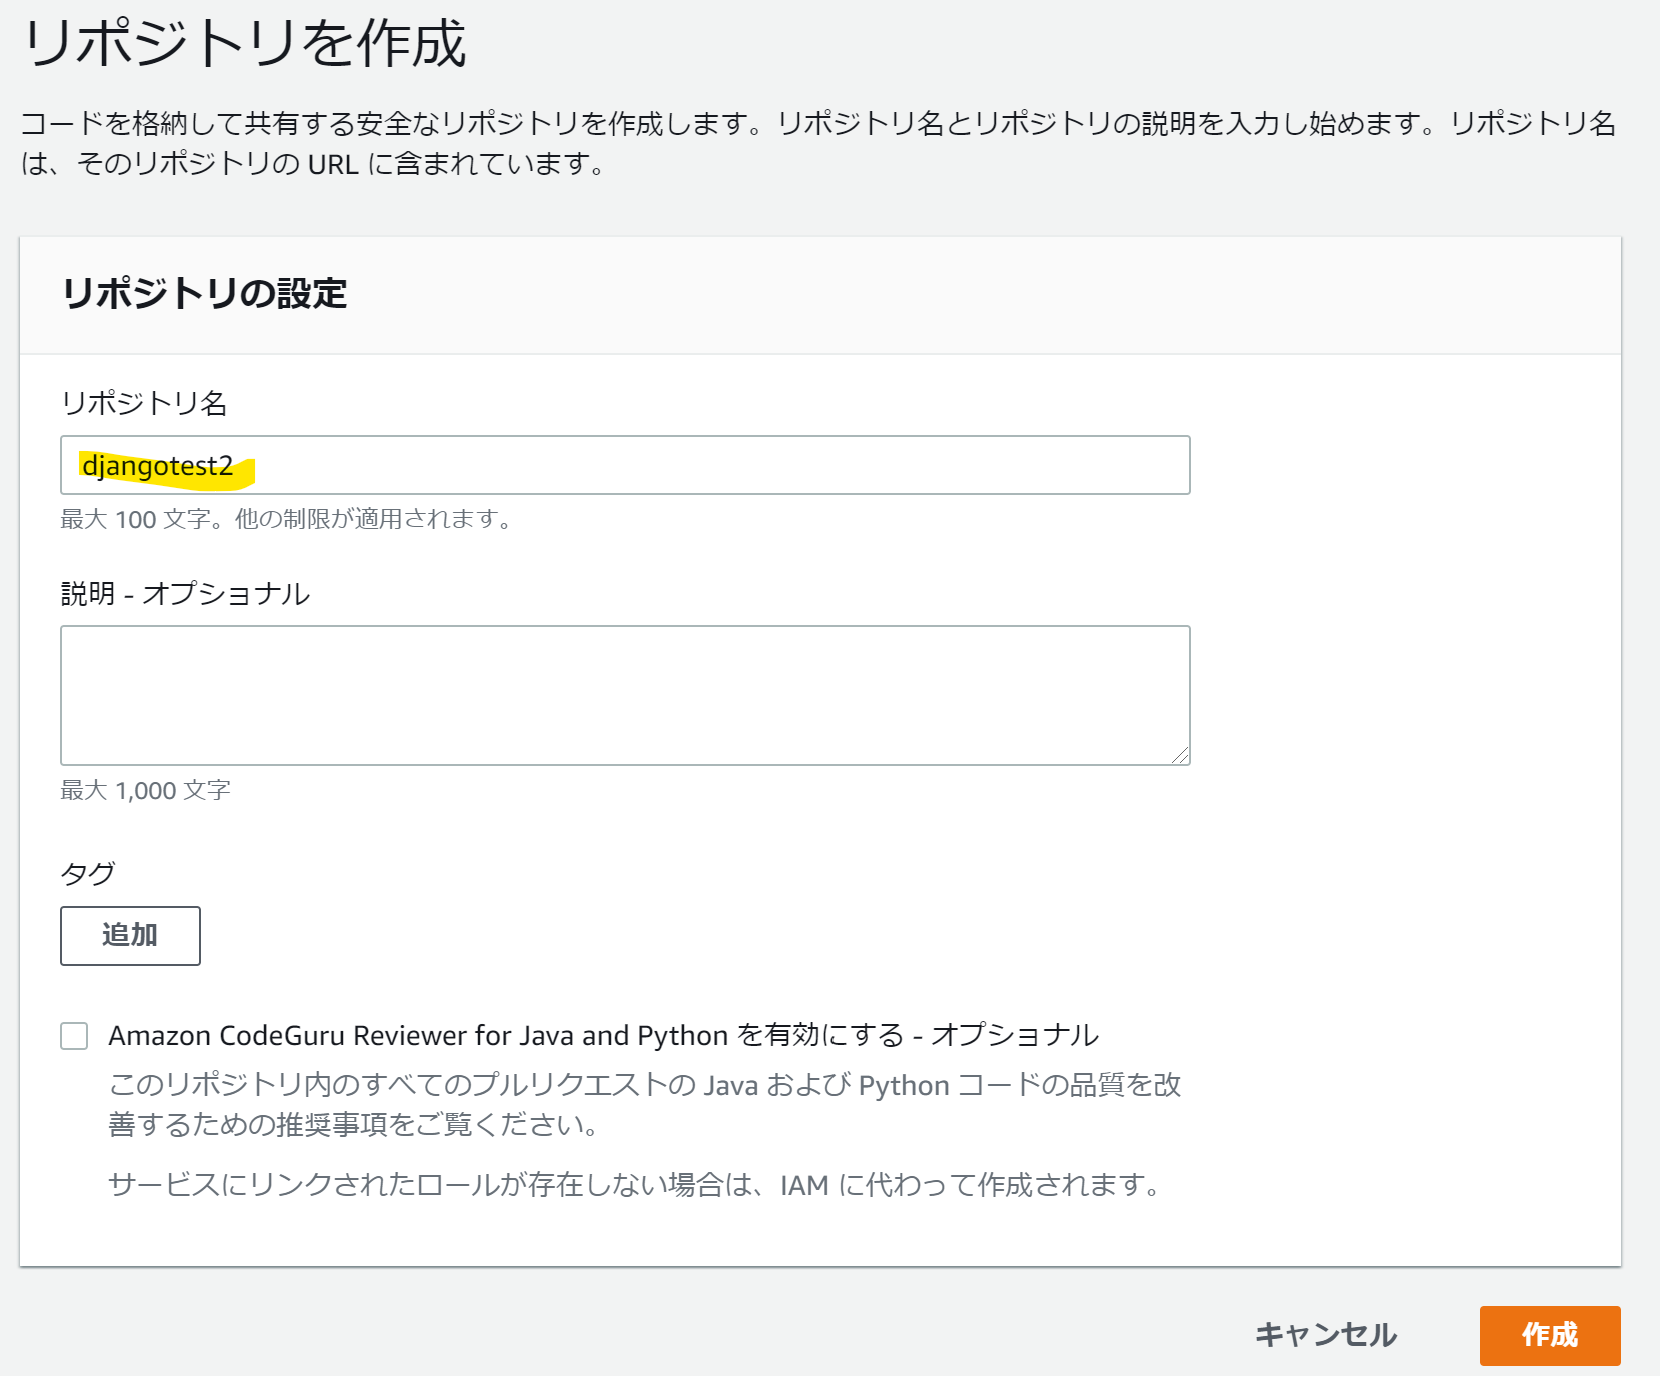
AWSへログインしてCodeCommitへ移動して、今回はdjangotest2という名前でリポジトリを作成。(現時点では空のリポジトリ)
ローカル環境でclone
前提:ローカル環境でCodeCommitにSSH接続できる設定が完了している(方法はリポジトリ作成後のCodeCommitコンソール画面に表示されます)
Git Bashでホームディレクトリに移動(下記pwdコマンドの場所)
$ pwd
/c/Users/User-Name
ローカル環境へリポジトリをCloneすると、ホームディレクトリにdjangotest2というフォルダが作成される
$ git clone ssh://git-codecommit.ap-northeast-1.amazonaws.com/v1/repos/djangotest2
Cloning into 'djangotest2'...
warning: You appear to have cloned an empty repository.
djangotest2フォルダへ移動
フォルダ内にはgitの設定ファイルが存在する
$ cd djangotest2
$ ls -la
total 12
drwxr-xr-x 1 User-Name 1049089 0  9月  9 16:23 ./
drwxr-xr-x 1 User-Name 1049089 0  9月  9 16:23 ../
drwxr-xr-x 1 User-Name 1049089 0  9月  9 16:23 .git/
VS Codeでdjangotest2フォルダを開く
開発環境の構築
PC本体にインストールされているPythonのバージョンを確認(グローバル)
$ python --version
Python 3.9.6
djangotest2フォルダ内にvenvで仮想環境を構築
仮想環境の名前は.venv
下記のコマンドを実行すると.venvというフォルダが作成される
$ python -m venv .venv
仮想環境に入る
$ source .venv/Scripts/activate
仮想環境に入ると下記のような表示になる
(.venv)
User-name MINGWxx ~/djangotest2 (master)
$
仮想環境のpipを最新版に更新する
$ python -m pip install --upgrade pip
Requirement already satisfied: pip in c:\users\User-name\djangotest2\.venv\lib\site-packages (21.1.3)
Collecting pip
  Using cached pip-21.2.4-py3-none-any.whl (1.6 MB)
Installing collected packages: pip
  Attempting uninstall: pip
    Found existing installation: pip 21.1.3
    Uninstalling pip-21.1.3:
      Successfully uninstalled pip-21.1.3
Successfully installed pip-21.2.4
仮想環境内にDjangoなどをインストールする
$ python -m pip install django django-environ dj-database-url django-widget-tweaks django-allauth
.
.
いろいろ表示されるので割愛
.
.
下記の表示になれば成功
Successfully installed ...
インストールされているライブラリを一覧表示
$ pip freeze
asgiref==3.4.1
certifi==2021.5.30
cffi==1.14.6
charset-normalizer==2.0.4
cryptography==3.4.8
defusedxml==0.7.1
dj-database-url==0.5.0
Django==3.2.7
django-allauth==0.45.0
django-environ==0.7.0
django-widget-tweaks==1.4.8
idna==3.2
oauthlib==3.1.1
pycparser==2.20
PyJWT==2.1.0
python3-openid==3.2.0
pytz==2021.1
requests==2.26.0
requests-oauthlib==1.3.0
sqlparse==0.4.2
urllib3==1.26.6
Djangoのプロジェクト(ひな形のようなもの)を作成
プロジェクトの名前はconfigでconfigという名前のフォルダが作成される
$ django-admin startproject config .
現在のdjangotest2フォルダ内の一覧
$ ls -la
total 17
drwxr-xr-x 1 User-Name 1049089   0  9月  9 17:17 ./
drwxr-xr-x 1 User-Name 1049089   0  9月  9 16:23 ../
drwxr-xr-x 1 User-Name 1049089   0  9月  9 16:23 .git/
drwxr-xr-x 1 User-Name 1049089   0  9月  9 16:48 .venv/
drwxr-xr-x 1 User-Name 1049089   0  9月  9 17:17 config/
-rwxr-xr-x 1 User-Name 1049089 684  9月  9 17:17 manage.py*
Djangoのアプリ(ひな形のようなもの)を作成
アプリの名前はappでappという名前のフォルダが作成される
$ django-admin startapp app
現在のdjangotest2フォルダ内の一覧
$ ls -la
total 21
drwxr-xr-x 1 User-Name 1049089   0  9月  9 17:23 ./
drwxr-xr-x 1 User-Name 1049089   0  9月  9 16:23 ../
drwxr-xr-x 1 User-Name 1049089   0  9月  9 16:23 .git/
drwxr-xr-x 1 User-Name 1049089   0  9月  9 16:48 .venv/
drwxr-xr-x 1 User-Name 1049089   0  9月  9 17:23 app/
drwxr-xr-x 1 User-Name 1049089   0  9月  9 17:17 config/
-rwxr-xr-x 1 User-Name 1049089 684  9月  9 17:17 manage.py*
Djangoを起動して正常に設定できたか確認する
$ python manage.py runserver
Watching for file changes with StatReloader
Performing system checks...

System check identified no issues (0 silenced).

You have 18 unapplied migration(s). Your project may not work properly until you apply the migrations for app(s): admin, auth, contenttypes, sessions.
Run 'python manage.py migrate' to apply them.
September 09, 2021 - 17:26:44
Django version 3.2.7, using settings 'config.settings'
Starting development server at http://127.0.0.1:8000/
Quit the server with CTRL-BREAK.
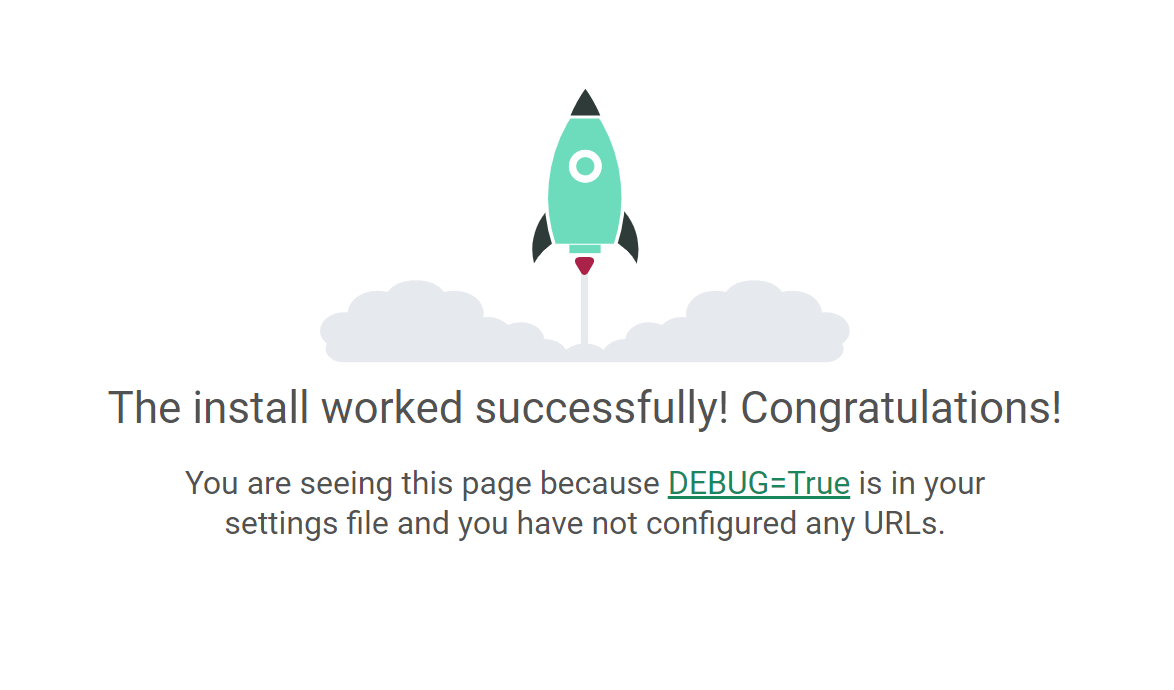
http://127.0.0.1:8000/へアクセスしてロケットが飛んでいればOK
Git Bashをctrl + cでDjangoを停止
機密データの処理
manage.pyがあるフォルダに.envという名前のファイルを作成
$ touch .env
.envファイルに下記を記載(config/settings.pyから転記)
SECRET_KEY=config/settings.pyから転記
DEBUG=False
DATABASE_URL=sqlite:///db.sqlite3
config/settings.pyを修正
import environ #追加
import os #追加

env = environ.Env() #追加
.
.
# Build paths inside the project like this: BASE_DIR / 'subdir'.
BASE_DIR = Path(__file__).resolve().parent.parent
# BASE_DIR = os.path.dirname(os.path.dirname(os.path.abspath(__file__)))
env.read_env(os.path.join(BASE_DIR, '.env')) #追加


# Quick-start development settings - unsuitable for production
# See https://docs.djangoproject.com/en/3.2/howto/deployment/checklist/

# SECURITY WARNING: keep the secret key used in production secret!
SECRET_KEY = env('SECRET_KEY') #変更

# SECURITY WARNING: don't run with debug turned on in production!
DEBUG = env('DEBUG') #変更

ALLOWED_HOSTS = []


# Application definition

INSTALLED_APPS = [
    'django.contrib.admin',
    'django.contrib.auth',
    'django.contrib.contenttypes',
    'django.contrib.sessions',
    'django.contrib.messages',
    'django.contrib.staticfiles',
    'widget_tweaks', #追加
    'app.apps.AppConfig', #追加(単にappとするのはダメと公式ドキュメントに記載されています)
]
.
.
.
DATABASES = {
    # 'default': {
    #     'ENGINE': 'django.db.backends.sqlite3',
    #     'NAME': BASE_DIR / 'db.sqlite3',
    # }
    'default': env.db(), #変更
}
.
.
# Internationalization
# https://docs.djangoproject.com/en/3.2/topics/i18n/

LANGUAGE_CODE = 'ja' #変更

TIME_ZONE = 'Asia/Tokyo' #変更
.
.
.
# Static files (CSS, JavaScript, Images)
# https://docs.djangoproject.com/en/3.2/howto/static-files/

STATIC_URL = '/static/'
STATIC_ROOT = os.path.join(BASE_DIR, 'static') #追加

# MEDIA_URL = '/media/'

# ローカル用設定
# if DEBUG:
    # ALLOWED_HOSTS = ['*']
    # EMAIL_BACKEND = 'django.core.mail.backends.console.EmailBackend'
    # MEDIA_ROOT = os.path.join(BASE_DIR, 'media')

# 本番環境用の設定
# if not DEBUG:
    # import environ
    # env = environ.Env()
    # env.read_env(os.path.join(BASE_DIR,'.env'))

    # SECRET_KEY = env('SECRET_KEY')
    # ALLOWED_HOSTS = env.list('ALLOWED_HOSTS')

    # EMAIL_BACKEND = 'django.core.mail.backends.smtp.EmailBackend'
    # EMAIL_HOST = 'smtp.gmail.com'
    # EMAIL_PORT = 587
    # EMAIL_HOST_USER = env('EMAIL_HOST_USER')
    # EMAIL_HOST_PASSWORD = env('EMAIL_HOST_PASSWORD')
    # EMAIL_USE_TLS = True

    # STATIC_ROOT = '/usr/share/nginx/html/static'
    # MEDIA_ROOT = '/usr/share/nginx/html/media'
.
.
INSTALLED_APPSには優先度があるため、優先したいものをリストの先頭から並べる必要がある
configにlocal_settings.pyを作成
DEBUG = True
SECRET_KEY = 'xxxxxxxxxxxxxxxxxxxxxxxxxxx'
.gitignoreファイルの作成
manage.pyがあるフォルダに.gitignoreという名前のファイルを作成
$ touch .gitignore
.gitignoreファイルに下記を記載(CodeCommitにPushしないファイルなど)
.env
.venv/
db.sqlite3
.vscode
__pycache__
*.pyc
.DS_Store
media
images
local_settings.py
動作に必要なライブラリを本番環境で入れるためにrequirements.txt作る
ローカルで使っているライブラリを書き出す
EC2でこれを使ってライブラリをインストールします
$ pip freeze > requirements-dev.txt
ローカルのライブラリ以外にEC2で追加で使うライブラリを追加
requirements.txtを作成
$ touch requirements.txt
requirements.txtに下記を記載
-r requirements-dev.txt
gunicorn
psycopg2
開発環境 + 本番環境追加分という書き方
現在のフォルダ内の構成
$ ls -la
total 29
drwxr-xr-x 1 User-Name 1049089   0  9月  9 18:07 ./
drwxr-xr-x 1 User-Name 1049089   0  9月  9 16:23 ../
-rw-r--r-- 1 User-Name 1049089 127  9月  9 17:42 .env
drwxr-xr-x 1 User-Name 1049089   0  9月  9 16:23 .git/
-rw-r--r-- 1 User-Name 1049089  14  9月  9 17:57 .gitignore
drwxr-xr-x 1 User-Name 1049089   0  9月  9 16:48 .venv/
drwxr-xr-x 1 User-Name 1049089   0  9月  9 17:23 app/
drwxr-xr-x 1 User-Name 1049089   0  9月  9 17:26 config/
-rw-r--r-- 1 User-Name 1049089   0  9月  9 17:26 db.sqlite3
-rwxr-xr-x 1 User-Name 1049089 684  9月  9 17:17 manage.py*
-rw-r--r-- 1 User-Name 1049089  45  9月  9 18:07 requirements.txt
-rw-r--r-- 1 User-Name 1049089 109  9月  9 18:03 requirements-dev.txt
簡単なDjangoアプリを作成する
config/urls.pyを修正
from django.contrib import admin
from django.urls import path, include #追加

urlpatterns = [
    path('admin/', admin.site.urls),
    path('', include("app.urls")) #追加
]
urls.pyをappディレクトリのなかに作成
app/urls.pyを作成して下記を記載
from django.urls import path
from . import views

urlpatterns = [
    path('', views.index, name='index'),
]
appディレクトリのviews.pyを修正
app/views.pyへ下記を記載
from django.shortcuts import render
from django.http import HttpResponse


def index(request):
    return HttpResponse('現在テスト中。。。')
Djangoを起動して正常に設定できたか確認する
$ python manage.py runserver
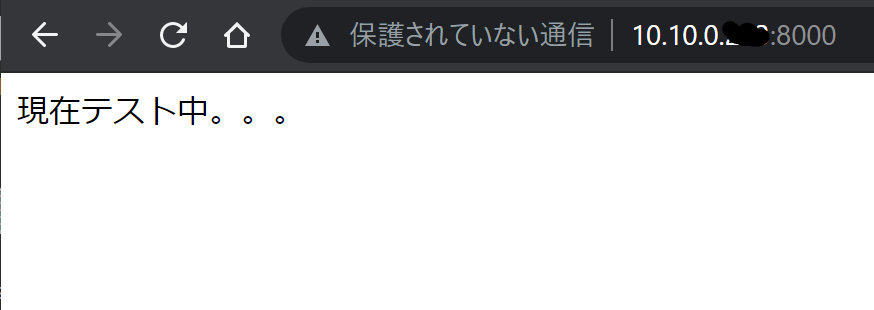
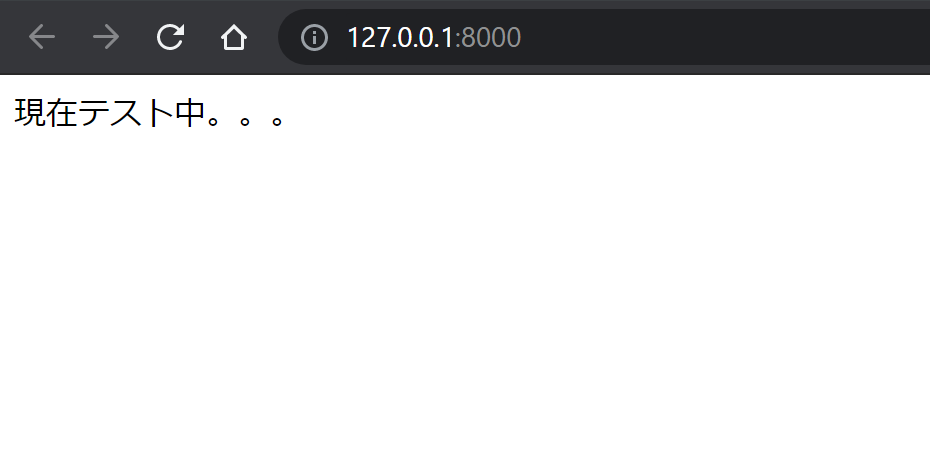
http://127.0.0.1:8000/へアクセスして下図のように表示されればOK
Git Bashをctrl + cでDjangoを停止
Djangoの管理者ページの設定
manage.pyがある階層にstaticフォルダを作成する
$ mkdir static
staticファイルを集めるコマンドの実行
$ python manage.py collectstatic

128 static files copied to 'C:\Users\user-name\djangotest2\static'.
Djangoを起動して正常に設定できたか確認する
$ python manage.py runserver
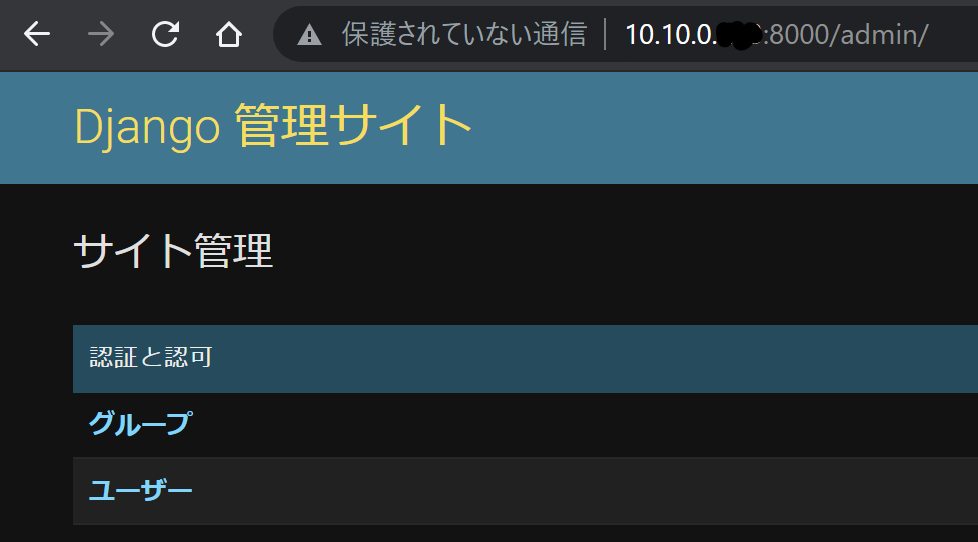
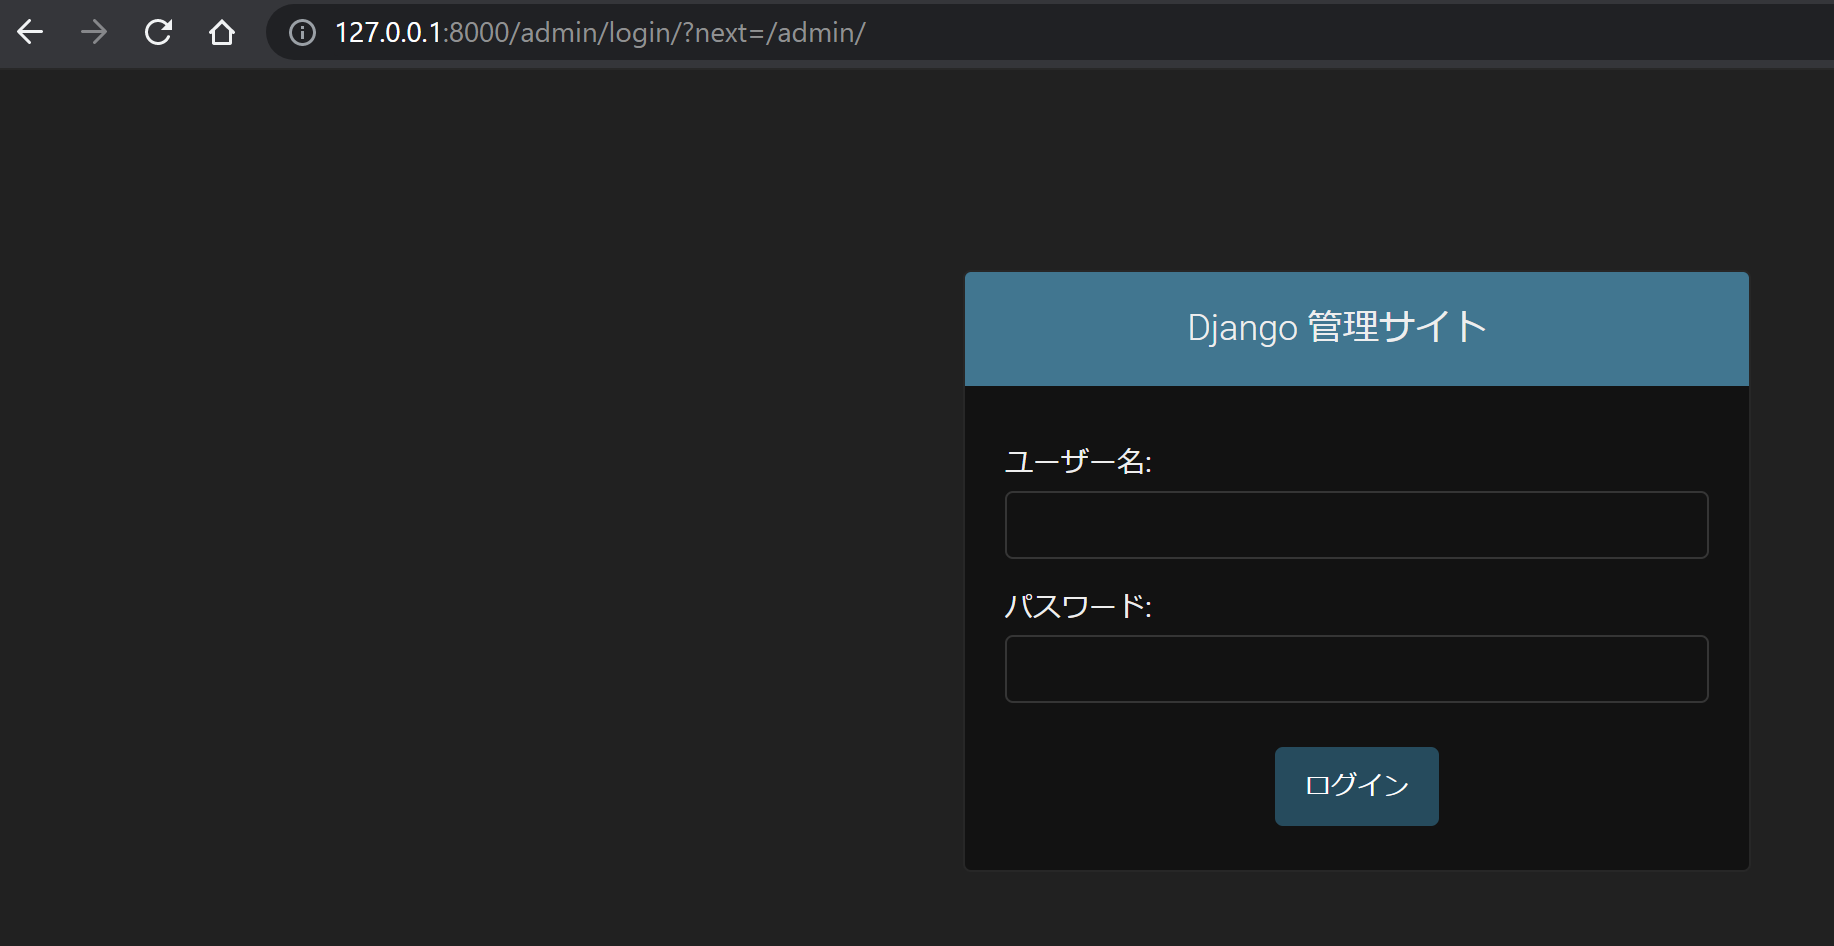
http://127.0.0.1:8000/adminへアクセスして下図のように表示されればOK
Git Bashをctrl + cでDjangoを停止
migrateコマンドの実行
$ python manage.py migrate
Operations to perform:
  Apply all migrations: admin, auth, contenttypes, sessions
Running migrations:
  Applying contenttypes.0001_initial... OK
  Applying auth.0001_initial... OK
  Applying admin.0001_initial... OK
  Applying admin.0002_logentry_remove_auto_add... OK
  Applying admin.0003_logentry_add_action_flag_choices... OK
  Applying contenttypes.0002_remove_content_type_name... OK
  Applying auth.0002_alter_permission_name_max_length... OK
  Applying auth.0003_alter_user_email_max_length... OK
  Applying auth.0004_alter_user_username_opts... OK
  Applying auth.0005_alter_user_last_login_null... OK
  Applying auth.0006_require_contenttypes_0002... OK
  Applying auth.0007_alter_validators_add_error_messages... OK
  Applying auth.0008_alter_user_username_max_length... OK
  Applying auth.0009_alter_user_last_name_max_length... OK
  Applying auth.0010_alter_group_name_max_length... OK
  Applying auth.0011_update_proxy_permissions... OK
  Applying auth.0012_alter_user_first_name_max_length... OK
  Applying sessions.0001_initial... OK
createsuperuserコマンドの実行
コマンドを実行するとユーザー名、メールアドレス、パスワードの設定が要求されます。
メールアドレスは未入力でもOK
$ python manage.py createsuperuser
ユーザー名 (leave blank to use 'uesr-name'): admini
メールアドレス: test@test.com
Password:
Password (again):
このパスワードは短すぎます。最低 8 文字以上必要です。
このパスワードは一般的すぎます。
Bypass password validation and create user anyway? [y/N]: y
Superuser created successfully.
Djangoを起動して管理者ページにログインできるか確認する
$ python manage.py runserver
http://127.0.0.1:8000/adminへアクセスしてログインして下図のように表示されればOK
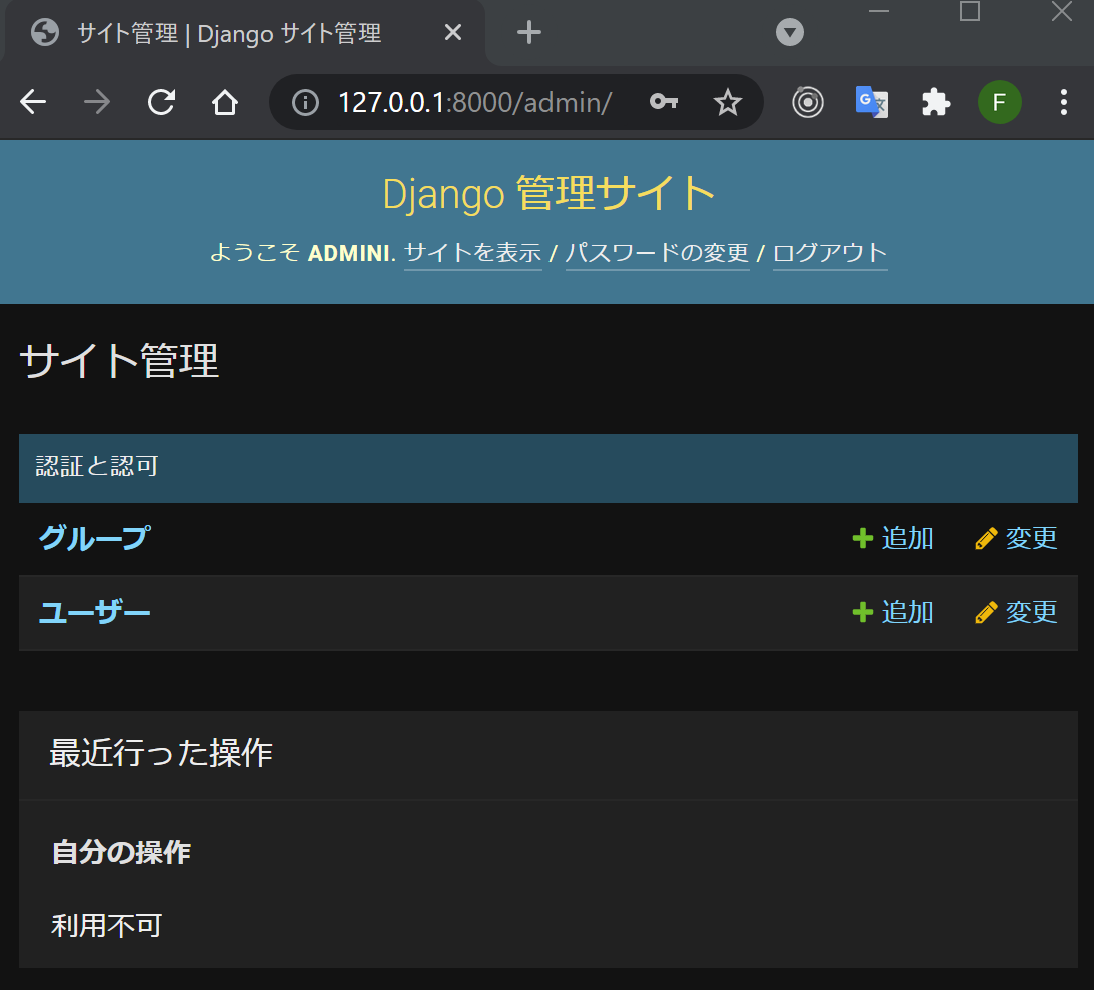
ログアウトして、Git Bashをctrl + cでDjangoを停止
手順を整理
上記では動作理解のため、都度確認したが、慣れれば下記の手順
- CodeCommitでリポジトリの作成
- ローカル環境でClone
- 仮想環境の作成
- 仮想環境へ入る
- pipのUpgrade
- Djangoなどのインストール
-
django-admin startproject config .でプロジェクトの作成 -
django-admin startapp appでアプリケーションの作成 -
.envファイルで機密データの処理 -
config/settings.pyの編集 -
.gitignoreファイルの作成 -
requirements-dev.txtの作成 -
requirements.txtの作成 -
staticフォルダの作成 -
python manage.py collectstaticを実行 -
python manage.py migrateを実行 -
python manage.py createsuperuserを実行 -
config/urls.pyを編集 -
app/urls.pyを新規作成 -
app/views.pyを編集 -
python manage.py runserverを実行 - トップページの確認
- 管理者ページの確認
CodeCommitにPushする
$ git add .
$ git commit -m "first commit"
$ git push -u origin master
どこのリポジトリにPushされるか確認したい場合はgit remote -v
AWSでEC2を起動させる
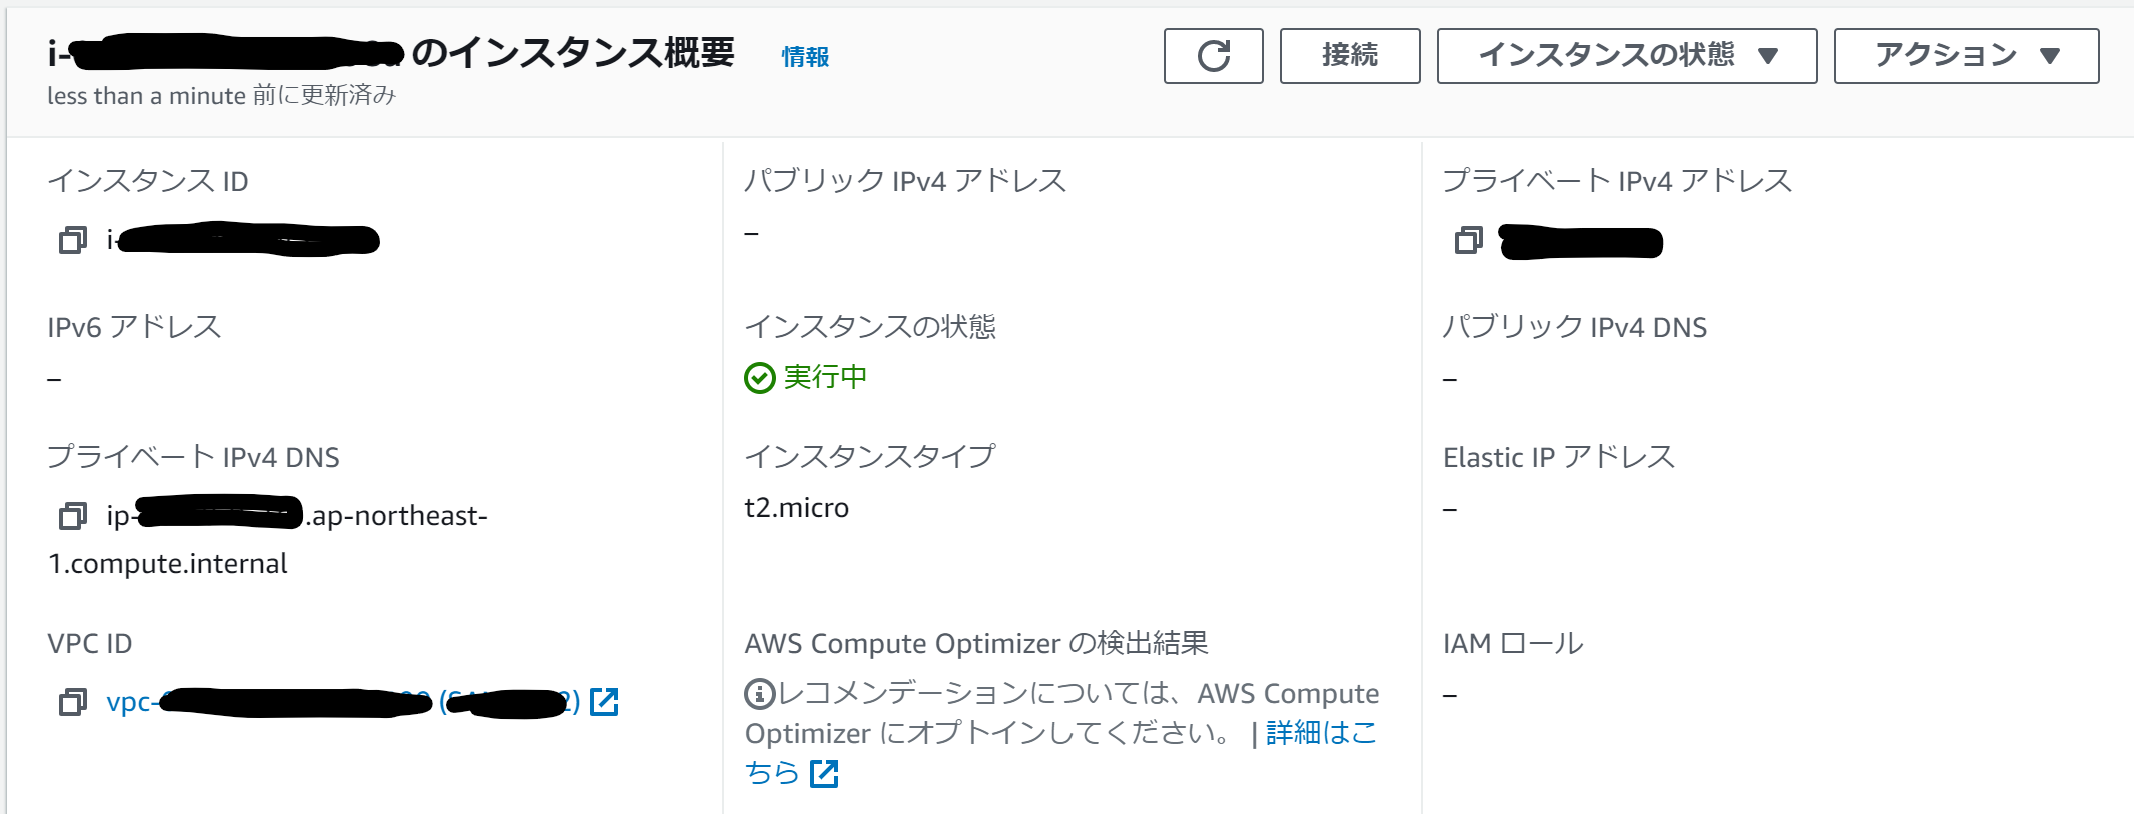
注意:社内NWとAWSはVPNで接続されているため、社内PCからEC2のプライベートIPを指定してアクセスできる
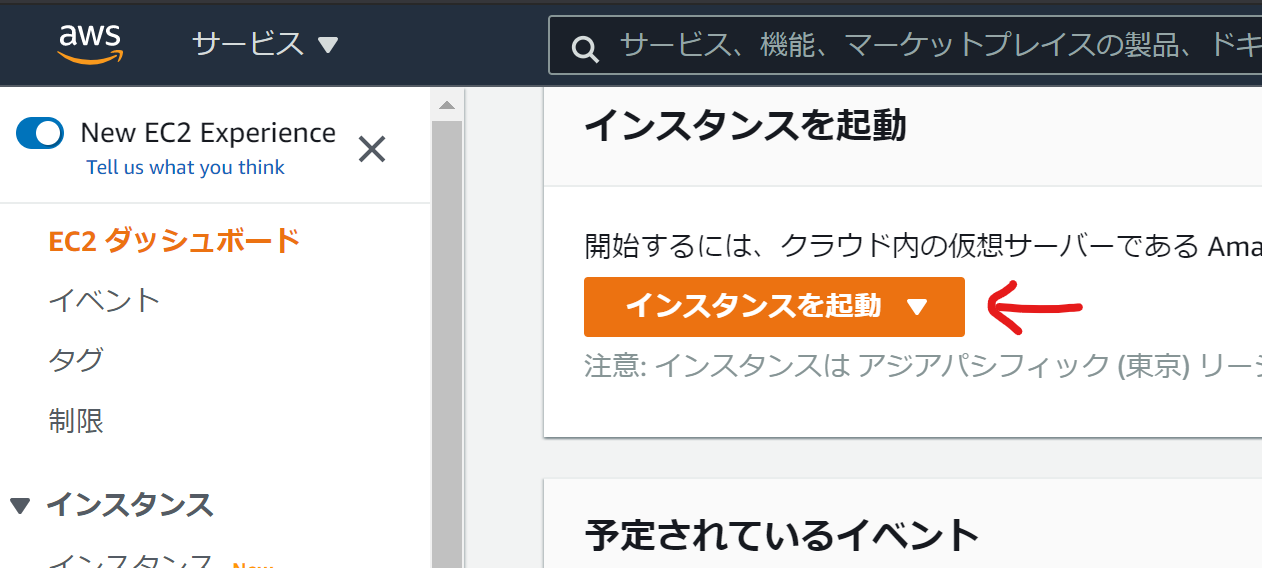
EC2ダッシュボードで「インスタンスを起動」を選択する
コンボボックスが展開されて「インスタンスを起動」を選択する
ステップ 1: Amazon マシンイメージ (AMI)
下図のようにUbuntu Server 20.04 LTS (HVM), SSD Volume Typeを選択する
ステップ 2: インスタンスタイプの選択
下図のようにt2.microを選び、「次のステップ:インスタンスの詳細の設定」を押す
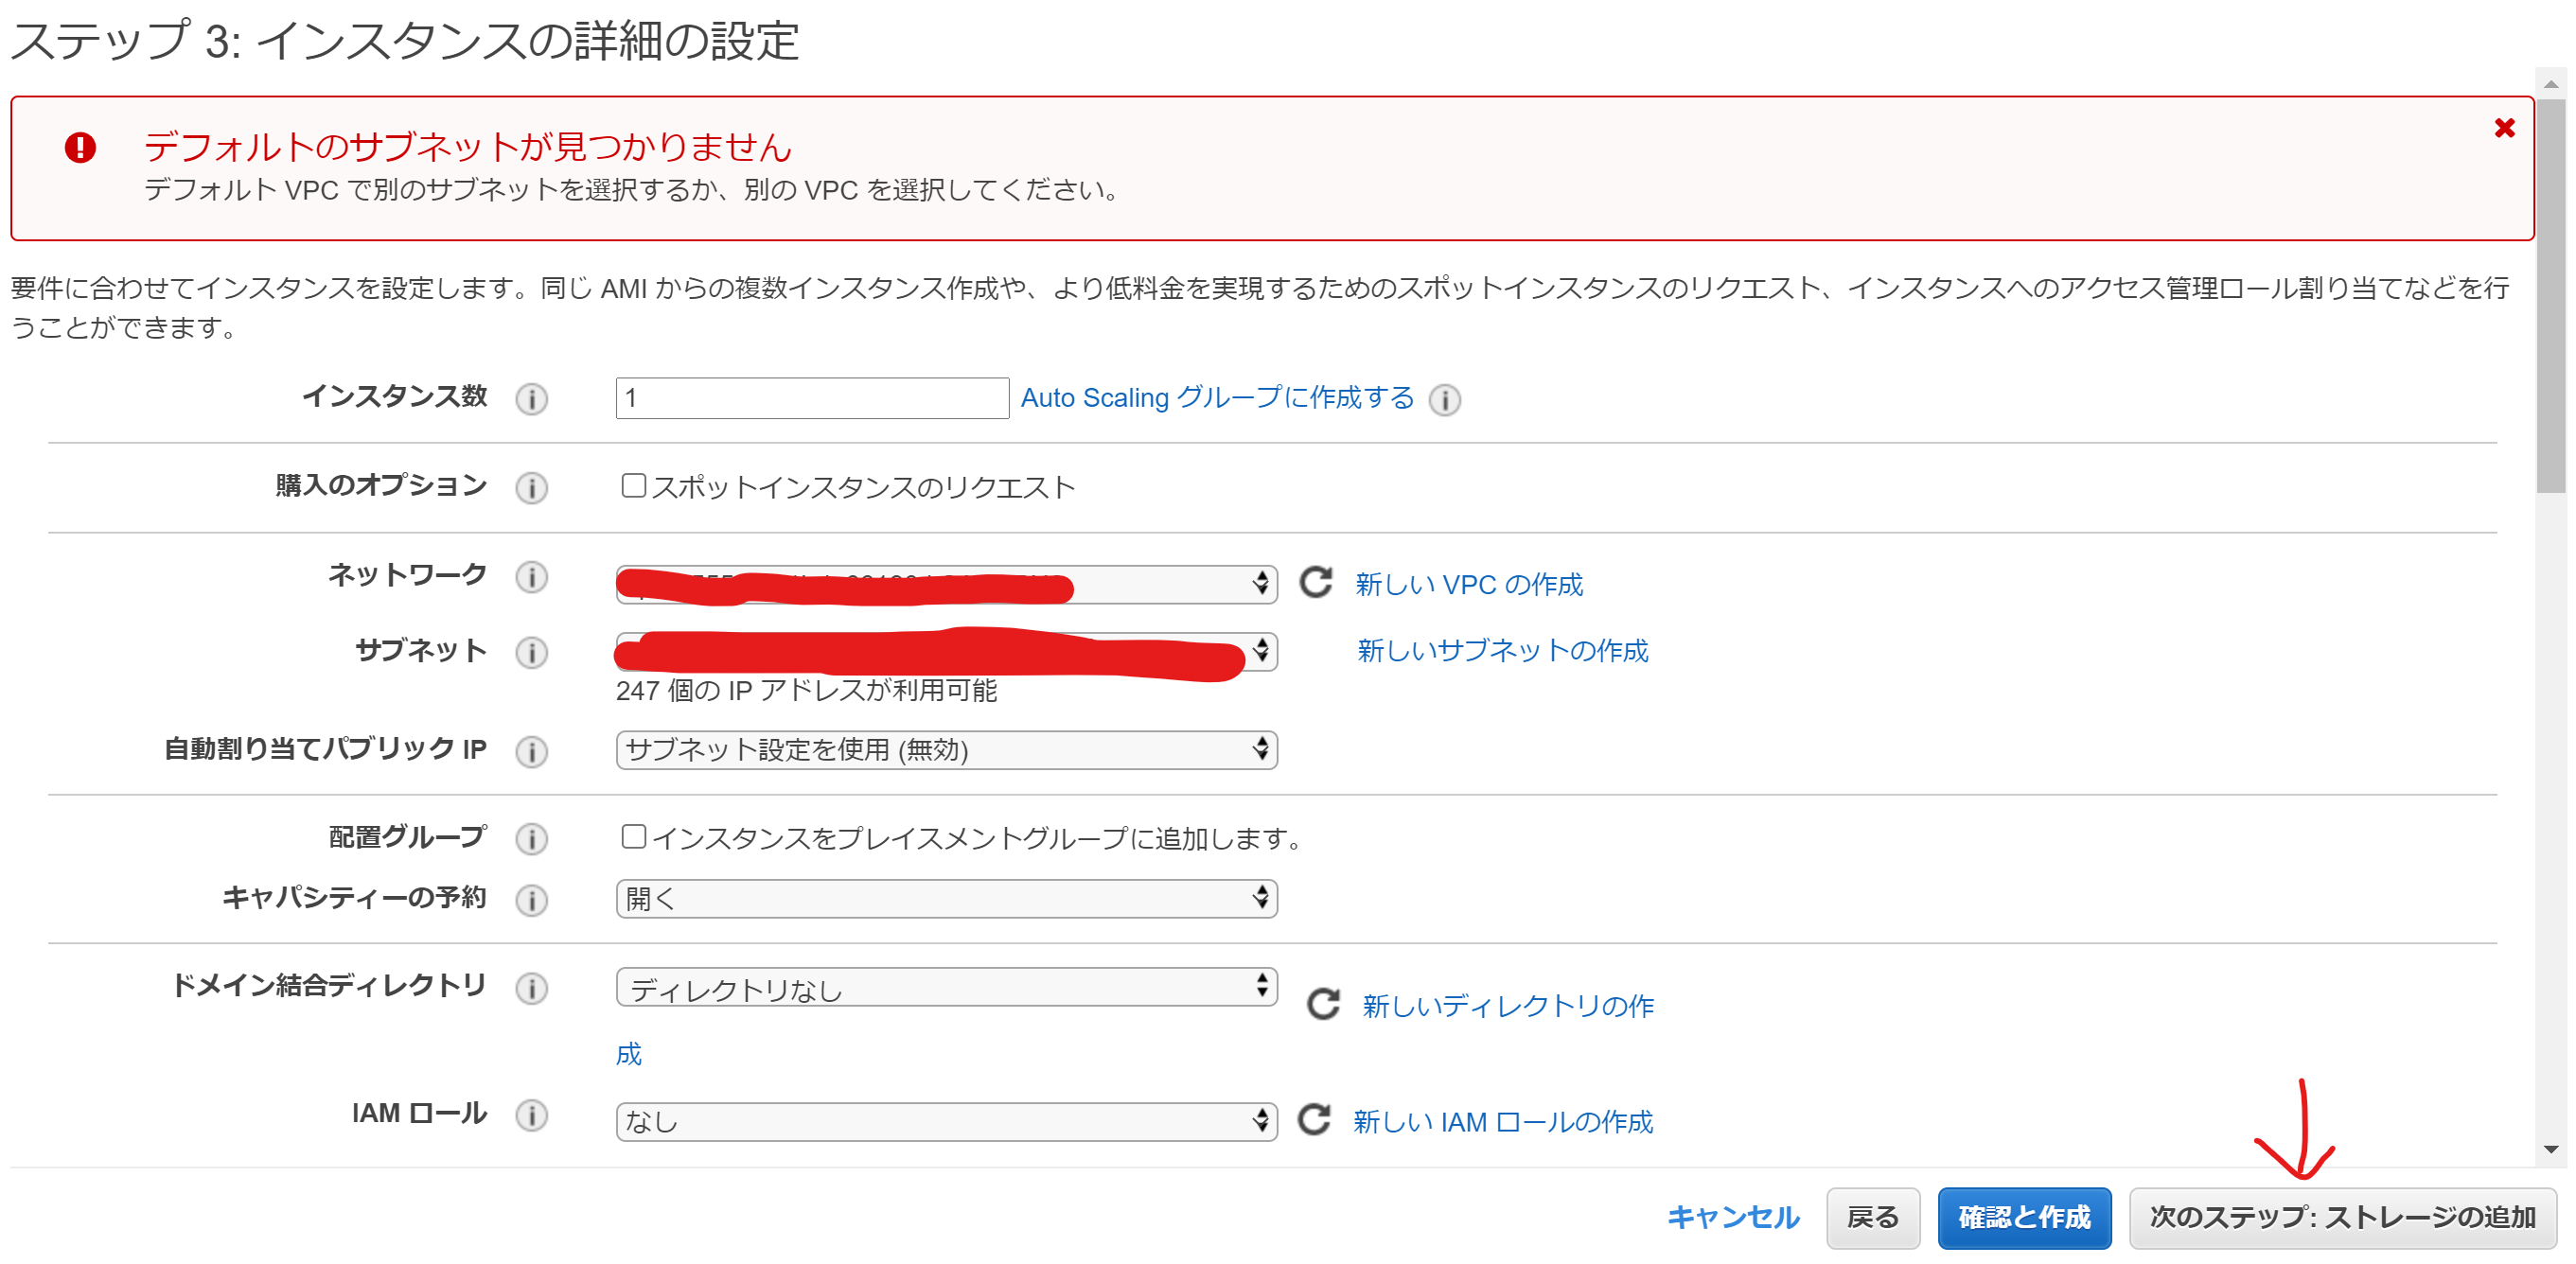
ステップ 3: インスタンスの詳細の設定
設定する項目は2点
ネットワークでは、VPNと接続しているVGWがアタッチされているVPCを選択
サブネットでは、プライベート状態のサブネットを選択
「次のステップ:ストレージの追加」を押す
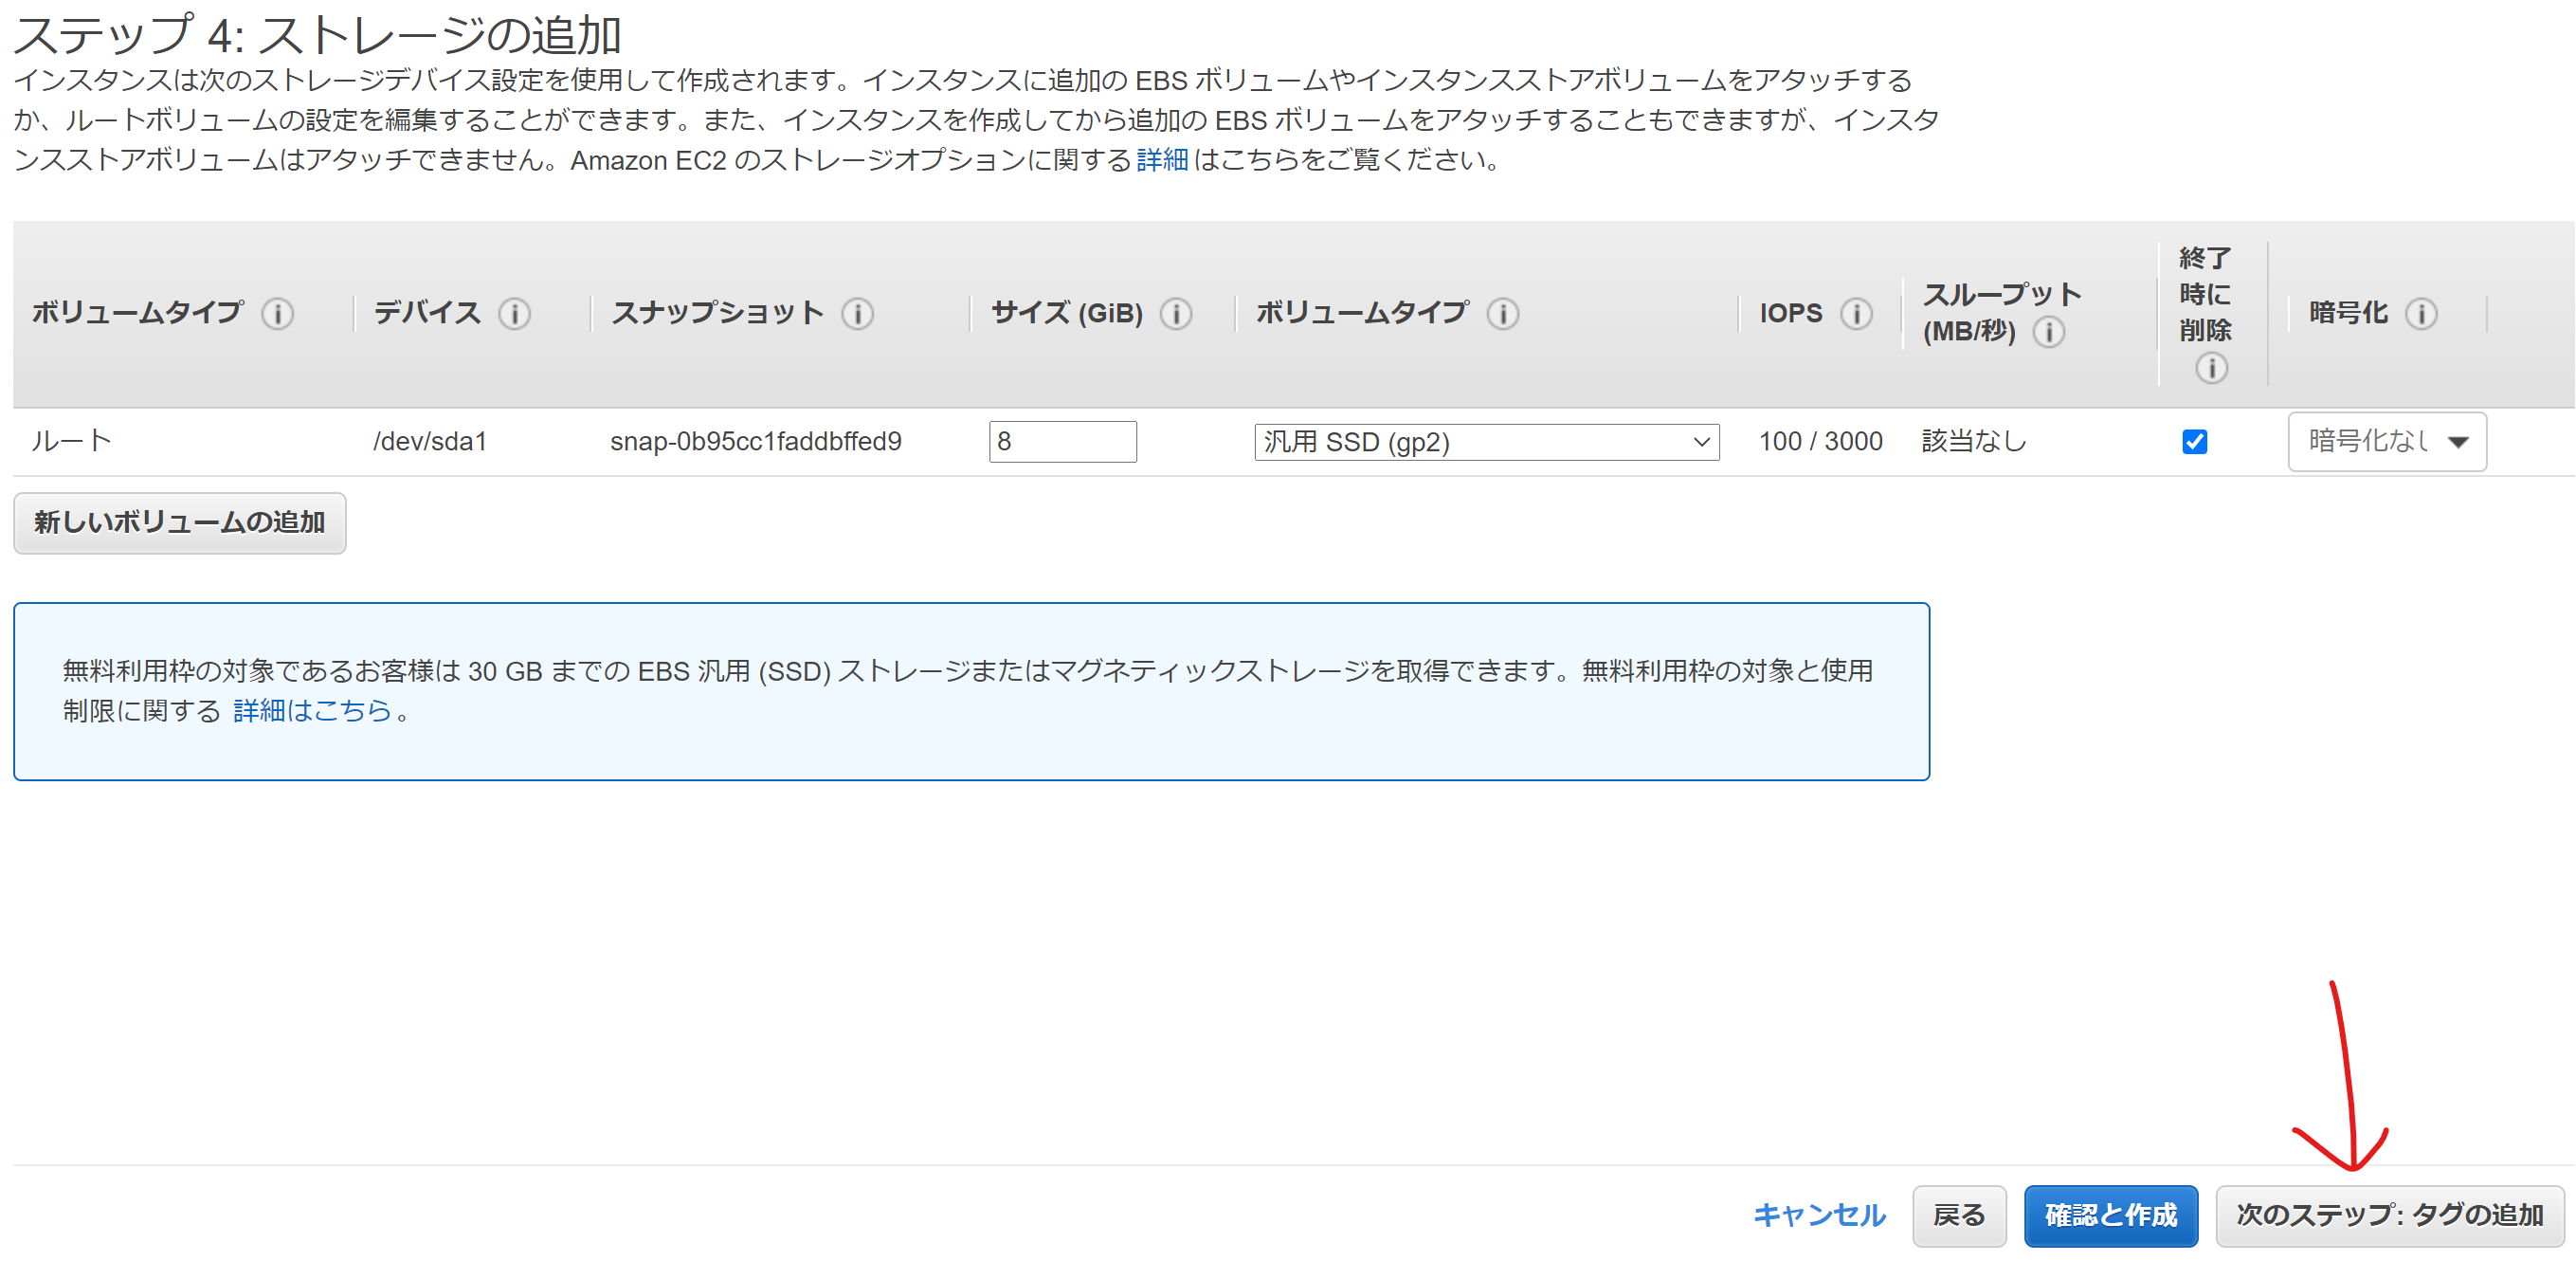
ステップ 4: ストレージの追加
ストレージはデフォルトのままでOK、「次のステップ:タグの追加」を押す
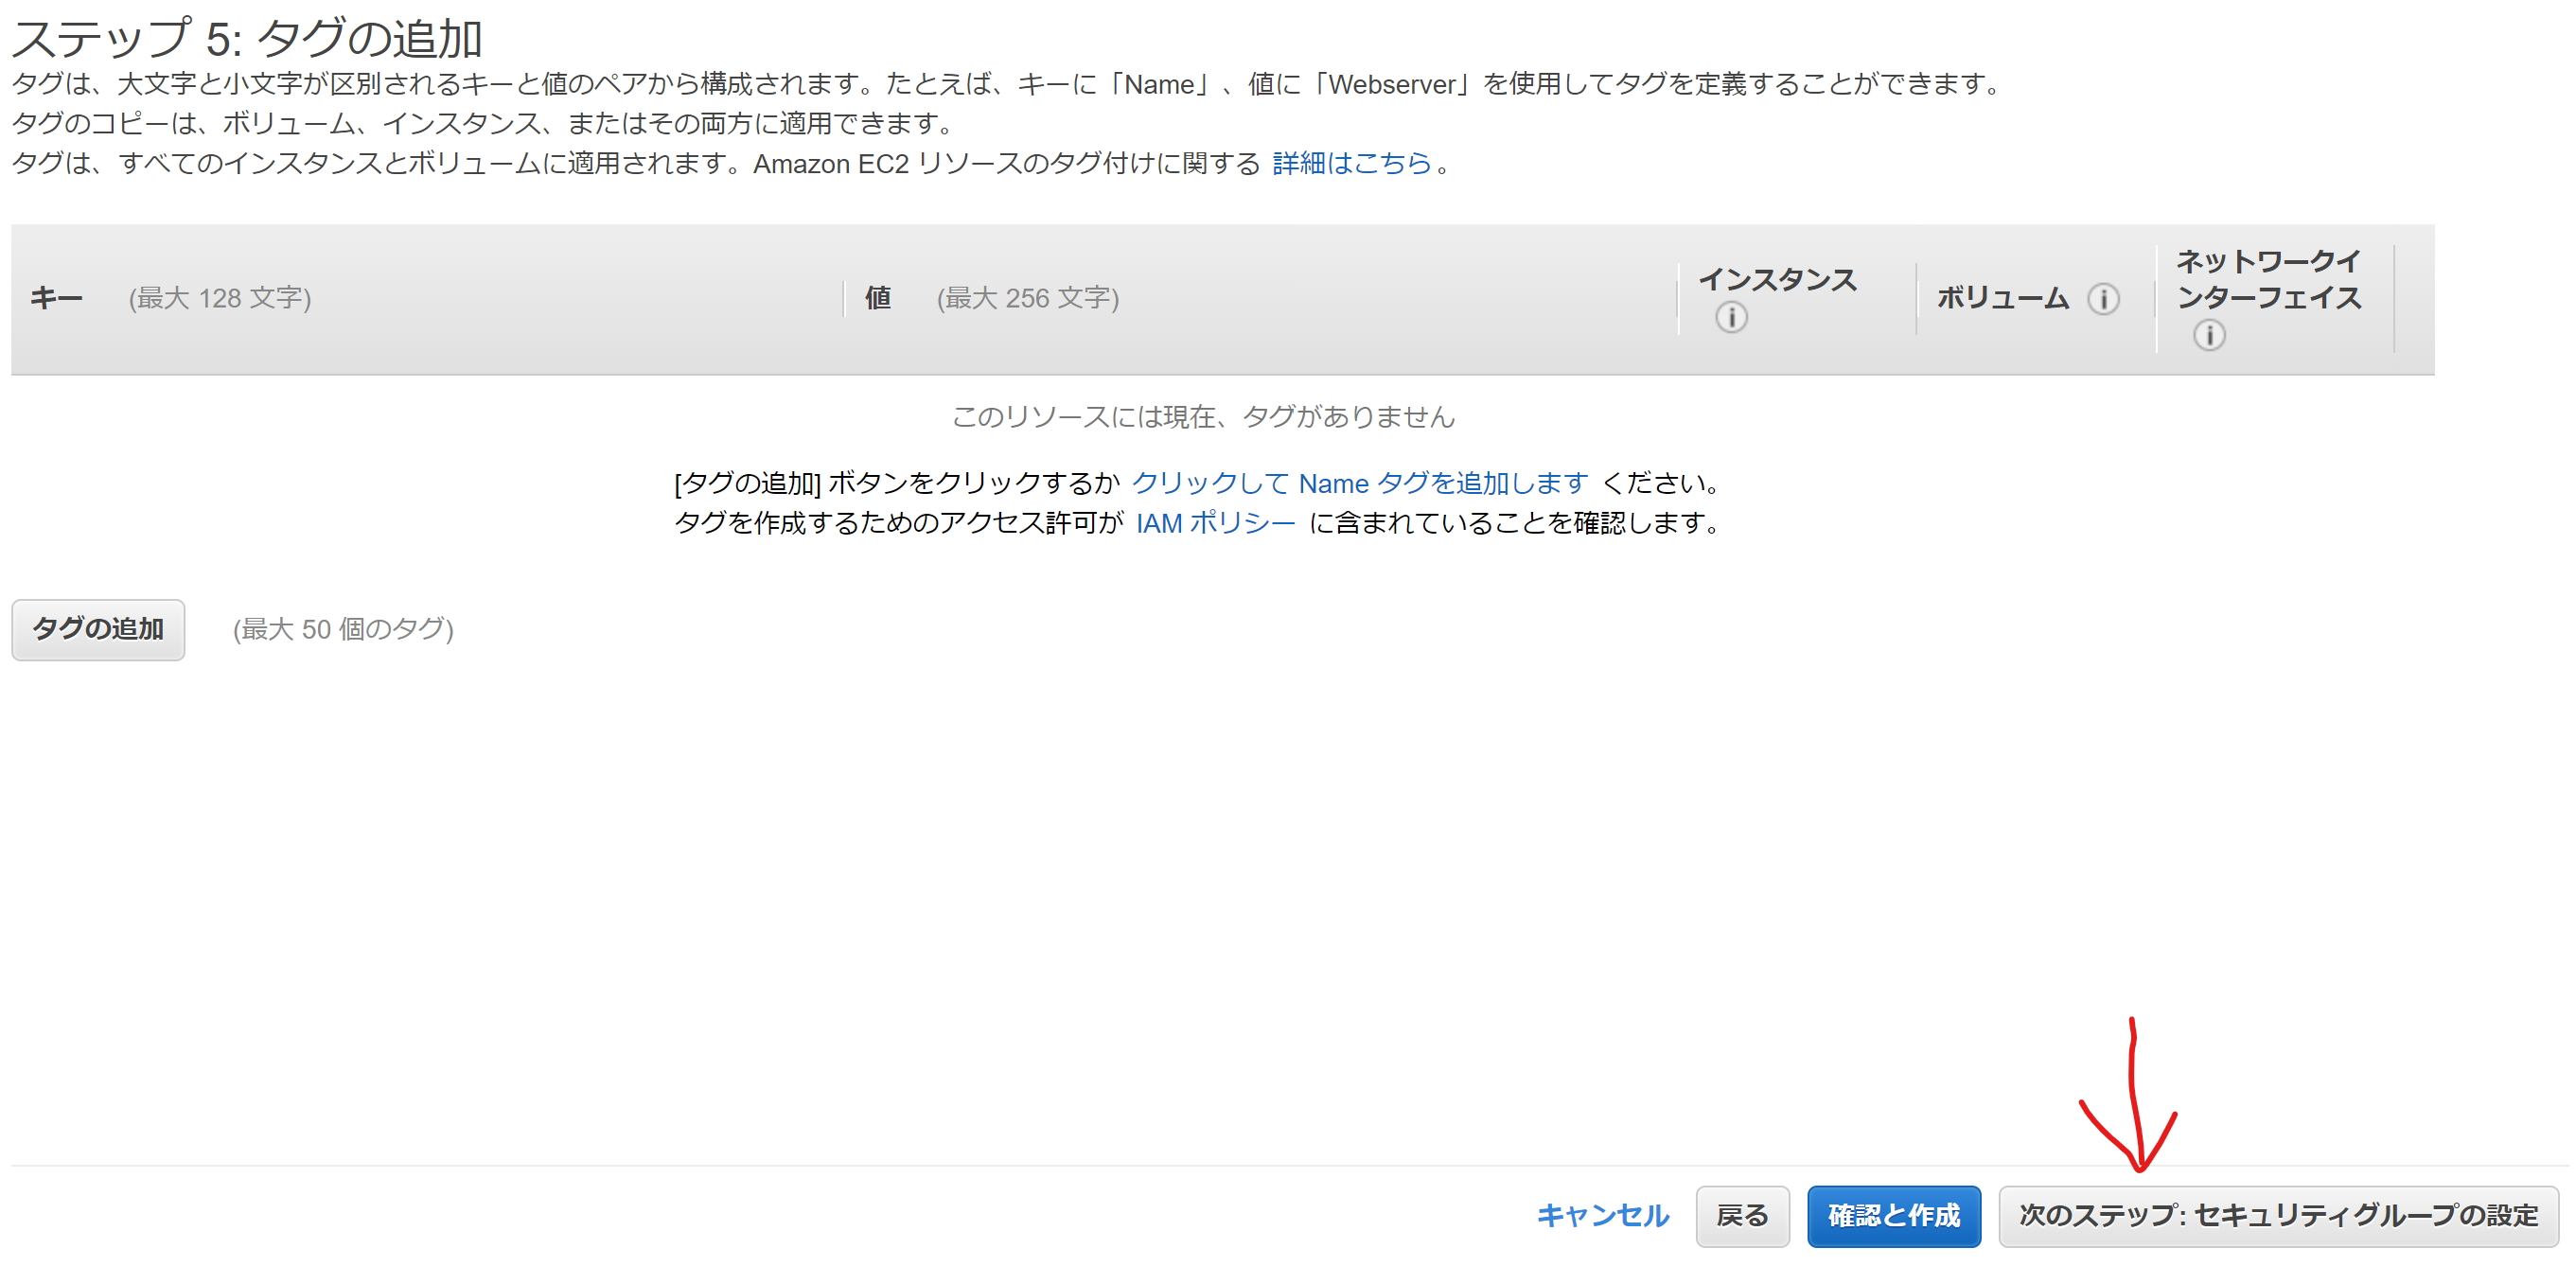
ステップ 5: タグの追加
タグはお好みでOK、「次のステップ:セキュリティグループの設定」を押す
ステップ 6: セキュリティグループの設定
セキュリティグループの選択は既存でも新規でもOK
下表のように自分のPCからのSSH、HTTPなどの通信が許可されていればOK、「確認と作成」を押す
自分のPCのIPアドレスはコマンドプロンプトなどでipconfig /allで確認できる
| タイプ | プロトコル | ポート範囲 | ソース |
|---|---|---|---|
| HTTP | TCP | 80 | 自分のPCのIPアドレス(例:123.123.123.123/32) |
| カスタムTCPルール | TCP | 8000 | 自分のPCのIPアドレス(例:123.123.123.123/32) |
| SSH | TCP | 22 | 自分のPCのIPアドレス(例:123.123.123.123/32) |
| すべての ICMP - IPv4 | すべて | 該当なし | 自分のPCのIPアドレス(例:123.123.123.123/32) |
以上の設定でインスタンスを起動させます。
起動したインスタンスの接続を確認
自分のPCのコマンドプロンプトからpingで起動したインスタンスのプライベートIP v4アドレスを指定して通信が成功することを確認
起動したインスタンスへsshでログイン
PowerShellを起動してインスタンス作成時に指定したキーペア(*.pem)を使ってsshログイン
> ssh -i *.pem ubuntu@10.0.0.123
Ubuntuでの作業
aptのUpdate
$ sudo apt update
timezoneの変更
$ sudo timedatectl set-timezone Asia/Tokyo
dateコマンドで設定が変更されたか確認
$ date
Fri Sep 17 14:56:12 JST 2021
PostgreSQL、Nginxなどをインストール
$ sudo apt install python3-pip python3-dev libpq-dev postgresql postgresql-contrib nginx
PostgreSQLの設定
- データベースを作成
- ユーザー作成
- DBの文字コードをUTF8にする
- トランザクション分離レベルを設定
- 日本時間に設定
- DBの全ての権限を作成したユーザーに付与
$ sudo -u postgres psql
postgres=# CREATE DATABASE djangodb;
postgres=# CREATE USER django WITH PASSWORD 'testPassword1';
postgres=# ALTER ROLE django SET client_encoding TO 'utf8';
postgres=# ALTER ROLE django SET default_transaction_isolation TO 'read committed';
postgres=# ALTER ROLE django SET timezone TO 'UTC+9';
postgres=# GRANT ALL PRIVILEGES ON DATABASE djangodb TO django;
postgres=# \q
UbuntuのPythonのバージョン確認
python3 -Vでバージョンを確認
$ python3 -V
Python 3.8.10
開発環境とは異なるバージョンがインストールされているので、開発環境と同じバージョンのPython3.9.6をインストールする
ビルド環境の準備
下記を実行。途中で何か聞かれたらYes。少し時間がかかる。
$ sudo apt update
$ sudo apt install build-essential libbz2-dev libdb-dev \
  libreadline-dev libffi-dev libgdbm-dev liblzma-dev \
  libncursesw5-dev libsqlite3-dev libssl-dev \
  zlib1g-dev uuid-dev tk-dev
ソースコードをダウンロード
$ wget https://www.python.org/ftp/python/3.9.6/Python-3.9.6.tar.xz
ダウンロードしたファイルを解凍
$ tar xJf Python-3.9.6.tar.xz
ビルド
数分程度時間がかかる
$ cd Python-3.9.6
$ ./configure
$ make
$ sudo make install
WARNING: ...なども出るかもしれませんが、下記が最後のほうに表示されればOK
Installing collected packages: setuptools, pip
Successfully installed pip-21.1.3 setuptools-56.0.0
インストールされたか確認
exitして、再度sshでログインして、下記で指定したバージョンが表示されればOK
$ python3 -V
Python 3.9.6
CodeCommitからclone
今回はCodeCommitからHttps認証でclone
下記コマンドを実行するとUserNameとPasswordの入力を求められる
Https認証の設定はIAMユーザーで事前に設定する
$ git clone https://git-codecommit.ap-northeast-1.amazonaws.com/v1/repos/djangotest2
cloneに成功するとdjangotest2というディレクトリが作成されている
$ ls
djangotest2
$ cd djangotest2/
$ ls
app  config  db.sqlite3  manage.py  requirements-dev.txt  requirements.txt  static
仮想環境の追加
djangotest2ディレクトリで下記コマンドを実行して仮想環境を作る
$ python3 -m venv .venv
ls -laで.venvディレクトリが作成されていることを確認
ライブラリをインストール
まずは仮想環境に入る
※ローカル環境とはPathが異なるので注意
$ source .venv/bin/activate
プロンプトに(.venv)という表示があればOK
pipのupgrade
$ python -m pip install --upgrade pip
requirements.txtを使ってライブラリをインストール
$ python -m pip install -r requirements.txt
本番環境用の.envファイルを作成
vimを使って作成
$ vim .env
.envファイルの記載内容
SECRET_KEY=ローカルの.envファイルの内容と同じ
DEBUG=False
DATABASE_URL=postgres://django:ここにさっき設定したDBのパスワード@localhost:/djangodb
ALLOWED_HOSTS=EC2インスタンスのプライベートIPアドレス
config/settings.pyを編集
vimを使って編集
$ vim config/settings.py
settings.pyファイルの変更内容
ALLOWED_HOSTS = env.list('ALLOWED_HOSTS')
migrate
$ python manage.py migrate
createsuperuser
UserNameとPasswordを設定
$ python manage.py createsuperuser
ユーザー名 (leave blank to use 'ubuntu'): admini
メールアドレス:
Password:
Password (again):
このパスワードは短すぎます。最低 8 文字以上必要です。
このパスワードは一般的すぎます。
Bypass password validation and create user anyway? [y/N]: y
Superuser created successfully.
runserverで起動
$ python manage.py runserver 0.0.0.0:8000
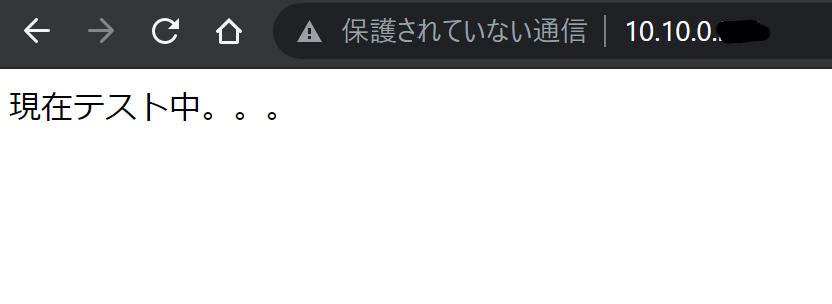
トップページが表示されるか確認
ログインして管理者ページが表示されるか確認
Gunicornの設定
仮想環境から抜ける
$ deactivate
gunicornの設定ファイルを新規に作成
$ sudo vim /etc/systemd/system/gunicorn.service
今回の場合は、以下のようになる
[Unit]
Description=gunicorn daemon
After=network.target

[Service]
User=ubuntu
Group=www-data
WorkingDirectory=/home/ubuntu/djangotest2
ExecStart=/home/ubuntu/djangotest2/.venv/bin/gunicorn --access-logfile - --workers 3 --bind unix:/home/ubuntu/djangotest2/config/config.sock config.wsgi:application

[Install]
WantedBy=multi-user.target
WorkingDirectory=/home/ubuntu/djangotest2
Gunicorn serviceの自動起動と有効化と状態の確認
$ sudo systemctl start gunicorn.service
$ sudo systemctl enable gunicorn
Created symlink /etc/systemd/system/multi-user.target.wants/gunicorn.service → /etc/systemd/system/gunicorn.service.
$ sudo systemctl status gunicorn
● gunicorn.service - gunicorn daemon
     Loaded: loaded (/etc/systemd/system/gunicorn.service; enabled; vendor preset: enabled)
     Active: active (running) since Fri 2021-09-10 09:21:29 UTC; 27s ago
Active: active (running)と表示されていればOK
Nginxの設定
Nginxの設定ファイルを新規に作成
$ sudo vim /etc/nginx/sites-available/djangotest2
ファイルの記載内容
server {
        listen 80;
        server_name ここにインスタンスのプライベートIP;

        location = /favicon.ico {access_log off; log_not_found off;}
        location /static/ {
                root /home/ubuntu/djangotest2;
        }

        location / {
                include proxy_params;
                proxy_pass http://unix:/home/ubuntu/djangotest2/config/config.sock;
        }
}
シンボリックリンクを作成
$ sudo ln -s /etc/nginx/sites-available/djangotest2 /etc/nginx/sites-enabled/
Niginx起動して80番ポートを開放
$ sudo systemctl restart nginx
$ sudo ufw delete allow 8000
$ sudo ufw allow 'Nginx Full'
Gunicornを再起動
$ sudo systemctl restart gunicorn
公開されたアプリケーションを確認
セキュリティグループのHttpを0.0.0.0にすれば社内に公開となる
AWSのEC2コンソールでインスタンスを終了させれば公開されたアプリケーションは全て消える
ローカル環境のアプリケーションを変更してインスタンスへ反映させるには
ローカル環境で変更をしたらCodeCommitへPush
$ git add .
$ git commit -m "comment"
$ git push -u origin master
インスタンスへSSHでログイン
$ ssh -i *.pem ubuntu@10.10.0.xxx
インスタンスのリポジトリでPull
$ git pull origin master
Gunicornの再起動
$ sudo systemctl restart gunicorn
これで変更点が反映される
データベースの変更などをした場合は、migrateなどが必要
複製したい場合
複製する場合は、AMIを作成して、そのAMIからEC2インスタンスを起動する必要があります。
インスタンス起動後は、.envファイルと/etc/nginx/sites-available/djangotest2ファイルのIPアドレスを書き換える必要があります。
最後にNginxとGunicornの再起動をすればOK!

