Next.js(Reactベースのフレームワーク)を使ってポートフォリオサイトを作って見たので、その時の手順などを簡単にまとめました。
コンテンツの部分はContentful、ホスティングはVercelです。
Next.jsをインストール
npx create-next-app
pagesディレクトリでページを増やす
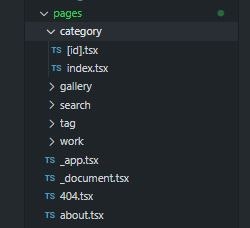
Next.jsでは、pagesディレクトリにファイルを増やしていくことで、自動的にルーティングもおこなってくれます。
ファイル名を404とすると、自動的に404のエラー用のページになります。
動的なページは[id]のように[]で囲む必要があります。
Reactで記述
const Home = () => {
  return (
    <div>
      <h1>hello</h1>
    </div>
  )
}
export default Home
Next.jsはReact製のフレームワークなので、記述はjsx(tsx)になります。
適時ライブラリを追加する
適時ライブラリ等を追加します。
tailwindcss(CSSフレームワーク)
CSSフレームワークは、tailwindcssを使用しました。
# If you’re using npm
npm install -D tailwindcss@latest postcss@latest autoprefixer@latest

# If you’re using Yarn
yarn add  tailwindcss@latest postcss@latest autoprefixer@latest
npx tailwindcss init -p #tailwindcssの設定をファイルを生成するコマンド
下記はtailwindcssのチートシートになります。cssのプロパティが一覧になっていてかなり便利です。
https://nerdcave.com/tailwind-cheat-sheet
TypeScript
TypeScriptを導入する。
# If you’re using npm
npm install --save-dev typescript @types/react @types/node

# If you’re using Yarn
yarn add --dev typescript @types/react @types/node
tsc --init
上記のコマンドで、tsconfig.jsonを作成できますので、オプションを指定します。
{
  "compilerOptions": {
    "target": "es5",
    "lib": [
      "dom",
      "dom.iterable",
      "esnext"
    ],
    "allowJs": true,
    "skipLibCheck": true,
    "strict": false,
    "forceConsistentCasingInFileNames": true,
    "noEmit": true,
    "esModuleInterop": true,
    "module": "esnext",
    "moduleResolution": "node",
    "resolveJsonModule": true,
    "isolatedModules": true,
    "jsx": "preserve"
  },
  "include": [
    "next-env.d.ts",
    "**/*.ts",
    "**/*.tsx"
, "next.config.js"  ],
  "exclude": [
    "node_modules"
  ]
}
TSLint
# If you’re using npm
npm install --save-dev tslint tslint-config-airbnb
npm install --save-dev tslint-react-hooks  # react hookを使用する場合

# If you’re using Yarn
yarn add --dev tslint tslint-config-airbnb
yarn add --dev tslint-react-hooks  # react hookを使用する場合
"tslint": "tslint -p . -c tslint.json"
tslint.jsonファイルを作り、設定を追加します。
{
  "extends": ["tslint-config-airbnb", "tslint-react-hooks"],
  "rules": {
    "import-name": false,
    "align": false,
    "react-hooks-nesting": false,
    "semicolon": false,
    "trailing-comma": false,
    "ter-arrow-parens": [true, "always"],
    "object-literal-shorthand": false,
    "function-name": [
      true,
      {
        "function-regex": "^[a-zA-Z$][\\w\\d]+$",
        "method-regex": "^[a-z$][\\w\\d]+$",
        "private-method-regex": "^[a-z$][\\w\\d]+$",
        "protected-method-regex": "^[a-z$][\\w\\d]+$",
        "static-method-regex": "^[a-z$][\\w\\d]+$"
      }
    ],
    "variable-name": {
      "options": [
        "ban-keywords",
        "check-format",
        "allow-leading-underscore",
        "allow-pascal-case"
      ]
    }
  }
}
npm run tslint
yarn tslint
上記のコマンドでlintのチェックをおこないます。
リアルタイムでlintチェックする
save時などにlintチェックしたい場合は、下記のプラグインを追加します。
# If you’re using npm
npm install --save-dev fork-ts-checker-webpack-plugin

# If you’re using Yarn
yarn add -D fork-ts-checker-webpack-plugin
next.config.jsに設定を追加。
const ForkTsCheckerWebpackPlugin = require('fork-ts-checker-webpack-plugin')

module.exports = {
  /**
   * Custom Webpack Config
   * https://nextjs.org/docs/api-reference/next.config.js/custom-webpack-config
   */
  webpack(config, options) {
    const { dev, isServer } = options

    // Do not run type checking twice:
    if (dev && isServer) {
      config.plugins.push(new ForkTsCheckerWebpackPlugin())
    }

    return config
  }
}
ContentfulとNext.jsを連携させる。
ContentfulとNext.jsを連携させる為のライブラリをインストールします。
# If you’re using npm
npm install contentful

# If you’re using Yarn
yarn add contentful
設定方法は下記の記事でまとめています。
Next.jsとContentfulを連携する方法
リッチテキストに対応
Contentfulのリッチテキストを表示するための対応です。
# If you’re using npm
npm install react-markdown

If you’re using Yarn
yarn add react-markdown
import ReactMarkdown from 'react-markdown'

const Home = (props) => {
  return (
    <div>
      <ReactMarkdown>{props}</ReactMarkdown>
    </div>
  )
}

export default Home
環境変数の設定
CTF_SPACE_ID=demo123

CTF_CDA_ACCESS_TOKEN=demo1234

NEXT_PUBLIC_PATH=https://demo.com   // クライアントサイドで使う場合
Contenfulなどの環境変数の設定をおこないます。
環境変数をクライアントサイドで使いたい場合は、NEXT_PUBLICで始まる形にします。
const path = process.env.NEXT_PUBLIC_PATH
ページ遷移はnext/link
ページ遷移はnext/linkを使用します。
import Link from 'next/link'

const LinkButton = ({ id, name }) => {
  return (
    <div>
      <Link href={`/tag/${id}`}>
        <a>{name}</a>
      </Link>
    </div>
  )
}

export default LinkButton
画像の扱いはnext/imageが便利
Next.jsで画像を利用するときは、next/imageが便利です。
import Image from 'next/image'

const ProfileImage = ({ image }) => {
  return (
    <div>
      <Image
        src={image.src}
        alt={image.alt}
        width={image.width}
        height={image.height}
        loading="lazy"
        objectFit="contain"
        className="bg-gray-400"
      />
    </div>
  )
}

export default ProfileImage
meta、ogpの設定はnext/head
meta、ogpの設定はnext/headを利用します。
import Head from 'next/head'
const Seo = ({
pageTitle,
pageDescription,
pagePath,
pageImg,
pageImgWidth,
pageImgHeight
}) => {
const defaultTitle = 'demo'
const defaultDescription = 'demo'
const title = pageTitle ? `${pageTitle} | ${defaultTitle}` : defaultTitle
const description = pageDescription ? pageDescription : defaultDescription
const url = pagePath
const imgUrl = pageImg
const imgWidth = pageImgWidth ? pageImgWidth : 1280
const imgHeight = pageImgHeight ? pageImgHeight : 640
return (
<Head>
<title>{title}</title>
<meta name="viewport" content="width=device-width,initial-scale=1.0" />
<meta name="description" content={description} />
<meta property="og:url" content={url} />
<meta property="og:title" content={title} />
<meta property="og:site_name" content={title} />
<meta property="og:description" content={description} />
<meta property="og:type" content="website" />
<meta property="og:image" content={imgUrl} />
<meta property="og:image:width" content={String(imgWidth)} />
<meta property="og:image:height" content={String(imgHeight)} />
<link rel="preconnect" href="https://fonts.gstatic.com" />
<link
href="https://fonts.googleapis.com/css?family=Roboto:100,300,400,500,700,900&display=swap"
rel="stylesheet"
/>
<link rel="canonical" href={url} />
</Head>
)
}
export default Seo
propsの値で設定するようにすることで、ページごとにmetaタグの設定が可能です。
デプロイはVercel
Vercelとgithubを連携させることで簡単にデプロイすることが可能です。
Conentfulの環境変数は別途設定する必要があります。
