本記事の内容
- AWS Cloudformationを利用して、下記を行う
- パブリックサブネットにnginxが動作するEC2(Amazon Linux2)を作成する
- 最低限のネットワークACL、セキュリティグループを設定する
- nginxはインストールのみで設定変更は特に行わない
- Cloudformationへのデプロイはシェルスクリプトにて行う
実施環境
- WSL2 Ubuntu-20.04
- AWS-CLI
- aws-cli/2.9.0 Python/3.9.11 Linux/5.10.16.3-microsoft-standard-WSL2 exe/x86_64.ubuntu.20 prompt/off
手順概要
- デプロイ用のシェルスクリプトの準備
- Cloudformationテンプレートの準備
- シェルスクリプト起動
- 動作確認
1. デプロイ用のシェルスクリプトの準備
Cloudformationへのデプロイは、順番にテンプレートをデプロイするシェルスクリプトを使用します。
シェルスクリプト
deploy.sh
#!/bin/bash
DATE=`date '+%Y-%m-%d %H:%M:%S'`
STACKS=(vpc security web)

for stack in ${STACKS[@]}
do
        echo "Start create ${stack} |" `date '+%Y-%m-%d %H:%M:%S'`
        aws cloudformation deploy \
        --template-file ${stack}.yaml \
        --stack-name ${stack}
        if [[ $AWS_CF_RETURN -ne 0 ]]; then
                echo "[ERROR]CloudFormation create ${stack} error." >&2
                exit 1
        fi
        echo "End create ${stack} |" `date '+%Y-%m-%d %H:%M:%S'`
        echo "---"
done
echo "Deploy End |" `date '+%Y-%m-%d %H:%M:%S'`
2. Cloudformationテンプレートの準備
Cloudformationスタック用の3つのテンプレートを準備します。
VPCテンプレート
- VPC・サブネット・インターネットゲートウェイ・ルートテーブルを作成
vpc.yaml
AWSTemplateFormatVersion: 2010-09-09
#------------------------------------------------------
#  Parameter
#------------------------------------------------------
Parameters:
  VPCCidr:
    Type: String
    Default: 10.0.0.0/16
  ProjectName:
    Type: String
    Default: simple-nginx
    Description: ProjectName
#------------------------------------------------------
#  VPC
#------------------------------------------------------
Resources:
  VPC:
    Type: AWS::EC2::VPC
    Properties:
      CidrBlock: !Ref VPCCidr
      EnableDnsSupport: true
      EnableDnsHostnames: true
      Tags:
        - Key: keyname
          Value: !Ref ProjectName
#------------------------------------------------------
#  Subnet
#------------------------------------------------------
  PublicSubnet1:
    Type: AWS::EC2::Subnet
    Properties:
      VpcId: !Ref VPC
      CidrBlock: !Ref VPCCidr
      Tags:
        - Key: keyname
          Value: !Ref ProjectName
#------------------------------------------------------
#  InternetGateway
#------------------------------------------------------
  InternetGateway:
    Type: AWS::EC2::InternetGateway
    Properties:
      Tags:
        - Key: keyname
          Value: !Ref ProjectName
  AttachGateway:
    Type: AWS::EC2::VPCGatewayAttachment
    Properties:
      VpcId: !Ref VPC
      InternetGatewayId: !Ref InternetGateway
#------------------------------------------------------
#  RouteTable
#------------------------------------------------------
  RouteTable:
    Type: AWS::EC2::RouteTable
    Properties:
      VpcId: !Ref VPC
      Tags:
        - Key: keyname
          Value: !Ref ProjectName
  Route:
    Type: AWS::EC2::Route
    DependsOn: AttachGateway
    Properties:
      RouteTableId: !Ref RouteTable
      DestinationCidrBlock:  0.0.0.0/0
      GatewayId: !Ref InternetGateway
  SubnetRouteTableAssociation:
    Type: AWS::EC2::SubnetRouteTableAssociation
    Properties:
      SubnetId: !Ref PublicSubnet1
      RouteTableId: !Ref RouteTable
#------------------------------------------------------
#  Output
#------------------------------------------------------
Outputs:
  StackVPC:
    Description: VPC ID
    Value: !Ref VPC
    Export:
      Name: !Sub ${ProjectName}-vpc
  StackPublicSubnet:
    Description: PublicSubnet ID
    Value: !Ref PublicSubnet1
    Export:
      Name: !Sub ${ProjectName}-publicsubnet
Securityテンプレート
- セキュリティグループ・ネットワークACL作成
- ネットワークACLのインバウンドルール・アウトバウンドルール設定
- ネットワークACLとサブネットの関連づける
security.yaml
AWSTemplateFormatVersion: 2010-09-09
#------------------------------------------------------
#  Parameter
#------------------------------------------------------
Parameters:
  ProjectName:
    Type: String
    Default: simple-nginx
    Description: ProjectName
  SSHAllowAddress:
    Type: String
    Default: 0.0.0.0/0
#------------------------------------------------------
#  security Group
#------------------------------------------------------
Resources:
  SecurityGroup:
    Type: AWS::EC2::SecurityGroup
    Properties:
      GroupDescription: Enable SSH access via port 22, 80
      VpcId:
        Fn::ImportValue: !Sub ${ProjectName}-vpc
      SecurityGroupIngress:
          - IpProtocol: tcp
            FromPort: 22
            ToPort: 22
            CidrIp: !Ref SSHAllowAddress
          - IpProtocol: tcp
            FromPort: 80
            ToPort: 80
            CidrIp: 0.0.0.0/0
#------------------------------------------------------
#  NetworkACL
#------------------------------------------------------
  NetworkAcl:
    Type: AWS::EC2::NetworkAcl
    Properties:
        VpcId:
          Fn::ImportValue: !Sub ${ProjectName}-vpc
        Tags:
        - Key: stack
          Value: develop
#------------------------------------------------------
#  Inbound NetwokACL
#------------------------------------------------------
  InboundSSHNetworkAclEntry:
    Type: AWS::EC2::NetworkAclEntry
    Properties:
      NetworkAclId: !Ref NetworkAcl
      Egress: false
      RuleNumber: 100
      Protocol: 6 #TCP
      RuleAction: allow
      CidrBlock: 0.0.0.0/0
      PortRange:
        From: 22
        To: 22
  InboundHTTPNetworkAclEntry:
    Type: AWS::EC2::NetworkAclEntry
    Properties:
      NetworkAclId: !Ref NetworkAcl
      Egress: false
      RuleNumber: 101
      Protocol: 6 #TCP
      RuleAction: allow
      CidrBlock: 0.0.0.0/0
      PortRange:
        From: 80
        To: 80
  InboundResponseNetworkAclEntry:
    Type: AWS::EC2::NetworkAclEntry
    Properties:
      NetworkAclId: !Ref NetworkAcl
      Egress: false
      RuleNumber: 104
      Protocol: 6 #TCP
      RuleAction: allow
      CidrBlock: 0.0.0.0/0
      PortRange:
        From: 1024
        To: 65535
#------------------------------------------------------
#  Outbound NetwokACL
#------------------------------------------------------
  OutboundHTTPNetworkAclEntry:
    Type: AWS::EC2::NetworkAclEntry
    Properties:
      NetworkAclId: !Ref NetworkAcl
      Egress: true
      RuleNumber: 100
      Protocol: 6 #TCP
      RuleAction: allow
      CidrBlock: 0.0.0.0/0
      PortRange:
        From: 80
        To: 80
  OutboundHTTPSNetworkAclEntry:
    Type: AWS::EC2::NetworkAclEntry
    Properties:
      NetworkAclId: !Ref NetworkAcl
      Egress: true
      RuleNumber: 101
      Protocol: 6 #TCP
      RuleAction: allow
      CidrBlock: 0.0.0.0/0
      PortRange:
        From: 443
        To: 443
  OutboundResponseNetworkAclEntry:
    Type: AWS::EC2::NetworkAclEntry
    Properties:
      NetworkAclId: !Ref NetworkAcl
      Egress: true
      RuleNumber: 102
      Protocol: 6 #TCP
      RuleAction: allow
      CidrBlock: 0.0.0.0/0
      PortRange:
        From: 1024
        To: 65535
#------------------------------------------------------
#  SubnetACL
#------------------------------------------------------
  SubnetNetworkAclAssociation:
    Type: AWS::EC2::SubnetNetworkAclAssociation
    Properties:
      SubnetId:
        Fn::ImportValue: !Sub ${ProjectName}-publicsubnet
      NetworkAclId:
        !Ref NetworkAcl
#------------------------------------------------------
#  Output
#------------------------------------------------------
Outputs:
  StackSecurityGroup:
    Description:  Security Group ID
    Value: !Ref SecurityGroup
    Export:
      Name: !Sub ${ProjectName}-sg
Webテンプレート
- キーペア・EC2作成
web.yaml
AWSTemplateFormatVersion: 2010-09-09
#------------------------------------------------------
#  Parameter
#------------------------------------------------------
Parameters:
  ProjectName:
    Type: String
    Default: simple-nginx
    Description: ProjectName
  AMIId:
    Type: AWS::SSM::Parameter::Value<String>
    Default: /aws/service/ami-amazon-linux-latest/amzn2-ami-hvm-x86_64-gp2
  Ec2InstanceType:
    Type: String
    Default: t3.nano
Resources:
#------------------------------------------------------
#  KeyPair
#------------------------------------------------------
  KeyPair:
    Type: 'AWS::EC2::KeyPair'
    Properties:
      KeyName: KeypairWeb
#------------------------------------------------------
#  EC2
#------------------------------------------------------
  WebSeverInstace:
    Type: AWS::EC2::Instance
    Properties:
      KeyName:  !Ref KeyPair
      ImageId: !Ref AMIId
      InstanceType: !Ref Ec2InstanceType
      Monitoring: false #詳細モニタリング オフ
      UserData: !Base64 |
        #!/bin/bash -ex
        yum update -y
        amazon-linux-extras install nginx1 -y
        sudo timedatectl set-timezone Asia/Tokyo && sudo localectl set-locale LANG=ja_JP.utf8 && sudo localectl set-keymap jp106
        export LANG=ja_JP.UTF-8
        systemctl start nginx
        systemctl enable nginx
      NetworkInterfaces:
        - GroupSet:
          - Fn::ImportValue: !Sub ${ProjectName}-sg
          DeleteOnTermination: true
          DeviceIndex: 0
          SubnetId:
            Fn::ImportValue: !Sub ${ProjectName}-publicsubnet
          AssociatePublicIpAddress: "true"  #自動割り当てパブリックIDの有効化
      Tags:
        - Key: key
          Value: !Ref ProjectName
3. シェルスクリプト起動
シェルスクリプトと3つのテンプレートを同じ階層に配置してから
./deploy.shを実行します。
内容がシンプルなのでおおよそ2~3分でスタック作成が完了します。
実行結果
~/develop/vpc_set# ./deploy.sh
Start create vpc | 2022-11-20 18:34:07

Waiting for changeset to be created..
Waiting for stack create/update to complete
Successfully created/updated stack - vpc
End create vpc | 2022-11-20 18:35:14
---
Start create security | 2022-11-20 18:35:14

Waiting for changeset to be created..
Waiting for stack create/update to complete
Successfully created/updated stack - security
End create security | 2022-11-20 18:36:22
---
Start create web | 2022-11-20 18:36:22

Waiting for changeset to be created..
Waiting for stack create/update to complete
Successfully created/updated stack - web
End create web | 2022-11-20 18:36:58
---
Deploy End | 2022-11-20 18:36:58
4. 動作確認
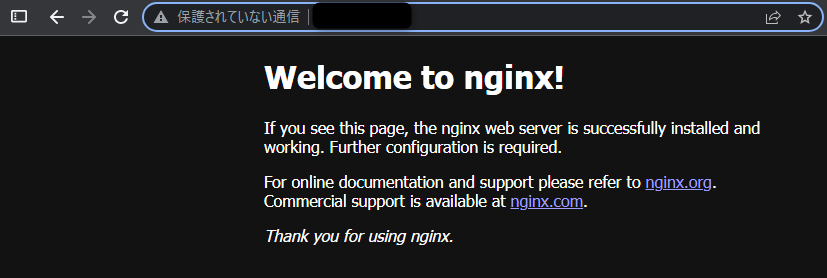
AWSコンソールのEC2からパブリックIPを確認。ブラウザにてアクセスしてnginxが開けば成功です。
確認が終わった後は、Cloudformationのスタック削除は忘れずに。
参考ページ・記事
-
https://oreout.hatenablog.com/entry/aws/cloudformation/12
- 非常に参考になりました
-
https://dev.classmethod.jp/articles/aws-cloudformation-nacl/
- AWS::EC2::NetworkAclEntryのイラストがすごい分かりやすい
-
https://aws.amazon.com/jp/blogs/news/query-for-the-latest-amazon-linux-ami-ids-using-aws-systems-manager-parameter-store/
- AMI取得コードを参考にしました
おわりに
Cloudformationのテンプレートをしっかりと読み込んだのは今回が初めてだったので、まずはシンプルな内容の確認のみとしました。これを足掛かりに他のサービスやCloudformationの構築セオリーを学んでいきたいと思います。
