WROOM-32のArduino開発環境でI2Cを行う方法を確認します。
理解が必要な事項は以下です。
- I2Cのデフォルトピンの確認
- Wireライブラリ
I2Cのデフォルトピンの確認
esp 32 のI2C ピンアサインは以下にあります。
https://github.com/espressif/arduino-esp32/blob/master/variants/nano32/pins_arduino.h
以下の表記があります。
static const uint8_t SDA = 21;
static const uint8_t SCL = 22;
ここはWROOM-32のピンが各社のモジュール上でどこにアサインされているかで変わるのでモジュールの回路図などを参考にしてください。
ちなみに秋月のDev-Moduleであればここ、Esprモジュールの場合はここ
どちらも普通にIO21,22に表示されているので、特に問題はないです。
Wireライブラリ
I2Cを使用するにはWireライブラリを使用します。
公式のリファレンスを参照しましょう。
https://www.arduino.cc/en/Reference/Wire
・使用するピンの設定はWire.beginでピン番号を指定します。
Wire.begin(21,22); //Wire.begin(SDA, SCL)
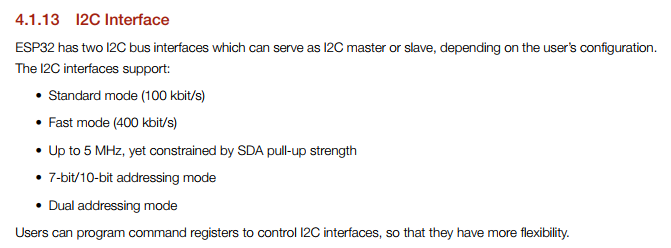
・I2Cの動作周波数の指定はsetClock()でできます。設定できる値はスタンダード100kbit/s、ファスト400kbit/sがあるようです。デフォルト値はfrequency=100000となっています。
Wire.setClock(100000);

ESP32 data sheet p.26
補足
・Wireライブラリではありませんが、内部プルアップの設定はpinModeで指定します。(外部プルアップの有無などに応じて設定が必要)
pinMode(21, INPUT_PULLUP); //デファルトのSDAピン21 のプルアップの指定
pinMode(22, INPUT_PULLUP); //デファルトのSDAピン22 のプルアップの指定
INPUT_PULLUPで内部プルアップ有効、INPUTで内部プルアップ無効です。
公式のpinModeマニュアルはこちらです。
♯注 ESP32の内部プルアップですが、GPIO34 から GPIO39では使用できないようです。→ 参考
I2C テスト <LCDコントローラ ST7032>
I2Cのテストとして、LCDコントローラのST7032で確認しました。
Arduinoのライブラリは作成してくださっている方がいましたので、以下を参考にしました。
http://ore-kb.net/archives/195
上記をそのまま使用するとエラーが出ました。
ESP32向けには若干の修正が必要なようで、以下を参考にさせていただきました。
http://blog.boochow.com/article/424685995.html
# include "ST7032.h"
# include "Arduino.h"
# include <Wire.h>
# if defined(__AVR__)  ← 追加
# include <avr/pgmspace.h>
# endif          ← 追加
サンプルで動作させたコード
# include <Wire.h>
# include <ST7032.h>

ST7032 lcd;

void setup() {
  // put your setup code here, to run once:
  lcd.begin(8, 2);
  lcd.setContrast(30);            // コントラスト設定
  lcd.print("hello !");
}

void loop() {
  // put your main code here, to run repeatedly:

}
ST7032ライブラリの使い方を少し確認します。
READMEを確認すると、Examplesにサンプルがありました。
- Autoscroll ()
- Blink ()
- Cursor ()
- CustomCharacter ()
- Display ()
- HelloWorld ()
- Scroll ()
- SerialDisplay ()
- setCursor ()
- TextDirection ()
文字の操作などはArduino本家のLiquidCrystalライブラリのコマンドとして使えるようなので、操作方法はLiquidCrystalライブラリを確認しましょう。
https://www.arduino.cc/en/Reference/LiquidCrystal