初めに
TypeScriptによるスクレピングの簡単な手法を紹介したいと思います。
記事のポイントはあくまでもTypeScriptの使用、高度なスクレピング技法の紹介ではありません。
前提条件
- ある程度Typescriptの文法が分かってること
- Node.jsの環境が整って、npmコマンド使えること
- グローバル環境にTypeScriptに入ってること
- 法に触れること、人に迷惑かけることをしないこと
プロジェクト初期化
mkdir [好きなディレクトリ] && cd [好きなディレクトリ]
package.jsonとtsconfig.jsonの初期化
npm init -y && tsc --init
プロジェクトのフォルダ内にsrcフォルダを作ります。
mkdir src
tscofig.jsonのrootDirをsrcフォルダに指定します。
 ...
     "rootDir": "./src",       /* Specify the root directory of input files. Use to control the output directory structure with --outDir. */
...
srcフォルダ内にcrowllwe.tsファイルを作って、中身 console.log('test')を追加します。
console.log('test');
現時点使用するライブラリをインストール
- npm install typescript -D
- npm install ts-node -D
package.jsonを修正します。
...
  "scripts": {
    "dev": "ts-node ./src/crowller.ts"
  },
...
コマンドラインで npm run devを実行します。testがもし正常に表示出来たらオーケーです。
$ npm run dev

> [好きなディレクトリ名]@1.0.0 dev [好きなディレクトリ名]
> ts-node ./src/crowller.ts

test
ここまで初期化は完了です。
ディレクトリ構成は以下の通りです。
好きなディレクトリ
|-node_modules
|-src
|- |- crowller.ts
|- package-lock.json
|- package.json
|- tsconfig.json
HTMLレスポンス取得
ターゲットサイトからHtmlレスポンスもらう必要がある為、リクエスト送れるライブラリsuperagentを使用します。
npm install superagent --save
インストール終わったら、crowller.tsにimportします。
import superagent from 'superagent'
この場合、恐らくIDEに怒られます。vscode使用してコーティングする場合、以下のメッセージが表示されます。
'superagent' が宣言されていますが、その値が読み取られることはありません。ts(6133)
モジュール 'superagent' の宣言ファイルが見つかりませんでした。'/qiita-spider-ts/node_modules/superagent/lib/node/index.js' は暗黙的に 'any' 型になります。
  Try `npm install @types/superagent` if it exists or add a new declaration (.d.ts) file containing `declare module 'superagent';`ts(
なぜなら、superagentはjavascriptで書かれているライブラリ、Typescriptが直接認識することができません。
その場合、ライブラリの翻訳ファイルが必要になります。翻訳ファイルは.d.tsの拡張子を持ってます。
翻訳ファイルをインストールします。
npm install @types/superagent -D
これでエラーが解決できるはずです、それでも消えない場合、一回IDEを再起動することお勧めします。
実際リクエスト送信して、HTMLリスポンス受けとってみましょう。
ターゲットサイトは任意で構いません。
import superagent from 'superagent'

class Crowller {
    private url = "url"
    constructor(){
         this.getRawHtml();
    }
    async getRawHtml(){
        const result = await superagent.get(this.url);
        console.log(result.text)
    }
}

const crowller = new Crowller()
npm run devで実行すると、レスポンスもらえたらオーケーです。
...
<span class='c-job_offer-detail__term-text'>給与</span>
</div>
</th>
<td class='c-job_offer-detail__description'>
<strong class='c-job_offer-detail__salary'>550万 〜 800万円</strong>
</td>
</tr>
<tr>
<th>
...
レスポンスから必要なデータを抜き取る
正規表現で抜き取ることもできますが、今回は多少便利になるcheerioというライブラリを使用します。
ドキュメント
npm install cheerio --save
npm install @types/cheerio -D
cheerioを使用すれば、jQueryのような文法でHTMLをから内容を抜き取れます。
実際使ってみます、下記のDOM構造からテキスト内容を抜き取るためにcrowller.tsを修正します。

import superagent from 'superagent';
import cheerio from 'cheerio';

class Crowller {
    private url = "url"
    constructor(){
         this.getRawHtml();
    }
    async getRawHtml(){
        const result = await superagent.get(this.url);
        this.getJobInfo(result.text);
    }

    getJobInfo(html:string){
       const $ = cheerio.load(html)
       const jobItems = $('.c-job_offer-recruiter__name');
       jobItems.map((index, element)=>{
           const companyName = $(element).find('a').text();
           console.log(companyName)
       })
    }
}

const crowller = new Crowller()
実行してみます。
$ npm run dev

> qiita-spider-ts@1.0.0 dev 好きなディレクトリ名\qiita-spider-ts
> ts-node ./src/crowller.ts

xxx株式会社
株式会社xxx
xxx株式会社
...
データの保存
srcフォルダと同じ階層でデータ保存用のdataフォルダを新規追加します。
|- node_modules
|- src
|- data
|- |- crowller.ts
|- package-lock.json
|- package.json
|- tsconfig.json
取得したデータをjson形式でdataフォルダに保存します。
その前にデータに含む要素を決めるためのインターフェースを定義します。
転職サイトをターゲットにしてるため、会社名とポジションと提示年収の三つをインターフェースの要素として追加します。
...
interface jobInfo {
    companyName: string,
    jobName: string,
    salary: string
}
...
そして配列に継承させて、データを入れていきます。
...
    getJobInfo(html:string){
       const $ = cheerio.load(html)
       const jobItems = $('.c-job_offer-box__body');
       const jobInfos:jobInfo[] = [] //インターフェース継承
       jobItems.map((index, element) => {
           const companyName = $(element).find('.c-job_offer-recruiter__name a').text();
           const jobName = $(element).find('.c-job_offer-detail__occupation').text();
           const salary= $(element).find('.c-job_offer-detail__salary').text();
           jobInfos.push({
            companyName,
            jobName,
            salary
           })
       });
       const result = {
           time: (new Date()).getTime(),
           data: jobInfos
       };
       console.log(result);
    }
...
再度実行してみます。データが綺麗になってることが分かります。
$ npm run dev

> qiita-spider-ts@1.0.0 dev 好きなディレクトリ名\qiita-spider-ts
> ts-node ./src/crowller.ts

{ time: 1583160397866,
  data:
   [ { companyName: 'xx株式会社',
       jobName: 'フロントエンドエンジニア',
       salary: 'xxx万 〜 xxx万円' },
     { companyName: '株式会社xxxx',
   ...
保存用の関数を定義
generateJsonContentというデータ保存用の関数を定義します。
    ...
    async getRawHtml(){
        const result = await superagent.get(this.url);
        const jobResult = this.getJobInfo(result.text); //整形後のデータを受け取ります。
        this.generateJsonContent(jobResult); //保存用の関数に渡します。
    }
    // 保存用の関数
    generateJsonContent(){

    }
    ...
    getJobInfo(html:string){
    ...
    const result = {
           time: (new Date()).getTime(),
           data: jobInfos
       };
       return result
   }
でも、そのままデータを受け取れないので保存用のinterfaceを定義します。
interface JobResult {
    time: number,
    data: JobInfo[]
}
それを保存用の関数の引数型として渡します。
...
generateJsonContent(jobResult:JobResult){

    }
...
データをファイルに保存するために、node.jsのファイル操作関連のライブラリをimport
import fs from 'fs';
import path from 'path'
generateJsonContent関数の中身書いていきます。
...
generateJsonContent(jobResult:JobResult){
        const filePath = path.resolve(__dirname, '../data/job.json')
        let fileContent = {}
        if(fs.existsSync(filePath)){
            fileContent = JSON.parse(fs.readFileSync(filePath, 'utf-8'));
        }
        fileContent[jobResult.time] = jobResult.data;
        fs.writeFileSync(filePath, JSON.stringify(fileContent));
    }
...
今の内容ですと、恐らく fileContent[jobResult.time] がエラーになると思います。
エラーの内容は以下の通り。
(property) JobResult.time: number
Element implicitly has an 'any' type because expression of type 'number' can't be used to index type '{}'.
  No index signature with a parameter of type 'number' was found on type '{}'.ts(7053)
これを解決するには fileContentに型を振る必要があります。
そのまま let fileContent:any = {}にしてもいいですが、
ちゃんとしたインターフェース定義した方がtypescriptらしいです。
...
interface Content {
    [propName: number]: JobInfo[];
}
...
generateJsonContent(jobResult:JobResult){
...
let fileContent:Content = {}
...
}
最後に実行してみましょう。
npm run dev
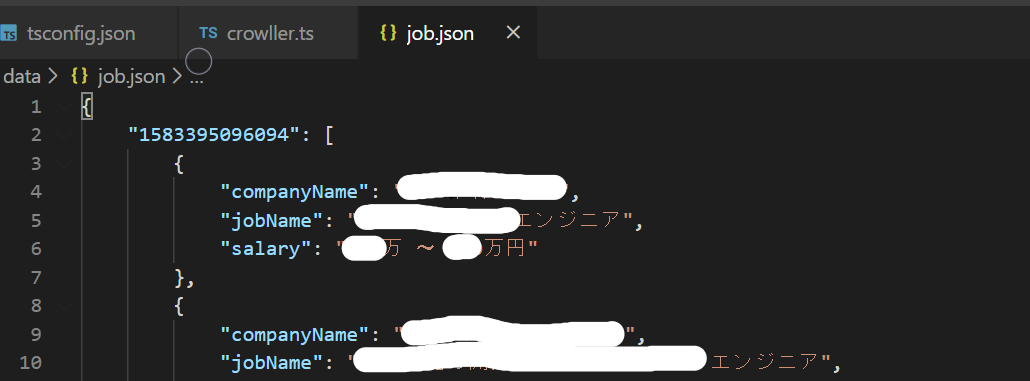
dataフォルダの下にjob.jsonファイルが作られて、データも保存されてるはずです。
終わりに
最初計画として、Typescriptを使ってExpressでスクレピングコントロールできるAPIを作るまでやりたかったのですが、
流石に長すぎて良くないと思いましたので、また今度時間ある時に。
import fs from 'fs';
import path from 'path'
import superagent from 'superagent';
import cheerio from 'cheerio';

interface JobInfo {
    companyName: string,
    jobName: string,
    salary: string
}

interface JobResult {
    time: number,
    data: JobInfo[]
}

interface Content {
    [propName: number]: JobInfo[];
}

class Crowller {
    private url = "url"
    constructor(){
         this.getRawHtml();
    }
    async getRawHtml(){
        const result = await superagent.get(this.url);
        const jobResult = this.getJobInfo(result.text);
        this.generateJsonContent(jobResult)
    }

    generateJsonContent(jobResult:JobResult){
        const filePath = path.resolve(__dirname, '../data/job.json')
        let fileContent:Content = {}
        if(fs.existsSync(filePath)){
            fileContent = JSON.parse(fs.readFileSync(filePath, 'utf-8'));
        }
        fileContent[jobResult.time] = jobResult.data;
        fs.writeFileSync(filePath, JSON.stringify(fileContent));
    }

    getJobInfo(html:string){
       const $ = cheerio.load(html)
       const jobItems = $('.c-job_offer-box__body');
       const jobInfos:JobInfo[] = []
       jobItems.map((index, element)=>{
           const companyName = $(element).find('.c-job_offer-recruiter__name a').text();
           const jobName = $(element).find('.c-job_offer-detail__occupation').text();
           const salary = $(element).find('.c-job_offer-detail__salary').text();
           jobInfos.push({
            companyName,
            jobName,
            salary
           })
       });
       const result = {
           time: (new Date()).getTime(),
           data: jobInfos
       };
       return result
    }
}

const crowller = new Crowller()