はじめに
Python × Flask × Tensorflow.Keras 猫の品種を予測するWebアプリで作ったPythonプログラムを変更しました。
変更内容
- 変更前
- 入力画像をファイル保存して扱う
- 変更後
- 入力画像をメモリに一時保存して扱う
変更ファイル
- sever.py
- 画像書き込み用バッファを確保
- 画像データをバッファに書き込む
- バイナリデータをbase64でエンコード
- utf-8でデコード
- 付帯情報を付与する
- HTMLに渡す
sever.py
from flask import Flask, render_template, request
from tensorflow.keras.preprocessing.image import load_img
from tensorflow.keras.models import load_model
import numpy as np
from image_process import examine_cat_breeds
from datetime import datetime
import os
import cv2
import pandas as pd
import base64
from io import BytesIO

app = Flask(__name__)

# モデル(model.h5)とクラスのリスト(cat_list)を読み込み
model = load_model('model.h5')
cat_list = []
with open('cat_list.txt') as f:
    cat_list = [s.strip() for s in f.readlines()]
print('= = cat_list = =')
print(cat_list)


@app.route("/", methods=["GET","POST"])
def upload_file():
    if request.method == "GET":
        return render_template("index.html")

    if request.method == "POST":
        # アプロードされたファイルをいったん保存する
        f = request.files["file"]
        #filepath = "./static/" + datetime.now().strftime("%Y%m%d%H%M%S") + ".png"
        #f.save(filepath)
        # 画像ファイルを読み込む
        # 画像ファイルをリサイズ
        input_img = load_img(f, target_size=(299, 299))

        # 猫の種別を調べる関数の実行
        result = examine_cat_breeds(input_img, model, cat_list)
        print("result")
        print(result)

        no1_cat = result[0,0]
        no2_cat = result[1,0]
        no3_cat = result[2,0]

        no1_cat_pred = result[0,1]
        no2_cat_pred = result[1,1]
        no3_cat_pred = result[2,1]

        # 画像書き込み用バッファを確保
        buf = BytesIO()
        # 画像データをバッファに書き込む
        input_img.save(buf,format="png")

        # バイナリデータをbase64でエンコード
        # utf-8でデコード
        input_img_b64str = base64.b64encode(buf.getvalue()).decode("utf-8")

        # 付帯情報を付与する
        input_img_b64data = "data:image/png;base64,{}".format(input_img_b64str)

        # HTMLに渡す
        return render_template("index.html", input_img_b64data=input_img_b64data,
        no1_cat=no1_cat, no2_cat=no2_cat, no3_cat=no3_cat,
        no1_cat_pred=no1_cat_pred, no2_cat_pred=no2_cat_pred, no3_cat_pred=no3_cat_pred)

if __name__ == '__main__':
    app.run(host="0.0.0.0")
- index.html
index.html
<!DOCTYPE html>
<html>
   <body>
      {% if no1_cat %}
      <img src="{{input_img_b64data}}" border="1" ><br>
      予測結果<br>
      {{no1_cat}}:{{no1_cat_pred}}<br>
      {{no2_cat}}:{{no2_cat_pred}}<br>
      {{no3_cat}}:{{no3_cat_pred}}<br>
      <hr>
      {% endif %}
      ファイルを選択して送信してください<br>
      <form action = "./" method = "POST"
         enctype = "multipart/form-data">
         <input type = "file" name = "file" />
         <input type = "submit"/>
      </form>
   </body>
</html>
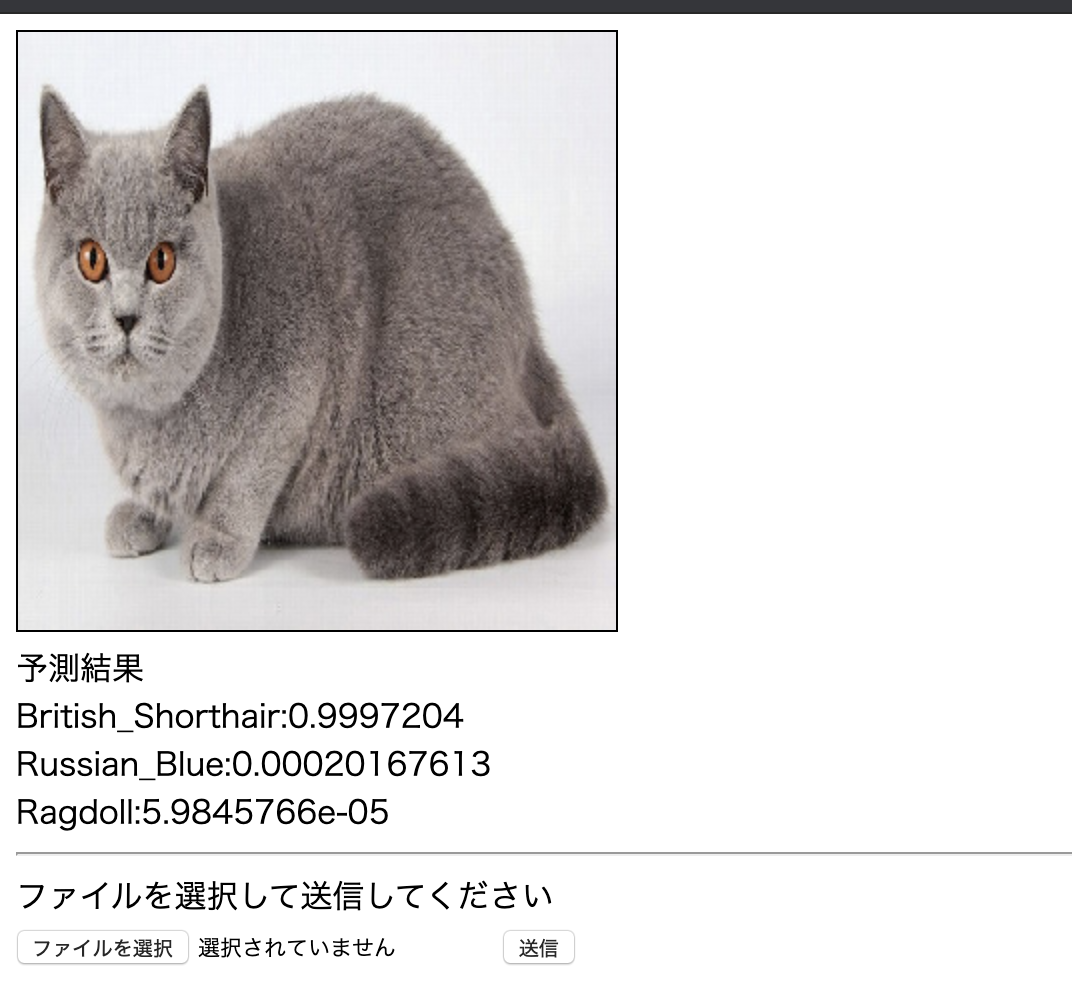
実行結果
画像は299×299で表示されます(モデルの入力サイズのまま・・・)
