私は生成AIを使用することがあります。
許可なく誰かのLoRAを作り、適用することはありません。
また、私が描いたイラストであっても、二次創作のものは、LoRAを作成し、アップロードすることはありません。
概要
- 目的:ローカルでFlux.1のLoRAをする
- パソコンのスペック:NVIDIA GeForce RTX 4090搭載のLinux機(GPU24GB、CPU64GB)
結論
いろいろとさまよった結果、学習にはFluxGymが使いやすかったです。
SimpleTunerは難しかった……。
今回は使いませんでしたが、ComfyUIを通じてFlax.1(モデル)で画像を生成していた経験も役に立ちました。
手順
FluxGymを使用し、トレーニングモデルを作成する。
ドキュメントに従い、Dockerをそのまま使わせてもらうのがおすすめです。
git clone https://github.com/cocktailpeanut/fluxgym
cd fluxgym
git clone -b sd3 https://github.com/kohya-ss/sd-scripts
デフォルトだと、ローカルホストのポート7860で動作するようです。
私の場合は、Windows機からSSH接続でLinux機に接続しているので、http://[IPアドレス]:7860でアクセスします。
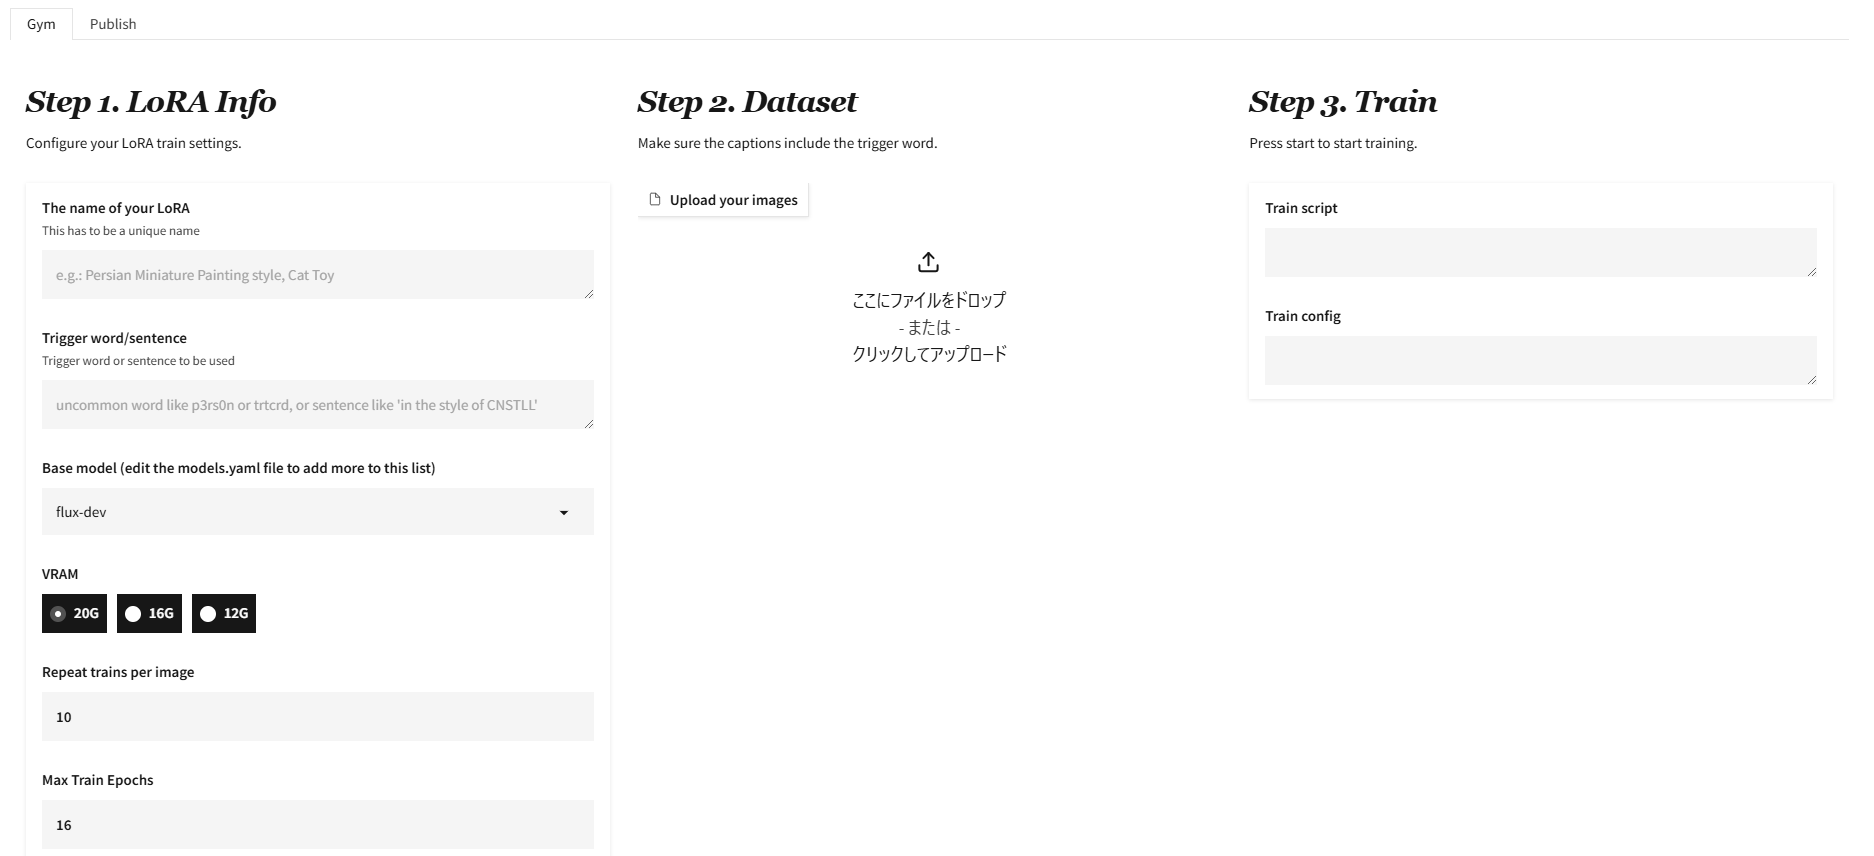
ありがたくわかりやすいUIが稼働します。
画像をアップロードし、キャプションをつけてトレーニングを開始します。
私の環境ですと、512×512の画像23枚で2時間程度かかりました。
もともとの画像が512*512ではなかったので、こちらで加工する必要があるか迷ったのですが、ツールの方でよいようにしてくれたと思います。
もし自分で調整したければ、Pythonのコードで一括処理すればいいかなと思います。
以下はコード例です。
作ったはいいのですが、使いませんでした。また、キャプションの記入はFluxGymのUI上でやるほうが直観的でよさそうです。
import os
from tkinter import Tk, filedialog

from PIL import Image


def resize_to_square_with_padding(input_path, output_path, target_size=512):
    # Open the image
    image = Image.open(input_path).convert("RGBA")

    # Get the original dimensions
    original_width, original_height = image.size

    # Calculate the new dimensions, preserving the aspect ratio
    if original_width > original_height:
        new_width = target_size
        new_height = int(original_height * (target_size / original_width))
    else:
        new_height = target_size
        new_width = int(original_width * (target_size / original_height))

    # Resize the image
    image = image.resize((new_width, new_height), Image.LANCZOS)

    # Create a new transparent canvas
    new_image = Image.new("RGBA", (target_size, target_size), (0, 0, 0, 0))

    # Center the image on the canvas
    top_left_x = (target_size - new_width) // 2
    top_left_y = (target_size - new_height) // 2
    new_image.paste(image, (top_left_x, top_left_y), image)

    # Save the result as a PNG to preserve transparency
    new_image.save(output_path, format="PNG")
    print(f"Image saved: {output_path}")

def save_caption(output_path, caption):
    # Save the caption as a .txt file
    caption_path = os.path.splitext(output_path)[0] + ".txt"
    with open(caption_path, "w", encoding="utf-8") as f:
        f.write(caption)
    print(f"Caption saved: {caption_path}")

def process_images(input_folder, output_folder, caption="Sample caption", target_size=512):
    # Create the output folder if it doesn't exist
    os.makedirs(output_folder, exist_ok=True)

    # Get all files in the input folder
    files = sorted(os.listdir(input_folder))
    if len(files) == 0:
        print("No images found in the input folder.")
        return

    for i, filename in enumerate(files):
        input_path = os.path.join(input_folder, filename)

        # Skip non-image files
        if not (filename.endswith(".jpg") or filename.endswith(".png")):
            continue

        # Create a sequential output filename
        output_filename = f"{i+1}.png"
        output_path = os.path.join(output_folder, output_filename)

        # Resize and pad the image
        resize_to_square_with_padding(input_path, output_path, target_size=target_size)

        # Save the caption
        save_caption(output_path, caption)

def select_input_folder():
    # Open a GUI to select the input folder
    root = Tk()
    root.withdraw()  # Hide the main window
    folder_selected = filedialog.askdirectory(title="Select Input Folder")
    root.destroy()
    return folder_selected

def main():
    print("Please select the input folder...")
    input_folder = select_input_folder()
    if not input_folder:
        print("No folder selected.")
        return

    # Output folder is fixed to 'output'
    output_folder = "output"
    print(f"Output folder: {output_folder}")

    # Placeholder caption
    caption = "A simple illustration of cat"

    # Start processing
    process_images(input_folder, output_folder, caption=caption)

if __name__ == "__main__":
    main()
学習を終えると、outputsにモデルが生成されます。
Flux.1を使用したい場合は、初回、HuggingFaceで権限のあるTokenを使用し、許可しておく必要があるんじゃないかと思います。うっかりしてたので慌てて後追いでログインしたら学習が進むようになりました。
出来上がったモデルを適用し、diffusersで画像を出力する。
前提として、仮想環境でdiffusersをインストールしています。
python -m venv .venv
source .venv/bin/activate
pip install diffusers
以下のようなスクリプトを書いて、実行します。
このスクリプトは、diffusersについて調べ、ChatGPTの助けを借りつつ自作したものです。
以下の記事を参考にしました。
参考:ローカル環境のFlux + DiffusersでAIグラビア
from diffusers import StableDiffusionPipeline, DPMSolverMultistepScheduler
import torch
from safetensors.torch import load_file

# 1. モデルと LoRA のパスを設定
base_model = "BASE_MODEL_PATH"  # ベースモデルのパス。ナントカ.safetensors
lora_path = "LORA_PATH"    # 学習済み LoRA モデルのパス。ナントカ.safetensors

# 2. Stable Diffusion パイプラインを準備
pipe = StableDiffusionPipeline.from_pretrained(base_model, torch_dtype=torch.float16)
pipe.scheduler = DPMSolverMultistepScheduler.from_config(pipe.scheduler.config)

# 3. LoRA モデルを適用
def apply_lora(pipe, lora_path, alpha=0.75):
    """LoRA を Stable Diffusion に適用"""
    state_dict = load_file(lora_path)
    for key, value in state_dict.items():
        # LoRA のキーに基づいて重みをマージ
        if "text_encoder" in key:
            target_dict = pipe.text_encoder.state_dict()
        elif "unet" in key:
            target_dict = pipe.unet.state_dict()
        else:
            continue

        # 重みを適用
        key = key.replace("text_encoder.", "").replace("unet.", "")
        if key in target_dict:
            target_dict[key] += alpha * value
        else:
            print(f"Key not found: {key}")

apply_lora(pipe, lora_path)

# 4. GPU を利用する設定
pipe.to("cuda")

# 5. プロンプトを指定して画像生成
prompt = "【ポジティブプロンプト】" # 学習の際に使用したプロンプトを使うと、RoLAのテストが出来る
negative_prompt = "【ネガティブプロンプト】" # cf. low quality, bad details
images = pipe(prompt, negative_prompt=negative_prompt, num_inference_steps=50, guidance_scale=7.5).images

# 6. 画像を保存
output_path = "generated_image.png"
images[0].save(output_path)
print(f"画像を保存しました: {output_path}")
補足:Flux.1のモデルをダウンロードしたい場合
FluxGymを通じてもダウンロードされているはずではあるのですが、どこにあるかわからなかったのと、別の方法で試行していたため、モデルがすでに手元にありました。
なので、ベースモデルはFluxGymで導入したものではなく、以下のやり方で指定しました。
huggingface login
huggingface-cli download black-forest-labs/FLUX.1-dev --local-dir=flux-base
余談
FluxのLoRAはクセがあるよ、という内容の記事

