少し複雑なアプリを作ろうとするとビューが増えて一つのStoryboadだと見にくくなります。
そこでStoryboard Referenceを使ってStoryboardを分割して管理する方法を解説していきます。
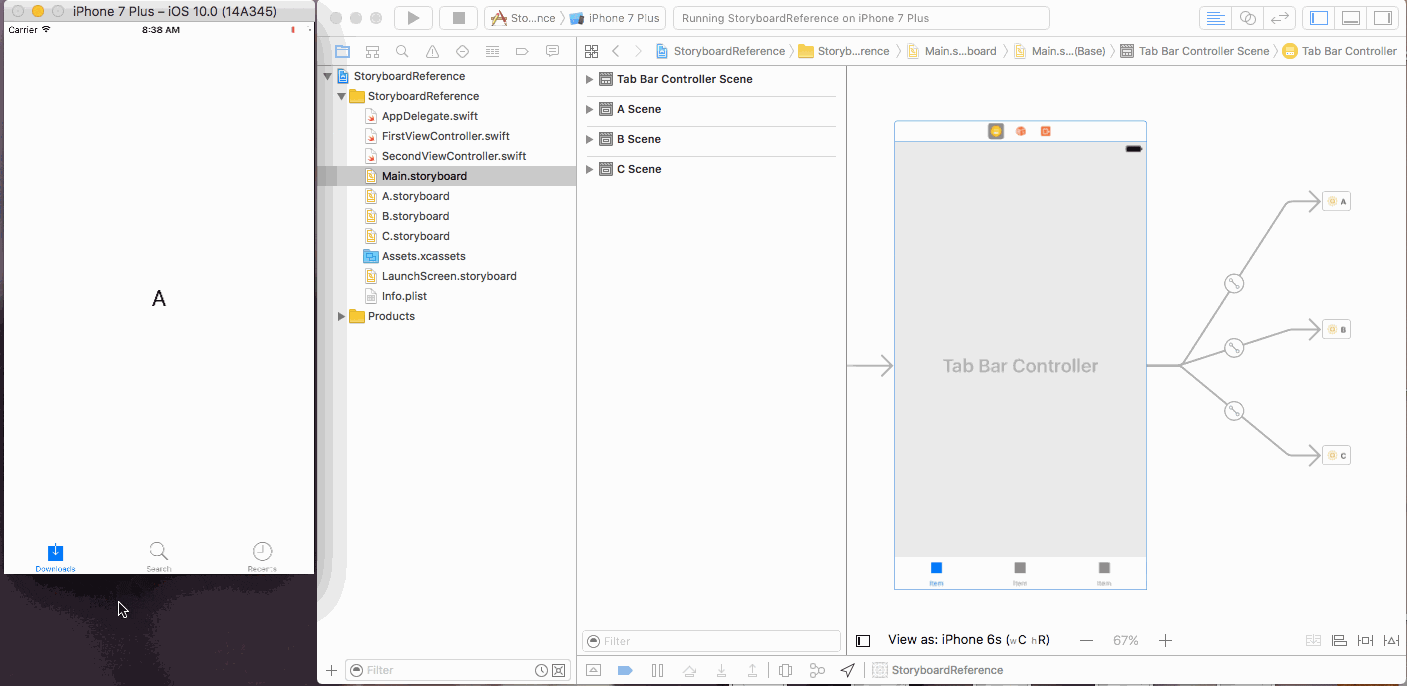
デモ
手順
- Tabbed Applicationで新規プロジェクトを作成し、First ViewとSecond Viewを削除しておきます。
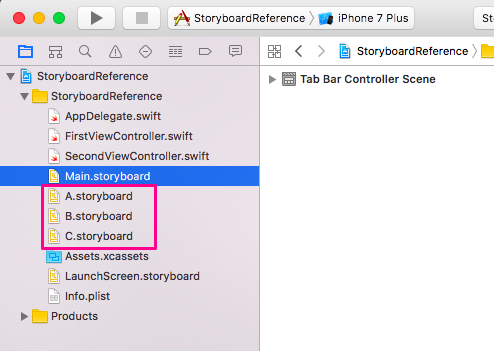
- タブ数分のStoryboardファイルを作成します。⌘+Nでファイルの新規作成画面に移動します。
今回はタブを3つにするので3つのStoryboardファイルを作成しました。(A.storyboard、B.storyboard、C.storyboard)
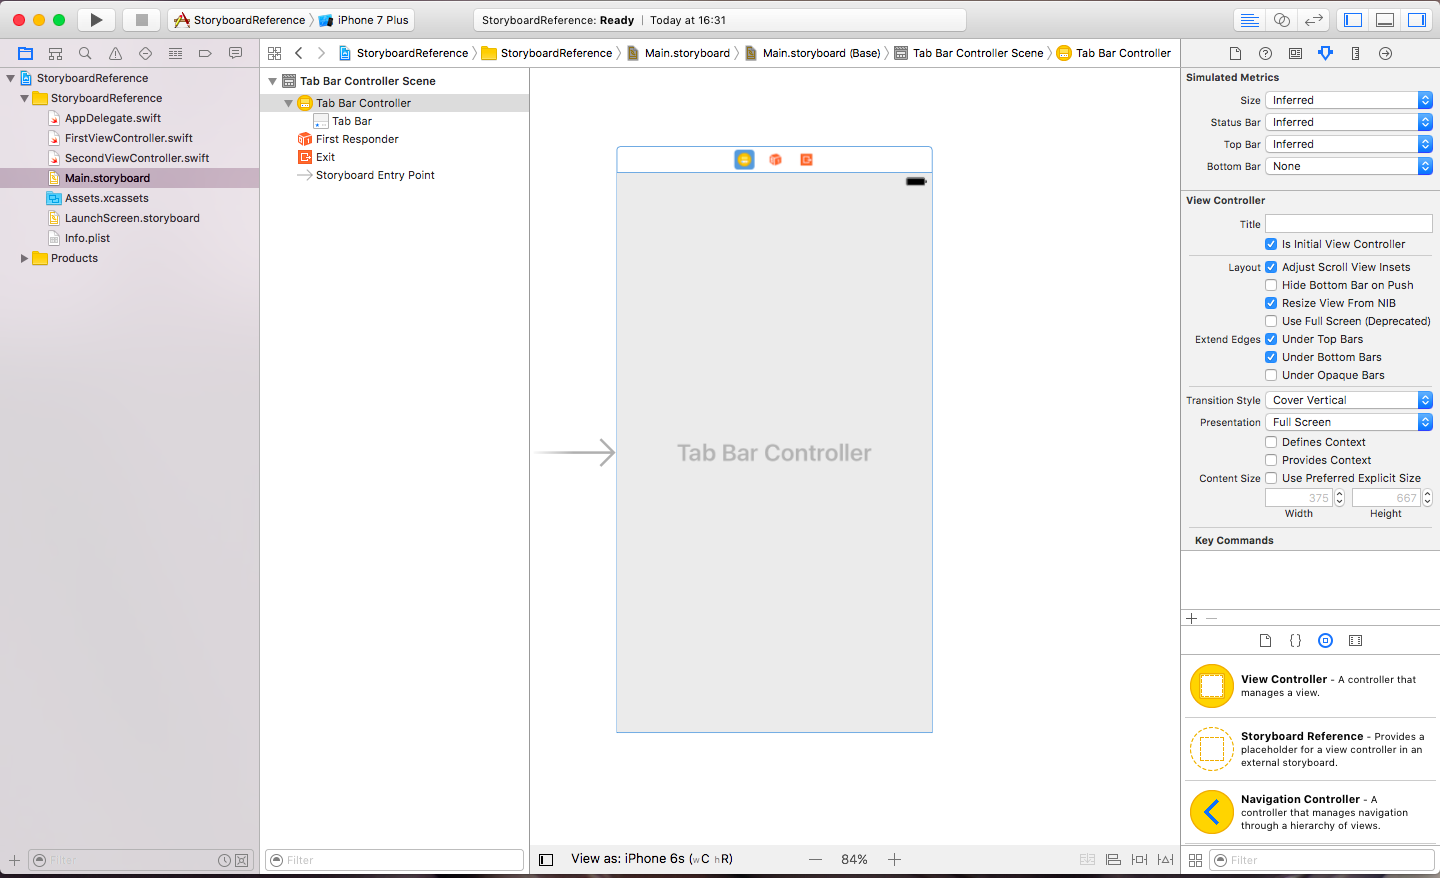
- Storyboard Referenceをタブ数分(3つ)設置します。
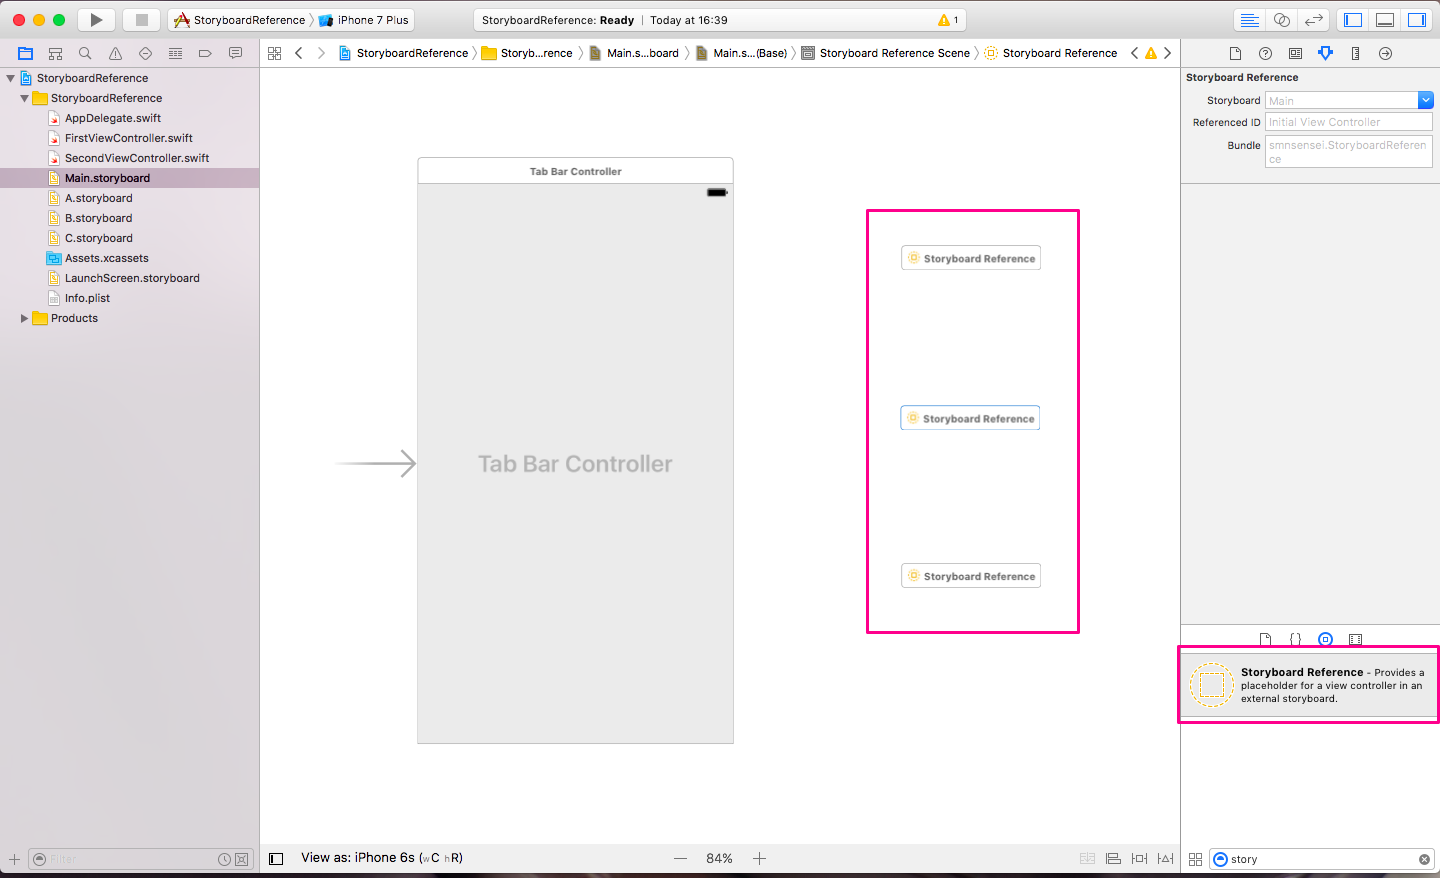
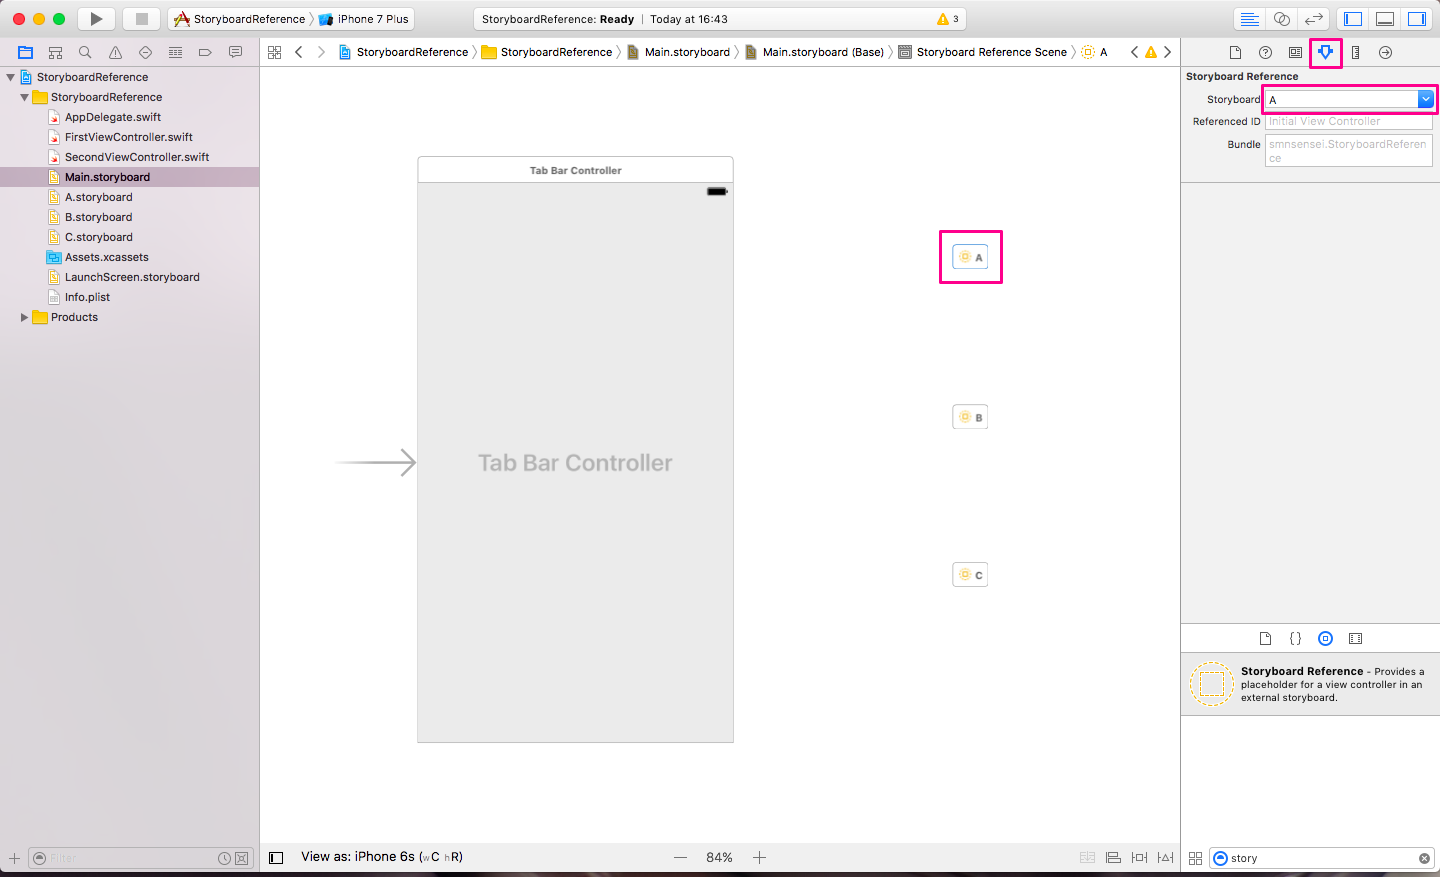
- Storyboard ReferenceにStoryboardを設定していきます。3つとも同じように設定します。
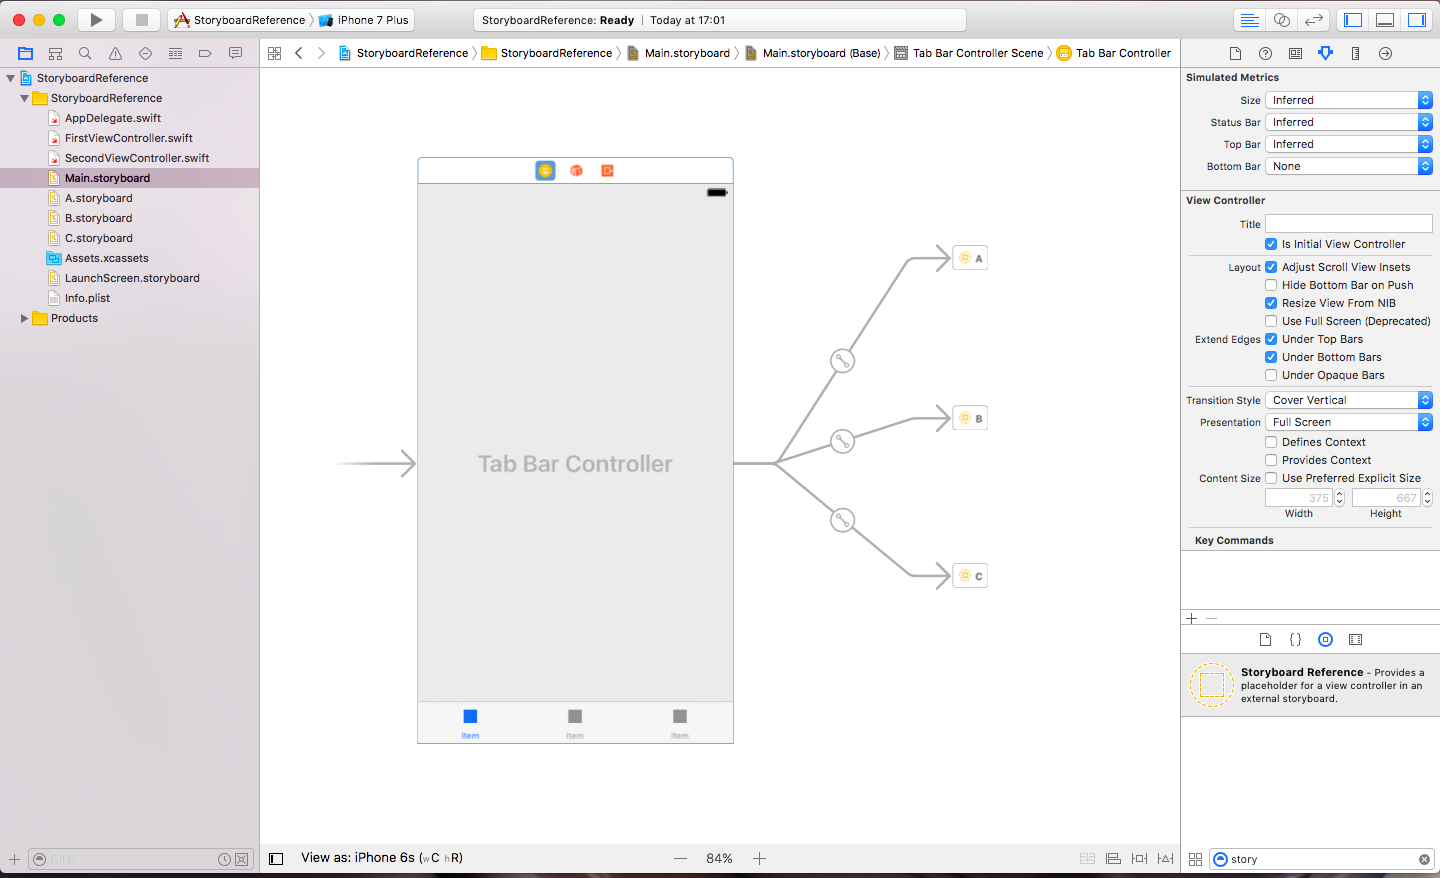
- control+ドラッグでStoryboard ReferenceにSegueを接続。
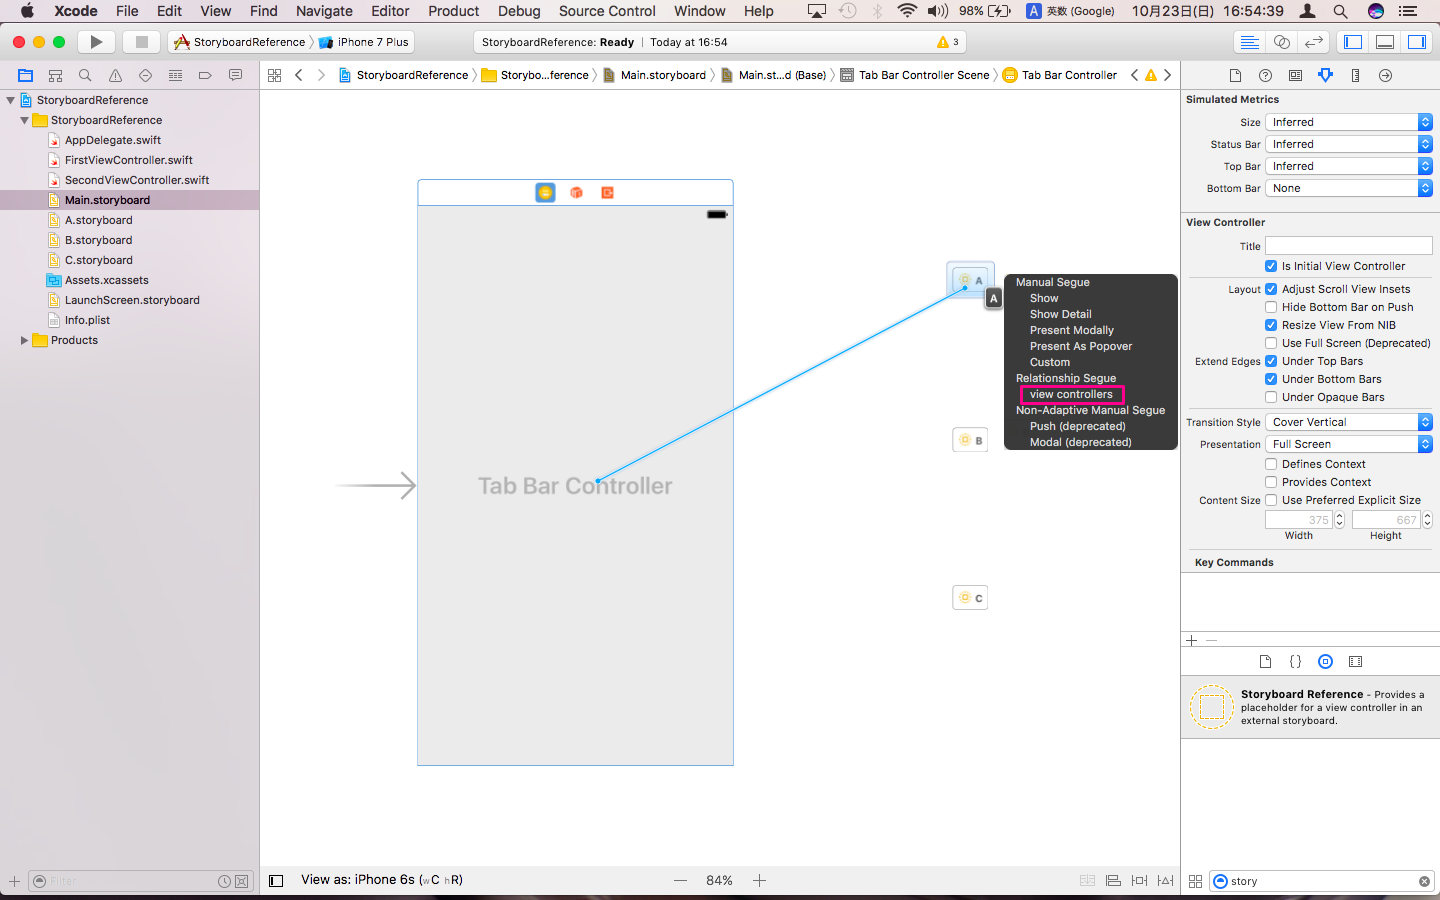
3つとも同じように設定します。
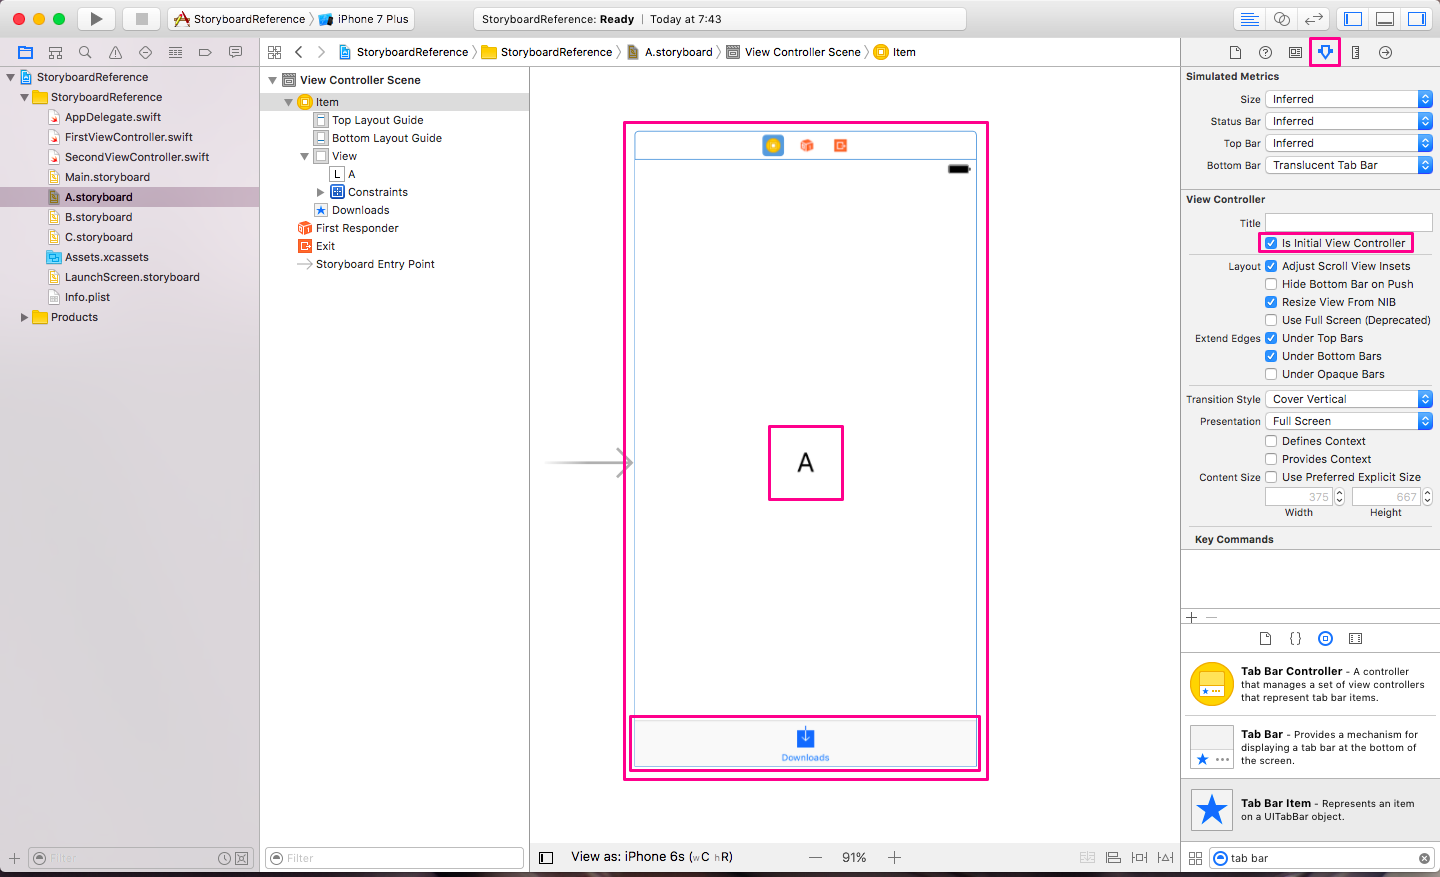
- 分割されたStoryboardの設定
View Controllerを設置して、「Is Initial View Controller」にチェックを入れます。
Tab Bar Controllerで接続されるのでTab Bar Itemを設置。
ついでにLabelでStoryboardのIDも入れて置きました。
これを3つとも同様に設定し、完了です。
起動時に表示されるタブを変更する
デフォルトでは一番左のタブが起動時に表示されるようになっています。
変更するにはAppDelegate.swiftにselectedIndexで指定します。
AppDelegate.swift
import UIKit

@UIApplicationMain
class AppDelegate: UIResponder, UIApplicationDelegate {

    var window: UIWindow?


    func application(_ application: UIApplication, didFinishLaunchingWithOptions launchOptions: [UIApplicationLaunchOptionsKey: Any]?) -> Bool {
        if let initialTab = self.window!.rootViewController as? UITabBarController  {

            // 0が一番左のタブ
            initialTab.selectedIndex = 2 // 左から3つ目のタブを指定
        }
        return true
    }

    func applicationWillResignActive(_ application: UIApplication) {
    }

    func applicationDidEnterBackground(_ application: UIApplication) {
    }

    func applicationWillEnterForeground(_ application: UIApplication) {
    }

    func applicationDidBecomeActive(_ application: UIApplication) {
    }

    func applicationWillTerminate(_ application: UIApplication) {
    }
}
起動時にロードするStoryboardを変更する
Tab Bar Controllerを使わずにStoryboardを分割した場合、起動時にロードするStoryboardを任意のStoryboardに指定したい場合があると思います。
その場合は、プロジェクト→TARGETS→General→Main Interfaceから指定できます。
