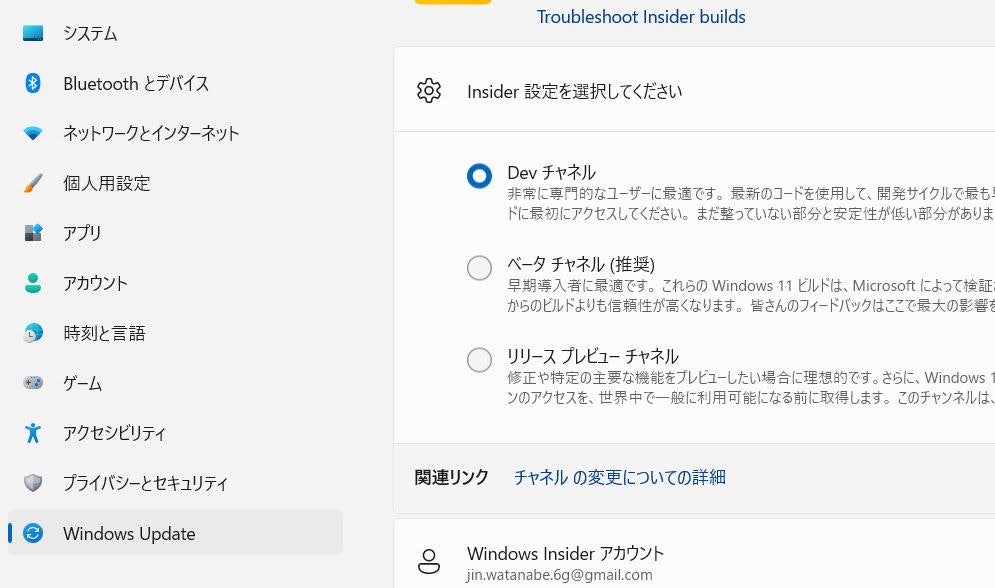
はじめに
この記事は2021年9月にまとめていた「細かいつまずいたことをメモしておく(9月編)をそれぞれ投稿した内容になります
解決方法が最新でない可能性もありますのでご了承ください
環境構築方法
基本的にはこの記事を確認した
若干わかりづらかったことだけをメモ
環境
- Ubuntu 18.04LTS
- GeForce GTX 1650
Ubuntu18.04のインストール
CMDからインストールしないと失敗した
$ wsl --install -d Ubuntu-18.04
NVIDIA Drivers for CUDA on WSLは説明通りで、GeForceをインストール
Toolkitは2つ目で紹介されているものをいれる
wget https://developer.download.nvidia.com/compute/cuda/repos/wsl-ubuntu/x86_64/cuda-wsl-ubuntu.pin
sudo mv cuda-wsl-ubuntu.pin /etc/apt/preferences.d/cuda-repository-pin-600
wget https://developer.download.nvidia.com/compute/cuda/11.4.1/local_installers/cuda-repo-wsl-ubuntu-11-4-local_11.4.1-1_amd64.deb
sudo apt-key add /var/cuda-repo-wsl-ubuntu-11-4-local/7fa2af80.pub # ここの順序を変える
sudo dpkg -i cuda-repo-wsl-ubuntu-11-4-local_11.4.1-1_amd64.deb # ここの順序を変える
sudo apt-get update
sudo apt-get -y install cuda
順序を入れ替えているところがあります。
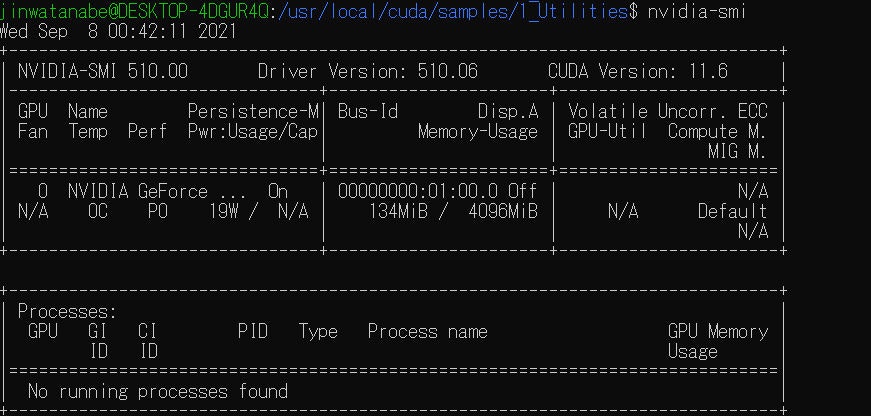
そのあとで、nvidea-smiのためのコマンドを記事通りに実行
すると立ち上がりました。
かなり前に苦戦して挫折したのでとてもうれしかったです。
ちなみにdockerでコンテナ上の認識も確認しました。
$ curl https://get.docker.com | sh
このあと、dockerインストールのためのNvidea Toolkitのシェルを作成
start.sh
#!/bin/sh

distribution=$(. /etc/os-release;echo $ID$VERSION_ID)
curl -s -L https://nvidia.github.io/nvidia-docker/gpgkey | sudo apt-key add -
curl -s -L https://nvidia.github.io/nvidia-docker/$distribution/nvidia-docker.list | sudo tee /etc/apt/sources.list.d/nvidia-docker.list
curl -s -L https://nvidia.github.io/libnvidia-container/experimental/$distribution/libnvidia-container-experimental.list | sudo tee /etc/apt/sources.list.d/libnvidia-container-experimental.list

sudo apt-get update
sudo apt-get install -y nvidia-docker2
sudo usermod -aG docker $USER
そのあと、sudo dockerとコマンドが打つのが嫌なのでグループ追加をする
$ sudo gpasswd -a $USER docker
$ sudo service docker restart
# 一度Ubuntuのタブを消す
$ docker ps (表示されればOK)

# Tensorflowのイメージを起動
$  docker run --gpus all -it --rm --name tensorflow-gpu -p 8888:8888 tensorflow/tensorflow:latest-gpu-py3-jupyter

# ログにでているlocalhost:8000/token=****にアクセス
# Jupyterで適当なファイルを作る
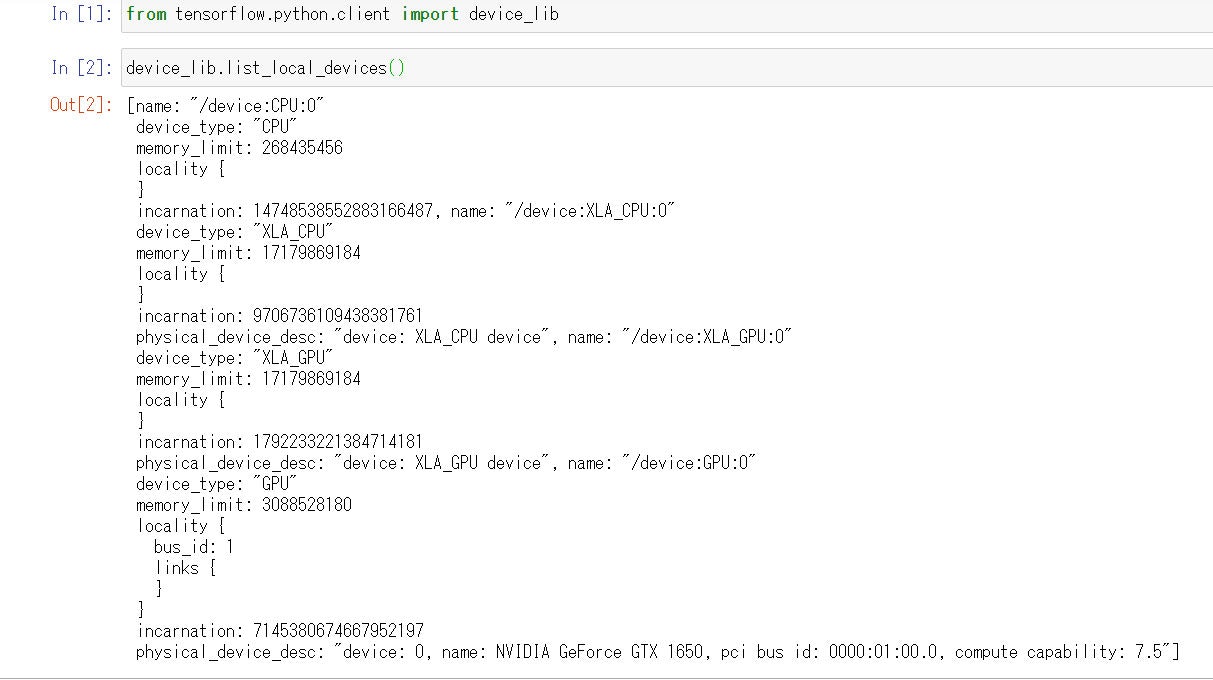
ファイルは以下のように書いて実行する
test.ipynb
IN[1] from tensorflow.python.client import device_lib
IN[2] device_lib.list_local_devices()
無事コンテナでもGPUを使うことができました。


