本編では、
前章作成したcreate-react-appで生成したファイルについて
個人的に割りと重要な部分を説明していきます。
ファイル構造
create-react-appで生成したファイルは下記の通りになります。
![]()
![]()
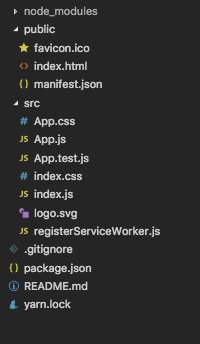
 package.json と /node_modules
 package.json
package.jsonは当ウェブアプリケーションの情報と依存関係を管理するファイルになります。
npmでパッケージをインストールした際に、
![]() のイメージになります。
のイメージになります。
(これからの紹介では実際に操作しますので、現段階では軽く記憶に残れば良いです。)
/node_modules:インストールしたパッケージの内容物を置きます。
package.josn:インストールしたパッケージのバージョン情報を管理します。
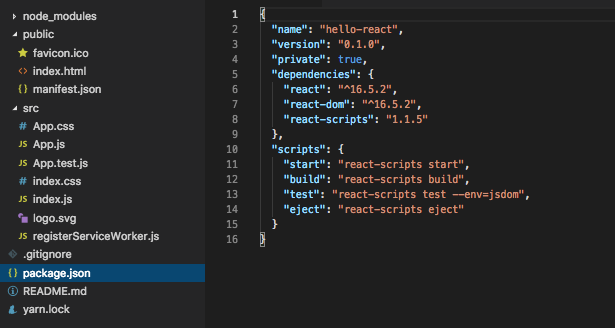
それでは、上記の内容を理解して行きましょう。
 アプリケーション基礎情報
アプリケーション名、バージョン、公開非公開など、
  {
  "name": "hello-react",
  "version": "0.1.0",
  "private": true,
  }
 この部分は依存しているパッケージ情報になります。
当アプリケーションが使っているパッケージのバージョンを示しています。
これからのreactの開発では、このような形で必要なパッケージを追加していきます。
 "dependencies": {
    "react": "^16.5.2",
    "react-dom": "^16.5.2",
    "react-scripts": "1.1.5"
  }
※dependencies:依存関係
こちらの依存関係に関しては、
第1章で紹介しました内容の最下部に書いている
始めよう React(基礎編)! Part 1 - React とは
 <script src="https://cdn.bootcss.com/react/16.2.0/umd/react.development.js"></script>
 <script src="https://cdn.bootcss.com/react-dom/16.2.0/umd/react-dom.development.js"></script>
 <script src="https://cdn.bootcss.com/babel-standalone/7.0.0-beta.3/babel.js"></script>
こちらの部分と同じ意味です。
例えば、上記の...cdn.bootcss.com/react/16.2.0/umd...
とpackage.jsonの"react": "^16.5.2"は同じようなイメージです。
 このアプリケーションの使い方です。
前章に書いてました、
$ npm startの部分になります。
始めよう React(基礎編)! Part 3 - create-react-app
  "scripts": {
    "start": "react-scripts start",
    "build": "react-scripts build",
    "test": "react-scripts test --env=jsdom",
    "eject": "react-scripts eject"
  }
 /node_modules
npmを使って、インストールされたパッケージを置く場所と言うイメージです。
前章のcreate-react-appをインストールした際に紹介しましたので、
![]() こちらを確認してイメージしやすくなります!
こちらを確認してイメージしやすくなります!
npm install
中身を見てみると、package.jsonに入っている
react、reactd-dom、react-scriptも入ってます!z
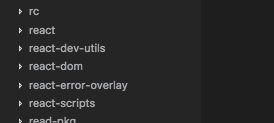
基本的インストールした時からセットになっています。
ウェブアプリケーションの開発に関しましては、直接触ることほぼありません。
少しだけでも変更があるとエラーになる可能性がありますので、
弄らないように心かけていきましょう。
 /src/index.js、/public/index.html、/src/App.js
 /src/index.js
こちらのを見てみると、先程はpackage.josn内の![]()
![]() が使われてます。
が使われてます。
    "react": "^16.5.2",
    "react-dom": "^16.5.2",
こちらのファイル内容について、説明していきましょう。
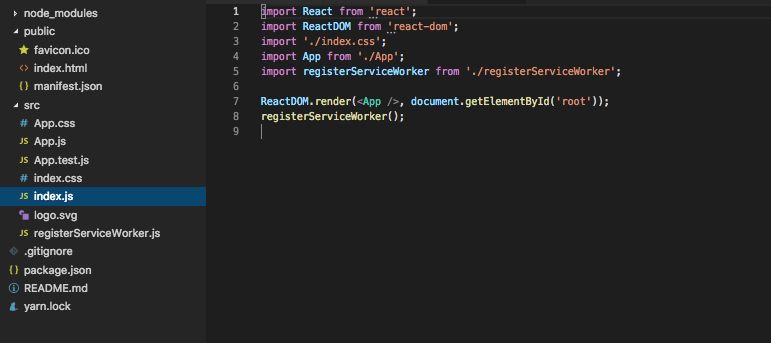
![]() 1,2行は基本的なreactの書き方です。
1,2行は基本的なreactの書き方です。
![]() 4行目は同じ/src配下のApp.jsファイルになります。
4行目は同じ/src配下のApp.jsファイルになります。
こちらのコンポネントをimportしでviewに反映しています。
こちらでは/Appの形で省略しています。
/src/App.jsについてが、後程説明します。
![]() 7行目はAppというコンポネントを使っていて、
7行目はAppというコンポネントを使っていて、
後半のdocument.getElementById('root')部分は
始めよう React(基礎編)! Part 1 - React とは
に紹介している内容と同じです。
こちらのgetElementById('root')は
/public/index.html(28行目)から取ってます。
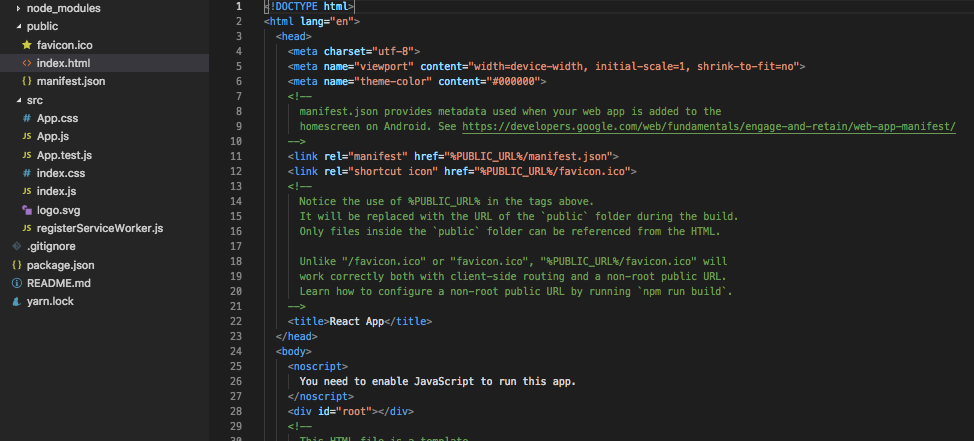
 /src/App.js
先程紹介しました/src/App.jsについては、
現在$npm startまたは$yarn startで見た画面はこちらの画面の内容を表示してます。
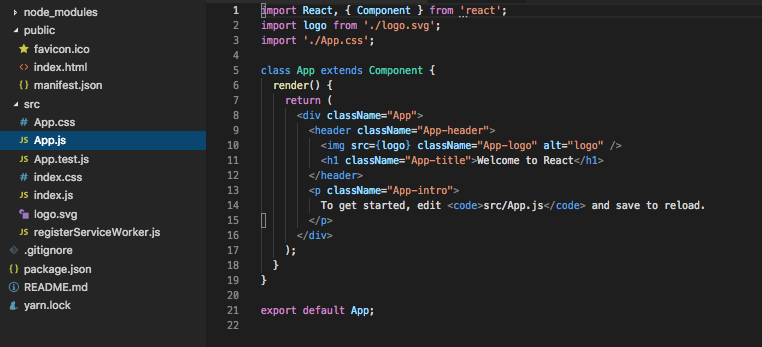
![]() 1行目基本的なreactのページの書き方です。
1行目基本的なreactのページの書き方です。
'react'というパッケージの**'React と Component'**を引用しています。
![]() 5行目はES6の書き方で、
5行目はES6の書き方で、
Appというclassを定義し、'react'のComponentを継承しています。
![]() 21行目でexport、Appという名のコンポネントとして出力します。
21行目でexport、Appという名のコンポネントとして出力します。
実際の変化を見て見ましょう!
少し文字部分のところを変更して、
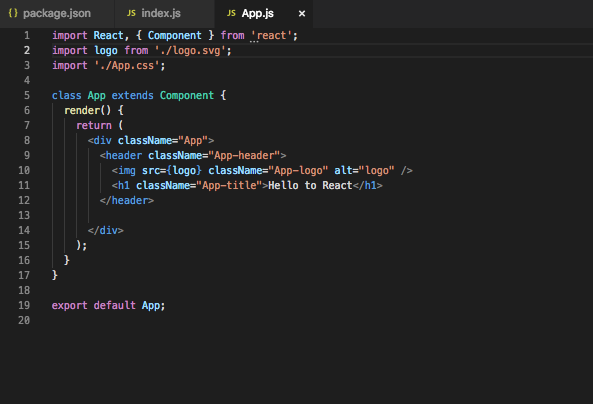
![]()
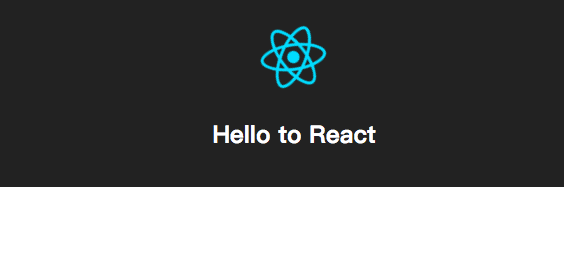
![]() Hello to Reactになりました!
Hello to Reactになりました!
最後に
ReactのHello worldの紹介はここまでです!
React実はそんなに難しくないでしょう!
次回はこちらのcreate-react-appの内容を修正して、初めてのコンポネントを作ります!
興味がある方是非見てみてください!!