はじめに
この記事はUnity #2 Advent Calendar 2017、12月14日の記事です。
今日は私の誕生日です。祝え
出来上がるもの
準備
Unityで新規プロジェクトを作成し、AssetStoreからUniRxをインポートしてください。
無料なので気軽にー
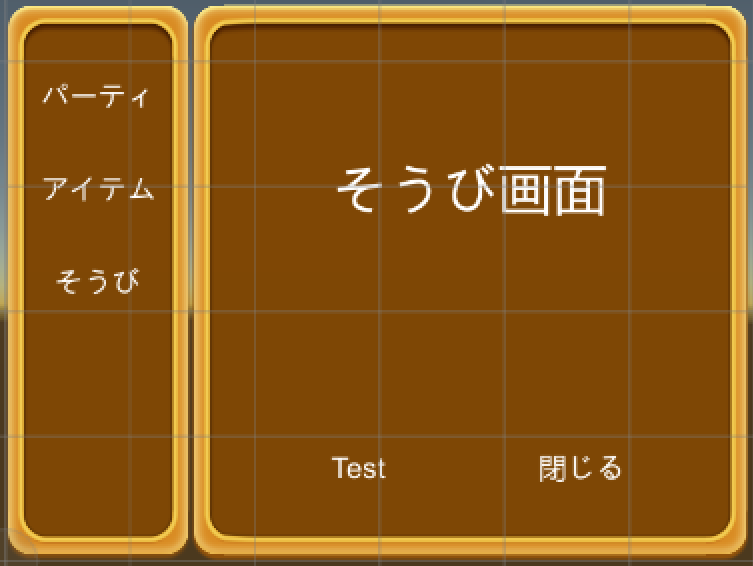
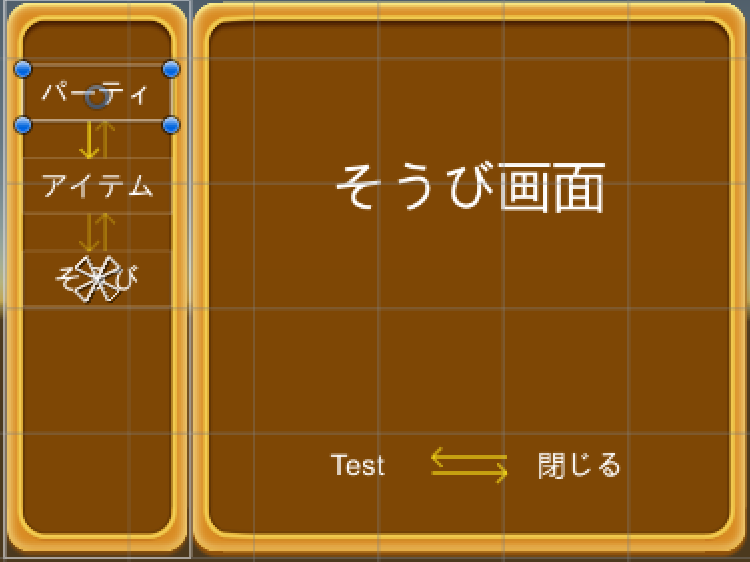
画面を用意する
こんな感じの画面を作ります。
右ビューは項目の数だけ作っておきます。
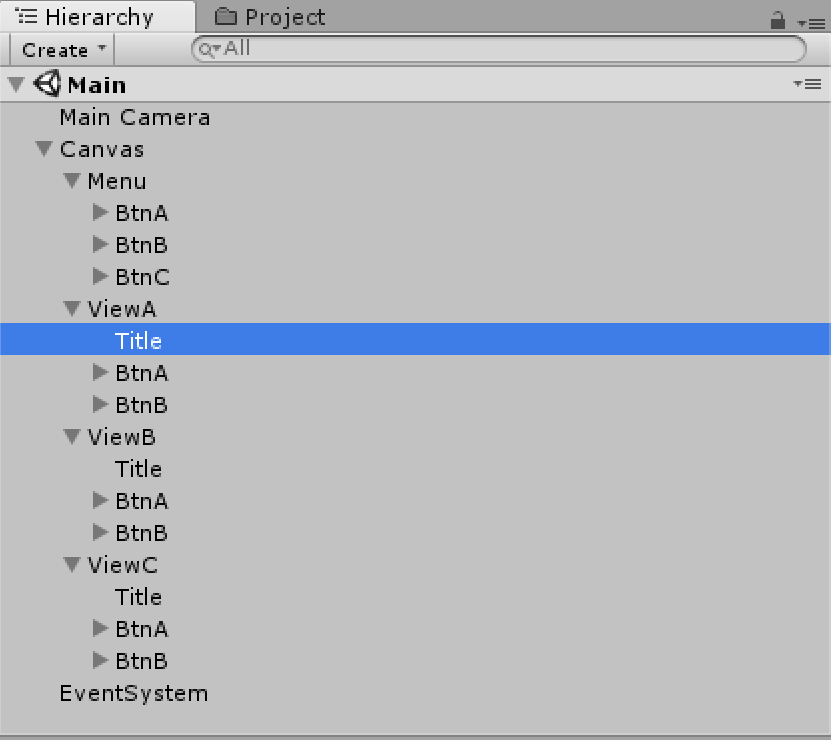
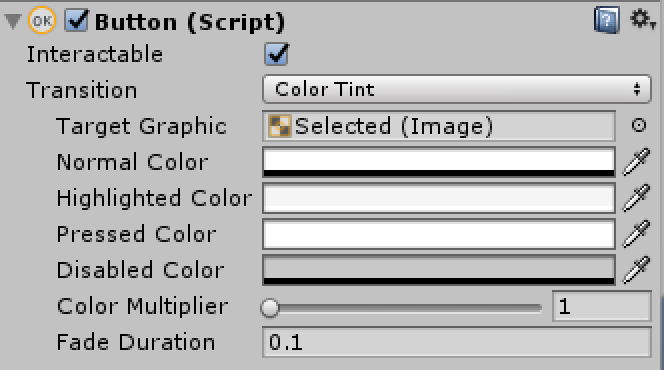
ボタンの設定をする
見出し以外の各テキストにはButtonコンポーネントを付け、
選択時の枠、ハイライト/押下時のみ枠が表示されるようにしておきます。
また、ボタンのナビゲーションをこんな感じに設定しておきます。
画面の表示タイプを示す列挙体を用意する
ここまで出来たらあとはスクリプトです。
まず、見出しの通りに列挙体を用意します。ついでにUniRx的に小細工をしておくといろいろ捗ります。
ViewType.cs
using UniRx;

public enum ViewType{
	Menu,
	ViewA,
	ViewB,
	ViewC
}

[System.Serializable]
public class ViewTypeReactiveProperty : ReactiveProperty<ViewType>
{
	public ViewTypeReactiveProperty ()
	{
	}
}

# if UNITY_EDITOR
[UnityEditor.CustomPropertyDrawer(typeof(ViewTypeReactiveProperty))]
public class ViewTypeReactivePropertyDrawer : InspectorDisplayDrawer
{}
# endif
次に、状態管理&メニュー表示用のスクリプトと、各画面制御用のスクリプトを用意します。
ボタンのバインドとかはUniRxでやってます。
MenuViewScript.cs
using UnityEngine;
using UnityEngine.UI;
using UniRx;
using UnityEngine.EventSystems;

public class MenuViewScript : MonoBehaviour {
	public ViewTypeReactiveProperty m_viewType;

	[SerializeField]private Button m_btnA;
	[SerializeField]private Button m_btnB;
	[SerializeField]private Button m_btnC;

	void Start()
	{
		m_viewType.Subscribe (type => {
			if(type == ViewType.Menu)
			{
				EventSystem.current.SetSelectedGameObject(m_btnA.gameObject);
			}
		}).AddTo (this);

		m_btnA.OnClickAsObservable ().Subscribe (_ => {
			m_viewType.Value = ViewType.ViewA;
		}).AddTo (this);
		m_btnB.OnClickAsObservable ().Subscribe (_ => {
			m_viewType.Value = ViewType.ViewB;
		}).AddTo (this);
		m_btnC.OnClickAsObservable ().Subscribe (_ => {
			m_viewType.Value = ViewType.ViewC;
		}).AddTo (this);
	}
}
SubViewScript.cs
using UnityEngine;
using UnityEngine.UI;
using UniRx;
using UnityEngine.EventSystems;

public class SubViewScript : MonoBehaviour {
	[SerializeField]private ViewType m_targetType;

	[SerializeField]private MenuViewScript m_mainScript;
	[SerializeField]private Button m_backBtn;
	void Start () {
		m_mainScript.m_viewType.Subscribe (type => {
			if(type == m_targetType)
			{
				this.gameObject.SetActive (true);
				EventSystem.current.SetSelectedGameObject(m_backBtn.gameObject);
			}else{
				this.gameObject.SetActive (false);
			}
		}).AddTo (this);

		m_backBtn.OnClickAsObservable ().Subscribe (_ => {
			m_mainScript.m_viewType.Value = ViewType.Menu;
		}).AddTo (this);
	}
}
Inspectorで設定する
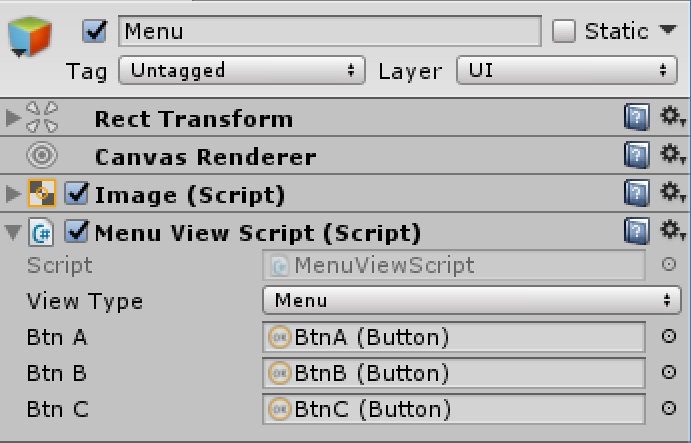
ちなみに先ほどの小細工のおかげで、ここのViewTypeをいじることでメニューを変更できます。
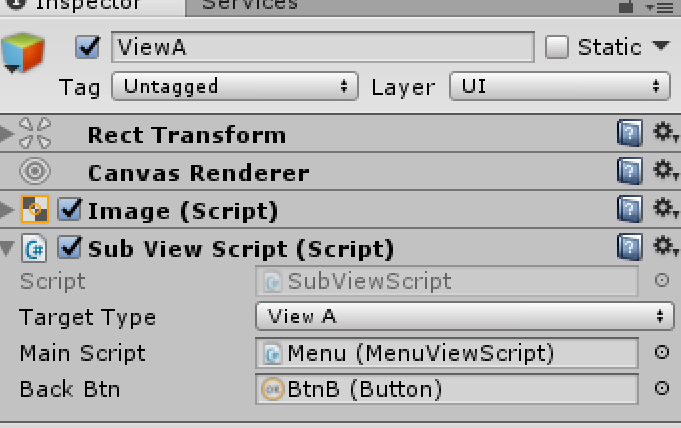
(ViewB/ViewCはほぼ同じため割愛)
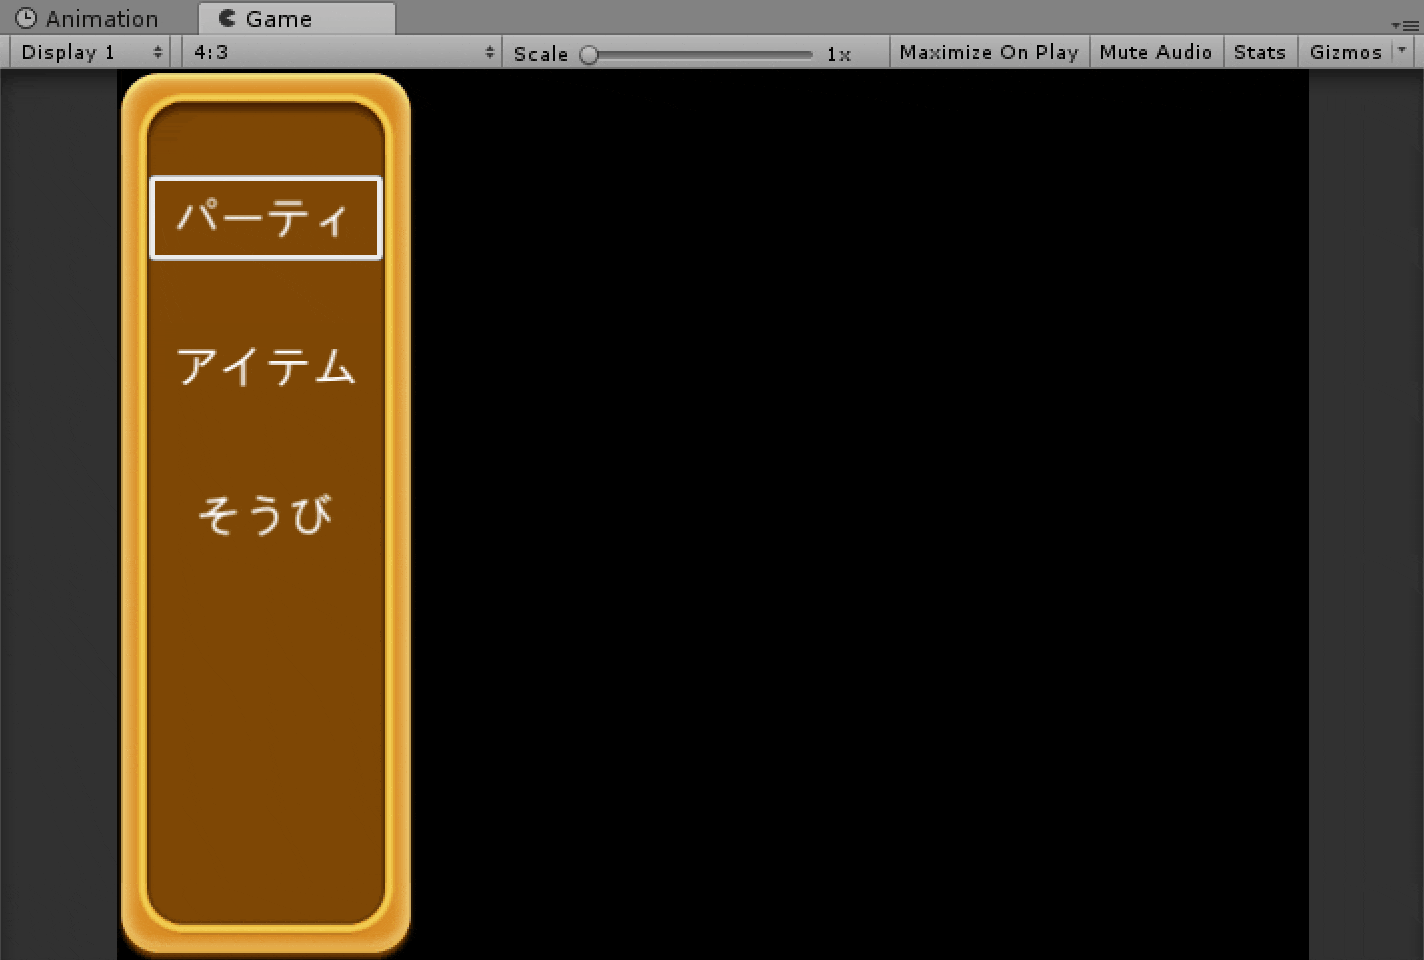
ゲームを実行する
どーん!
この書き方の利点
ViewTypeに項目を追加するだけで、簡単に画面数を増やすことができます。
また、各機能がほぼ独立しているため、変更が容易です。
あとがき
ちょっと時間がないので書き逃げ気味ですが、ReactivePropertyだけでもいろいろと使えますし、
かなりシンプルにいろいろなことができます。
(ちなみにこのサンプルプロジェクト作るのに10分くらい)
試しに触ってみるといいかもです。
明日はsakuo_sundayさんの「unityとarduinoで何かします。」です。