今回は、nuxt.jsとfirebase Cloud Functionを用いて簡単なメールフォームを作ってみたいと思います。
nuxtとfirebaseの簡単なインストール方法等はこちらからどうぞ。
対象者
・nuxt.jsにまだあまり慣れてはいないが、メールフォームを作りたい人。
・Laravelなどを使わずに、nuxtだけでメール機能を使いたい人。
では早速、firebase Cloud Functionsを初期化していきましょう。
firebase Cloud Functionの導入
今回はすでに、firebaseは入っているものとして考えさせてもらいます。
firebase init -functions
まずは、firebase Cloud Functionsを目的のプロジェクトに作成します。
? What language would you like to use to write Cloud Functions? (Use arrow keys)

❯ JavaScript
  TypeScript
Cloud Functionsに使う言語を聞かれるので、今回はJavaScriptを選択。
? Do you want to use ESLint to catch probable bugs and enforce style? (y/N)
ESLintの仕様の有無を聞かれます。
今回は使わないので、Nを選択。
Do you want to install dependencies with npm now? (Y/n)
依存関係について聞かれます。
ここは後で、めんどくさくなるのでYを選択。
これら全てを選択すると、インストールが始まります。
✔ Firebase initialization complete!
これが表示されると、firebase Cloud Functionsの初期化に成功しています。
では早速、プロジェクトファイルの中身をみていきましょう。
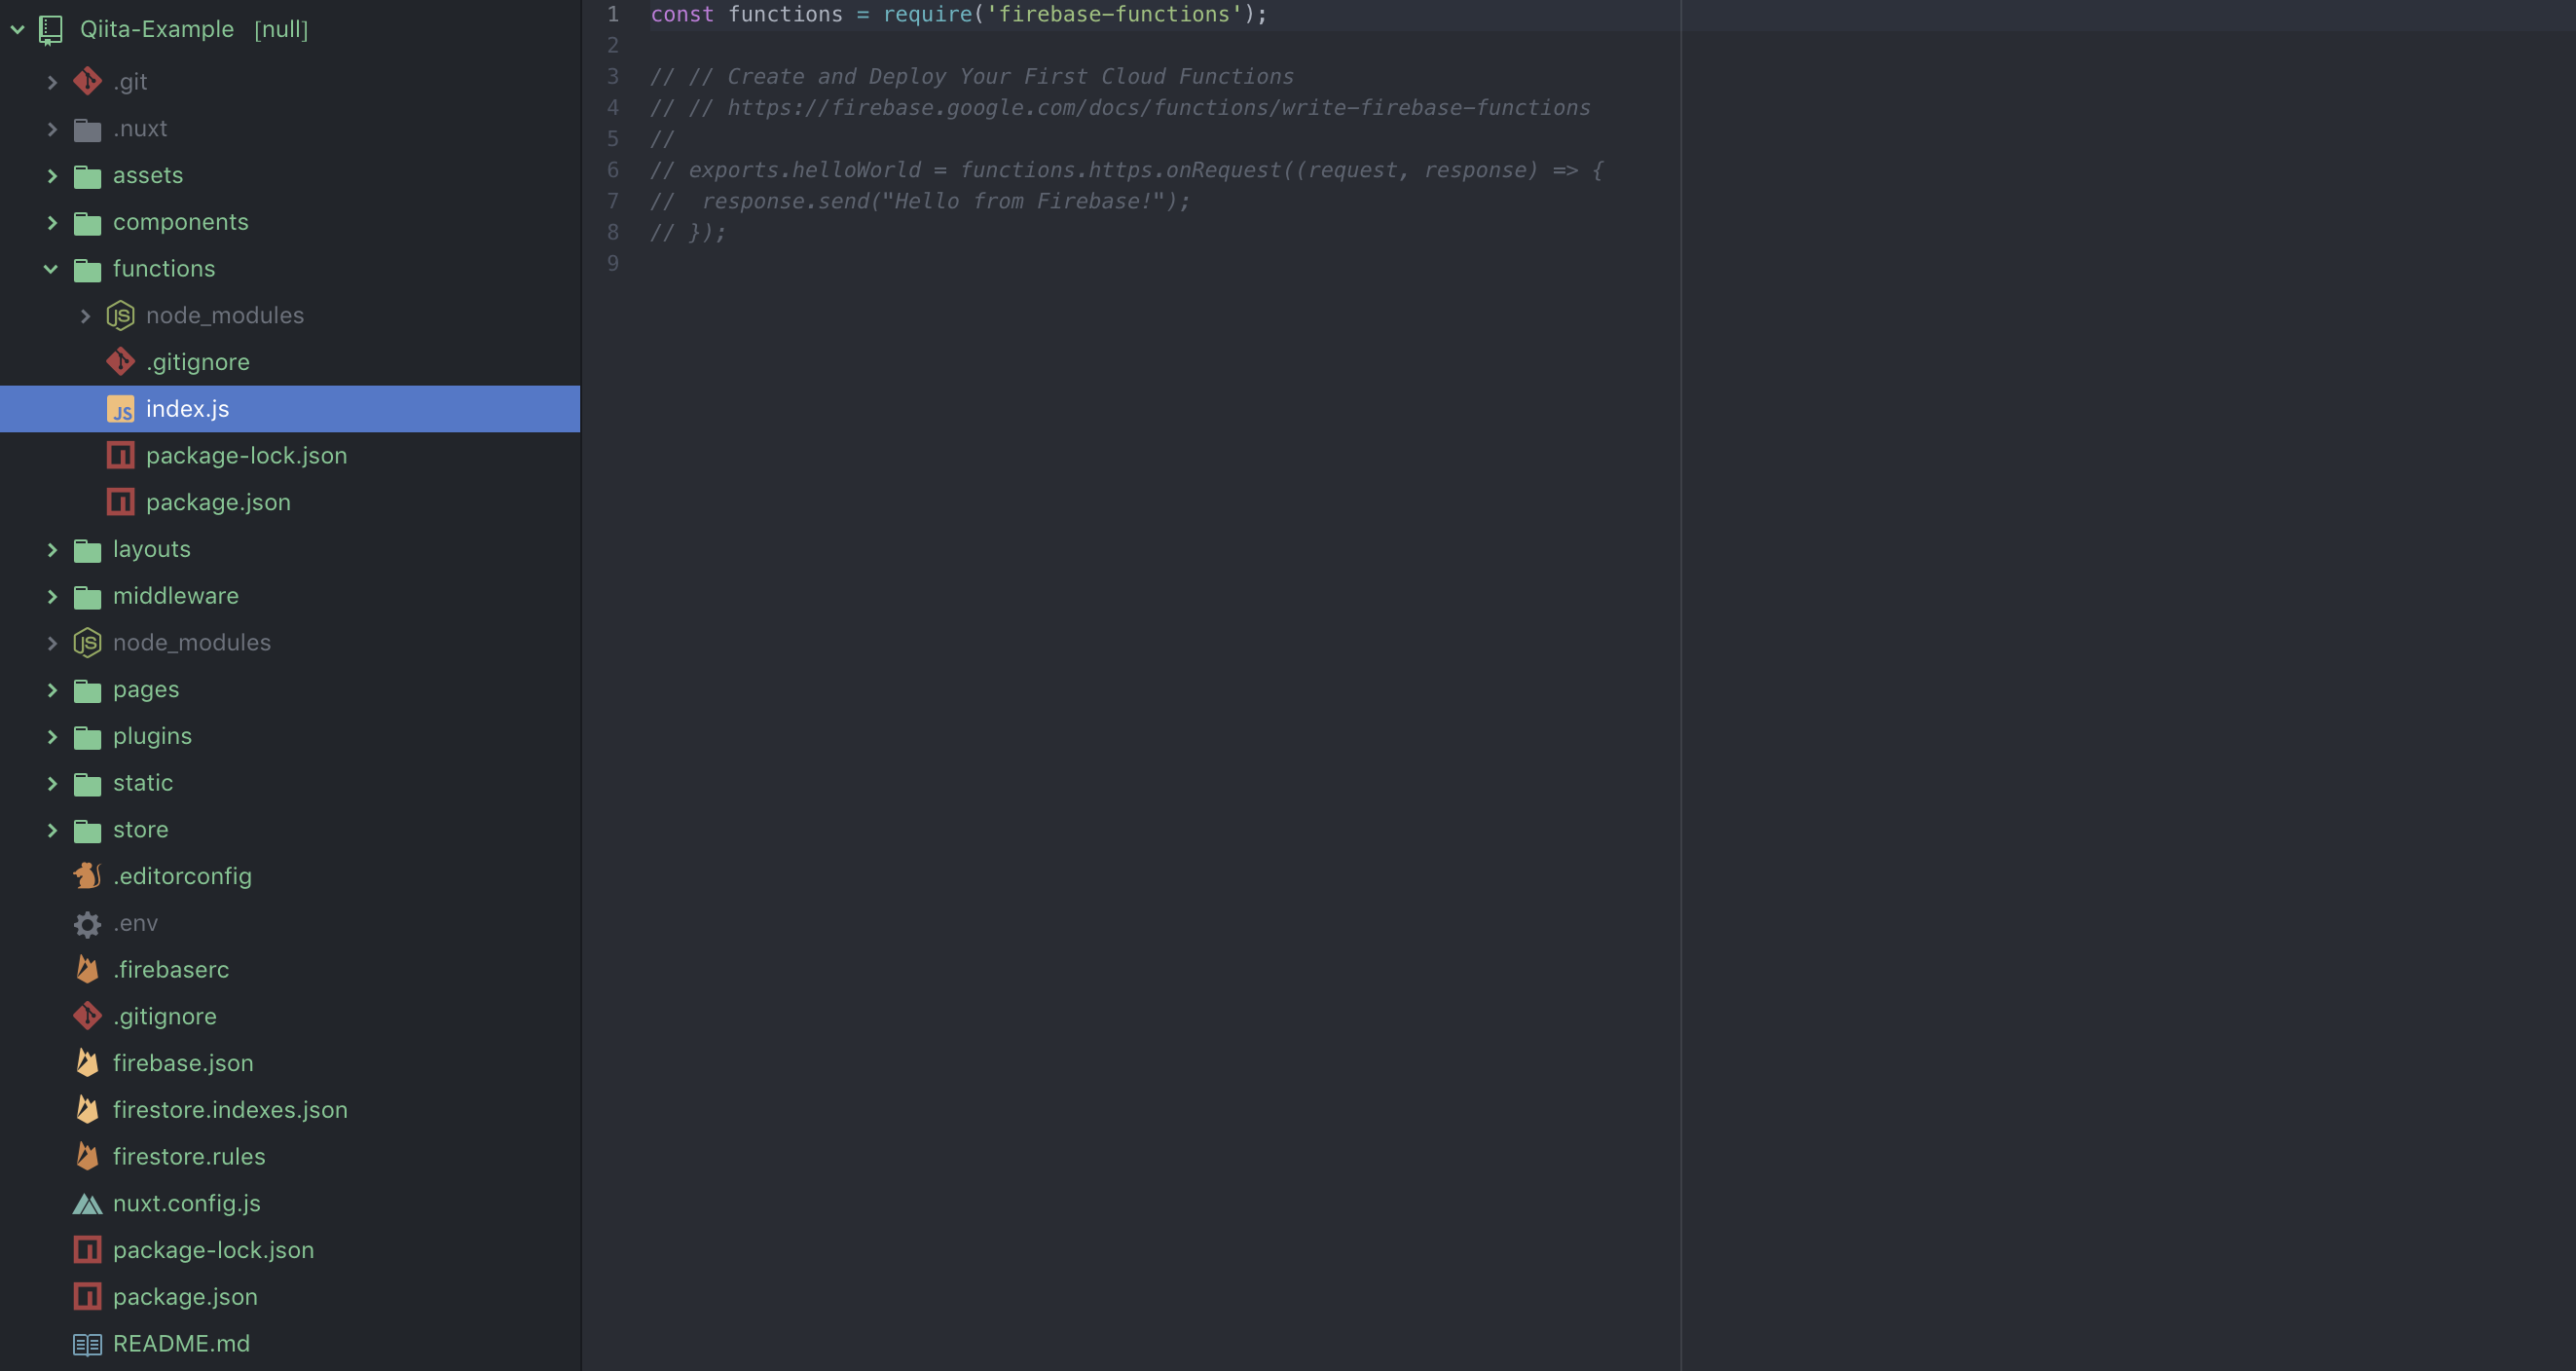
実際にプロジェクトの中身を見てみると、確かにプロジェクトディレクトリ直下に、/functionsができています。
今回のメール送信機能など、詳しい内容は基本的にfunctiuons/index.jsのなかに記述していきます。
nodemailerとは
node.jsからメールの送信などを可能にするモジュールです。
今回はこれを用いて、管理者に自動でメールを送るような仕様にしていきたいと思います。
公式はこちらからどうぞ。
nodemailerのインストール
cd functions
npm install nodemailer --save
これだけで準備はオッケーです。
では早速メール送信機能を実装していきましょう。
nodemailer実装の下準備
nodemailerを実装する前に、送受信用のメールアドレスが必要になります。
firebase functions:config:set gmail.email="送信用メールアドレス" gmail.password="送信用メールアドレスのパスワード" admin.email="受信用メールアドレス"
これを直接ターミナルに書き込んでおいてください。
念の為、設定できているか確認してみましょう。
firebase functions:config:get
{
  "gmail": {
    "password": "送信用メールアドレスのパスワード",
    "email": "送信用メールアドレス"
  },
  "admin": {
    "email": "受信用メールアドレス"
  }
以上の様に表示されていれば、設定は完了しています。
注意点としては、送受信用のメールアドレスはgmailが望ましいです。他のものだと、追加料金が発生したり送受信できなかったりする場合があります。
また、受信用のメールアドレスは普段使っているものを使用してもいいですが、送信用のメールアドレスはfirebase Cloud Functionsから干渉を受けるため、セキュリティレベルを下げる必要があります。
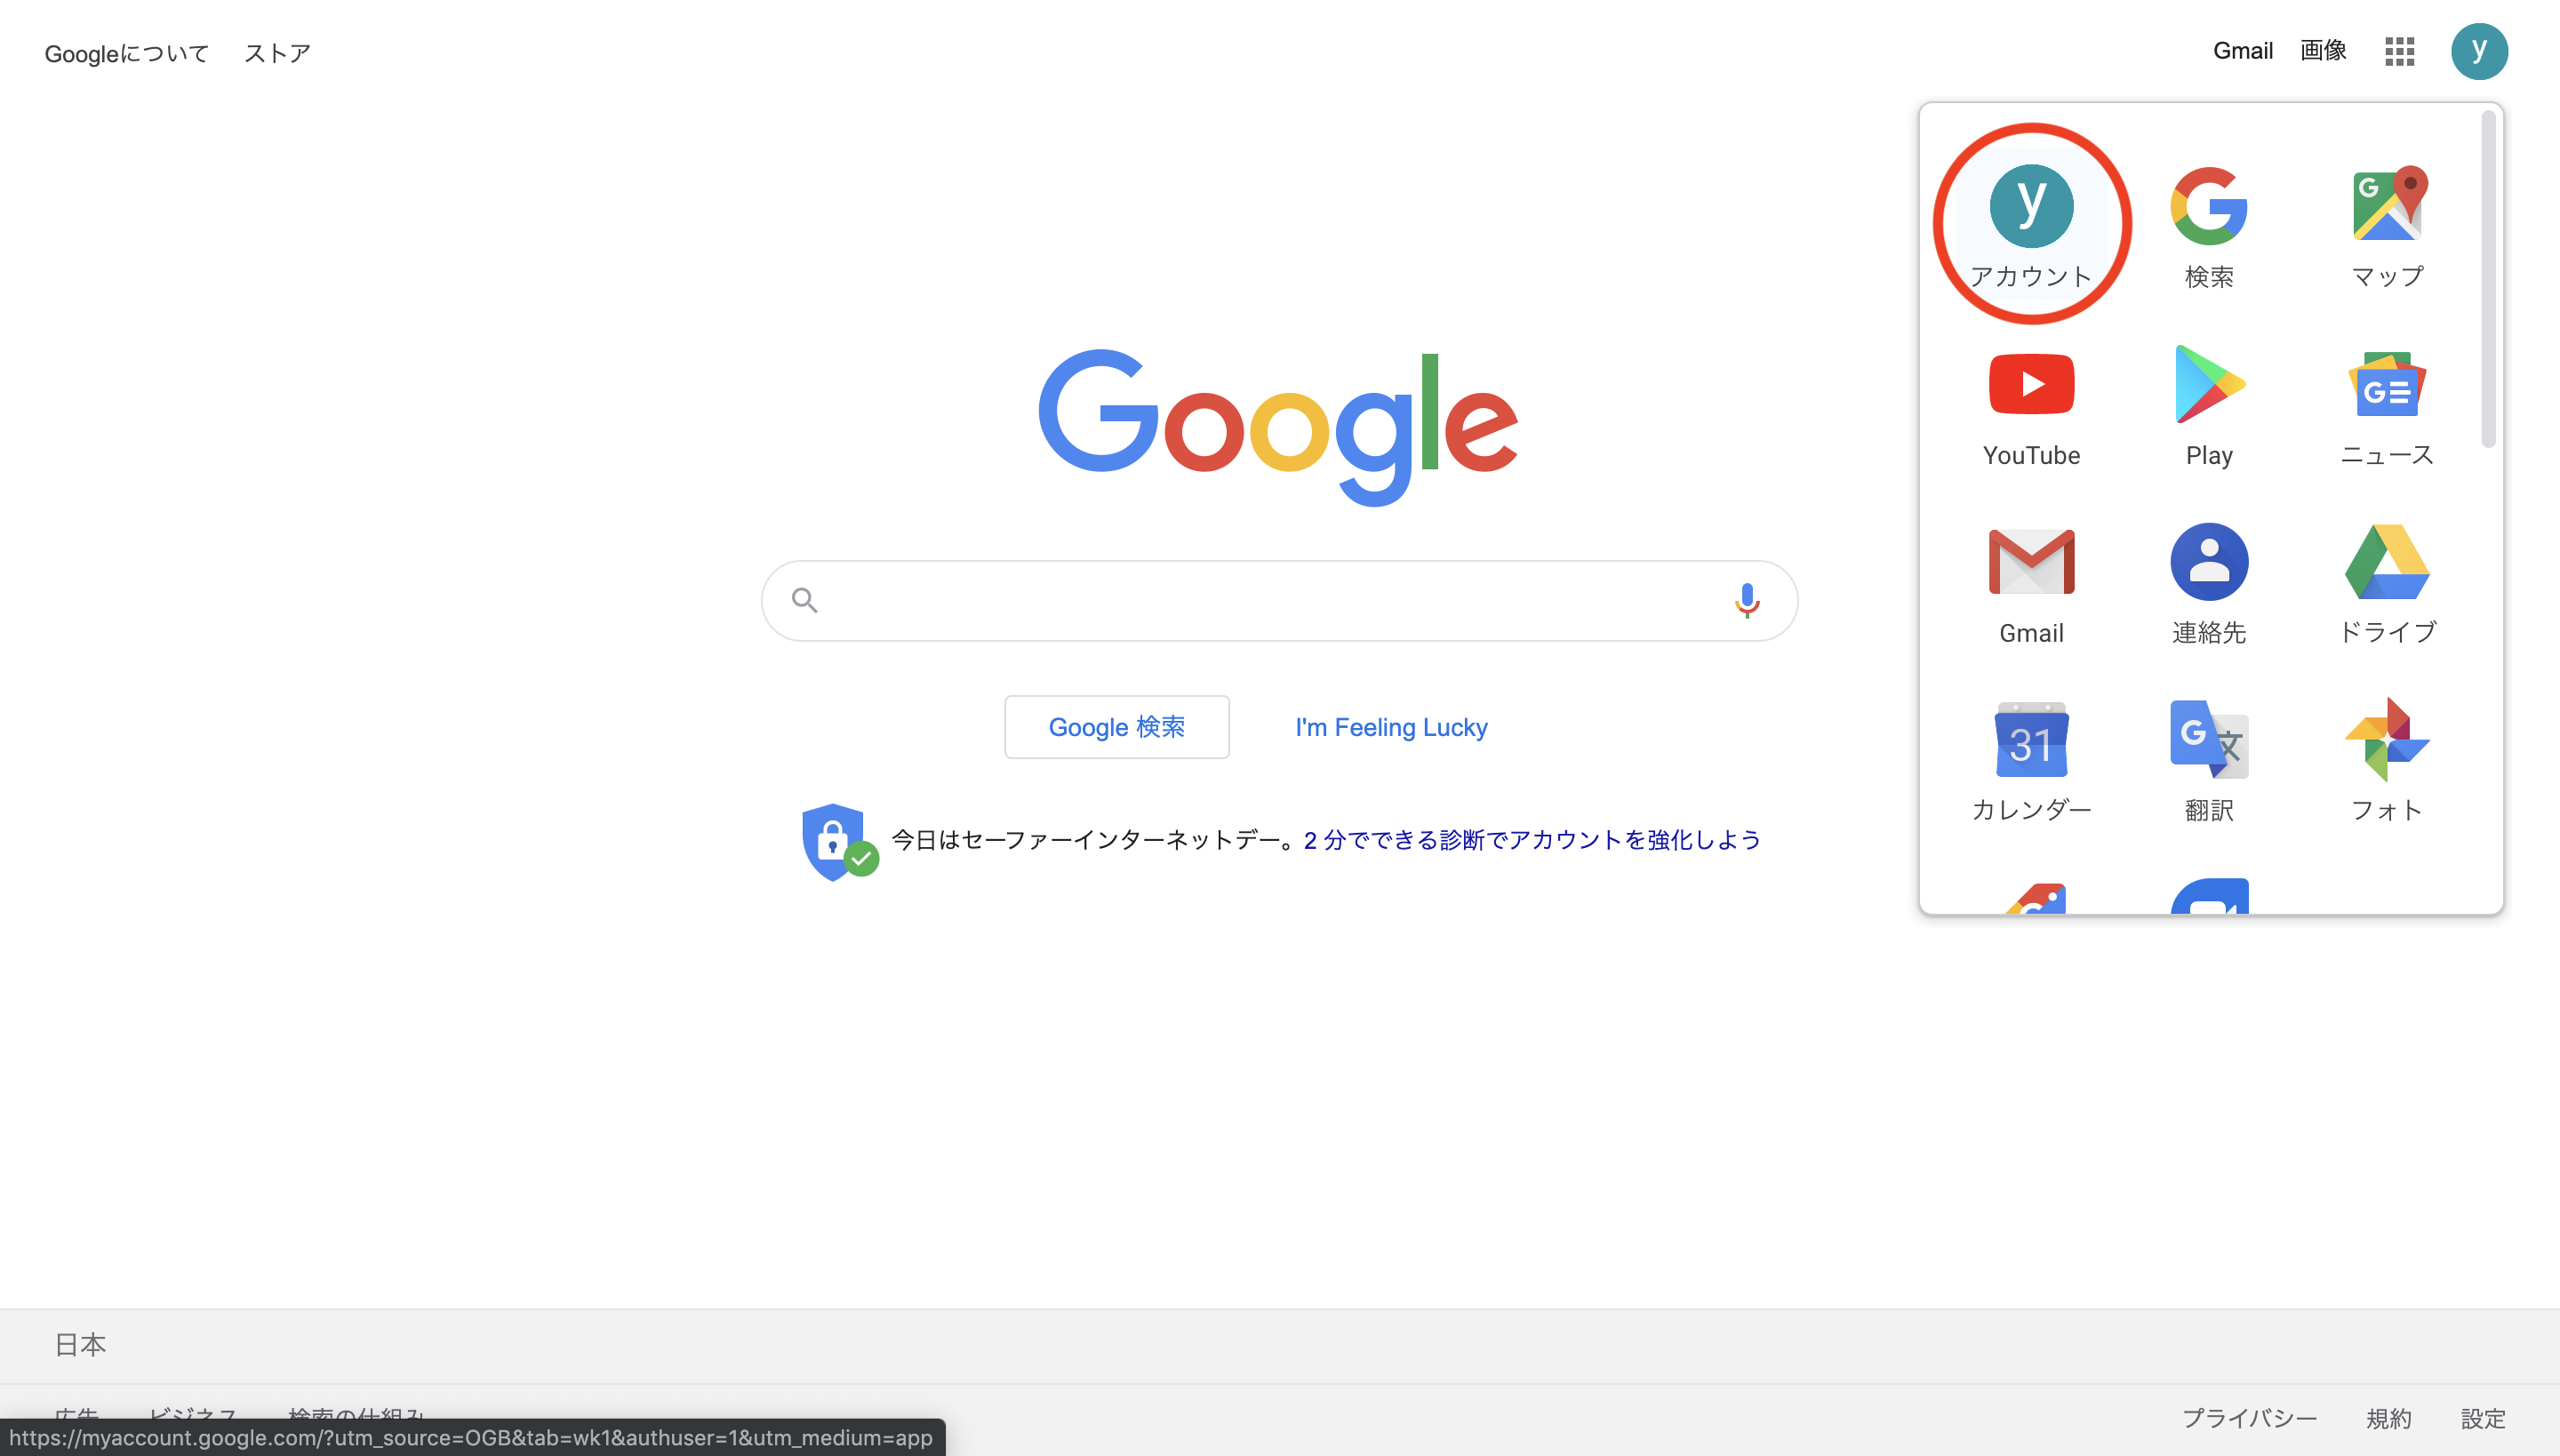
Googleアカウントのセキュリティレベルの変更
Googleのトップページから、アカウントを選択。
画面右のドロワー内のセキュリティを選択。
その後、安全性の低いアプリのアクセスをオンにしておく。
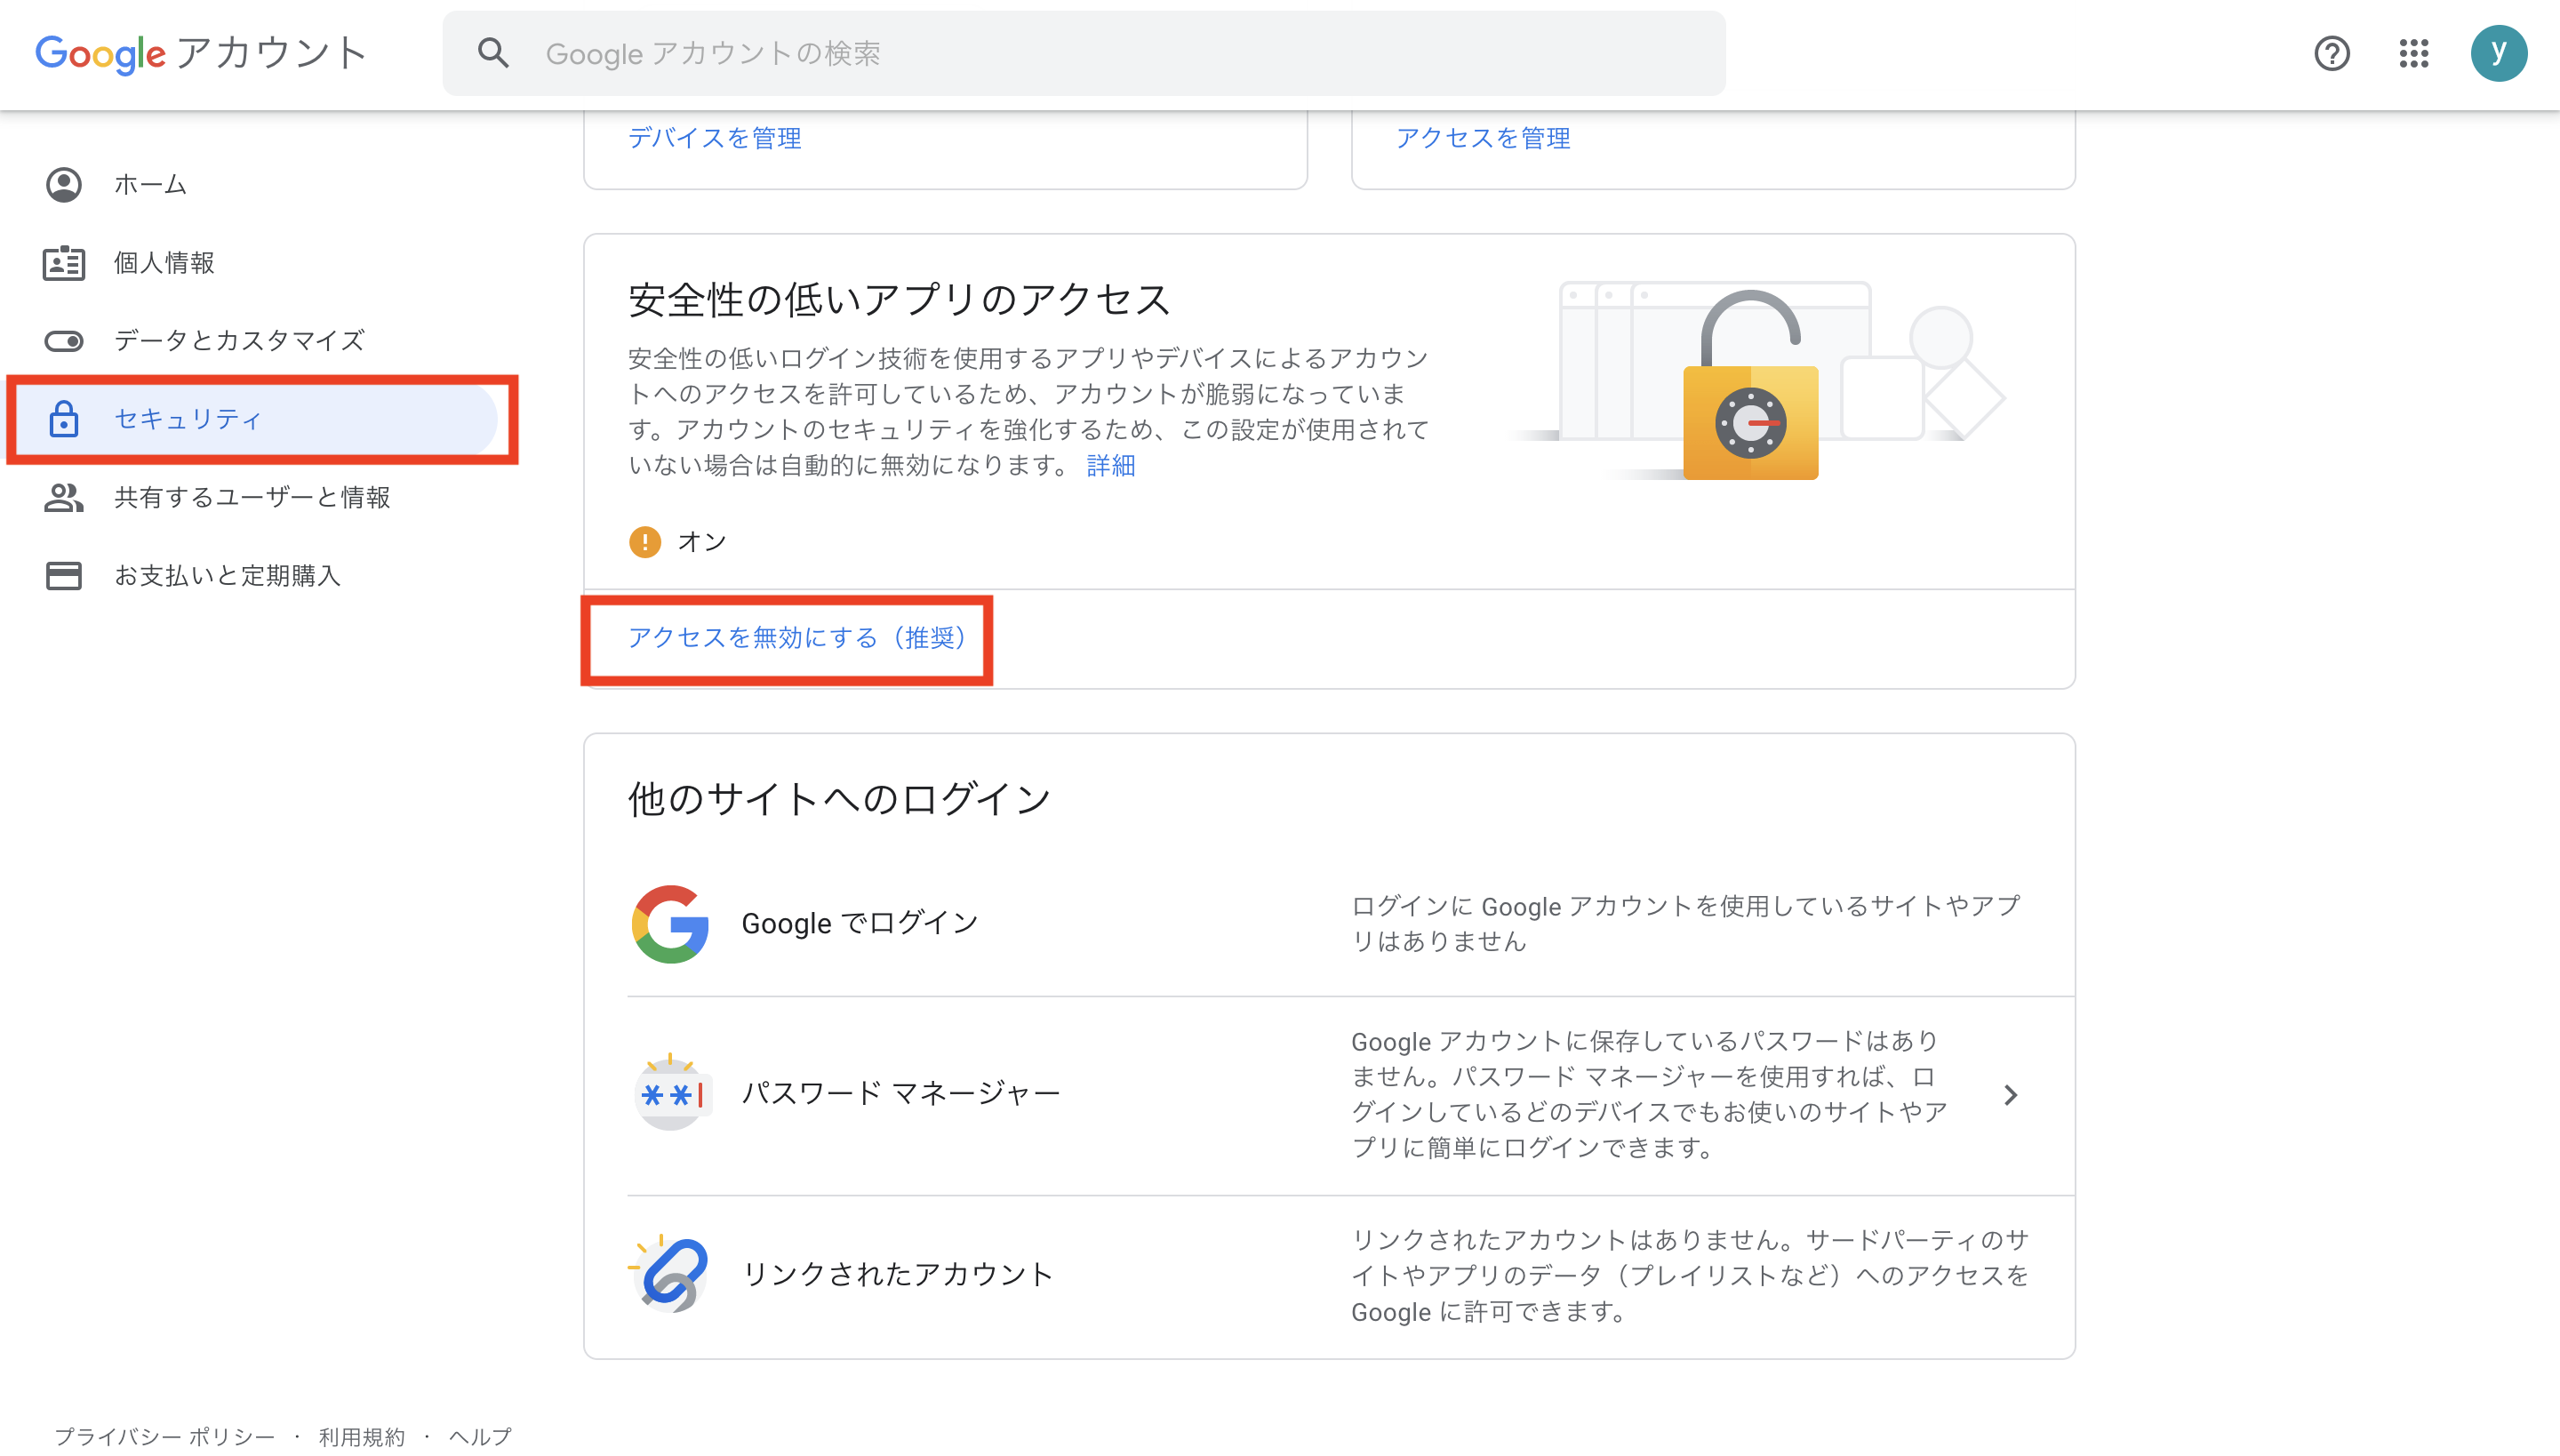
これで送信用のメールアドレスの設定は終了です。
では、実際に実装をしていきましょう。
メール送信機能の実装
const functions = require('firebase-functions');
const nodemailer = require("nodemailer");
const gmailEmail = functions.config().gmail.email;
const gmailPassword = functions.config().gmail.password;
const adminEmail = functions.config().admin.email;

//SMTPサーバーの設定
const mailTransport = nodemailer.createTransport({
  service: "gmail",
  auth: {
    user: gmailEmail,
    pass: gmailPassword
  }
});

//メールの内容
const adminContents = function(data){
  return `ホームページにお問い合わせがありました。

お名前:
${data.name}

メールアドレス:
${data.email}

内容:
${data.contents}
`;
};

//実際の機能
exports.sendMail = functions.https.onCall(async function(data, context) {
//送信元、送信先、題名、内容を1つの変数にまとめる
  let adminMail = {
    from: gmailEmail,
    to: adminEmail,
    subject: "ホームページお問い合わせ",
    text: adminContents(data)
  };

//nodemailerのsendMail機能で、メールを送信する。
//変数は送信元などをまとめたもの
  try {
    await mailTransport.sendMail(adminMail);
   } catch (e) {
    return e.message;
   }
});
以上で、メール送信機能は完成です。
次にフォームを仕上げていきます。
メールフォームの実装
今回はvuetifyを使います。
完成形はこちら。
<template>
    <v-content>
      <v-container>
        <v-col cols="80%">
          <v-card
            title="お問い合わせ"
            textarea="canter"
            class="card-background"
          >
            <v-col cols="100%">
              <v-col cols="80%" >
                <h3 class="card-title">お問い合わせ</h3>
              </v-col>
            <v-col cols="60%">
              <v-form
                ref="form"
                v-model="valid"
                lazy-validation
              >

        //入力中のみの表示
              <div v-bind:class="{ delatearea: inputdata }">
                <v-text-field
                  v-model="form.name"
                  :rules="nameRules"
                  label="お名前"
                  required
                ></v-text-field>
                <v-text-field
                  v-model="form.email"
                  :rules="emailRules"
                  label="メールアドレス"
                  required
                ></v-text-field>
                <v-textarea
                  v-model="form.contents"
                  outlined
                  auto-grow
                  label="お問い合わせ内容"
                  rows="10"
                  row-height="30"
                  class="contents-area"
                ></v-textarea>
              </div>

        //確認中のみの表示
              <div v-bind:class="{ delatearea: makesure }">
                <div class="sure-item">
                  <small>お名前</small>
                  <p>{{this.form.name}}</p>
                </div>
                <div class="sure-item">
                  <small>メールアドレス</small>
                  <p>{{this.form.email}}</p>
                </div>
                <div class="sure-item">
                  <small>お問い合わせ内容</small>
                  <p>{{this.form.contents}}</p>
                </div>
              </div>

        //入力中のみの表示
              <div v-bind:class="{ delatearea: inputdata }">
                <v-btn
                  color="error"
                  class="mr-4"
                  @click="reset"
                >
                  リセット
                </v-btn>
                <v-btn
                  :disabled="!valid"
                  color="success"
                  class="mr-4"
                  @click="validate"
                >
                  確認
                </v-btn>
              </div>

        //確認中のみの表示
              <div v-bind:class="{ delatearea: makesure }">
                <v-btn
                  color="error"
                  class="mr-4"
                  @click="back"
                >
                  戻る
                </v-btn>
                <v-btn
                  color="success"
                  class="mr-4"
                  @click="sendMail()"
                >
                  送信
                </v-btn>
              </div>

              </v-form>
            </v-col>
          </v-col>
        </v-card>
      </v-col>
    </v-container>
  </v-content>
</template>


<script>
import firebase from "~/plugins/firebase.js";

export default {
  data() {
    return {
      valid: true,

      //名前が入力されていないときにエラー文を表示させる
      nameRules: [
        v => !!v || 'お名前を入力してください。',
      ],
      emailerror: false,

      //メールアドレスが入力されていないときにエラー文を表示させる
      emailRules: [
        v => !!v || 'メールアドレスが適切ではありません。',
      ],

      inputdata: false,
      makesure: true,
      form: {
        name: '',
        email: '',
        contents: '',
      }
    }
  },
  methods: {
    validate () {

      //メールアドレスの形を確認する
      if (this.form.email.match(/.+@.+\..+/)) {
        this.inputdata = true
        this.makesure = false
      }else{
        this.emailerror = true;
        this.form.email = "";
      }
    },
    reset () {
      console.log(this.$refs.form.validate())
      this.form.name = "",
      this.form.email = "",
      this.form.contents = ""
      this.$refs.form.reset();
    },
    back () {
      this.inputdata = false;
      this.makesure = true
    },
    sendMail () {
      const tr = this.$router
      const form = this.form

      //ここで、functions/index.jsでexportsした、sendMailを呼ぶ
      const send = firebase.functions().httpsCallable("sendMail");
      send(form)
      .then(function(data) {
        alert("送信しました。");
        tr.push("/");
      })
      .catch(function(error) {
        alert("送信に失敗しました。");
      })
    }
  },
}
</script>


<style>
.card-title {
  color: #9c9797;
  text-align: center;
}
.card-background {
  width: 100%;
  background-color: white;
}
.delatearea {
  position: absolute;
  left: -9999px;
}
.sure-item > p {
  border-bottom: 1px solid #d2d5d2;
}
.contents-area {
  padding-top: 10px !important;
}
</style>
少し長くなりましたが、以上でメールのバリデーション・メールの送信ができる環境は整いました。
では実際に動かしていきましょう。
動作確認
まずはfirebaseにログインしておきましょう。
firebase login
次にfirebase Cloud Functionsのデプロイを行います。
firebase deploy --only functions
=== Deploying to 'プロジェクト名'...

i  deploying functions
i  functions: ensuring necessary APIs are enabled...
✔  functions: all necessary APIs are enabled
i  functions: preparing functions directory for uploading...
i  functions: packaged functions (26.72 KB) for uploading
✔  functions: functions folder uploaded successfully
i  functions: creating Node.js 8 function sendMail(us-central1)...
✔  functions[sendMail(us-central1)]: Successful create operation.
Function URL (sendMail): https://*****************.cloudfunctions.net/sendMail

✔  Deploy complete!

Project Console: https://console.firebase.google.com/project/*********/overview
この様に、最初にdeployした時だけFunction URLが表示されますが、二回目以降は表示されませんので、ご注意ください。
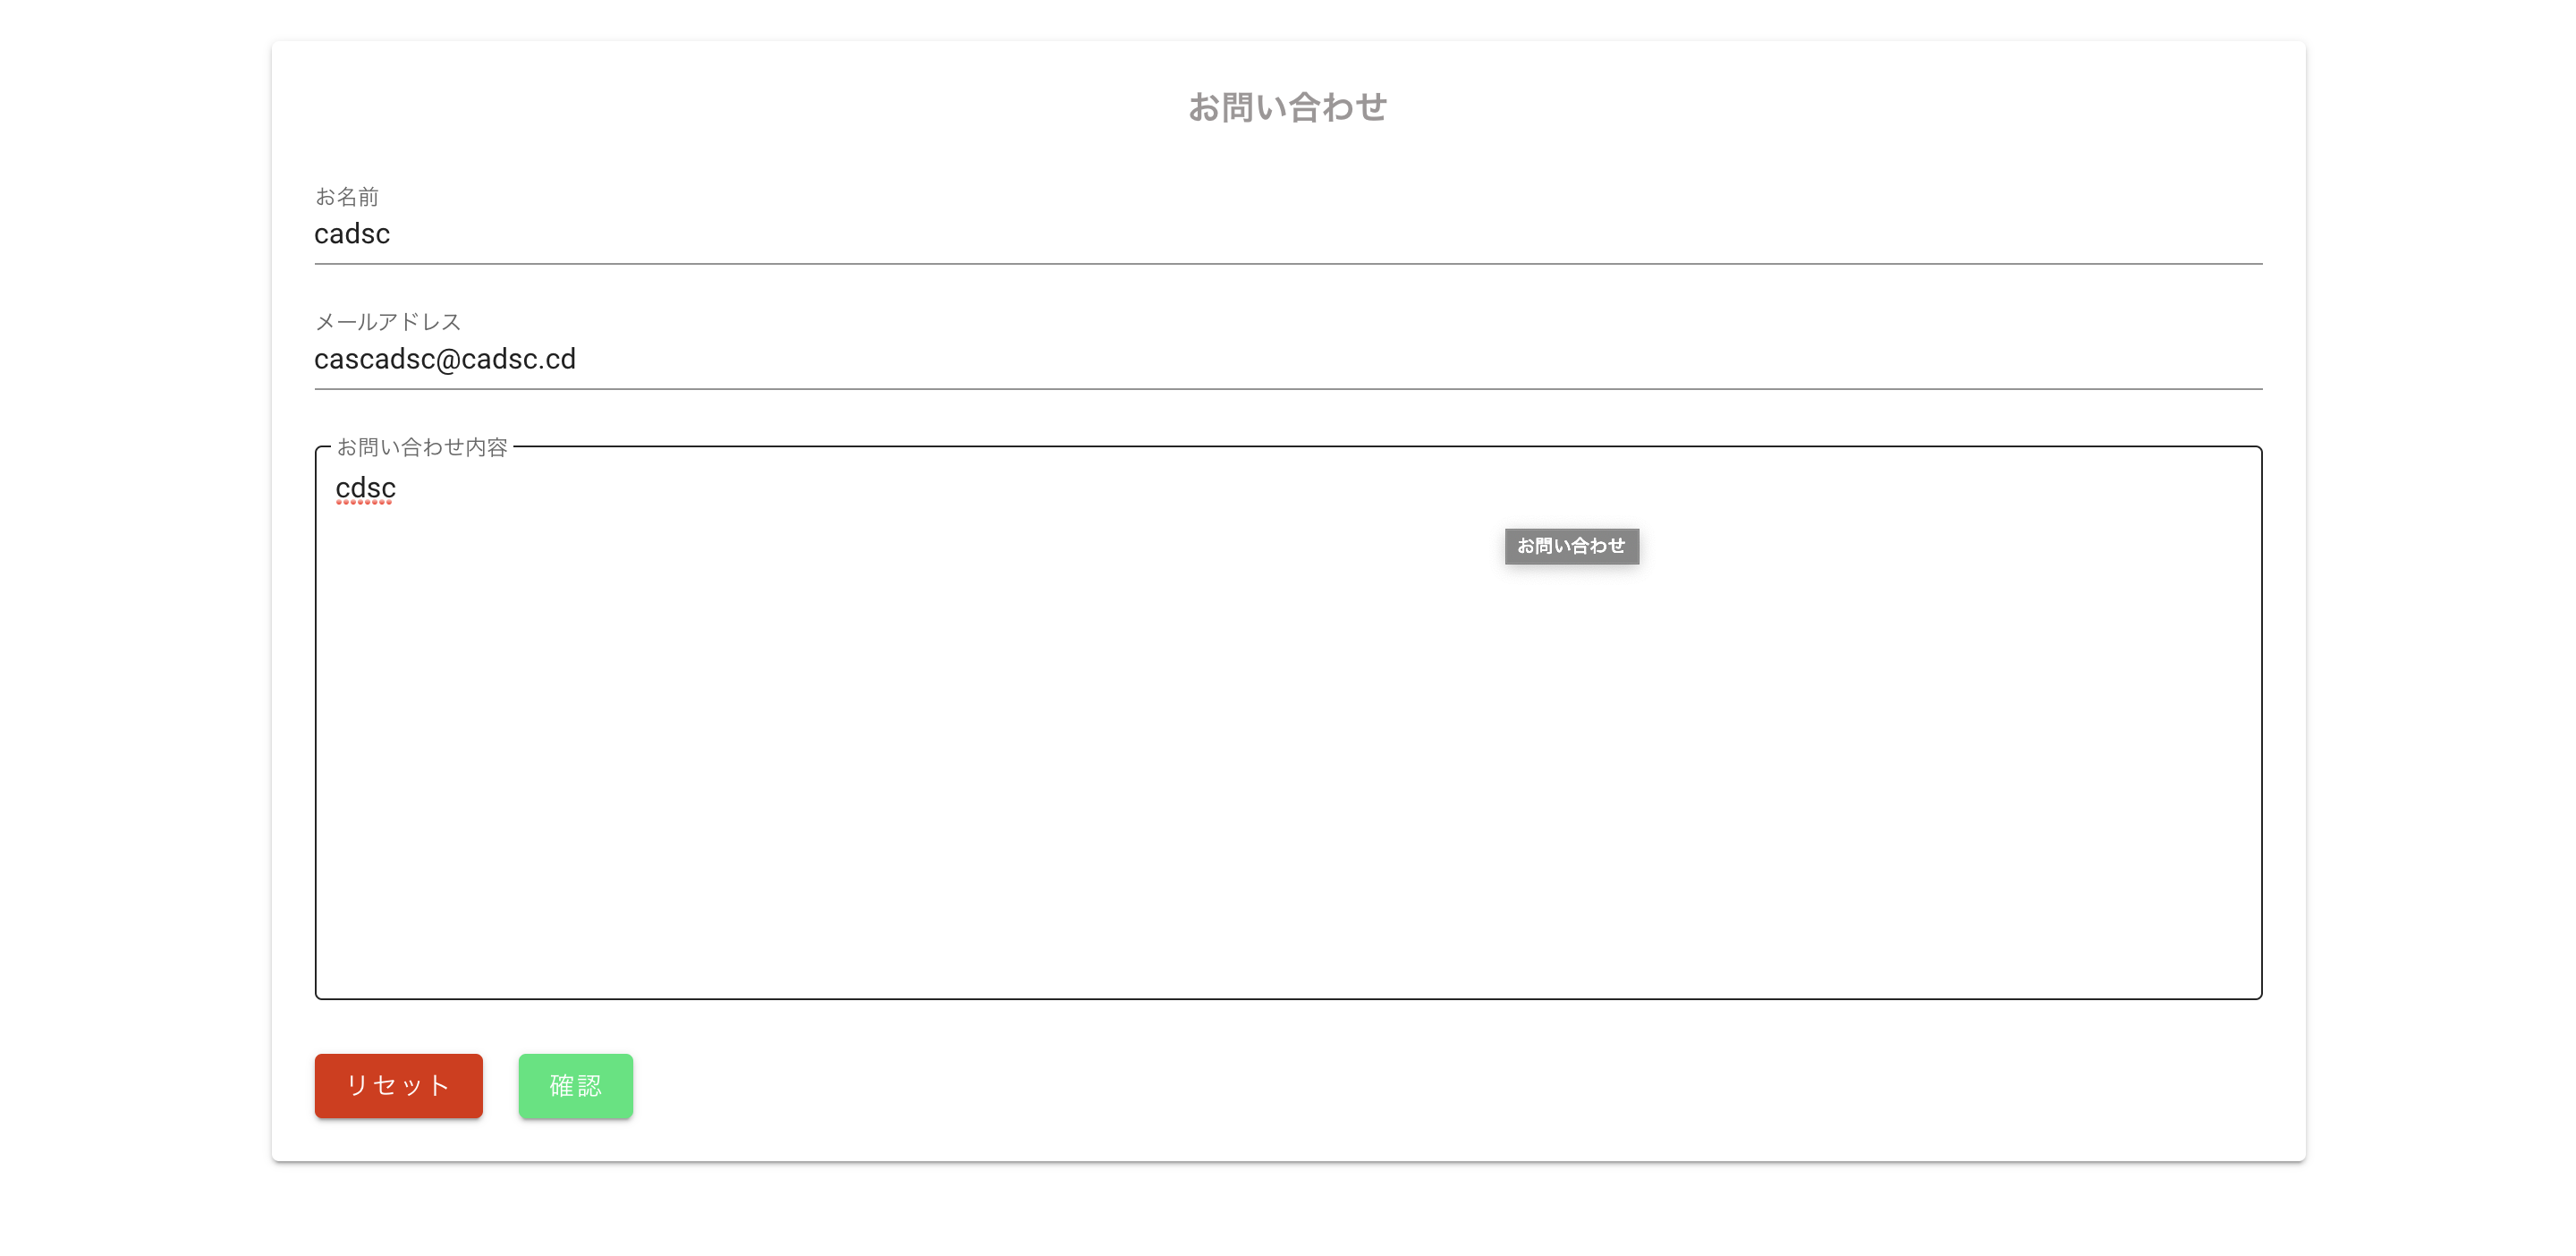
あとは実際に動作を確認してみたください。
npm run dev
問題なく送れている様です。
何か間違いがあればご指摘いただけると幸いです。