経緯
初めまして。エンジニア1年生のシャロと申します。
IT未経験からSESとして案件に参画し、日々奮闘しています。
現在LPICの勉強中なのですが、コマンド暗記の連続で少し飽き……息抜きが必要になりました。そこで、モチベーション維持と技術力アップを兼ねて、以前から興味があったフロントエンド(React/Next.js)の勉強を始めてみることにしました。
コンセプト:Re:Garden
「勉強時間が視覚化されるとやる気が出る」という自分の性格を活かし、「資格勉強が楽しく続けられる習慣化アプリ」を制作します。
テーマ: 学ぶことで荒廃した世界に生命が戻る。
体験: 学習記録を付けると、10×10のグリッド(世界)が「荒廃 → 草 → 花」と再生していく。
ユーザー体験
1.学習記録
2.学習量表示
3.Garden表示
4.学習で世界が少しずつ蘇る
MVP要件
10×10グリッド表示
タイル100個
CSS Gridで表示
| 状態 | 内容 |
|---|---|
| dead | 荒廃 |
| grass | 草 |
| flower | 花 |
dead → grass → flower へ遷移する
- Water
- 勉強量によって水が与えられる
- リセットボタン
- 世界の初期化
- セーブ機能
- localStorageで保存
- レスポンシブ
- PCメイン
- スマホは軽く
- 保守性
- component分割
- state分離
- 型定義
MVPループ
勉強
↓
Water獲得
↓
タイルクリック
↓
成長
↓
癒し
採用技術スタック
| 分類 | 技術 |
|---|---|
| Framework | Next.js |
| UI | React |
| Language | TypeScript |
| Styling | TailwindCSS |
| State | useState |
| animation | CSS Transition |
| Storage | localStorage |
| Deploy | Vercel |
難しい技術は使わず、まずは基礎的な技術かつ実務でもよくつかわれるものを選定しました
コンポーネント構成
src/
├ app/
│ ├ page.tsx
│ └ globals.css
│
├ components/
│ ├ layout/
│ │ ├ Header.tsx
│ │ └ GameLayout.tsx
│ │
│ ├ game/
│ │ ├ Grid.tsx
│ │ ├ Tile.tsx
│ │ ├ ManaBar.tsx
│ │ ├ ControlPanel.tsx
│ │ ├ TileEffects.tsx
│ │ └ BackgroundEffects.tsx
│ │
│ └ ui/
│   ├ Button.tsx
│   ├ Panel.tsx
│   └ GlowText.tsx
│
├ hooks/
│ ├ useMap.ts
│ └ useLocalStorage.ts
│
├ lib/
│ ├ map.ts
│ └ tile.ts
│
├ types/
│ └ game.ts
│
├ constants/
│ └ colors.ts
│
└ styles/
  └ animations.css
AIと相談してみたところ、ひとまずこのような構成にしてみることに
環境構築
Node.jsは入っていたので省略
ターミナルで以下を実行
npx create-next-app@latest regarden
✔ TypeScript → Yes
✔ ESLint → Yes
✔ Tailwind CSS → Yes
✔ src/ directory → Yes
✔ App Router → Yes
✔ Turbopack → Yes
✔ import alias → Yes
npm run dev

http://localhost:3000
その後、コンポーネント構成の通りにディレクトリをつくっていきます
ディレクトリ構成の罠
AIと相談して決めた構成で進めようとしたところ、一点トラブルが。
create-next-app 時の選択によっては、/src ディレクトリが作成されず、ルート直下に /app が配置されることがあります。今回は以下の構成で進めることにしました。
regarden/
├ app/
components/
├ game/
│ ├ Grid.tsx
│ ├ Tile.tsx
│ ├ WaterBar.tsx
│ ├ StudyForm.tsx
│ └ StatusPanel.tsx
│
├ layout/
│ ├ Header.tsx
│ └ GameLayout.tsx
│
└ ui/
│ ├ Button.tsx
│ └ Panel.tsx
├ hooks/
├ lib/
├ types/
├ constants/
└ styles/
起動した画面を見てみる
page.tsxがいつものNext.jsくんの画面だったので、見た目だけ簡単に調整してみました
export default function Home() {
  return (
    <main className="flex min-h-screen items-center justify-center bg-slate-950">
      <h1 className="text-6xl font-bold text-cyan-300">
        Re:Garden
      </h1>
    </main>
  )
}

まだ題名だけですがそれっぽい……!
直感的に書けるのでやっぱりtailwindCSSは優秀です
Grid実装
1.型作成
まずは「タイル」がどんなデータを持つべきか定義します。
export type TileType =
  | "dead"
  | "grass"
  | "flower"
  | "tree"

export type Tile = {
  x: number
  y: number
  type: TileType
}
2.タイル作成
10×10の配列を作っています
import { Tile } from "@/types/game"

export function createInitialMap(): Tile[][] {
  return Array.from({ length: 10 }, (_, y) =>
    Array.from({ length: 10 }, (_, x) => ({
      x,
      y,
      type: "dead",
    }))
  )
}
import { Tile as TileType } from "@/types/game"

type Props = {
  tile: TileType
}

export default function Tile({ tile }: Props) {
  return (
    <div
      className="
        h-12
        w-12
        rounded-md
        border
        border-white/10
        bg-stone-700
        transition-all
        duration-300
      "
    />
  )
}
3.Gridコンポーネント
二次元配列のままだとReactのJSX内でループ(map)を二重に回す必要があり、CSS Gridでの管理が少し複雑になります。そこで、.flat() を使って1次元の配列に変換してから表示しています。
import { Tile as TileType } from "@/types/game"
import Tile from "./Tile"

type Props = {
  map: TileType[][]
}

export default function Grid({ map }: Props) {
  return (
    <div className="grid grid-cols-10 gap-1">
      {map.flat().map((tile) => (
        <Tile
          key={`${tile.x}-${tile.y}`}
          tile={tile}
        />
      ))}
    </div>
  )
}
二次元配列について
二次元配列 ([][])
エクセルの表やチェス盤のように縦×横にデータが存在するもの
二次元配列はデータとして扱いづらいので、map.flat()で配列にしている(grid-cols-10を指定しているので、10列配置されたら折り返す)
紆余曲折あり出来上がったものがこちらです
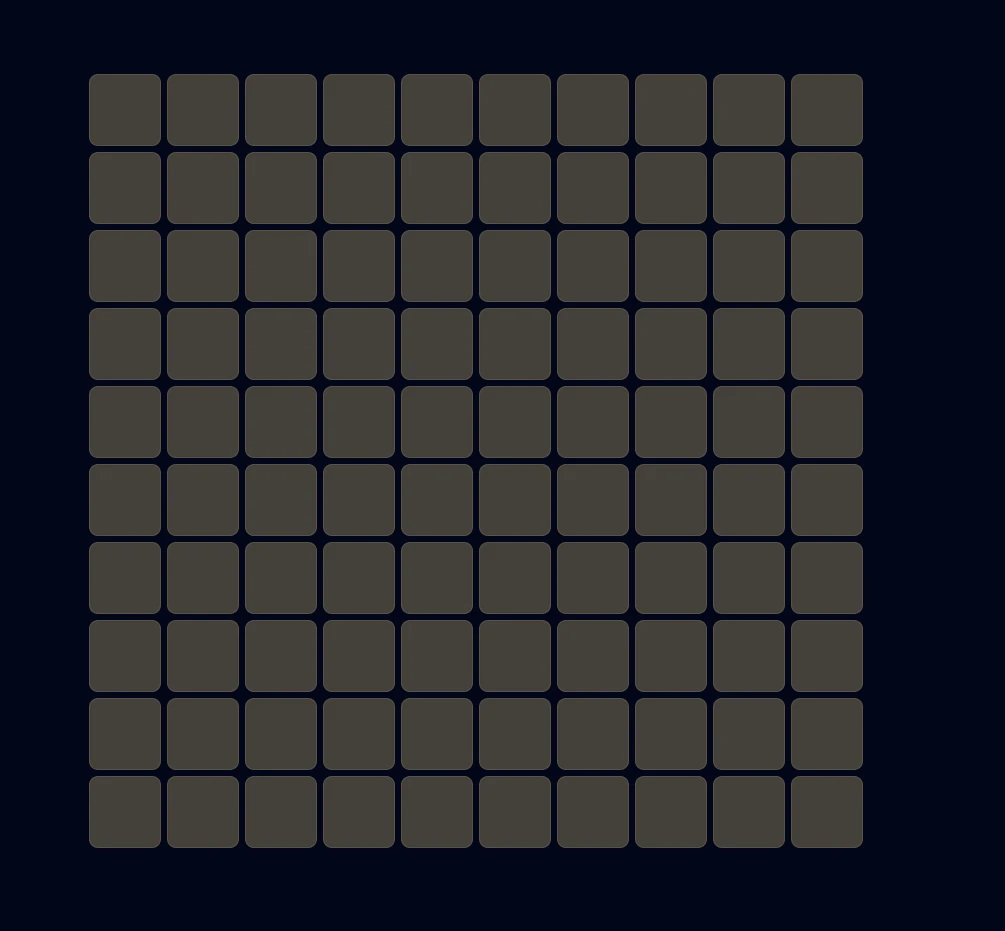
まだまだみすぼらしいですが達成感があります
まとめ
今回の実装を通じて、「型定義 → データの作成 → コンポーネント化」というReact開発の基本的な流れを体感することができました。
特に印象的だったのは、コンポーネントは定義しただけでは不十分。Propsを通じてデータを渡すことで初めて命が吹き込まれるという点です。
Propsを意識することで、コンポーネントの再利用性というReactの強みが少しずつ理解できてきた気がします。
現在はまだ静的な画面ですが、次回は useState を使った状態管理に挑戦し、実際に世界を動かしていきたいと思います。
ここから花を咲かせていくのが楽しみです!