はじめに
前回はAzure Static Web AppsでVuePressサイトを作成しました。
今回はAuth0で認証してみたいと思います。
参考にしたのはこれ
https://auth0.com/blog/vuepress-authentication/
https://auth0.com/blog/complete-guide-to-vue-user-authentication/
開発環境
- Auth0
- Azure
- Node.js
- GitHub
- Windows 10 PC
導入
1.前回を参考にVuePressサイトを作る
.github
.gitignore
以外は全部消してOK、最初からやっていく
2.Node.jsのコマンドプロンプトから初期化、vuepress、auth0プラグインのインストール
cd vuepress-static-app
npm init -y
npm install --save-dev vuepress
npm install @auth0/auth0-spa-js
3.package.jsonの編集("scripts"の部分)
{
  "name": "vuepress-static-app",
  "version": "1.0.0",
  "description": "",
  "main": "index.js",
  "scripts": {
    "build": "vuepress build",
    "dev": "vuepress dev",
    "test": "echo \"Error: no test specified\" && exit 1"
  },
  "repository": {
    "type": "git",
    "url": "git+https://github.com/SatoshiRobatoFujimoto/vuepress-static-app.git"
  },
  "keywords": [],
  "author": "",
  "license": "ISC",
  "bugs": {
    "url": "https://github.com/SatoshiRobatoFujimoto/vuepress-static-app/issues"
  },
  "homepage": "https://github.com/SatoshiRobatoFujimoto/vuepress-static-app#readme",
  "devDependencies": {
    "vuepress": "^1.8.2"
  },
  "dependencies": {
    "@auth0/auth0-spa-js": "^1.15.0"
  }
}
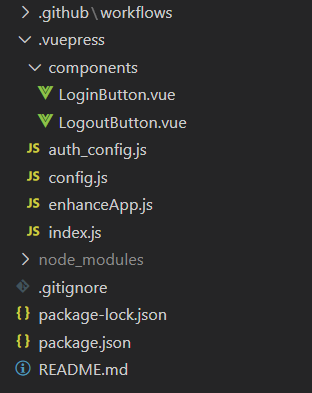
4.ファイル構成は次のようになっている
5..vuepress/config.jsを作成
module.exports = {
    title: "My Documentation Site",
    description: "This is going to be awesome!",
    themeConfig: {
      nav: [
        { text: "Home", link: "/" },
        { text: "About", link: "/about/" }
      ]
    }
  };
6.Auth0アプリケーションを作成
Auth0に登録、ログイン
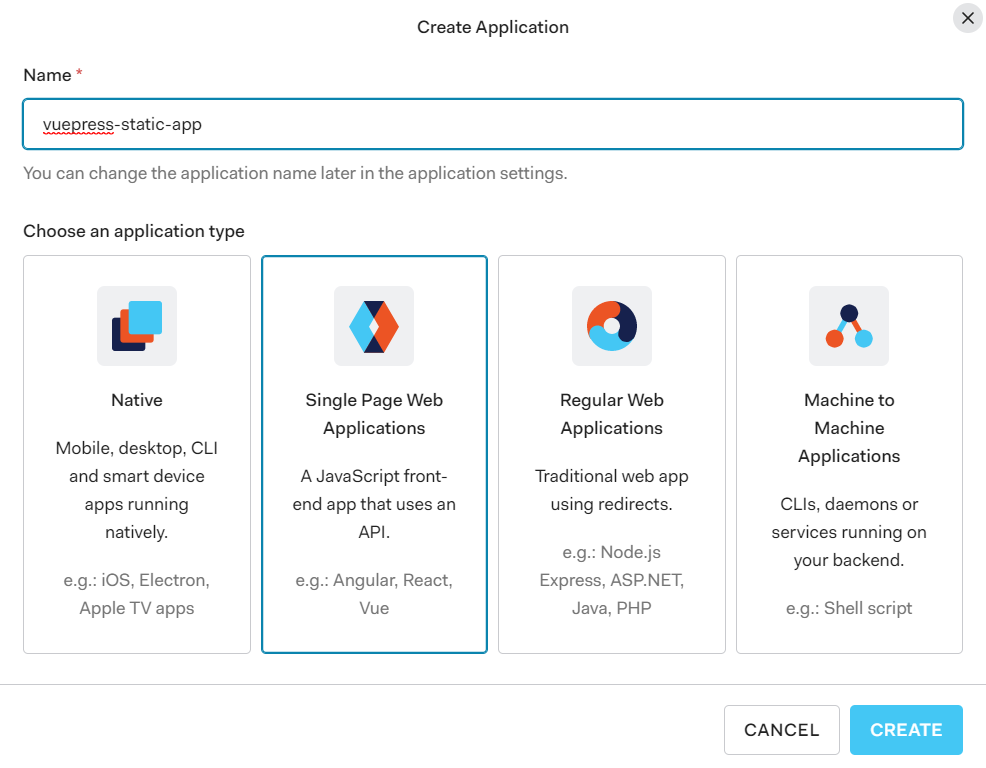
ダッシュボードのActivityからCREATE APPLICATIONボタンをクリック

アプリ名を入れて、Single Page Web Applicationsを選び、CREATEする
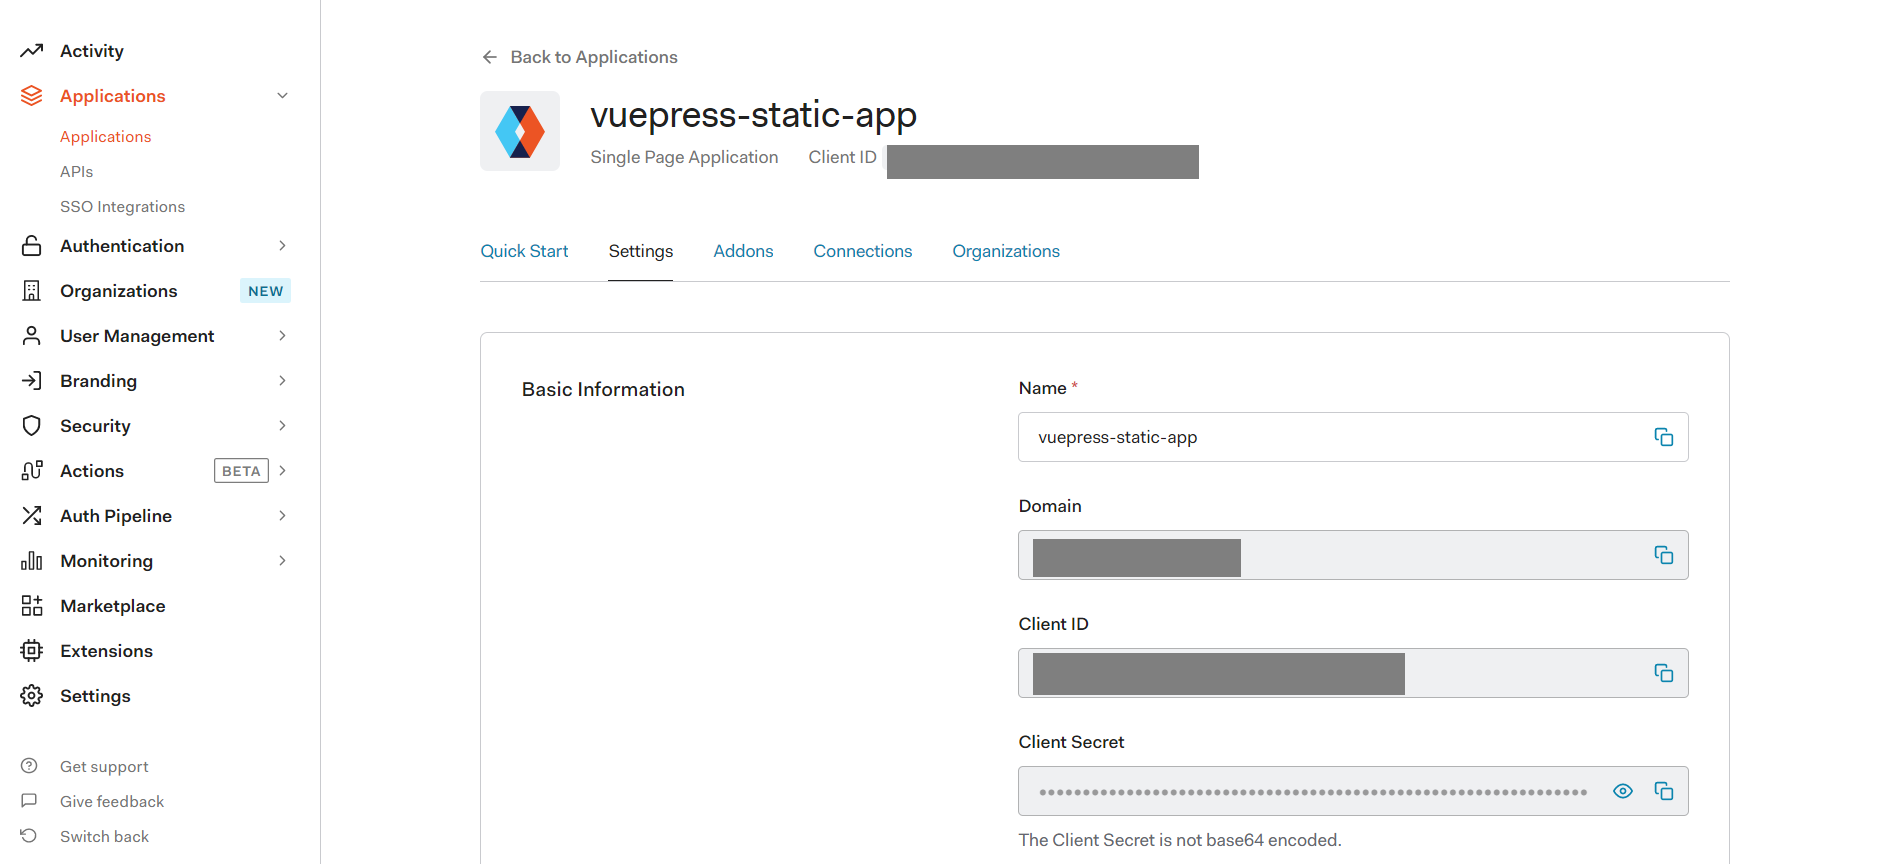
アプリのSettingsからDomain、Client IDをメモしておく。あとで使う。
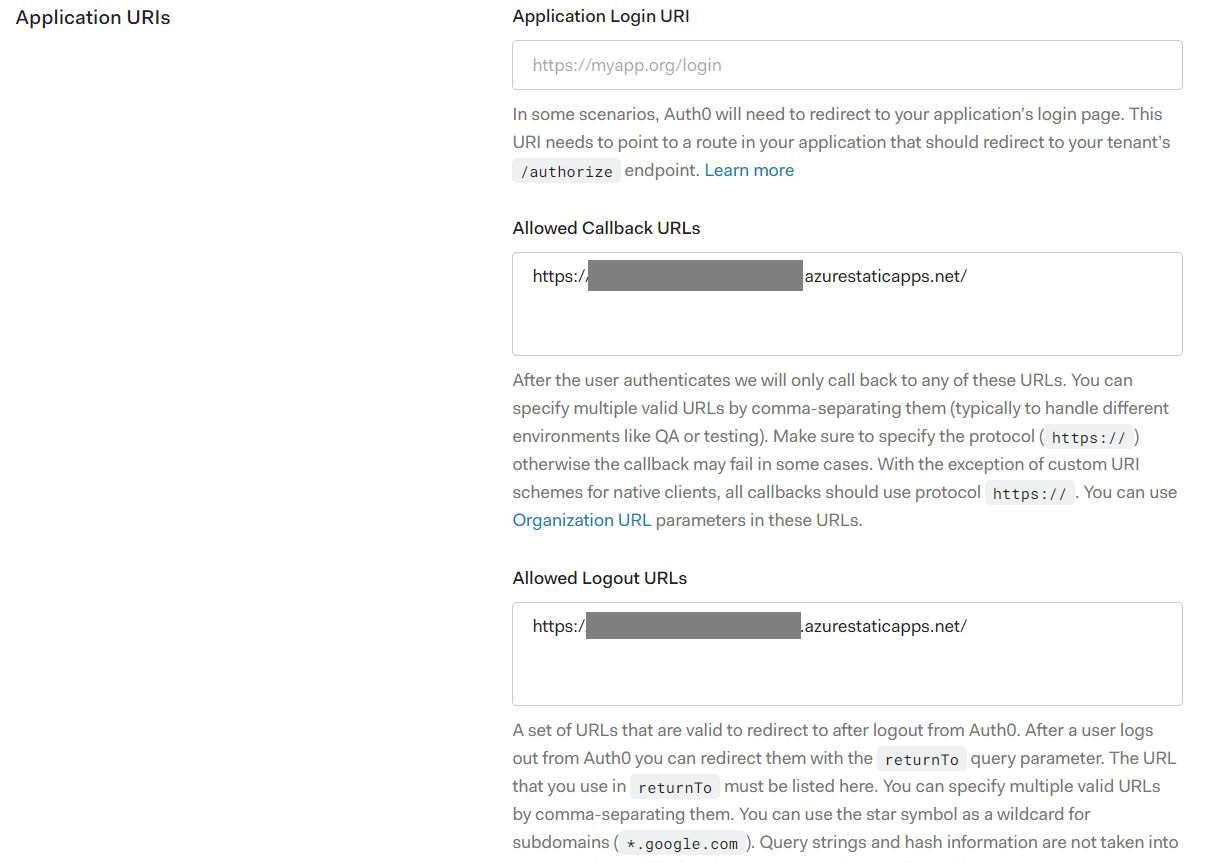
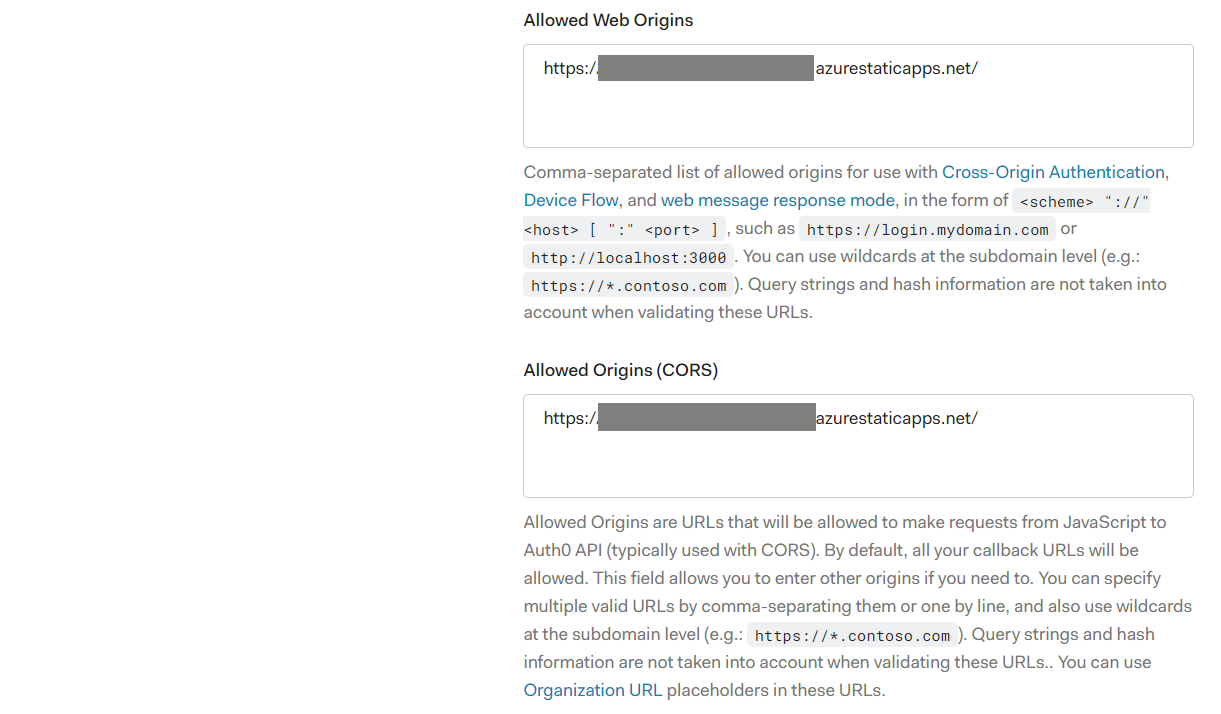
Allowed Callback URLs, Allowed Logout URLs, Allowed Web Origins, Allowed Origins (CORS) に http://localhost:8080 を入力する。本番でやるときはAzure Static Web Appsで発行されたアプリのURLにする。
SAVE CHANGESで保存
6..vuepress/auth_config.jsを作成
const config = {
    domain: "YOUR_AUTH0_DOMAIN",
    clientId: "YOUR_CLIENT_ID"
  };

  export default config;
YOUR_AUTH0_DOMAINとYOUR_CLIENT_IDには先ほどメモしたものを入れる。GitHubにアップロードするのでリポジトリはPrivateにしておく。本来は環境変数とかで設定した方がいいと思う。(.gitignoreでpushしないように設定もしたほうがいい)
7..vuepress/index.jsを作成
import config from "./auth_config";
import createAuth0Client from "@auth0/auth0-spa-js";

async function createClient() {
  let auth0Client = await createAuth0Client({
    domain: config.domain,
    client_id: config.clientId
  });

  return auth0Client;
}

async function loginWithPopup(client, options) {
  try {
    await client.loginWithPopup(options);
  } catch (e) {
    // eslint-disable-next-line
    console.error(e);
  }
}

function logout(client) {
  return client.logout();
}

const auth = {
  createClient,
  loginWithPopup,
  logout
};

export default auth;
※実行時に、createAuth0Clientがないと怒られたので、@auth0/auth0-spa-jsプラグインのインストールとインポートが必要だった
8..vuepress/enhanceApp.jsを作成
if (typeof window !== "undefined")
    window.global = window;
※実行時に ReferenceError: global is not defined vuepress というエラーがでたので対応( https://github.com/vuejs/vuepress/issues/1434 )
9..vuepress/components/LoginButton.vueを作成
<template>
    <button @click="login()">Login</button>
</template>

<script>
import auth from "../";
export default {
    props : ['client'],
    methods : {
        async login () {
            await auth.loginWithPopup(this.client);

            this.$emit('login-complete');
        }
    }
}
</script>
10..vuepress/components/LogoutButton.vueを作成
<template>
    <button @click="logout()">Log Out</button>
</template>

<script>
import auth from "../";
export default {
    props : ['client'],
    methods : {
        async logout () {

            await auth.logout(this.client);
        }
    }
}
</script>
11.README.mdを作成
---
home: true
footer: Made by Auth0 User with ❤️
---
<template>
<div class="main-content">
<div v-if="user">
<p align="center">
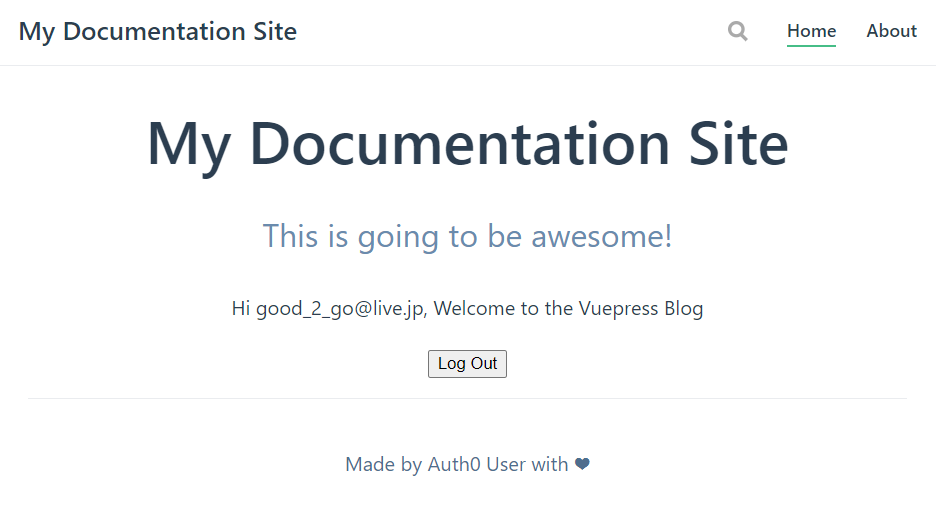
Hi {{user.email}}, Welcome to the Vuepress Blog
</p>
<p align="center">
<LogoutButton :client="auth0client" />
</p>
</div>
<div v-else>
<p align="center">
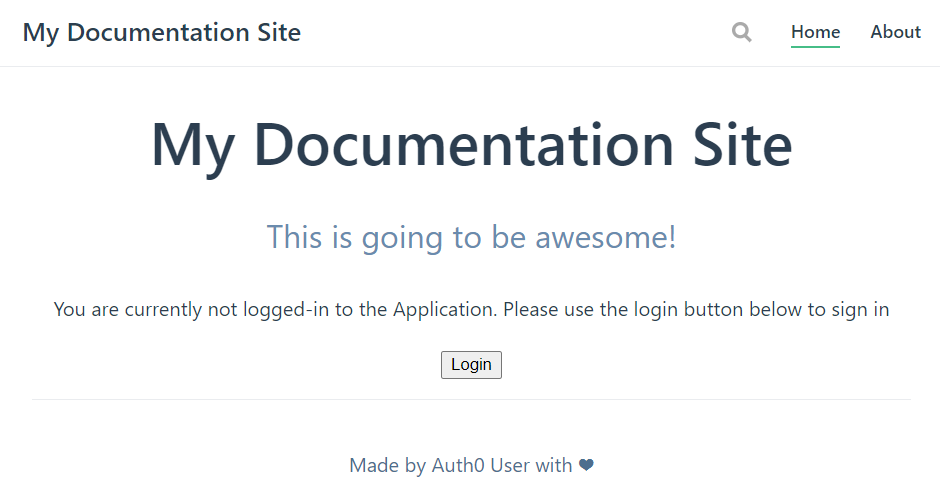
You are currently not logged-in to the Application. Please use the login button below to sign in
</p>
<p align="center">
<LoginButton :client="auth0client" @login-complete="getUser()" />
</p>
</div>
</div>
</template>
<script>
import auth from "./.vuepress";
import LoginButton from "./.vuepress/components/LoginButton";
import LogoutButton from "./.vuepress/components/LogoutButton";
export default {
data() {
return {
auth0client : null,
user : null
}
},
async mounted(){
this.auth0client = await auth.createClient();
this.user = await this.auth0client.getUser();
},
methods : {
async login () {
await auth.loginWithPopup(this.auth0client);
},
async getUser(){
this.user = await this.auth0client.getUser();
}
}
}
</script>
12.npm run devでアプリを起動、 http://localhost:8080 を開き、確認
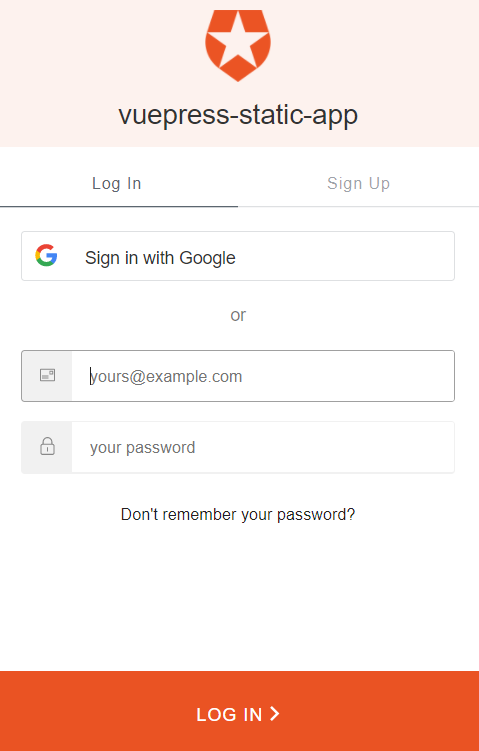
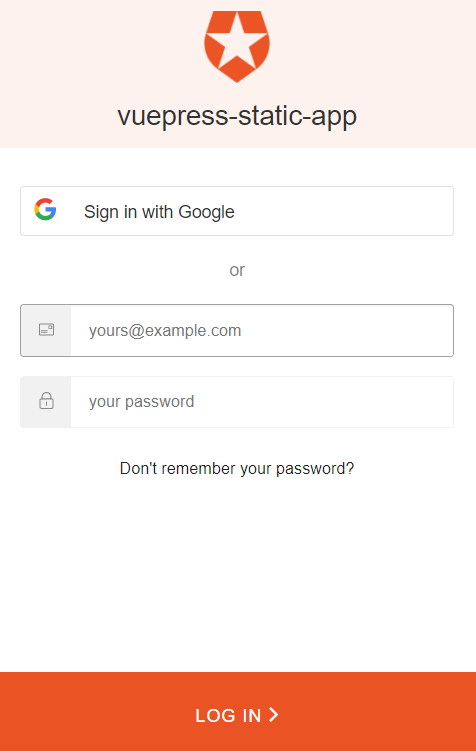
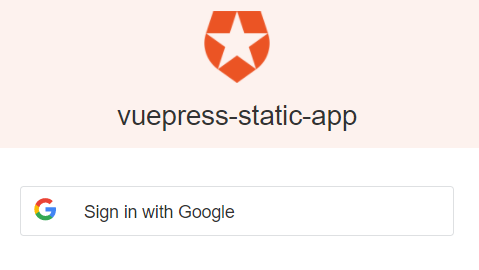
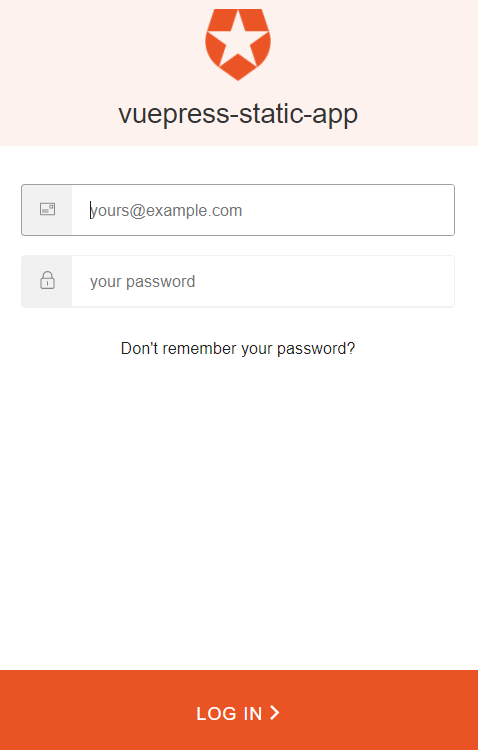
13.ログインボタンを押すとAuth0のログイン画面が出てくる。ここから誰でもSign Up、Log Inすることが可能。きたこれ
14.ログインが完了すると、ログインした人しか見れないページになっている
15.サインアップさせたくない場合は、Auth0のAuthenticationからDisable Sign Upsをオンにする

するとサインアップが消えている!すごい!
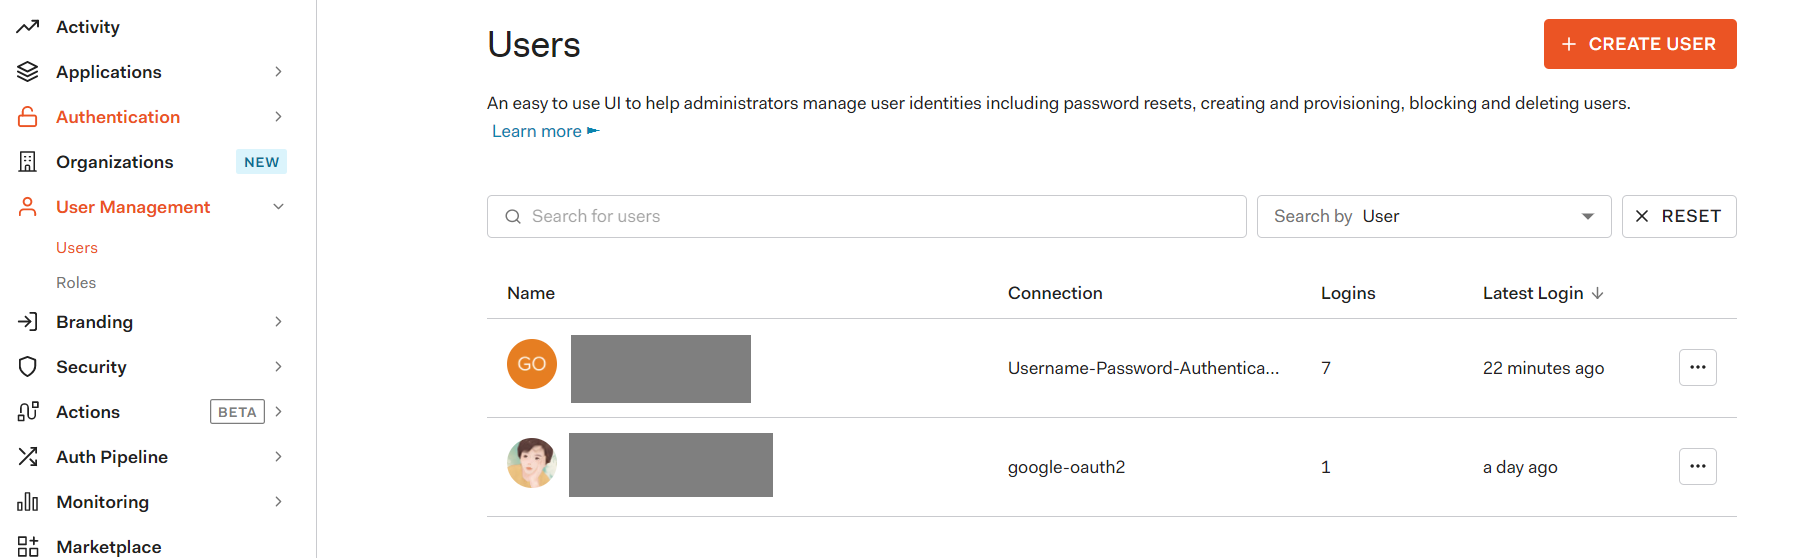
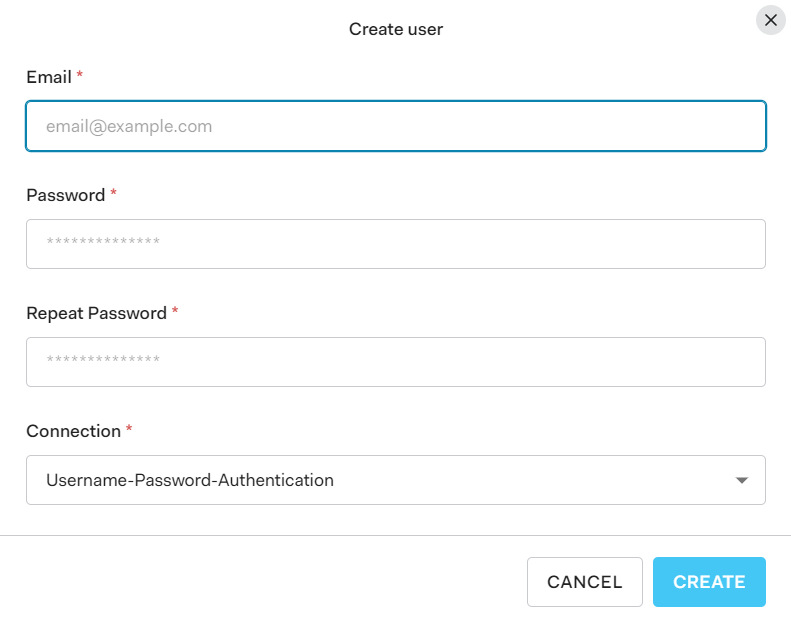
サインアップできないようにしたら、Auth0のUsers画面からCREATE USERで追加したり、削除ができる
16.ApplicationsのConnectionsタブから、DatabaseもしくはSocialからのログインをオンオフできる

| すべてオフ | Socialのみ | Databaseのみ |
|---|---|---|
 |
 |
 |
社内ドキュメントに使う予定なのでDatabaseのみとした
17.ログインできるメールアドレスの制限はAuth PiplineのRulesからCREATE、Access ControlのWhitelistを選択する
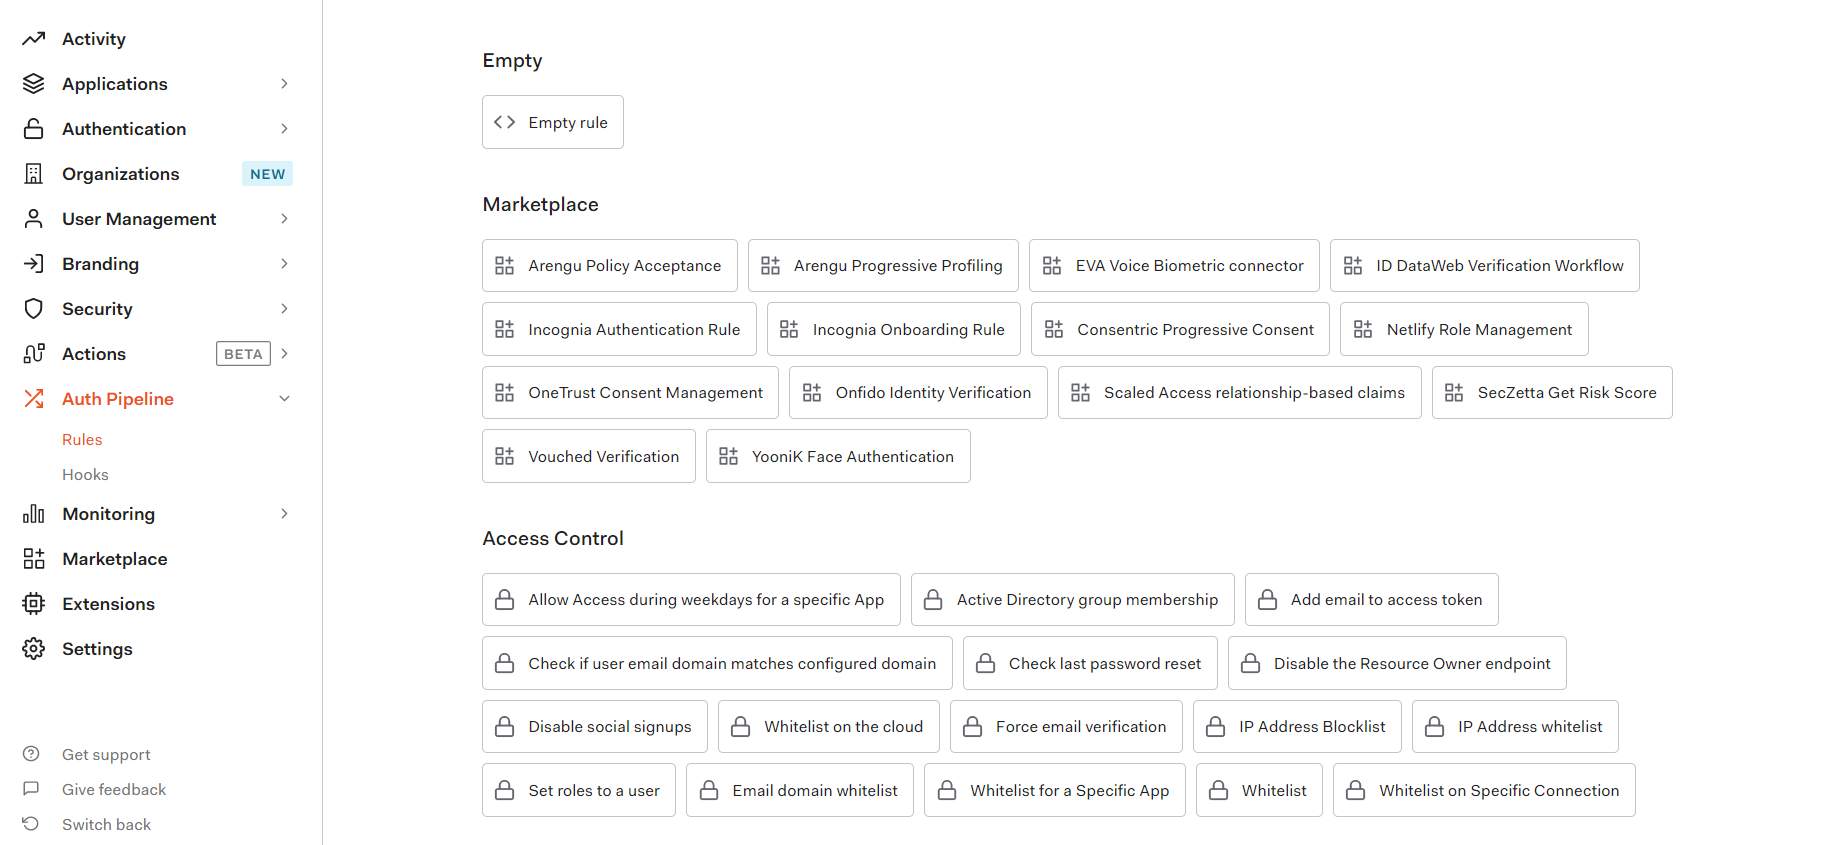
Ruleを編集し、whitelistにログインを許可するメールアドレスを指定する
function userWhitelist(user, context, callback) {
  // Access should only be granted to verified users.
  if (!user.email || !user.email_verified) {
    return callback(new UnauthorizedError('Access denied.'));
  }

  const whitelist = ['YOUR EMAIL ADDRESS']; //authorized users
  const userHasAccess = whitelist.some(function (email) {
    return email === user.email;
  });

  if (!userHasAccess) {
    return callback(new UnauthorizedError('Access denied.'));
  }

  callback(null, user, context);
}
18.GitHubにpush
git status
git add .
git commit -m "add Auth0"
git push
19.Azure Static Web Appsで発行されたURLでアプリの確認ができたら完成(Allowed Callback URLs, Allowed Logout URLs, Allowed Web Origins, Allowed Origins (CORS)の設定を忘れずに!)
VuePressで特定ユーザーのみログイン可能な社内ドキュメントサイト完成!