準備
環境とかインストールしておくべきものとか
環境
- Anaconda
- Ubuntu 18.04.1(on WSL2)
インストール
condaでRDKit用の仮想環境を作成
$ conda create -c rdkit -n (仮想環境名) rdkit
そのままimport rdkitを使ってみると、○○のライブラリが無いとか言われるのでダウンロード (自分の場合はlibxrender1)
$ sudo apt install libxrender1
その他matplotlibやscikit-learnを$ conda install XXXXでインストール
(あと記事作成用にtabulate)
試してみる
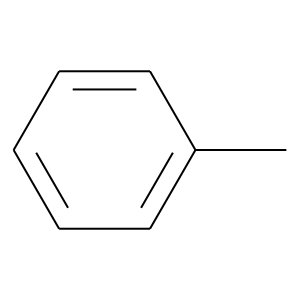
分子の表示
from rdkit import Chem
from rdkit.Chem import Draw

# SMILES記法で書いた分子をmolファイルと呼ばれる形式に変更
molecule_1 = Chem.MolFromSmiles('Cc1ccccc1')

# mol形式ファイルを画像に変換 (display)
Draw.MolToImage(molecule_1)
フィンガープリントの作成
以下の記事を参考に、化合物のSMILESと溶解度のデータを取得。
化学情報学にRDKitとScikit-learnで入門する
| smile | XXXX | logS | |
|---|---|---|---|
| 0 | O=C(C)N | 60-35-5 | 1.58 |
| 1 | NNC | 60-34-4 | 1.34 |
| 2 | O=C(C)O | 64-19-7 | 1.22 |
| 3 | N1CCCC1 | 123-75-1 | 1.15 |
| 4 | O=C(N)NO | 127-07-1 | 1.12 |
SMILE形式で保存されているものをMOL形式に変換。その後にフィンガープリントを取得。
- radius: 半径。注目する原子から何原子先までを考慮するか。
smiles = df['smile']
molecules = [Chem.MolFromSmiles(smile) for smile in smiles]

# 試しに一つだけフィンガープリントを作成
from rdkit.Chem import AllChem
molecule_1 = molecules[0]

fingerprint = AllChem.GetMorganFingerprintAsBitVect(mol=molecule_1, radius=2, nBits=2048)
# -> rdkit.DataStructs.cDataStructs.ExplicitBitVectというクラスのデータが作成

fingerprint.ToBitString()
# -> 000000000000000100000000000000100のような表現に変更
# -> あとはこれを使って好きなように機械学習のモデルに突っ込めばOK
