この記事について
CUDAが有効な環境で裏側の動きを調べたい事情があり環境を作りましたので構築手順メモを残します。
Jetson NanoでOpenCV-CUDA11有効にできるか?と果敢にsource探してmakeしましたが真偽不明のままGW時間切れとなりQ-engineeringさんのイメージ使わせてもらいしました。ホスト機は眠っていたJetson Nano B01を使いましたOrin Nanoではありません。
CUDAの動作確認のため使用実績のあるYOLOv5で推論DEMOを実施しました。
環境
Jetson
Jetson Nano DEV KIT B01
ストレージ
microSDカード 64GB
イメージ
A Jetson Nano - Ubuntu 20.04 image with OpenCV, TensorFlow and Pytorch
ログイン情報の初期設定は以下。
hostname: nano
username: jetson
passphrase: jetson
詳細
hardware: {'Model': 'NVIDIA Jetson Nano Developer Kit',
            '699-level Part Number': 'xxx-xxxxx-0000-401 D.0',
            'P-Number': 'pxxxx-0000',
            'BoardIDs': 'pxxxx',
            'Module': 'NVIDIA Jetson Nano (4 GB ram)',
            'SoC': 'tegra210',
            'CUDA Arch BIN': '5.3',
            'Codename': 'Porg',
            'Serial Number': 'xxxxxxxxxxxxx',
            'L4T': '32.6.1', 'Jetpack': '4.6'}
platform: {'Machine': 'aarch64',
            'System': 'Linux',
            'Distribution':
            'Ubuntu 20.04 focal',
            'Release': '4.9.253-tegra',
            'Python': '3.8.10'}
libraries: {'CUDA': '10.2.300',
            'OpenCV': '4.8.0',
            'OpenCV-Cuda': True,
            'cuDNN': '8.2.1.32',
            'TensorRT': '8.0.1.6',
            'VPI': '1.1.15',
            'Vulkan': '1.2.141'}
準備
- JetsonNanoUb20_3b.img.xzをWindowsPCにダウンロード。
- balenaEtcherでJetsonNanoUb20_3b.img.xzをmicroSDカードに書き込み。
- 別のLinux機でgpartedを使って書き込んだJetsonNanoUb20_3b.imgをmicroSDカードのサイズに容量拡張。
- microSDカードをJetson NanoのmicroSDカードslotに挿入して電源ON。
カスタマイズ
user作成
検証作業用にuser名:userを追加しました。
WindowsPCよりssh login
C:\Users\user> ssh jetson@nano
groups jetsonは以下。
jetson adm cdrom sudo audio dip video plugdev i2c lpadmin gdm lightdm gpio weston-launch sambashare jtop
group userを作成。
$ sudo groupadd user
jetsonと同じ権限を持つ"user"を作成してpasswd設定。
$ sudo useradd -g user -G adm,cdrom,sudo,audio,dip,video,plugdev,i2c,lpadmin,gdm,lightdm,gpio,weston-launch,sambashare,jtop -s /bin/bash user
$ sudo passwd user
directoryをcloneして所有者と権限をuserに変更。
$ sudo rsync -a /home/jetson/ /home/user/
$ sudo chown -R user:user /home/user/
userで再ログイン。
$ exit
C:\Users\user> ssh user@nano
VNC設定
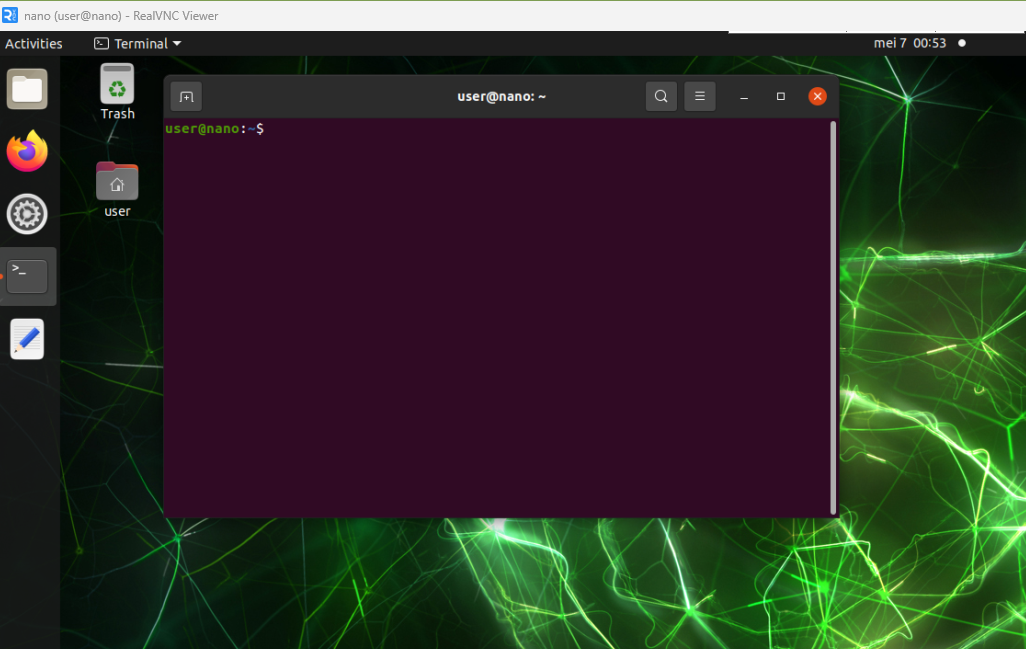
標準インストールされているvinoを使います。
自動起動設定して
$ mkdir -p ~/.config/autostart
$ cp /usr/share/applications/vino-server.desktop ~/.config/autostart
config設定ではmypasswdは任意に設定します。
$ gsettings set org.gnome.Vino prompt-enabled false
$ gsettings set org.gnome.Vino require-encryption false
$ gsettings set org.gnome.Vino authentication-methods "['vnc']"
$ gsettings set org.gnome.Vino vnc-password $(echo -n 'mypasswd'|base64)
自動loginの設定
login userはここでは"user"になります。
#以下をアンコメント AutomaticLoginは自分が設定したusernameに変更
AutomaticLoginEnable = true
AutomaticLogin = user
解像度設定
FHD指定したいので以下を追加します。
Section "Screen"
   Identifier    "Default Screen"
   Monitor       "Configured Monitor"
   Device        "Tegra0"
   SubSection "Display"
       Depth    24
       Virtual 1920 1080
   EndSubSection
EndSection
再起動してVNCでログインできることを確認。
$ sudo reboot

公開鍵設定
事前に用意したmy-ed25519というキーペアで公開鍵認証設定します。
WinSCPまたはftp等で/home/userにpub key:my-ed25519.pubをコピーします。
$ ls *.pub
my-ed25519.pub
~/.sshに公開鍵を設置。
$ mkdir .ssh
$ cat my-ed25519.pub >> .ssh/authorized_keys
$ chmod 700 .ssh
$ chmod 600 .ssh/authorized_keys
$ sudo chmod 666 /etc/ssh/sshd_config
port番号を22から62000に変更して公開鍵認証/Basic認証拒否で設定しsshdを再起動。
$ sudo cp /etc/ssh/sshd_config /etc/ssh/sshd_config.bak

$ sudo sed -i "s/#Port 22/Port 62000/g" /etc/ssh/sshd_config
$ sudo sed -i "s/#PubkeyAuthentication yes/PubkeyAuthentication yes/g" /etc/ssh/sshd_config
$ sudo sed -i "s/PasswordAuthentication yes/PasswordAuthentication no/g" /etc/ssh/sshd_config
$ sudo sed -i "s/#PasswordAuthentication no/PasswordAuthentication no/g" /etc/ssh/sshd_config

$ sudo systemctl restart ssh
秘密鍵で再ログイン。
$ exit
C:\Users\user> ssh user@nano -i "C:\Users\user\.ssh\my-ed25519" -p 62000
Welcome to Ubuntu 20.04.6 LTS (GNU/Linux 4.9.253-tegra aarch64)
・
・
・
Last login: Tue May  7 01:18:35 2024 from 192.168.11.171
user@nano:~$
filter設定
何時ものやつです、普段使いのものにDOCKERの設定が追加されています。多分過不足と怪しいところがありますのでご利用は自己責任でお願いします。
docker0へのFORWARD設定は既存の設定を流用しました。
$ sudo apt install -y iptables-persistent
$ sudo chmod +x set_nft.sh
$ ./set_nft.sh
#!/bin/bash

sudo cp /etc/iptables/rules.v4 /etc/iptables/rules.v4.bak
sudo rm /etc/iptables/rules.v4

STATIC_IP=$(ip addr show eth0 | grep "inet " | awk '{print $2}' | cut -d/ -f1)
cidr=$(ip addr show eth0 | grep "inet " | awk '{print $2}' | cut -d/ -f1 | awk -F'.' '{print $1"."$2"."$3".0"}')

sudo iptables -F
sudo iptables -X
sudo iptables -P INPUT DROP
sudo iptables -P FORWARD DROP
sudo iptables -P OUTPUT ACCEPT
sudo iptables -A INPUT -i lo -j ACCEPT
sudo iptables -A INPUT -d 127.0.0.0/8 ! -i lo -j REJECT --reject-with icmp-port-unreachable
sudo iptables -A INPUT -m state --state RELATED,ESTABLISHED -j ACCEPT
sudo iptables -A INPUT -p tcp -m tcp --dport 8883 -j ACCEPT
sudo iptables -A INPUT -s 127.0.0.0/8 -p tcp -m tcp --dport 1883 -j ACCEPT
sudo iptables -A INPUT -s ${cidr}/24 -p tcp -m tcp --dport 1883 -j ACCEPT
sudo iptables -A INPUT -s ${cidr}/24 -p udp -m udp --dport 53 -j ACCEPT
sudo iptables -A INPUT -s 169.254.0.0/16 -p udp -m udp --dport 53 -j ACCEPT
sudo iptables -A INPUT -s 2.debian.pool.ntp.org -p udp -m udp --dport 123 -j ACCEPT
sudo iptables -A INPUT -s ${cidr}/24 -p udp -m udp --dport 5353 -j ACCEPT
sudo iptables -A INPUT -s 169.254.0.0/16 -p udp -m udp --dport 5353 -j ACCEPT
sudo iptables -A INPUT -s ${cidr}/24 -p tcp -m tcp --dport 5900 -j ACCEPT
sudo iptables -A INPUT -s 169.254.0.0/16 -p tcp -m tcp --dport 5900 -j ACCEPT
sudo iptables -A INPUT -s ${cidr}/24 -p udp -m udp --dport 5900 -j ACCEPT
sudo iptables -A INPUT -s 169.254.0.0/16 -p udp -m udp --dport 5900 -j ACCEPT
if echo "$STATIC_IP" | grep -q "192.168"; then
    sudo iptables -A INPUT -s ${cidr}/24 -p tcp -m state --state NEW -m tcp --dport 62000 --tcp-flags FIN,SYN,RST,ACK SYN -m hashlimit --hashlimit-upto 1/min --hashlimit-burst 10 --hashlimit-mode srcip --hashlimit-name t_sshd --hashlimit-htable-expire 120000 -j ACCEPT
fi
sudo iptables -A INPUT -s 169.254.0.0/16 -p tcp -m state --state NEW -m tcp --dport 62000 --tcp-flags FIN,SYN,RST,ACK SYN -m hashlimit --hashlimit-upto 1/min --hashlimit-burst 10 --hashlimit-mode srcip --hashlimit-name t_sshd --hashlimit-htable-expire 120000 -j ACCEPT
sudo iptables -A INPUT -s ${cidr}/24 -p icmp -m icmp --icmp-type 8 -j ACCEPT
sudo iptables -A INPUT -s 192.168.0.0/16 -p icmp -m icmp --icmp-type 8 -j ACCEPT
sudo iptables -A INPUT -s 169.254.0.0/16 -p icmp -m icmp --icmp-type 8 -j ACCEPT
sudo iptables -A INPUT -m limit --limit 5/min -j LOG --log-prefix "iptables denied: " --log-level 7
sudo iptables -A INPUT -j REJECT --reject-with icmp-port-unreachable

sudo iptables -N DOCKER
sudo iptables -N DOCKER-ISOLATION-STAGE-1
sudo iptables -N DOCKER-ISOLATION-STAGE-2
sudo iptables -N DOCKER-USER

# Rules for DOCKER-ISOLATION-STAGE-1 chain
sudo iptables -A DOCKER-ISOLATION-STAGE-1 -j DOCKER-ISOLATION-STAGE-2
sudo iptables -A DOCKER-ISOLATION-STAGE-1 -j RETURN

# Rules for DOCKER-ISOLATION-STAGE-2 chain
sudo iptables -A DOCKER-ISOLATION-STAGE-2 -j DROP
sudo iptables -A DOCKER-ISOLATION-STAGE-2 -j RETURN

# Rules for DOCKER-USER chain
sudo iptables -A DOCKER-USER -j RETURN

sudo service netfilter-persistent reload
sudo service netfilter-persistent save
sudo sh -c "iptables-save >/etc/iptables.ipv4.filter"
sudo iptables-save | sudo tee /etc/iptables/rules.v4
動作確認
YOLOv5インストール
$ sudo apt -y install python3.8-venv
$ git clone https://github.com/ultralytics/yolov5.git
$ cd yolov5
$ python3.8 -m venv venv
$ source venv/bin/activate
GPU動作確認
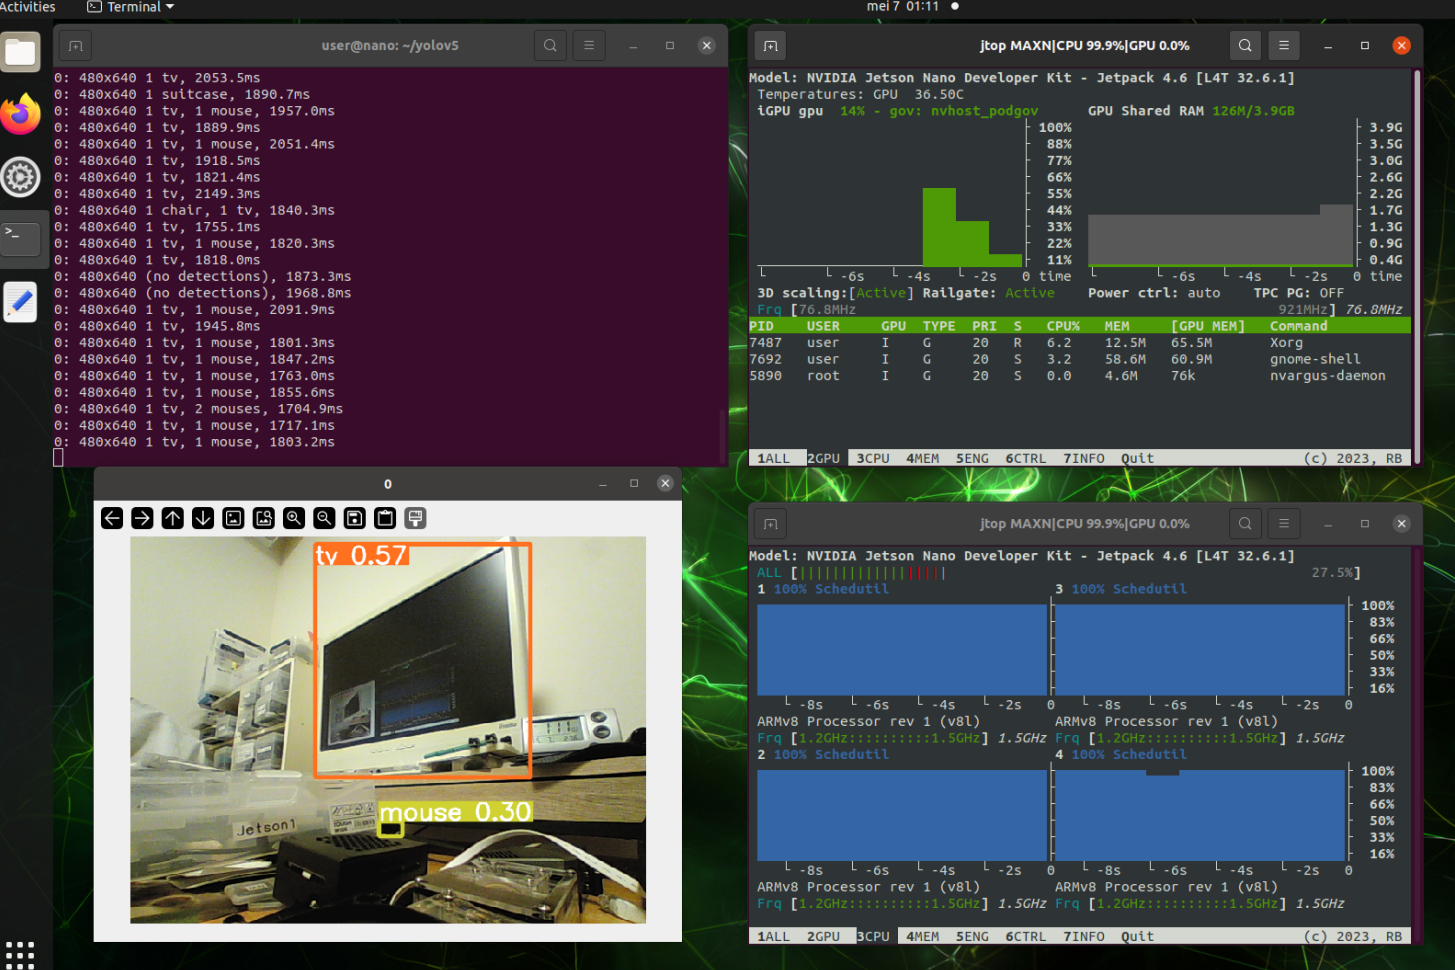
USBカメラを接続してYOLOv5のDEMO codeを実行します。
(venv)$ python3.8 detect.py --source 0

GPUが動いていることが確認できました。
途中のupgradeで依存関係にハマらないか冷や汗をかきましたがカスタマイズも完了しました。目的の検証で活用したいと思います。
先達の皆さま今回も文献によるご教示ありがとうございました。