iOS8から使用可能になった指紋認証のTouchID APIの使い方のまとめです。
frameworkの追加が抜けていたり、Swiftのコードがなかったりしたので、まとめてみました。
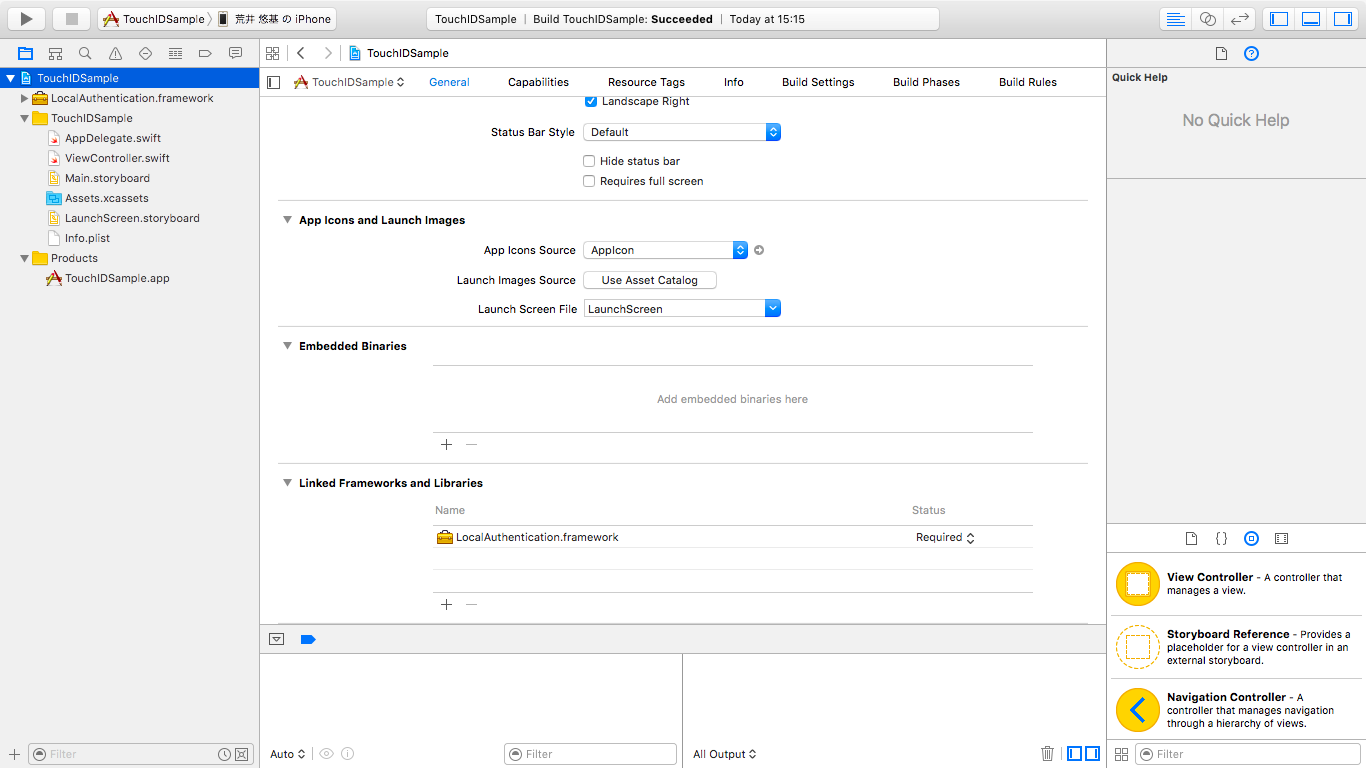
LocalAuthentication.frameworkをプロジェクトに追加
LocalAuthenticationをViewControllerにインポートして実装
ViewController.swift
import UIKit
import LocalAuthentication

class ViewController: UIViewController {

    override func viewDidLoad() {
        super.viewDidLoad()
        // Do any additional setup after loading the view, typically from a nib.
        let context = LAContext()
        var error : NSError?
        if context.canEvaluatePolicy(LAPolicy.DeviceOwnerAuthenticationWithBiometrics, error: &error) {
            context.evaluatePolicy(LAPolicy.DeviceOwnerAuthenticationWithBiometrics, localizedReason: "サンプル確認のための認証チェック", reply: {
                success, error in
                if (success) {
                    NSLog("認証成功")
                } else {
                    NSLog("認証失敗:" + error!.code.description)
                }
            })
        } else {
            NSLog("TouchID非対応")
        }
    }

    override func didReceiveMemoryWarning() {
        super.didReceiveMemoryWarning()
        // Dispose of any resources that can be recreated.
    }


}
ポイントは以下の通りです。
- LocalAuthenticationをimport
- LAContext.canEvaluatePolicyでTouchID端末かを判定
- LAContext.evaluatePolicyでTouchID認証のアラート表示、及びコールバック制御する
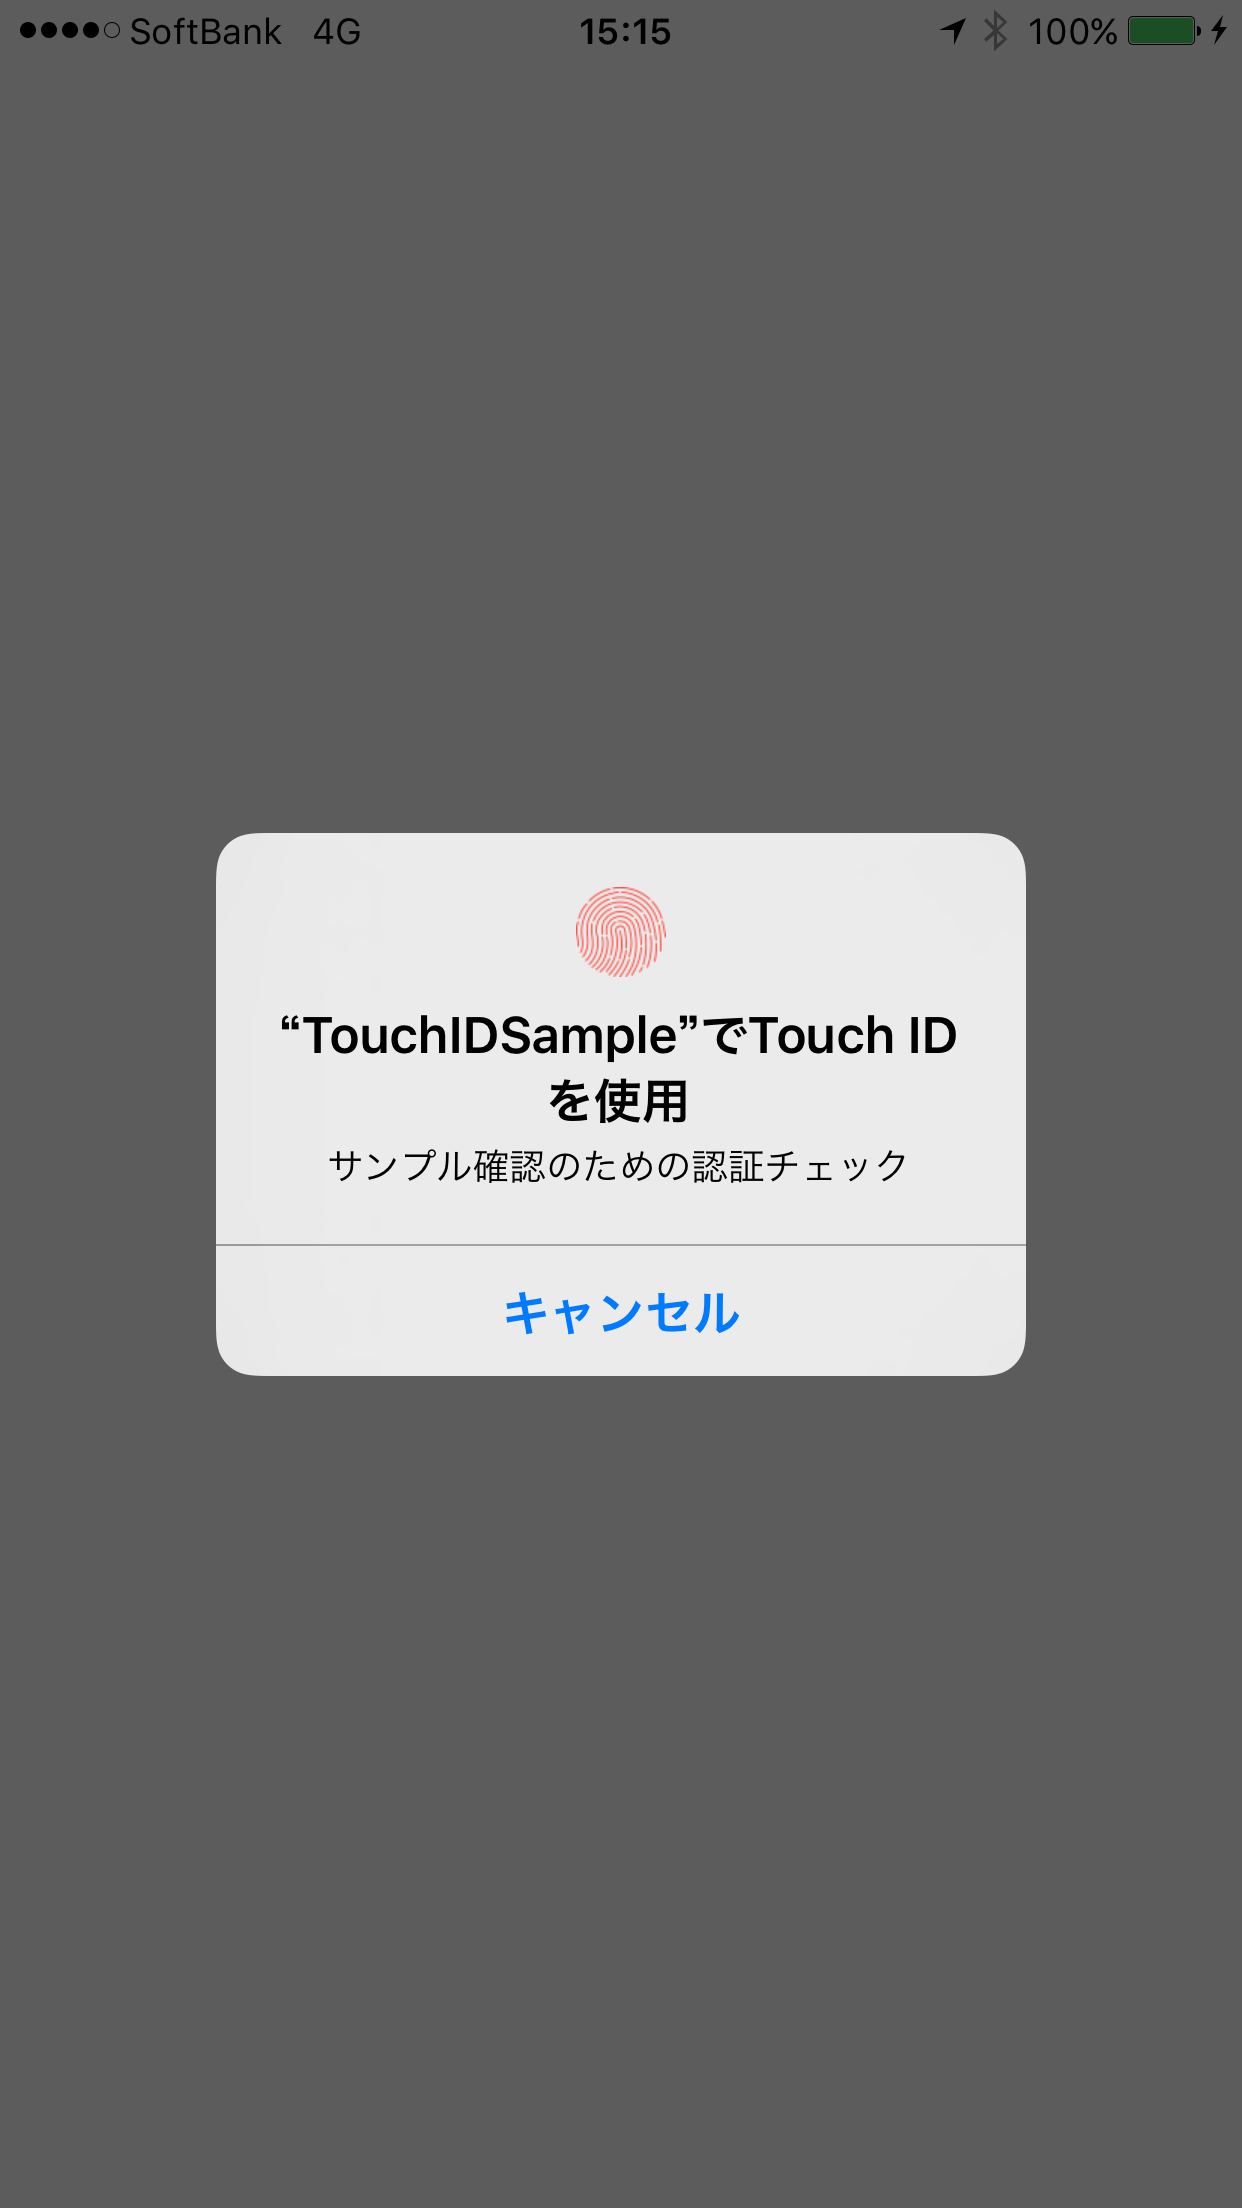
TouchID端末で実行時
上記の画像のように認証用のアラートが出てきて、指紋認証が成功すれば、認証OKです。
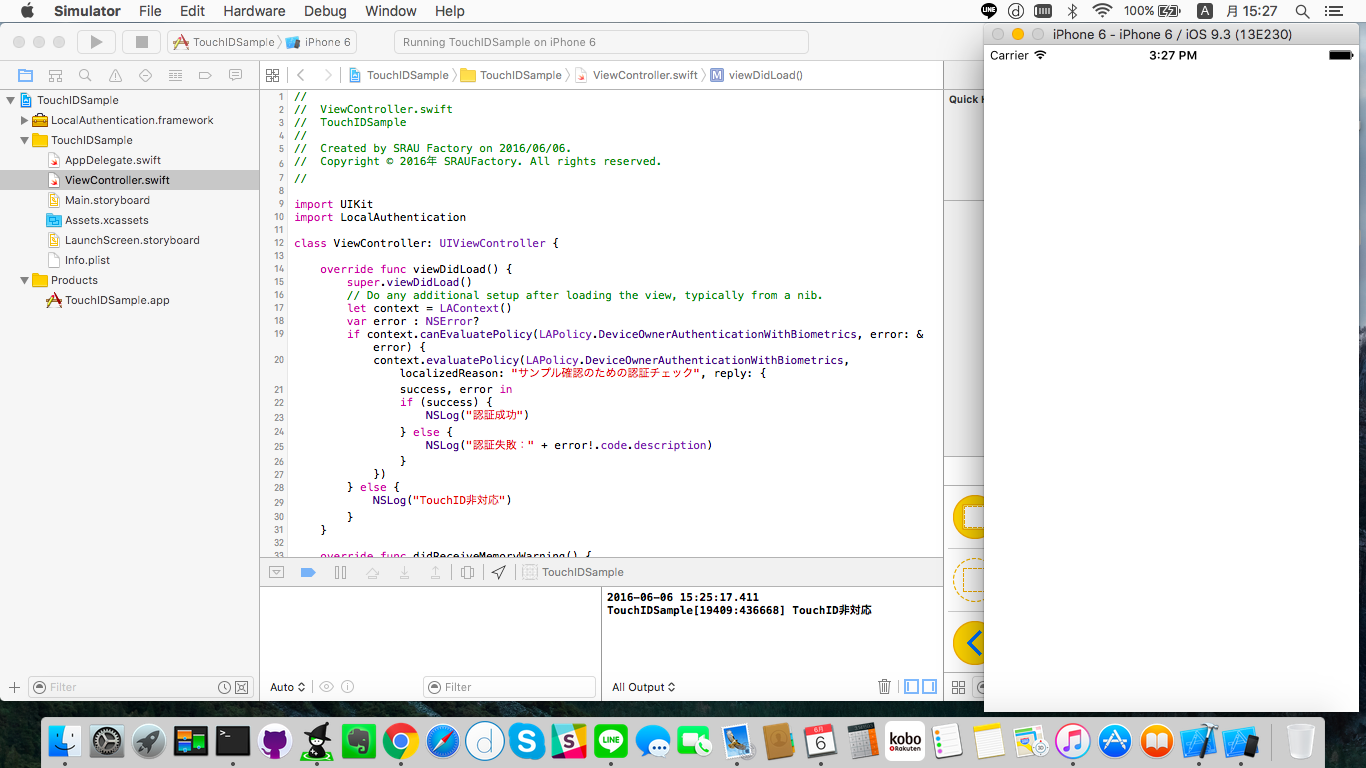
非TouchID端末で実行時
非TouchID端末では、以下のように認証用のアラートが表示されず、ログが出力されるだけになります。
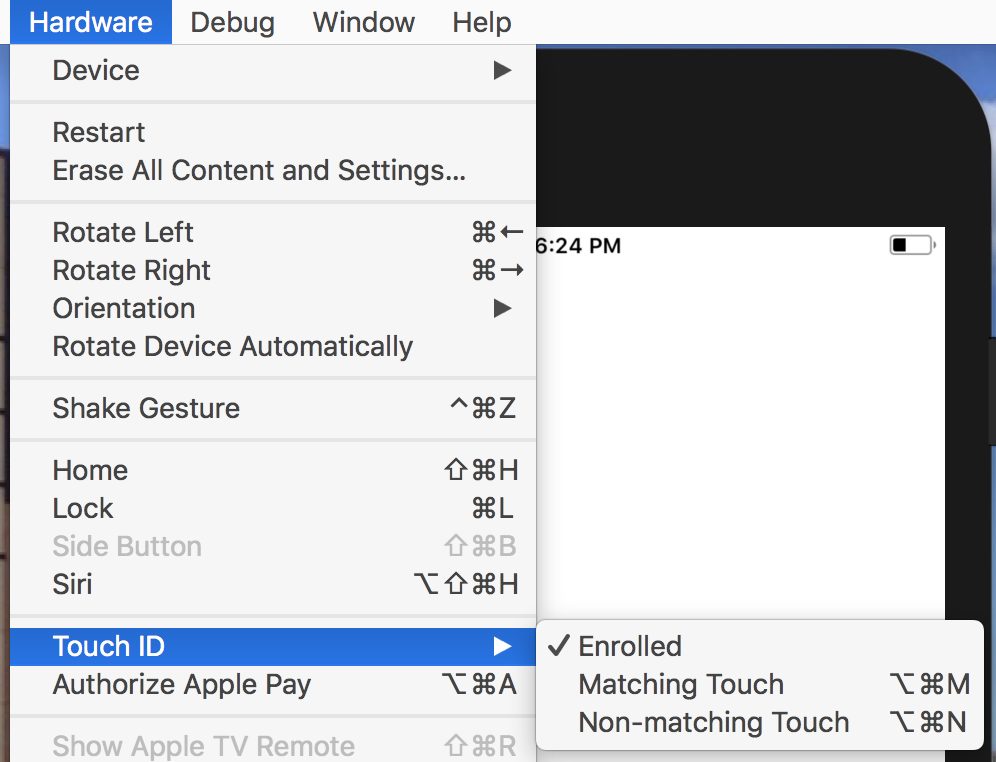
iOSシュミレータでTouchIDを使用する場合
iOSシュミレータの「Hardware」-「TouchID」の項目にチェックを入れると、iOSシュミレータでも実機と同様にTouchIDのアラートが表示されるようになります。


