前回の記事の続編になります。
今回は、「追加ボタン」を配置してこのボタンをクリックすると、ファイルアップロード機能が1つずつ追加される仕様を実装していきます。
イメージ
画面下部の「追加ボタン」をクリックすると、
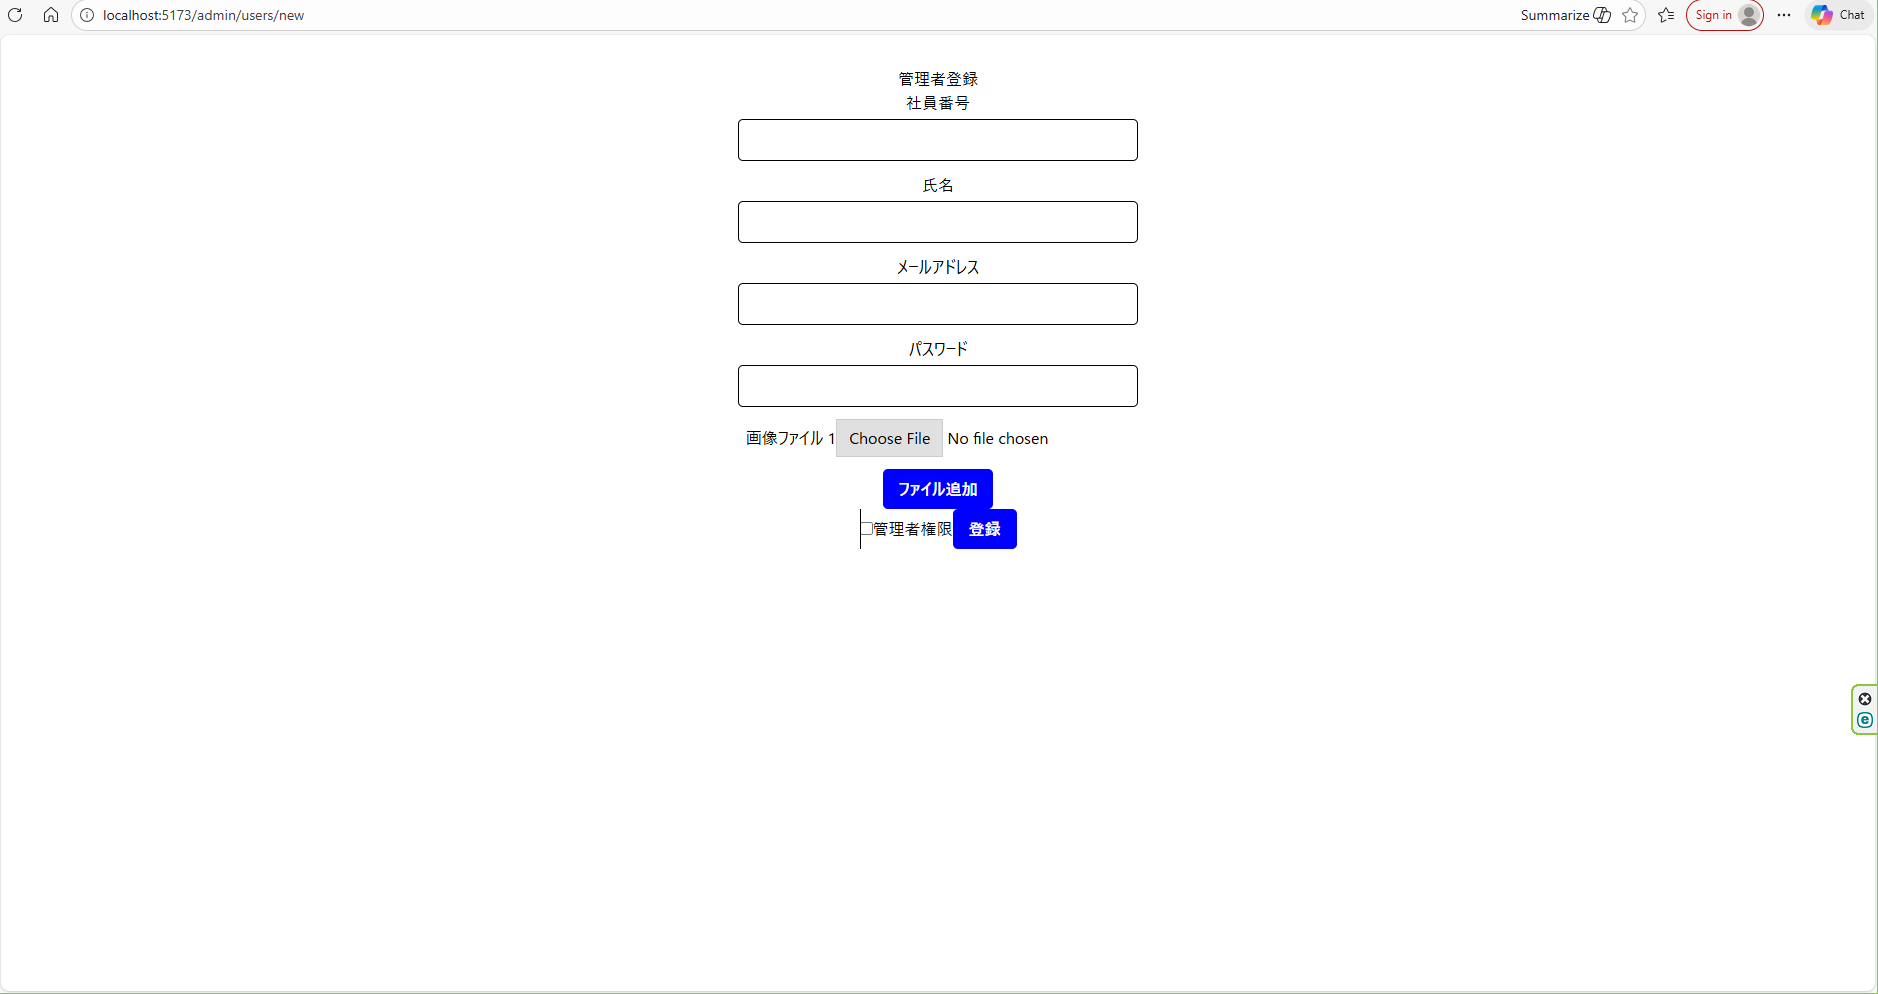
下記のように、ファイルアップロード機能が順次追加されるようになっています。

ディレクトリ構造
ディレクトリは変わっていませんが、載せておきます。
└── Frontend/
    ├── node_modules
    ├── public
    └── src/
        ├── assets
        └── components/
            ├── atoms/
            │   ├── Button.tsx
            │   ├── Checkbox.tsx
            │   ├── Input.tsx
            │   ├── InputFile.tsx
            │   └── Label.tsx
            ├── molecules/
            │   ├── FileField.tsx
            │   ├── FormField.tsx
            │   └── PasswordField.tsx
            ├── organisms/
            │   └── AdminUserForm.tsx
            ├── templates/
            │   └── AdminUserTemplate.tsx
            ├── pages/
            │   └── AdminUserRegisterPage.tsx
            ├── styles/
            │   └── global.css 👈自作
            ├── App.css
            ├── App.tsx
            ├── index.css
            ├── main.tsx
            ├── .env
            ├── eslint.config.js
            ├── index.html
            ├── package.json
            ├── package.lock.json
            ├── tsconfig.json
            ├── tsconfig.app.json
            ├── tsconfig.node.json
            └── vite.config.ts
実装の方針
やりたいことは 「FileField を配列で管理して、map で複数描画する」 が王道です。
ポイントはこの3つです。👇
①useState を Fileの配列 にする
②「追加」ボタンで 配列を増やす
③map でFileFieldを描画し、index でどのファイルか判別する
① stateを配列にする
最初は1個だけ表示したいので[null]で初期化します。
Sample.tsx
const [files, setFiles] = useState<(File | null)[]>([null]);
②FileField側
src/components/molecules/FileField.tsx
type Props = {
    label:string;
    onChange:(e:React.ChangeEvent<HTMLInputElement>)=>void;
}

export const FileField:React.FC<Props> = ({ label,onChange })=>{
    return (
        <div style={{ marginBottom:"12px" }}>
            <label>{label}</label>
            <input
                type="file"
                accept="image/png, image/jpeg"
                onChange={onChange}
            />
        </div>
    )
}
③ AdminUserForm で複数描画する
FileField をmapで描画して、追加ボタン押下で項目を増やします。
src/components/organisms/AdminUserForm.tsx
//(略)
const [files, setFiles] = useState<(File | null)[]>([null]);

{files.map((file, index) => (
  <FileField
    key={index}
    label={`画像ファイル ${index + 1}`}
    onChange={(e) => {
      if (e.target.files && e.target.files.length > 0) {
        const newFiles = [...files];
        newFiles[index] = e.target.files[0];
        setFiles(newFiles);
      }
    }}
  />
))}

<Button type="button" onClick={() => setFiles([...files, null])}>
  追加
</Button>
//(略)
全体コード
src/components/molecules/FileField.tsx
type Props = {
    label:string;
    onChange:(e:React.ChangeEvent<HTMLInputElement>)=>void;
}

export const FileField:React.FC<Props> = ({ label,onChange })=>{
    return (
        <div style={{ marginBottom:"12px" }}>
            <label>{label}</label>
            <input
                type="file"
                accept="image/png, image/jpeg"
                onChange={onChange}
            />
        </div>
    )
}
src/components/organisms/AdminUserForm.tsx
import { useState } from "react";
import { PasswordField } from "../molecules/PasswordField";
import { FormField } from "../molecules/FormField";
import { Checkbox } from "../atoms/Checkbox";
import { Button } from "../atoms/Button";
import axios from "axios";
import { FileField } from "../molecules/FileField";

export const AdminUserForm:React.FC = ()=>{
    const [id,setId] = useState("");
    const [name, setName] = useState("");
    const [email, setEmail] = useState("");
    const [password, setPassword] = useState("");
    const [adminrole, setAdminrole] = useState(false);
    {/*const [file, setFile] = useState<File | null>(null);*/}
    const [files, setFiles] = useState<(File | null)[]>([null]);
    // 管理者登録URL
    const create_admin_user_url = import.meta.env.VITE_NEW_ADMINUSER_CREATE;

    const handleSubmit = async(e:React.FormEvent)=>{
        e.preventDefault();
        const body = {
            id,
            name,
            email,
            password,
            adminrole
        };

        try{
            const response = await axios.post(create_admin_user_url,//"/api/new/adminusercreate"
                body,
                {
                    headers:{
                        "Content-Type": "application/json"
                    },
                    //withCredentials: true
                }
            )

            console.log(response);
            alert(response.data);

        }catch(error:any){
            if (error.response) {
            // サーバーが返したステータスコードがある場合
            alert(`エラー: ${error.response.status} ${error.response.data}`);
            } else if (error.request) {
                // リクエストは作られたがレスポンスなし
                alert("サーバーに到達できませんでした");
                return
            } else {
                // その他のエラー
                alert("予期せぬエラー");
                return
            }
            console.error(error);
            }

    };
    return (
        <form onSubmit={handleSubmit}>
            <FormField label="社員番号" value={id} onChange={(e)=>setId(e.target.value)}/>
            <FormField label="氏名" value={name} onChange={(e)=>setName(e.target.value)}/>
            <FormField type="email" label="メールアドレス" value={email} onChange={(e)=>setEmail(e.target.value)}/>
            <PasswordField value={password} onChange={(e) => setPassword(e.target.value)} />
            {/*
            <FileFied label="画像ファイル" onChange={(e)=>{
                if(e.target.files && e.target.files.length > 0){
                    setFile(e.target.files[0])
                }
            }}/>
            */}
            {files.map((file,index)=>(
                <FileField
                    key={index}
                    label={`画像ファイル ${index + 1}`}
                    onChange={(e)=>{
                        if(e.target.files && e.target.files.length > 0){
                            const newFiles = [...files];
                            newFiles[index] = e.target.files[0];
                            setFiles(newFiles);
                        }
                    }}
                />
            ))}
            <Button type="button" onClick={()=>setFiles([...files,null])}>
                ファイル追加
            </Button>
            <div style={{ marginBottom: "12px" }}>
                <label>
                    <Checkbox checked={adminrole} onChange={(e)=>setAdminrole(e.target.checked)}/>
                    管理者権限
                </label>
                <Button type="submit">登録</Button>
            </div>
        </form>
    )
}
サイト
【React】Atmic designでFileアップロード機能を実装する