はじめに
Bootstrap File Inputの導入方法について説明します。
Bootstrap File Inputを利用することで、「input type="file"」のボタンについても
その他ボタンとレイアウトを合わせることが可能となります。
また、ファイルをドラッグ&ドロップで選択したり、
選択したファイルを除外する機能も簡単に実装出来るようになります。
0. 前提条件
npmを使って、Bootstrap File Inputをインストールします。
また、gulpで環境を整えていくので、Bootstrap + gulpの環境を事前に準備下さい。
以前、Bootstrap4 + gulp 環境の作成方法について
紹介していますので、ご参考下さい。
⇒ Bootstrap4 + gulp 環境でモックアップを作成する。
上記を前提に以下の環境(作業ディレクトリ)に導入していきます。
bootstrap_sample/
├ node_modules/
│ ├ bootstrap/
│ │ ├ dist/
│ │ │ └ js/
│ │ │ └ bootstrap.bundle.min.js
│ │ └ scss/
│ │ └ bootstrap.scss
│ ├ gulp/
│ └ gulp-sass/
├ src/
│ ├ css/
│ │ └ main.css
│ ├ html/
│ │ └ index.html
│ ├ js/
│ │ ├ bootstrap.bundle.min.js
│ │ └ jquery.slim.min.js
│ └ scss/
│ ├ _bootstrap-custom.scss
│ ├ _override-functions.scss
│ ├ _override-variables.scss
│ └ main.scss
└ gulpfile.js
※ 本投稿に関係のないディレクトリ、ファイルについては割愛しています。
※ Bootstrapとgulpさえ揃っていれば、フォルダ構成等は自由ですので、
各自の環境に合わせて導入して下さい。
※ マシンのOSのバージョンは、macOS High Sierra 10.13.4です。
★★★ 最初に作業ディレクトリに移動して下さい。 ★★★
1. Bootstrap File Inputのインストール
"npm install -D bootstrap-fileinput"を実行します。
$ npm install -D bootstrap-fileinput
npm WARN bootstrap_sample@1.0.0 No description
npm WARN bootstrap_sample@1.0.0 No repository field.

+ bootstrap-fileinput@4.5.2
added 1 package and audited 8790 packages in 16.018s
found 1 low severity vulnerability
2. gulpfile.jsの修正
gulpでBootstrap File Inputのscssファイルをコンパイルする為、
gulpfile.jsのincludePathsにインストールしたBootstrap File Inputのパスを追加します。
修正前のgulpfile.js(一部抜粋)
// Bootstrap sass ディレクトリ
var bootstrapSass = {
    in: './node_modules/bootstrap/scss'
};

// sass、css関連の変数を設定
var sass = {
    in: source + 'scss/**/*scss',
    out: source + 'css/',
    watch: source + 'scss/**/*',
    sassOpts: {
        outputStyle: 'nested',              // 圧縮方法を指定(作成されたcssの可読性、容量に影響する。)
        includePaths: [bootstrapSass.in]    // @import機能で利用できるパスを指定
    }
};
修正後のgulpfile.js(一部抜粋)
// Bootstrap sass ディレクトリ
var bootstrapSass = {
    in: './node_modules/bootstrap/scss',
    in2: './node_modules/bootstrap-fileinput/scss'
};

// sass、css関連の変数を設定
var sass = {
    in: source + 'scss/**/*scss',
    out: source + 'css/',
    watch: source + 'scss/**/*',
    sassOpts: {
        outputStyle: 'nested',                                 // 圧縮方法を指定(作成されたcssの可読性、容量に影響する。)
        includePaths: [bootstrapSass.in, bootstrapSass.in2]    // @import機能で利用できるパスを指定
    }
};
3. main.scssの修正
'fileinput'を追加します。
修正前のmain.scss
@import "override-functions";
@import "override-variables";
@import "bootstrap-custom";
修正後のmain.scss
@import "override-functions";
@import "override-variables";
@import "bootstrap-custom";
@import 'fileinput';
4. コンパイル
Bootstrap File Inputのコンパイル環境が整ったので、
コンパイルを実行します。
$ npx gulp
コンパイル後のmain.cssに以下のようなBootstrap File Inputのコメントが
含まれていれば正常に設定が出来ています。
/*!
 * bootstrap-fileinput v4.5.2
 * http://plugins.krajee.com/file-input
 *
5. Javascriptの準備
Bootstrap File Inputの機能に必要なJavascriptの準備を行います。
5-1. fileinput.min.jsのコピー
$ cp node_modules/bootstrap-fileinput/js/fileinput.min.js src/js/fileinput.min.js
5-2. jquery.min.jsのコピー
$ cp node_modules/jquery/dist/jquery.min.js src/js/jquery.min.js
元々「jquery.slim.min.js」を利用していましたが、
Bootstrap File Inputの一部の機能(×ボタンの選択ファイル除外など)が
動かなかったので、「jquery.min.js」に切り替えました。
6. モックアップの作成
6-1. モックアップの準備
Bootstrap File Inputをインストールした時に、
サンプルのページ(index.html)が含まれているので、作業ディレクトリにコピーします。
$ cp node_modules/bootstrap-fileinput/examples/index.html src/html/index.html
6-2. 画面の確認
http://localhost:3000/html/index.htmlにアクセスし、
画面を確認します。
そうすると以下のように画面が崩れた状態で表示されます。
(cssのパス等が正しくない為)
6-3. サンプルページの設定変更
css、Javascriptのパスを環境に合わせて変更します。
修正前のindex.html(headタグ部分)
<head>
<meta charset="UTF-8"/>
<title>Krajee JQuery Plugins - © Kartik</title>
<link rel="stylesheet" href="https://stackpath.bootstrapcdn.com/bootstrap/4.1.3/css/bootstrap.min.css" crossorigin="anonymous">
<link href="../css/fileinput.css" media="all" rel="stylesheet" type="text/css"/>
<link rel="stylesheet" href="https://use.fontawesome.com/releases/v5.5.0/css/all.css" crossorigin="anonymous">
<link href="../themes/explorer-fas/theme.css" media="all" rel="stylesheet" type="text/css"/>
<script src="https://code.jquery.com/jquery-3.3.1.min.js" crossorigin="anonymous"></script>
<script src="https://stackpath.bootstrapcdn.com/bootstrap/4.1.3/js/bootstrap.bundle.min.js" crossorigin="anonymous"></script>
<script src="../js/plugins/sortable.js" type="text/javascript"></script>
<script src="../js/fileinput.js" type="text/javascript"></script>
<script src="../js/locales/fr.js" type="text/javascript"></script>
<script src="../js/locales/es.js" type="text/javascript"></script>
<script src="../themes/fas/theme.js" type="text/javascript"></script>
<script src="../themes/explorer-fas/theme.js" type="text/javascript"></script>
</head>
修正後のindex.html(headタグ部分)
<head>
<meta charset="UTF-8"/>
<title>Krajee JQuery Plugins - © Kartik</title>
<link href="/css/main.css" media="all" rel="stylesheet" type="text/css"/>
<script src="/js/jquery.min.js"></script>
<script src="/js/bootstrap.bundle.min.js"></script>
<script src="/js/fileinput.min.js" type="text/javascript"></script>
</head>
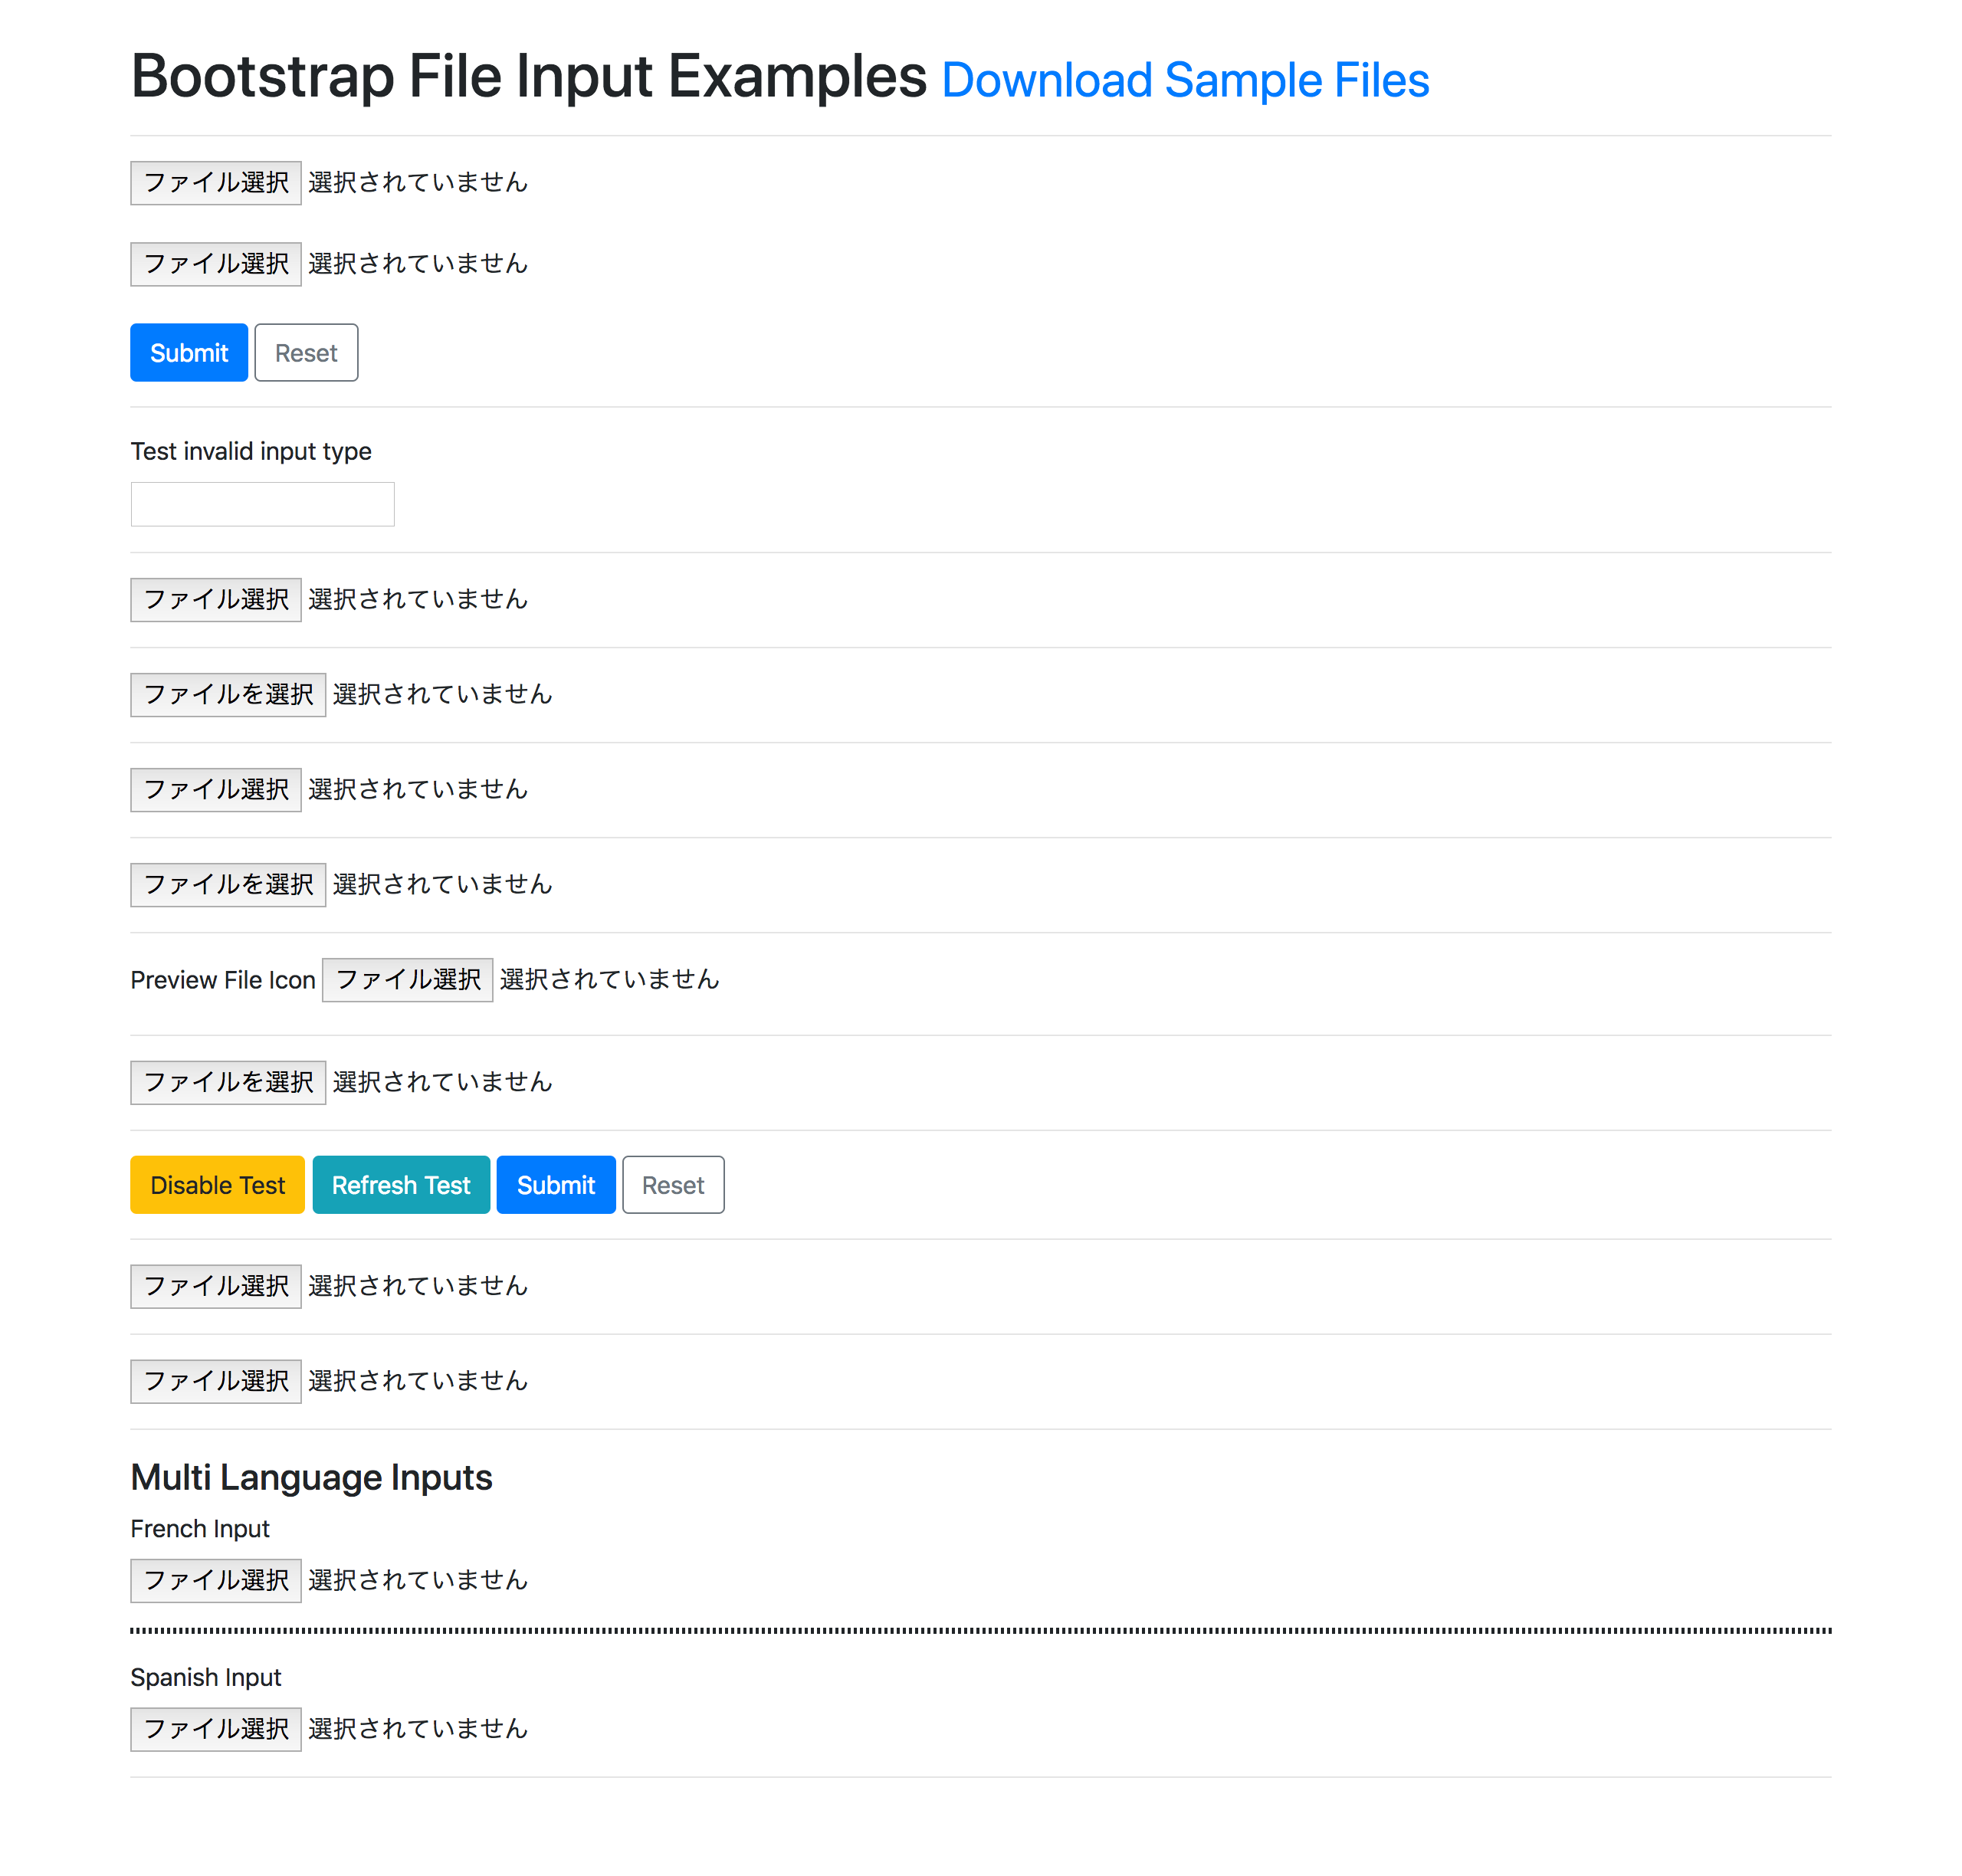
6-4. 修正後の画面確認
以下のように画面が表示されていれば全て正常に設定が出来ています。
ファイルをドラッグ&ドロップで選択したり、色々動作確認してみて下さい。

7. レイアウトの変更
レイアウト等の設定を変更する場合は、下記のようにJavascriptの箇所を修正します。
オプションの細かい説明はここでは割愛します。
⇒ オプション一覧
修正前のindex.html(Javascriptを一部抜粋)
    $("#file-3").fileinput({
        theme: 'fas',
        showUpload: false,
        showCaption: false,
        browseClass: "btn btn-primary btn-lg",
        fileType: "any",
        previewFileIcon: "<i class='glyphicon glyphicon-king'></i>",
        overwriteInitial: false,
        initialPreviewAsData: true,
        initialPreview: [
            "http://lorempixel.com/1920/1080/transport/1",
            "http://lorempixel.com/1920/1080/transport/2",
            "http://lorempixel.com/1920/1080/transport/3"
        ],
        initialPreviewConfig: [
            {caption: "transport-1.jpg", size: 329892, width: "120px", url: "{$url}", key: 1},
            {caption: "transport-2.jpg", size: 872378, width: "120px", url: "{$url}", key: 2},
            {caption: "transport-3.jpg", size: 632762, width: "120px", url: "{$url}", key: 3}
        ]
    });
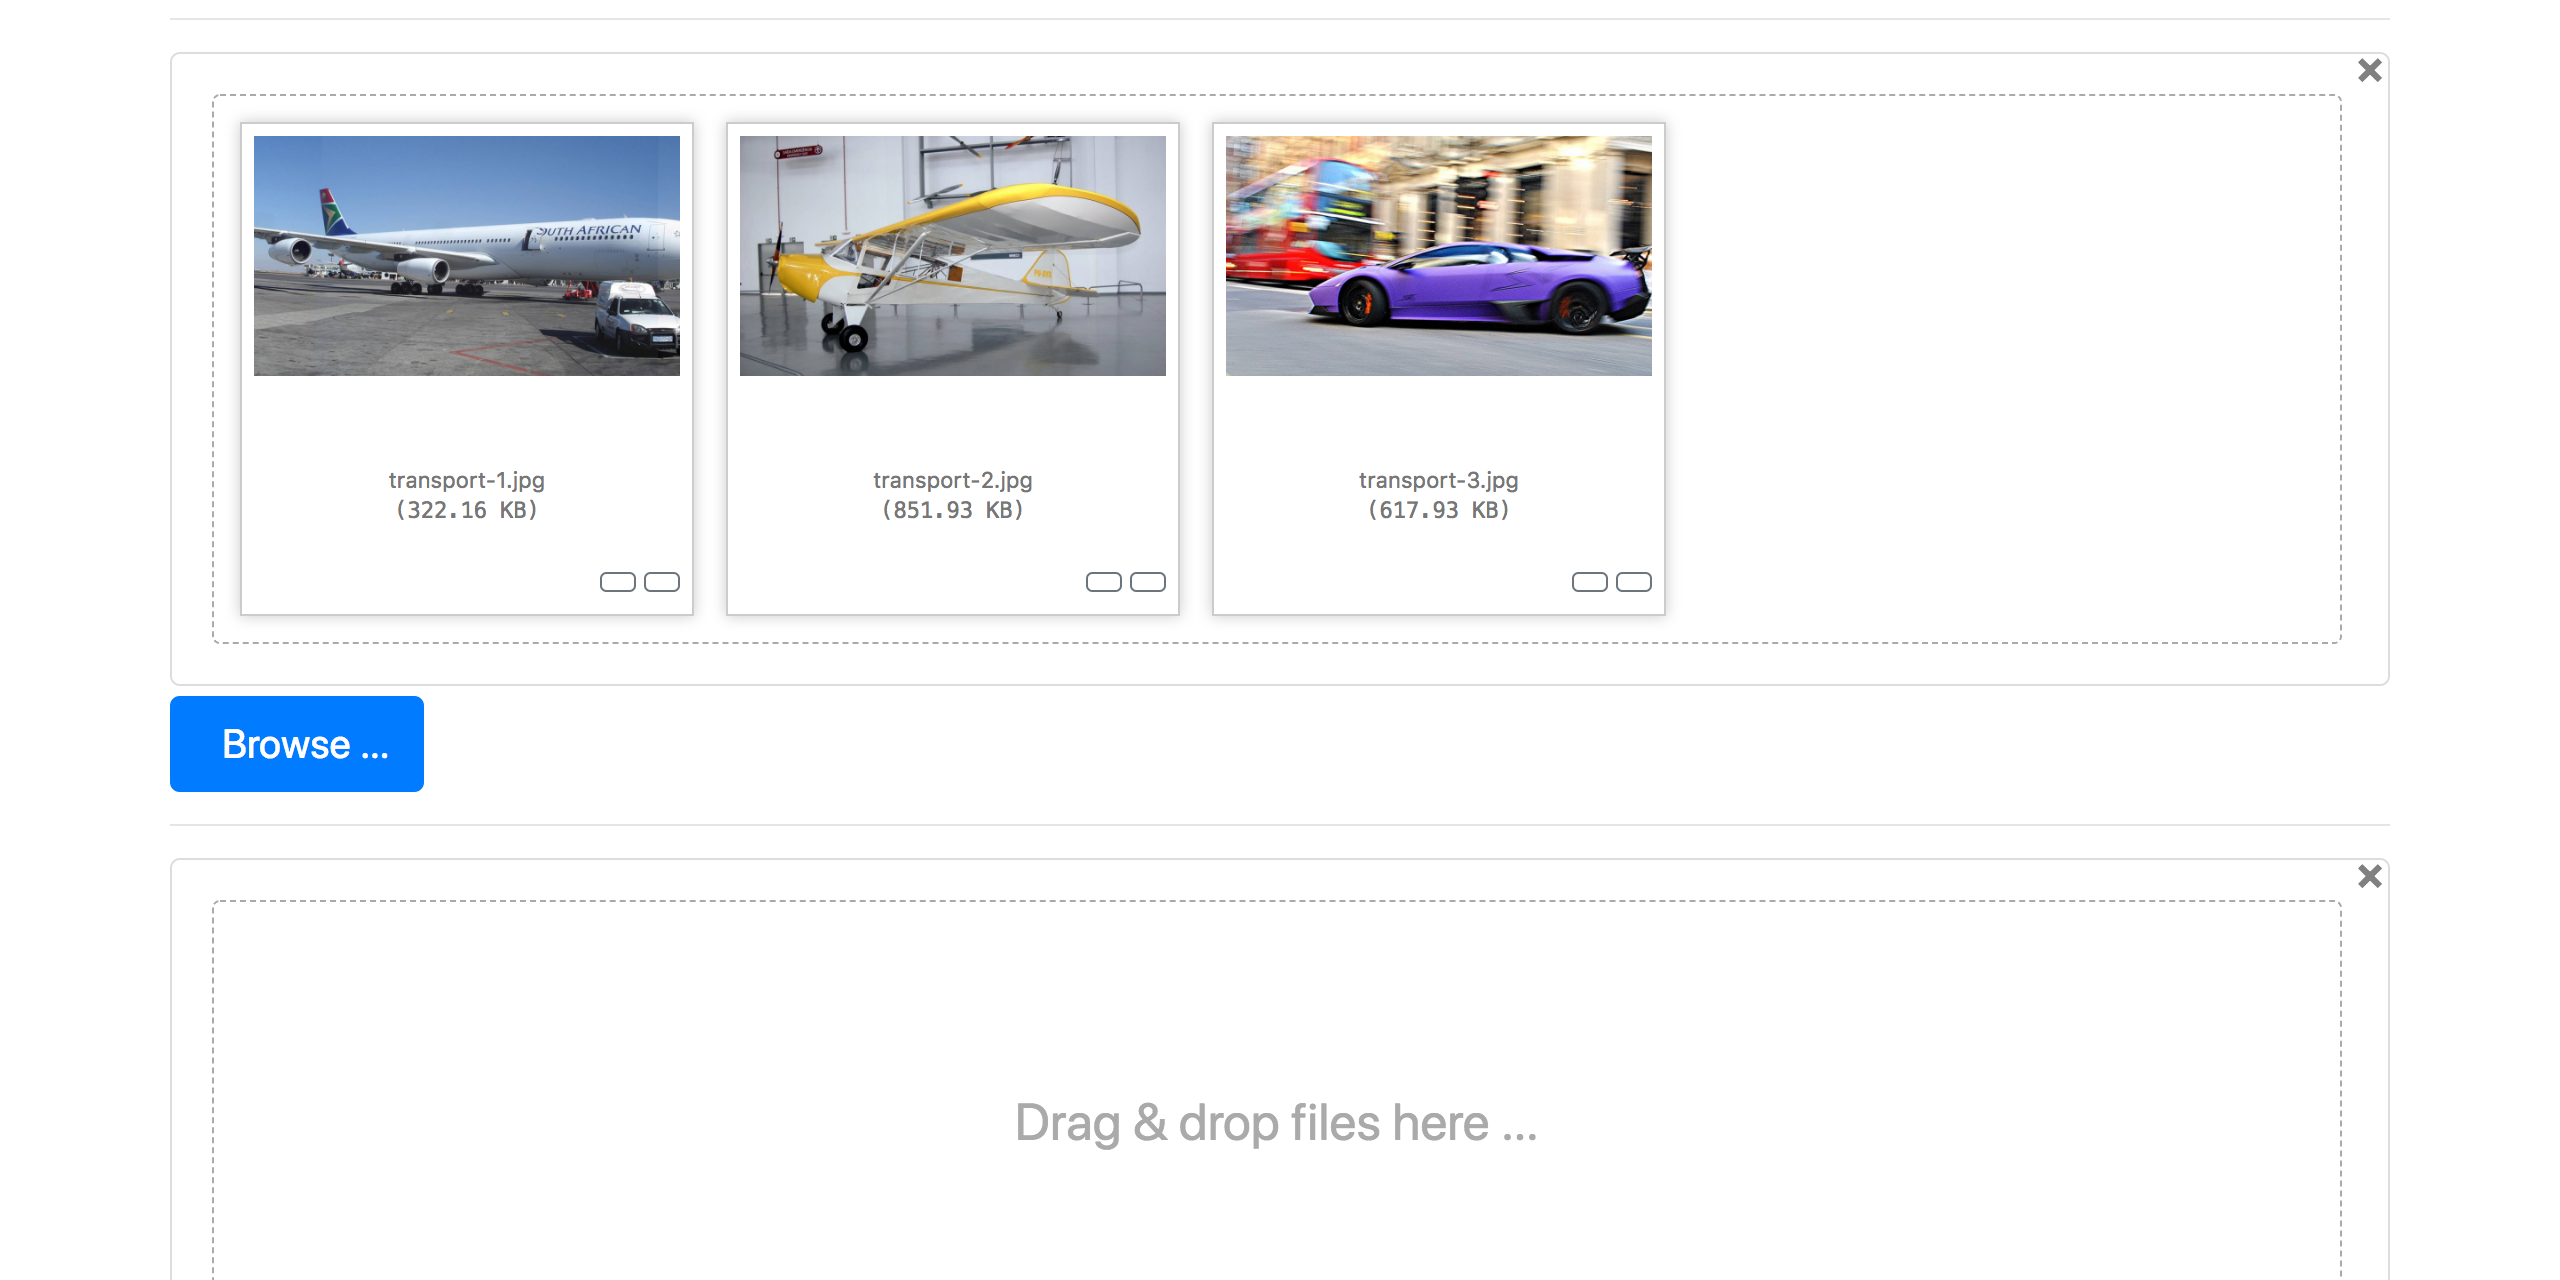
修正前のレイアウト
修正後のindex.html(Javascriptを一部抜粋)
    $("#file-3").fileinput({
        theme: 'fas',
        showUpload: false,
        showCaption: false,
        browseClass: "btn btn-primary btn-lg",
        fileType: "any",
        previewFileIcon: "<i class='glyphicon glyphicon-king'></i>",
        overwriteInitial: false,
        initialPreviewAsData: true,
        initialPreview: [
            "http://lorempixel.com/1920/1080/transport/1",
            "http://lorempixel.com/1920/1080/transport/2",
            "http://lorempixel.com/1920/1080/transport/3"
        ],
        initialPreviewConfig: [
            {caption: "transport-1.jpg", size: 329892, width: "120px", url: "{$url}", key: 1},
            {caption: "transport-2.jpg", size: 872378, width: "120px", url: "{$url}", key: 2},
            {caption: "transport-3.jpg", size: 632762, width: "120px", url: "{$url}", key: 3}
        ]
    });
修正後のレイアウト

以上となります。
最後に、最終的な作業ディレクトリのディレクトリ構成を以下に示します。
bootstrap_sample/
├ node_modules/
│ ├ bootstrap/
│ │ ├ dist/
│ │ │ └ js/
│ │ │ └ bootstrap.bundle.min.js
│ │ └ scss/
│ │ └ bootstrap.scss
│ ├ bootstrap-fileinput/
│ │ ├ examples/
│ │ │ └ index.html
│ │ └ js/
│ │ └ fileinput.min.js
│ ├ jquery/
│ │ └ dist/
│ │ └ jquery.min.js
│ ├ gulp/
│ └ gulp-sass/
├ src/
│ ├ css/
│ │ └ main.css
│ ├ html/
│ │ └ index.html
│ ├ js/
│ │ ├ bootstrap.bundle.min.js
│ │ ├ fileinput.min.js
│ │ └ jquery.min.js
│ └ scss/
│ ├ _bootstrap-custom.scss
│ ├ _override-functions.scss
│ ├ _override-variables.scss
│ └ main.scss
└ gulpfile.js