はじめに
Phoenix Framework で作った Web サイトをとりあえず AWS 上で公開したい!
でも、 EC2 でサーバーを立てたり SSH 接続して環境構築とかしたくない!
ちょっと動かしたいだけなので Ansible まで使いたくない!
AWS コンソールから VPC の設定とかもしたくない!
かといって CloudFormation も Terraform も面倒臭い!
という人向けの記事です
AWS Copilot を使えば何も考えずに Phoenix が AWS 上で動きます
※本番環境用となるとクラスタリングだったり、 mix release したりとかあるので、
あくまでも簡単に立ち上げるだけです
※ある程度 AWS や Docker の知識があることを前提としています
AWS Copilot 公式はこちら
本記事で実装したコードはこちら
AWS Copilot とは
Copilot = 副操縦士の名前の通り、 AWS 上のシステム構築を補助してくれるツールです
GitHub Copilot も優秀ですが、この副操縦士も超優秀です
「こんな感じでやっといて」で1から10まで全部やってしまいます
本記事で言うと、 Docker コンテナさえ用意しておけば、
ECS や VPC や ALB などをいい感じに設定してくれます
AWS Copulot CLI のインストール方法はこちら
Web アプリケーションの作成
こちらのリポジトリーに沿って手順を説明します
まず、公開したい Web サイトを作ります
ローカル環境構築
私は普段から asdf を愛用しているので、 asdf で Elixir をインストールします
asdf を使わない場合は Elixir 1.13.4 OTP 24 を何らかの手段でインストールしてください
asdf plugin add elixir
asdf install
これで .too-versions に記載されている Elixir 1.13.4 OTP 24 がインストールできます
次に Phoenix を使うための準備をします
mix local.hex --force \
  && mix archive.install hex phx_new --force \
  && mix local.rebar --force
Phoenix プロジェクトの作成
上記リポジトリーではすでに作成済なので、同じプロジェクトを使う場合はこの手順を飛ばしてください
DB は使わないので、
mix phx.new sample_app --no-ecto
で Phoenix のプロジェクトを作成します
また、外部からアクセスしたいので sample_app/dev.exs の 12行目を変更します
変更前
http: [ip: {127, 0, 0, 1}, port: 4000],
変更後
http: [ip: {0, 0, 0, 0}, port: 4000],
ローカルでの Phoenix 起動
sample_app ディレクトリーに移動して、 Phoenix を起動します
cd sample_app \
  && mix setup \
  && mix phx.server
以下のような表示が出たら http://localhost:4000 にアクセスしてください
[info] Running SampleAppWeb.Endpoint with cowboy 2.9.0 at 0.0.0.0:4000 (http)
[info] Access SampleAppWeb.Endpoint at http://localhost:4000
[debug] Downloading esbuild from https://registry.npmjs.org/esbuild-darwin-64/-/esbuild-darwin-64-0.14.29.tgz
[watch] build finished, watching for changes...
このような画面が表示されれば OK です
control + c で中断し、 a を入力して Phoenix を終了させます
Docker での起動
次に Docker 上で動かしてみます
ローカルでインストールした依存パッケージやビルドしたファイルを削除してから、ルートディレクトリーに戻ります
rm -rf deps _build \
  && cd ..
コンテナは Dockerfile に以下のように定義しています
FROM elixir:1.13.4

RUN mix local.hex --force \
  && mix archive.install hex phx_new --force \
  && mix local.rebar --force

COPY ./sample_app /app

WORKDIR /app

RUN mix deps.get

RUN mix compile.phoenix

EXPOSE 4000

CMD ["mix", "phx.server"]
デプロイ後、ヘルスチェックにすぐ応えられるよう
コンテナビルド時に mix compile.phoenix まで実行しています
また、 EXPOSE 4000 としておけば、 Copilot が 4000 番ポートを使うことを察してくれます
docker-compose.yml は以下のように定義しています
---

version: '3.2'
services:
  web:
    container_name: phoenix
    build: .
    ports:
      - '4000:4000'
    command: mix phx.server
    environment:
      - MIX_ENV=dev
では、 docker compose で動かしてみましょう
docker compose up
以下のような表示が出たら再び http://localhost:4000 にアクセスしてください
phoenix  | [info] Running SampleAppWeb.Endpoint with cowboy 2.9.0 at 0.0.0.0:4000 (http)
phoenix  | [info] Access SampleAppWeb.Endpoint at http://localhost:4000
phoenix  | [watch] build finished, watching for changes...
このような画面が表示されれば OK です(ローカル実行と同じ)
control + c でコンテナを停止させます
AWS Copilot による AWS へのデプロイ
さあ、いよいよ AWS Copilot の出番です
少なくとも AWS アカウントと、操作を実行するための IAM ユーザーが必要になります
IAM ユーザーのパーミッション
管理者権限を持っていて何でもできる IAM ユーザーであれば気にする必要はありませんが、
そうでない場合、以下のようなパーミッションが必要になります
※App Runner でのデプロイ時だけ使うパーミッションも含んでいます
※過剰になっている箇所があるかもしれません
{
    "Version": "2012-10-17",
    "Statement": [
        {
            "Sid": "Fulls",
            "Effect": "Allow",
            "Action": [
                "cloudformation:*"
                "cloudtrail:LookupEvents",
                "codebuild:ListProjects",
                "codestar-connections:CreateConnection",
                "codestar-connections:ListConnections",
                "codestar-connections:PassConnection",
                "codestar-connections:TagResource",
                "codestar-connections:UntagResource"
                "iam:*",
                "ec2:*",
                "ecr:*",
                "ecs:CreateCluster",
                "s3:*",
                "secretsmanager:DescribeSecret",
                "servicediscovery:*"
            ],
            "Resource": "*"
        },
        {
            "Sid": "ECRCreateRole",
            "Effect": "Allow",
            "Action": [
                "iam:CreateServiceLinkedRole"
            ],
            "Resource": "*",
            "Condition": {
                "StringEquals": {
                    "iam:AWSServiceName": [
                        "replication.ecr.amazonaws.com"
                    ]
                }
            }
        },
        {
            "Sid": "CodeStarConnections",
            "Effect": "Allow",
            "Action": [
                "codestar-connections:DeleteConnection",
                "codestar-connections:GetConnection"
            ],
            "Resource": [
                "arn:aws:codestar-connections:*:<アカウントID>:connection/*"
            ]
        },
        {
            "Sid": "CodeBuild",
            "Effect": "Allow",
            "Action": [
                "codebuild:CreateProject",
                "codebuild:DeleteProject",
                "codebuild:UpdateProject"
            ],
            "Resource": [
                "arn:aws:codebuild:*:<アカウントID>:project/*"
            ]
        },
        {
            "Sid": "ECS",
            "Effect": "Allow",
            "Action": [
                "ecs:DeleteCluster",
                "ecs:DescribeClusters"
            ],
            "Resource": "arn:aws:ecs:*:<アカウントID>:cluster/*"
        },
        {
            "Sid": "SSM",
            "Effect": "Allow",
            "Action": [
                "ssm:DeleteParameter",
                "ssm:DeleteParameters",
                "ssm:GetParameter",
                "ssm:GetParameters",
                "ssm:GetParametersByPath",
                "ssm:PutParameter"
            ],
            "Resource": "arn:aws:ssm:*:<アカウントID>:parameter/*"
        },
        {
            "Sid": "STS",
            "Effect": "Allow",
            "Action": "sts:AssumeRole",
            "Resource": "arn:aws:iam::<アカウントID>:role/*"
        }
    ]
}
アプリケーションの初期化
アプリケーションとサービスを作成します
※作成しても、まだデプロイはしていない状態です
$ copilot init \
    --app sample-app \
    --name lb-svc \
    --type "Load Balanced Web Service"
Welcome to the Copilot CLI! We're going to walk you through some questions
to help you get set up with a containerized application on AWS. An application is a collection of
containerized services that operate together.

Manifest file for service lb-svc already exists. Skipping configuration.
Ok great, we'll set up a Load Balanced Web Service named lb-svc in application sample-app.

⠴ Creating the infrastructure to manage services and jobs under application sample-app.
sample-app がアプリケーション名、 lb-svc がサービス名です
--type には以下のものを指定可能です
- "Request-Driven Web Service"
- "Load Balanced Web Service"
- "Backend Service"
- "Worker Service"
- "Scheduled Job"
"Request-Driven Web Service" は AWS App Runner ですが、
Web Socket に未対応なので使えません
"Load Balanced Web Service" が ALB の後ろにコンテナを動かす Web サービスなので、
これを選択しています
(今回は1台なのでロードバランサーの意味はないですが、、、)
しばらく待つと以下のように質問されます
All right, you're all set for local development.

  Would you like to deploy a test environment? [? for help] (y/N)
CloudWatch の Container Insights を使いたいので、ここでは N を入力してください
次に test 環境を作成します
<プロファイル名> の部分だけ自分のプロファイルに変更して実行してください
copilot env init \
  --name test \
  --profile <プロファイル名> \
  --default-config \
  --container-insights
作成に数分かかるため、しばらく待ちます
以下のような表示が出れば test 環境が作成できています
✔ Proposing infrastructure changes for the sample-app-test environment.
- Creating the infrastructure for the sample-app-test environment.            [create complete]  [93.7s]
  - An IAM Role for AWS CloudFormation to manage resources                    [create complete]  [30.3s]
  - An ECS cluster to group your services                                     [create complete]  [9.4s]
  - An IAM Role to describe resources in your environment                     [create complete]  [28.5s]
  - A security group to allow your containers to talk to each other           [create complete]  [6.1s]
  - An Internet Gateway to connect to the public internet                     [create complete]  [18.2s]
  - Private subnet 1 for resources with no internet access                    [create complete]  [4.3s]
  - Private subnet 2 for resources with no internet access                    [create complete]  [4.3s]
  - A custom route table that directs network traffic for the public subnets  [create complete]  [15.3s]
  - Public subnet 1 for resources that can access the internet                [create complete]  [5.7s]
  - Public subnet 2 for resources that can access the internet                [create complete]  [5.7s]
  - A private DNS namespace for discovering services within the environment   [create complete]  [50.2s]
  - A Virtual Private Cloud to control networking of your AWS resources       [create complete]  [12.8s]
✔ Created environment test in region ap-northeast-1 under application sample-app.
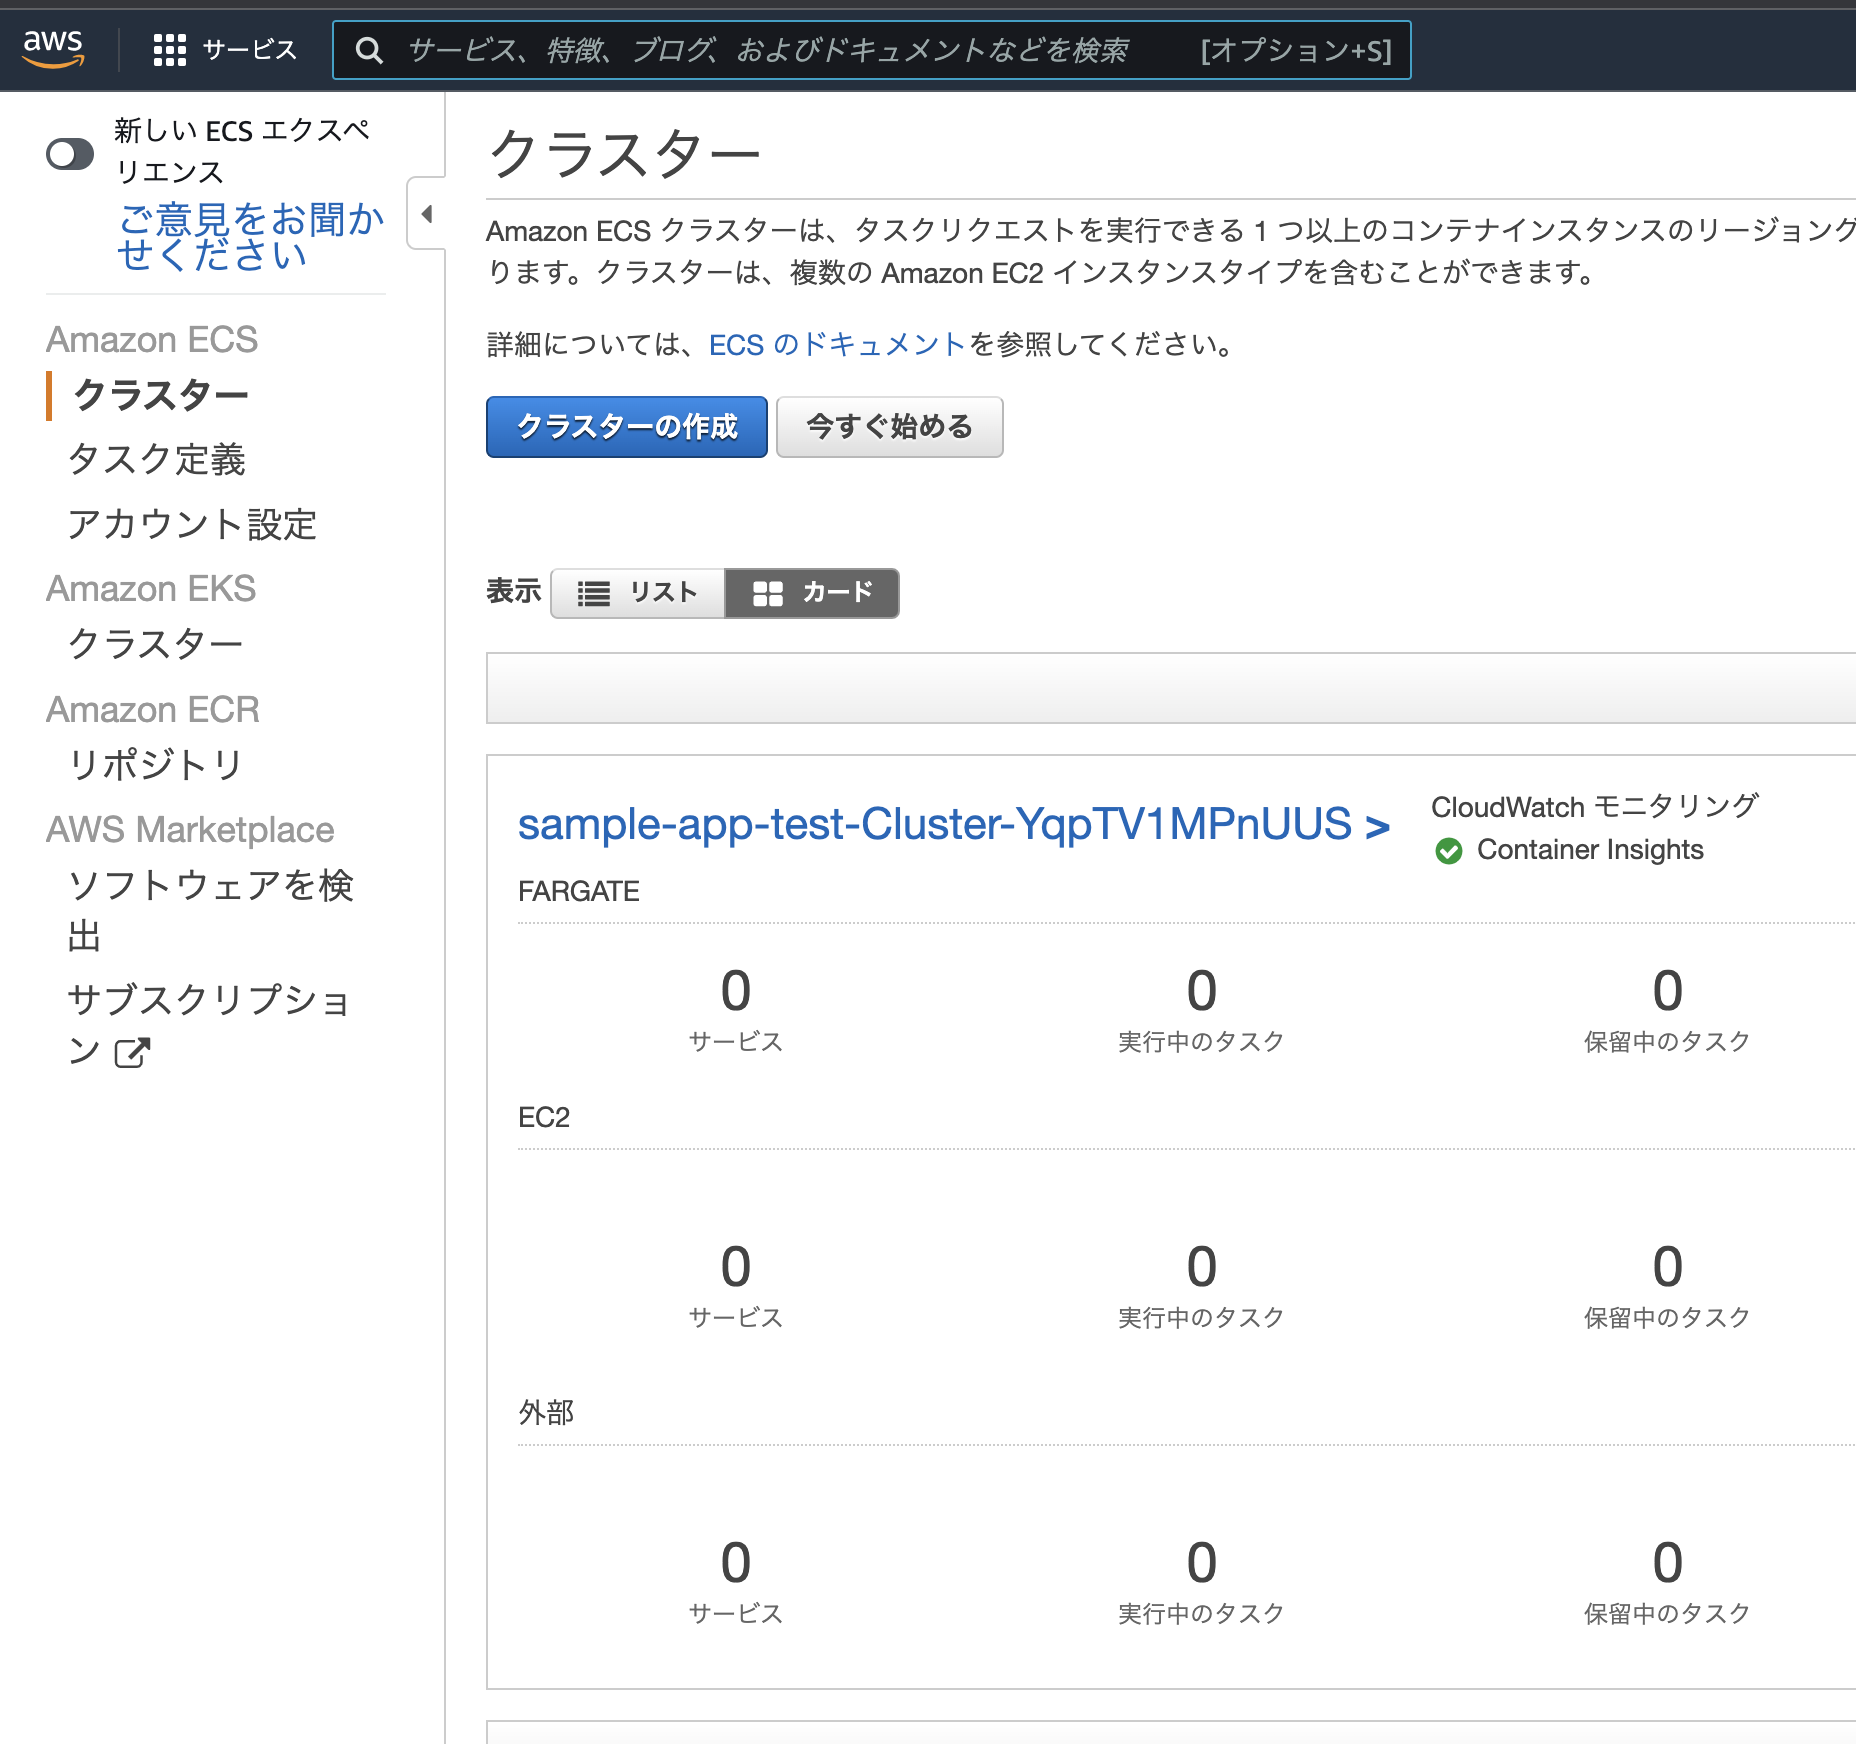
例えば、 ECS が以下のようにクラスターが作成されています
まだタスクは1つも実行されていない状態です
アプリケーションのデプロイ
以下のコマンドでデプロイします
copilot svc deploy \
  --name lb-svc \
  --env test
途中で以下のような表示が出ます
  - An ECS service to run and maintain your tasks in the environment cluster      [create in progress]  [17.3s]
    Deployments
               Revision  Rollout        Desired  Running  Failed  Pending
      PRIMARY  5         [in progress]  1        0        0       1
これは保留中のタスク(コンテナ)が1台、と言う意味で、コンテナが起動してヘルスチェックに成功すれは以下のような表示に切り替わります
  - An ECS service to run and maintain your tasks in the environment cluster      [create complete]  [100.5s]
    Deployments
               Revision  Rollout        Desired  Running  Failed  Pending
      PRIMARY  5         [in progress]  1        1        0       0
その後、以下のように表示されるので、 http://sampl- から始まる URL にアクセスしてください
✔ Deployed service lb-svc.
Recommended follow-up action:
  - You can access your service at http://sampl-Publi-xxx-1316580721.ap-northeast-1.elb.amazonaws.com over the internet.
このような画面が表示されれば OK です(ローカル実行と同じ)
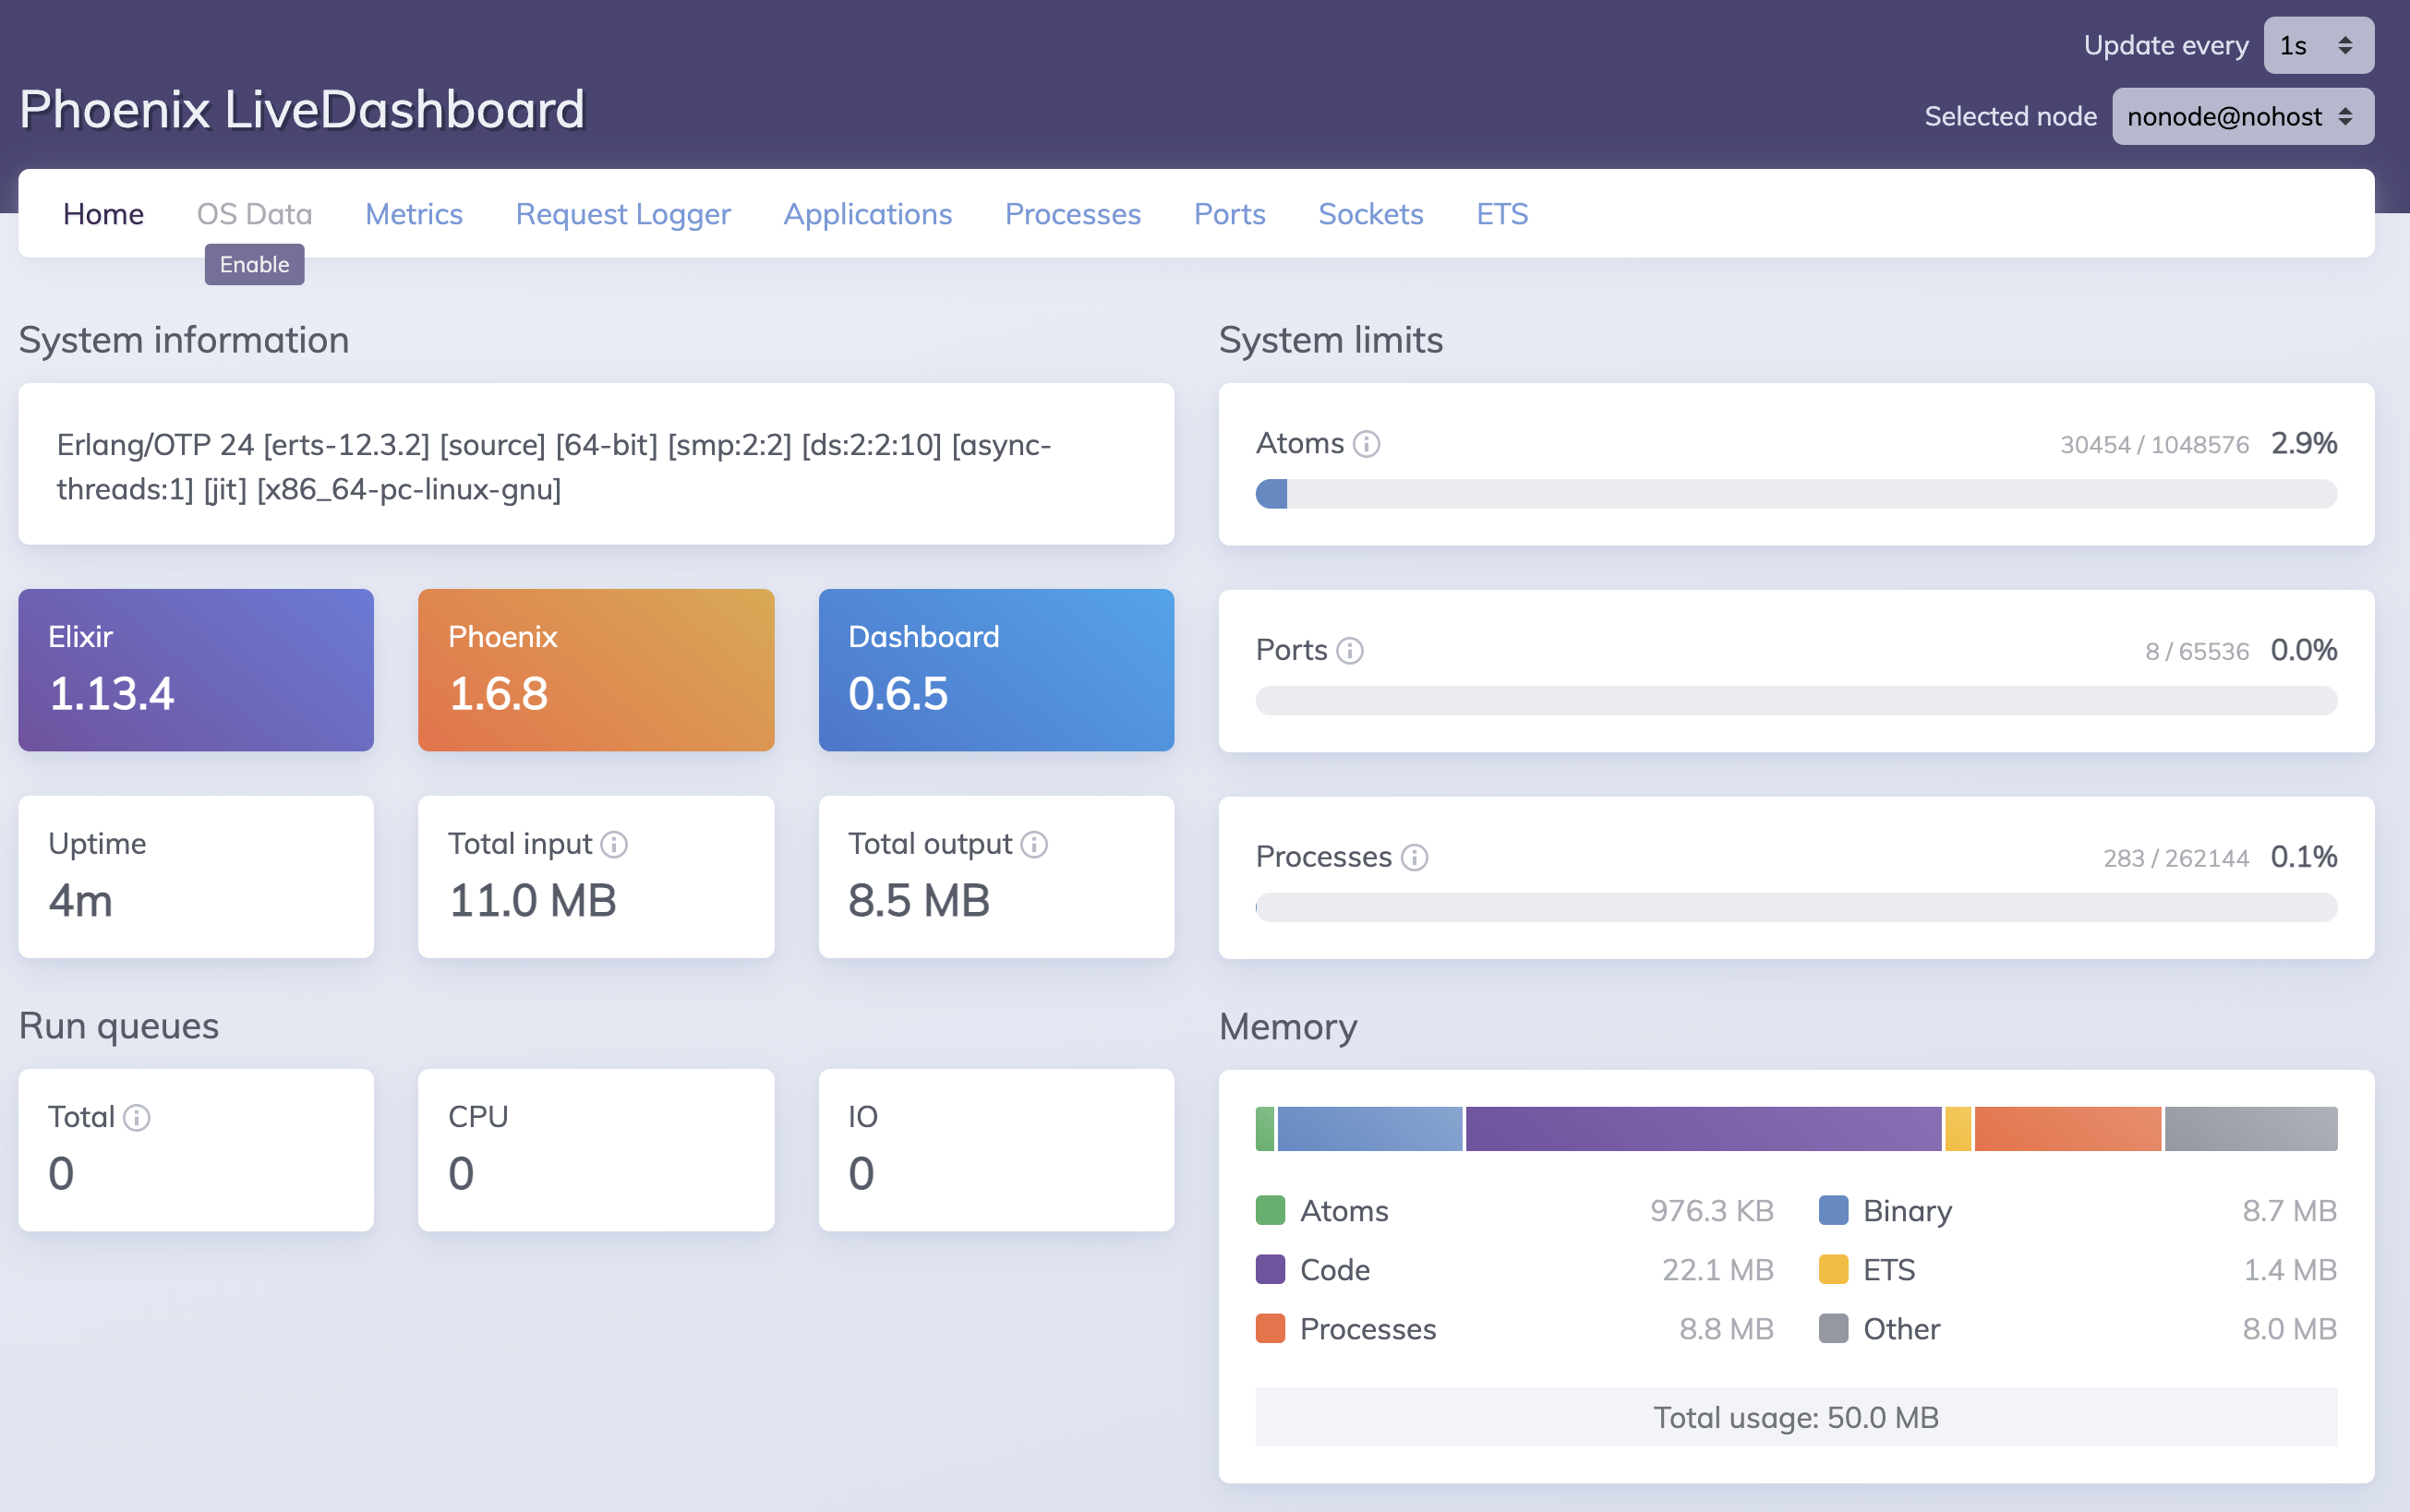
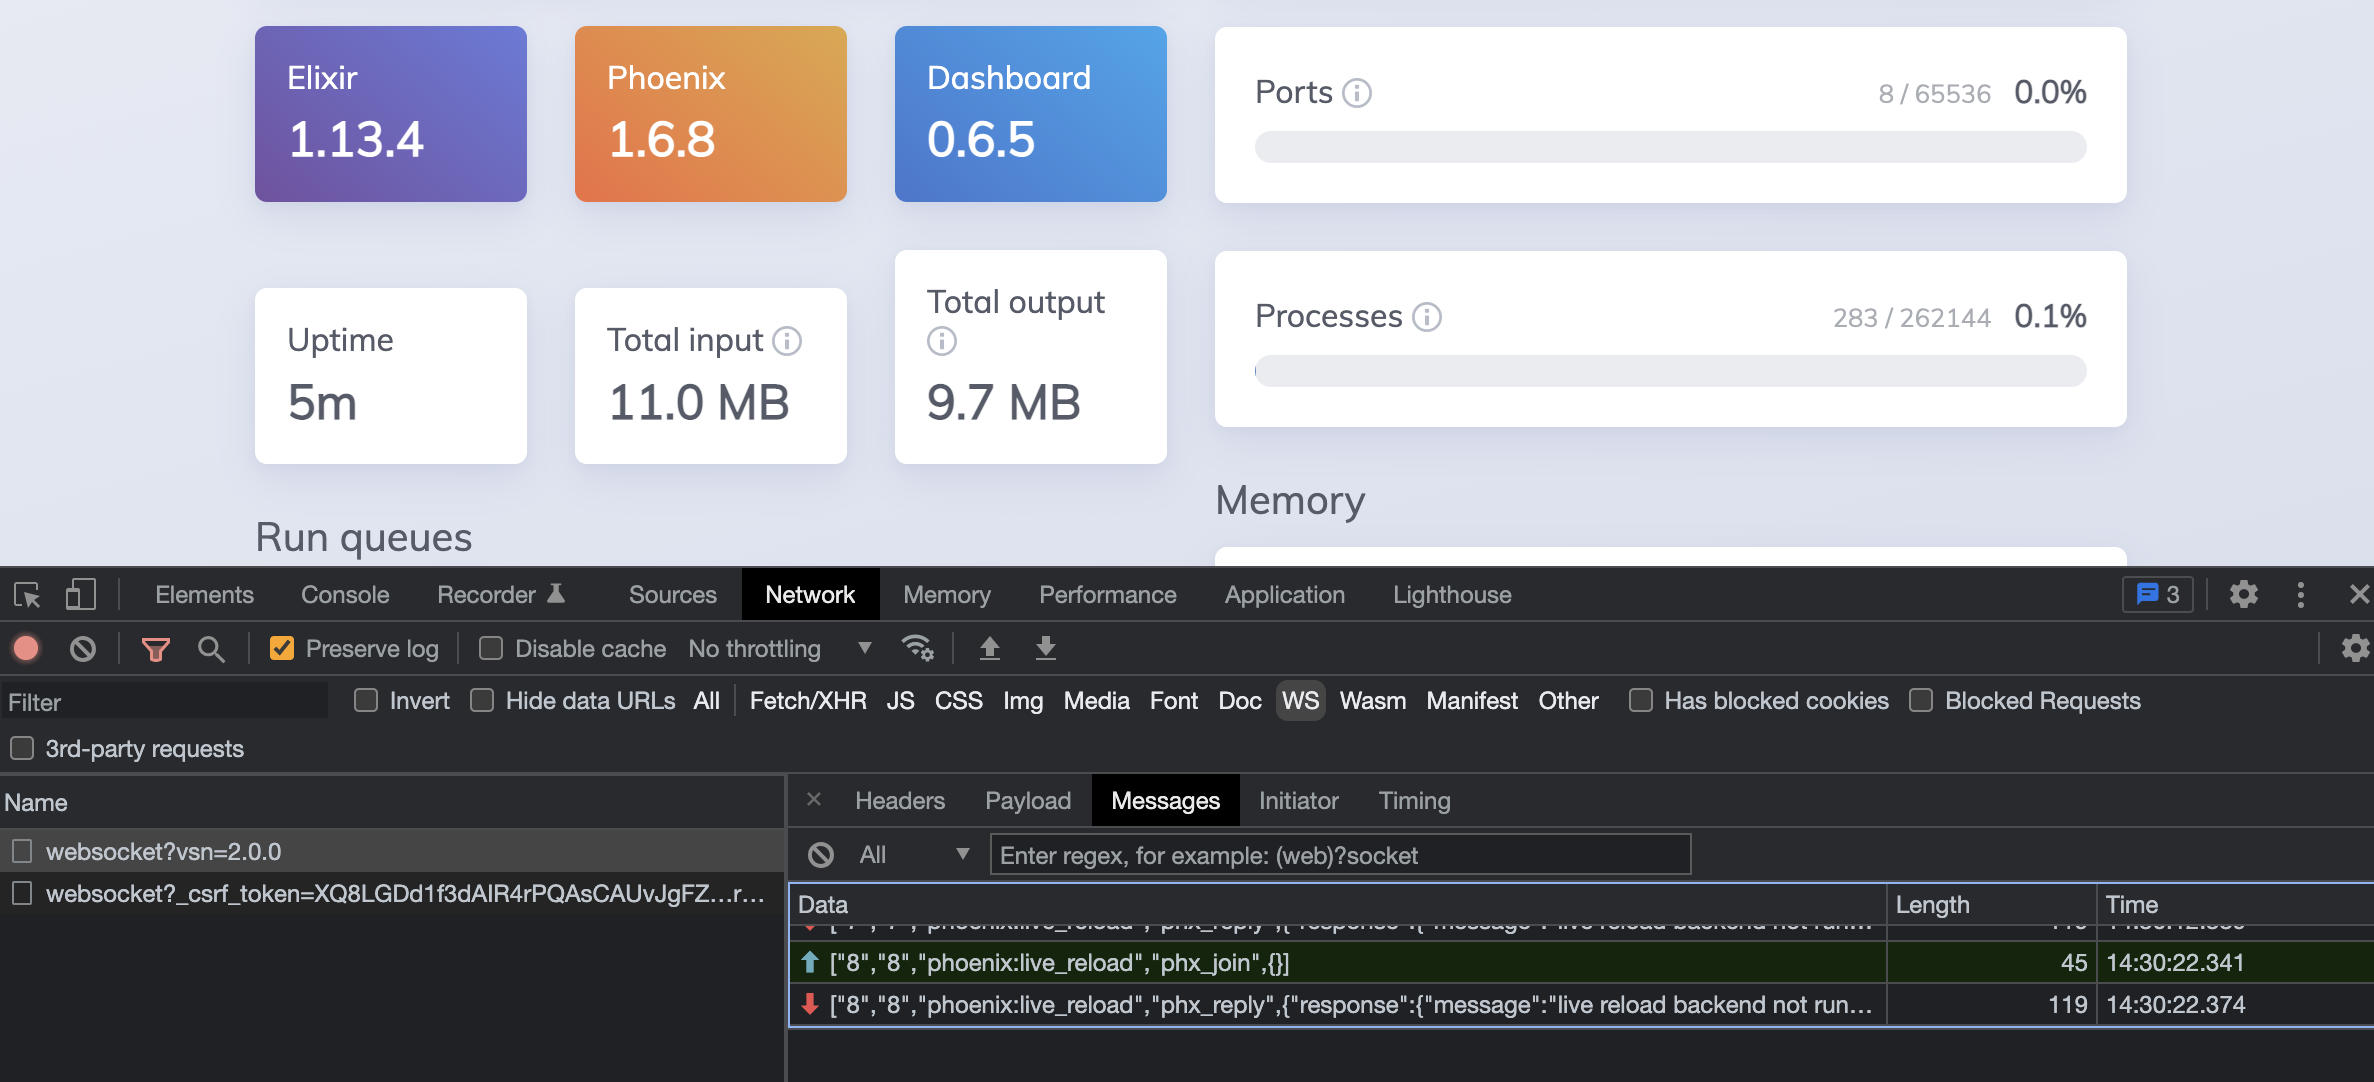
ついでに LiveDashboard も見てみましょう
開発者ツールを使ってみれば、 WebSocket 通信できていることが確認できます
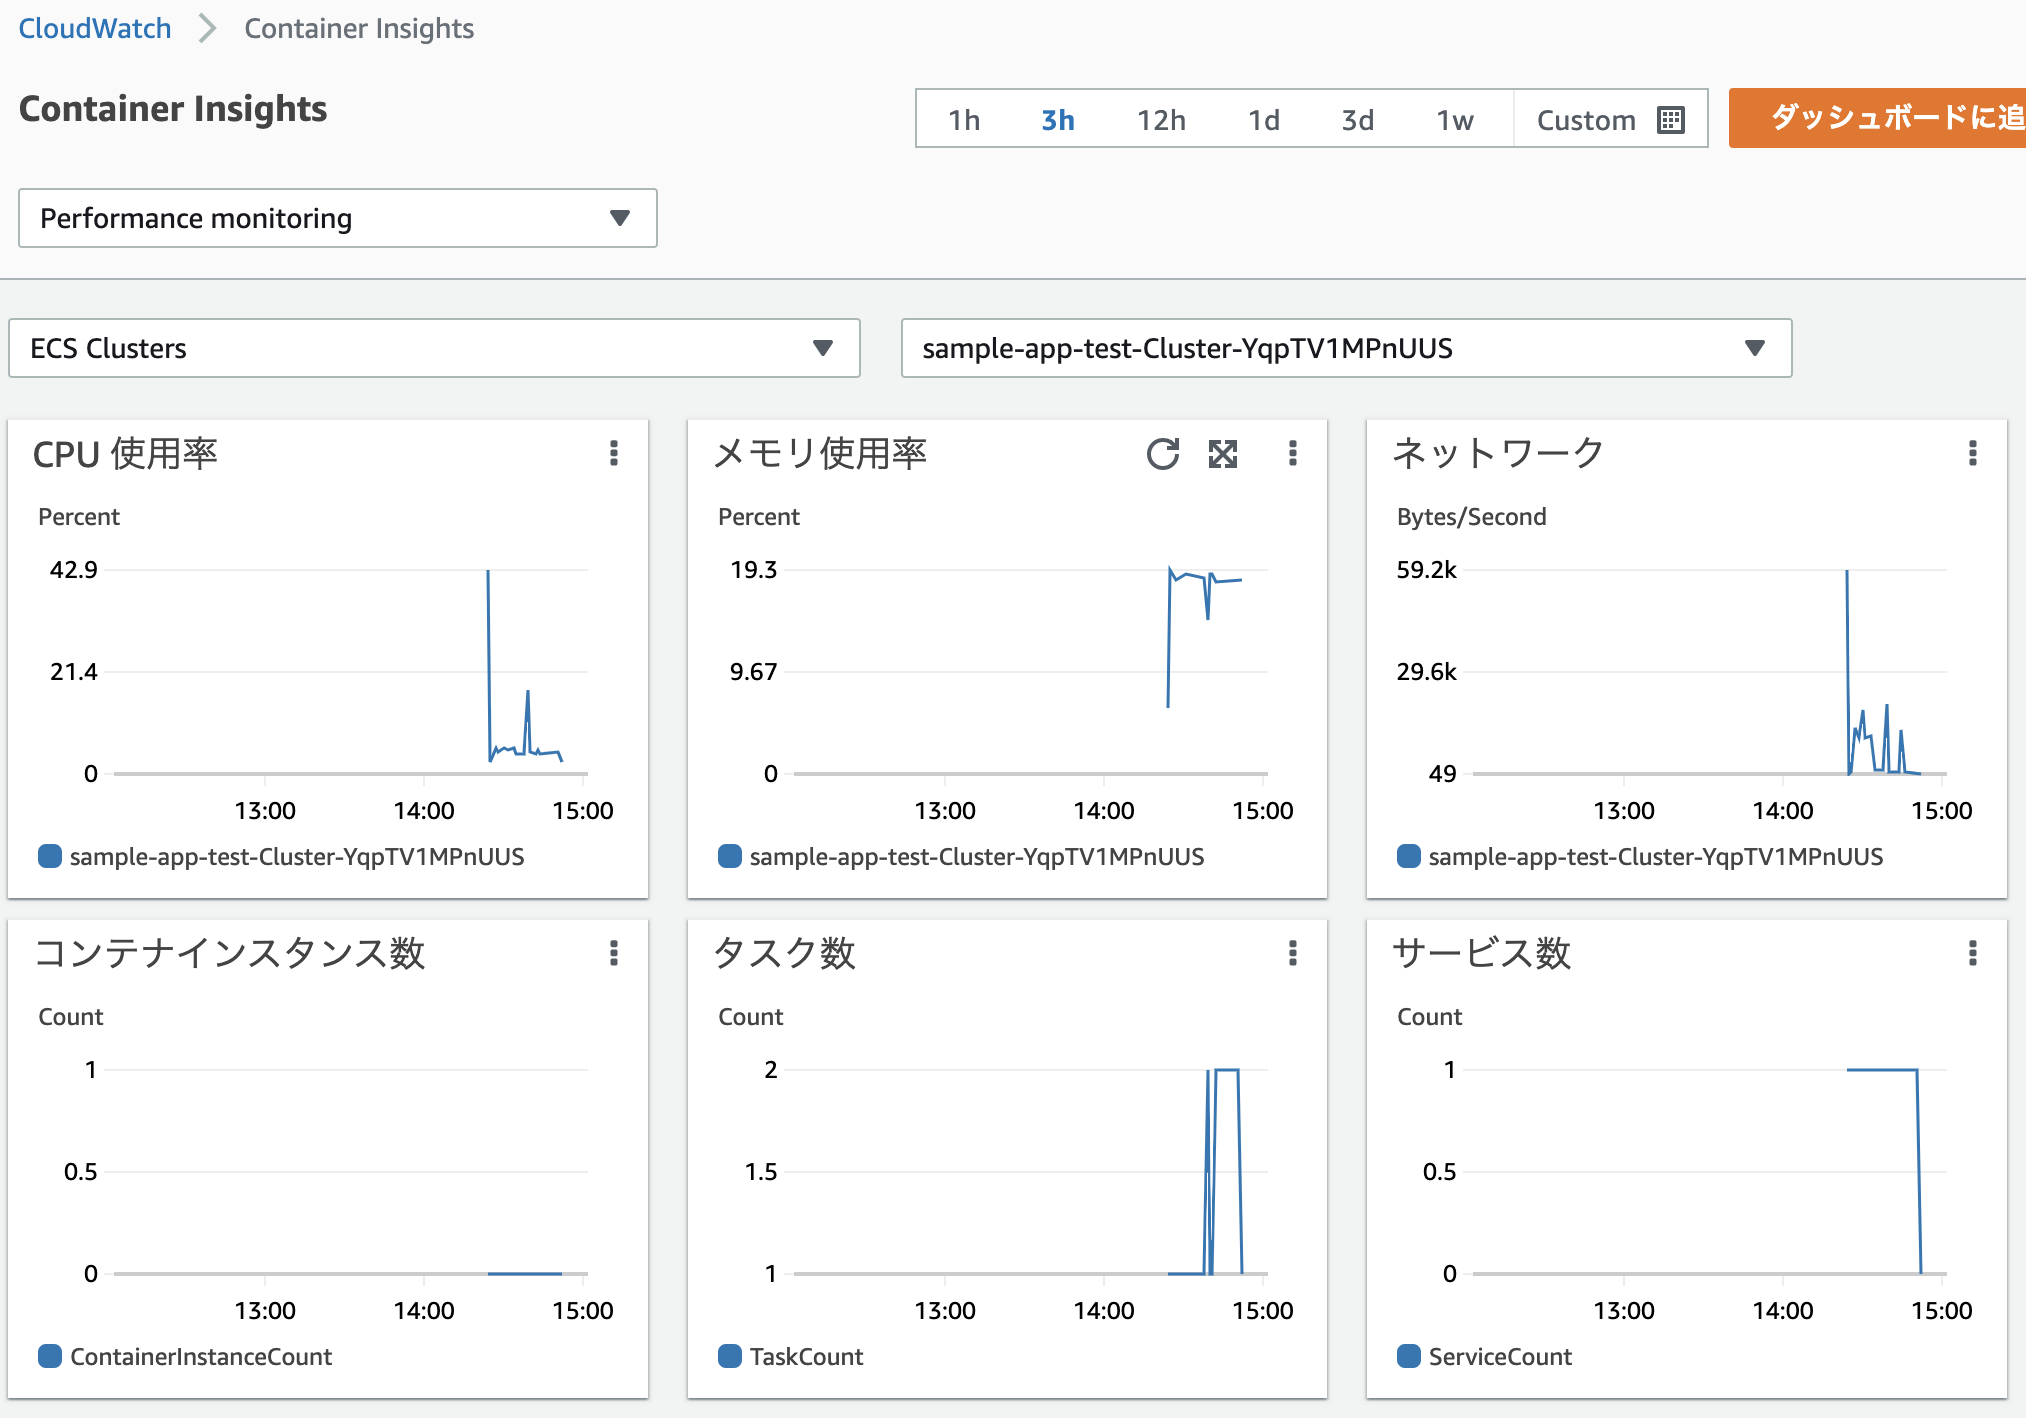
Container Insights を有効にしたため、 Cloud Watch からもコンテナの状態を確認できます
アプリケーションの更新
では、少し変更してデプロイしてみましょう
sample_app/lib/sample_app_web/templates/page/index.html.heex の先頭を以下のように変えてみます
name: "Phoenix" の部分を name: "AWS" に変更しています
<section class="phx-hero">
  <h1><%= gettext "Welcome to %{name}!", name: "AWS" %></h1>
  <p>Peace of mind from prototype to production</p>
</section>
この状態で、もう一度デプロイコマンドを実行します
copilot svc deploy \
  --name lb-svc \
  --env test
コンテナのビルドが走り、再びデプロイが開始されます
今度は以下のような表示になります
  - An ECS service to run and maintain your tasks in the environment cluster  [update in progress]  [7.8s]
    Deployments
               Revision  Rollout        Desired  Running  Failed  Pending
      PRIMARY  6         [in progress]  1        0        0       1
      ACTIVE   5         [completed]    1        1        0       0
現在1台コンテナが動いていて、裏で新しい1台が起動しようとしています
しばらくすると以下のようになり、
  - An ECS service to run and maintain your tasks in the environment cluster  [update in progress]  [115.7s]
    Deployments
               Revision  Rollout        Desired  Running  Failed  Pending
      PRIMARY  6         [in progress]  1        1        0       0
      ACTIVE   5         [completed]    1        1        0       0
こうなって、
  - An ECS service to run and maintain your tasks in the environment cluster  [update in progress]  [210.3s]
    Deployments
               Revision  Rollout        Desired  Running  Failed  Pending
      PRIMARY  6         [in progress]  1        1        0       0
      ACTIVE   5         [completed]    1        0        0       0
こうなります
  - An ECS service to run and maintain your tasks in the environment cluster  [update in progress]  [258.0s]
    Deployments
               Revision  Rollout        Desired  Running  Failed  Pending
      PRIMARY  6         [in progress]  1        1        0       0
つまり、旧バージョンが動いている裏で新バージョンを起動させ、起動し終わってから新バージョンに切り替えているわけです
これによって無停止でのデプロイができるようになっています
最終的に以下のように表示されれば更新完了です
  - An ECS service to run and maintain your tasks in the environment cluster  [update complete]  [258.9s]
    Deployments
               Revision  Rollout      Desired  Running  Failed  Pending
      PRIMARY  6         [completed]  1        1        0       0
  - An ECS task definition to group your containers and run them on ECS       [delete complete]  [0.0s]
✔ Deployed service lb-svc.
Recommended follow-up action:
  - You can access your service at http://sampl-Publi-xxx-1316580721.ap-northeast-1.elb.amazonaws.com over the internet.
URL にアクセスすると表示が更新されています
以降は copilot svc deploy ... を実行するだけでデプロイできるので、非常に楽ですね
リソースの変更
copilot/lb-svc/manifest.yml の cpu と memory を変更することで、
コンテナに割り当てるリソースを調整することができます
cpu: 256       # Number of CPU units for the task.
memory: 512    # Amount of memory in MiB used by the task.
count: 1       # Number of tasks that should be running in your service.
アプリケーションの削除
以下のコマンドでアプリケーション、環境、サービスを全て削除できます
アプリケーションを削除しないと課金され続けるので注意してください
> copilot app delete
...
✔ Deleted service lb-svc from environment test.
✔ Deleted resources of service lb-svc from application sample-app.
✔ Deleted service lb-svc from application sample-app.
✔ Deleted environment test from application sample-app.
✔ Cleaned up deployment resources.
✔ Deleted application resources.
✔ Deleted application configuration.
✔ Deleted local .workspace file.
おわりに
Elixir と言えば、昔は edeliver を使ってデプロイしていて、
これがややこしかったり、途中でエラーになったりでリリース作業が毎回嫌でした
その後 mix release ができて改善されたものの、
この記事やこの記事で書いたようなエラーが度々発生しているので、
未だに、特に久しぶりのリリース作業だと嫌になります
AWS Copilot を使って ECS で動かすようにしてしまえば、
リリース関連の不安からはキレイサッパリ解放されるので、
この方法を本番運用に使えるように試行錯誤していきたいです


