はじめに
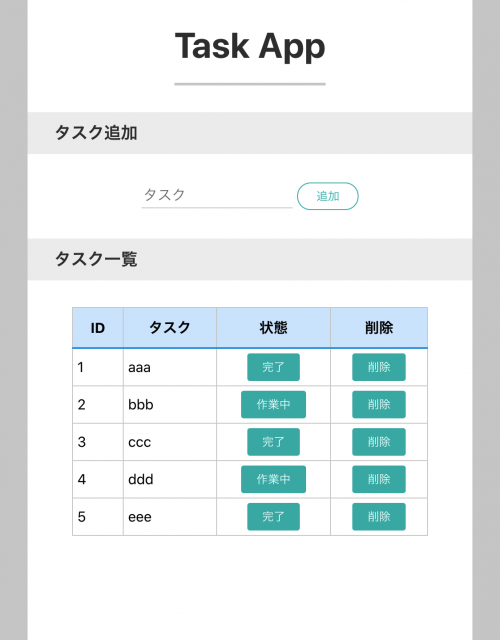
今回はDockerとNuxt.jsとExpressを使ってタスク管理アプリを作成していきます。
こんな感じのアプリケーションになります。
対象読者
・ Dockerを使ったことがない方
・ Nuxt.jsとExpressで何か作ってみたい方
・ Node.jsのORMライブラリであるSequelizeを使ってみたい方
完成コード
それでは一緒に作っていきましょう!
Githubからクローン
Dockerから解説となると長くなるので省略します。
上記のファイルで環境構築が可能です。
// ①クローンする
$ git clone git@github.com:ssk9597/Docker-Nuxtjs-Express.git

// ②ディレクトリに移動する
$ cd Docker-Nuxtjs-Express

// ③Nuxt.jsの作成とDockerの起動を行う
$ make nuxt
これでOKです。
それでは、ファイルの修正が何点か必要になるのでその対応をやっていきましょう!
①nuxt.config.jsの修正
require('dotenv').config();
const { API_URL, API_URL_BROWSER } = process.env;

export default {
  head: {
    title: 'frontend',
    htmlAttrs: {
      lang: 'ja',
    },
    meta: [
      { charset: 'utf-8' },
      { name: 'viewport', content: 'width=device-width, initial-scale=1' },
      { hid: 'description', name: 'description', content: '' },
    ],
    link: [{ rel: 'icon', type: 'image/x-icon', href: '/favicon.ico' }],
  },

  css: [],

  plugins: [],

  components: true,

  buildModules: [],

  watchers: {
    webpack: {
      poll: true,
    },
  },

  modules: ['@nuxtjs/axios', '@nuxtjs/proxy', '@nuxtjs/dotenv'],

  env: {
    API_URL,
    API_URL_BROWSER,
  },

  proxy: {
    '/api': process.env.API_URL,
  },

  axios: {
    baseURL: process.env.API_URL,
    browserBaseURL: process.env.API_URL_BROWSER,
  },

  build: {},
};
.envの修正
API_URL = "http://app:18080"
API_URL_BROWSER = "http://localhost:18080"
ここで理解ができないのがAPI_URLかと思います。
では、こちらを解説いたします。
まずSSRでAPI_URL = "http://localhost:18080"とした場合、**connect ECONNREFUSED**のエラーが発生します。
【理由】
SPAの場合はホストからコンテナへの通信となるためURLがAPIのURLでアクセスできます。(クライアント→DockerのAPIにアクセスするイメージ)
なので、API_URL = "http://localhost:18080"で問題ありません。
しかし、SSRの場合コンテナからコンテナへの通信になるので、コンテナ名を使ったアドレスでAPIとフロントエンドの通信を行い、そのデータをクライアントに返す必要があります。(DockerのFrontendからDockerのAPIにアクセスし、そのデータをクライアント側で描写するイメージ)
では、どのようにしてURLが決まるかに関して解説します。
URLはdocker-compose.ymlに全て書いてあります。
# 【backend】Express
  app:
    build:
      context: ./docker/app
    environment:
      - TZ=Asia/Tokyo
      - DEBUG=api:*
    tty: true
    ports:
      - $BACKEND_PORT:18080
    restart: always
    volumes:
      - $BACKEND_DIR:$BACKEND_WORK_DIR
    working_dir: $BACKEND_WORK_DIR
    command: [sh, -c, npm install && npm start]
    networks:
      - container-link
必要な情報は2つです。
コンテナ名> app
ポート> 18080
この2つから、URLを作ります。
**http://(コンテナ名):(ポート番号)**なので、http://app:18080となります。
フロントエンドとバックエンドの通信が可能か確認
<template>
  <div>
    <h1 class="title">
      {{ text }}
    </h1>
  </div>
</template>

<script>
export default {
  async asyncData({ $axios }) {
    const text = await $axios.$get('/api');
    return {
      text,
    };
  },
  data() {
    return {
      text: '',
    };
  },
};
</script>
これでAPIとの通信が可能になります。
以下のようになっていれば成功です。

HTMLとCSS部分を作成
まずは、HTMLとCSSの部分を作成していきます。
<template>
  <div class="task-wrapper">
    <div class="task-container">
      <h2 class="task-heading-ttl">Task App</h2>
      <h3 class="task-heading-sub">タスク追加</h3>
      <div class="task-form-container">
        <input type="text" class="task-form-input" placeholder="タスク" />
        <button class="task-form-button">追加</button>
      </div>
      <h3 class="task-heading-sub">タスク一覧</h3>
      <table class="task-table">
        <thead>
          <tr>
            <th>ID</th>
            <th>タスク</th>
            <th>状態</th>
            <th>削除</th>
          </tr>
        </thead>
        <tbody>
          <tr>
            <td>1</td>
            <td>aaa</td>
            <td>完了</td>
            <td>削除</td>
          </tr>
        </tbody>
      </table>
    </div>
  </div>
</template>

<style lang="scss" scoped>
.task {
  &-wrapper {
    background: #ccc;
    height: 100vh;
    width: 100%;
  }
  &-container {
    height: 100vh;
    max-width: 500px;
    width: 100%;
    margin: 0 auto;
    background: #fff;
    display: flex;
    flex-direction: column;
    align-items: center;
  }
  &-heading-ttl {
    padding-top: 30px;
    padding-bottom: 20px;
    font-size: 2.5rem;
    color: #333;
    border-bottom: 3px solid #ccc;
  }
  &-heading-sub {
    width: 100%;
    margin: 30px 0;
    padding: 10px 10px 10px 30px;
    color: #333;
    background: #eee;
  }
  &-form {
    &-input {
      box-sizing: border-box;
      max-width: 200px;
      height: 27px;
      margin: 4px 0;
      font-size: 16px;
      color: #333;
      border: 0;
      border-top: none;
      border-right: none;
      border-bottom: 1px solid #ccc;
      border-left: none;
      outline: 0;
      transition: 0.3s;
      &:focus {
        border: 1px solid #00b5ad;
        border-top: none;
        border-right: none;
        border-left: none;
      }
    }
    &-button {
      cursor: pointer;
      display: inline-block;
      padding: 0.4em 1.6em;
      font-size: 0.8rem;
      color: #00b5ad;
      text-decoration: none;
      user-select: none;
      border: 1px #00b5ad solid;
      border-radius: 20px;
      transition: 0.4s ease;
      background: #fff;
      &:hover {
        color: #fff;
        background: #00b5ad;
      }
    }
  }
  &-table {
    width: 80%;
    border-collapse: collapse;
    text-align: left;
    line-height: 1.5;
    border: 1px solid #ccc;

    & th {
      padding: 10px;
      font-weight: bold;
      text-align: center;
      border-top: 1px solid #ccc;
      border-right: 1px solid #ccc;
      border-bottom: 2px solid #0099e3;
      background: #cee7ff;
    }

    & td {
      padding: 5px;
      border-top: 1px solid #ccc;
      border-right: 1px solid #ccc;
    }

    &-button {
      cursor: pointer;
      margin: 0 auto;
      display: block;
      padding: 0.3rem 1rem;
      font-size: 0.8rem;
      color: #fff;
      text-decoration: none;
      background: #00b5ad;
      border: 1px #00b5ad solid;
      border-radius: 3px;
    }
  }
}
</style>
タスク追加機能を作成
まずはフロントエンド側から作成します。
<template>
  <div class="task-wrapper">
    <div class="task-container">
      <h2 class="task-heading-ttl">Task App</h2>
      <h3 class="task-heading-sub">タスク追加</h3>
      <div class="task-form-container">
+       <input type="text" class="task-form-input" placeholder="タスク" v-model="content" />
+       <button class="task-form-button" @click="addTask()">追加</button>
      </div>
      <h3 class="task-heading-sub">タスク一覧</h3>
      <table class="task-table">
        <thead>
          <tr>
            <th>ID</th>
            <th>タスク</th>
            <th>状態</th>
            <th>削除</th>
          </tr>
        </thead>
        <tbody>
          <tr>
            <td>1</td>
            <td>aaa</td>
            <td>完了</td>
            <td>削除</td>
          </tr>
        </tbody>
      </table>
    </div>
  </div>
</template>

<script>
export default {
  data() {
    return {
+     content: '',
    };
  },
  methods: {
+   async addTask() {
+     window.location.href = 'http://localhost:3000';
+     await this.$axios.$post('/api/tasks/store', {
+       content: this.content,
+       status: false,
+     });
+   },
  },
};
</script>

<style lang="scss" scoped>
.task {
  &-wrapper {
    background: #ccc;
    height: 100vh;
    width: 100%;
  }
  &-container {
    height: 100vh;
    max-width: 500px;
    width: 100%;
    margin: 0 auto;
    background: #fff;
    display: flex;
    flex-direction: column;
    align-items: center;
  }
  &-heading-ttl {
    padding-top: 30px;
    padding-bottom: 20px;
    font-size: 2.5rem;
    color: #333;
    border-bottom: 3px solid #ccc;
  }
  &-heading-sub {
    width: 100%;
    margin: 30px 0;
    padding: 10px 10px 10px 30px;
    color: #333;
    background: #eee;
  }
  &-form {
    &-input {
      box-sizing: border-box;
      max-width: 200px;
      height: 27px;
      margin: 4px 0;
      font-size: 16px;
      color: #333;
      border: 0;
      border-top: none;
      border-right: none;
      border-bottom: 1px solid #ccc;
      border-left: none;
      outline: 0;
      transition: 0.3s;
      &:focus {
        border: 1px solid #00b5ad;
        border-top: none;
        border-right: none;
        border-left: none;
      }
    }
    &-button {
      cursor: pointer;
      display: inline-block;
      padding: 0.4em 1.6em;
      font-size: 0.8rem;
      color: #00b5ad;
      text-decoration: none;
      user-select: none;
      border: 1px #00b5ad solid;
      border-radius: 20px;
      transition: 0.4s ease;
      background: #fff;
      &:hover {
        color: #fff;
        background: #00b5ad;
      }
    }
  }
  &-table {
    width: 80%;
    border-collapse: collapse;
    text-align: left;
    line-height: 1.5;
    border: 1px solid #ccc;

    & th {
      padding: 10px;
      font-weight: bold;
      text-align: center;
      border-top: 1px solid #ccc;
      border-right: 1px solid #ccc;
      border-bottom: 2px solid #0099e3;
      background: #cee7ff;
    }

    & td {
      padding: 5px;
      border-top: 1px solid #ccc;
      border-right: 1px solid #ccc;
    }

    &-button {
      cursor: pointer;
      margin: 0 auto;
      display: block;
      padding: 0.3rem 1rem;
      font-size: 0.8rem;
      color: #fff;
      text-decoration: none;
      background: #00b5ad;
      border: 1px #00b5ad solid;
      border-radius: 3px;
    }
  }
}
</style>
次に、バックエンドの作成をします。
モデルの作成
今回はTaskテーブルの作成を行います。
キーは、contentとstatusの2つです。
※ id、createdAt、updatedAtのフィールドが自動作成されます
※ --attributesの後に項目と型指定を行います
$ npx sequelize-cli model:generate --name Task --attributes content:string,status:boolean
以下の2つのファイルが作成されます。
・/models/task.js
・/migrations/xxxxxxxxxxxxxx-create-task.js
では、作成されたファイルでマイグレーションを行いましょう。
マイグレーションの実行
正常に処理が終わればDBにTaskテーブルが作成されます。
モデルも生成済みなのですぐにでもデータの操作ができるようになります。
$ npx sequelize-cli db:migrate
では、次にcontrollerの作成を行いましょう。
controllerの作成
// model
const db = require('../models');

const taskController = {
  async store(req, res) {
    const content = req.body.content;
    const status = req.body.status;
    await db.Task.create({
      content: content,
      status: status,
    });
  },
};

module.exports = taskController;
Sequelizeのモデルの使い方は以下の記事が一番まとまっているので、わからない方はこちらの記事を見てください。
最近はTypeScriptの使用頻度も高いのでいずれORMは、TypeORMもしくはPrismaになると思います。
なので、公式サイトを読み込むというよりもまとめてあるサイトで学習で十分だと思います。
では次にルーティングの作成を行いましょう。
ルーティングの作成
var express = require('express');
var router = express.Router();

// controller_file
- const indexController = require('../controller/IndexController');
+ const taskController = require('../controller/TaskController');

// routing
- router.get('/api', indexController.index);
+ router.post('/api/tasks/store', taskController.store);

module.exports = router;
これでタスクの作成ができるようになりました。
次に作成したタスクの一覧を確認できるようにしましょう。
タスク一覧機能を作成
まずはフロントエンドから作成しましょう。
<template>
  <div class="task-wrapper">
    <div class="task-container">
      <h2 class="task-heading-ttl">Task App</h2>
      <h3 class="task-heading-sub">タスク追加</h3>
      <div class="task-form-container">
        <input type="text" class="task-form-input" placeholder="タスク" v-model="content" />
        <button class="task-form-button" @click="addTask()">追加</button>
      </div>
      <h3 class="task-heading-sub">タスク一覧</h3>
      <table class="task-table">
        <thead>
          <tr>
            <th>ID</th>
            <th>タスク</th>
            <th>状態</th>
            <th>削除</th>
          </tr>
        </thead>
        <tbody>
+         <tr v-for="(task, index) in tasks" :key="index">
+           <td>{{ index + 1 }}</td>
+           <td>{{ task.content }}</td>
+           <td v-if="task.status">
+             <button class="task-table-button">完了</button>
+           </td>
+           <td v-else>
+             <button class="task-table-button">作業中</button>
+           </td>
+           <td>
+             <button class="task-table-button">削除</button>
+           </td>
+         </tr>
        </tbody>
      </table>
    </div>
  </div>
</template>

<script>
export default {
+ async asyncData({ $axios }) {
+   const tasks = await $axios.$get('/api/tasks');
+   return {
+     tasks,
+   };
+ },
  data() {
    return {
      content: '',
+     tasks: '',
    };
  },
  methods: {
    async addTask() {
      window.location.href = 'http://localhost:3000';
      await this.$axios.$post('/api/tasks/store', {
        content: this.content,
        status: false,
      });
    },
  },
};
</script>

<style lang="scss" scoped>
.task {
  &-wrapper {
    background: #ccc;
    height: 100vh;
    width: 100%;
  }
  &-container {
    height: 100vh;
    max-width: 500px;
    width: 100%;
    margin: 0 auto;
    background: #fff;
    display: flex;
    flex-direction: column;
    align-items: center;
  }
  &-heading-ttl {
    padding-top: 30px;
    padding-bottom: 20px;
    font-size: 2.5rem;
    color: #333;
    border-bottom: 3px solid #ccc;
  }
  &-heading-sub {
    width: 100%;
    margin: 30px 0;
    padding: 10px 10px 10px 30px;
    color: #333;
    background: #eee;
  }
  &-form {
    &-input {
      box-sizing: border-box;
      max-width: 200px;
      height: 27px;
      margin: 4px 0;
      font-size: 16px;
      color: #333;
      border: 0;
      border-top: none;
      border-right: none;
      border-bottom: 1px solid #ccc;
      border-left: none;
      outline: 0;
      transition: 0.3s;
      &:focus {
        border: 1px solid #00b5ad;
        border-top: none;
        border-right: none;
        border-left: none;
      }
    }
    &-button {
      cursor: pointer;
      display: inline-block;
      padding: 0.4em 1.6em;
      font-size: 0.8rem;
      color: #00b5ad;
      text-decoration: none;
      user-select: none;
      border: 1px #00b5ad solid;
      border-radius: 20px;
      transition: 0.4s ease;
      background: #fff;
      &:hover {
        color: #fff;
        background: #00b5ad;
      }
    }
  }
  &-table {
    width: 80%;
    border-collapse: collapse;
    text-align: left;
    line-height: 1.5;
    border: 1px solid #ccc;

    & th {
      padding: 10px;
      font-weight: bold;
      text-align: center;
      border-top: 1px solid #ccc;
      border-right: 1px solid #ccc;
      border-bottom: 2px solid #0099e3;
      background: #cee7ff;
    }

    & td {
      padding: 5px;
      border-top: 1px solid #ccc;
      border-right: 1px solid #ccc;
    }

    &-button {
      cursor: pointer;
      margin: 0 auto;
      display: block;
      padding: 0.3rem 1rem;
      font-size: 0.8rem;
      color: #fff;
      text-decoration: none;
      background: #00b5ad;
      border: 1px #00b5ad solid;
      border-radius: 3px;
    }
  }
}
</style>
次に、バックエンドの作成をします。
最初にcontrollerの作成を行いましょう。
controllerの作成
// model
const db = require('../models');

const taskController = {
  async index(req, res) {
    const results = await db.Task.findAll();
    res.json(results);
  },

+ async store(req, res) {
+   const content = req.body.content;
+   const status = req.body.status;
+   await db.Task.create({
+     content: content,
+     status: status,
+   });
+ },
};

module.exports = taskController;
では次にルーティングの作成を行いましょう。
ルーティングの作成
var express = require('express');
var router = express.Router();

// controller_file
const taskController = require('../controller/TaskController');

// routing
router.get('/api/tasks', taskController.index);
+ router.post('/api/tasks/store', taskController.store);

module.exports = router;
これでタスクの一覧を確認できるようになりました。
次に作成したタスクの削除機能を作成しましょう。
タスク削除機能を作成
まずはフロントエンドから作成しましょう。
<template>
  <div class="task-wrapper">
    <div class="task-container">
      <h2 class="task-heading-ttl">Task App</h2>
      <h3 class="task-heading-sub">タスク追加</h3>
      <div class="task-form-container">
        <input type="text" class="task-form-input" placeholder="タスク" v-model="content" />
        <button class="task-form-button" @click="addTask()">追加</button>
      </div>
      <h3 class="task-heading-sub">タスク一覧</h3>
      <table class="task-table">
        <thead>
          <tr>
            <th>ID</th>
            <th>タスク</th>
            <th>状態</th>
            <th>削除</th>
          </tr>
        </thead>
        <tbody>
          <tr v-for="(task, index) in tasks" :key="index">
            <td>{{ index + 1 }}</td>
            <td>{{ task.content }}</td>
            <td v-if="task.status">
              <button class="task-table-button">完了</button>
            </td>
            <td v-else>
              <button class="task-table-button">作業中</button>
            </td>
            <td>
+             <button class="task-table-button" @click="deleteTask(task.id)">削除</button>
            </td>
          </tr>
        </tbody>
      </table>
    </div>
  </div>
</template>

<script>
export default {
  async asyncData({ $axios }) {
    const tasks = await $axios.$get('/api/tasks');
    return {
      tasks,
    };
  },
  data() {
    return {
      content: '',
      tasks: '',
    };
  },
  methods: {
    async addTask() {
      window.location.href = 'http://localhost:3000';
      await this.$axios.$post('/api/tasks/store', {
        content: this.content,
        status: false,
      });
    },
+   async deleteTask(id) {
+     window.location.href = 'http://localhost:3000';
+     await this.$axios.$post('/api/tasks/delete', {
+       id,
+     });
+   },
  },
};
</script>

<style lang="scss" scoped>
.task {
  &-wrapper {
    background: #ccc;
    height: 100vh;
    width: 100%;
  }
  &-container {
    height: 100vh;
    max-width: 500px;
    width: 100%;
    margin: 0 auto;
    background: #fff;
    display: flex;
    flex-direction: column;
    align-items: center;
  }
  &-heading-ttl {
    padding-top: 30px;
    padding-bottom: 20px;
    font-size: 2.5rem;
    color: #333;
    border-bottom: 3px solid #ccc;
  }
  &-heading-sub {
    width: 100%;
    margin: 30px 0;
    padding: 10px 10px 10px 30px;
    color: #333;
    background: #eee;
  }
  &-form {
    &-input {
      box-sizing: border-box;
      max-width: 200px;
      height: 27px;
      margin: 4px 0;
      font-size: 16px;
      color: #333;
      border: 0;
      border-top: none;
      border-right: none;
      border-bottom: 1px solid #ccc;
      border-left: none;
      outline: 0;
      transition: 0.3s;
      &:focus {
        border: 1px solid #00b5ad;
        border-top: none;
        border-right: none;
        border-left: none;
      }
    }
    &-button {
      cursor: pointer;
      display: inline-block;
      padding: 0.4em 1.6em;
      font-size: 0.8rem;
      color: #00b5ad;
      text-decoration: none;
      user-select: none;
      border: 1px #00b5ad solid;
      border-radius: 20px;
      transition: 0.4s ease;
      background: #fff;
      &:hover {
        color: #fff;
        background: #00b5ad;
      }
    }
  }
  &-table {
    width: 80%;
    border-collapse: collapse;
    text-align: left;
    line-height: 1.5;
    border: 1px solid #ccc;

    & th {
      padding: 10px;
      font-weight: bold;
      text-align: center;
      border-top: 1px solid #ccc;
      border-right: 1px solid #ccc;
      border-bottom: 2px solid #0099e3;
      background: #cee7ff;
    }

    & td {
      padding: 5px;
      border-top: 1px solid #ccc;
      border-right: 1px solid #ccc;
    }

    &-button {
      cursor: pointer;
      margin: 0 auto;
      display: block;
      padding: 0.3rem 1rem;
      font-size: 0.8rem;
      color: #fff;
      text-decoration: none;
      background: #00b5ad;
      border: 1px #00b5ad solid;
      border-radius: 3px;
    }
  }
}
</style>
次に、バックエンドの作成をします。
最初にcontrollerの作成を行いましょう。
controllerの作成
// model
const db = require('../models');

const taskController = {
  async index(req, res) {
    const results = await db.Task.findAll();
    res.json(results);
  },

  async store(req, res) {
    const content = req.body.content;
    const status = req.body.status;
    await db.Task.create({
      content: content,
      status: status,
    });
  },

+ async delete(req, res) {
+   const id = req.body.id;
+   await db.Task.destroy({
+     where: { id: id },
+   });
+ },
};

module.exports = taskController;
では次にルーティングの作成を行いましょう。
ルーティングの作成
var express = require('express');
var router = express.Router();

// controller_file
const taskController = require('../controller/TaskController');

// routing
router.get('/api/tasks', taskController.index);
router.post('/api/tasks/store', taskController.store);
+ router.post('/api/tasks/delete', taskController.delete);

module.exports = router;
これでタスクの削除ができるようになりました。
次に作成したタスクの更新機能を作成しましょう。
タスク更新機能を作成
まずはフロントエンドから作成しましょう。
<template>
  <div class="task-wrapper">
    <div class="task-container">
      <h2 class="task-heading-ttl">Task App</h2>
      <h3 class="task-heading-sub">タスク追加</h3>
      <div class="task-form-container">
        <input type="text" class="task-form-input" placeholder="タスク" v-model="content" />
        <button class="task-form-button" @click="addTask()">追加</button>
      </div>
      <h3 class="task-heading-sub">タスク一覧</h3>
      <table class="task-table">
        <thead>
          <tr>
            <th>ID</th>
            <th>タスク</th>
            <th>状態</th>
            <th>削除</th>
          </tr>
        </thead>
        <tbody>
          <tr v-for="(task, index) in tasks" :key="index">
            <td>{{ index + 1 }}</td>
            <td>{{ task.content }}</td>
            <td v-if="task.status">
              <button class="task-table-button" @click="updateTask(task.id, task.status)">
                完了
              </button>
            </td>
            <td v-else>
+             <button class="task-table-button" @click="updateTask(task.id, task.status)">
+               作業中
+             </button>
            </td>
            <td>
+             <button class="task-table-button" @click="deleteTask(task.id)">削除</button>
            </td>
          </tr>
        </tbody>
      </table>
    </div>
  </div>
</template>

<script>
export default {
  async asyncData({ $axios }) {
    const tasks = await $axios.$get('/api/tasks');
    return {
      tasks,
    };
  },
  data() {
    return {
      content: '',
      tasks: '',
    };
  },
  methods: {
    async addTask() {
      window.location.href = 'http://localhost:3000';
      await this.$axios.$post('/api/tasks/store', {
        content: this.content,
        status: false,
      });
    },
    async deleteTask(id) {
      window.location.href = 'http://localhost:3000';
      await this.$axios.$post('/api/tasks/delete', {
        id,
      });
    },
+   async updateTask(id, status) {
+     window.location.href = 'http://localhost:3000';
+     await this.$axios.$post('/api/tasks/update', {
+       id,
+       status,
+     });
+   },
  },
};
</script>

<style lang="scss" scoped>
.task {
  &-wrapper {
    background: #ccc;
    height: 100vh;
    width: 100%;
  }
  &-container {
    height: 100vh;
    max-width: 500px;
    width: 100%;
    margin: 0 auto;
    background: #fff;
    display: flex;
    flex-direction: column;
    align-items: center;
  }
  &-heading-ttl {
    padding-top: 30px;
    padding-bottom: 20px;
    font-size: 2.5rem;
    color: #333;
    border-bottom: 3px solid #ccc;
  }
  &-heading-sub {
    width: 100%;
    margin: 30px 0;
    padding: 10px 10px 10px 30px;
    color: #333;
    background: #eee;
  }
  &-form {
    &-input {
      box-sizing: border-box;
      max-width: 200px;
      height: 27px;
      margin: 4px 0;
      font-size: 16px;
      color: #333;
      border: 0;
      border-top: none;
      border-right: none;
      border-bottom: 1px solid #ccc;
      border-left: none;
      outline: 0;
      transition: 0.3s;
      &:focus {
        border: 1px solid #00b5ad;
        border-top: none;
        border-right: none;
        border-left: none;
      }
    }
    &-button {
      cursor: pointer;
      display: inline-block;
      padding: 0.4em 1.6em;
      font-size: 0.8rem;
      color: #00b5ad;
      text-decoration: none;
      user-select: none;
      border: 1px #00b5ad solid;
      border-radius: 20px;
      transition: 0.4s ease;
      background: #fff;
      &:hover {
        color: #fff;
        background: #00b5ad;
      }
    }
  }
  &-table {
    width: 80%;
    border-collapse: collapse;
    text-align: left;
    line-height: 1.5;
    border: 1px solid #ccc;

    & th {
      padding: 10px;
      font-weight: bold;
      text-align: center;
      border-top: 1px solid #ccc;
      border-right: 1px solid #ccc;
      border-bottom: 2px solid #0099e3;
      background: #cee7ff;
    }

    & td {
      padding: 5px;
      border-top: 1px solid #ccc;
      border-right: 1px solid #ccc;
    }

    &-button {
      cursor: pointer;
      margin: 0 auto;
      display: block;
      padding: 0.3rem 1rem;
      font-size: 0.8rem;
      color: #fff;
      text-decoration: none;
      background: #00b5ad;
      border: 1px #00b5ad solid;
      border-radius: 3px;
    }
  }
}
</style>
次に、バックエンドの作成をします。
最初にcontrollerの作成を行いましょう。
controllerの作成
// model
const db = require('../models');

const taskController = {
  async index(req, res) {
    const results = await db.Task.findAll();
    res.json(results);
  },

  async store(req, res) {
    const content = req.body.content;
    const status = req.body.status;
    await db.Task.create({
      content: content,
      status: status,
    });
  },

  async delete(req, res) {
    const id = req.body.id;
    await db.Task.destroy({
      where: { id: id },
    });
  },

+ async update(req, res) {
+   const id = req.body.id;
+   const status = req.body.status;
+   await db.Task.update({ status: !status }, { where: { id: id } });
+ },
};

module.exports = taskController;
では次にルーティングの作成を行いましょう。
ルーティングの作成
var express = require('express');
var router = express.Router();

// controller_file
const taskController = require('../controller/TaskController');

// routing
router.get('/api/tasks', taskController.index);
router.post('/api/tasks/store', taskController.store);
router.post('/api/tasks/delete', taskController.delete);
+ router.post('/api/tasks/update', taskController.update);

module.exports = router;
これでタスクの更新ができました。
これで完成です。
終わりに
ここまでできればNuxt.jsとExpressの基本は完璧です。
ここから難しいアプリの作成を始めてもいいですし、
TypeScriptの導入や、フロントエンドにはComposition-API、バックエンドはTypeORM, Prismaなどの導入も勉強になると思います。
次回の記事は、TypeScriptとComposition-APIとPrismaの導入を行って同様のタスク管理アプリを作成しようと思います。