以前LINE Messaging APIを使って、天気予報アプリを作成しました。
今まで作った記事の中で一番いいねを頂きました☺️

ということで、第2弾です。
LINE Messaging APIを使って現在地から美味しいお店を探すアプリを作ってみました。
完成形としては以下の通りです。


どのようなアプリか
皆さんは、どのようにして飲食店を探しますか?
私は、食べログなどのグルメサイトを使わずに Google Mapで探します。
以前食べログで「星 3.8 問題」がありました。
これだけではなく、食べログで見つけた行ったお店がイマイチだったこともあり、
グルメサイトはお店を探す場所ではなく、お店を予約するためのサイトと私は割り切りました。
電話が苦手な自分としては、まだまだ飲食店で独自の予約サイトを持っている企業も少ないので、食べログやホットペッパーで予約が可能なのはすごく助かっています。

Google Mapでお店を探すのもなかなか手間がかかるので、今回はGoogle Mapを使って近くの名店を10個教えてくれるアプリを作成しました。
アプリの流れ
アプリの流れは大まかに以下の9つのステップで成り立っています。
| クライアント | LINE(バックエンド) |
|---|---|
| ①「お店を探す」をタップ | |
| ②「現在地を送る」ためのボタンメッセージを送信 | |
| ③「お店を探す」以外のメッセージが届いたときにエラーメッセージを送信 | |
| ④ 現在地を送る | |
| ⑤ お店の配列を作成する | |
| ⑥ 必要なデータのみにする | |
| ⑦ 評価順に並び替えて上位 10 店舗にする | |
| ⑧ Flex Message を作成する | |
| ⑨ お店の情報を Flex Message で送る |
Github
完成形のコードは以下となります。
ディレクトリ構造
先にざっくりと構造を説明します。
api/controller/src内にコードを書いていきます。
コンパイルを行うと、それらのコードがapi/controller/distに格納されます。
また、src/Commonに関数を切り分けています。
TemplateMessageはメッセージの雛形を作るまでの過程を全てこちらのファイル内で行っています。
SendMessageはメッセージを送信する関数があります。
.
├── api/
│   ├── controller/
│   │        └── dist/ (コンパイル後)
│   │        └── src/ (コンパイル前)
│   │        │        └── Common/
│   │        │        │        └── SendMessage/ (メッセージを送信する)
│   │        │        │        └── TemplateMessage/ (メッセージのテンプレートを作成する)
│   │        │        └── index.ts
├── node_modules
├── .env
├── .env.example
├── .gitignore
├── package.json
├── package-lock.json
├── README.md
├── tsconfig.json
では実際に作成していきましょう!
LINE Developersにアカウントを作成する
LINE Developersにアクセスして、「ログイン」ボタンをクリックしてください。
その後諸々入力してもらったら以下のように作成できるかと思います。
注意事項としては、今回Messaging APIとなるので、チャネルの種類を間違えた方は修正してください。

チャネルシークレットとチャネルアクセストークンが必要になるのでこの2つを発行します。


ではこの2つを.envに入力します。
# LINE(ご自分のBotの値に書き換えを行ってください)
CHANNEL_SECRET = "a9152"
CHANNEL_ACCESS_TOKEN = "zTon3"
package.jsonの作成
以下のコマンドを入力してください。
これで、package.jsonの作成が完了します。
$ npm init -y
必要なパッケージのインストール
dependencies
dependenciesはすべてのステージで使用するパッケージです。
今回使用するパッケージは以下の4つです。
| 必要なパッケージ |
|---|
| @line/bot-sdk |
| express |
| dotenv |
| axios |
以下のコマンドを入力してください。
これで全てのパッケージがインストールされます。
$ npm install @line/bot-sdk express dotenv axios --save
devDependencies
devDependenciesはコーディングステージのみで使用するパッケージです。
今回使用するパッケージは以下の7つです。
| 必要なパッケージ |
|---|
| typescript |
| @types/node |
| @types/express |
| ts-node |
| ts-node-dev |
| rimraf |
| npm-run-all |
以下のコマンドを入力してください。
これで全てのパッケージがインストールされます。
$ npm install -D typescript @types/node @types/express ts-node ts-node-dev rimraf npm-run-all
package.jsonにコマンドの設定を行う
**npm run dev**が開発環境の立ち上げに使います。
**npm run start**が本番環境用です。
{
  "scripts": {
    "dev": "ts-node-dev --respawn api/controller/src/index.ts",
    "clean": "rimraf dist",
    "tsc": "tsc",
    "build": "npm-run-all clean tsc",
    "start": "npm run build && node ."
  },
}
tsconfig.jsonの作成
以下のコマンドを実行しTypeScriptの初期設定を行います。
$ npx tsc --init
それでは、作成されたtsconfig.jsonの上書きをしていきます。
{
  "compilerOptions": {
    "target": "ES6",
    "module": "commonjs",
    "sourceMap": true,
    "outDir": "./api/controller/dist",
    "strict": true,
    "moduleResolution": "node",
    "esModuleInterop": true,
    "skipLibCheck": true,
    "forceConsistentCasingInFileNames": true
  },
  "include": ["api/controller/src/**/**/*"]
}
簡単にまとめると、
**api/controller/srcディレクトリ以下を対象として、それらをapi/controller/dist**ディレクトリにES6の書き方でビルドされるという設定です。
tsconfig.jsonに関して詳しく知りたい方は以下のサイトをどうぞ。
また、この辺りで必要ないディレクトリはGithubにpushしたくないので、**.gitignore**も作成しておきましょう。
node_modules
package-lock.json
.env
dist
https://localhost:3000にアクセスするとhello worldが表示
APIサーバーが正しく動くか検証のため一応作っておきましょう。
// Load the package
import { Client, ClientConfig } from '@line/bot-sdk';
import express from 'express';
import dotenv from 'dotenv';
dotenv.config();

// Read the ports from process.env.file
const PORT = process.env.PORT || 3000;

// Load the access token and channel secret from the .env file
const clientConfig: ClientConfig = {
  channelAccessToken: process.env.CHANNEL_ACCESS_TOKEN || '',
  channelSecret: process.env.CHANNEL_SECRET || '',
};

// Instantiate
const app: express.Express = express();
const client: Client = new Client(clientConfig);

// Do routing
// Test
app.get('/', (req: express.Request, res: express.Response): void => {
  res.send('Hello World');
});

// Start the server
app.listen(PORT, (): void => {
  console.log('http://localhost:3000');
});
上記の内容はほぼ公式サイトからコピペしているだけなので特に難しいところはないと思います。
公式サイトを載せておきますのでこちらをこちらを見て下さい。
localhost.runで開発用のhttpsを取得
以前作成した天気予報アプリの記事でも使った**localhost.run**を使います。
ということでここからはターミナル2つ使って開発していきます。
こんな感じです。

ターミナルに2つのコードを貼り付けて実行してください。
$ npm run dev
$ ssh -R 80:localhost:3000 localhost.run
Webhook URLの登録
localhost.runで作成したhttpsのURLをコピーしてください。
私の場合は以下のURLです。
これをLINE DevelopersのWebhookに設定します。

これで初期設定は完了です。
ここまでの作業は以下のブランチで行っています。
ここからは実際にLINE Messaging APIを使って作成していきます。
簡単にここからの流れを説明します。
| クライアント | LINE(バックエンド) |
|---|---|
| ①「お店を探す」をタップ | |
| ②「現在地を送る」ためのボタンメッセージを送信 | |
| ③「お店を探す」以外のメッセージが届いたときにエラーメッセージを送信 | |
| ④ 現在地を送る | |
| ⑤ お店の配列を作成する | |
| ⑥ 必要なデータのみにする | |
| ⑦ 評価順に並び替えて上位 10 店舗にする | |
| ⑧ Flex Message を作成する | |
| ⑨ お店の情報を Flex Message で送る | |
| では作っていきましょう! | |
またこれら全てのコードをapi/controller/src/index.tsに書くとコードが肥大化し可読性が落ちます。 |
|
なので**Common**ディレクトリに関数に切り分けて作成していきます。 |
またここからはLINEBotのオリジナルの型が頻出します。
1つずつ説明するのはあまりに時間がかかるので、知らない型が出てきたらその度に以下のサイトで検索するようにしてください。
①「お店を探す」をタップ
こちらに関してはクライアント側の操作なので作業することはありません。
②「現在地を送る」ためのボタンメッセージを送信
ボタンメッセージのテンプレートを作成する
// Load the package
import { TemplateMessage } from '@line/bot-sdk';

export const yourLocationTemplate = (): TemplateMessage => {
  return {
    type: 'template',
    altText: '現在地を送ってください!',
    template: {
      type: 'buttons',
      text: '今日はどこでご飯を食べる?',
      actions: [
        {
          type: 'uri',
          label: '現在地を送る',
          uri: 'https://line.me/R/nv/location/',
        },
      ],
    },
  };
};
ちなみに以下のURLですが、LINEで利用できるURLスキームというもので位置情報を送れるものです。
https://line.me/R/nv/location/
詳しくは以下をご確認ください。
ボタンメッセージの送信
// Load the package
import { Client, WebhookEvent } from '@line/bot-sdk';

// Load the module
import { yourLocationTemplate } from '../TemplateMessage/YourLocation';

export const sendLocationOrError = async (client: Client, event: WebhookEvent): Promise<void> => {
  try {
    // If the message is different from the target, returned
    if (event.type !== 'message' || event.message.type !== 'text') {
      return;
    }

    // Retrieve the required items from the event
    const replyToken = event.replyToken;
    const text = event.message.text;

    // Perform a conditional branch
    if (text === 'お店を探す') {
      await client.replyMessage(replyToken, yourLocationTemplate());
    } else {
      // エラーメッセージを送る
    }
  } catch (err) {
    console.log(err);
  }
};
③「お店を探す」以外のメッセージが届いたときにエラーメッセージを送信
エラーメッセージのテンプレートを作成する
// Load the package
import { TextMessage } from '@line/bot-sdk';

export const errorMessageTemplate = (): TextMessage => {
  return {
    type: 'text',
    text: 'ごめんなさい、このメッセージは対応していません',
  };
};
エラーメッセージの送信
// Load the package
import { Client, WebhookEvent } from '@line/bot-sdk';

// Load the module
import { yourLocationTemplate } from '../TemplateMessage/YourLocation';
import { errorMessageTemplate } from '../TemplateMessage/ErrorMessage';

export const sendLocationOrError = async (client: Client, event: WebhookEvent): Promise<void> => {
  try {
    // If the message is different from the target, returned
    if (event.type !== 'message' || event.message.type !== 'text') {
      return;
    }

    // Retrieve the required items from the event
    const replyToken = event.replyToken;
    const text = event.message.text;

    // Perform a conditional branch
    if (text === 'お店を探す') {
      await client.replyMessage(replyToken, yourLocationTemplate());
    } else {
      await client.replyMessage(replyToken, errorMessageTemplate());
    }
  } catch (err) {
    console.log(err);
  }
};
APIに登録する
これで②と③のメッセージが送信されます!
// Load the package
import { Client, ClientConfig, MiddlewareConfig, middleware, WebhookEvent } from '@line/bot-sdk';
import express from 'express';
import dotenv from 'dotenv';
dotenv.config();

// Load the module
import { sendLocationOrError } from './Common/SendMessage/SendLocationOrError';

// Read the ports from process.env.file
const PORT = process.env.PORT || 3000;

// Load the access token and channel secret from the .env file
const clientConfig: ClientConfig = {
  channelAccessToken: process.env.CHANNEL_ACCESS_TOKEN || '',
  channelSecret: process.env.CHANNEL_SECRET || '',
};
const middlewareConfig: MiddlewareConfig = {
  channelAccessToken: process.env.CHANNEL_ACCESS_TOKEN || '',
  channelSecret: process.env.CHANNEL_SECRET || '',
};

// Instantiate
const app: express.Express = express();
const client: Client = new Client(clientConfig);

// Do routing
// Test
app.get('/', (req: express.Request, res: express.Response): void => {
  res.send('Hello World');
});

// API Routing
app.post(
  '/api/line/message',
  middleware(middlewareConfig),
  async (req: express.Request, res: express.Response): Promise<void> => {
    const events: WebhookEvent[] = req.body.events;

    events.map(
      async (event: WebhookEvent): Promise<void> => {
        try {
          await sendLocationOrError(client, event);

          // これでデバッグしつつ進めていくとよろし。
          // console.log(event);
        } catch (err) {
          console.log(err);
        }
      }
    );
  }
);

// Start the server
app.listen(PORT, (): void => {
  console.log('http://localhost:3000');
});
④ 現在地を送る
こちらに関してはクライアント側の操作なので作業することはありません。
⑤ お店の配列を作成する
ここからGoogle MapのAPIを使っていきます!
まずはGCPのコンソール画面に入って下さい。

コンソールに入ったらプロジェクトを作成しましょう!

私は、LINE-Node-TypeScript-Gourmetで作成しました。

では、ライブラリを有効化しましょう!
使うライブラリは2つです。
Map JavaScript API
Places API
お店検索をするAPIは「Places API」ですが、
JavaScriptから呼び出すために「Map JavaScript API」が必要となります。


ここまでできたら次にAPIを作成しましょう。

APIは開発環境用と本番環境用の2つを作成しましょう。
これからの開発はこちらのAPIキーを使います。

このAPIキーは本番環境で使います。

上記の説明でわからなければ以下のサイトを参考にされて下さい。
この発行したAPIキーを.envに登録します。
# LINE(ご自分のBotの値に書き換えを行ってください)
CHANNEL_SECRET = "a9152"
CHANNEL_ACCESS_TOKEN = "zTon3"

# Google_map(ご自分の値に書き換えを行ってください)
GOOGLE_DEV_API = "AIzaS"
GOOGLE_PROD_API = "AIzaS"
また、今回は公式のパッケージを使用せずに作成します。
型定義もできるみたいですが、Axiosで作った方がスムーズだと判断しました。
近隣のお店を調べるので、Place SearchのNearby Search requestsを使います。
// Load the package
import axios, { AxiosResponse } from 'axios';

export const getGourmetInfo = async (latitude: number, longitude: number) => {
  try {
    // Google Map API
    const Google_API = process.env.GOOGLE_DEV_API;

    const url = `https://maps.googleapis.com/maps/api/place/nearbysearch/json?location=${latitude},${longitude}&radius=800&type=restaurant&key=${Google_API}&language=ja`;
    const gourmets: AxiosResponse<any> = await axios.get(url);
    const gourmetData = gourmets.data.results;

    return gourmetData;
  } catch (err) {
    console.log(err);
  }
};
⑥ 必要なデータのみにする
使うデータは以下の通りです。
| 必要なデータ | 理由 |
|---|---|
| geometry_location_lat | 店舗案内のURLで使うため |
| geometry_location_lng | 店舗案内のURLで使うため |
| name | Flex Message内と店舗詳細のURLで使うため |
| photo_reference | 店舗写真を生成するために使う |
| rating | Flex Message内で使うため |
| vicinity | 店舗詳細のURLで使うため |
店舗詳細と店舗案内、店舗写真のURLはこの後解説します。
ということで必要なデータのみを抜き出して配列を再生成しましょう。
// Load the module
import { getGourmetInfo } from './GetGourmetInfo';

// types
import { RequiredGourmetData } from './type/FormatGourmetData.type';

export const formatGourmetData = async (latitude: number, longitude: number) => {
  try {
    const gourmetData = await getGourmetInfo(latitude, longitude);

    // Extract only the data you need
    const sufficientDataArray: any = gourmetData.filter(
      (gourmet: any) => gourmet.photos !== undefined || null
    );

    const requiredGourmetData: RequiredGourmetData = sufficientDataArray.map((gourmet: any) => {
      return {
        geometry_location_lat: gourmet.geometry.location.lat,
        geometry_location_lng: gourmet.geometry.location.lng,
        name: gourmet.name,
        photo_reference: gourmet.photos[0].photo_reference,
        rating: gourmet.rating,
        vicinity: gourmet.vicinity,
      };
    });

    return requiredGourmetData;
  } catch (err) {
    console.log(err);
  }
};
上記で、RequiredGourmetDataという型を使用しているので型定義ファイルを作ります。
export type RequiredGourmetData = {
  geometry_location_lat: number;
  geometry_location_lng: number;
  name: string;
  photo_reference: string;
  rating: number;
  vicinity: string;
}[];
ちなみに私はこの⑥の内容が一番詰まりました。
理由としては、Google Mapでphoto_referenceが登録されていない店舗があったためです。
gourmet.photos[0]でエラーが出たので配列の取得間違ってるんかなと焦りました。。。
ということで今回は、店舗写真がないお店に関しては除外するようにしました。(sufficientDataArray)
⑦ 評価順に並び替えて上位10店舗にする
ここはそんなに難しくないです。
sortで並び替えて、sliceで新たな配列を作ってあげましょう!
// Load the module
import { formatGourmetData } from './FormatGourmetData';

// types
import { GourmetData, SortGourmetData } from './type/SortRatingGourmet.type';

export const sortRatingGourmet = async (
  latitude: number,
  longitude: number
): Promise<SortGourmetData | undefined> => {
  try {
    const gourmetData = await formatGourmetData(latitude, longitude);

    if (gourmetData === undefined) {
      return;
    }

    // Sort by rating
    gourmetData.sort((a: GourmetData, b: GourmetData) => b.rating - a.rating);

    // narrow it down to 10 stores.
    const sortGourmetData: SortGourmetData = gourmetData.slice(0, 10);

    return sortGourmetData;
  } catch (err) {
    console.log(err);
  }
};
型定義を行いましょう。
export type GourmetData = {
  geometry_location_lat: number;
  geometry_location_lng: number;
  name: string;
  photo_reference: string;
  rating: number;
  vicinity: string;
};

export type SortGourmetData = GourmetData[];
⑧ Flex Messageを作成する
⑥で説明した必要なデータについて解説します。
| 必要なデータ | 理由 |
|---|---|
| geometry_location_lat | 店舗案内のURLで使うため |
| geometry_location_lng | 店舗案内のURLで使うため |
| name | Flex Message内と店舗詳細のURLで使うため |
| photo_reference | 店舗写真を生成するために使う |
| rating | Flex Message内で使うため |
| vicinity | 店舗詳細のURLで使うため |
nameとratingはFlex Message内で使います。
店舗詳細に関してですが、こちらのURLは以下となります。
https://maps.google.co.jp/maps?q=${店舗名}${住所}&z=15&iwloc=A
店舗案内に関しては以下のURLとなります。
https://www.google.com/maps/dir/?api=1&destination=${緯度},${経度}
店舗写真に関しては以下のURLとなります。
https://maps.googleapis.com/maps/api/place/photo?maxwidth=${任意の幅}&photoreference=${photo_reference}&key=${Google_API}
ということで、Flex Message内でこれらのURLを生成していけば完成です。
やっていきましょう!
ちなみにここが2番目に詰まりました。
ここは型定義です。
Flex Messageは、FlexMessageという型なのですが、以下のサイトを見ればわかる通り、
FlexContainer, FlexBubble, FlexCarouselなど様々なものに依存しているので、
これらをしっかり型定義しないと、FlexMessageだけ型定義してもエラーとなります。
JavaScriptではもっと省略して書けたのですが、TypeScriptの場合は順序を意識して書く必要がありました。
型エラーが出なければ安全に動くというのがわかるので、多少コードは長くなっても便利だなと思いました。
// Load the package
import { FlexMessage, FlexCarousel, FlexBubble } from '@line/bot-sdk';

// Load the module
import { sortRatingGourmet } from './SortRatingGourmet';

// types
import { Gourmet } from './type/CreateFlexMessage.type';

export const createFlexMessage = async (
  latitude: number,
  longitude: number
): Promise<FlexMessage | undefined> => {
  try {
    const sortGourmetData = await sortRatingGourmet(latitude, longitude);

    if (sortGourmetData === undefined) {
      return;
    }

    // FlexMessage
    const FlexMessageContents: FlexBubble[] = await sortGourmetData.map((gourmet: Gourmet) => {
      // Google Map API
      const Google_API = process.env.GOOGLE_DEV_API || undefined;

      // Create a URL for a store photo
      const photoURL = `https://maps.googleapis.com/maps/api/place/photo?maxwidth=400&photoreference=${gourmet.photo_reference}&key=${Google_API}`;

      // Create a URL for the store details
      const encodeURI = encodeURIComponent(`${gourmet.name} ${gourmet.vicinity}`);
      const storeDetailsURL = `https://maps.google.co.jp/maps?q=${encodeURI}&z=15&iwloc=A`;

      // Create a URL for store routing information
      const storeRoutingURL = `https://www.google.com/maps/dir/?api=1&destination=${gourmet.geometry_location_lat},${gourmet.geometry_location_lng}`;

      const flexBubble: FlexBubble = {
        type: 'bubble',
        hero: {
          type: 'image',
          url: photoURL,
          size: 'full',
          aspectMode: 'cover',
          aspectRatio: '20:13',
        },
        body: {
          type: 'box',
          layout: 'vertical',
          contents: [
            {
              type: 'text',
              text: gourmet.name,
              size: 'xl',
              weight: 'bold',
            },
            {
              type: 'box',
              layout: 'baseline',
              contents: [
                {
                  type: 'icon',
                  url:
                    'https://scdn.line-apps.com/n/channel_devcenter/img/fx/review_gold_star_28.png',
                  size: 'sm',
                },
                {
                  type: 'text',
                  text: `${gourmet.rating}`,
                  size: 'sm',
                  margin: 'md',
                  color: '#999999',
                },
              ],
              margin: 'md',
            },
          ],
        },
        footer: {
          type: 'box',
          layout: 'vertical',
          contents: [
            {
              type: 'button',
              action: {
                type: 'uri',
                label: '店舗詳細',
                uri: storeDetailsURL,
              },
            },
            {
              type: 'button',
              action: {
                type: 'uri',
                label: '店舗案内',
                uri: storeRoutingURL,
              },
            },
          ],
          spacing: 'sm',
        },
      };

      return flexBubble;
    });

    const flexContainer: FlexCarousel = {
      type: 'carousel',
      contents: FlexMessageContents,
    };

    const flexMessage: FlexMessage = {
      type: 'flex',
      altText: 'this is a flex message',
      contents: flexContainer,
    };

    return flexMessage;
  } catch (err) {
    console.log(err);
  }
};
型定義を行いましょう。
export type Gourmet = {
  geometry_location_lat: number;
  geometry_location_lng: number;
  name: string;
  photo_reference: string;
  rating: number;
  vicinity: string;
};
⑨ お店の情報を Flex Messageで送る
Flex Messageの送信
// Load the package
import { Client, WebhookEvent } from '@line/bot-sdk';

// Load the module
import { createFlexMessage } from '../TemplateMessage/GoogleMap/CreateFlexMessage';

export const sendGourmetMessage = async (client: Client, event: WebhookEvent) => {
  try {
    // If the message is different from the target, returned
    if (event.type !== 'message' || event.message.type !== 'location') {
      return;
    }

    // Retrieve the required items from the event
    const replyToken = event.replyToken;
    const latitude = event.message.latitude;
    const longitude = event.message.longitude;

    const flexMessage = await createFlexMessage(latitude, longitude);

    if (flexMessage === undefined) {
      return;
    }

    await client.replyMessage(replyToken, flexMessage);
  } catch (err) {
    console.log(err);
  }
};
APIに登録する
// Load the package
import { Client, ClientConfig, MiddlewareConfig, middleware, WebhookEvent } from '@line/bot-sdk';
import express from 'express';
import dotenv from 'dotenv';
dotenv.config();

// Load the module
import { sendLocationOrError } from './Common/SendMessage/SendLocationOrError';
import { sendGourmetMessage } from './Common/SendMessage/SendGourmetMessage';

// Read the ports from process.env.file
const PORT = process.env.PORT || 3000;

// Load the access token and channel secret from the .env file
const clientConfig: ClientConfig = {
  channelAccessToken: process.env.CHANNEL_ACCESS_TOKEN || '',
  channelSecret: process.env.CHANNEL_SECRET || '',
};
const middlewareConfig: MiddlewareConfig = {
  channelAccessToken: process.env.CHANNEL_ACCESS_TOKEN || '',
  channelSecret: process.env.CHANNEL_SECRET || '',
};

// Instantiate
const app: express.Express = express();
const client: Client = new Client(clientConfig);

// Do routing
// Test
app.get('/', (req: express.Request, res: express.Response): void => {
  res.send('Hello World');
});

// API Routing
app.post(
  '/api/line/message',
  middleware(middlewareConfig),
  async (req: express.Request, res: express.Response): Promise<void> => {
    const events: WebhookEvent[] = req.body.events;

    events.map(
      async (event: WebhookEvent): Promise<void> => {
        try {
          await sendLocationOrError(client, event);
          await sendGourmetMessage(client, event);
        } catch (err) {
          console.log(err);
        }
      }
    );
  }
);

// Start the server
app.listen(PORT, (): void => {
  console.log('http://localhost:3000');
});
これで完成です。
ここまでの作業は以下のブランチで行っています。
ブランチを見ていただければわかると思うのですが、
最初は「車か徒歩か」などで分岐させお店の検索範囲を変えようと思ったのですが、
この要件ではDBを必要としたので一旦DBなしの構成で作成してみました。
この後、ジャンル検索やお気に入り店舗の登録などの機能も作っていく予定です。
では最後にデプロイしましょう!
今回もデプロイはGlitchを使います。
アカウントは、Githubで作るのがおすすめです。
作成しましたら、プロジェクトを作成します。
**「import from GitHub」**をクリックします。
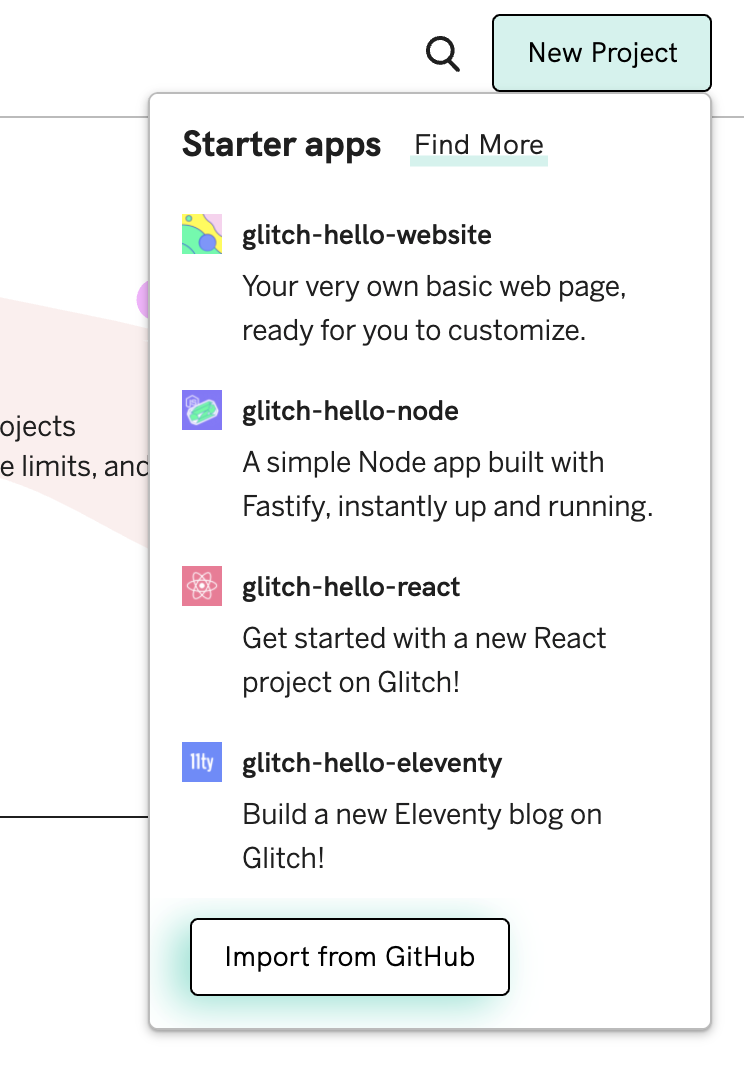
ここには、GithubのURLを貼り付けます。

少し待つとこのように読み込まれます。

最後に.envに値を入力します。

ここまで行えばデプロイは成功です!

Webhookの設定を変更

最後に
次はDBを使い、このアプリをより良いものにしていきたいです。
AWS Lambdaなどを使うか、Firebaseを使うか迷いますな。

ここまで読んでいただきありがとうございました!