はじめに
アプリにMap表示したいー!
そう考えたとき、思い浮かぶものはMapKitかGoogleMapです。
MapKitは、地図を表示することはもちろん、住所検索やピン配置などをデフォルトで使用できる素晴らしいフレームワークです。
GoogleMapはGoogle社が提供しているAPIを使用することにより表示することができ、様々な機能を実装することができます。
Google Maps Platform
MapKitはSwiftのみですが、GoogleMapは他の言語でも使用する可能性があるので、これを機に勉強しようと思い、その備忘録及びアウトプットのためにここに記載していきます。
対象者
- これからアプリにMapを導入したいと思っている人
- とりあえずGoogleMapなんぞやと思っている人
バージョン
- Xcode....Version 11.1
- Swift....5.0
実装
導入
まずはじめに、上記の公式HPからアクセスし、右上のコンソールをタップします。
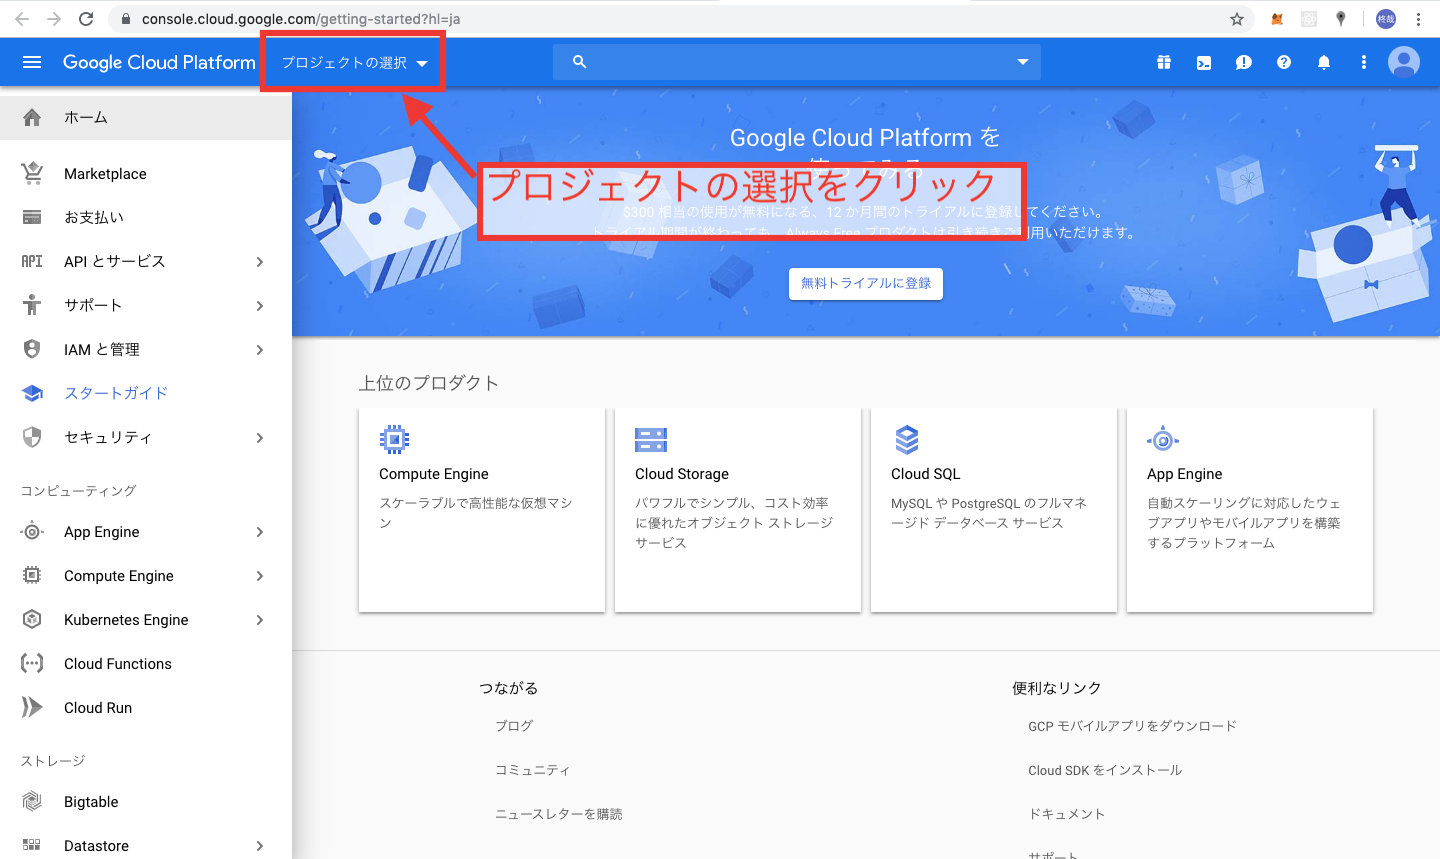
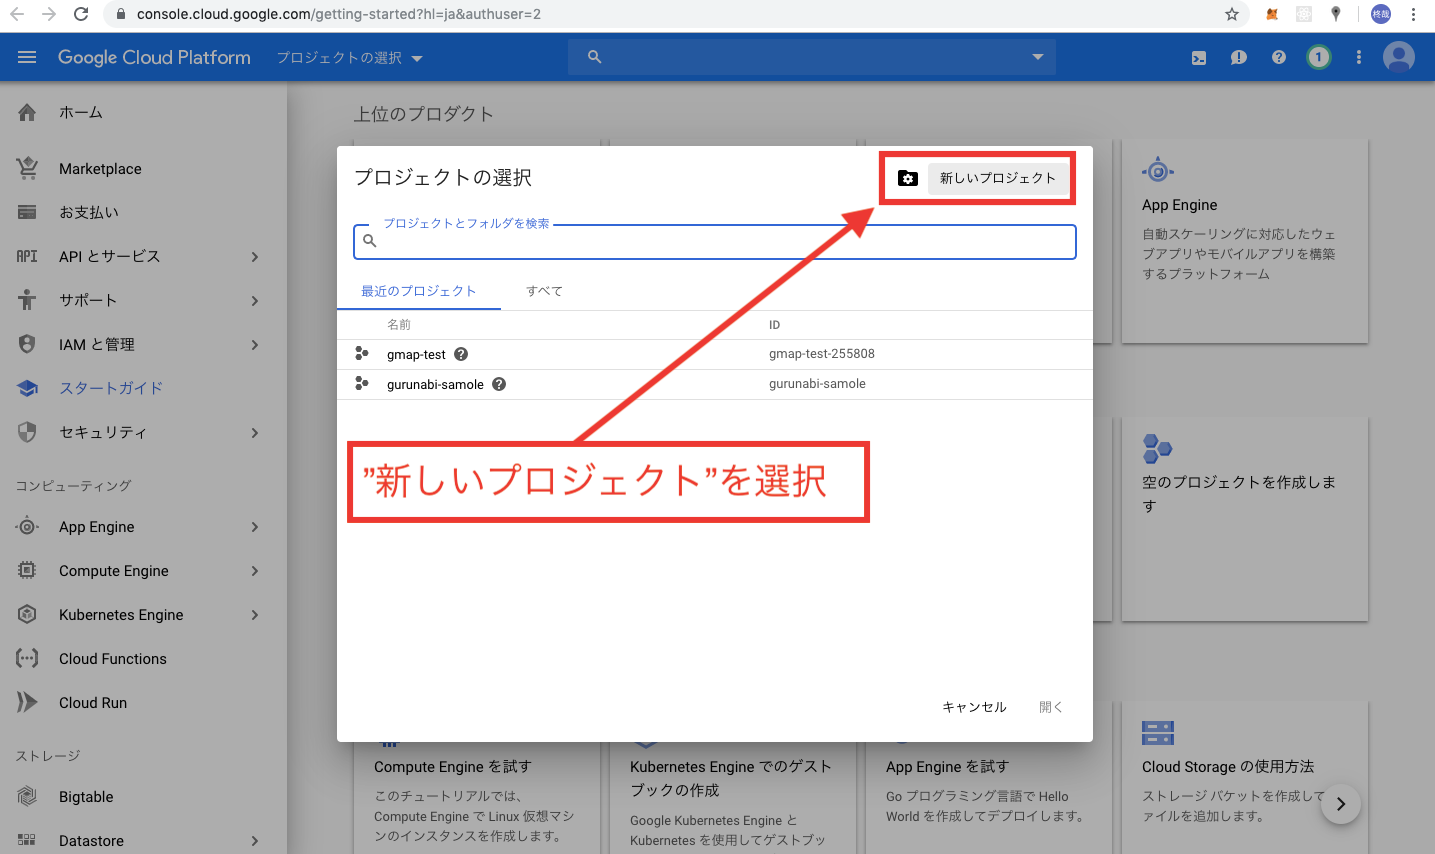
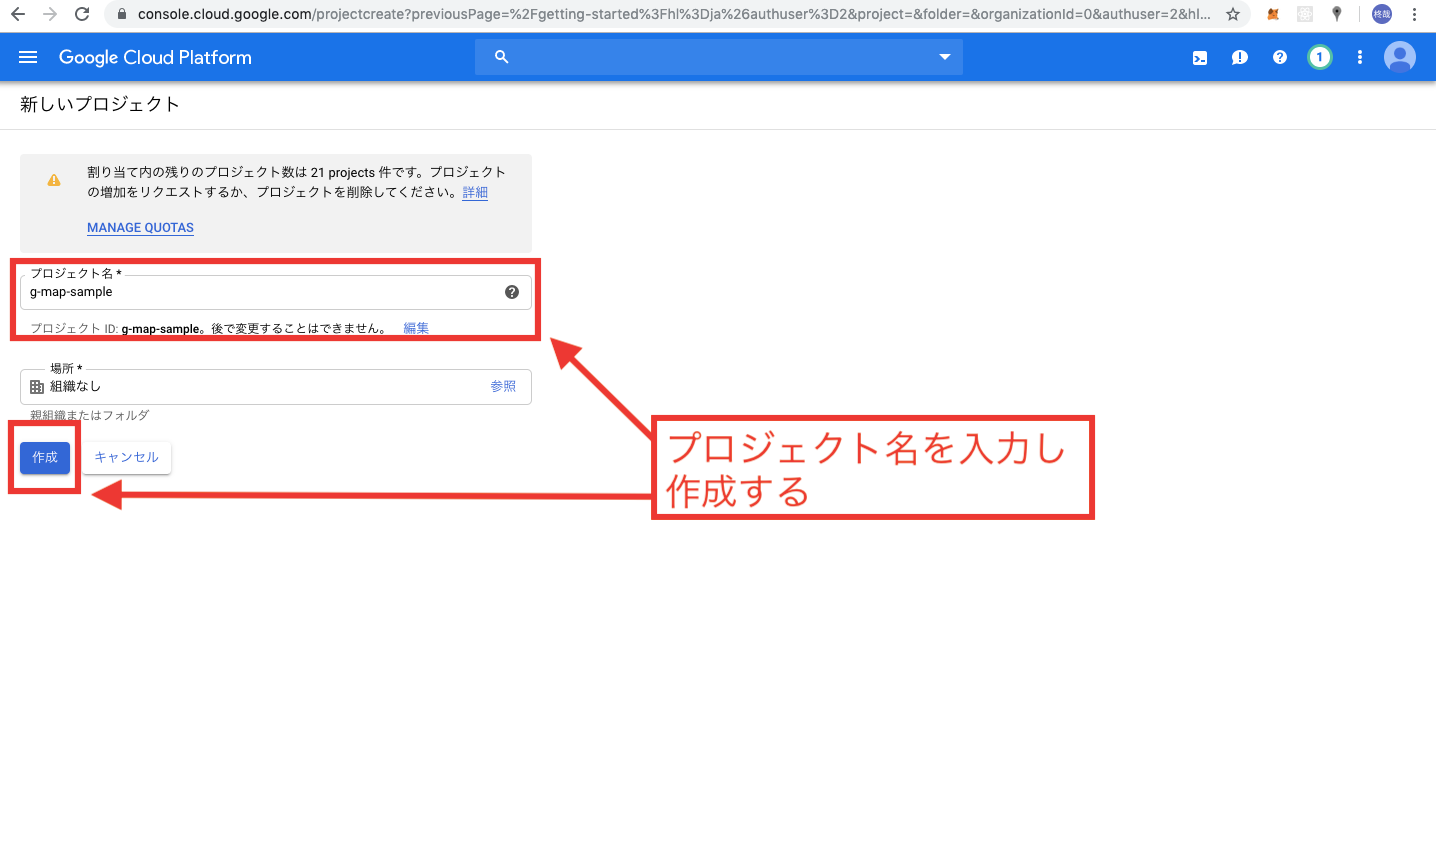
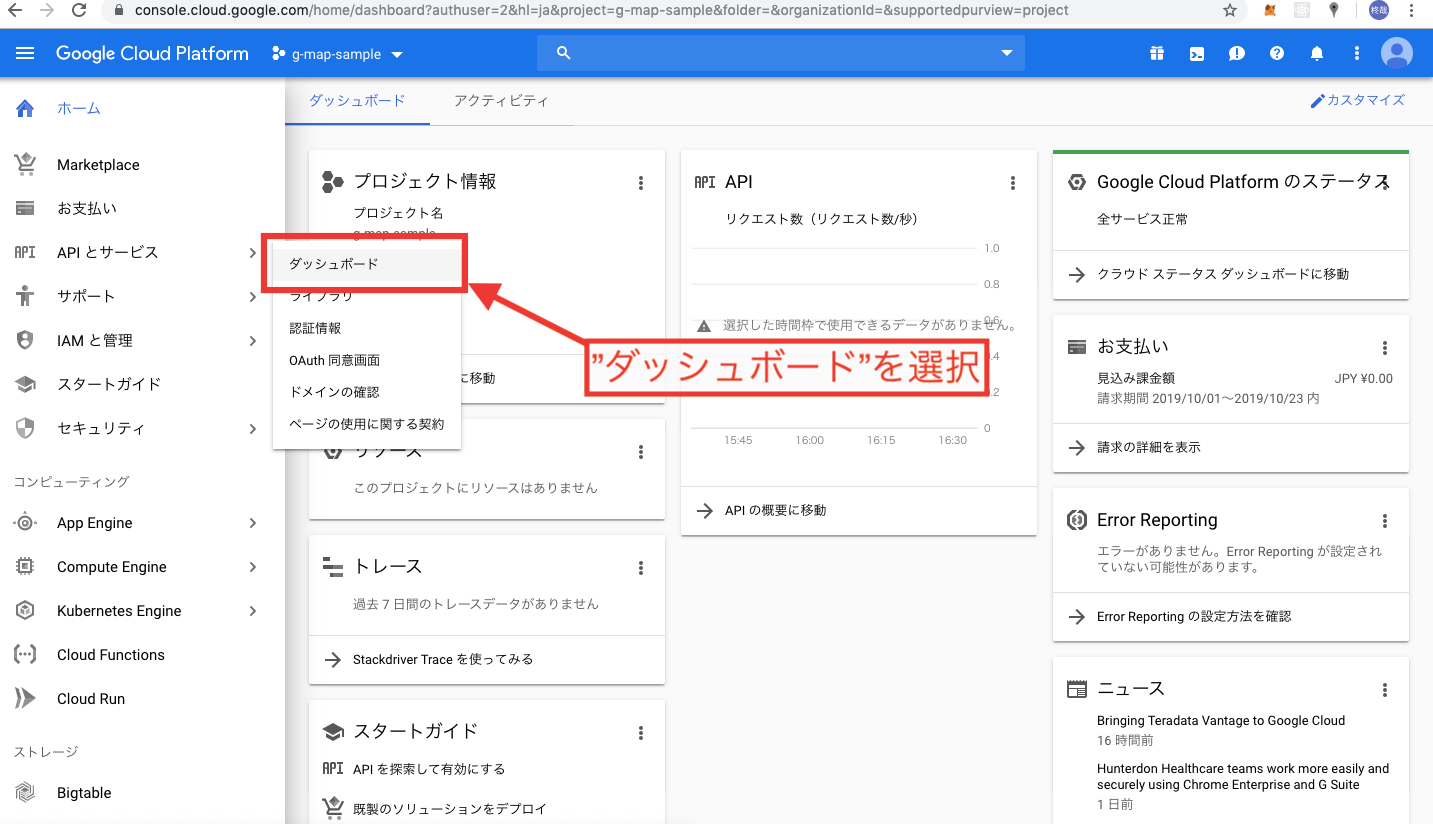
以上でCloudPlatformの初期設定は終了です。
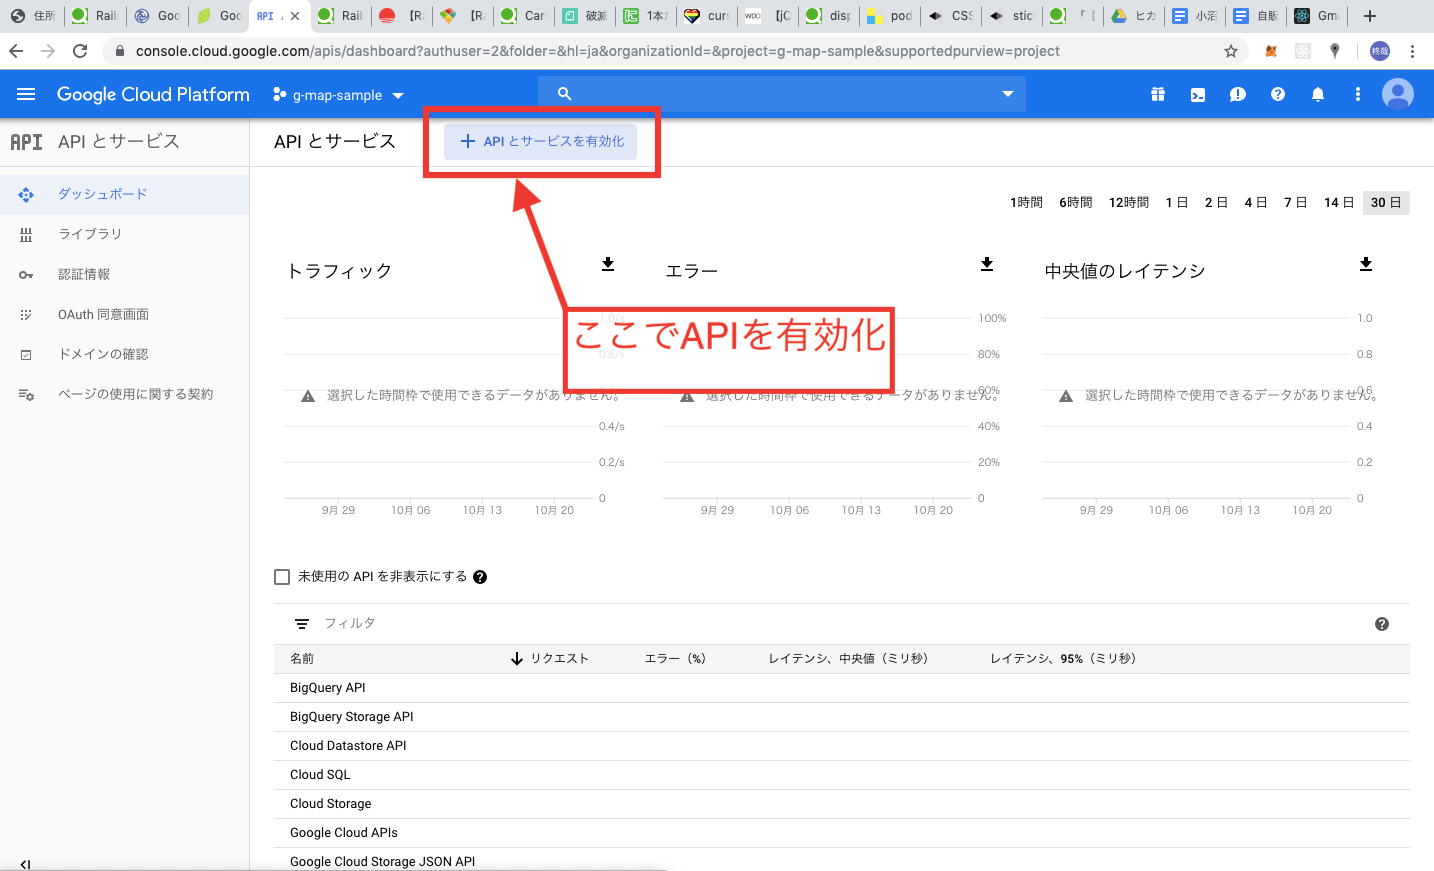
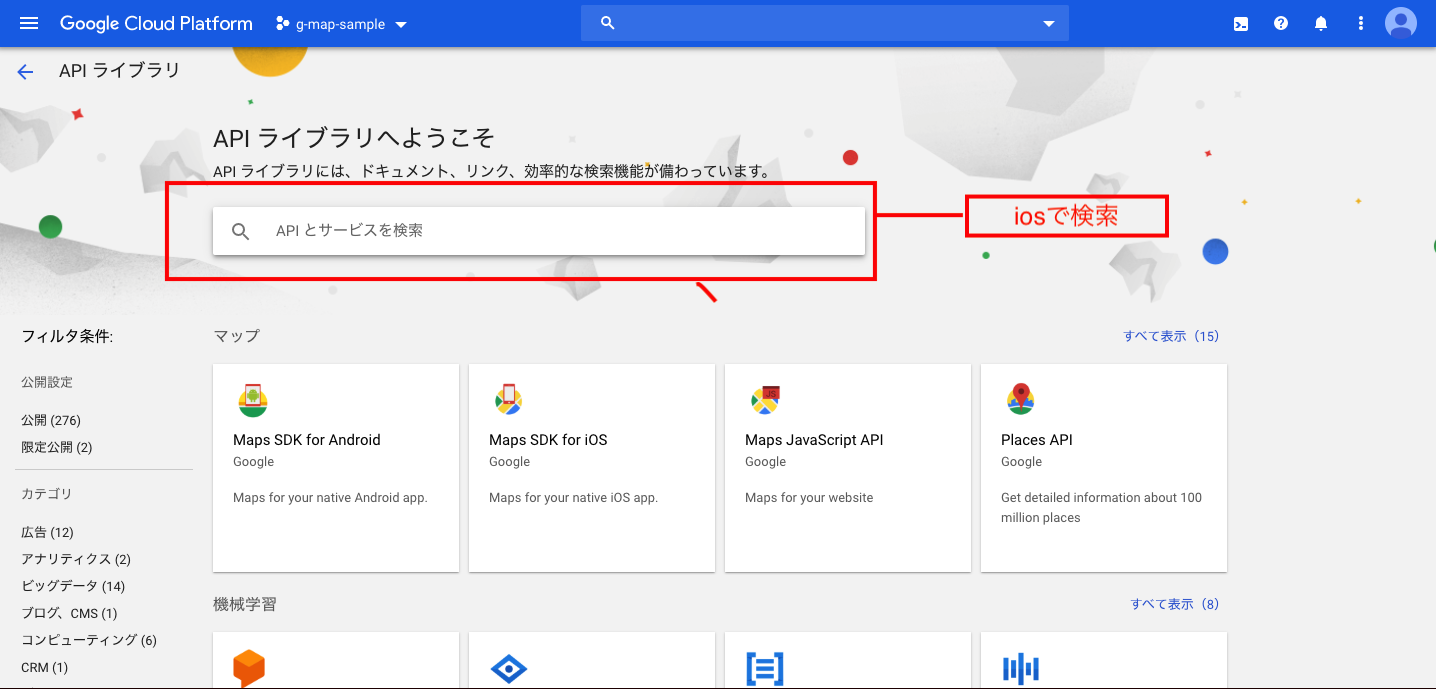
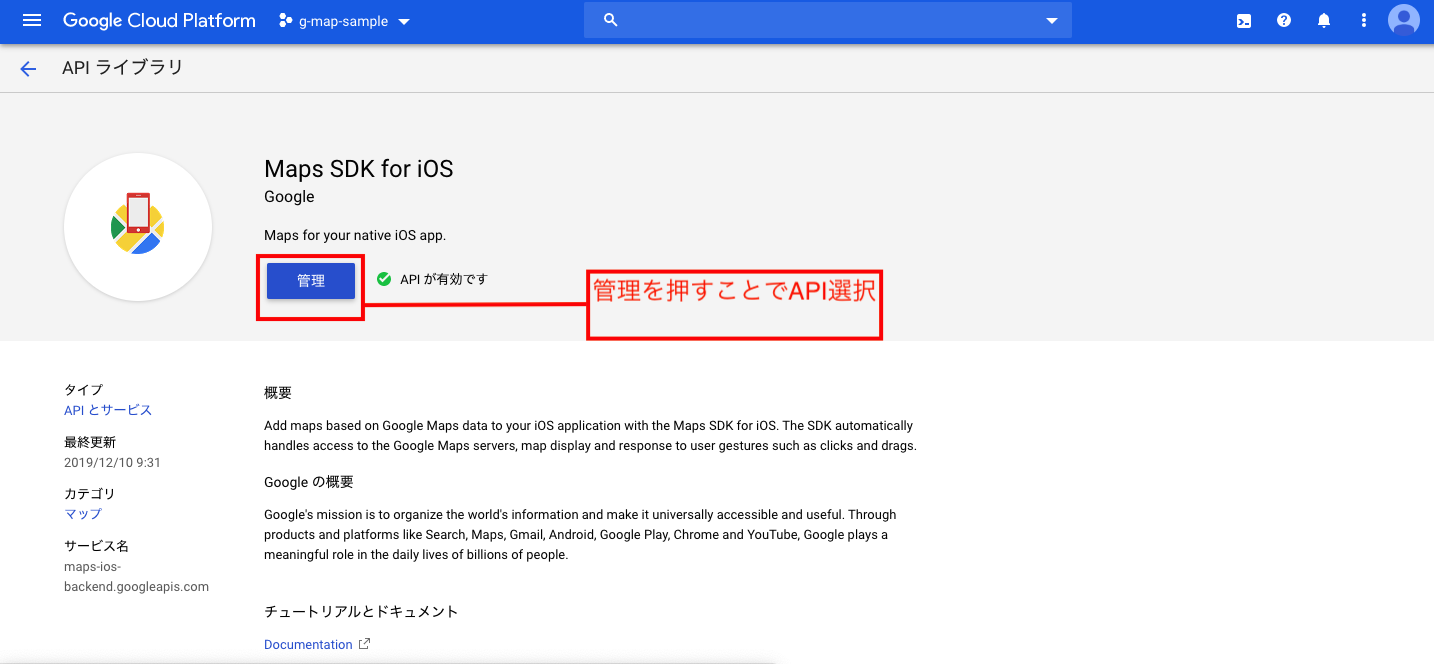
APIkeyの登録
ライブラリの導入をするためにpodfileをインストールしてください。
その後、以下のコードをpodfileに記入します。
pod 'GoogleMaps'
pod installをしたら、プロジェクトを開きましょう!
AppDelegateを開いて、APIキーを登録していきます。
まず、先程導入したGoogleMapsをimportします。
import GoogleMaps
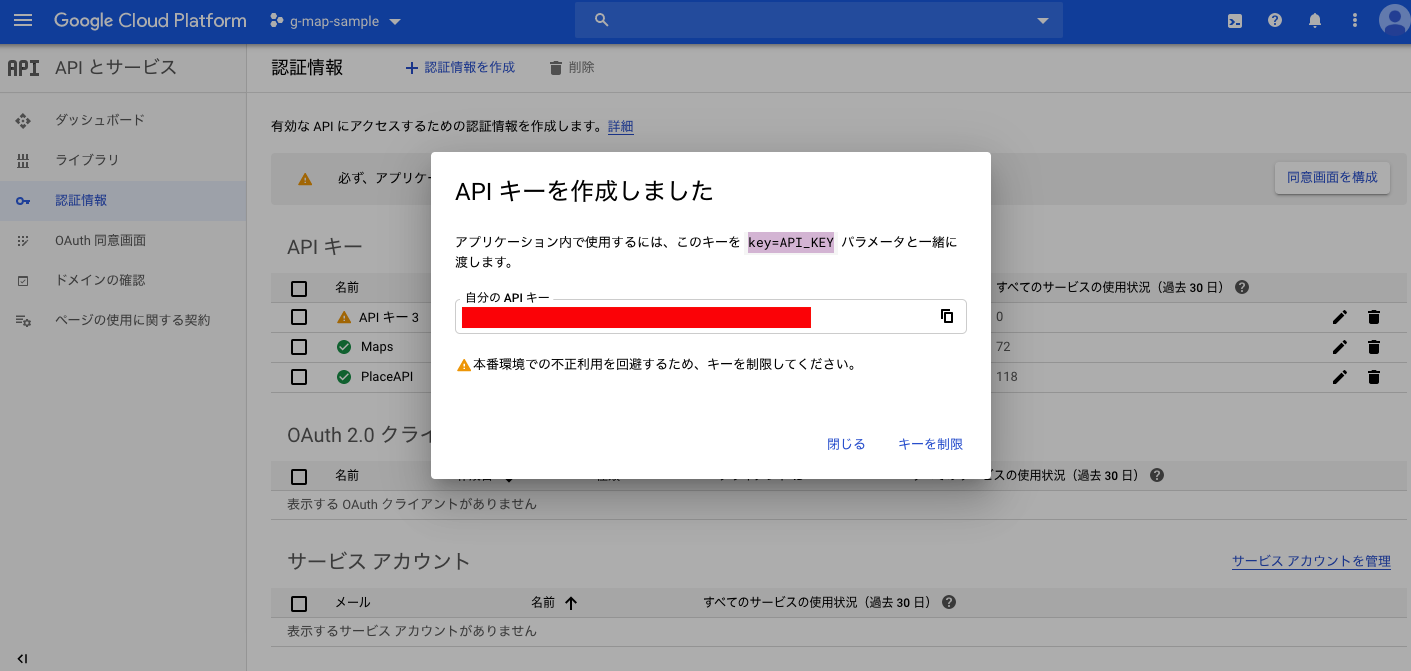
そしてapplication(_app~)メソッドに、先程発行したAPIキーを挿入します。
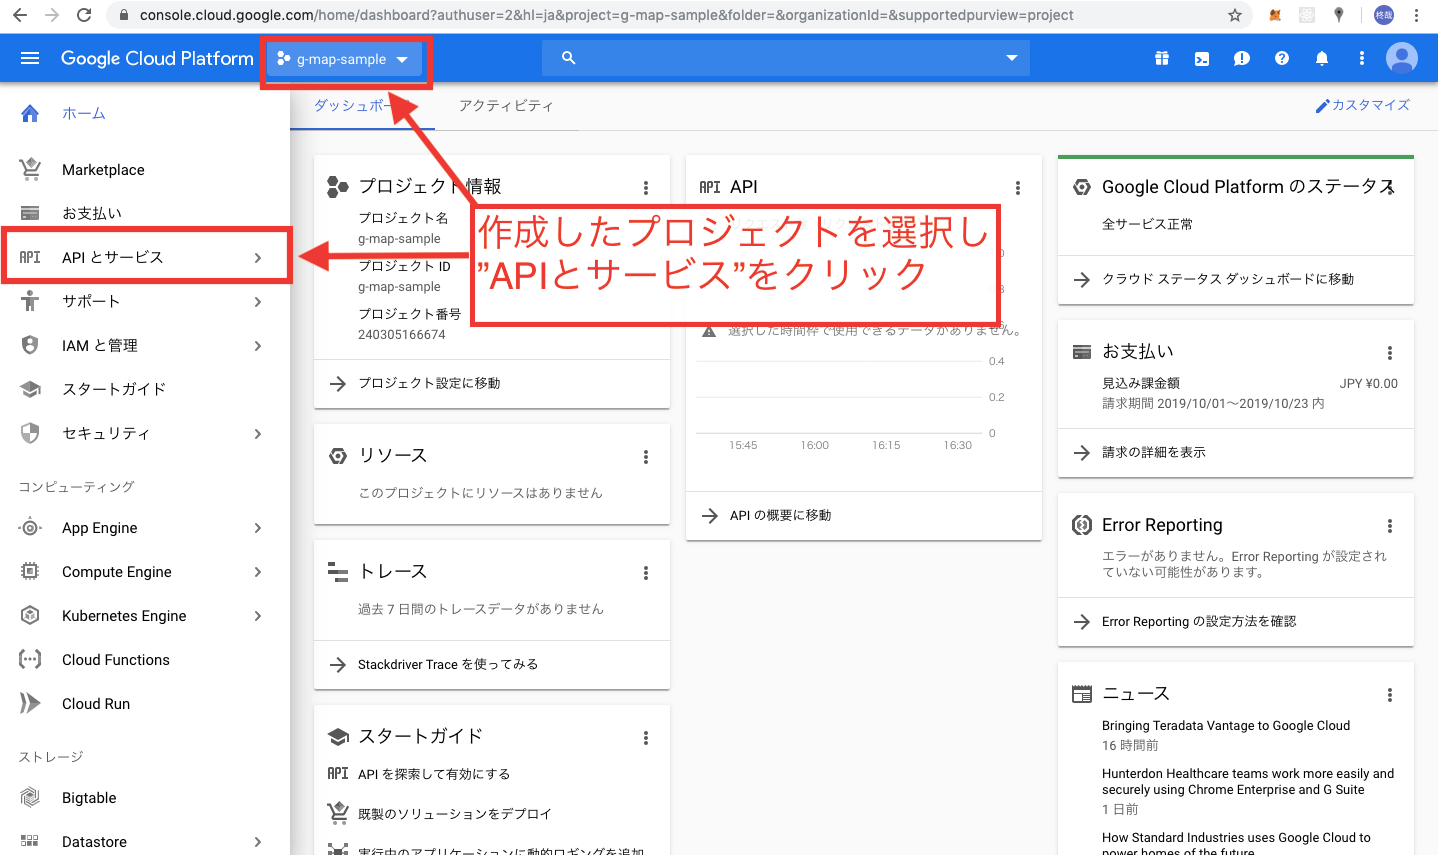
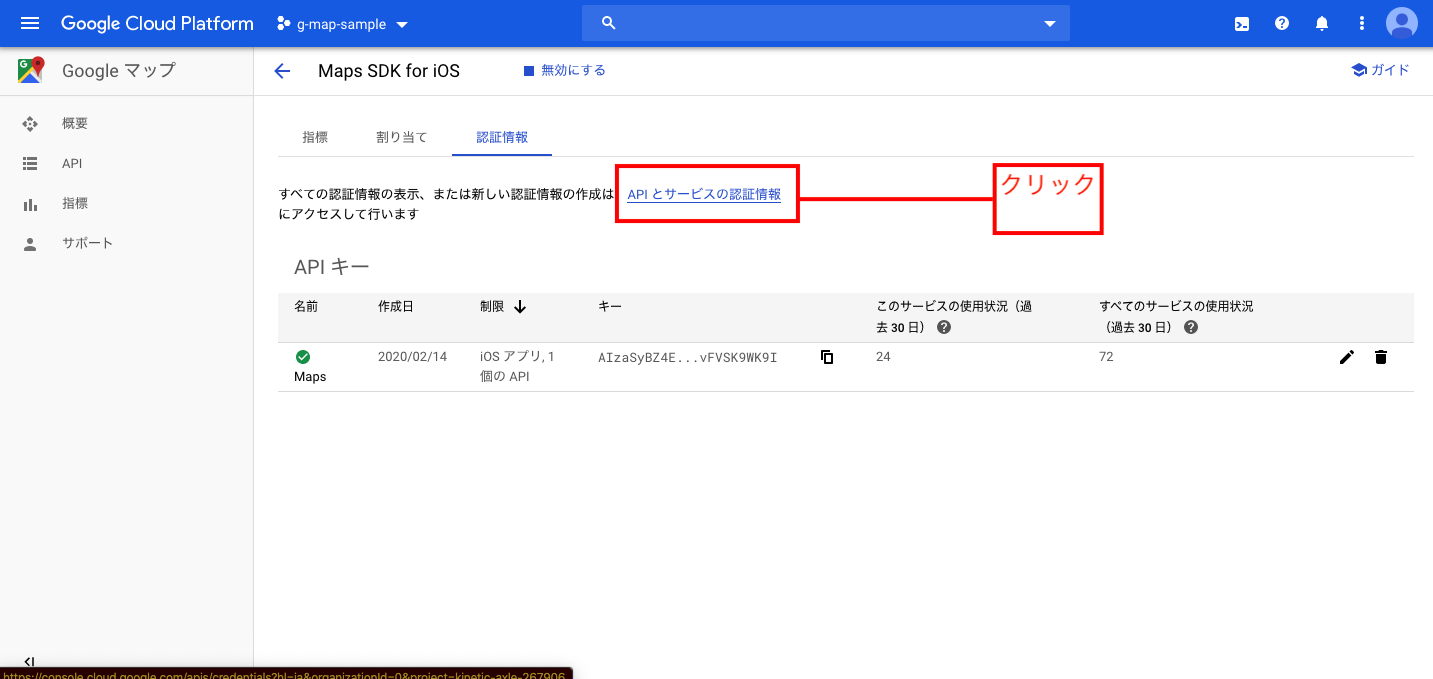
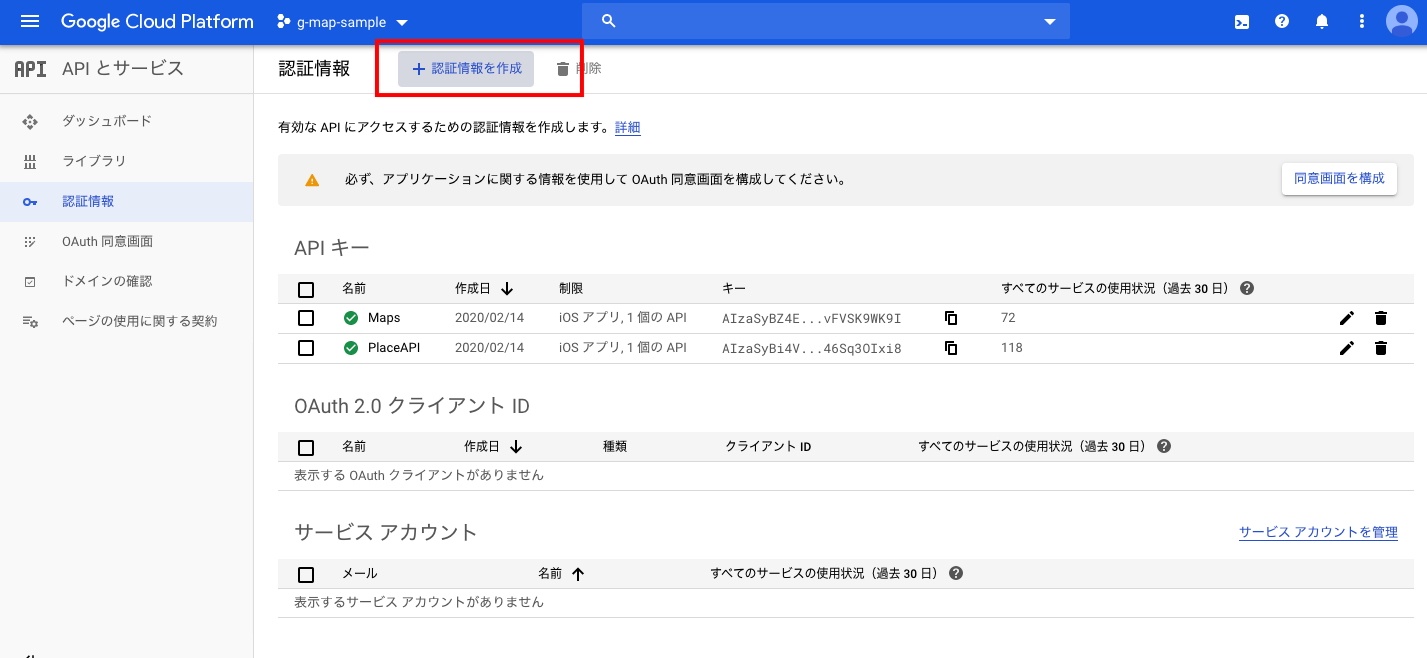
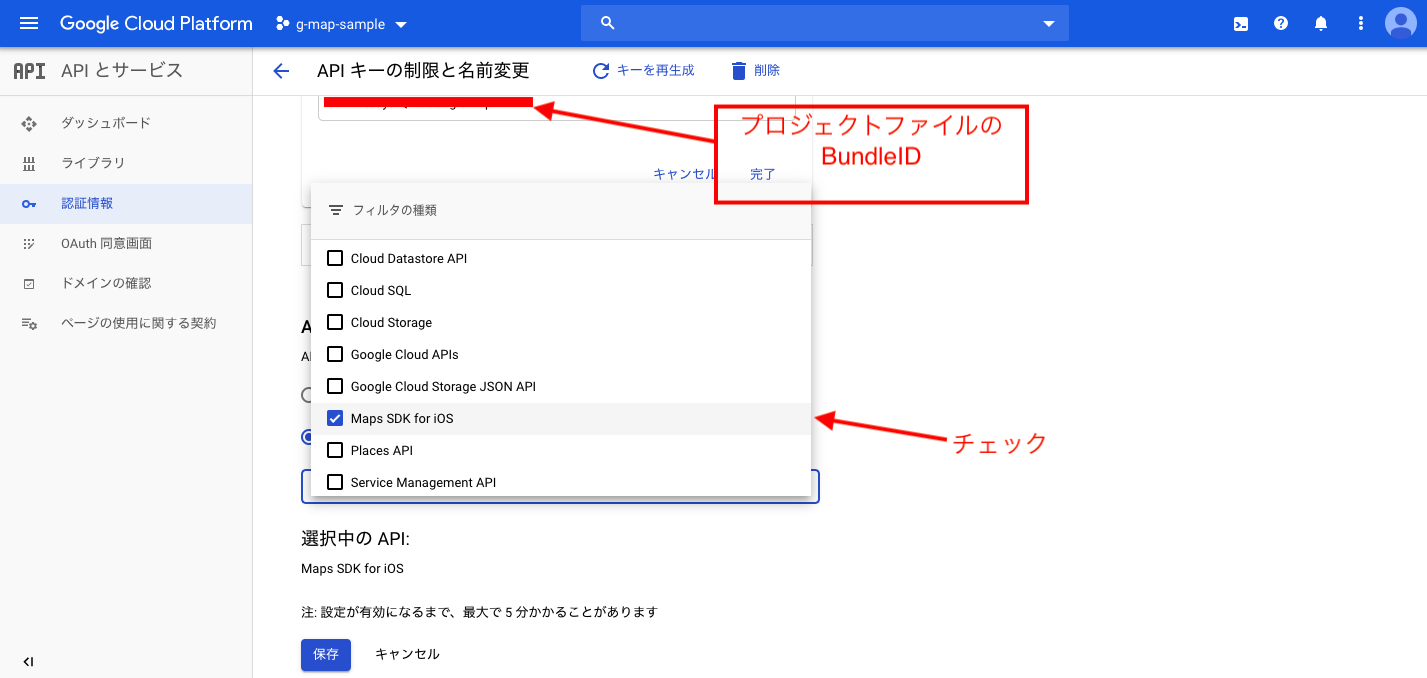
*APIキーは、CloudPlatformのコンソールでこのプロジェクトを選択し、「APIとサービス」→「認証情報」のところにあります。
  func application(_ application: UIApplication, didFinishLaunchingWithOptions launchOptions: [UIApplication.LaunchOptionsKey: Any]?) -> Bool {
        // Override point for customization after application launch.

        GMSServices.provideAPIKey("発行したAPIキー")

        return true
    }
これで、Platform上で作成したものと、このXcodeプロジェクトファイルがひも付きました。
ひとまずGoogleMapを表示してみる
では、実際にMapを表示してみたいと思います。
まずは、自分の現在地を取得する前に、公式ドキュメントのようにMapを表示することを目標にします。以下のコードをViewControllerに記述してください。
import UIKit
import GoogleMaps

class ViewController: UIViewController {

    override func viewDidLoad() {
        super.viewDidLoad()
    }

    override func loadView() {

      //表示するMapの位置と表示の縮小具合
      let camera = GMSCameraPosition.camera(withLatitude: -33.86, longitude: 151.20, zoom: 6.0)
      let mapView = GMSMapView.map(withFrame: CGRect.zero, camera: camera)
      view = mapView

      // 指定した場所にピンを立てる。
      let marker = GMSMarker()
      marker.position = CLLocationCoordinate2D(latitude: -33.86, longitude: 151.20)
      marker.title = "Sydney"
      marker.snippet = "Australia"
      marker.map = mapView
    }

}
コードの内容は、簡単にコメントアウトしたので、参照してください。
上記のコードにより、AustraliaのSydneyにピンが立ったと思います。
現在地にピンを立てる。
では次に、自分の位置をGoogleMapで表示させます。手順としては、
① 自分のiphoneの端末で緯度・軽度を取得する
② それをGoogleMapsのメソッドに引数として挿入する
③ Mapを表示させる
です!
ではまず①から行いましょう!
①を行う際、こちらの記事を参考にしました。🔽
【CoreLocation】位置情報を取得する
注意点としては、位置情報を取得するときユーザーから許可を得るためにInfo.Plistにしっかり記入することです。
この記事を元にすると、現在地の緯度と軽度が取得できます。
取得したものはそれぞれ
  var currentLatitude :Double!
  var currentLongitude :Double!
上記のようにDouble型で定義します。
では次に、②と③を同時にやってしまいます。
位置情報を取得する際に使用した、locationManager(_ manager: CLLocationManager, didUpdateLocations locations: [CLLocation])メソッドの中に、先程のMap表示とピン立てにおいて書いたコードである、GMSCameraPosition.cameraとCLLocationCoordinate2Dの引数である緯度・軽度にそれぞれ取得したものを挿入します。
コードとしては以下です。
  func locationManager(_ manager: CLLocationManager, didUpdateLocations locations: [CLLocation]) {
        let location = locations.first

        currentLatitude = location?.coordinate.latitude
        currentLongitude = location?.coordinate.longitude

        print("latitude: \(currentLatitude!)\nlongitude: \(currentLongitude!)")

        let camera = GMSCameraPosition.camera(withLatitude: currentLatitude, longitude: currentLongitude, zoom: 6.0)
        let mapView = GMSMapView.map(withFrame: CGRect.zero, camera: camera)
        view = mapView


        let marker = GMSMarker()
        marker.position = CLLocationCoordinate2D(latitude: currentLatitude, longitude: currentLongitude)
        marker.map = mapView
    }
これで、自分が今いる現在地がgoogleMap上に表記できたと思います。
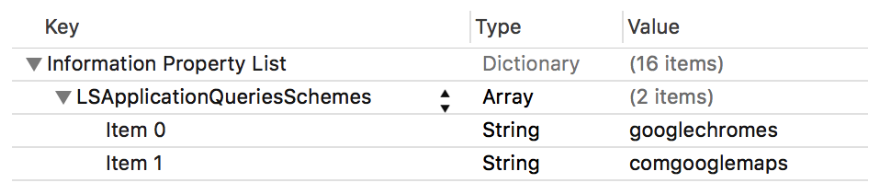
最後に、左下にあるgoogleマークをタップしたとき、GoogleMapに正しく遷移させるために、Info.Plistに以下のようなものを追加しましょう。
(ドキュメント通り)
おわりに
写真の前半部分などは、こちらからの転用です!
【Rails5】RailsでGoogle Map APIの導入
Railsでの使用を考えてる方は、ぜひ!