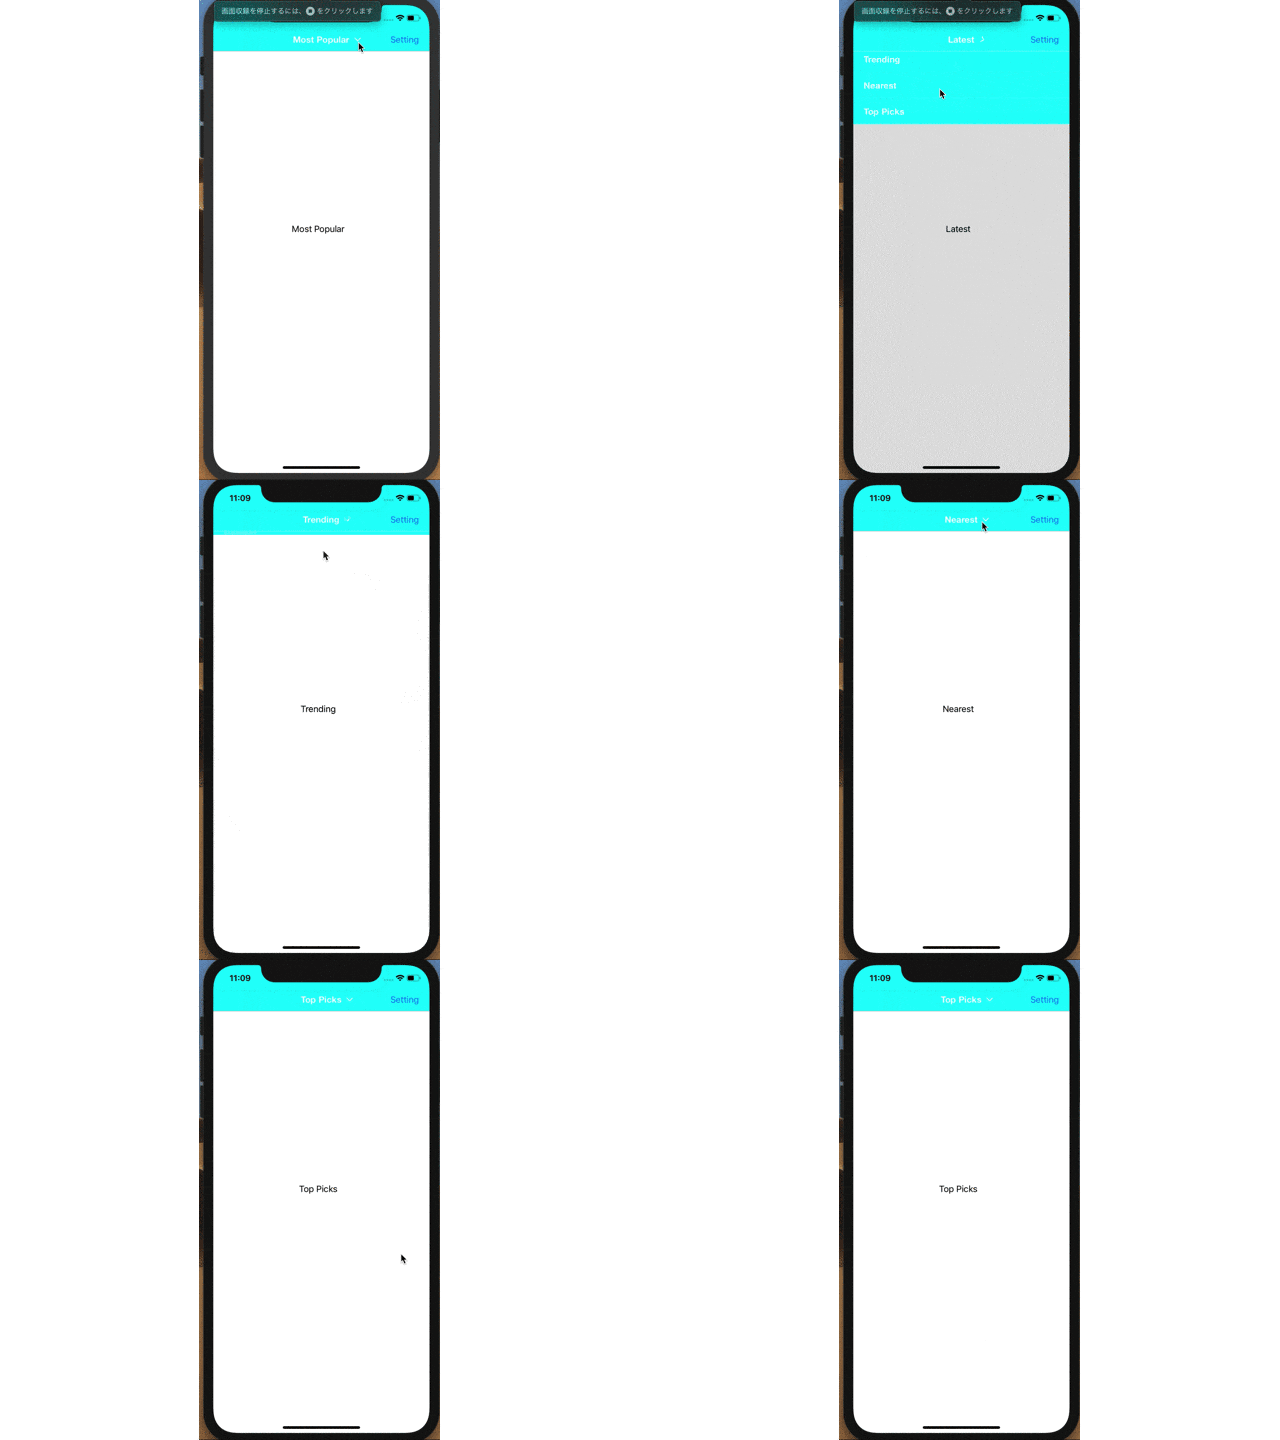
iOSアプリ開発の担当になって、仕事でもプライベートでもやりたかったiOSアプリ開発の勉強ができるようになった。
iPhoneX系の端末が主流になってきて、上側にあるメニューは最近の流れとは反するが、初心者の自分的にはとりあえず動くものを作りながら、作り方を覚えるのが最初だと思ったのでそのあたりのことはとりあえず気にしない。
環境
| バージョン | |
|---|---|
| OS | Mojave 10.14.1 |
| Xcode | 10.1 |
| BTNavigationDropdownMenu | 0.5 |
BTNavigationDropdownMenuの導入
CocoaPodsを使う
pod 'BTNavigationDropdownMenu'
をPodfileに追記。
$ pod install # プロジェクトのある場所で。
BaseViewControllerを作る
メニューって、大体どの画面に遷移しても使うので、共通して使うBaseViewControllerを作る。
Xcode左下にある「+」ボタンから
File > Cocoa Touch Class を選択。(最初Xcode触ってた時はSwift Classを選択して作ってたけど、Cocoa Touch Classの方が、テンプレートで色々書かれた状態で作ってくれるので基本はこれを選択した方が良さげ。)
ファイル名を「BaseViewController」(なんでもいい)に。
継承クラスは「UIViewController」
ファイルの場所を決めて作成。
import UIKit
import BTNavigationDropdownMenu   // ①インポート

class BaseViewController: UIViewController {

    @IBOutlet weak var selectedCellLabel: UILabel!  // 処理確認用ラベル。
    var menuView: BTNavigationDropdownMenu!  // ②menuViewの準備

    override func viewDidLoad() {
        super.viewDidLoad()
        setMenu()    // ④ 下で作成した関数を呼び出し、ドロップダウンメニューを表示させる。
        // Do any additional setup after loading the view.
    }

    // 処理は分けたい派なので関数に分けて、viewDidLoadで呼び出すようにしている。
    /// ③ BTNavigationDropdownMenuをセットする関数
    fileprivate func setMenu() {
        let items = ["Most Popular", "Latest", "Trending", "Nearest", "Top Picks"]

        self.selectedCellLabel.text = items.first
        self.navigationController?.navigationBar.isTranslucent = false
        self.navigationController?.navigationBar.barTintColor = UIColor(red: 0.0/255.0, green:280/255.0, blue:220/225.0, alpha: 1.0)
        self.navigationController?.navigationBar.titleTextAttributes = [NSAttributedString.Key.foregroundColor: UIColor.white]
        menuView = BTNavigationDropdownMenu(navigationController: self.navigationController, containerView: self.navigationController!.view, title: "Dropdown Menu", items: items)
        menuView.didSelectItemAtIndexHandler = {(IndexPath: Int) -> () in
            print("Did select item at index: \(IndexPath)")
            self.selectedCellLabel.text = items[IndexPath]
        }
        self.navigationItem.titleView = menuView
    }

    /*
    // MARK: - Navigation

    // In a storyboard-based application, you will often want to do a little preparation before navigation
    override func prepare(for segue: UIStoryboardSegue, sender: Any?) {
        // Get the new view controller using segue.destination.
        // Pass the selected object to the new view controller.
    }
    */

}
BaseViewControllerを継承させる
SingleViewで最初プロジェクトを作成しているならViewController.swiftファイルがあると思う。
継承するクラスをBaseViewControllerに変える。
import UIKit

class ViewController: BaseViewController {  // UIViewControllerをBaseViewControllerに変える

    override func viewDidLoad() {
        super.viewDidLoad()
    }
}
これでビルドすれば使えるようになるはず。
完成図
こんな感じで出来上がると思う。右上のSettingは関係ないので気にしないでください。
