はじめに
皆さん、ご無沙汰しております。皆さんに忘れられた頃に現れるそれが@Raphael_de_murlです。最後に投稿した記事から3ヶ月ぐらい経ちましたね。新規案件に入り中々時間が取れなくてすみません。(絶対言い訳ではありま...)で!今回投稿したい内容はタイトルの通りGANについて共有して行きたいと思います。本当今更なんですけど流行りが終わった後で紹介するのが私です。では始めます。
GAN(敵対的生成ネットワーク)とは
Wikipedia:Generative adversarial network
A generative adversarial network (GAN) is a class of machine learning systems invented by Ian Goodfellow in 2014. Two neural networks contest with each other in a game (in the sense of game theory, often but not always in the form of a zero-sum game). Given a training set, this technique learns to generate new data with the same statistics as the training set. For example, a GAN trained on photographs can generate new photographs that look at least superficially authentic to human observers, having many realistic characteristics. Though originally proposed as a form of generative model for unsupervised learning, GANs have also proven useful for semi-supervised learning, fully supervised learning, and reinforcement learning. In a 2016 seminar, Yann LeCun described GANs as "the coolest idea in machine learning in the last twenty years".
上記の内容をわかりやすくすると
- GANsは2014年lan goodfellowによって発明された機械学習のクラス。
- ゼロサムゲームの中でお互い競合する2つのニューラールネットワークによって実装される。
- 訓練セットを与えられると、セットと同じ統計を用いて新しいデータの生成を学ぶ。
- GANsは半教師あり学習、完全教師あり学習、強化学習にも有用なことが証明された。
GANは生成モデルの一種で教師なし学習の手法として使われてます。正解データを与えることではなくデータの特徴を用いて実在しない画像を生成したり合成することが出来ます。なのでどう使うかによって汎用性が広いため最近注目されているモデルであります。
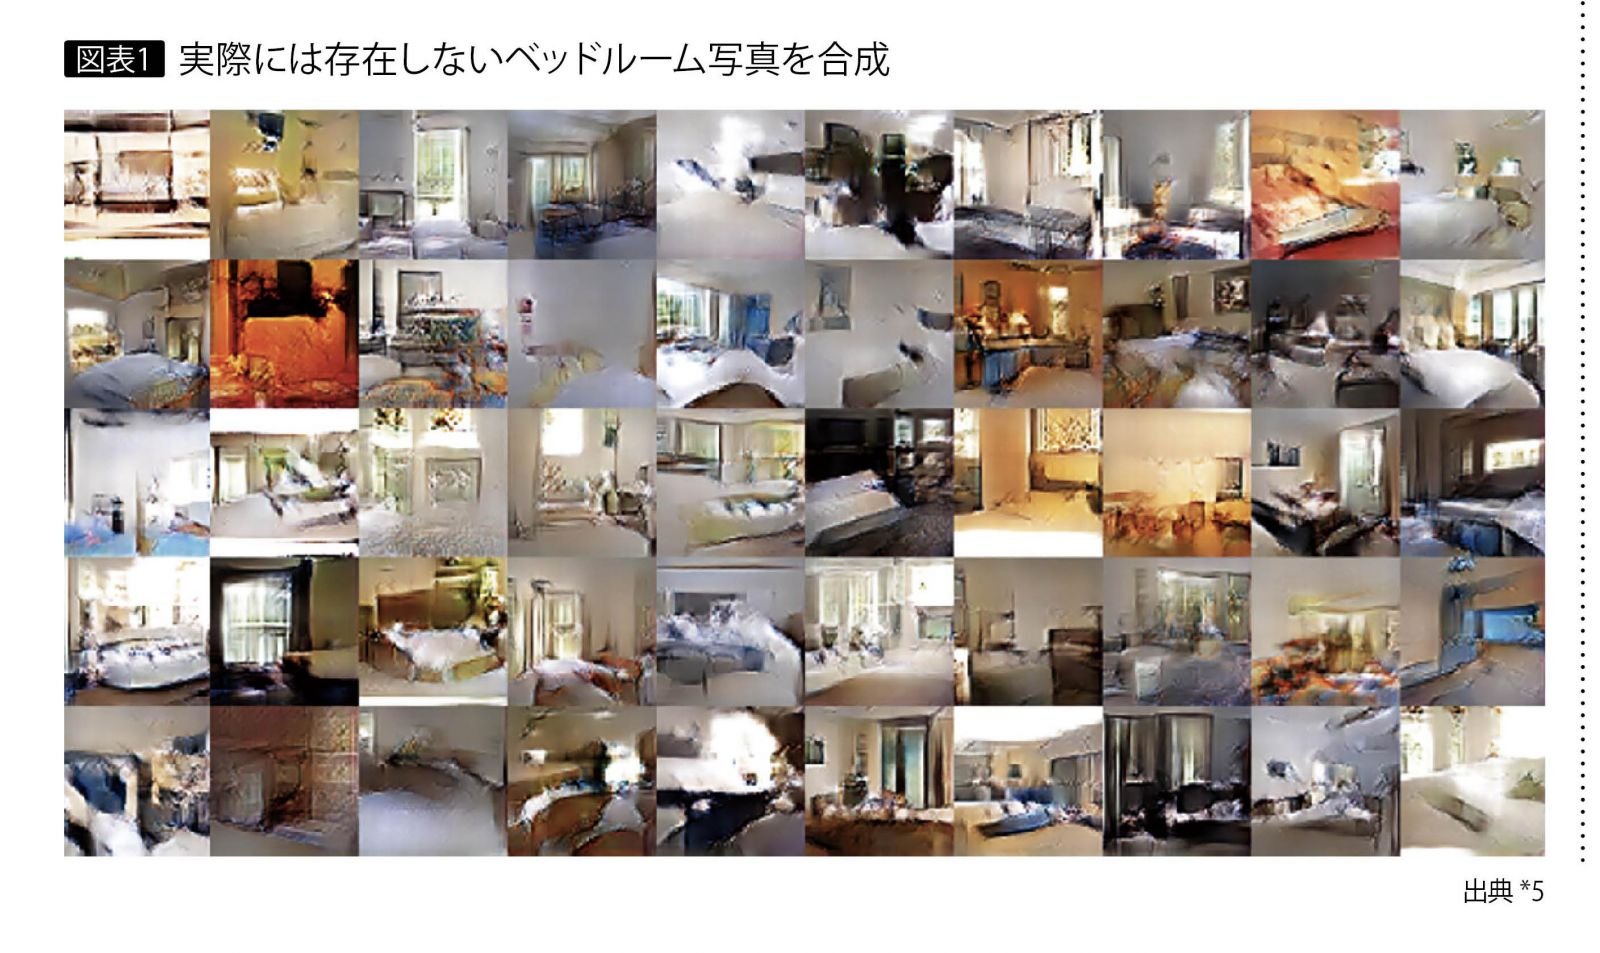
上記のように普通にありそうな部屋の画像のように見えるがこれがGANによって合成された画像です。
GANの仕組み

こちらが基本GANの仕組みになります。理解易くするためにコナンを例として説明します。
GANには2つのネットワークが存在します。Generator Network(生成機)は訓練データと同じようなデータを生成します。これを犯人にします。そしてもう一つのDiscriminator Network(識別機)は対処のデータが訓練データ(Real Images)から来たデータか犯人(生成機)から生成された画像(Fake Images)かを識別します。これを警察側にします。
まず犯人(生成機)はノイズを入力として偽の札束(Fake Images)を生成します。そうしたら警察(識別機)は訓練データ(Real Images)と見比べて本当の札束なのかを識別(学習)します。そうやって識別ができて能力が上がると犯人の精度は下がります。
そうやって犯行に失敗した犯人はもう一回そっくりの札束を作ります。それで警察の識別がうまくできなければ犯行は成功になります。GeneratoreとDiscriminatorはこれを繰り返して学習を行います。結果Discriminatorの精度はどんどん下がり、Generatorの精度はどんどん上がって訓練データと同じようなデータの生成が期待されます。
これを数式に表現すると以下となります。
- D:Discriminator(弁別機)
- G:Generator(生成機)
- x:Real Images(訓練データ)
- z:noise
Gはzを入力としてデータを生成します。D(x)はGによって生成されたデータが訓練データである確率を表します。Dは訓練データと生成データに対して正しくラベル付けを行う確率を最大化しようとします。一方、Gはlog(1−D(G(z)))を最小化しようとします。これらをまとめて以下のように表現します。

結果Dがうまく分類できるようになると、D(x)が大きくなり、logD(x)が大きくなります。また、偽物だとばれてD(G(z))は小さくなるため、log(1−D(G(z)))は大きくなります。一方、Gが訓練データに似ているものを生成できるようになると、Dがうまく分類できなくなるためD(G(z))は大きくなり、log(1−D(G(z)))は小さくなるという構造になっています。
GANの学習
投稿予定(今頑張って理解している中です。)
GANの基本構造
from __future__ import print_function, division

from keras.datasets import mnist
from keras.layers import Input, Dense, Reshape, Flatten, Dropout
from keras.layers import BatchNormalization, Activation, ZeroPadding2D
from keras.layers.advanced_activations import LeakyReLU
from keras.layers.convolutional import UpSampling2D, Conv2D
from keras.models import Sequential, Model
from keras.optimizers import Adam

import matplotlib.pyplot as plt

import sys

import numpy as np

class GAN():
    def __init__(self):
        self.img_rows = 28
        self.img_cols = 28
        self.channels = 1
        self.img_shape = (self.img_rows, self.img_cols, self.channels)
        self.latent_dim = 100

        optimizer = Adam(0.0002, 0.5)

        # Build and compile the discriminator
        self.discriminator = self.build_discriminator()
        self.discriminator.compile(loss='binary_crossentropy',
            optimizer=optimizer,
            metrics=['accuracy'])

        # Build the generator
        self.generator = self.build_generator()

        # The generator takes noise as input and generates imgs
        z = Input(shape=(self.latent_dim,))
        img = self.generator(z)

        # For the combined model we will only train the generator
        self.discriminator.trainable = False

        # The discriminator takes generated images as input and determines validity
        validity = self.discriminator(img)

        # The combined model  (stacked generator and discriminator)
        # Trains the generator to fool the discriminator
        self.combined = Model(z, validity)
        self.combined.compile(loss='binary_crossentropy', optimizer=optimizer)


    def build_generator(self):

        model = Sequential()

        model.add(Dense(256, input_dim=self.latent_dim))
        model.add(LeakyReLU(alpha=0.2))
        model.add(BatchNormalization(momentum=0.8))
        model.add(Dense(512))
        model.add(LeakyReLU(alpha=0.2))
        model.add(BatchNormalization(momentum=0.8))
        model.add(Dense(1024))
        model.add(LeakyReLU(alpha=0.2))
        model.add(BatchNormalization(momentum=0.8))
        model.add(Dense(np.prod(self.img_shape), activation='tanh'))
        model.add(Reshape(self.img_shape))

        model.summary()

        noise = Input(shape=(self.latent_dim,))
        img = model(noise)

        return Model(noise, img)

    def build_discriminator(self):

        model = Sequential()

        model.add(Flatten(input_shape=self.img_shape))
        model.add(Dense(512))
        model.add(LeakyReLU(alpha=0.2))
        model.add(Dense(256))
        model.add(LeakyReLU(alpha=0.2))
        model.add(Dense(1, activation='sigmoid'))
        model.summary()

        img = Input(shape=self.img_shape)
        validity = model(img)

        return Model(img, validity)

    def train(self, epochs, batch_size=128, sample_interval=50):

        # Load the dataset
        (X_train, _), (_, _) = mnist.load_data()

        # Rescale -1 to 1
        X_train = X_train / 127.5 - 1.
        X_train = np.expand_dims(X_train, axis=3)

        # Adversarial ground truths
        valid = np.ones((batch_size, 1))
        fake = np.zeros((batch_size, 1))

        for epoch in range(epochs):

            # ---------------------
            #  Train Discriminator
            # ---------------------

            # Select a random batch of images
            idx = np.random.randint(0, X_train.shape[0], batch_size)
            imgs = X_train[idx]

            noise = np.random.normal(0, 1, (batch_size, self.latent_dim))

            # Generate a batch of new images
            gen_imgs = self.generator.predict(noise)

            # Train the discriminator
            d_loss_real = self.discriminator.train_on_batch(imgs, valid)
            d_loss_fake = self.discriminator.train_on_batch(gen_imgs, fake)
            d_loss = 0.5 * np.add(d_loss_real, d_loss_fake)

            # ---------------------
            #  Train Generator
            # ---------------------

            noise = np.random.normal(0, 1, (batch_size, self.latent_dim))

            # Train the generator (to have the discriminator label samples as valid)
            g_loss = self.combined.train_on_batch(noise, valid)

            # Plot the progress
            print ("%d [D loss: %f, acc.: %.2f%%] [G loss: %f]" % (epoch, d_loss[0], 100*d_loss[1], g_loss))

            # If at save interval => save generated image samples
            if epoch % sample_interval == 0:
                self.sample_images(epoch)

    def sample_images(self, epoch):
        r, c = 5, 5
        noise = np.random.normal(0, 1, (r * c, self.latent_dim))
        gen_imgs = self.generator.predict(noise)

        # Rescale images 0 - 1
        gen_imgs = 0.5 * gen_imgs + 0.5

        fig, axs = plt.subplots(r, c)
        cnt = 0
        for i in range(r):
            for j in range(c):
                axs[i,j].imshow(gen_imgs[cnt, :,:,0], cmap='gray')
                axs[i,j].axis('off')
                cnt += 1
        fig.savefig("images/%d.png" % epoch)
        plt.close()


if __name__ == '__main__':
    gan = GAN()
    gan.train(epochs=30000, batch_size=32, sample_interval=200)
こちらのコードはMNISTのデータを利用しているので基本的な設定はほとんと変わらないと思います。ただし今回はGANの学習ということで変数にはgeneratorとdiscriminatorとnoizeが必要となります。変数の定義が終わったら次にbuild_generatorを定義します。generatorではnoizeを入力としてnoizeとimageを返します。次にbuild_discriminatorでは入力としてMNISTを利用し、シグモイド関数により0,1を返します。
まとめに
あくまでも私が勉強している中でメモしながら投稿しているので内容が足りないかもしれません。でもわかる次第次々アップデートしますので少しでも皆さんにお役に立つと幸いです。ちなみにGANの学習パートは近いうちに記載するので少々お待ち下さい。