動作環境
本記事の動作環境は以下の通りです。
| 項目 | 環境 |
|---|---|
| OS | Windows 10 |
| Blender | 2.82 |
できるもの
以下のような雨。マテリアル設定を変えたり、背景をつければもっと3Dっぽくなる。
ワークフロー
雨を降らすためにパーティクルシステムを使用する。
ワークフローは以下のとおり。
- パーティクルを放出するメッシュオブジェクトを作成
- パーティクルシステムを設定
- パーティクルで放出するオブジェクトを作成
- パーティクルシステムにオブジェクトを設定
パーティクルシステムとは
メッシュオブジェクトからアイテムを放出してくれるシステム。
パーティクルを放出するメッシュオブジェクトを作成
shift + a でメッシュ>平面を追加
パーティクルシステムを設定
追加したメッシュオブジェクトにパーティクルプロパティからパーティクルシステムを追加。

パーティクルで放出するオブジェクトを作成
今回は以下の手順で雨粒を作成。
-
shift + a >メッシュ > ico球でいこsぺれを追加
-
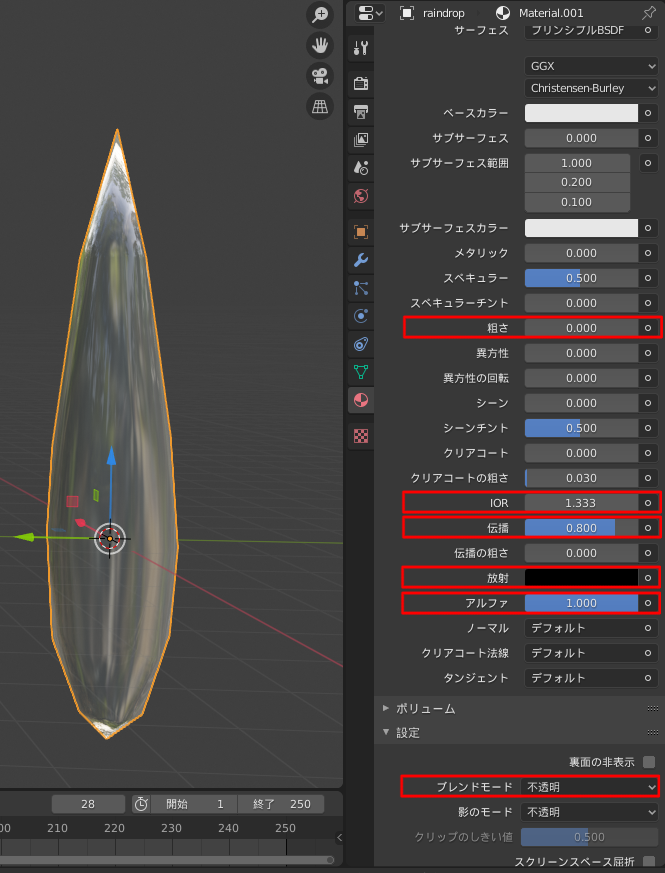
マテリアルを割り当て(プリンシプルBSDFで設定は以下の通り)
- 粗さ:0
- IOR:1.333 ※水の屈折率
- 伝播:0.8
- 放射:濃いめのグレー(任意)
- アルファ:0.7(任意)
- 設定:アルファハッシュ(任意)
背景が暗い場合に放射以下の設定をするとレンダリングしたときに雨粒が見やすい。
今回は採用。
パーティクルシステムにオブジェクトを設定
以下の手順でパーティクルシステムにオブジェクトを設定。
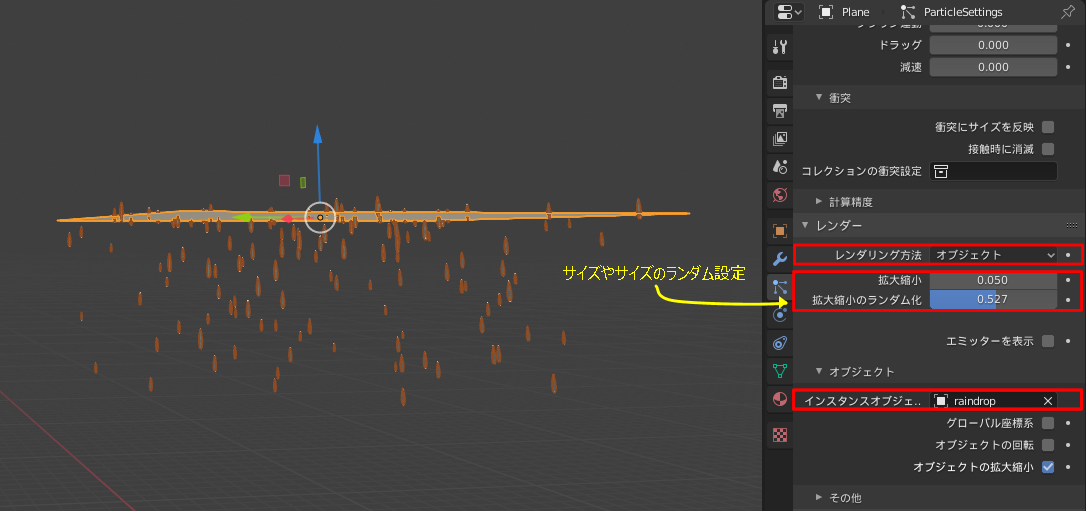
- パーティクルプロパティ>レンダー>レンダリング方法をオブジェクトに設定
- インスタンスオブジェクトに作成したオブジェクトを設定
- 適宜オブジェクトのサイズやランダム化を変更
また、必要に応じて放射の項目を変更する。
完成!
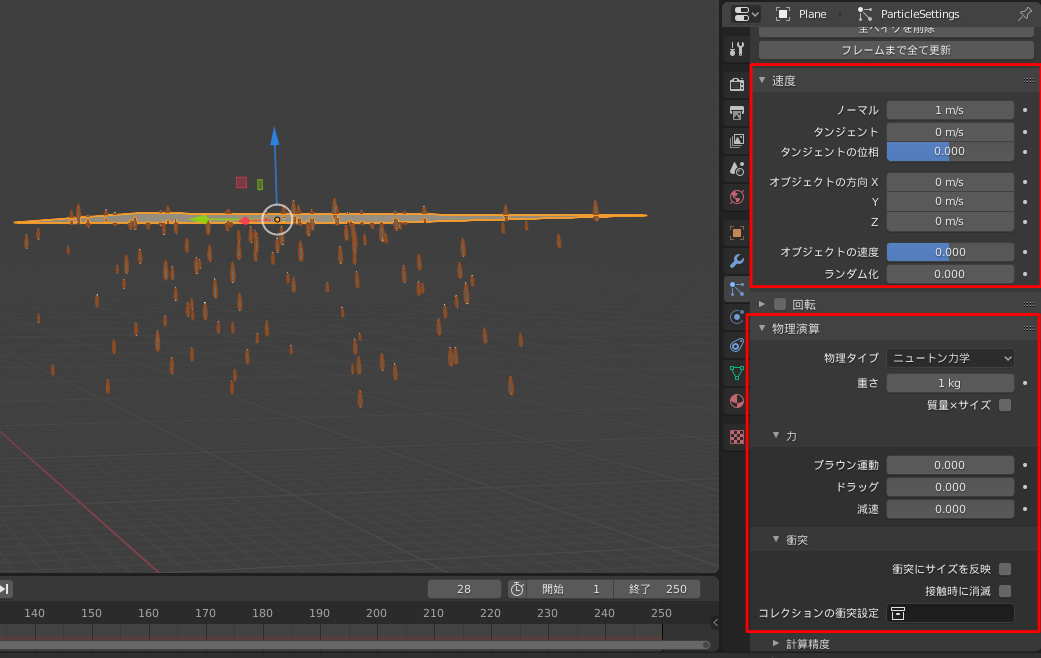
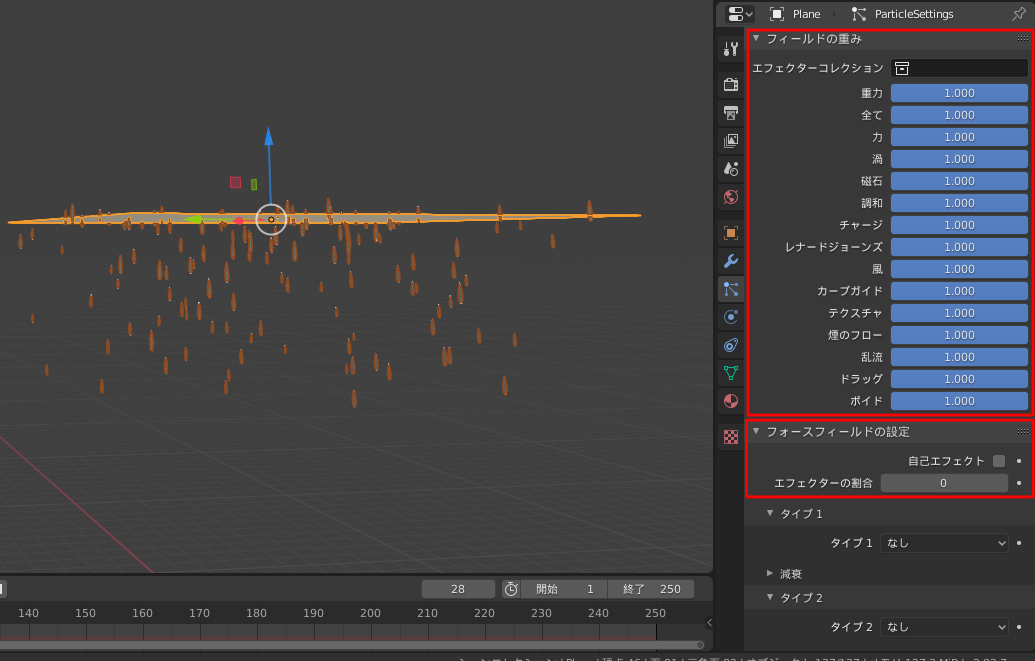
+αの設定項目
参考サイト
以下、パーティクルに関するBlender 2.8の公式サイト
https://docs.blender.org/manual/ja/2.82/physics/particles/index.html
あとがき
雨の作り方の備忘録として。


