前書き
初心者向けに自分なりの言葉で柔らかく書いたつもりです。非エンジニアですが、メモ目的とアウトプットの恩恵のために記事にしました。間違っているところなどありましたら、コメントをください。
あとコードにコメントが多く視認性が悪いかもしれません。そこは申し訳なく…
stripe実装
アカウント作成
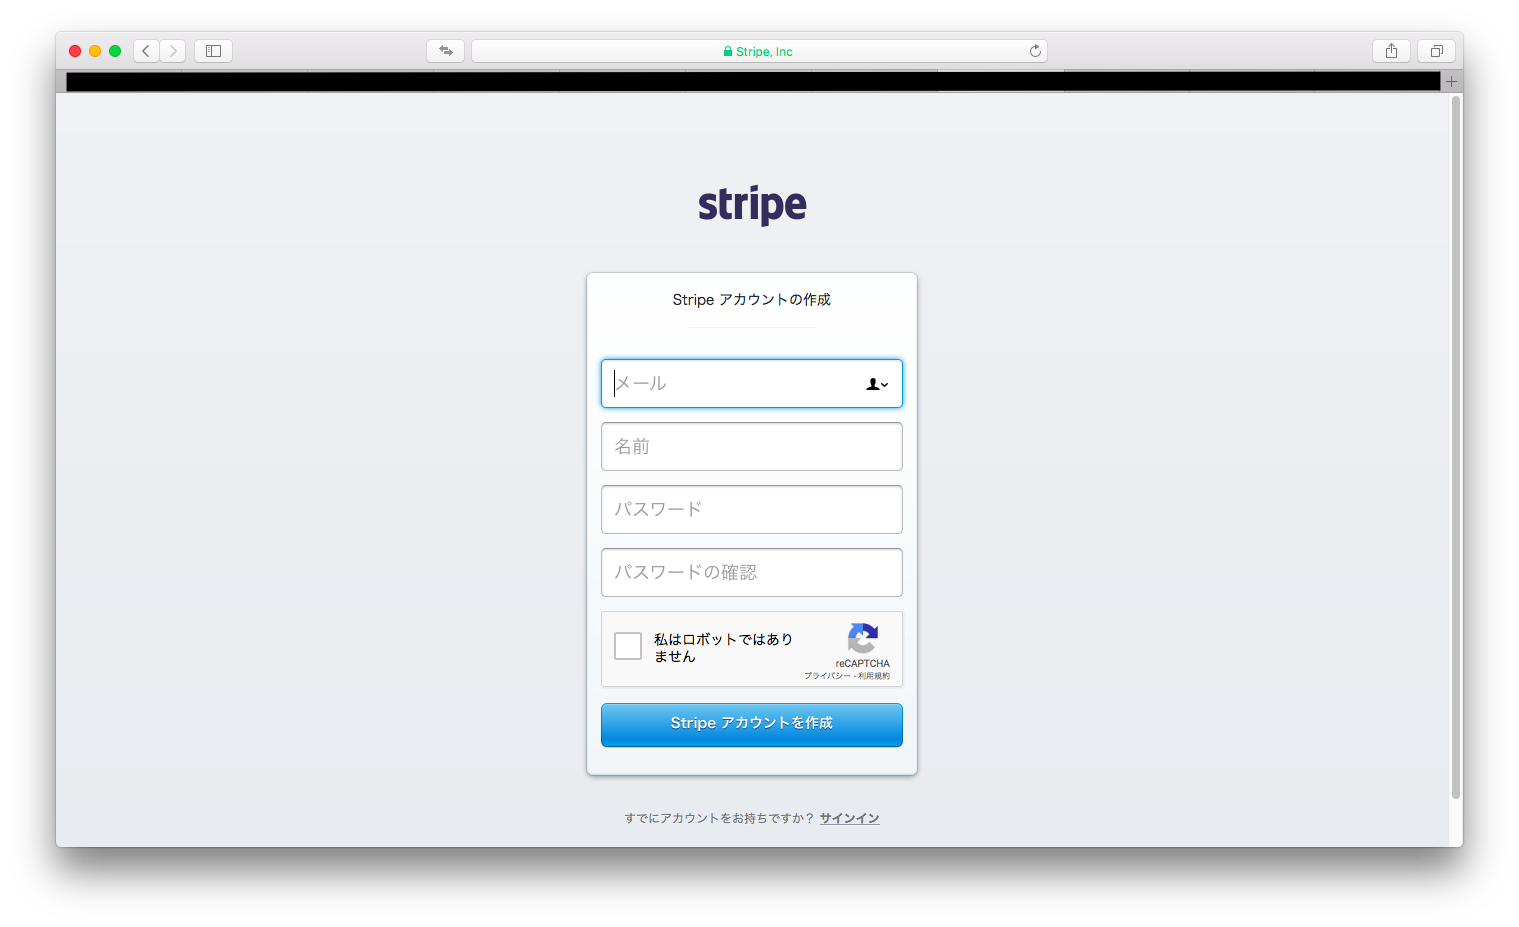
stripeダッシュボードログイン
メールアドレスと名前、パスワードですぐにアカウントを作成できる。

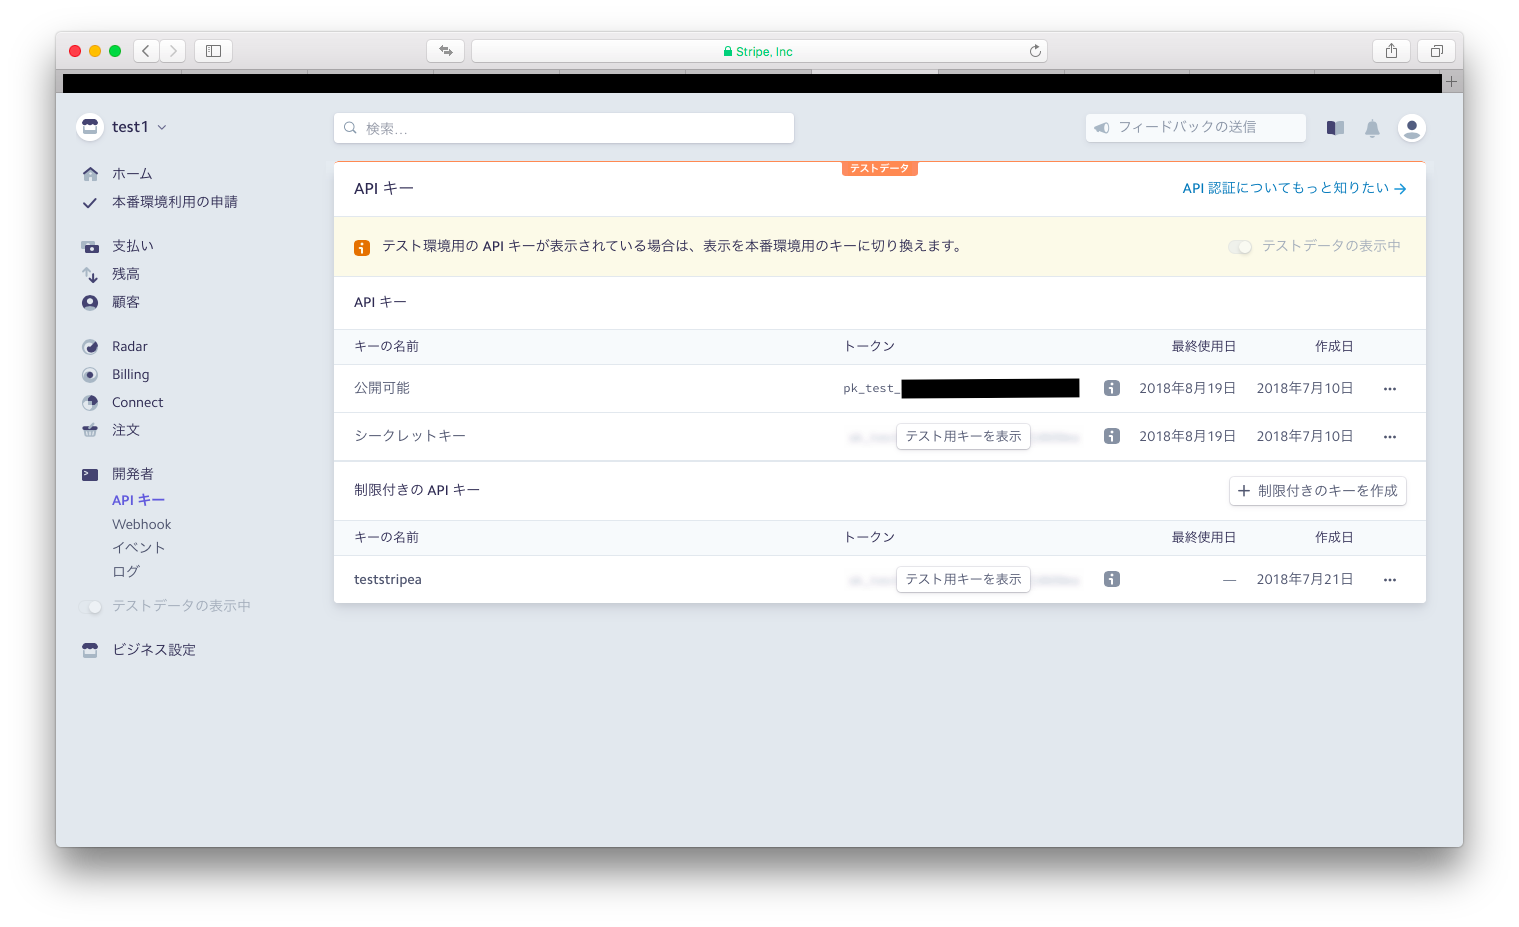
公開可能キー、シークレットキーの取得
開発者、APIキー、から公開可能キー、シークレットキーを取得しておく。
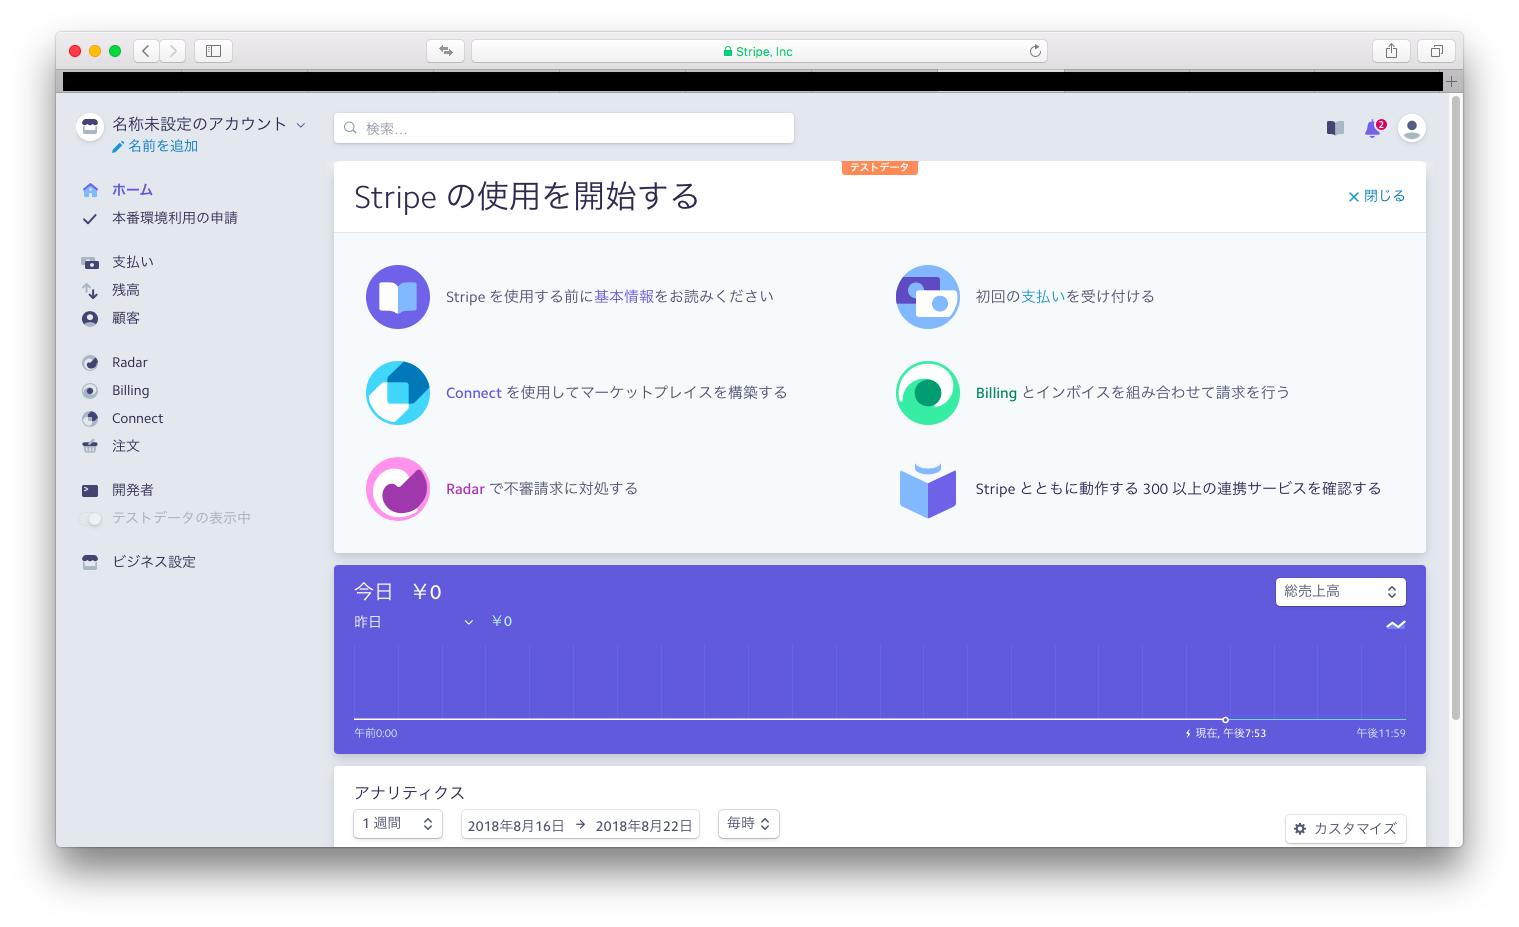
stripe実装のアプリはダッシュボードを主軸として考えて管理していくと理解しやすくわかりやすいと思った。
つまりRailsからの通信の記録を、このダッシュボードに記録として刻んでいく作業。
だからこそダッシュボードのどこに何の記録を刻み残してあるのかを掴んでおくと、理解がスムーズに進むと思う。
前提知識としてRailsからの通信でStripe側(ダッシュボード)に刻むべき記録とは何か?と、大凡の画面一覧を見ようと思う。
Railsからの通信でStripe側(ダッシュボード)に刻むべき記録
- Plan(商品を売るための計画情報)
- Product(商品情報)
- email(メールアドレス) + stripe token(カード情報) = Customer(顧客情報)
- Plan + Customer = Subscription(定期支払い情報)
Product(商品情報)
Productの中にはname、typeを入れる
product = Stripe::Product.create({
    name: '商品の名前',# 商品の名前
    type: 'service',# タイプserviceとgoodがあるそうな
})
Stripe::Product.createとすることで、gemのStripeライブラリーが内部的にStripe側(ダッシュボード)に通信してProduct情報を記録してくれる
Plan(商品を売るための計画情報)
Planの中にはproduct、nickname、amount、currency、intervalを入れる。
または
Planの中にproduct(の中にname)、amount、currency、intervalを入れる
# Productを作成する場合(商品を複数持っている場合)

plan = Stripe::Plan.create({
  product: 'prod_CbvTFuXWh7BPJH',# Productを作る場合はIDを指定する
  nickname: 'プランの名前',# 名前
  amount: 1000,# 値段
  currency: 'jpy',# 通貨
  interval: 'month',# 月額課金
})


# Productを作成しない場合(商品を複数持っていない場合)

plan = Stripe::Plan.create(
  # productを作らずにnameだけでPlanを作る場合のやり方
  :product => {
    :name => ‘プランの名前’# 名前
  },
  :amount => 1000,# 値段
  :currency => 'jpy',# 通貨
  :interval => 'month',# 月額課金
  # :usage_type='licensed', #Subscription開始時に請求を開始するタイプ(即時決済)(前払い性)
  # これがなくてもデフォルトで'licensed'になるっぽいので記述していない。
  # 'Metered'は各期間の終わりにその期間分を請求することができる。利用料に応じて請求できるタイプ
)
Stripe::Plan.createとすることで、gemのStripeライブラリーが内部的にStripe側(ダッシュボード)に通信してPlan情報を記録してくれる
stripe token(カード情報)
カード番号を送信してstripe tokenを取得する
そのためのフォームをstripe公式ホームページからコピペしてきてviewに貼り付ける
カードエレメントクイックスタート
<script src="https://js.stripe.com/v3/"></script>

<form action="/charge" method="post" id="payment-form">
  <div class="form-row">
    <label for="card-element">
      Credit or debit card
    </label>
    <div id="card-element">
      <!-- A Stripe Element will be inserted here. -->
    </div>

    <!-- Used to display form errors. -->
    <div id="card-errors" role="alert"></div>
  </div>

  <button>Submit Payment</button>
</form>


<%# ******************************************************* %>
<%# ボタン %>
<script type="text/javascript">
  // Create a Stripe client.
  var stripe = Stripe('<%= publishable_key %>');

  // Create an instance of Elements.
  var elements = stripe.elements();

  // Custom styling can be passed to options when creating an Element.
  // (Note that this demo uses a wider set of styles than the guide below.)
  var style = {
    base: {
      color: '#32325d',
      lineHeight: '18px',
      fontFamily: '"Helvetica Neue", Helvetica, sans-serif',
      fontSmoothing: 'antialiased',
      fontSize: '16px',
      '::placeholder': {
        color: '#aab7c4'
      }
    },
    invalid: {
      color: '#fa755a',
      iconColor: '#fa755a'
    }
  };

  // Create an instance of the card Element.
  var card = elements.create('card', {style: style});

  // Add an instance of the card Element into the `card-element` <div>.
  card.mount('#card-element');

  // Handle real-time validation errors from the card Element.
  card.addEventListener('change', function(event) {
    // フォームのエラー表示部分を取り出す
    var displayError = document.getElementById('card-errors');
    if (event.error) {
      // エラー文を直接表示
      displayError.textContent = event.error.message;
    } else {
      // エラー文を好きな文字で表示
      displayError.textContent = '';
    }
  });

  // Handle form submission.
  // 上のフォームを取り出す
  var form = document.getElementById('payment-form');

  // submitイベントが働いた時の動き
  form.addEventListener('submit', function(event) {
    event.preventDefault();

    // ストライプトークンを作成
    stripe.createToken(card).then(function(result) {
      // エラーの場合
      if (result.error) {
        // Inform the user if there was an error.
        // フォームのエラー表示部分を取り出す
        var errorElement = document.getElementById('card-errors');
        // エラー文を直接表示
        errorElement.textContent = result.error.message;
      } else {

        // Send the token to your server.
        //カード情報
        stripeTokenHandler(result.token);

      }
    });
  });
</script>

<%# ******************************************************* %>


<%# ******************************************************* %>
<%# stripeTokenHandler(token)関数 %>
<script type="text/javascript">
  function stripeTokenHandler(token) {
    // Insert the token ID into the form so it gets submitted to the server
    // 上のフォームを取り出す
    var form = document.getElementById('payment-form');
    var hiddenInput = document.createElement('input');
    hiddenInput.setAttribute('type', 'hidden');
    hiddenInput.setAttribute('name', 'stripeToken');
    hiddenInput.setAttribute('value', token.id);
    // フォームにトークンを挿入
    form.appendChild(hiddenInput);

    // Submit the form
    // フォームを送信
    form.submit();

  }
</script>
<%# ******************************************************* %>
email + stripe token = Customer(顧客情報)
Customerにはemail、source(stripe token)を入れる
customer = Stripe::Customer.create({
    email: 'stripestripe@gmail.com',# メールアドレス
    source: 'tok_18eYalAHEMiOZZp1l9ZTjSU0',# stripe token
})
Stripe::Customer.createとすることで、gemのStripeライブラリーが内部的にStripe側(ダッシュボード)に通信してCustomer情報を記録してくれる
Plan + Customer = Subscription(定期支払い情報)
Subscriptionにはcustomer、items(の中にplan)を入れる
subscription = Stripe::Subscription.create({
    customer: 'cus_4fdAW5ftNQow1a',# CustomerID
    items: [{plan: 'plan_CBXbz9i7AIOTzr'}],# PlanID
})
Stripe::Subscription.createとすることで、gemのStripeライブラリーが内部的にStripe側(ダッシュボード)に通信してSubscription情報を記録してくれる
これらのパラメータを当てはめる事によって、Stripeに記録を刻むことができる
ダッシュボード画面一覧
ホーム画面
開発中は特に注意して見ることもないと思う
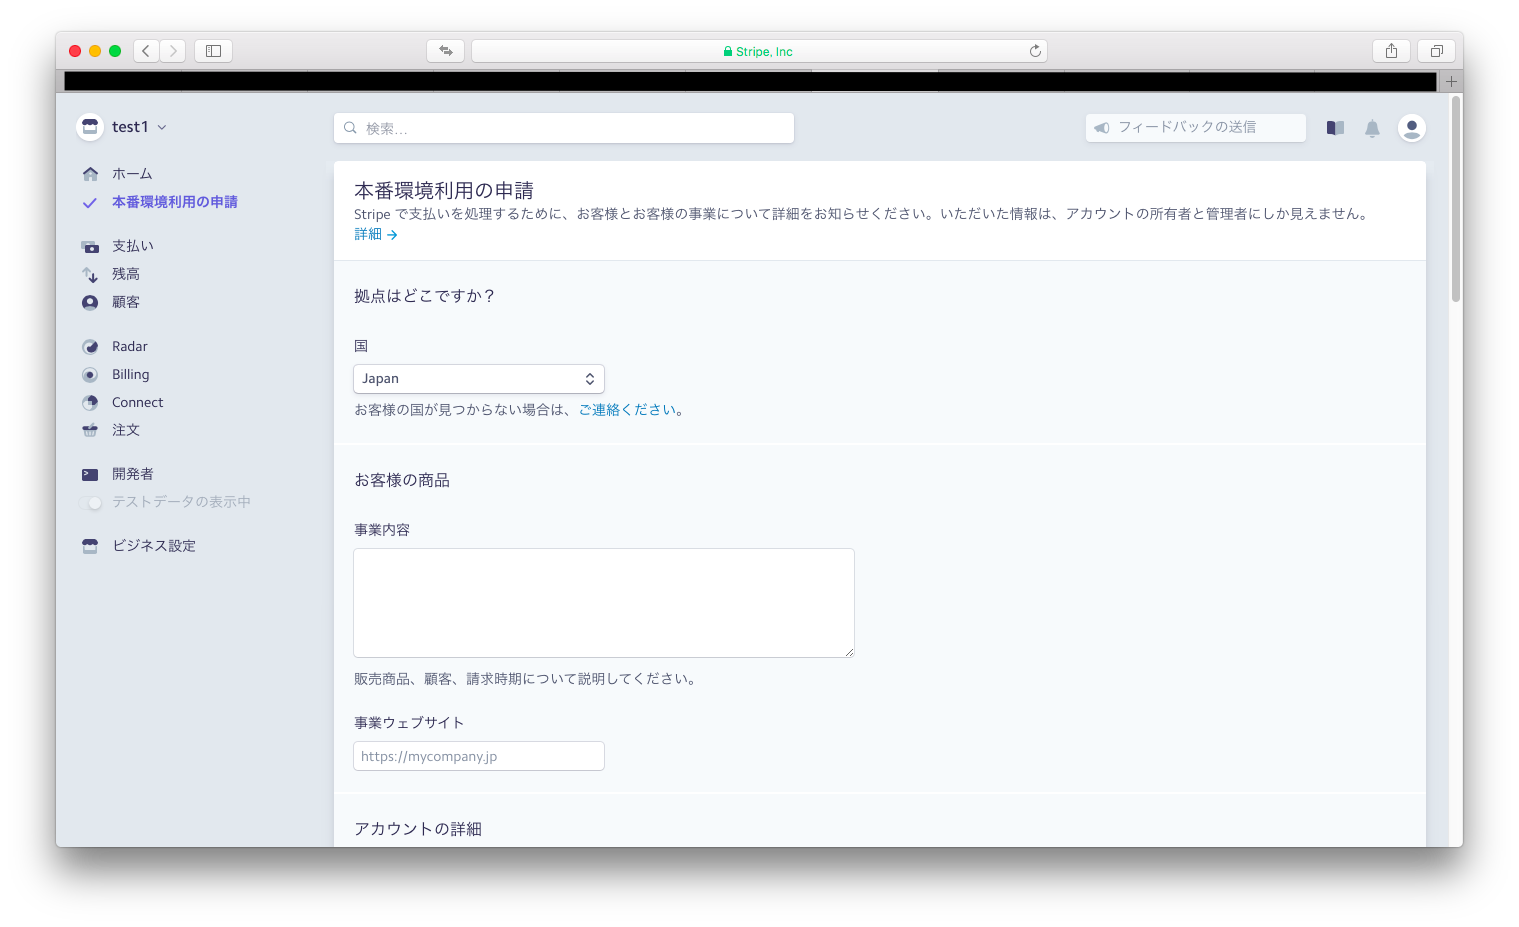
本番環境利用の申請画面
アカウント登録した時点でのテスト環境では、この画面が現れている状態
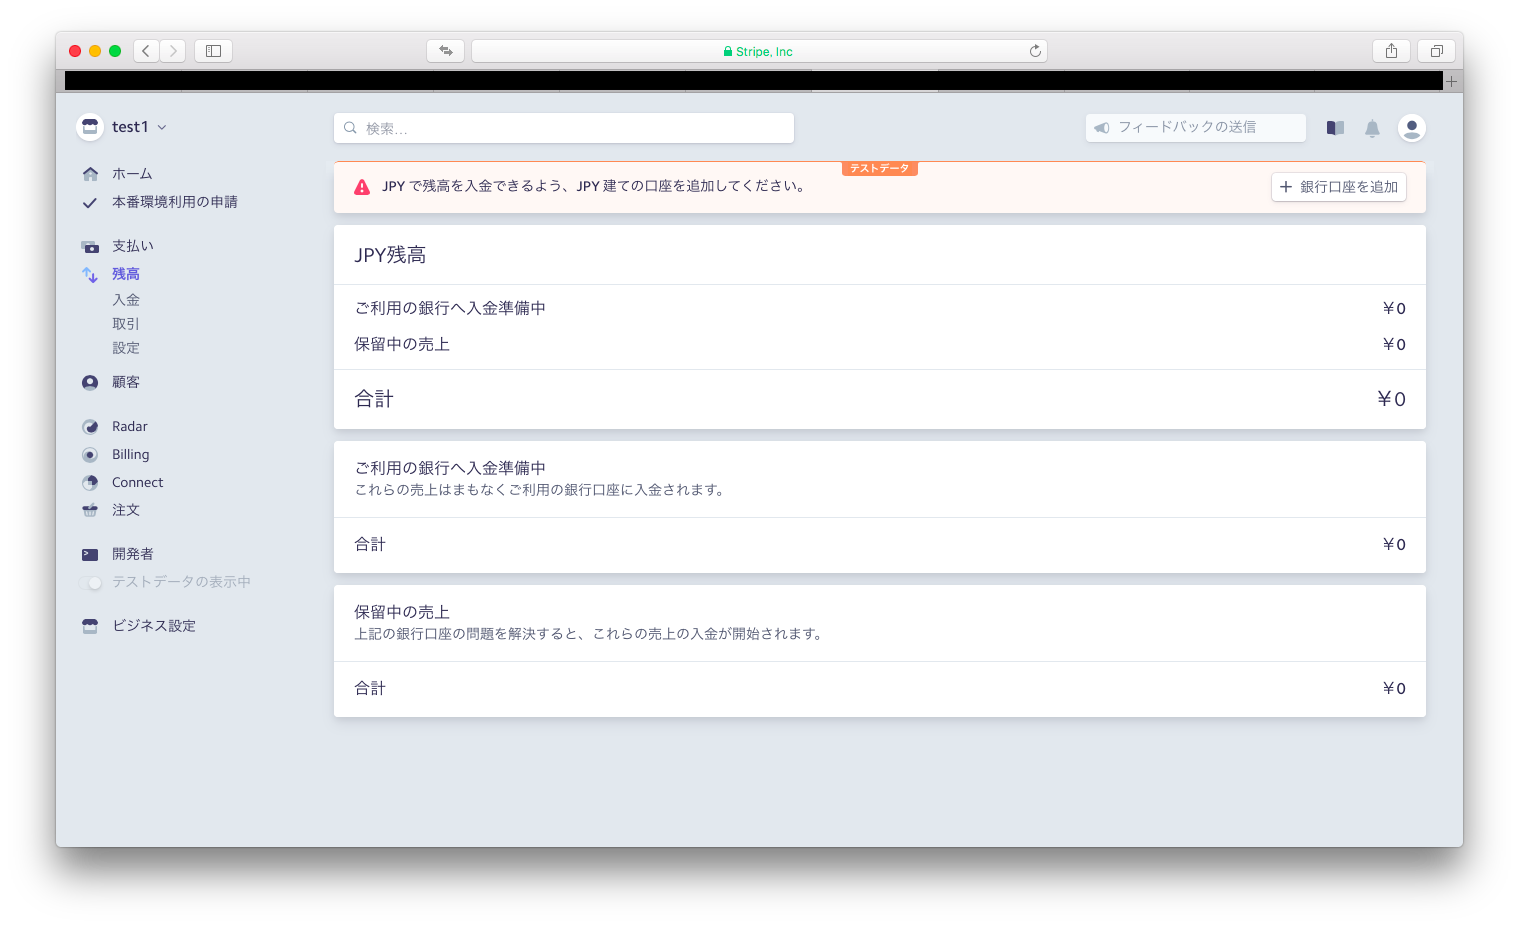
残高画面
顧客から支払ってもらった対価を銀行へ自動入金するスケジュールを設定したりする
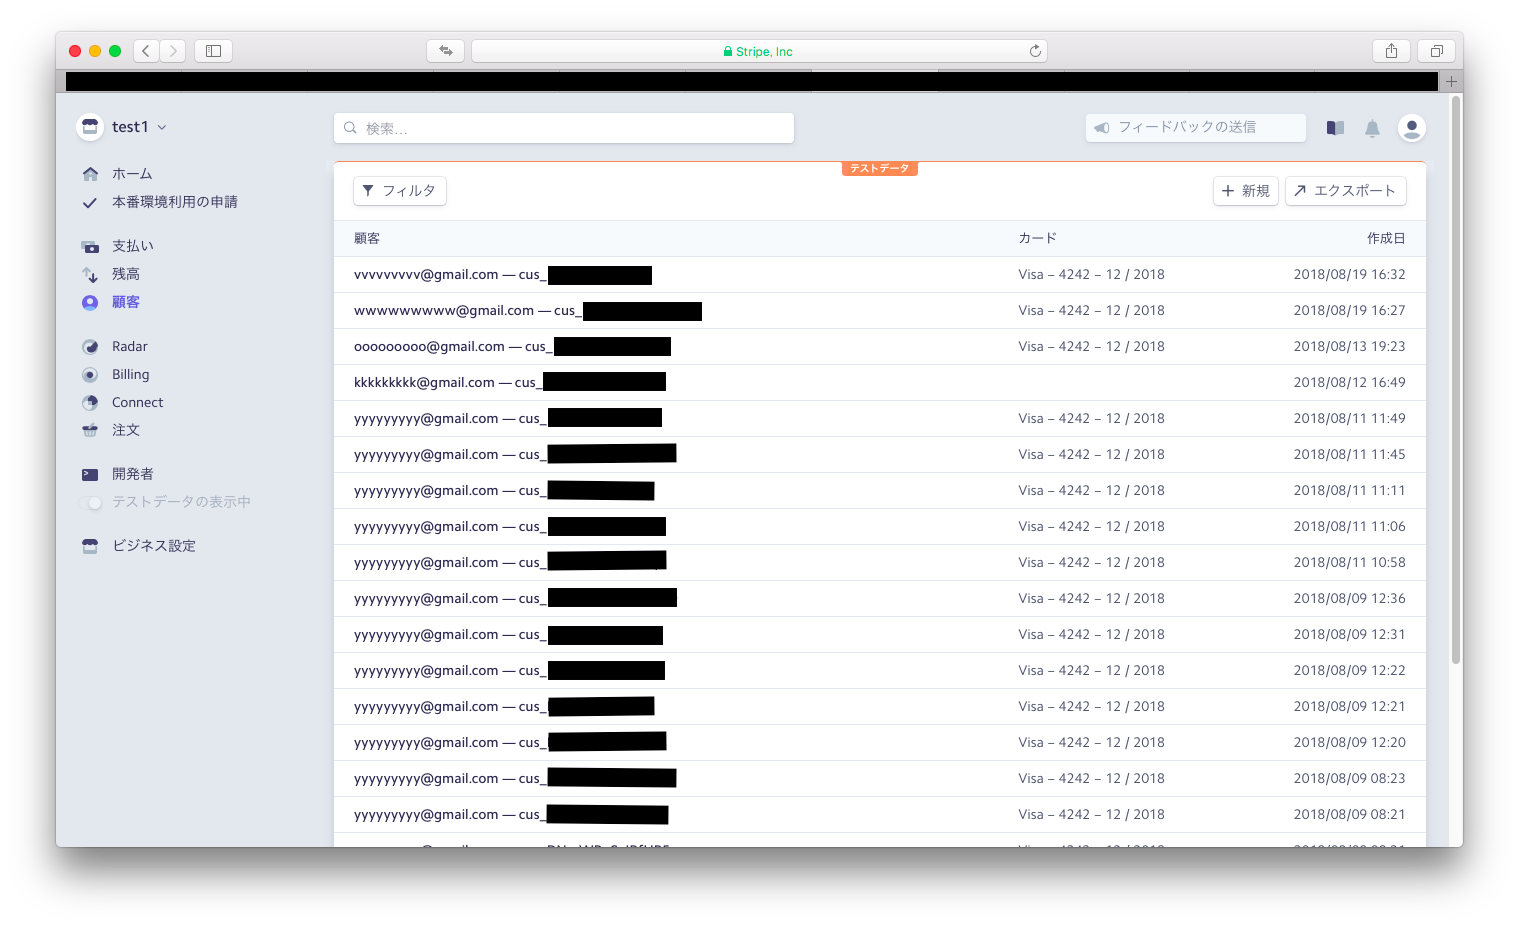
顧客(Custmer)の管理をする画面
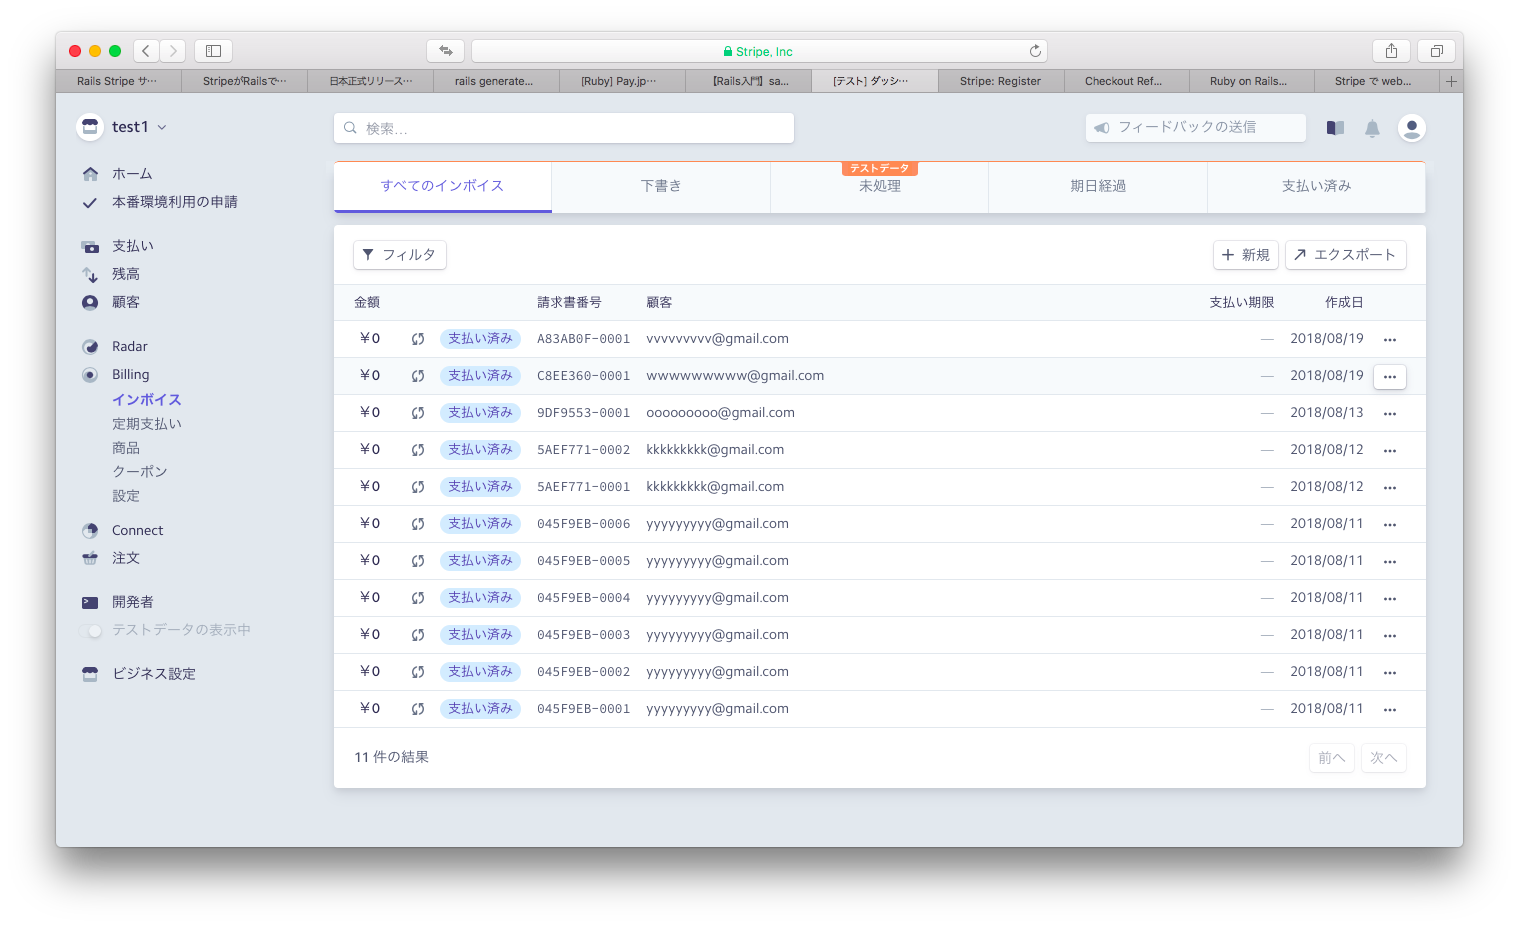
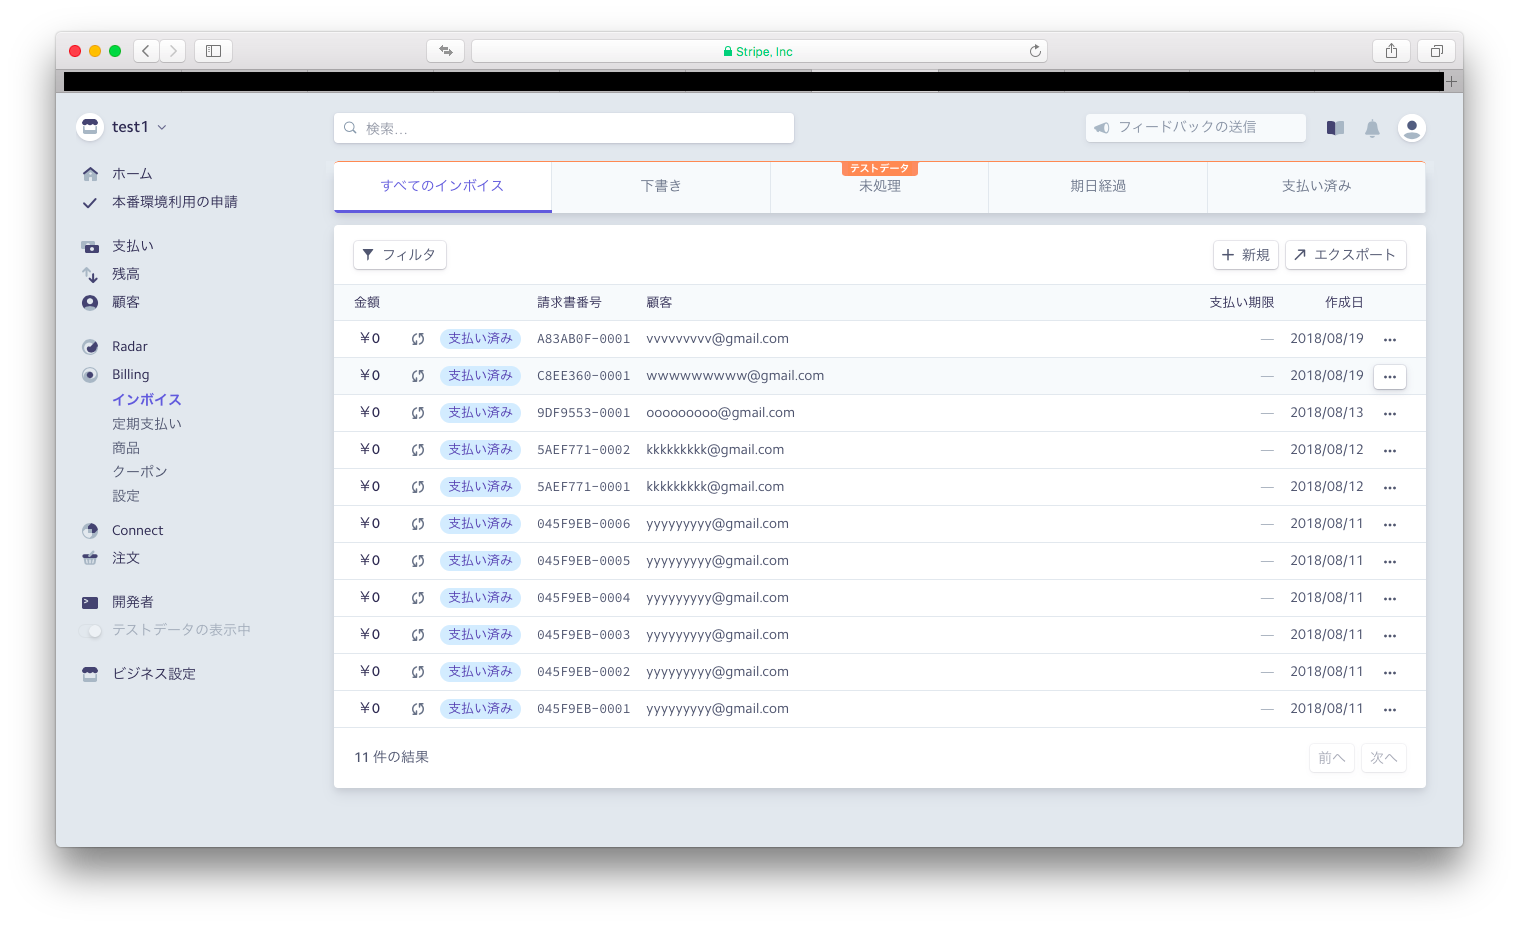
Billing内、請求書(Invoice)を管理する画面
Billing内、月額課金(定期支払いSubscription)を管理する画面
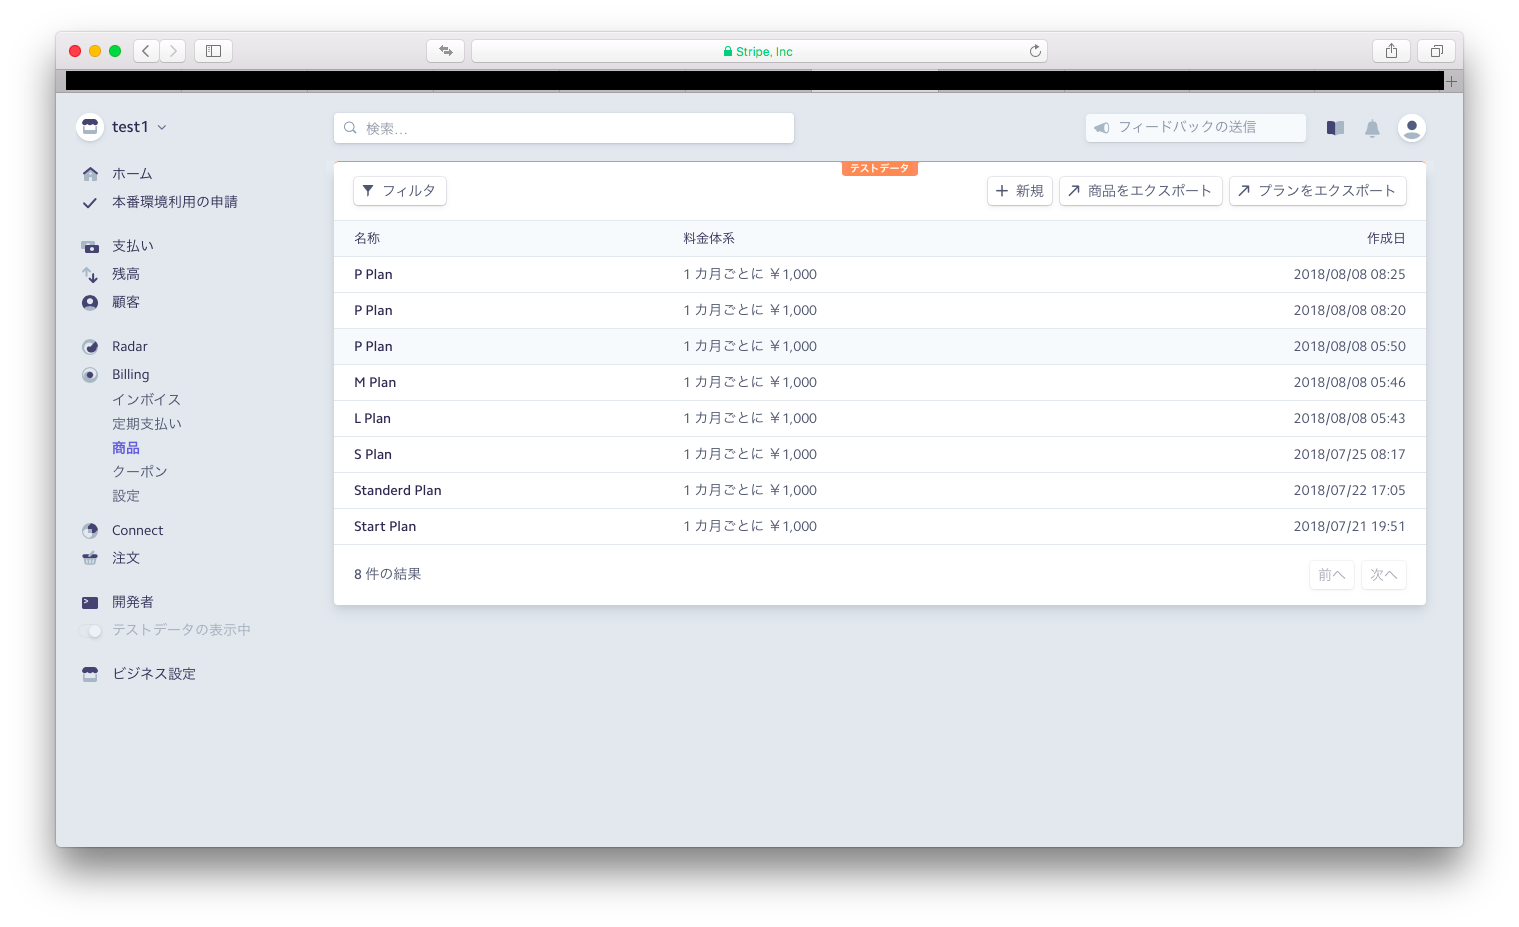
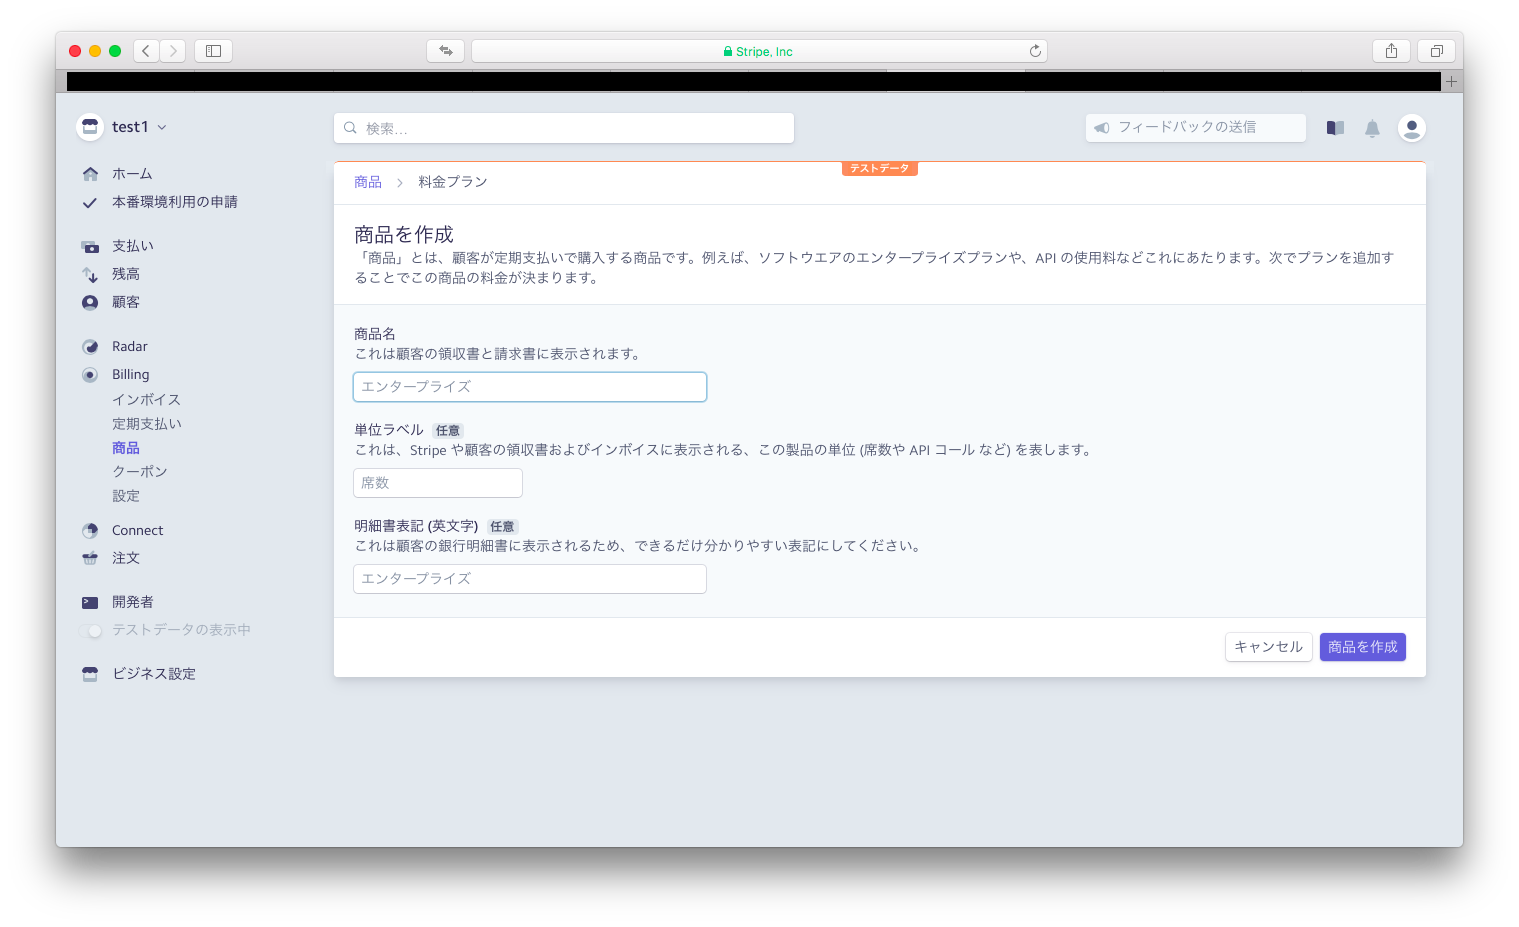
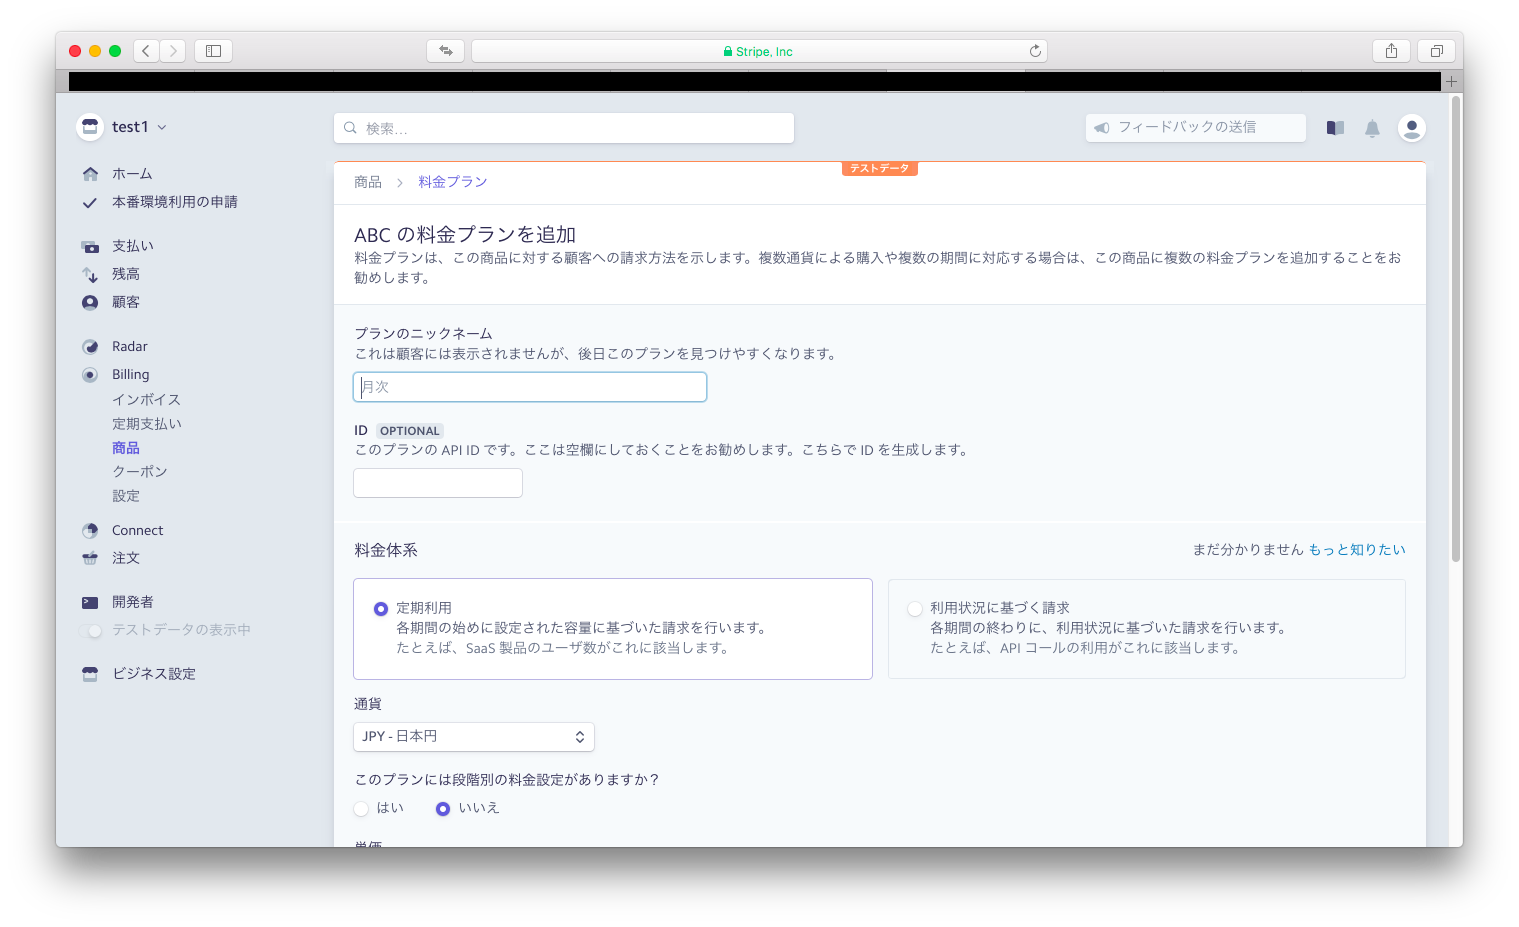
登録されたPlanの詳細を管理する画面
(Planに割り当てられたproduct商品も見られる)
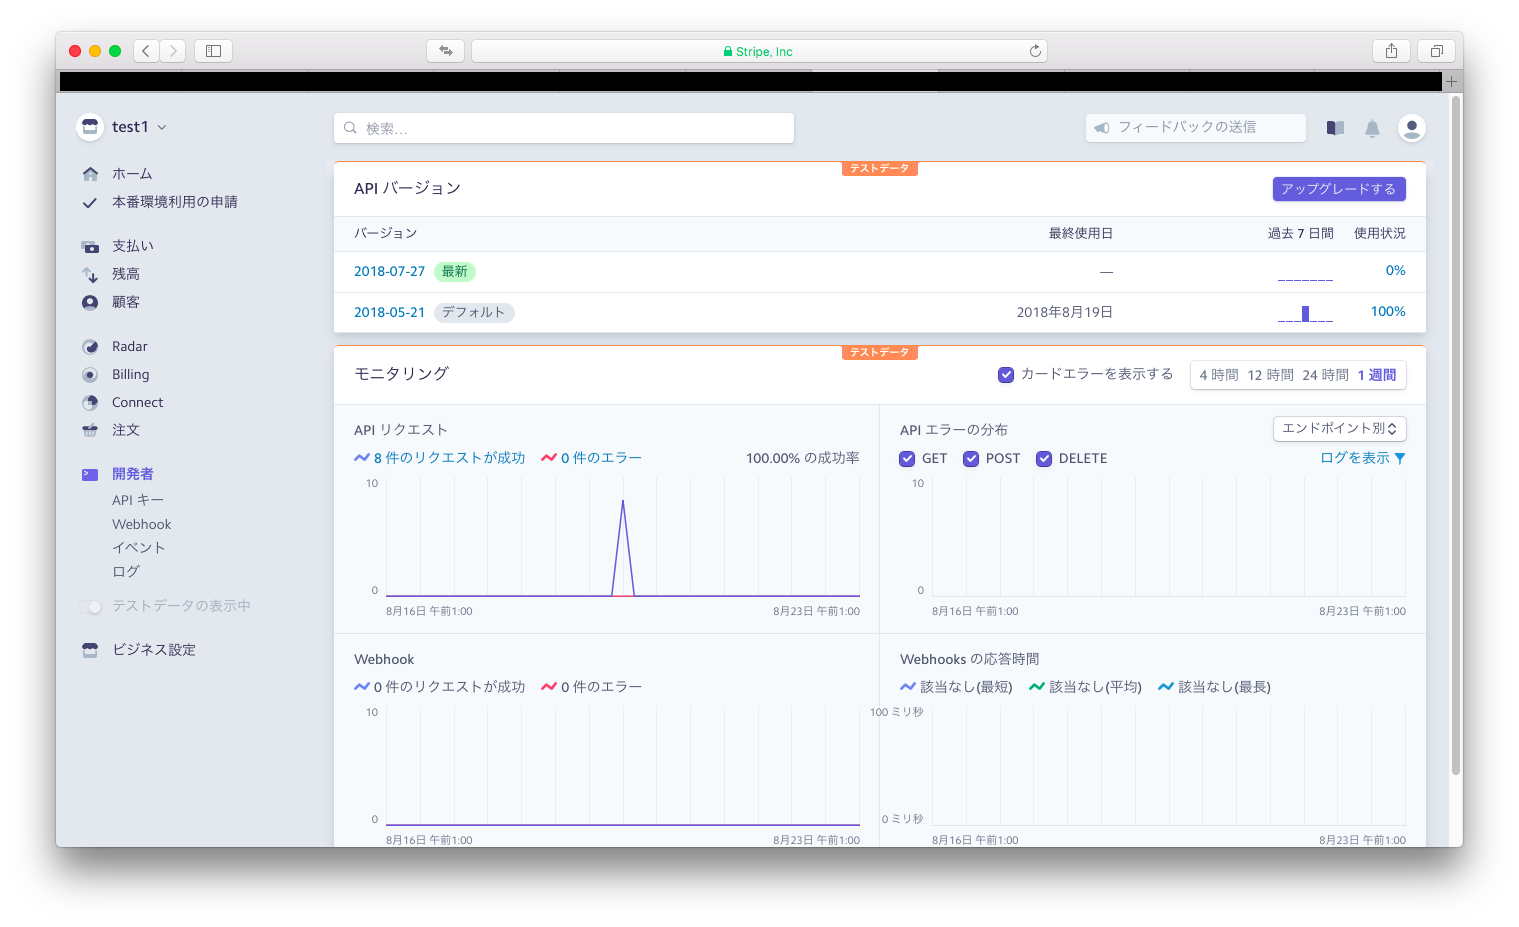
Railsなど、APIを使って外部からの通信での記録やアクションを管理する画面
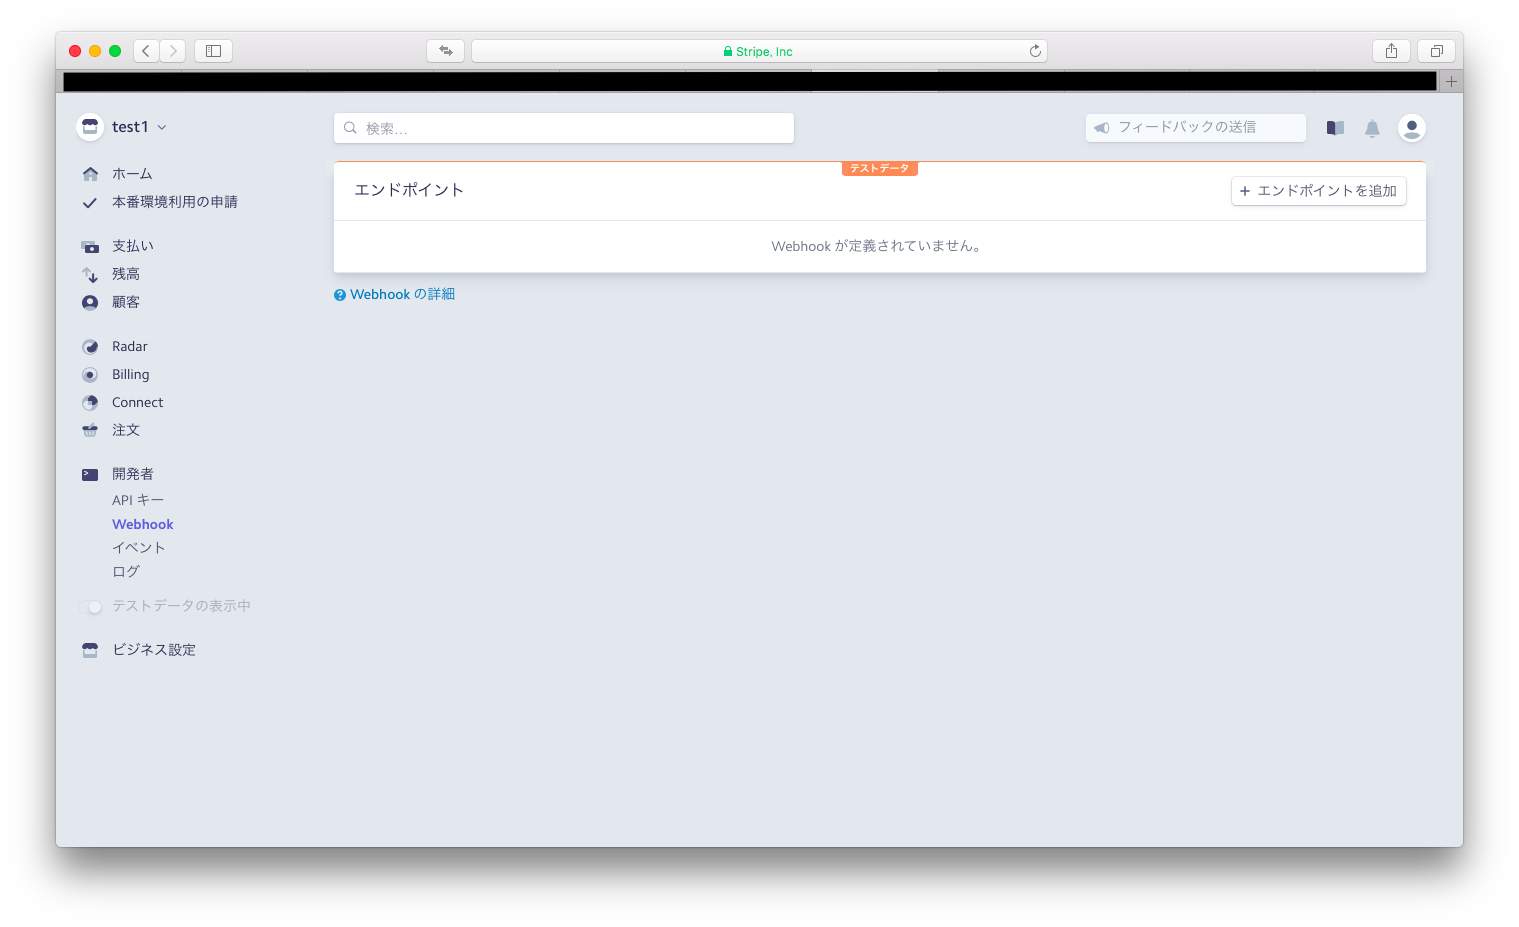
webhook画面
何かのイベントが起こった時に自動的に、指定するアドレスに情報を送信する機能のイベントの種類やアドレスが設定できる画面
各種イベントのログが見られる画面
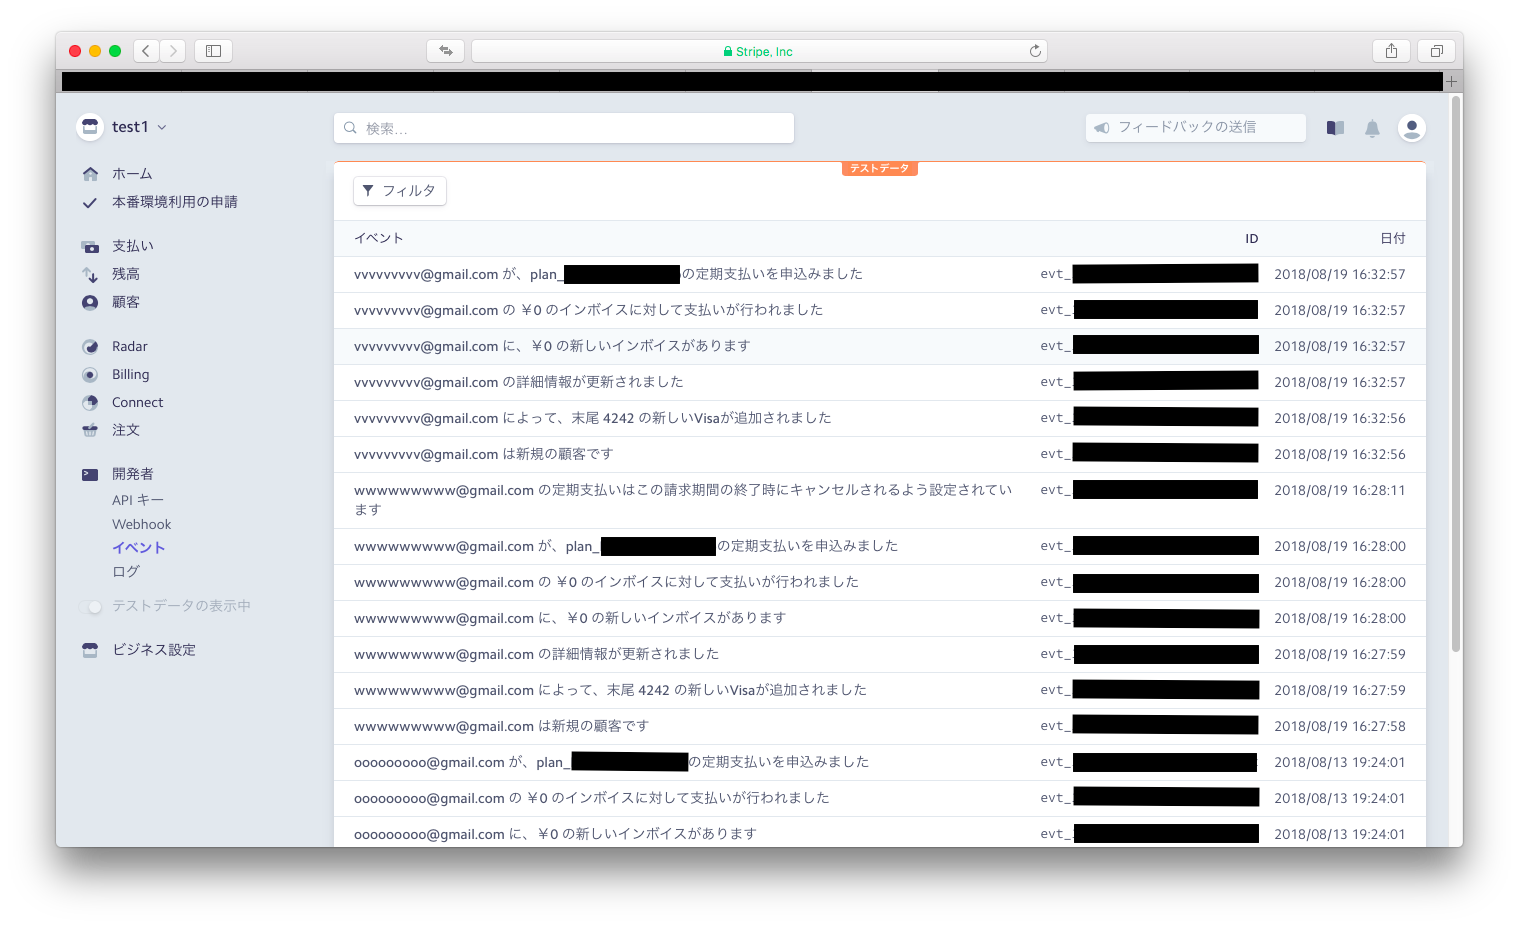
Railsなどの、アプリに追加したstripe決済機能で使っているAPIからの通信のログを見られる画面

Rails側の実装
gem編集
stripeのgemをインストールする
gem 'stripe'
$ bundle install
stripe初期設定
こちらの記事を参考に公開可能キーとシークレットキーを設定し、stripeを使用できる状態にする
Rails Stripe サブスクリプション決済実装 初期設定をしてAPIを使える状態にする
secrets.ymlの作成
configにsecrets.ymlはRailsのバージョンによっては最初から無い場合があるのでその時は新規作成する
development:
  secret_key_base: **********************

  # stripeのキーの実装
  stripe_publishable_key: pk_test_**********************# 公開可能キー
  stripe_secret_key: sk_test_**********************シークレットキー

test:
  secret_key_base: **********************
stripe.rbの作成
config/initializersにstripe.rbは最初から無いので新規作成する
Rails.configuration.stripe = {
  publishable_key: Rails.application.secrets.stripe_publishable_key,
  secret_key: Rails.application.secrets.stripe_secret_key
}

Stripe.api_key = Rails.application.secrets.stripe_secret_key
各種モデルとテーブルの作成
Planモデルを作成
$ rails g model Plan
Teamモデルを作成
$ rails g model Team
app/models/plan.rbを編集
class Plan < ApplicationRecord
  has_many   :teams
end
app/models/team.rbを編集
class Team < ApplicationRecord
  # Userをownerという名前で使う
  # optional: trueで関連先を検査しないようにする
  belongs_to :owner, class_name: 'User', optional: true
  belongs_to :plan, optional: true

  # Team削除時にStripe::Subscriptionも削除
  around_destroy :delete_stripe_subscription_before_destroy

  private

  # Team削除時にStripe::Subscriptionも削除
  def delete_stripe_subscription_before_destroy
    team = self.where(user_id: current_user.id)
    ActiveRecord::Base.transaction do
      # サブスクリプションIDでサブスクリプションを呼び出し
      deleting_stripe_subscription = Stripe::Subscription.retrieve(team.stripe_subscription_id)
      yield
      # データベース上のTeamが削除されたと同時に、stripe側に保存されているサブスクリプションを削除
      deleting_stripe_subscription.delete
    end
  end
end
Planテーブルの作成
ユーザーが月額課金を始める際に、毎回Planを指定しなくてはならないので、ここから呼び出して使えるようにする
class CreatePlans < ActiveRecord::Migration[5.2]
  def change
    create_table :plans do |t|

      t.string :stripe_plan_id,       null: false# nameと同じ名前でOK
      t.string :name,                 null: false# プランの名前
      t.integer :amount,              null: false# 値段
      t.string :currency,             null: false# 通貨名
      t.string :interval,             null: false# 課金周期(月額month)

      t.timestamps
    end
  end
end
Teamテーブルを作成(ユーザーのStripeの現状を保存する)
class CreateTeams < ActiveRecord::Migration[5.2]
  def change
    create_table :teams do |t|

      t.string  :plan_id# プランID
      t.integer :user_id# 月額課金をキャンセル、再開時に必要なのでcurrent_user.idを保存する
      t.string   :stripe_card_id# カードトークン
      t.string   :stripe_customer_id# カスタマーID
      t.string   :stripe_subscription_id# サブスクリプションID
      t.datetime :active_until, null: false# カスタマーを作った時の時間

      t.timestamps
    end
  end
end
テーブル作成実行
$ rake db:migrate
Planの作成
月額課金を始める場合は、あらかじめstripe側のPlanを作成しておく必要がある。
stripeのダッシュボードから作成しそのままダッシュボードにPlanを記録する方法、またはRails側からseeds.rbを使ってコードで作成することでstripeのダッシュボードにPlanを記録する方法などがある。
前者
Billing、商品、+新規で商品を登録
の後、プランを登録
これでプランのIDを取得することができるので、月額課金(subscription)スタート時にこのIDを割り当てれば月額課金がスタートする事になる
subscription = Stripe::Subscription.create({
    customer: 'cus_4fdAW5ftNQow1a',# CustomerID
    items: [{plan: 'plan_CBXbz9i7AIOTzr'}],# PlanID
})
後者
# Planを作ったあと、Plan名はレスポンスのjsonに無い(Stripe::Plan.createの中に無い)ので保存できないためPlan名はここで固定
planname = 'P Plan'

# Plan作成
plan = Stripe::Plan.create(
  # productを作らずにnameだけでPlanを作る場合のやり方
  :product => {
    :name => planname
  },
  :amount => 1000,
  :currency => 'jpy',
  :interval => 'month',
  # :usage_type='licensed', #Subscription開始時に請求を開始するタイプ(即時決済)(前払い性)
  # これがなくてもデフォルトで'licensed'になる
  # 'Metered'は各期間の終わりにその期間分を請求することができる。利用料に応じて請求できるタイプ
  # 今の場合だと、記述がないので'licensed'の設定
)


# Plan(Stripe::Plan.create)を作ることができていたら
if plan != nil

  # 保存するパラメーターを出力して有るかを見る
  puts plan
  puts plan.id
  puts planname# Plan名はjsonに無い
  puts plan.amount
  puts plan.currency
  puts plan.interval

  # データベースに保存
  Plan.create(
    id: 1,# Planが重複しないように1に固定
    stripe_plan_id: plan.id,
    name: planname,# Plan名はjsonに無いので直接保存
    amount: plan.amount,
    currency: plan.currency,
    interval: plan.interval
  )
end
seedファイルを実行
$ rake db:seed
各種viewの作成
- カード情報を入力して月額課金をスタートするviewの作成
- app/views/card/edit.html.erb
- スタートした月額課金を停止するviewの作成
- app/views/card/destroy.html.erb
- 停止した月額課金を再開するviewの作成
- app/views/card/restart.html.erb
- これらが実行された後に移動するviewの作成
- app/views/card/fin_subscription.html.erb
これら新しく作成したviewへのルートを作成する
Rails.application.routes.draw do

  devise_for :users
  root to: 'home#index'

  get 'card/edit'# app/views/card/edit.html.erb画面にアクセス

  get 'card/destroy'# app/views/card/destroy.html.erb画面にアクセス

  get 'card/restart'# app/views/card/restart.html.erb画面にアクセス

  get 'card/fin_subscription'# app/views/card/fin_subscription.html.erb画面にアクセス

  # For details on the DSL available within this file, see http://guides.rubyonrails.org/routing.html
end
header部分を書き換える
自分のTeamを持っていなかった場合は、まだカードで月額課金を1度もスタートしたことがないので、カード情報を入力するフォームを表示するviewへのリンクを表示する
次にTeamを持っていたとしても、Team内のstripe_subscription_idを消したり追加したりして、それが有るか無いかで月額課金を停止したり再開したりを切り替えるようにするので、再開画面に行くか停止画面に行くかを切り替えられるようにする。
<!DOCTYPE html>
<html>
  <head>
    <title>Stripe1</title>
    <%= csrf_meta_tags %>
    <%= csp_meta_tag %>

    <%= stylesheet_link_tag    'application', media: 'all', 'data-turbolinks-track': 'reload' %>
    <%= javascript_include_tag 'application', 'data-turbolinks-track': 'reload' %>

  </head>

  <body>
    <header>
      <nav>
        <ul>
          <%# ログインしている場合 %>
          <% if user_signed_in? %>
            <li>
              <%= link_to '認証情報の変更', edit_user_registration_path %>
            </li>
            <li>
              <%= link_to 'ログアウト', destroy_user_session_path, method: :delete %>
            </li>


            <%# 自分のteamを呼び出す %>
            <% team = Team.find_by(user_id: current_user.id) %>

            <%# teamを持っていなかった場合 %>
            <% if team == nil %>

              <li>
                <%# カードを登録して月額課金を初めて開始するリンクを表示する(edit.html.erb) %>
                <%= link_to 'カード定期決済', card_edit_path %>
              </li>

            <% end %>

            <%# teamを持ってた場合 %>
            <% if team != nil %>

              <%# サブスクリプションIDがなかった場合 %>
              <% if team.stripe_subscription_id == nil %>
                <li>
                  <%# 月額課金を再開する画面へのリンクを表示(前回作ったteamを使ってサブスクリプションを作成させる)(restart.html.erb) %>
                  <%= link_to 'カード定期再開', card_restart_path %>
                </li>
              <% end %>

              <%# サブスクリプションIDがあった場合 %>
              <% if team.stripe_subscription_id != nil %>
                <li>
                  <%# 月額課金を終了する画面へのリンクを表示(destroy.html.erb) %>
                  <%= link_to 'カード定期キャンセル', card_destroy_path %>
                </li>
              <% end %>

            <% end %>

            <%# 最後のリストにログインしているかしていないかを確認できるように表示を作る %>
            <li>
                ログイン中
            </li>


          <%# ログアウトしている場合 %>
          <% else %>
            <li>
              <%= link_to 'サインアップ', new_user_registration_path %>
            </li>
            <li>
              <%= link_to 'ログイン', new_user_session_path %>
            </li>
            <%# 最後のリストにログインしているかしていないかを確認できるように表示を作る %>
            <li>
                ログアウト中
            </li>


          <% end %>


        </ul>
      </nav>
    </header>

    <p class="notice"><%= notice %></p>
    <p class="alert"><%= alert %></p>
    <%= yield %>

  </body>
</html>
各viewを編集
ナビゲーションバーの月額課金キャンセルのリンク先のview
<h1>card#destroy</h1>

<ul>
  <li>
    <%# ボタンを作って、押したら"/home/cancel_subscription"にアクセスする %>
    <%# class: 'btn'でボタン化 %>
    <%= button_to '月額課金キャンセル', home_cancel_subscription_path, method: :put %>
  </li>
</ul>
ナビゲーションバーの月額課金再開のリンク先のview
<h1>card#restart</h1>

<ul>
  <li>
    <%# ボタンを作って、押したら"/home/restart_subscription"にアクセスする %>
    <%# class: 'btn'でボタン化 %>
    <%= button_to '月額課金再開', home_restart_subscription_path, method: :put %>
  </li>
</ul>
カード定期決済、月額課金キャンセル、月額課金再開を実行、成功後の画面
<h1>card#fin_subscription</h1>

<ul>
  <li>
    <%# ボタンを作って、押したら"/"にアクセスする %>
    <%# class: 'btn'でボタン化 %>
    <%= link_to "メインに戻る", root_path, class: 'btn btn-default' %>
  </li>
</ul>
ナビゲーションバーのカード定期決済のリンク先のview
app/views/card/edit.html.erbはカードエレメントクイックスタート
をコピペしてきて貼り付け、formのactionにstripe tokenを送りたいアクションのルートを指定する
<h1>card#edit</h1>

<script src="https://js.stripe.com/v3/"></script>

<%# 公開可能キーを呼び出す %>
<% publishable_key = Rails.application.secrets.stripe_publishable_key %>
<%# ******************************************************* %>
<%# フォーム %>
<%# 送信した結果をhome/createに送られる %>
<%# "/home/create" %>

<form action="<%= home_create_path %>" method="post" id="payment-form">
  <div class="form-row">

    <label for="card-element">Credit or debit card</label>

    <!-- A Stripe Element will be inserted here. -->
    <div id="card-element"></div>
    <!-- Used to display form errors. -->
    <div id="card-errors" role="alert"></div>
  </div>

  <button>Submit Payment</button>
</form>
<%# ******************************************************* %>


<%# ******************************************************* %>
<%# ボタン %>
<script type="text/javascript">
  // Create a Stripe client.
  <%# 呼び出した公開可能キーをセット %>
  var stripe = Stripe('<%= publishable_key %>');

  // Create an instance of Elements.
  var elements = stripe.elements();

  // Custom styling can be passed to options when creating an Element.
  // (Note that this demo uses a wider set of styles than the guide below.)
  var style = {
    base: {
      color: '#32325d',
      lineHeight: '18px',
      fontFamily: '"Helvetica Neue", Helvetica, sans-serif',
      fontSmoothing: 'antialiased',
      fontSize: '16px',
      '::placeholder': {
        color: '#aab7c4'
      }
    },
    invalid: {
      color: '#fa755a',
      iconColor: '#fa755a'
    }
  };

  // Create an instance of the card Element.
  var card = elements.create('card', {style: style});

  // Add an instance of the card Element into the `card-element` <div>.
  card.mount('#card-element');

  // Handle real-time validation errors from the card Element.
  card.addEventListener('change', function(event) {
    // フォームのエラー表示部分を取り出す
    var displayError = document.getElementById('card-errors');
    if (event.error) {
      // エラー文を直接表示
      displayError.textContent = event.error.message;
    } else {
      // エラー文を好きな文字で表示
      displayError.textContent = '';
    }
  });

  // Handle form submission.
  // 上のフォームを取り出す
  var form = document.getElementById('payment-form');

  // submitイベントが働いた時の動き
  form.addEventListener('submit', function(event) {
    event.preventDefault();

    // ストライプトークンを作成
    stripe.createToken(card).then(function(result) {
      // エラーの場合
      if (result.error) {
        // Inform the user if there was an error.
        // フォームのエラー表示部分を取り出す
        var errorElement = document.getElementById('card-errors');
        // エラー文を直接表示
        errorElement.textContent = result.error.message;
      } else {

        // Send the token to your server.
        //カード情報はこの中に入っている
        stripeTokenHandler(result.token);

      }
    });
  });
</script>

<%# ******************************************************* %>


<%# ******************************************************* %>
<%# stripeTokenHandler(token)関数 %>
<script type="text/javascript">
  function stripeTokenHandler(token) {
    // Insert the token ID into the form so it gets submitted to the server
    // 上のフォームを取り出す
    var form = document.getElementById('payment-form');
    var hiddenInput = document.createElement('input');
    hiddenInput.setAttribute('type', 'hidden');
    hiddenInput.setAttribute('name', 'stripeToken');
    hiddenInput.setAttribute('value', token.id);
    // フォームにトークンを挿入
    form.appendChild(hiddenInput);

    // Submit the form
    // フォームを送信
    form.submit();

  }
</script>
<%# ******************************************************* %>
ナビゲーションバーのカード定期決済のリンク先のviewのcss
cardform.cssと、新しくcssファイルを作成してカードエレメントクイックスタート
からcssもコピペしてきて貼り付ける。width: 400px;のみ付け足す
.StripeElement {
  background-color: white;
  height: 40px;
  /* 付け足す */
  width: 400px;
  padding: 10px 12px;
  border-radius: 4px;
  border: 1px solid transparent;
  box-shadow: 0 1px 3px 0 #e6ebf1;
  -webkit-transition: box-shadow 150ms ease;
  transition: box-shadow 150ms ease;
}

.StripeElement--focus {
  box-shadow: 0 1px 3px 0 #cfd7df;
}

.StripeElement--invalid {
  border-color: #fa755a;
}

.StripeElement--webkit-autofill {
  background-color: #fefde5 !important;
}

.center{
  border: 1px solid #aaa;
  width: 400px;
  text-align: center;
}
各種viewのボタンを押した時のコントローラーアクションの編集
stripe tokenをカードエレメントのフォームで指定した、アクションが受信するので、そのアクションを記述する
class HomeController < ApplicationController
  # クレジットカード情報を送ってストライプトークンがcreateアクションに送られてくるのだが
  # https通信ではないやり取りで安全性が確認できないためプロテクトから除外させる
  protect_from_forgery except: :create

  def index
  end

  # httpメソッドはpost
  # edit.html.erbのボタンで発動
  def create

    # Customer作成に必要なデータが揃ったか出力して確認
    logger.debug('createアクション実行中')
    logger.debug(params[:stripeToken])# 送られてきたストライプトークンを出力
    logger.debug('current_user.email' + current_user.email)# ログインしているユーザーのメールアドレス
    logger.debug('@current_user.email' + @current_user.email)# ログインしているユーザーのメールアドレス

    # params[:stripeToken]が無くてもCustomerは作れてしまう
    # Customerが作れてしまうからSubscriptionも作れてしまう
    # そのための判定

    # stripetokenが送られてきた場合
    if params[:stripeToken] != nil

      # カスタマーを作る
      customer = Stripe::Customer.create({
        email: current_user.email,# ログインしているユーザーのメールアドレス
        source: params[:stripeToken],# ストライプトークン
      })

      # Customerが作れたかどーかの判定
      if customer.id != nil
        # customerが作成できたか出力して確認
        logger.debug('customer')
        logger.debug(customer)# customerそのもの
        logger.debug('customer.id')
        logger.debug(customer.id)# customer.id

        # 保存が完了したら、Planを呼び出す(プラン選択はないのでidで良い)
        # Plan名、もしくはidでデータベースからPlanを取り出す
        plan = Plan.find_by(id: 1)# idが1のPlanしか無いので1で良い(フォームでPlanを選ばせるようにするなどの工夫があると良い)

        # Subscriptionの作成に必要なデータが揃ったか出力して確認
        logger.debug('Plan.id')
        logger.debug(plan.stripe_plan_id)# stripe_plan_id

        # 作れていたら、今までに作ってきたデータをTeamに保存
        begin
          Team.transaction() do
            team = Team.new({
              user_id: current_user.id,
              plan_id: plan.stripe_plan_id,# ①プランID
              stripe_card_id: params[:stripeToken],# ②カードトークン
              stripe_customer_id: customer.id,# ③カスタマーID
              active_until: Time.at(Time.now.to_i)})

            # save!でモデルに定義したバリデーションを検証してもらえる
            team.save!

            # trial_endとbilling_cycle_anchorの時間を取得
            trial_end_time = Time.at(Time.local(2018, 12, 31, 12, 0, 0, 0).to_i)# 日時を指定したものをUNIXタイムにしたもの
            billing_cycle_anchor_time = Time.at(Time.local(2018, 12, 31, 12, 28, 0, 0).to_i)# 最初の請求日

            logger.debug('trial_end_time')
            logger.debug(trial_end_time.to_i)# 試用期間終了日
            logger.debug('billing_cycle_anchor_time')
            logger.debug(billing_cycle_anchor_time.to_i)# 最初の請求日

            # アップデートができるか試す
            # team.update( stripe_subscription_id: 'sub_49ty4767H20z6a', active_until: Time.at(Time.now.to_i))

            # エラーが確認できなかったらSubscriptionを作成
            subscription = Stripe::Subscription.create({
              customer: customer.id,
              items: [{plan: plan.stripe_plan_id}],
              tax_percent: 8.00,# 税金(サービスの税金なので税理士に相談して税率を決定)(消費税率にしてるだけ)
              trial_end: trial_end_time.to_i,# 無料の試用期間
              # (試用期間が終わるまでを表したUNIXのタイムスタンプ整数)
              # (早期に終了したい場合はtrial_end: 'now’にする)
              # (trial_period_daysで日数での指定もできるがtrial_endの方が使いやすい)
              # (試用期間終了3日前にWebhookからcustomer.subscription.trial_will_endイベントが送信される)
              # (試用期間終了後invoice.createdイベントが送信される)

              billing_cycle_anchor: billing_cycle_anchor_time.to_i,# 試用期間が終わった初めての請求日の設定
              # (請求日までの時間をUNIXのタイムスタンプ整数にしたもの)
              # (サブスクリプションの通常の定期更新の時の請求日は即時になるが、これがあると請求日サイクル日を設定できる)
              # (この設定がなければ月の最終日に請求がある?)
              # 試用期間終了後は、ここで設定した日付までを日割り計算した金額を即時決済され、設定した日付が来たら請求サイクルで決済される?
              # 例えば2018/8/9に登録したとして、2018/8/9に2018/08/28(月末、月頭でも良い)までの日割り計算された金額を即時決済(licensタイプ)され、請求サイクルの日付は2018/08/28の設定になる
              # キャンセルしたら即座に使えなくなる(Planが'licensed'で前払い性なのでいつ辞めてもそれ以降の金額は関係ない)
              # 前払い性なので、ここで設定した日付から1ヶ月サイクルまで使える状態を作れる


              # billing: 'send_invoice',# 請求書のデフォルト
              # days_until_due: 30,# 未払いを決定する日にち、整数値
              # 数分のPlanの設定やPlanの数量設定もできる
              # items=[
              #   {
              #     "plan": "{{GRADUATED_PLAN_ID}}",
              #     "quantity": "11",# 数量
              #   },
              # ]


            })

            # Subscriptionの実行が完了したら、Subscription_IDをTeamに保存
            # Subscriptionが作れたかどーかの判定
            if subscription.id != nil
              # subscriptionが作成できたか出力して確認
              logger.debug('subscription')
              logger.debug(subscription.id)# customerそのもの
              # ④サブスクリプションID
              # ⑤カスタマーを作った時(サブスクリプションを作った時)の時間
              team.update( stripe_subscription_id: subscription.id, active_until: Time.at(Time.now.to_i))

              # 月額課金がスタートしたので別画面に飛ばす
              render "card/fin_subscription"

            end

          end

          # エラー(バリデーション)が出た場合の処理
        rescue ActiveRecord::RecordInvalid => e
          # e.record.errors
          # 別画面に飛び、エラーメッセージを表示
          render plain: e.message

        end

      end

    end

  end


  # httpメソッドはdelete
  # destroy.html.erbのキャンセルボタンで発動
  def cancel_subscription

    # キャンセルでsubscription_IDが必要になる
    # ログインしているUser(current_user)でTeamを見つけてその中のstripe_subscription_idを取ってくる
    team = Team.find_by(user_id: current_user.id)

    # サブスクリプションが開始されていた場合
    if team.stripe_subscription_id != nil
      # サブスクリプションの停止(キャンセル)
      subscription = Stripe::Subscription.retrieve(team.stripe_subscription_id)
      subscription.delete(at_period_end: true)# 期間終了時にキャンセルのオプション付き

      # 月額課金がキャンセルされたのでレコードから:plan_idと:active_untilとstripe_subscription_idを削除
      # カードトークンとカスタマーIDは残す
      begin
        Team.transaction() do
          team.plan_id = nil
          team.stripe_subscription_id = nil
          team.active_until = Time.at(Time.now.to_i)
          team.save!

          # team.update( plan_id: "", stripe_subscription_id: "", active_until: Time.at(Time.now.to_i))
        end

        # 月額課金をキャンセルしたので別画面に飛ばす
        render "card/fin_subscription"

      # エラー(バリデーション)が出た場合の処理
      rescue ActiveRecord::RecordInvalid => e
        # e.record.errors
        # 別画面に飛び、エラーメッセージを表示
        render plain: e.message

      end

    end

  end


  # httpメソッドはput
  # restart.html.erbの再開ボタンで発動
  def restart_subscription

    # ログインしているUser(current_user)で自分のTeamを見つけてくる
    team = Team.find_by(user_id: current_user.id)

    # Plan名、もしくはidでデータベースからPlanを取り出す
    plan = Plan.find_by(id: 1)# idが1のPlanしか無いので1で良い(フォームでPlanを選ばせるようにするなどの工夫があると良い)
    # Subscriptionの作成に必要なデータが揃ったか出力して確認
    logger.debug('Plan.id')
    logger.debug(plan.stripe_plan_id)# stripe_plan_id

    # trial_endとbilling_cycle_anchorの時間を取得
    trial_end_time = Time.at(Time.local(2018, 12, 31, 12, 0, 0, 0).to_i)# 日時を指定したものをUNIXタイムにしたもの
    billing_cycle_anchor_time = Time.at(Time.local(2018, 12, 31, 12, 28, 0, 0).to_i)# 最初の請求日

    logger.debug('trial_end_time')
    logger.debug(trial_end_time.to_i)# 試用期間終了日
    logger.debug('billing_cycle_anchor_time')
    logger.debug(billing_cycle_anchor_time.to_i)# 最初の請求日

    # アップデートができるか試す
    # team.update( plan_id: 'plan_', stripe_subscription_id: 'sub_', active_until: Time.at(Time.now.to_i))

    # エラーが確認できなかったらSubscriptionを作成
    subscription = Stripe::Subscription.create({
      customer: team.stripe_customer_id,
      items: [{plan: plan.stripe_plan_id}],
      tax_percent: 8.00,# 税金(サービスの税金なので税理士に相談して税率を決定)(消費税率にしてるだけ)
      trial_end: trial_end_time.to_i,# 無料の試用期間
      # (試用期間が終わるまでを表したUNIXのタイムスタンプ整数)
      # (早期に終了したい場合はtrial_end: 'now'にする)
      # (trial_period_daysで日数での指定もできるがtrial_endの方が使いやすい)
      # (試用期間終了3日前にWebhookからcustomer.subscription.trial_will_endイベントが送信される)
      # (試用期間終了後invoice.createdイベントが送信される)
      billing_cycle_anchor: billing_cycle_anchor_time.to_i,# 試用期間が終わった初めての請求日の設定
      # (請求日までの時間をUNIXのタイムスタンプ整数にしたもの)
      # (サブスクリプションの通常の定期更新の時の請求日とは違う。だから定期更新の時の請求日と合わせるとやりやすい)
      # (この設定がなければ月の最終日に請求がある)
      # billing: 'send_invoice',# 請求書のデフォルト
      # days_until_due: 30,# 未払いを決定する日にち、整数値
    })

    # Subscriptionの実行が完了したら、Subscription_IDをTeamに保存
    if subscription.id != nil
      # subscriptionが作成できたか出力して確認
      logger.debug('subscription')
      logger.debug(subscription.id)# customerそのもの
      # ④サブスクリプションID
      # ⑤カスタマーを作った時(サブスクリプションを作った時)の時間

      begin
        Team.transaction() do
          team.plan_id = plan.stripe_plan_id
          team.stripe_subscription_id = subscription.id
          team.active_until = Time.at(Time.now.to_i)
          team.save!

          # team.update( plan_id: plan.stripe_plan_id, stripe_subscription_id: subscription.id, active_until: Time.at(Time.now.to_i))
        end

        # 月額課金がスタートしたので別画面に飛ばす
        render "card/fin_subscription"

      # エラー(バリデーション)が出た場合の処理
      rescue ActiveRecord::RecordInvalid => e
        # e.record.errors
        # 別画面に飛び、エラーメッセージを表示
        render plain: e.message

      end

    end

  end


end
各種viewのボタンを押した時のアクションを実行するルートを追加する
Rails.application.routes.draw do

  devise_for :users
  root to: 'home#index'

  get 'card/edit'# app/views/card/edit.html.erb画面にアクセス
  post 'home/create'# homeコントローラーのcreateアクション実行

  get 'card/destroy'# app/views/card/destroy.html.erb画面にアクセス
  put 'home/cancel_subscription'# homeコントローラーのcancel_subscriptionアクション実行

  get 'card/restart'# app/views/card/restart.html.erb画面にアクセス
  put 'home/restart_subscription'# homeコントローラーのrestart_subscriptionアクション実行

  get 'card/fin_subscription'# app/views/card/fin_subscription.html.erb画面にアクセス

  # For details on the DSL available within this file, see http://guides.rubyonrails.org/routing.html
end
Invoice内容は後日更新する予定
これで一通りstripeの月額課金(定期更新購読)ができたが、内容に何かありましたら是非コメント下さい。
次はBootstrapで見た目を改善する。
Bootstrap実装
RailsのdeviseとStripe(とBootstrap)の組み合わせで、ただただユーザー登録させたユーザーに定期定額課金させるだけのappの実装方法③