久しぶりの投稿です!
はじめに
相変わらず、OpenShift関連のお仕事では個人的にはServiceMesh(Istio)を使うことが多いです。
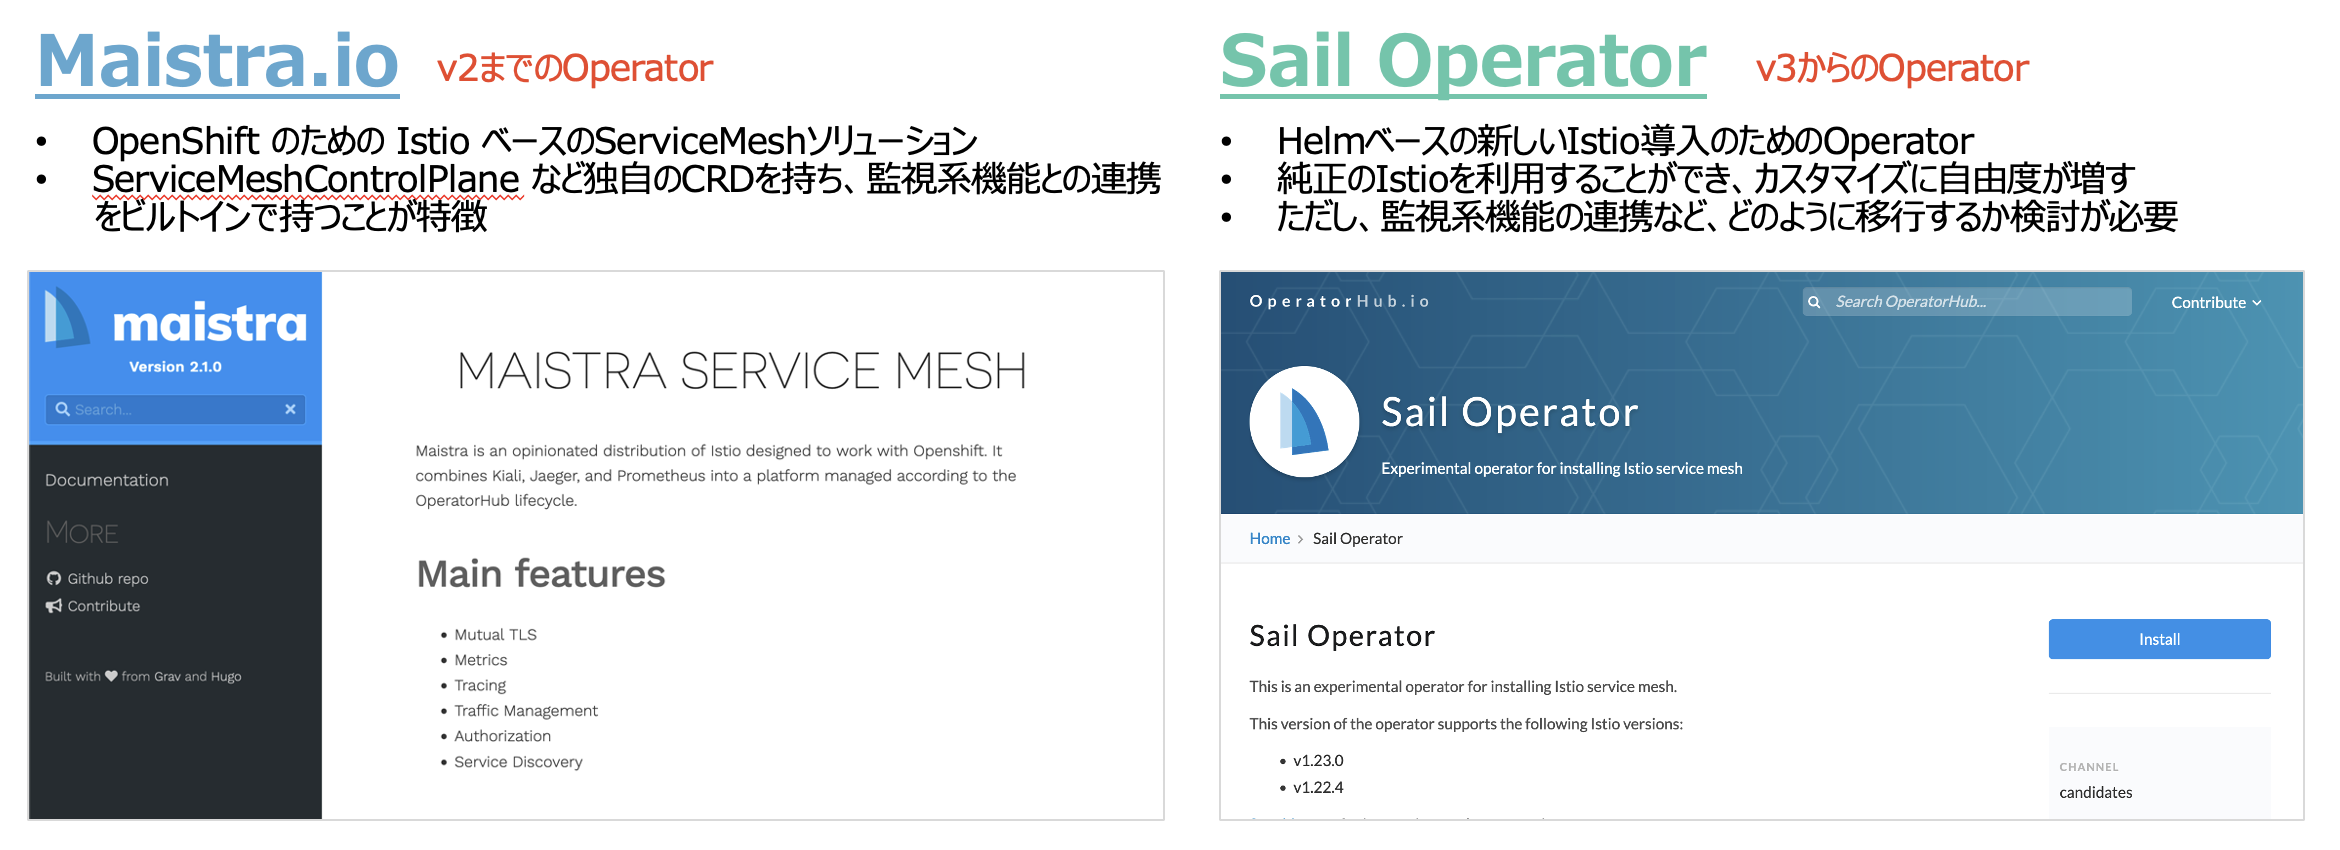
現行のバージョンはv2.xですが、いままではMaistraと呼ばれるIstioベースのOSSをベースとしたOperatorが利用されてきました。しかしながら、v3からは少し実装が変わり、より純正のIstioベースになっていくと昨年末に発表がありまして、個人的にずっっっと気になっておりました。
2024年はDeveloper Previewのあまり情報のないタイミングからあれこれ触ってきましたが、Technology Previewになり、GA間近になってきていると思うので、改めて少しずつ情報発信していければと思っています。
この記事では、まずは導入と、サンプルアプリを動かすところまでをまとめます。
長くなってしまったので、Prometheus/Kialiでの可視化は別記事にまとめます。
2024/12/18時点
OpenShift ServiceMesh v3は 執筆時点では Technology Preview (TP) です。
GAになるまでは実稼働環境ではサポートの観点でまだ適用できない点に注意です。
記事の前提
本記事のために、IBM CloudのManaged OpenShift (ROKS) を準備しました。
バージョンは4.17.5です。
% oc version
Client Version: 4.17.8
Kustomize Version: v5.0.4-0.20230601165947-6ce0bf390ce3
Server Version: 4.17.5
Kubernetes Version: v1.30.5
また、作業用のPCにはOpenShift CLI(oc)とIstio CLI(istioctl)がすでに導入されていることを前提とします。
Step 1. Operatorを導入する
導入方法は簡単です。OperatorHubからポチポチすれば導入できます。
最後にアプリケーションをHTTPS通信で公開したいので、証明書発行を容易にするためにcert-managerも導入します。
ServiceMesh v3 Operator (Sail Operator)の導入
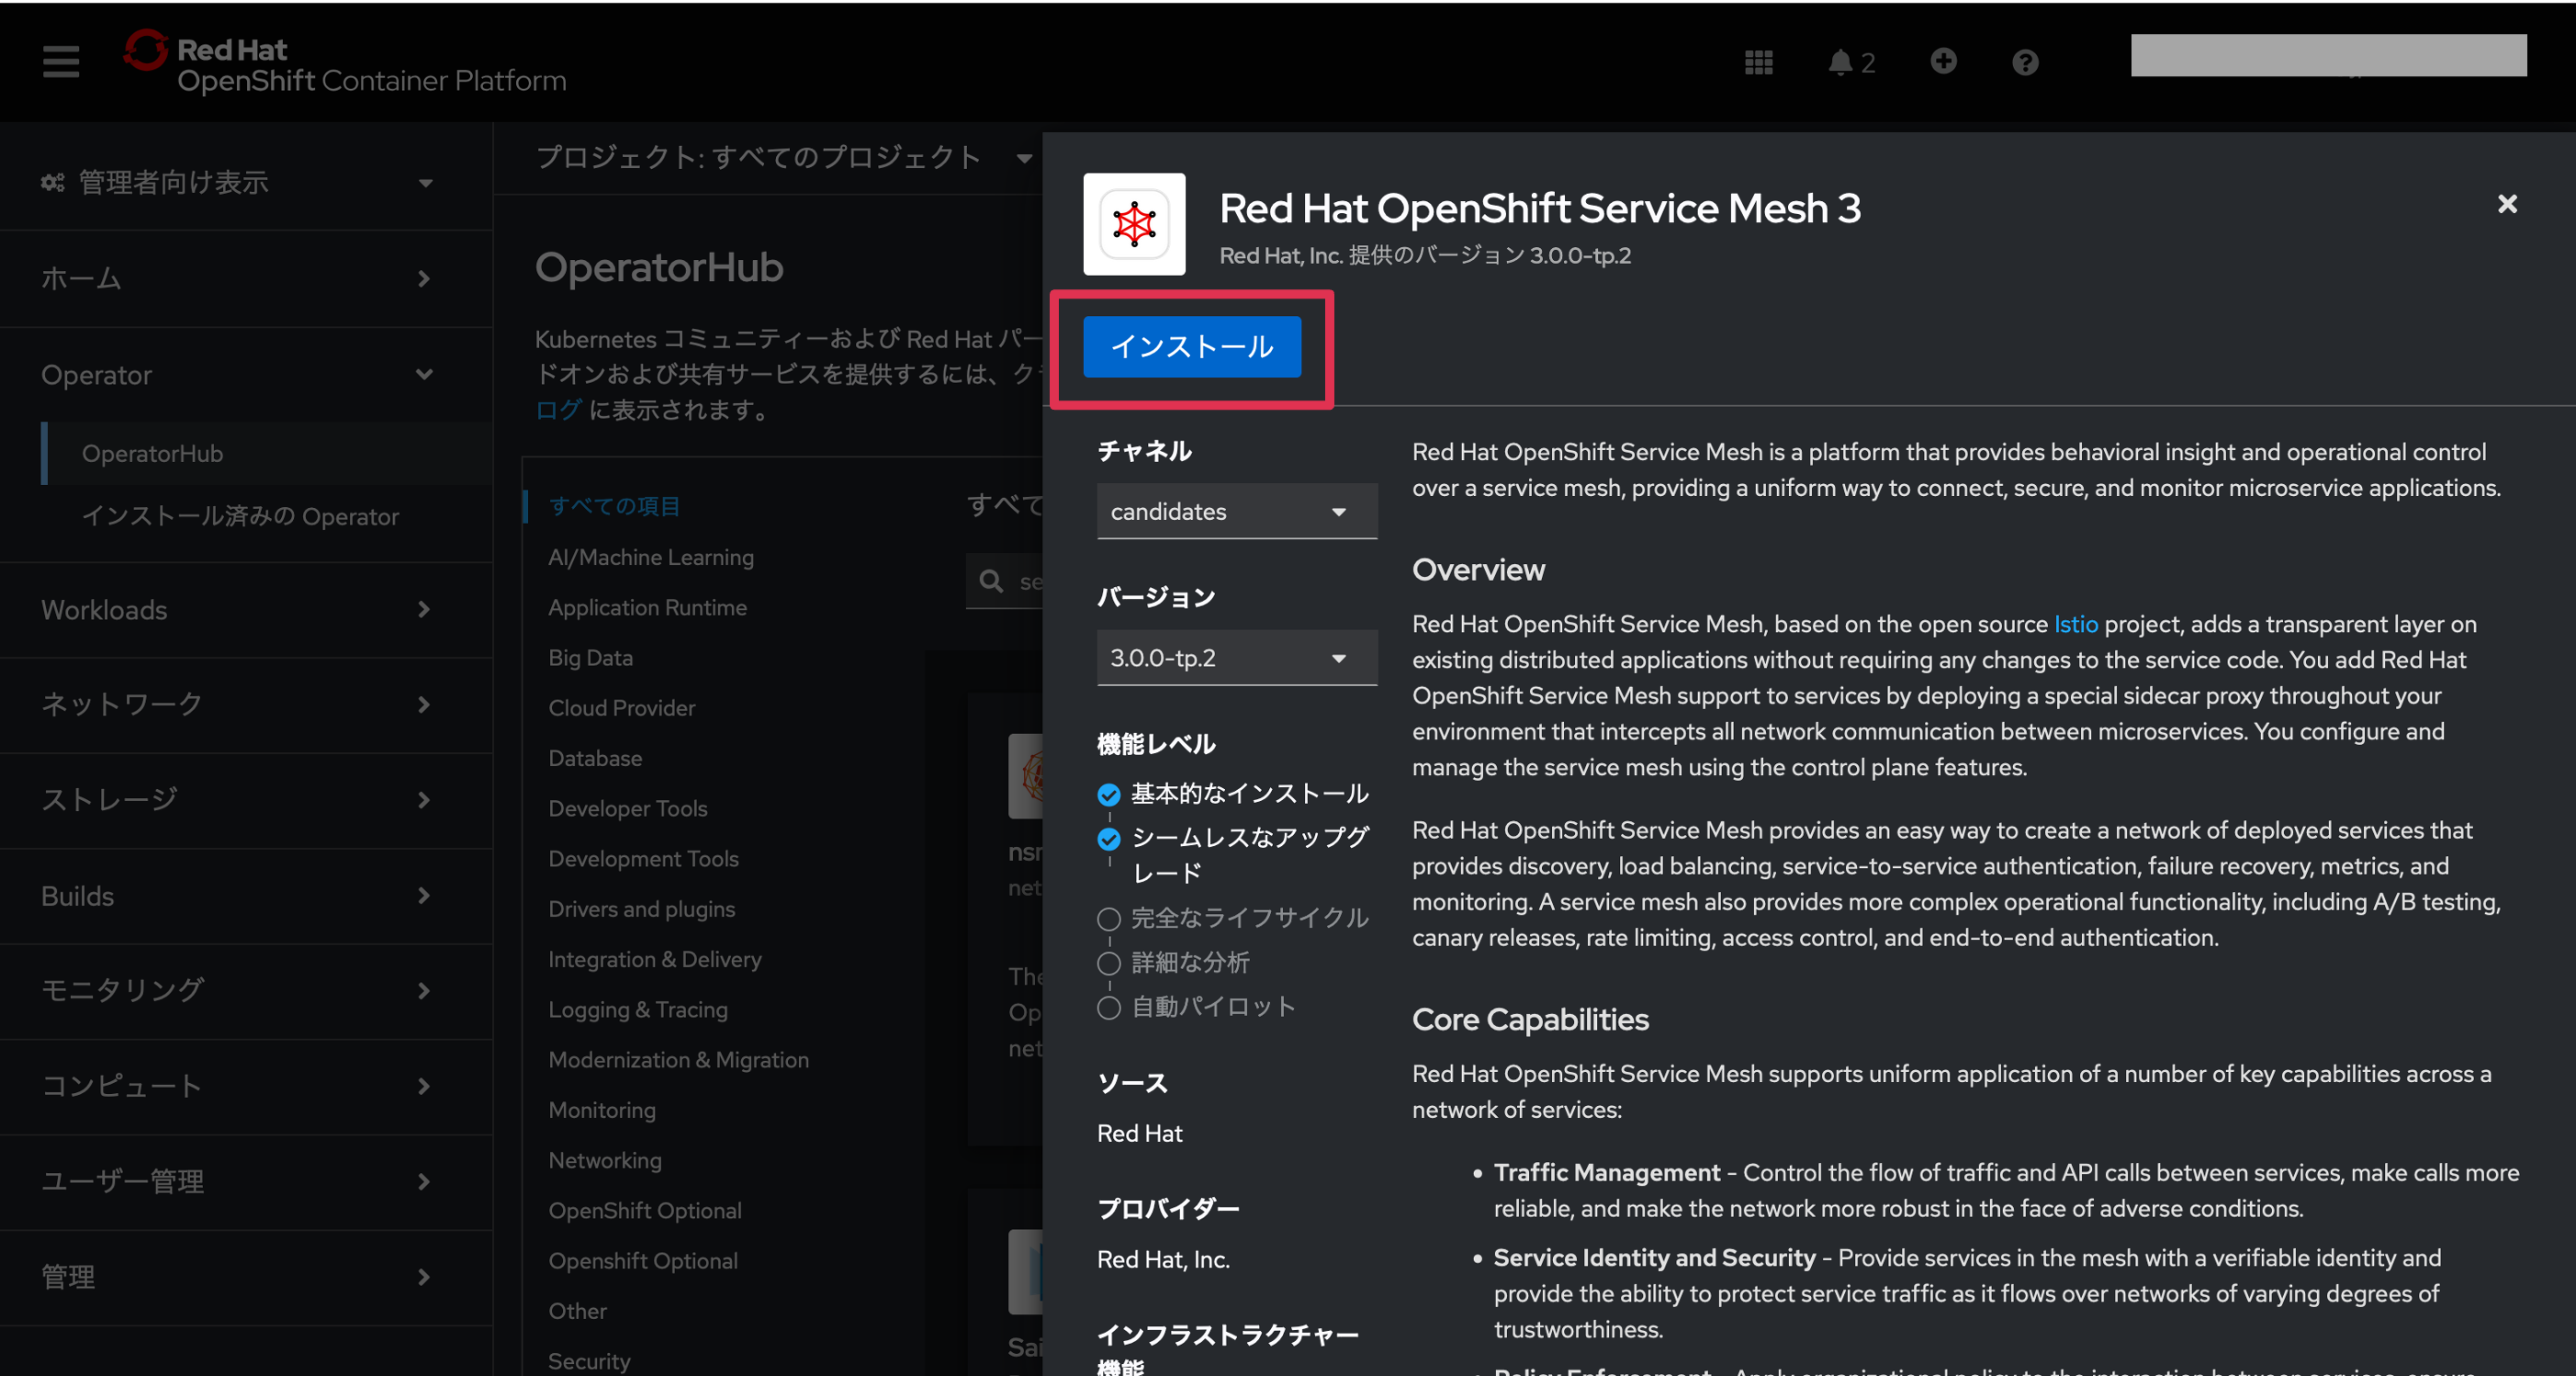
[1] クラスター管理者権限を持つユーザーで、「Operator」>「OperatorHub」をクリックします
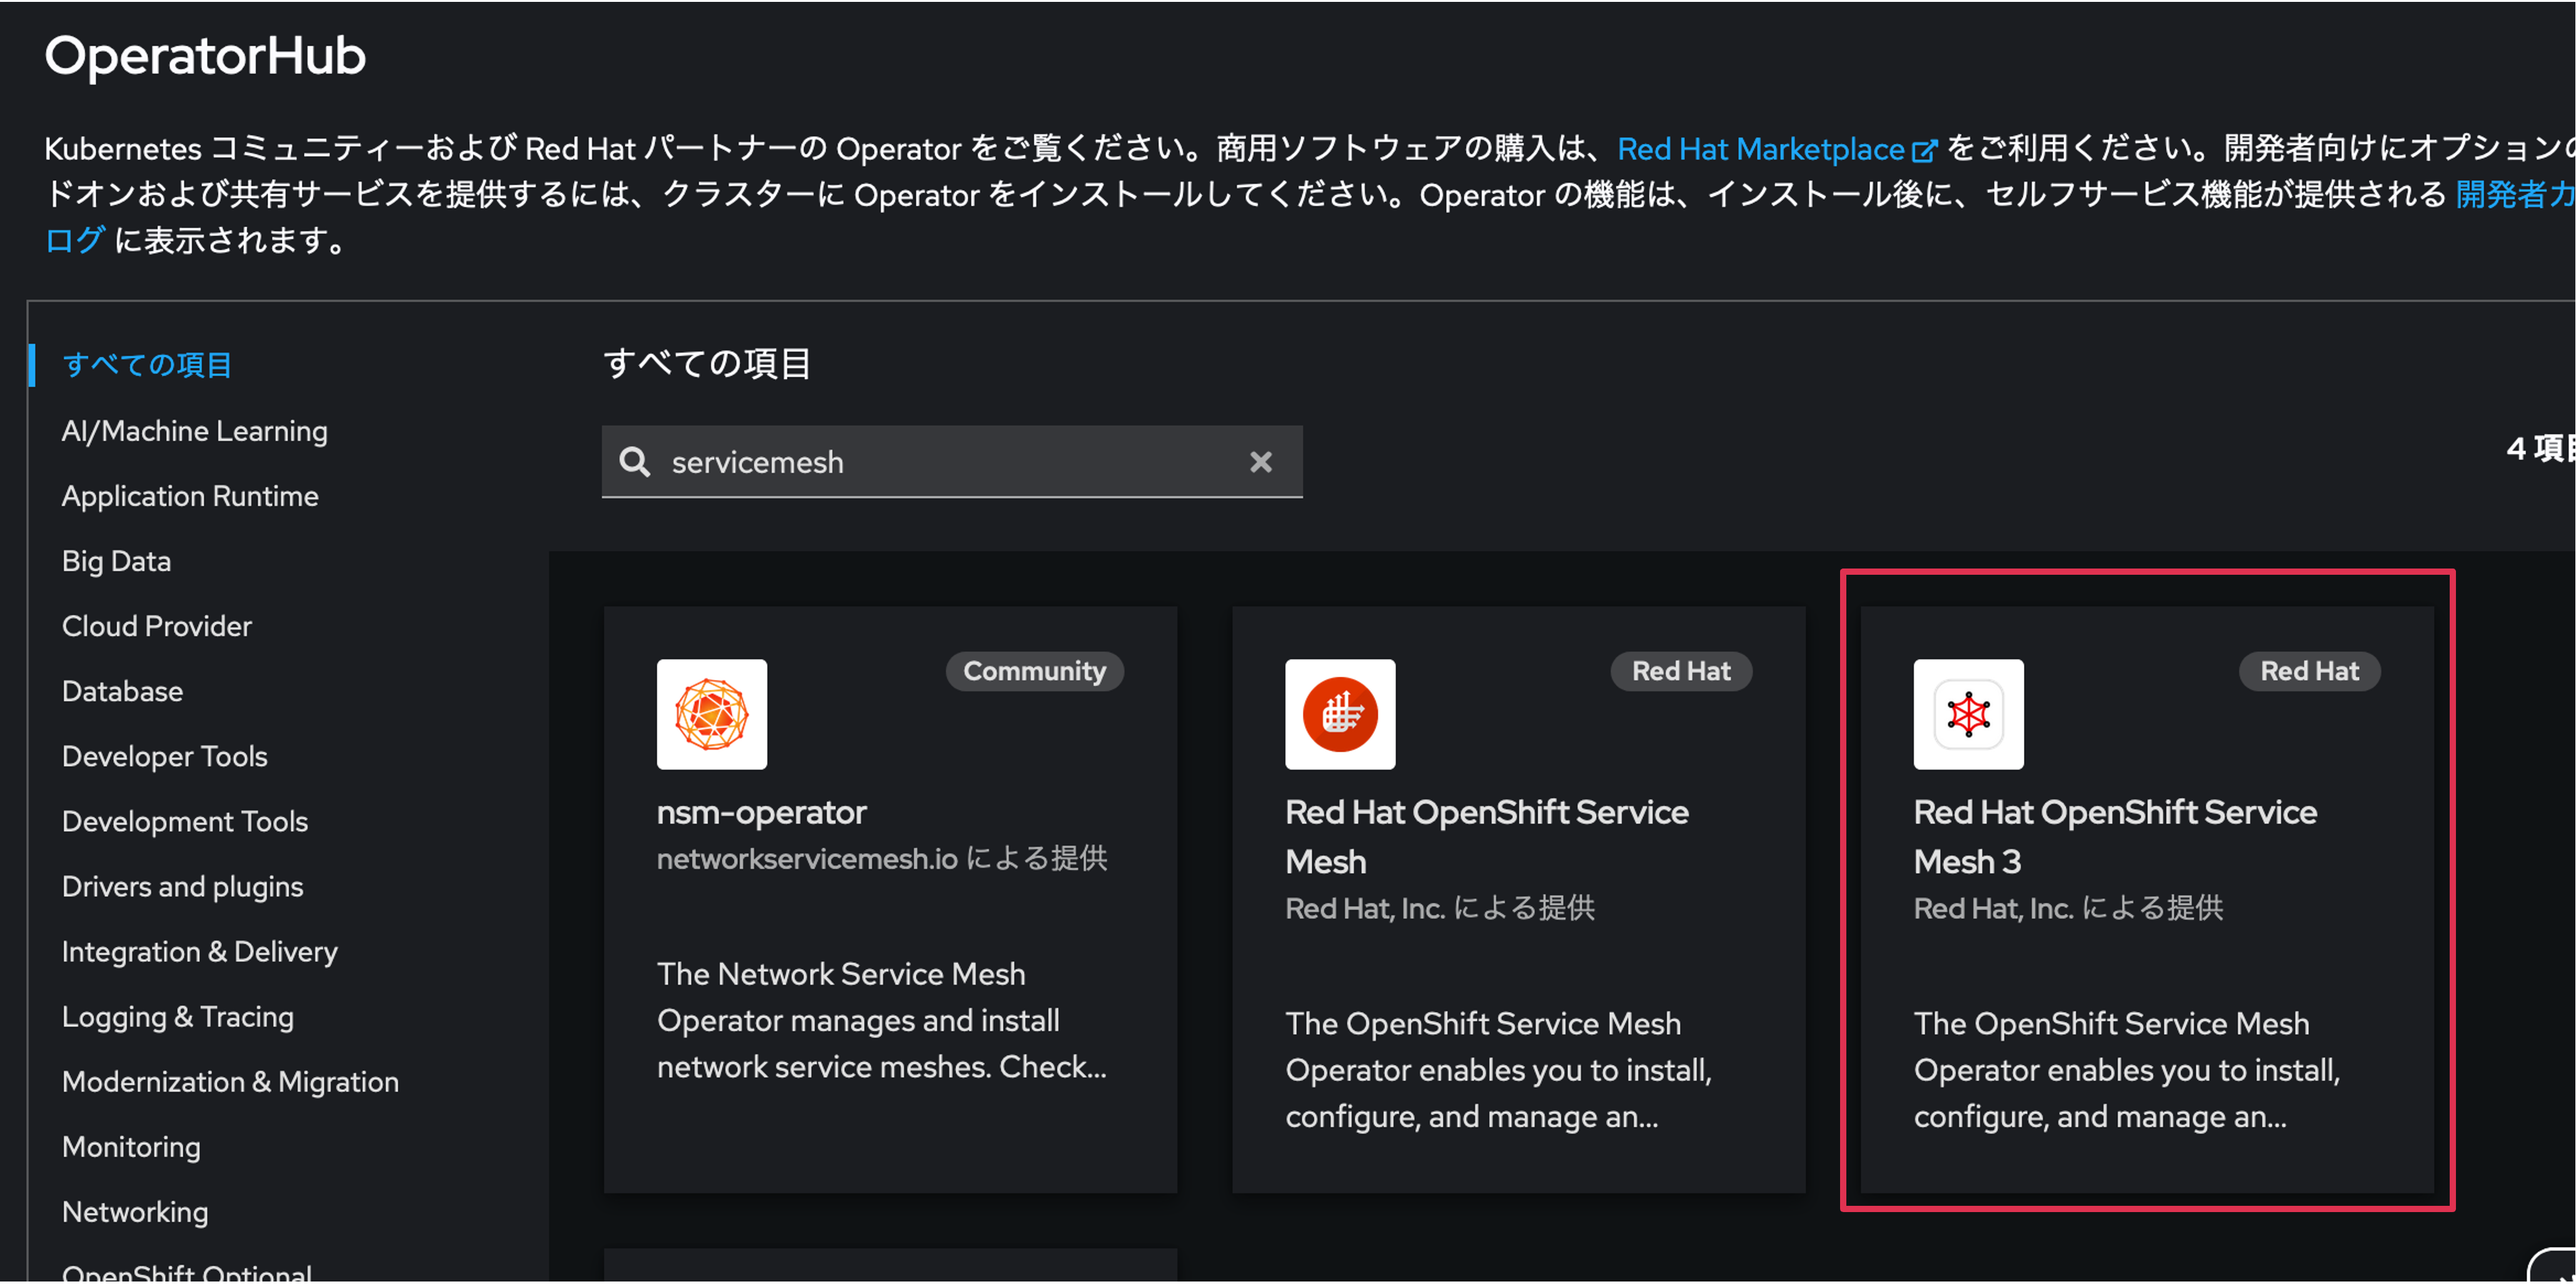
[2]「servicemesh」で検索し、「Red Hat OpenShift Service Mesh 3」を選択します
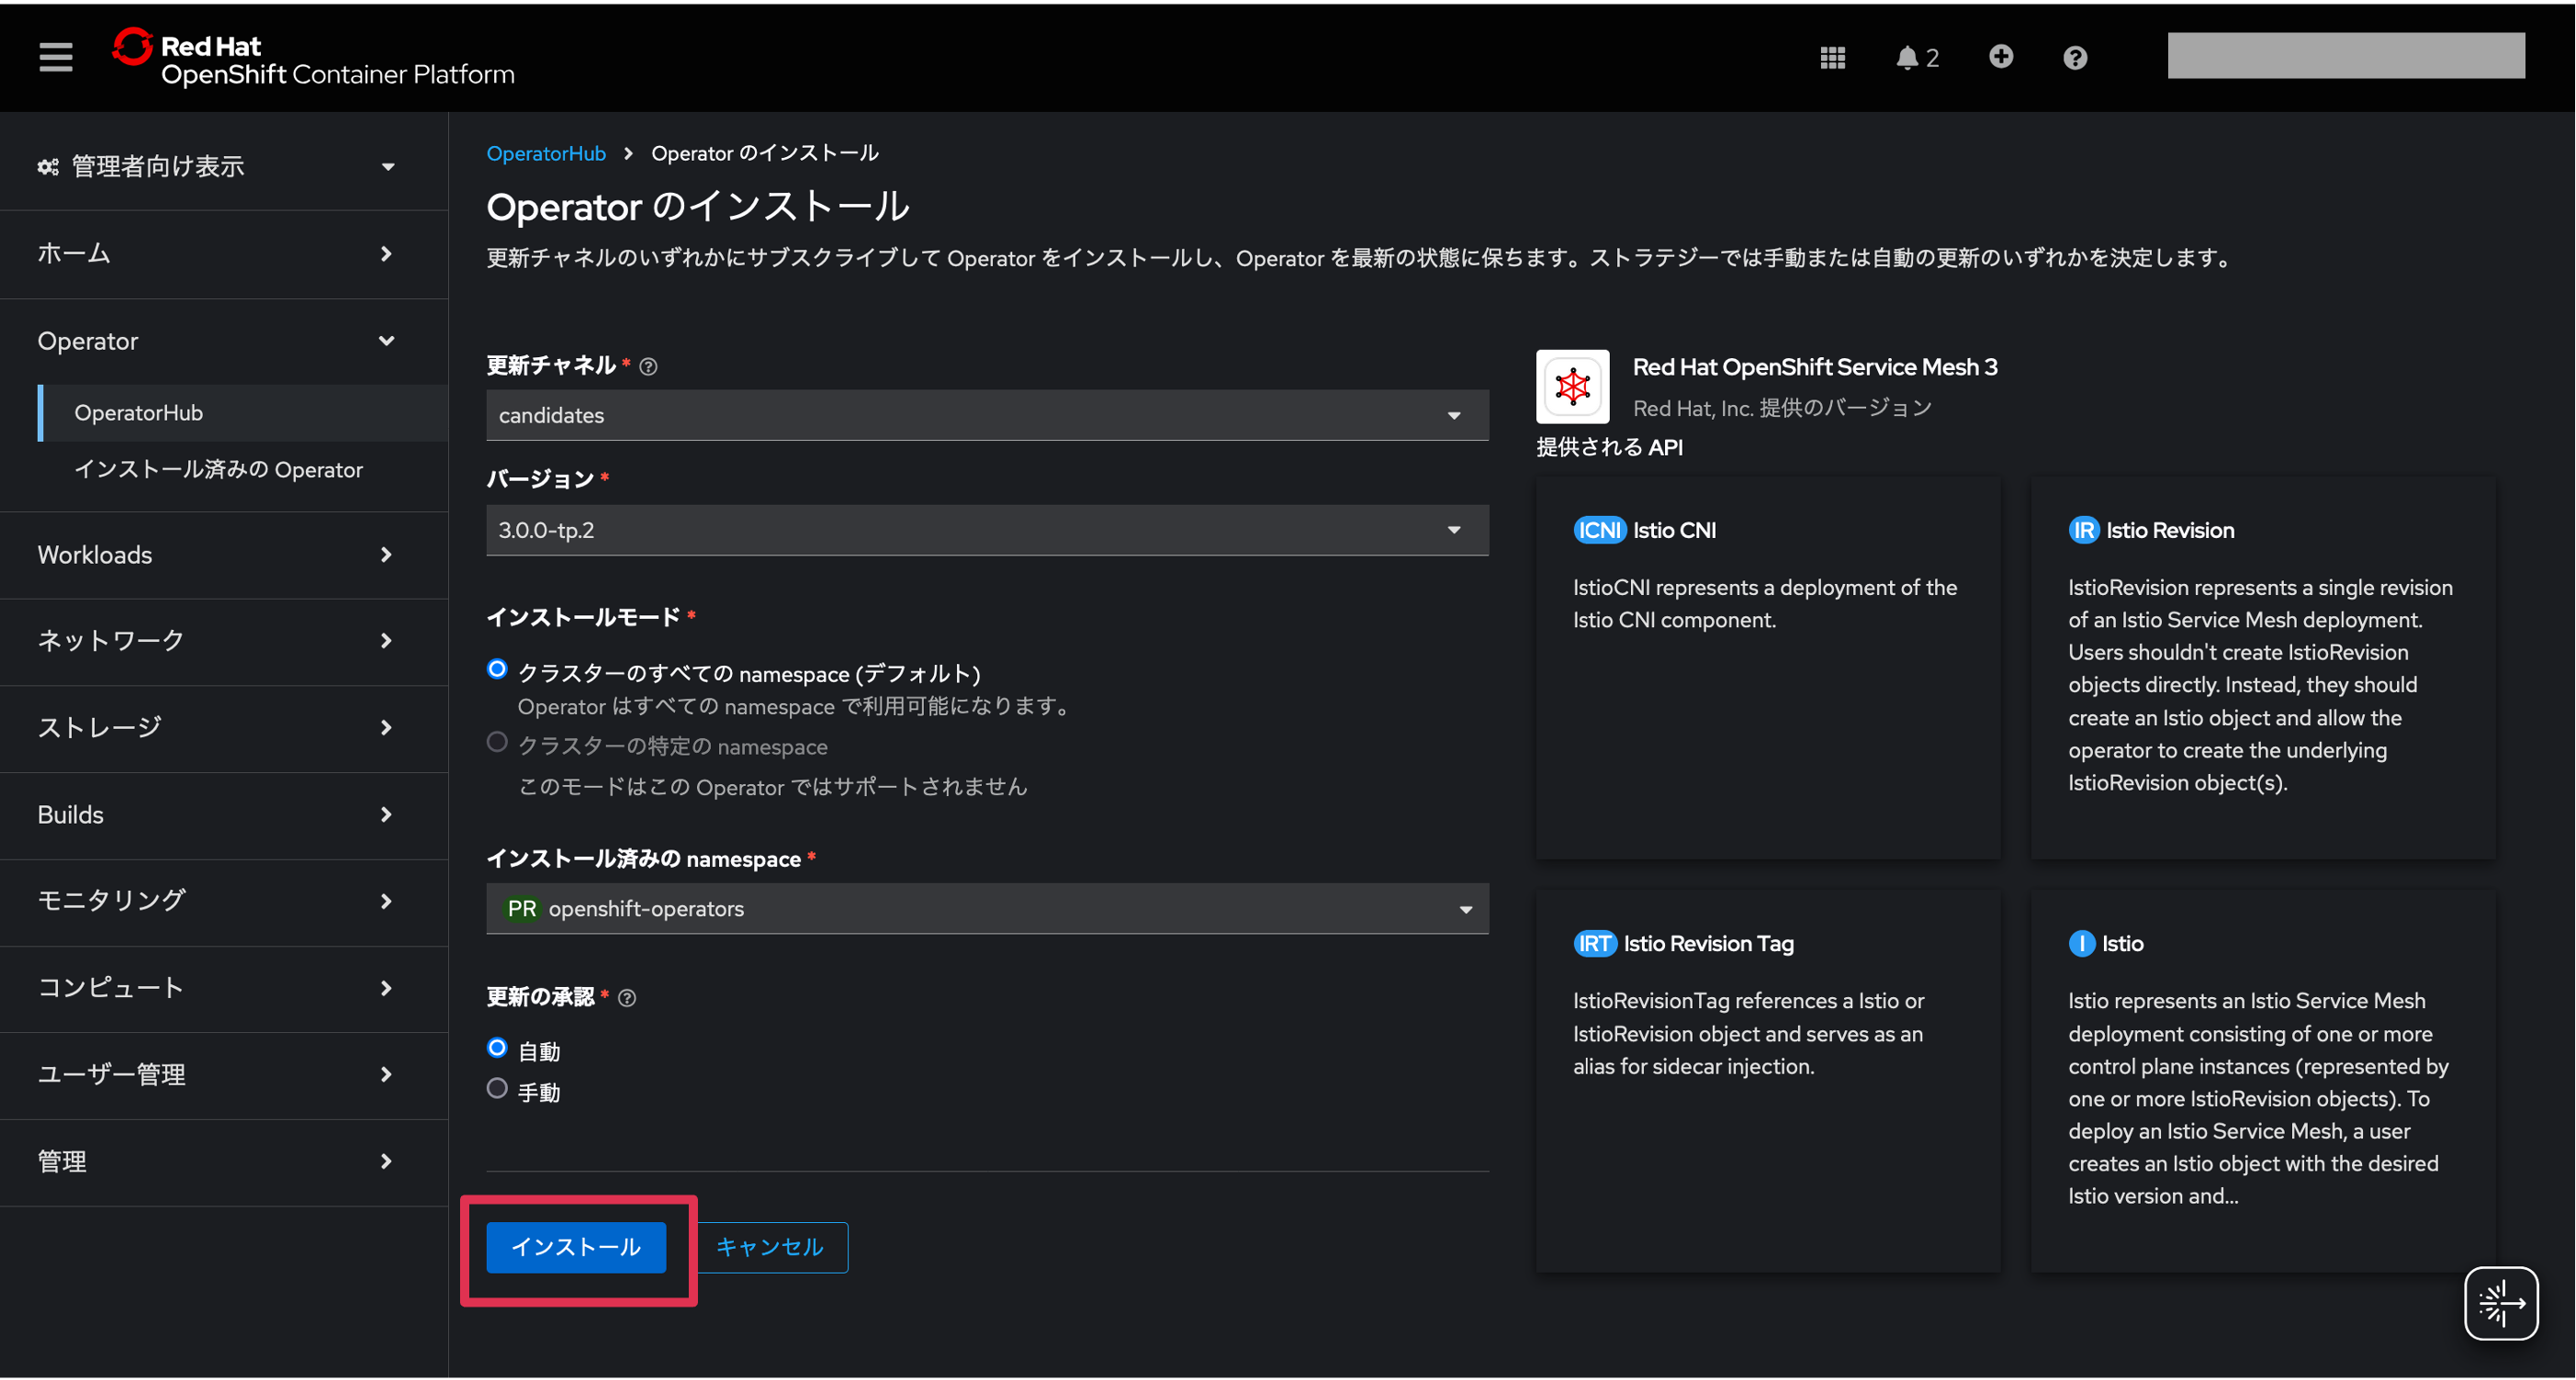
[4] 更新チャネルとバージョン、インストールモードはデフォルトのまま、必要に応じてUpdate Strategy(更新の承認)を変更して、「インストール」をクリックします
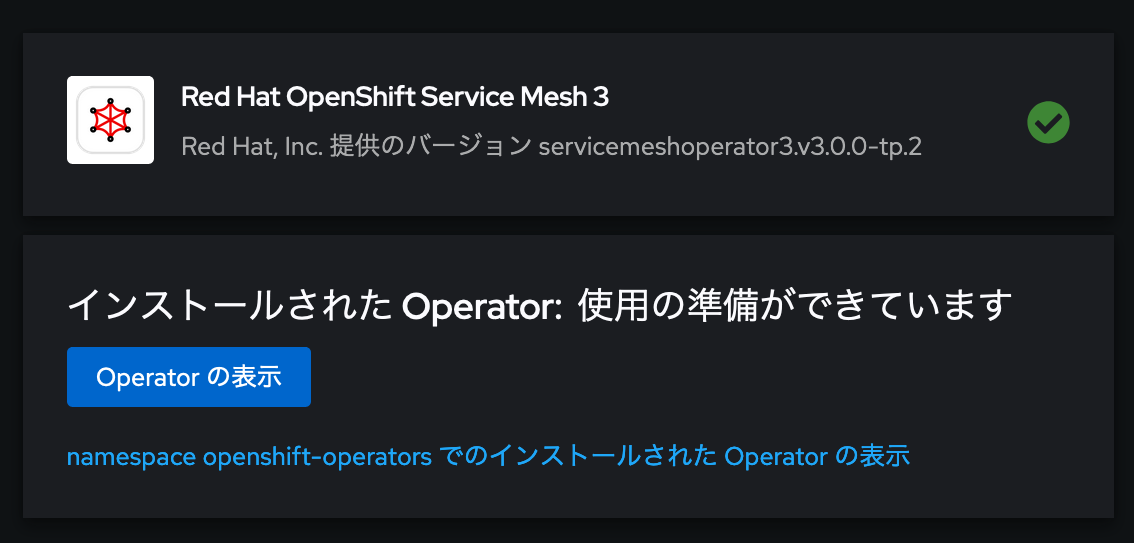
[5] しばらく待ち、以下のようなメッセージが出力されたら導入は完了です
cert-managerの導入
「cert-manager」で検索し、Red Hat社提供のcert-managerを導入します。
導入の仕方はServiceMesh v3 Operatorと変わらないので詳細はスキップします。
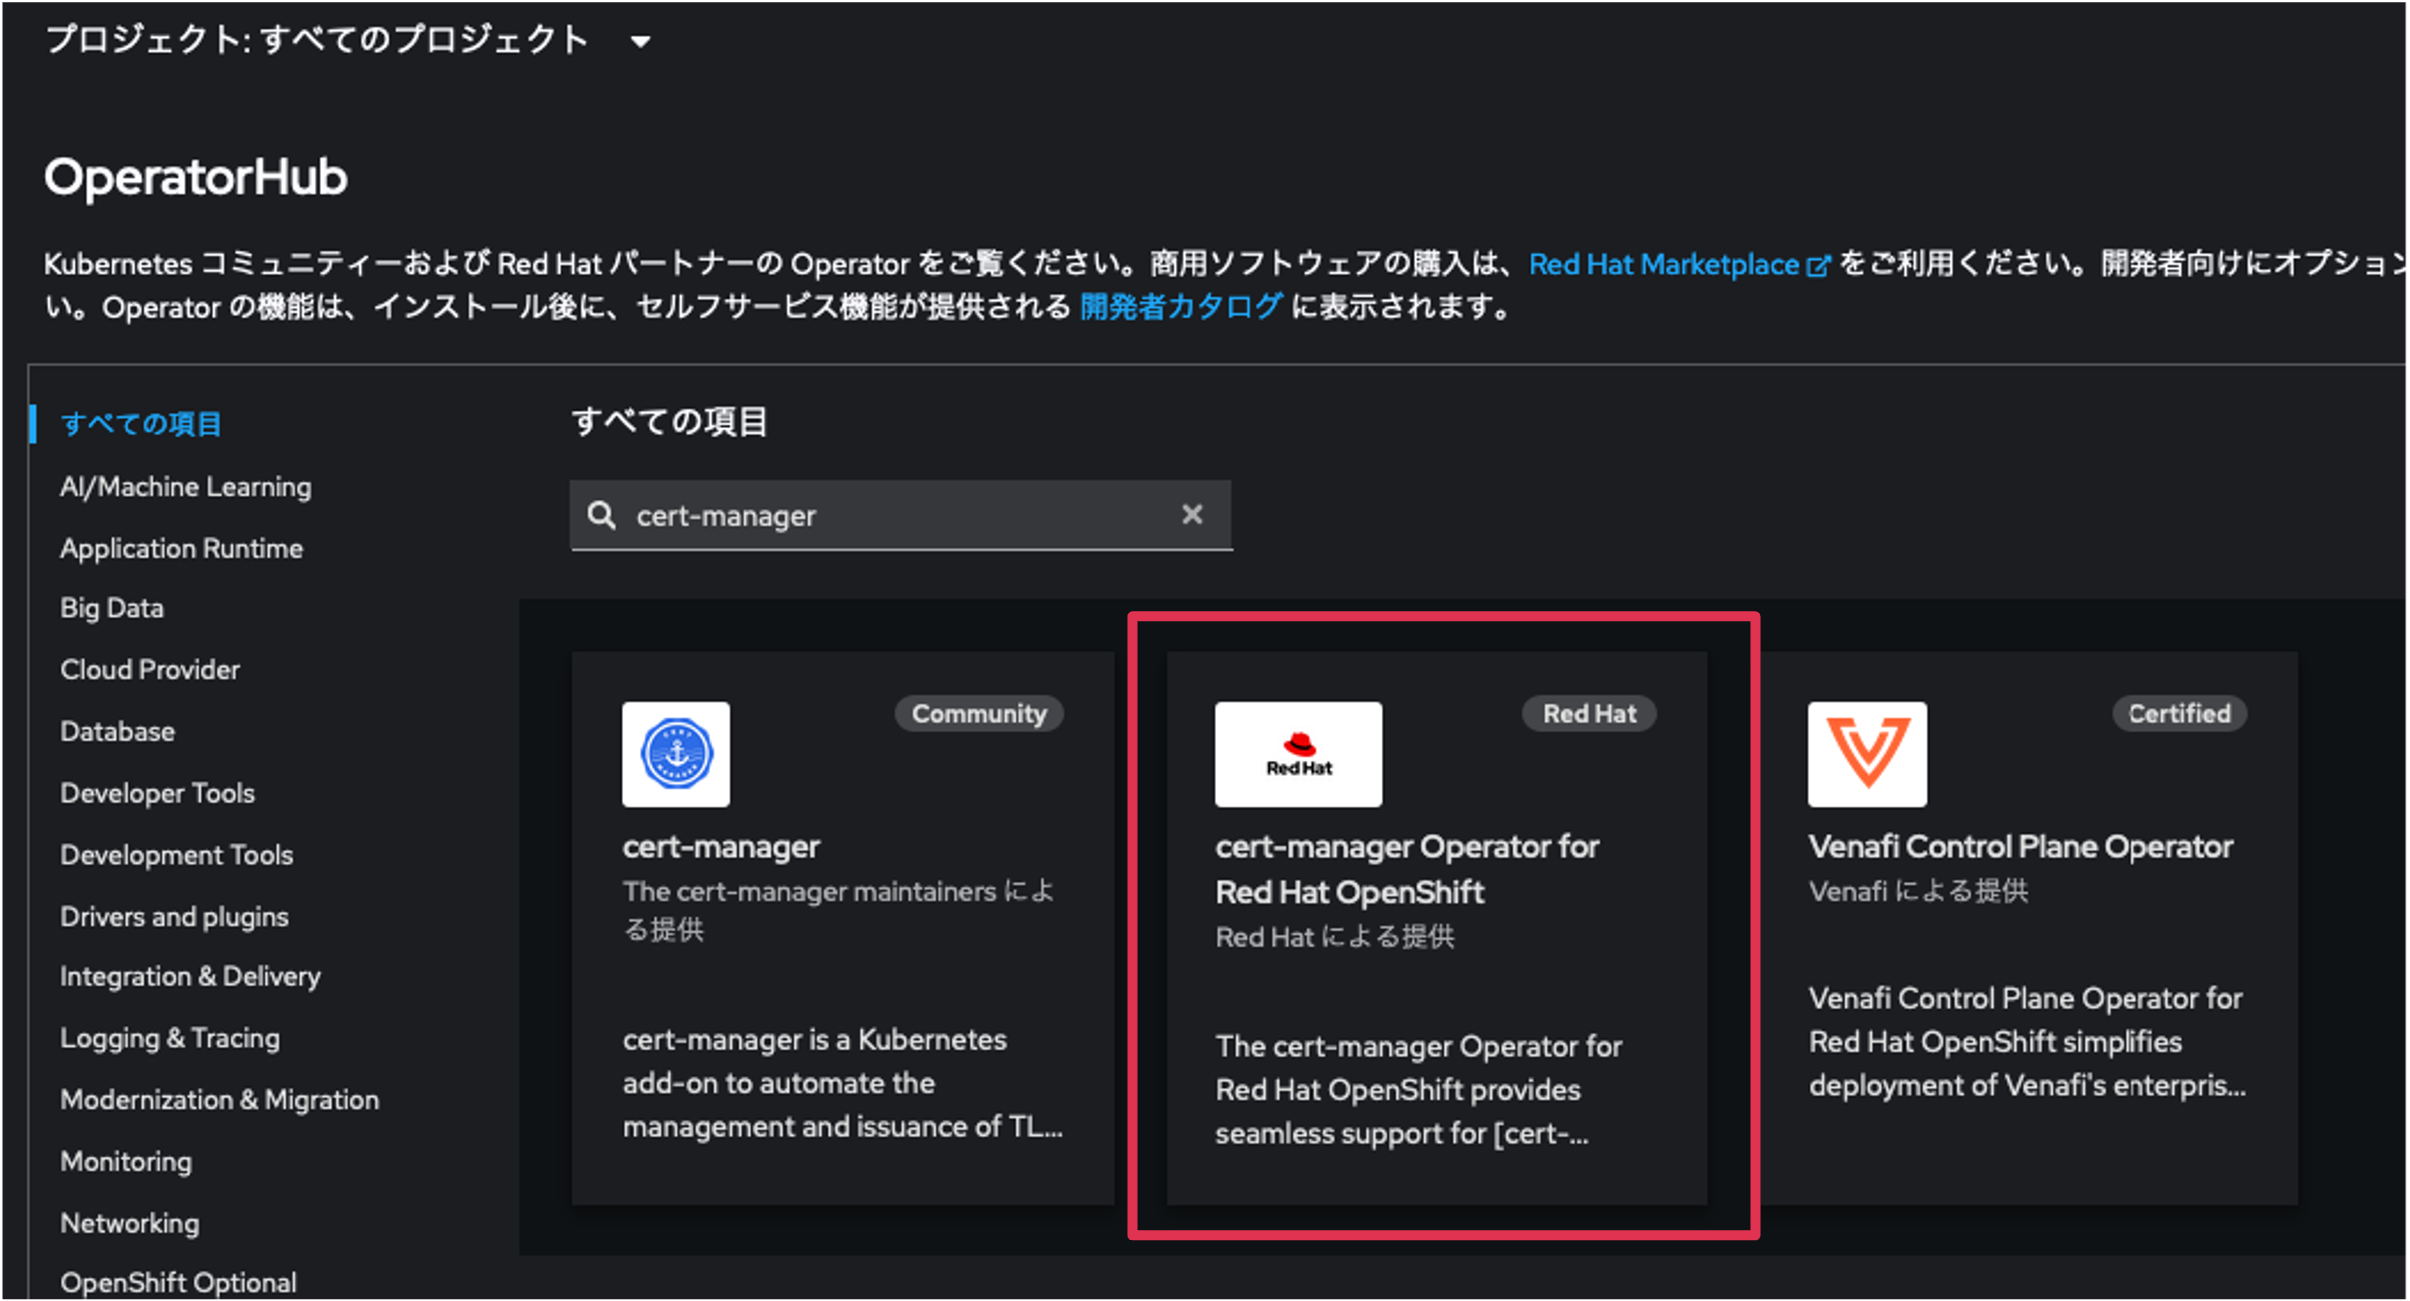
これで最低限の準備は完了です!
あとはターミナルでセットアップします。
Step 2. Control Planeのセットアップ
引き続き、ServiceMesh(Istio)のControl Plane(istiod)をセットアップします。
[1] Project (Namespace)の作成
先に必要なNamespaceを作成しておきます。
# Istio CNI (Container Network Interface)のためのProject(Namespace)の作成
% oc new-project istio-cni

# Istiod を稼働させるためのProject(Namespace)の作成
% oc new-project istio-system

# Istio Ingress Gateway を稼働させるためのProject(Namespace)の作成
% oc new-project istio-ingress
[2] istio-cni の導入
Istioでは、iptablesのルールでトラフィックをインターセプトし、Sidecar Proxyに流す仕様で動作しています。本来iptablesのルールを変えるためにはコンテナに対し特権を与える必要があるのですが、セキュリティー上望ましくない場合が多いです。istio-cniは特権コンテナを利用せず、iptablesのルール変更を行う仕組みを提供するために利用可能なリソースであり、v3においては明示的に導入しておきます。
以下のようなyamlファイルを用意します。
kind: IstioCNI
apiVersion: sailoperator.io/v1alpha1
metadata:
  name: default
spec:
  namespace: istio-cni
  version: v1.24.1
そして、oc applyで適用します。
# リソースの作成
% oc apply -n istio-ingress -f istio-cni.yml
sailoperator.io/default created

# DaemonSetが作成されたことを確認
% oc get daemonset -n istio-cni
NAME             DESIRED   CURRENT   READY   UP-TO-DATE   AVAILABLE   NODE SELECTOR            AGE
istio-cni-node   3         3         3       3            3           kubernetes.io/os=linux   51s

# 各ノードにPodが立っていることを確認
% oc get pod -n istio-cni -o wide
NAME                   READY   STATUS    RESTARTS   AGE   IP              NODE            NOMINATED NODE   READINESS GATES
istio-cni-node-7jdrn   1/1     Running   0          80s   172.17.83.167   10.244.128.10   <none>           <none>
istio-cni-node-qlrqd   1/1     Running   0          80s   172.17.117.42   10.244.0.15     <none>           <none>
istio-cni-node-wq68l   1/1     Running   0          80s   172.17.81.98    10.244.64.11    <none>           <none>
[3] Istiod の作成
ServiceMeshのControl PlaneであるIstiodを作成します。
v3からIstiodの導入はアップデート方式が異なる In-Place (上書き更新)か Revision-Based (切り替え更新)のいずれかを選べます。今回はシンプルにIn-Placeで作成します。
以下のようなファイルを用意します。istiodに対する設定オプションはSail Operator - API Referenceを確認ください。
kind: Istio
apiVersion: sailoperator.io/v1alpha1
metadata:
  name: default
spec:
  namespace: istio-system
  updateStrategy:
    inactiveRevisionDeletionGracePeriodSeconds: 30
    type: InPlace
  version: v1.24.1
  values:
    meshConfig:
      outboundTrafficPolicy:
        mode: REGISTRY_ONLY
      enableAutoMtls: true
      meshMTLS:
        minProtocolVersion: TLSV1_3
そして、oc applyで適用します。
# リソースの作成
% oc apply -f istio-inplace.yml
sailoperator.io/default created

# istioリソースの状態確認
% oc get istio -n istio-system
NAME      REVISIONS   READY   IN USE   ACTIVE REVISION   STATUS    VERSION   AGE
default   1           1       0        default           Healthy   v1.24.1   2m22s

# istiod Podが稼働しているか確認
% oc get po -n istio-system
NAME                      READY   STATUS    RESTARTS   AGE
istiod-54746b5db6-cqqzr   1/1     Running   0          2m29s

# Control Planeとして稼働していることを確認
% istioctl version
client version: 1.24.1
control plane version: 1.24.1_ossm_tp.2
data plane version: none
Step 3. Ingress Gatewayの作成
Control Planeに続いて、アプリケーションを公開するためのIngress Gatewayを構成します。
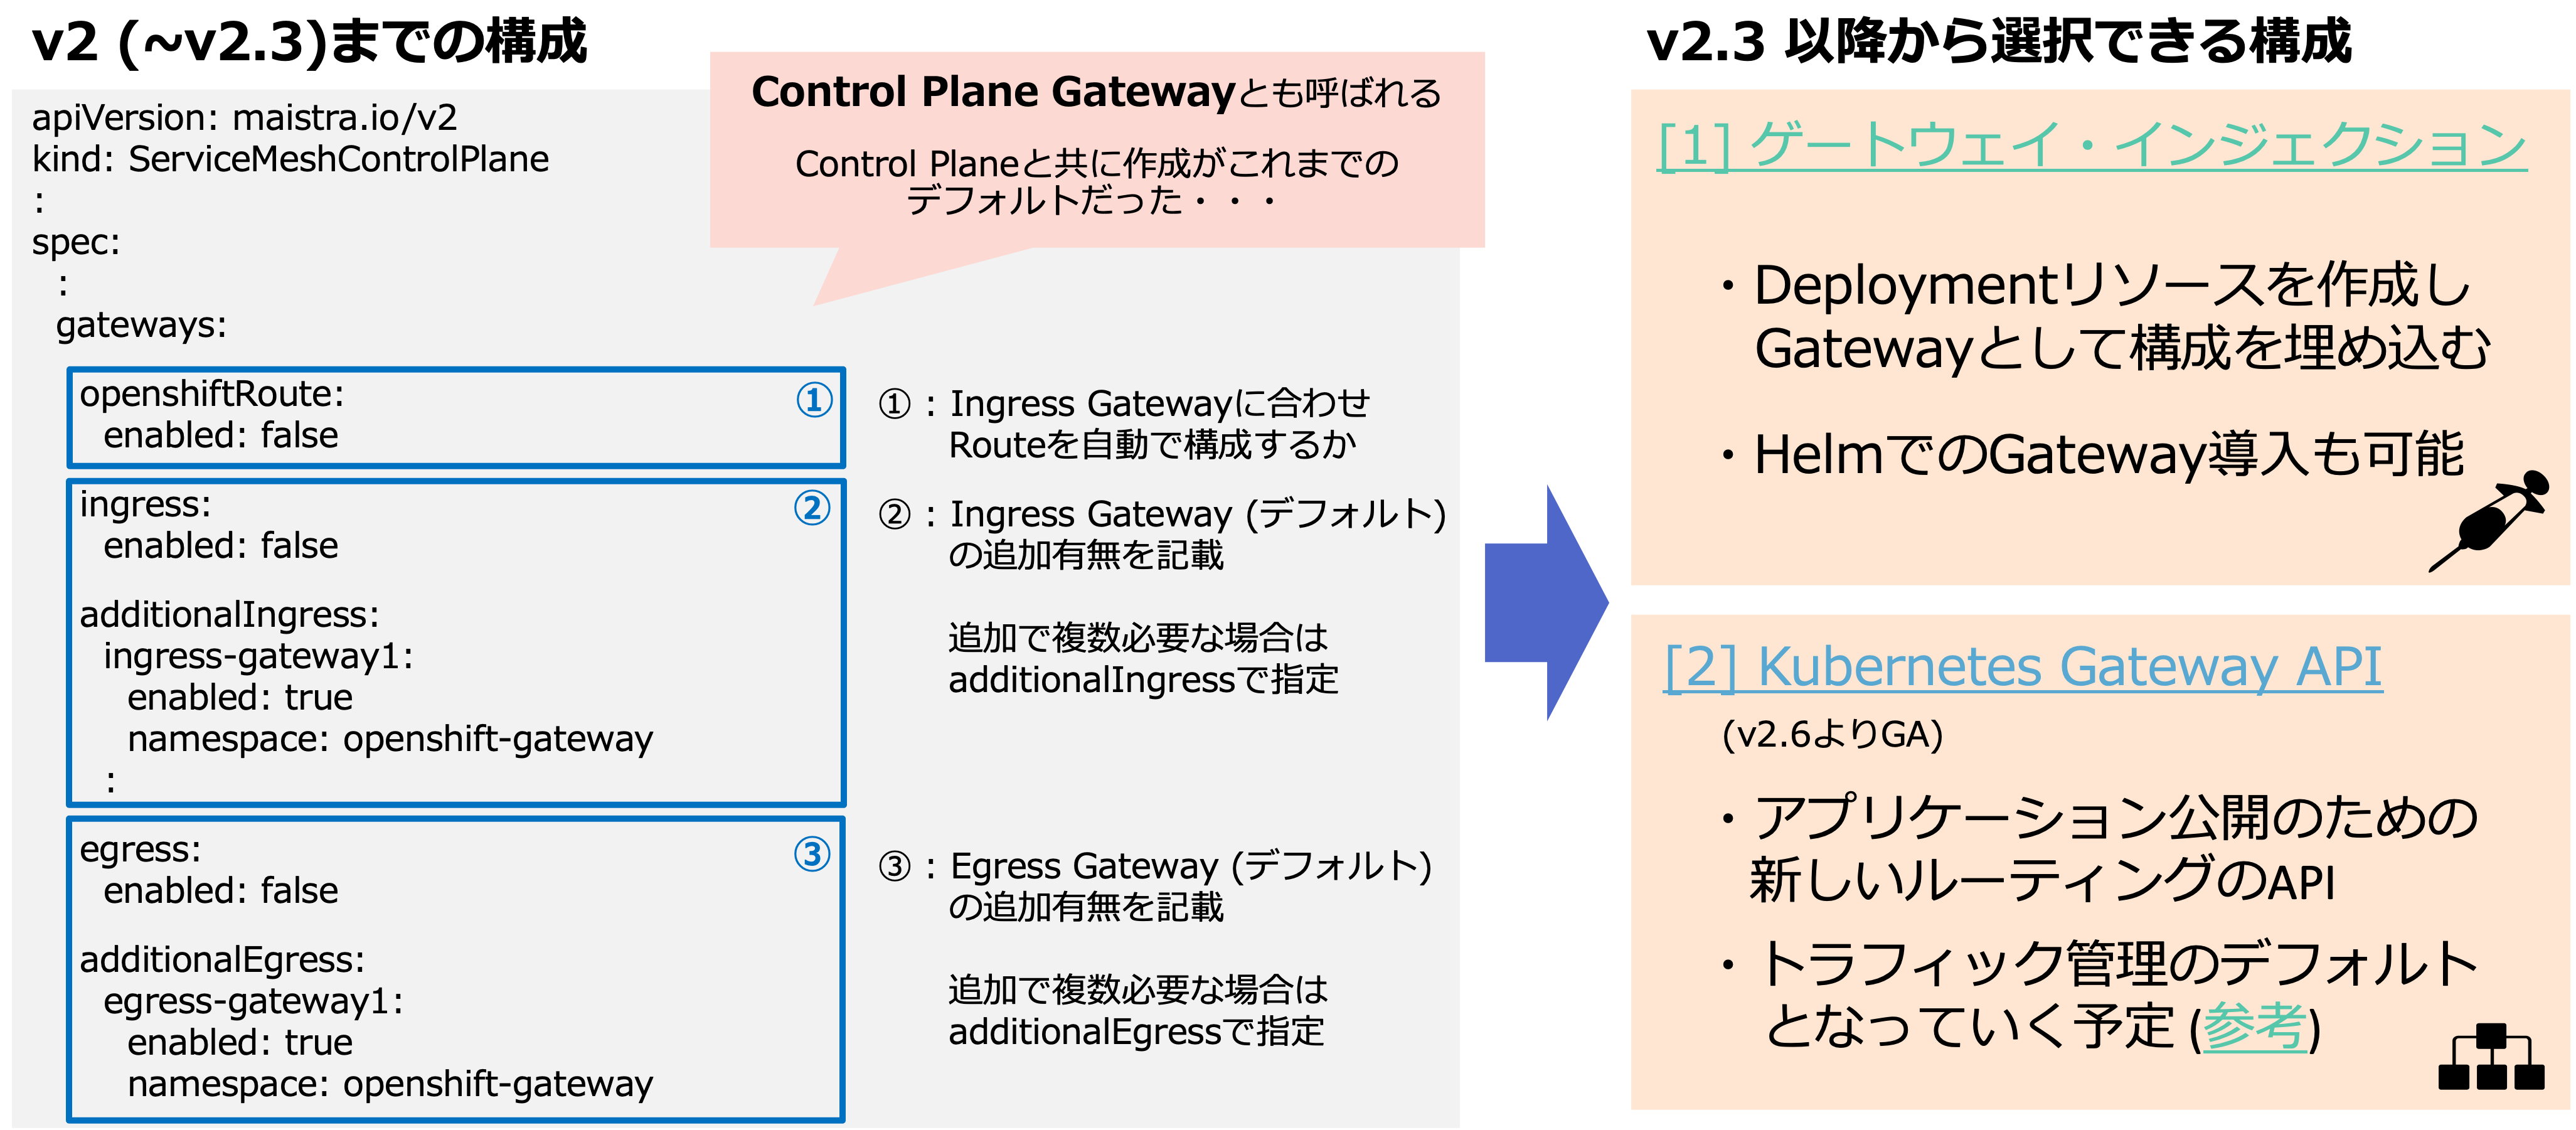
v2の途中までは、ControlPlaneを構成するCRDのServiceMeshControlPlaneリソースでistiodと合わせてIngress Gateway (Egress Gateway)を構成することが多かったかと思います。
v3が控えている現在では、Gatway Injectionで従来通りのIngress Gatewayを構成するか、Kubernetes Gateway APIを利用した新たなIngressを構成するか、の2つ選択肢が提供されています。
本記事では、従来通りIngress Gatewayを構成します。が、そのうちKubernetes Gateway APIでの構成に関してもまとめたいと思っています。
Ingress Gatewayの作成 (Gateway Injection)
サンプルに倣い、yamlファイルを準備します。
apiVersion: v1
kind: Service
metadata:
  name: istio-ingressgateway
spec:
  type: ClusterIP
  selector:
    istio: ingressgateway
  ports:
  - name: http2
    port: 80
    targetPort: 8080
  - name: https
    port: 443
    targetPort: 8443
---
apiVersion: apps/v1
kind: Deployment
metadata:
  name: istio-ingressgateway
spec:
  selector:
    matchLabels:
      istio: ingressgateway
  template:
    metadata:
      annotations:
        # Select the gateway injection template (rather than the default sidecar template)
        inject.istio.io/templates: gateway
      labels:
        # Set a unique label for the gateway. This is required to ensure Gateways can select this workload
        istio: ingressgateway
        # Enable gateway injection. If connecting to a revisioned control plane, replace with "istio.io/rev: revision-name"
        sidecar.istio.io/inject: "true"
    spec:
      containers:
      - name: istio-proxy
        image: auto # The image will automatically update each time the pod starts.

---
# Set up roles to allow reading credentials for TLS
apiVersion: rbac.authorization.k8s.io/v1
kind: Role
metadata:
  name: istio-ingressgateway-sds
rules:
- apiGroups: [""]
  resources: ["secrets"]
  verbs: ["get", "watch", "list"]
---
apiVersion: rbac.authorization.k8s.io/v1
kind: RoleBinding
metadata:
  name: istio-ingressgateway-sds
roleRef:
  apiGroup: rbac.authorization.k8s.io
  kind: Role
  name: istio-ingressgateway-sds
subjects:
- kind: ServiceAccount
  name: default
---
#Allow outside traffic to access the gateway
apiVersion: networking.k8s.io/v1
kind: NetworkPolicy
metadata:
  name: gatewayingress
spec:
  podSelector:
    matchLabels:
      istio: ingressgateway
  ingress:
    - {}
  policyTypes:
  - Ingress
そして、Project「istio-ingress」にIngress Gatewayリソースを作成します。
# リソースの作成
% oc apply -n istio-ingress -f ingress-gateway.yml
service/istio-ingressgateway created
deployment.apps/istio-ingressgateway created
role.rbac.authorization.k8s.io/istio-ingressgateway-sds created
rolebinding.rbac.authorization.k8s.io/istio-ingressgateway-sds created
networkpolicy.networking.k8s.io/gatewayingress created

# Ingress Gateway Podが稼働していることを確認
% oc get po -n istio-ingress
NAME                                    READY   STATUS    RESTARTS   AGE
istio-ingressgateway-54b6f57cbf-xpbk5   1/1     Running   0          51s

# istioctlコマンドで、dataplaneとしてIngress Gatewayがカウントされていることを確認
% istioctl version
client version: 1.24.1
control plane version: 1.24.1_ossm_tp.2
data plane version: 1.24.1 (1 proxies)

# Istiodと構成の同期が取れているかを確認
% istioctl proxy-status
NAME                                                    CLUSTER        CDS                LDS                EDS                RDS         ECDS        ISTIOD                      VERSION
istio-ingressgateway-54b6f57cbf-dgj79.istio-ingress     Kubernetes     SYNCED (5m44s)     SYNCED (5m44s)     SYNCED (5m44s)     IGNORED     IGNORED     istiod-54746b5db6-cqqzr     1.24.1
以上でServiceMeshの基盤準備は完了です。あとはアプリを動かしてみましょう。
Step 4. BookInfoアプリケーションを動かす
IstioのサンプルアプリケーションであるBookInfoアプリケーションを動かしてます。
[1] アプリケーションのProject(Namespace)の作成
「app1」という名前のProjectを作成します。
そして、ラベルを付与してNamespace Injectorでistio-proxyをPodに自動挿入されるように設定します。
# Projectの作成
% oc new-project app1

# istio-injectionラベルを付与
% oc label ns app1 istio-injection=enabled
namespace/app1 labeled
[2] Deployment & Serviceの作成
サンプルをダウンロードし、リソースを作成します。
# リソースの作成
% oc apply -f istio-bookinfo-app.yml
service/details created
serviceaccount/bookinfo-details created
deployment.apps/details-v1 created
service/ratings created
serviceaccount/bookinfo-ratings created
deployment.apps/ratings-v1 created
service/reviews created
serviceaccount/bookinfo-reviews created
deployment.apps/reviews-v1 created
deployment.apps/reviews-v2 created
deployment.apps/reviews-v3 created
service/productpage created
serviceaccount/bookinfo-productpage created
deployment.apps/productpage-v1 created

# Pod作成されて稼働していること、Pod内のコンテナ数が2になっていることを確認
% oc get po
NAME                              READY   STATUS    RESTARTS   AGE
details-v1-cdd874bc9-q2fbj        2/2     Running   0          2m22s
productpage-v1-5bb9985d4d-vjx58   2/2     Running   0          2m20s
ratings-v1-6484d64bbc-fpqzn       2/2     Running   0          2m21s
reviews-v1-598f9b58fc-kpvcr       2/2     Running   0          2m21s
reviews-v2-5979c6fc9c-s5tw6       2/2     Running   0          2m21s
reviews-v3-7bbb5b9cf7-4s7zz       2/2     Running   0          2m21s

# istiodと各Podのistio-proxyの間で同期が取れているか確認
% istioctl proxy-status
NAME                                                    CLUSTER        CDS                LDS                EDS                RDS                ECDS        ISTIOD                      VERSION
details-v1-cdd874bc9-q2fbj.app1                         Kubernetes     SYNCED (2m33s)     SYNCED (2m33s)     SYNCED (2m29s)     SYNCED (2m33s)     IGNORED     istiod-54746b5db6-cqqzr     1.24.1
istio-ingressgateway-54b6f57cbf-dgj79.istio-ingress     Kubernetes     SYNCED (2m35s)     SYNCED (2m35s)     SYNCED (2m29s)     IGNORED            IGNORED     istiod-54746b5db6-cqqzr     1.24.1
productpage-v1-5bb9985d4d-vjx58.app1                    Kubernetes     SYNCED (2m33s)     SYNCED (2m33s)     SYNCED (2m29s)     SYNCED (2m33s)     IGNORED     istiod-54746b5db6-cqqzr     1.24.1
ratings-v1-6484d64bbc-fpqzn.app1                        Kubernetes     SYNCED (2m33s)     SYNCED (2m33s)     SYNCED (2m29s)     SYNCED (2m33s)     IGNORED     istiod-54746b5db6-cqqzr     1.24.1
reviews-v1-598f9b58fc-kpvcr.app1                        Kubernetes     SYNCED (2m29s)     SYNCED (2m29s)     SYNCED (2m29s)     SYNCED (2m29s)     IGNORED     istiod-54746b5db6-cqqzr     1.24.1
reviews-v2-5979c6fc9c-s5tw6.app1                        Kubernetes     SYNCED (2m35s)     SYNCED (2m35s)     SYNCED (2m29s)     SYNCED (2m35s)     IGNORED     istiod-54746b5db6-cqqzr     1.24.1
reviews-v3-7bbb5b9cf7-4s7zz.app1                        Kubernetes     SYNCED (2m35s)     SYNCED (2m35s)     SYNCED (2m29s)     SYNCED (2m35s)     IGNORED     istiod-54746b5db6-cqqzr     1.24.1

# サービスの確認
% oc get svc
NAME          TYPE        CLUSTER-IP       EXTERNAL-IP   PORT(S)    AGE
details       ClusterIP   172.21.96.94     <none>        9080/TCP   3m16s
productpage   ClusterIP   172.21.189.204   <none>        9080/TCP   3m16s
ratings       ClusterIP   172.21.78.53     <none>        9080/TCP   3m16s
reviews       ClusterIP   172.21.238.5     <none>        9080/TCP   3m16s
[3] 証明書の作成
cert-managerを用いて、アプリケーション用に自己署名証明書を作成します。
アプリケーションにアクセスする際のFQDNを確認した上で、認証局と自己署名証明書を作成します。
---
apiVersion: cert-manager.io/v1
kind: ClusterIssuer
metadata:
  name: selfsigned-issuer
spec:
  selfSigned: {}
---
apiVersion: cert-manager.io/v1
kind: Certificate
metadata:
  name: selfsigned-ca
  namespace: istio-ingress
spec:
  isCA: true
  commonName: selfsigned-ca
  duration: 438000h
  secretName: selfsigned-ca-cert
  privateKey:
    algorithm: RSA
    size: 2048
  issuerRef:
    name: selfsigned-issuer
    kind: ClusterIssuer
    group: cert-manager.io
---
apiVersion: cert-manager.io/v1
kind: Issuer
metadata:
  name: ca-issuer
  namespace: istio-ingress
spec:
  ca:
    secretName: selfsigned-ca-cert
---
apiVersion: cert-manager.io/v1
kind: Certificate
metadata:
  name: bookinfo-https
  namespace: istio-ingress
spec:
  subject:
    organizations:
    - Rainmaker
    countries:
    - Japan
    organizationalUnits:
    - ServiceMesh
    localities:
    - Chiba
    provinces:
    - Chiba
  commonName: bookinfo-https-cn
  duration: 8760h
  dnsNames:
  - <アプリアクセスのためのFSQNを指定>
  secretName: bookinfo-https-cert
  issuerRef:
    name: ca-issuer
    kind: Issuer
    group: cert-manager.io
  privateKey:
    algorithm: RSA
    size: 2048
ファイルを準備したら、それぞれ適用します。自己署名証明書を発行するProjectはIngress Gatewayが稼働しているProjectに合わせる(今回の場合はistio-ingress)必要があることに注意してください。
証明書が格納されるSecretが実際に作成されていれば、証明書の準備は完了です。
% oc apply -f ca.yml
clusterissuer.cert-manager.io/selfsigned-issuer created
certificate.cert-manager.io/selfsigned-ca created
issuer.cert-manager.io/ca-issuer created

% oc apply -n istio-ingress -f cert-bookinfo.yml
certificate.cert-manager.io/bookinfo-https created

% oc get secret -n istio-ingress |grep bookinfo
bookinfo-https-cert        kubernetes.io/tls         3      12m
[4] VirtualService & Gateway リソースの作成
Istioが提供するCRDであるVirtualServiceとGatewayリソースを作成します。
以下のyamlファイルを用意します。<アプリアクセスのためのFSQNを指定>の部分は環境に合わせて設定します。
apiVersion: networking.istio.io/v1
kind: Gateway
metadata:
  name: bookinfo-gateway
spec:
  selector:
    istio: ingressgateway
  servers:
  - hosts:
    - <アプリアクセスのためのFSQNを指定>
    port:
      name: https
      number: 443
      protocol: HTTPS
    tls:
      credentialName: bookinfo-https-cert  # istio-ingressにSecretがあることを確認する
      mode: SIMPLE
---
apiVersion: networking.istio.io/v1
kind: VirtualService
metadata:
  name: bookinfo
spec:
  hosts:
  - <アプリアクセスのためのFSQNを指定>
  gateways:
  - bookinfo-gateway
  http:
  - match:
    - uri:
        exact: /productpage
    - uri:
        prefix: /static
    - uri:
        exact: /login
    - uri:
        exact: /logout
    - uri:
        prefix: /api/v1/products
    route:
    - destination:
        host: productpage
        port:
          number: 9080
そして、oc applyで適用します。作成する先はアプリケーションが動く「app1」とします。
% oc apply -f istio-gateway.yml
gateway.networking.istio.io/bookinfo-gateway created
virtualservice.networking.istio.io/bookinfo created
[5] Routeリソースの作成
本当はRouter経由で公開しなくても別途LBを立てて直接Ingress Gatewayにアクセスでも良いのですが、本記事ではRouter経由でアプリケーションにアクセスすることにします。
以下のようなyamlファイルを用意します。<アプリアクセスのためのFSQNを指定>の部分は環境に合わせて設定します。
kind: Route
apiVersion: route.openshift.io/v1
metadata:
  name: bookinfo-gateway-https
  namespace: istio-ingress
spec:
  host: <アプリアクセスのためのFSQNを指定>
  to:
    kind: Service
    name: istio-ingressgateway
    weight: 100
  port:
    targetPort: https
  tls:
    termination: passthrough
  wildcardPolicy: None
そして、oc applyで適用します。
% oc apply -f route-bookinfo.yaml
route.route.openshift.io/bookinfo-gateway-https created
[6] BookInfoアプリにアクセスする
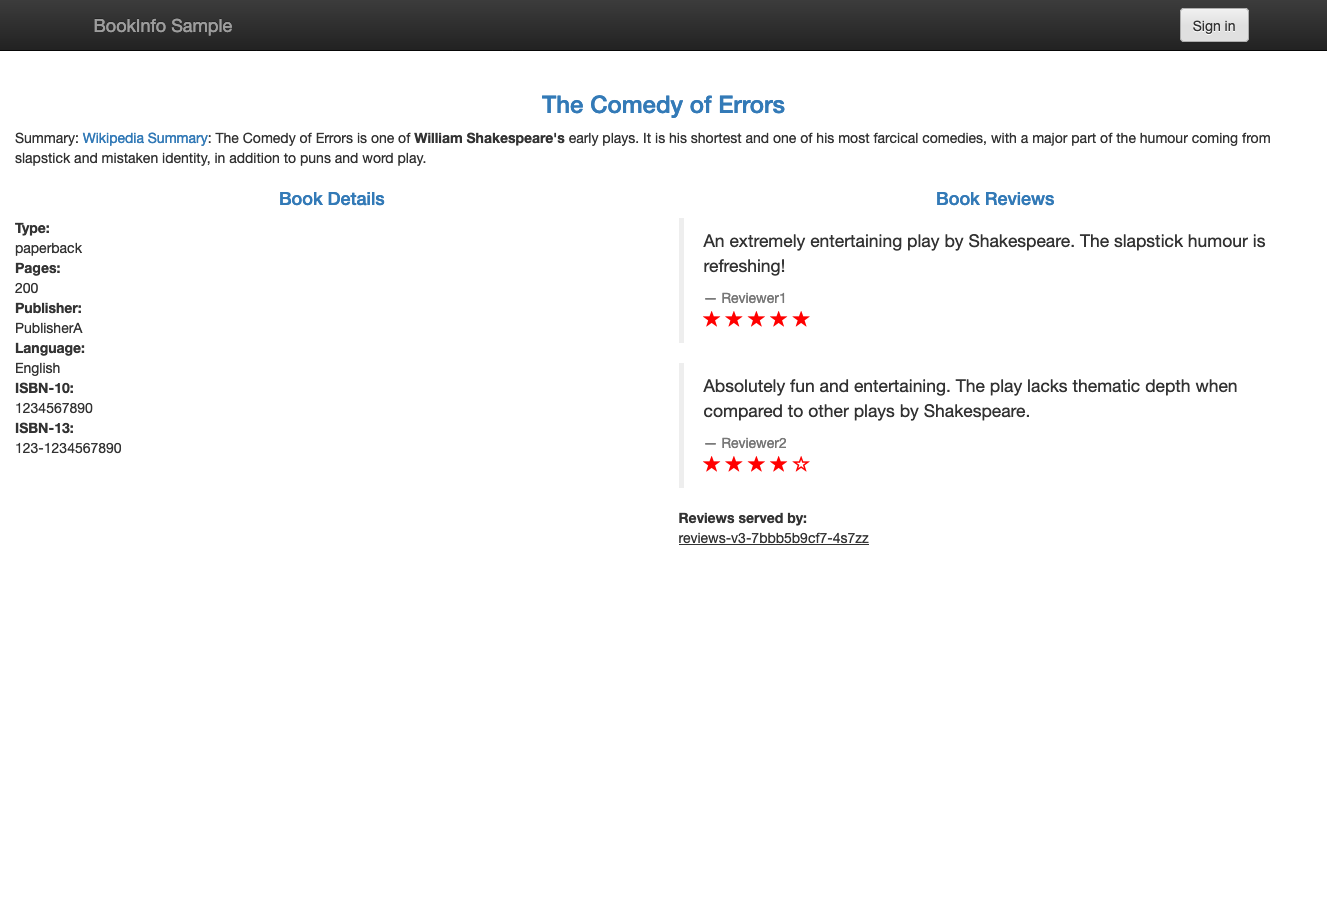
実際にブラウザでアクセスしてみましょう。https://<アプリアクセスのためのFSQNを指定>/productpageにアクセスすれば、以下のような画面が表示されます!
記事のまとめと次回予告
OpenShift ServiceMesh v3で、導入・Control Planeの構成・アプリケーションの簡単な稼働確認まで実施できました。ServiceMesh v2の頃とは手順が若干違いますが、最低限の導入という観点ではさほど苦労なくできたかなと思います。
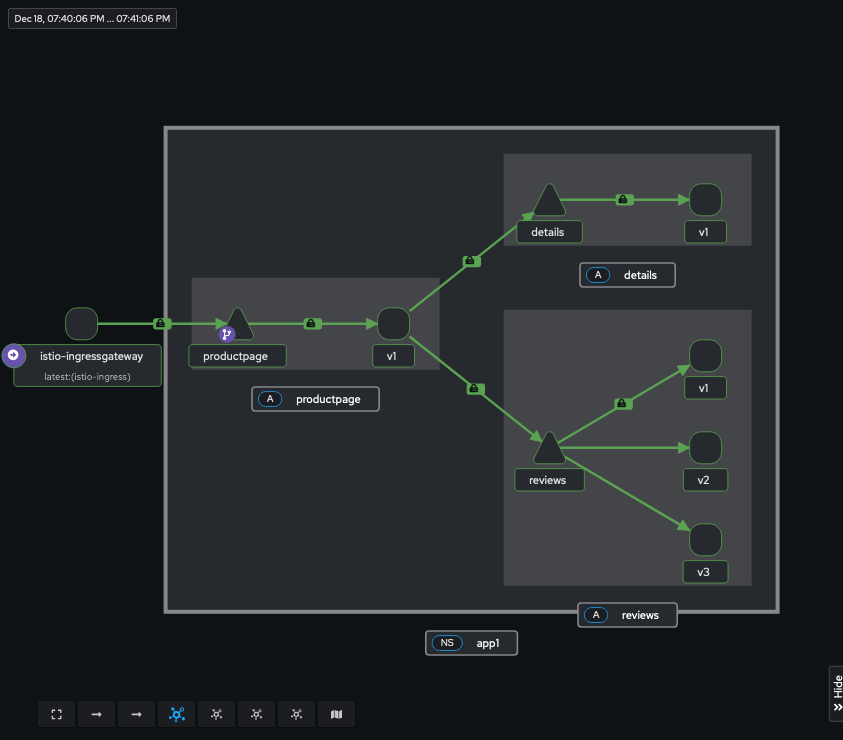
ただ、今の構成で本当にServiceMeshとして期待する構成になっているのか(例えば、Pod間でmTLSが強制できているのかなど)、、可視化したいところですよね。
以下の図のように、Kialiでの可視化もTechnical Peviewになり情報が整理され、かなりすっきりシンプルに設定できるようになりました。後続記事として早めに公開したいと思います。
