
研究用にネットワークシミュレーターのns3のバージョン30を使いたいのですが、macOS版はエラーが出てうまく動かなかったので、Ubuntu18.04のDockerコンテナを立てることにしました。
今回のソースコードは以下のgithubレポジトリで公開しています。
https://github.com/RIckyBan/ns3-docker/tree/master
環境
PC: MacBook Air (Retina, 13-inch, 2018)
OS: macOS Catalina
メモリ: 16GB
ns3とは
ns3とは、オープンソースの離散事象ネットワークシミュレータです。
作るもの
やりたいこととしては、Docker内でns3の環境を構築し、visualizerのGUI出力もローカルに持ってきたいです。これはホストとコンテナの間にsocatでソケット通信を作り、ホスト側のXQuartzに表示させることで実現できます。
ns3-26用のDockerコンテナは公開してくださっている方がいたので、これをバージョン30用に書き換え、追加パッケージのインストールコマンドもついでに書き足しました。
インストール
ホスト側のMacBookにこれらのパッケージをインストールします。
# Homebrewが入ってない場合
$ /usr/bin/ruby -e "$(curl -fsSL https://raw.githubusercontent.com/Homebrew/install/master/install)"

$ brew install socat
$ brew install --cask xquartz
コンテナ側に必要なパッケージはshellスクリプトを作成し、コンテナ内でインストールを行います。(こちらの記事よりお借りしました。)
# !/bin/bash

apt install -y wget

# minimal requirements for Python users (release 3.30 and ns-3-dev)
apt install -y gcc g++ python python3 python3-dev

# minimal requirements for Python (development)
apt install -y python3-setuptools git mercurial

# Netanim animator
apt install -y qt5-default mercurial

# Support for ns-3-pyviz visualizer
apt install -y gir1.2-goocanvas-2.0 python-gi python-gi-cairo python-pygraphviz python3-gi python3-gi-cairo python3-pygraphviz gir1.2-gtk-3.0 ipython ipython3

# Support for MPI-based distributed emulation
apt install -y openmpi-bin openmpi-common openmpi-doc libopenmpi-dev

# Support for utils/check-style.py code style check program
apt install -y uncrustify

# GNU Scientific Library (GSL) support for more accurate 802.11b WiFi error models (not needed for OFDM):
apt install -y gsl-bin libgsl-dev libgsl23 libgslcblas0

# Database support for statistics framework
apt install -y sqlite sqlite3 libsqlite3-dev

# Xml-based version of the config store (requires libxml2 >= version 2.7)
apt install -y libxml2 libxml2-dev

# Support for generating modified python bindings
apt install -y cmake libc6-dev libc6-dev-i386 libclang-6.0-dev llvm-6.0-dev automake pip
python3 -m pip install --user cxxfilt

# A GTK-based configuration system
apt install -y libgtk2.0-0 libgtk2.0-dev

# To experiment with virtual machines and ns-3
apt install -y vtun lxc

# Support for openflow module (requires some boost libraries)
apt install -y libboost-signals-dev libboost-filesystem-dev
Dockerfile・makefileの作成
ns3自体のビルドには
-
bakeを用いる -
downoload.pyを呼び出す -
wafを用いる
の3種類の方法がありますが、ここではwafを用いる方法で統一しています。
wgetを実行するvisualizerのURLは公式より最新版のPyBindGenを取ってきています、随時変更してください。
FROM ubuntu:18.04

MAINTAINER Riki Bando <ricky1231@g.ecc.u-tokyo.ac.jp>

LABEL Description="Docker image for NS-3 Network Simulator"

# NS-3
# Create working directory
RUN mkdir -p /usr/ns3
WORKDIR /usr

COPY . /usr

    # Install needed packages
RUN set -x && \
    apt-get update && \
    sh requirements.sh && \
    # Configure and compile NS-3
    cd /usr/ns-allinone-3.30/ns-3.30 && \
    ./waf configure --build-profile=debug --enable-examples --enable-tests && \
    ./waf && \
    # For visualizer
    cd /usr/ns-allinone-3.30/ && \
    wget https://files.pythonhosted.org/packages/e7/9f/32655239a4d978e92dd59233c4a3fd8e064ef1193487f58c889fe116b780/PyBindGen-0.20.1.tar.gz && \
    tar -xf PyBindGen-0.20.1.tar.gz && \
    # For click
    git clone https://github.com/kohler/click.git && \
    cd click && \
    ./configure --enable-userlevel --disable-linuxmodule --enable-nsclick && \
    make && \
    cd .. && \
    # For brite
    hg clone http://code.nsnam.org/BRITE && \
    cd BRITE && \
    make && \
    cd .. && \
    # For openflow
    hg clone http://code.nsnam.org/openflow && \
    cd openflow && \
    ./waf configure && \
    ./waf build && \
    # For integration
    cd /usr/ns-allinone-3.30/ns-3.30 && \
    ./waf configure --enable-examples --enable-tests --with-pybindgen=../PyBindGen-0.20.1 --with-nsclick=../click --with-brite=../BRITE --with-openflow=../openflow && \
    ./waf build && \
    # Make symlink
    ln -s /usr/ns-allinone-3.30/ns-3.30/ /usr/ns3/ && \
    # Cleanup
    apt-get clean && \
    rm -rf /var/lib/apt
ハマったポイントとしては、RUNを1つのコマンドにまとめないと実行できないものがありました。
NAME=docker-ns3-30

build: Dockerfile
	if [ -d "./ns-allinone-3.30" ]; then \
		echo "Dir exists, skip downloading .."; \
	else \
		wget http://www.nsnam.org/release/ns-allinone-3.30.tar.bz2; \
		tar -xf ./ns-allinone-3.30.tar.bz2; \
		rm ./ns-allinone-3.30.tar.bz2; \
	fi
	docker build -t $(NAME) .

run:
	docker run --rm -it -v `pwd`/ns-allinone-3.30/ns-3.30/src/:/usr/ns3/ns-3.30/src -e DISPLAY=docker.for.mac.host.internal:0 $(NAME)
NAMEでは適当なコンテナ名を指定しましょう。
コンテナのビルド
$ cd ns3-docker-30
$ make
でビルドを行います。1時間ぐらいかかりますが、気長に待ちましょう。
ホスト側の準備
XQuartzの起動・ソケット通信の作成を行います。socatの方を先に実行してください。
$ socat TCP-LISTEN:6000,reuseaddr,fork UNIX-CLIENT:\"$DISPLAY\"
別のターミナルで、
$ open -a XQuartz
きちんとソケットが開いているかは、以下のコマンドで確認できます。
$ lsof -i TCP:6000
COMMAND   PID  USER   FD   TYPE             DEVICE SIZE/OFF NODE NAME
socat   91461 ricky    5u  IPv4 0x46a0af6169c64ac9      0t0  TCP *:6000 (LISTEN)
コンテナ起動とサンプル実行
$ cd ns3-docker-30
$ make run
でコンテナに入ります。
$ cd ns3/ns-3.30
# サンプルを適当に実行
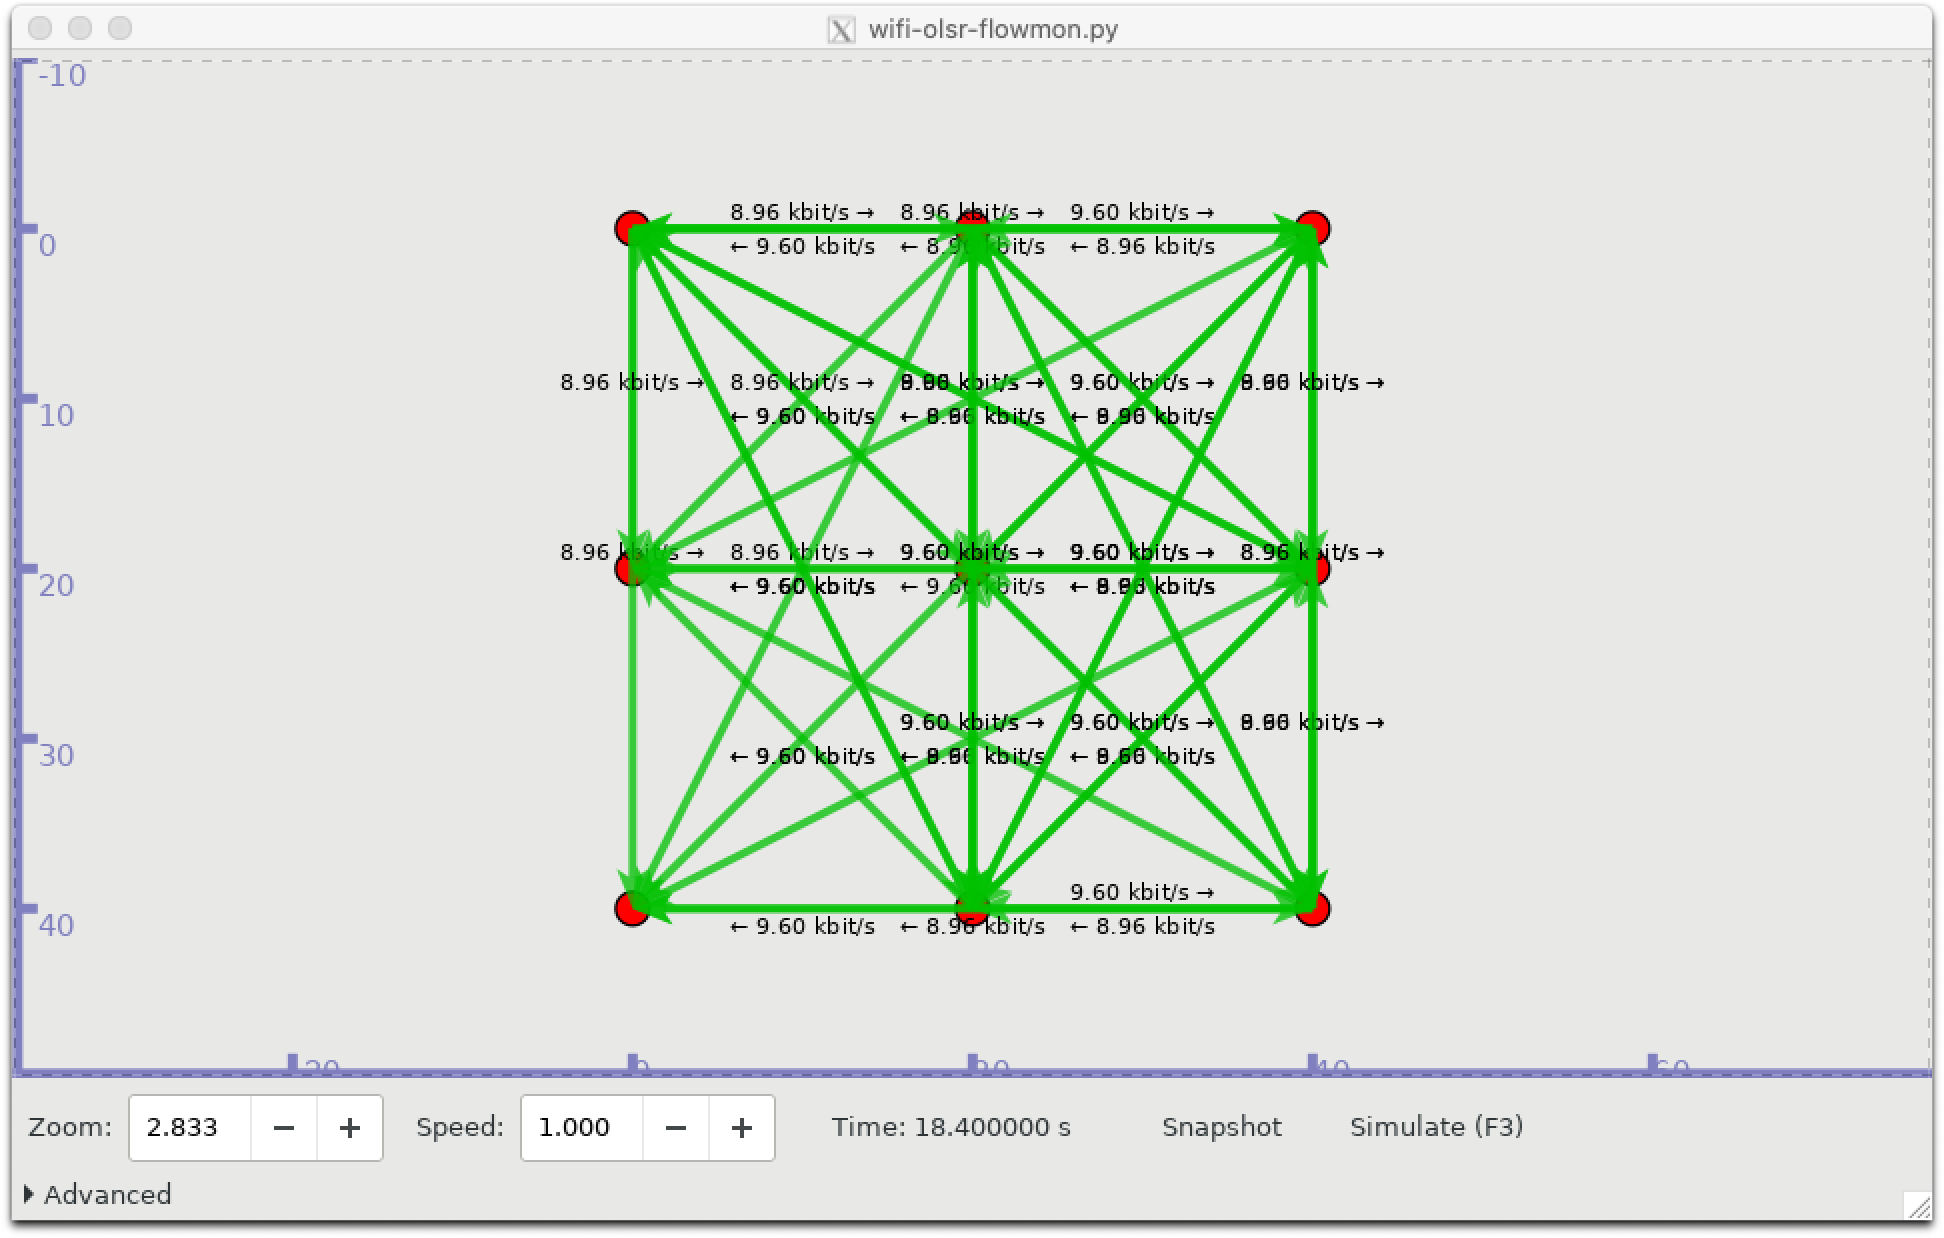
$ ./waf --pyrun src/flow-monitor/examples/wifi-olsr-flowmon.py --vis
上手くいけば以下のようにビジュアライザが起動し、Simulate(F3)ボタンでシミュレーションが開始します!
参考
以上