注意事項
リンク先に記載
[Ubuntu Server 22.04] 個人的初期設定 覚書
概要
「目次」
1.Tailscale インストール
概要
コンストラクション
ーTailscale インストール
1.インストレイション
[一括インストール]
[手動インストール]
2.Tailscale サービスの認証
[Authentication]
ー任意な追加の設定
3.オプション
[IPフォワードの有効化]
[サブネット ルーティング、出口ノードの利用可能化]
4.ブラウザから有効化
ーその他の操作
Tailscale へのログイン、ログアウト、アカウントの追加、アカウントの切り替え
[ログイン、再ログイン(+起動)]
[ログアウト]
[アカウントの追加]
[アカウントの切り替え]
テールネット内にローカル サーバーを展開
引用元、参照元、参考先
2.WeTTY インストール
3.Ubuntu Desktop(GDM3 ubuntu カスタム) インストール、自動ログイン設定
4.Ubuntu Desktop RDP セットアップ
5.PowerTOP TLP インストール
6.自動再起動設定(Crontab, rtcwake)
「説明」
Tailscale は、非常に簡単に構築できる、機器同士を VPN でピアツーピア接続するソフトです。
コンストラクション
Tailscale インストール
1.インストレイション
➀~➃ までを行う
[一括インストール]
‘[手動インストール]の ➀~➁ に相当‘
curl -fsSL https://tailscale.com/install.sh | sh
[手動インストール]
’➀ Tailscale 公式サイトから、リポジトリと鍵を追加’
  curl -fsSL https://pkgs.tailscale.com/stable/ubuntu/jammy.noarmor.gpg | sudo tee /usr/share/keyrings/tailscale-archive-keyring.gpg >/dev/null
  curl -fsSL https://pkgs.tailscale.com/stable/ubuntu/jammy.tailscale-keyring.list | sudo tee /etc/apt/sources.list.d/tailscale.list

’➁ Tailscale をインストール’
  sudo apt update
  sudo apt install tailscale

’➂ Tailscale の起動及び、ブラウザでの認証’
  sudo tailscale up

’➃ Tailscale の起動確認’
  tailscale ip -4
  tailscale status
2.Tailscale サービスの認証
ブラウザから、Tailscale サービスの認証を行います。
[Authentication]
1. sudo tailscale up を実行して表示された URL に適当なブラウザからアクセスしてください
※再認証は sudo tailscale up --force-reauth

2. すでに所有している Google, Microsoft, GitHub のいずれかのアカウントでサインインし、そのアカウントを Tailscale に登録してください。
※ここでは Google アカウントを使っています。


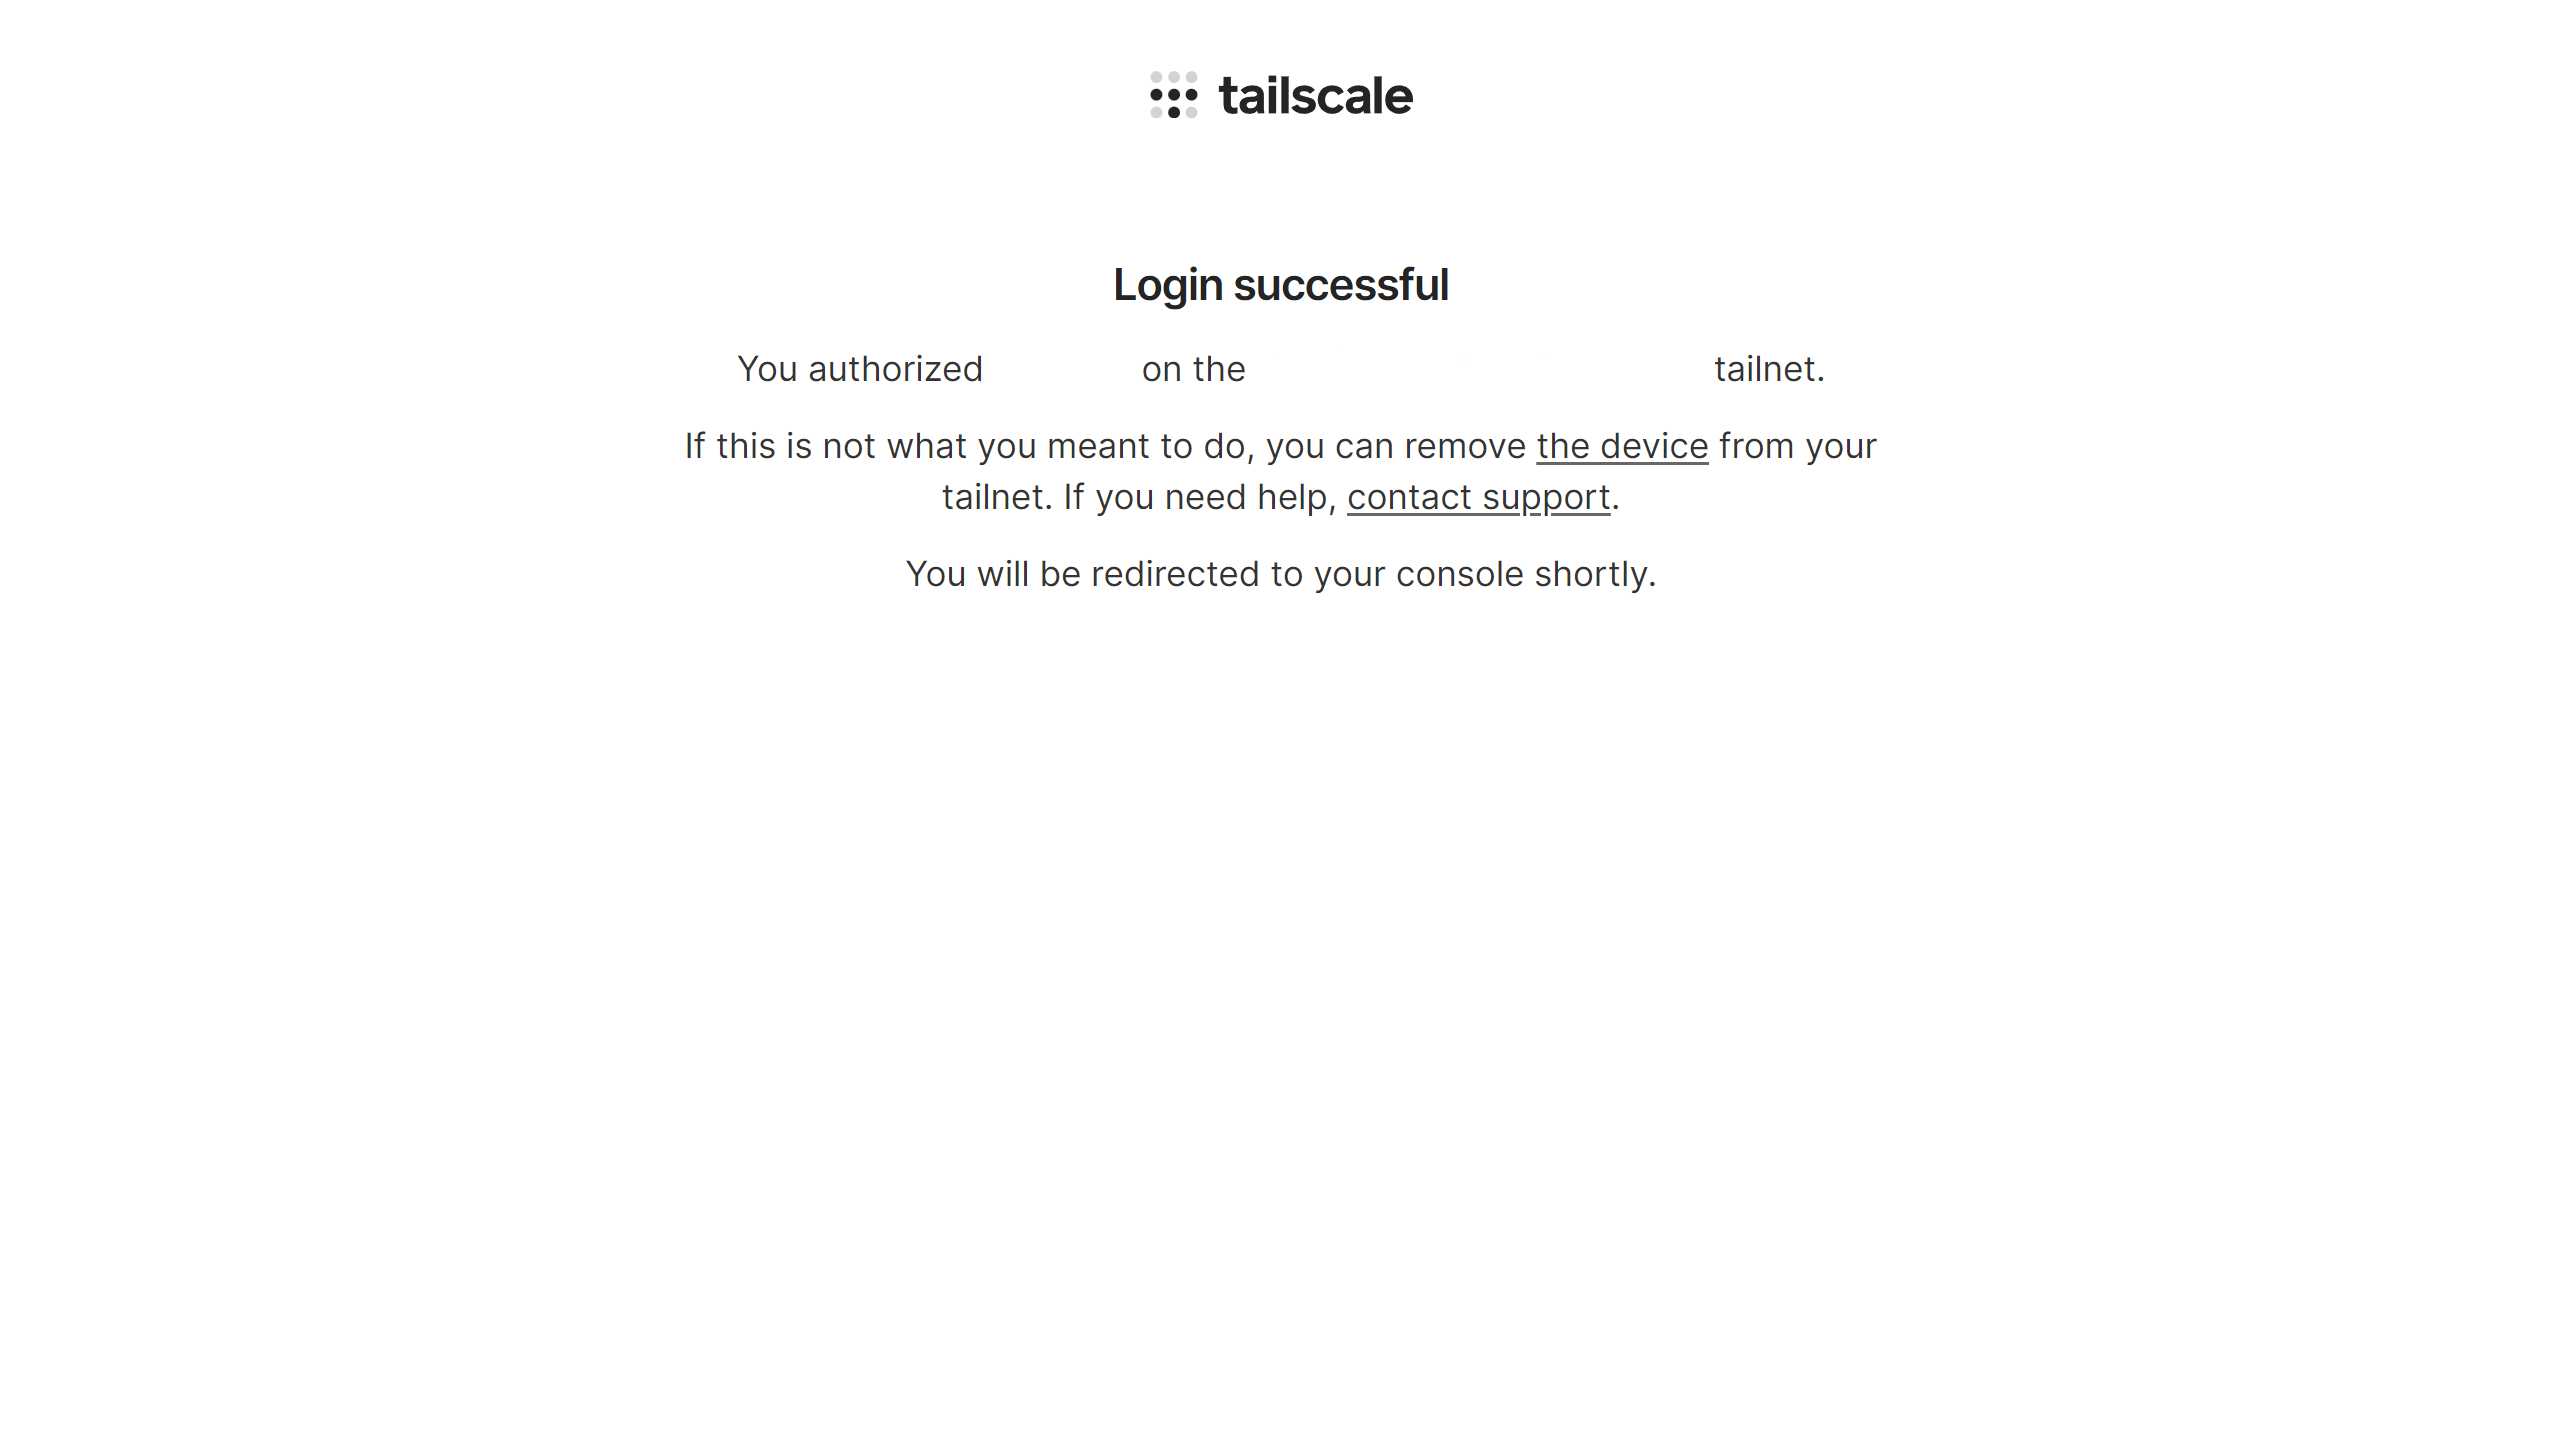
↑サインインが完了すれば、上記の画面が表示され、認証されています。
3. アドミンコンソールにアクセスして機器が登録されていることを確認します。
https://login.tailscale.com/admin/machines
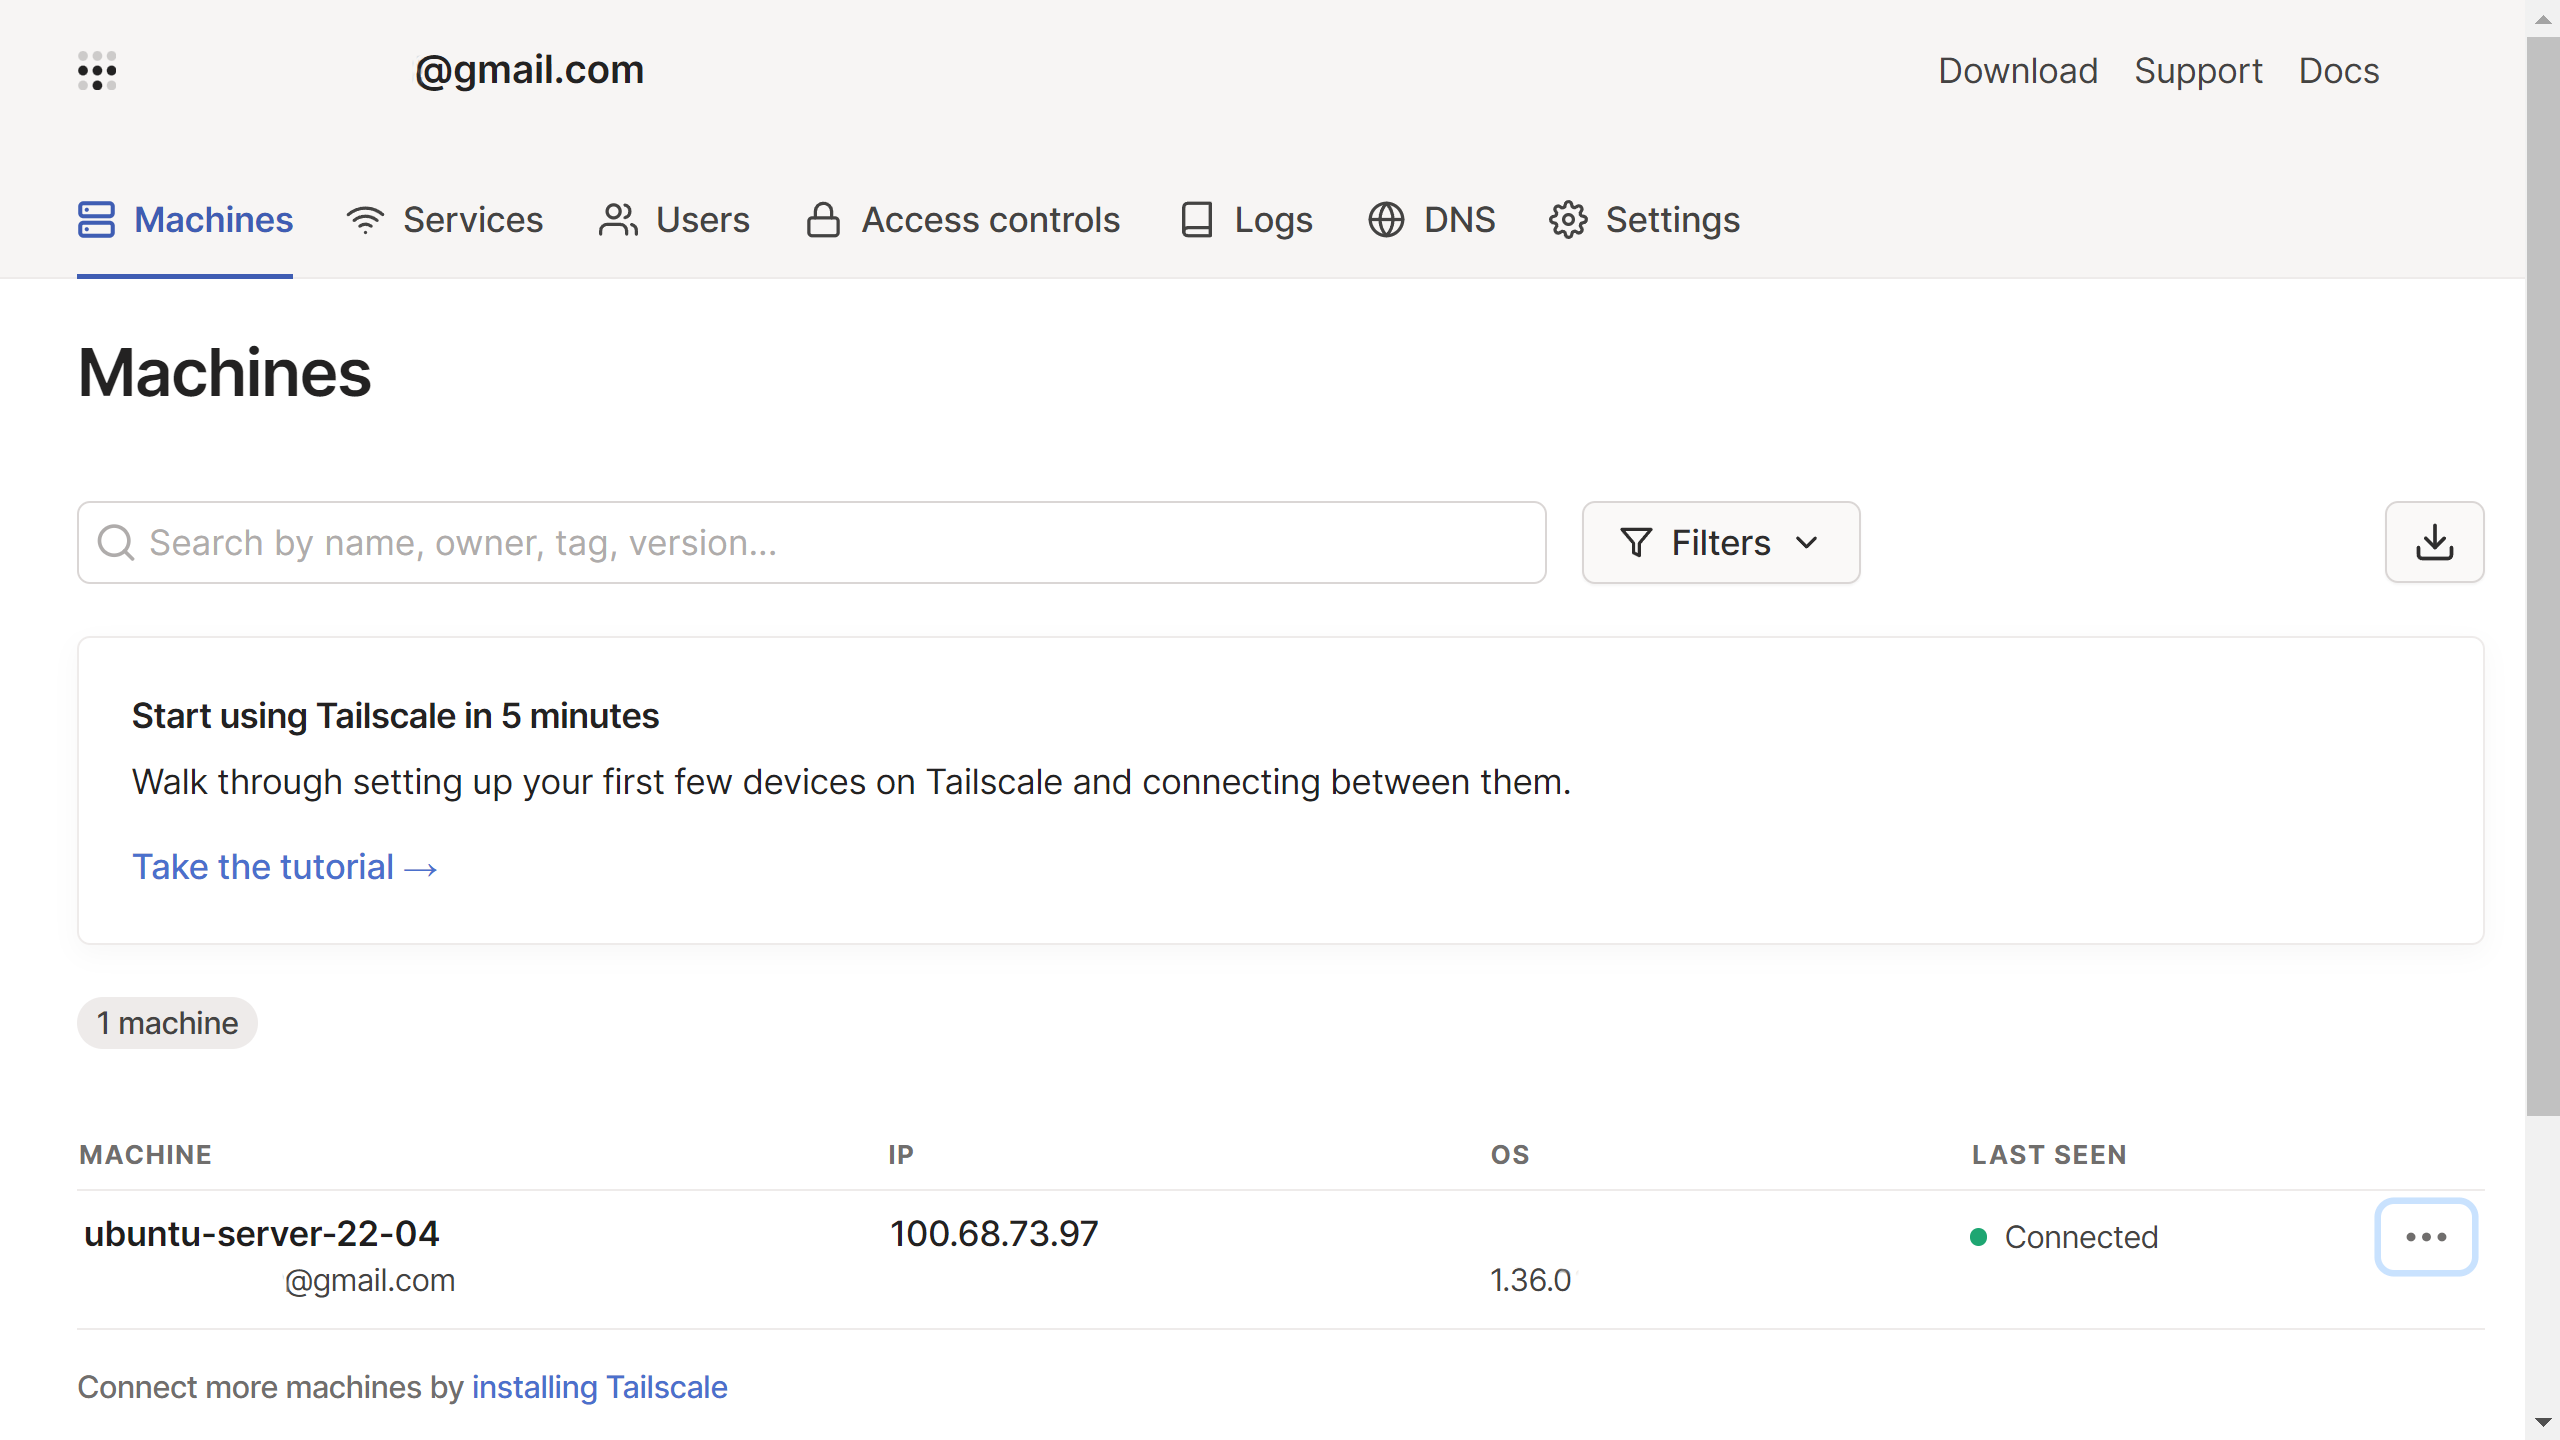
以上で認証は完了です。
任意な追加の設定
※必要な場合のみ行う
3.オプション
[IPフォワードの有効化]
’➄サブネットルーターの設定、IPフォワードの有効化’
  echo 'net.ipv4.ip_forward = 1' | sudo tee -a /etc/sysctl.d/99-tailscale.conf
  echo 'net.ipv6.conf.all.forwarding = 1' | sudo tee -a /etc/sysctl.d/99-tailscale.conf
  sudo sysctl -p /etc/sysctl.d/99-tailscale.conf
オプション:UFW での許可
Add_Text='\\n-A ufw-before-forward -i tailscale0 -j ACCEPT \n-A ufw-before-forward -o tailscale0 -j ACCEPT'

# 確認
sudo grep "# End required lines" /etc/ufw/before.rules
sudo sed '/^# End required lines$/a '"$Add_Text" /etc/ufw/before.rules | awk '/# End required lines/,/# allow all on loopback/'

# 実行
sudo sed -i '/^# End required lines$/a '"$Add_Text" /etc/ufw/before.rules

# 確認
sudo awk '/# End required lines/,/# allow all on loopback/' /etc/ufw/before.rules
[サブネット ルーティング、出口ノードの利用可能化]
[IPフォワードの有効化]を行った後に実行する。
’➅′   1.LAN内へのアクセスと、ローカルIPアドレスの使用を可能にさせる’
  sudo tailscale down
  sudo tailscale up
  sudo tailscale up --advertise-routes=xxx.xxx.xxx.xxx/24

’➅′′  2.対象PCを出口ノードとして使用できるようにする         ’
  sudo tailscale down
  sudo tailscale up
  sudo tailscale up --advertise-exit-node

’➅′′′ 1.LAN内へのアクセスと、ローカルIPアドレスの使用を可能にさせる’
’     2.対象PCを出口ノードとして使用できるようにする         ’
  sudo tailscale down
  sudo tailscale up
  sudo tailscale up --advertise-routes=xxx.xxx.xxx.xxx/24 --advertise-exit-node

  # 例)
  # tailscale up --advertise-routes=192.168.10.0/24 --advertise-exit-node
  # tailscale up --advertise-routes=172.19.0.0/16 --advertise-exit-node

  # うまくいかない場合
  # sudo tailscale up --reset
Available ; Enable
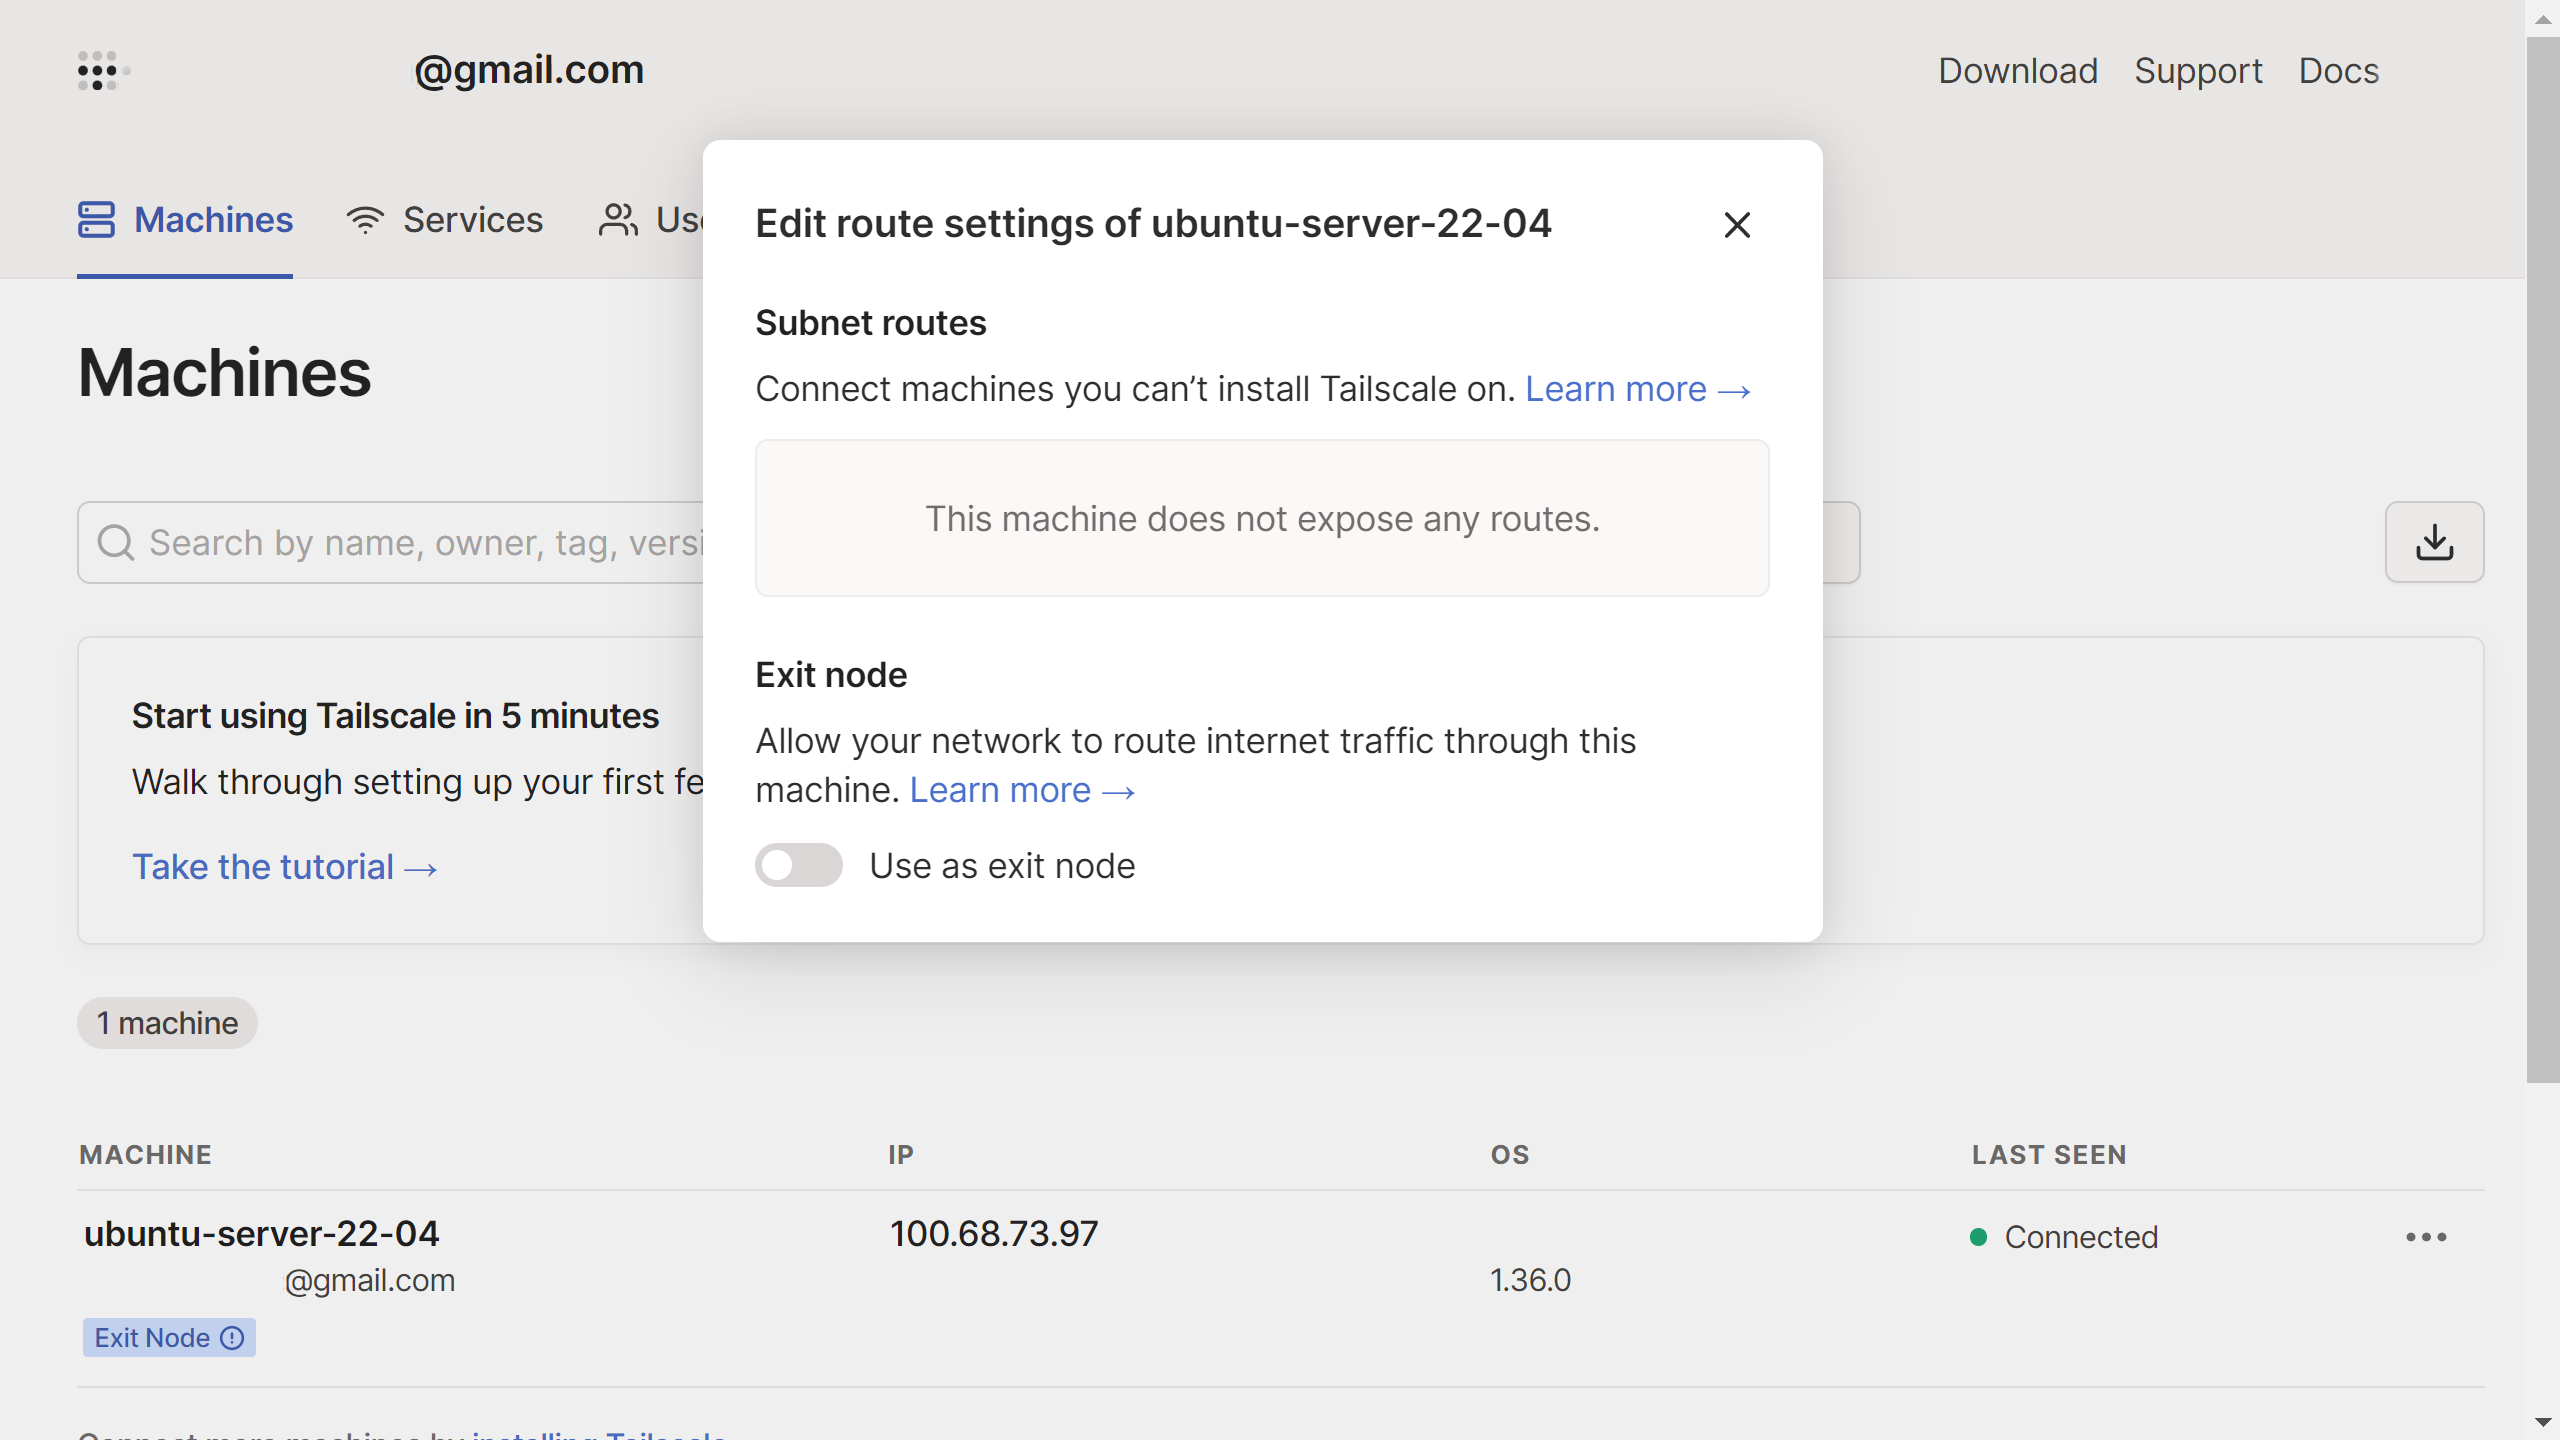
4.ブラウザから有効化
[サブネット ルーティング、出口ノードの利用可能化]を行った後に実行する。
次に アドミンコンソール へアクセス
https://login.tailscale.com/admin/machines
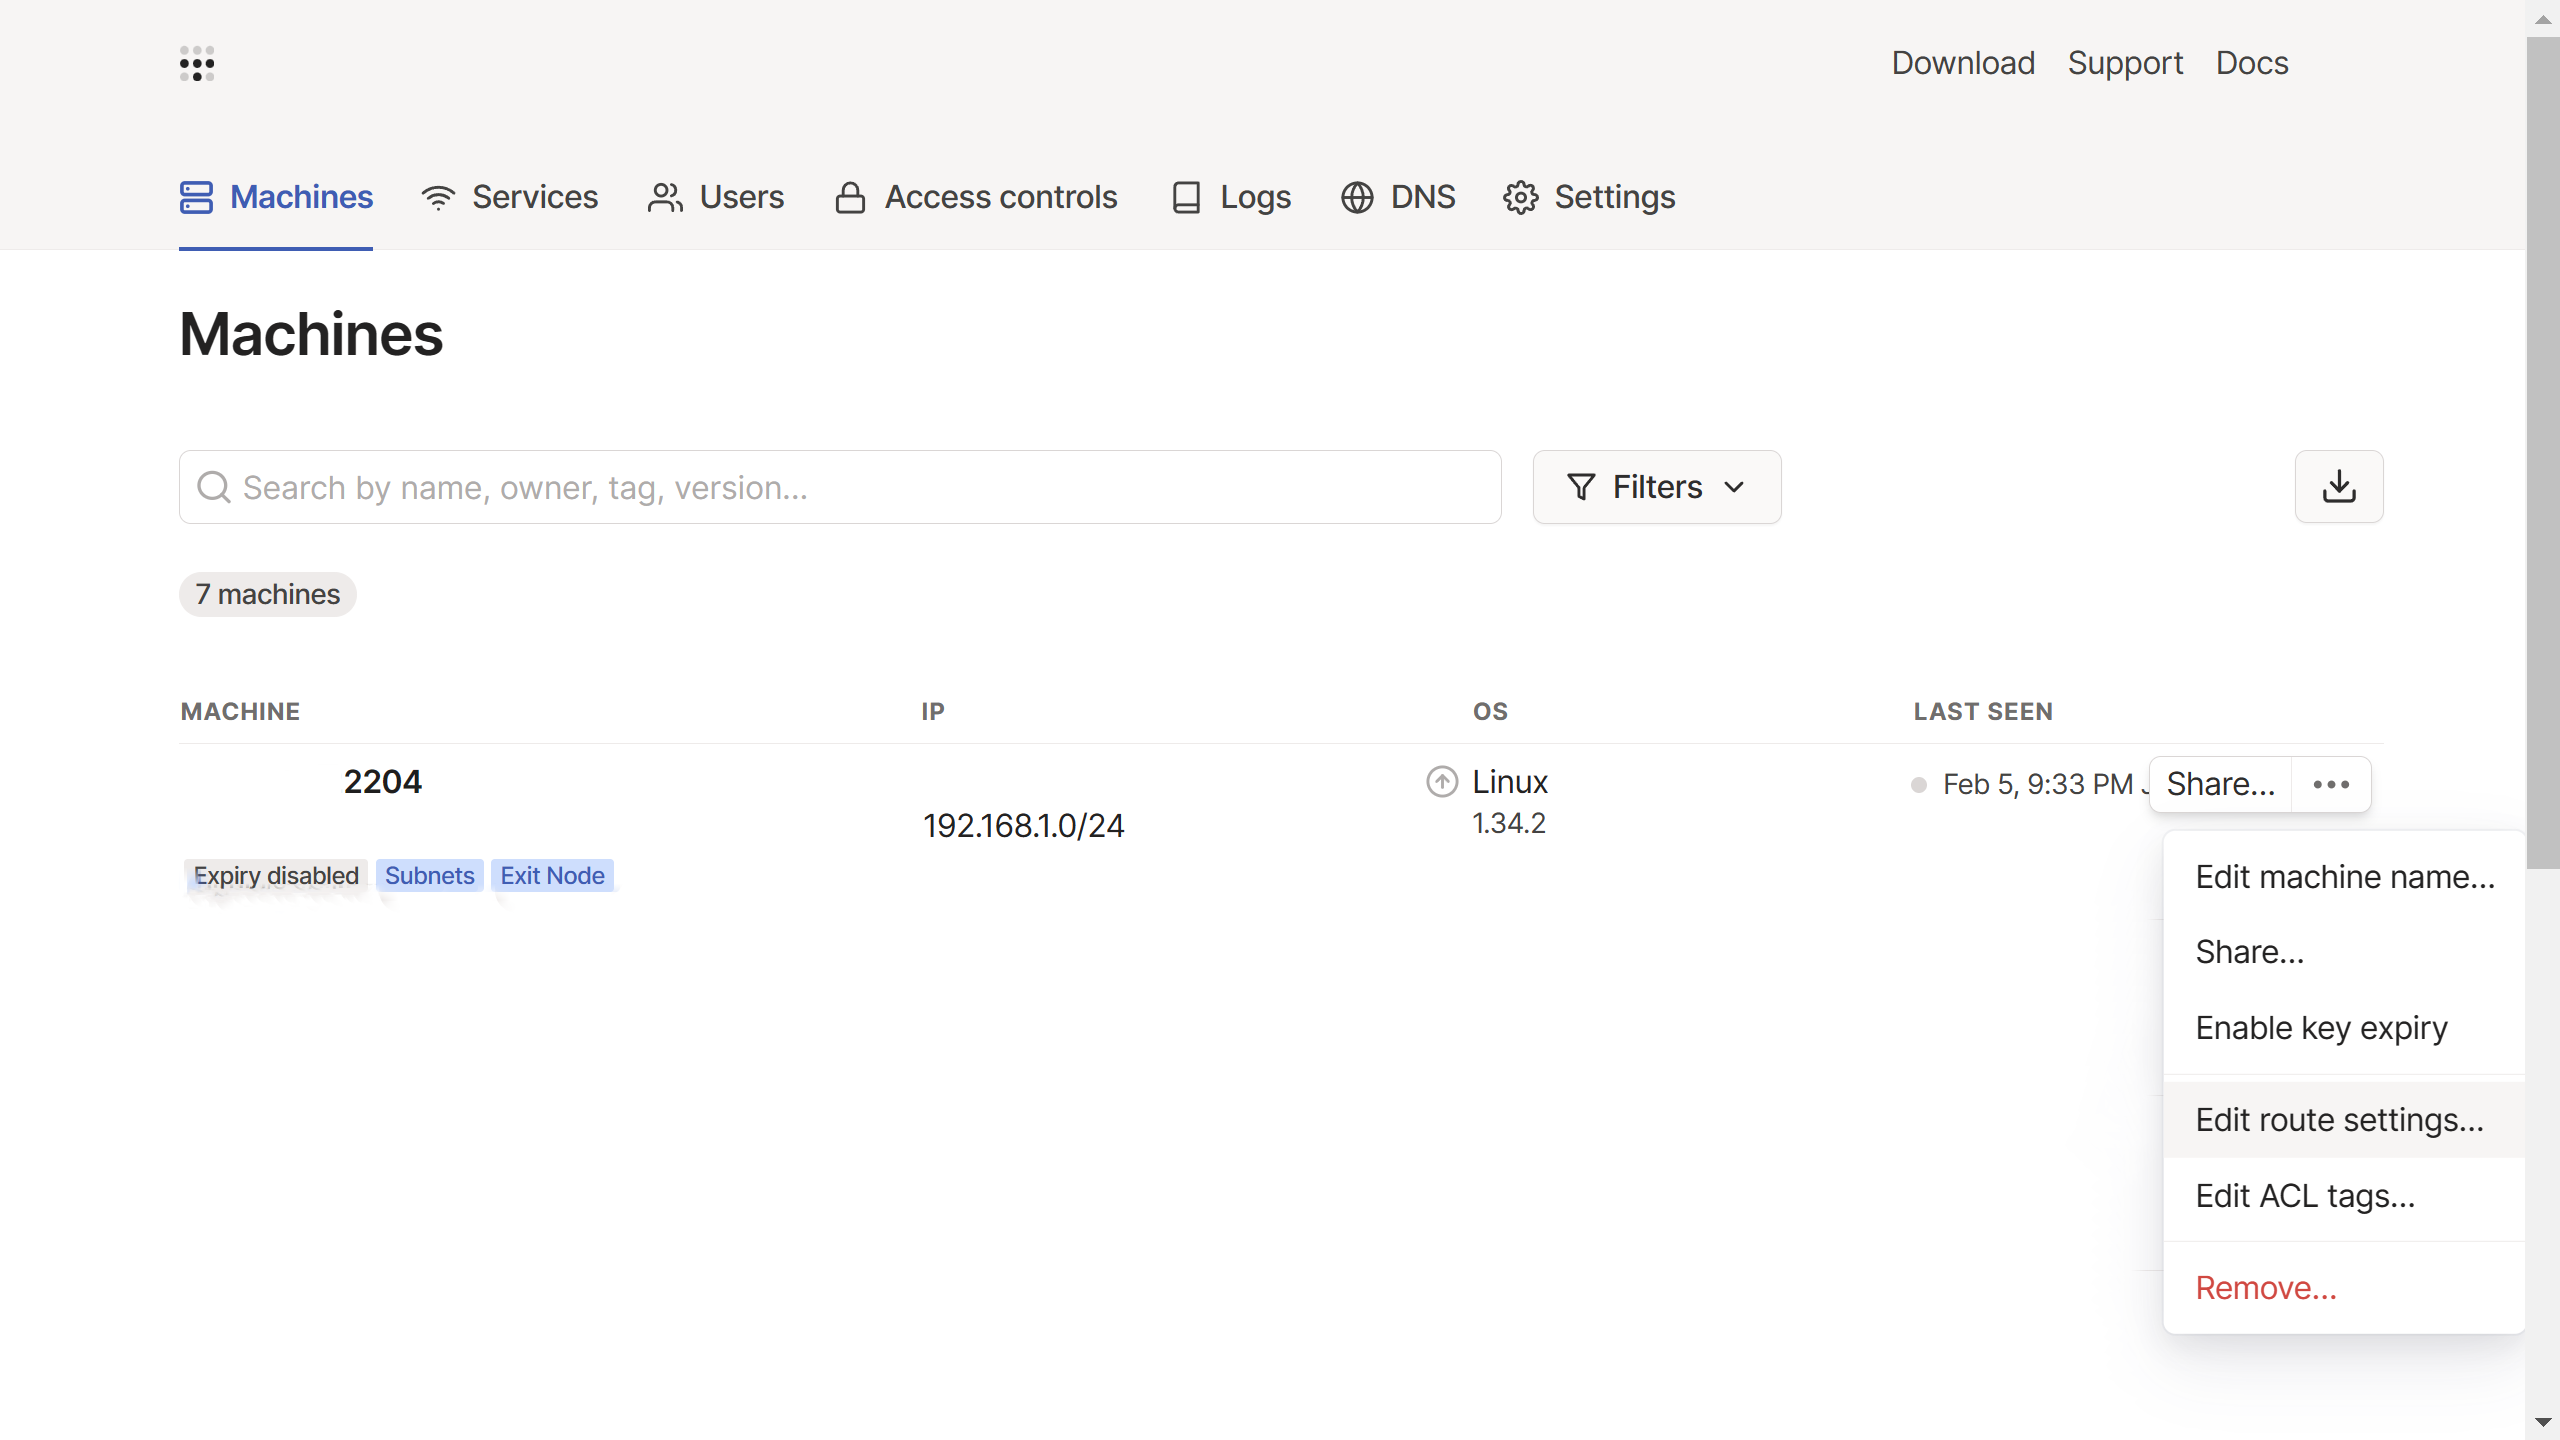
[別区分のネットワークへの転送を有効化]
・"・・・" ⇒ "Edit route setting" ⇒ "Subnet routes"
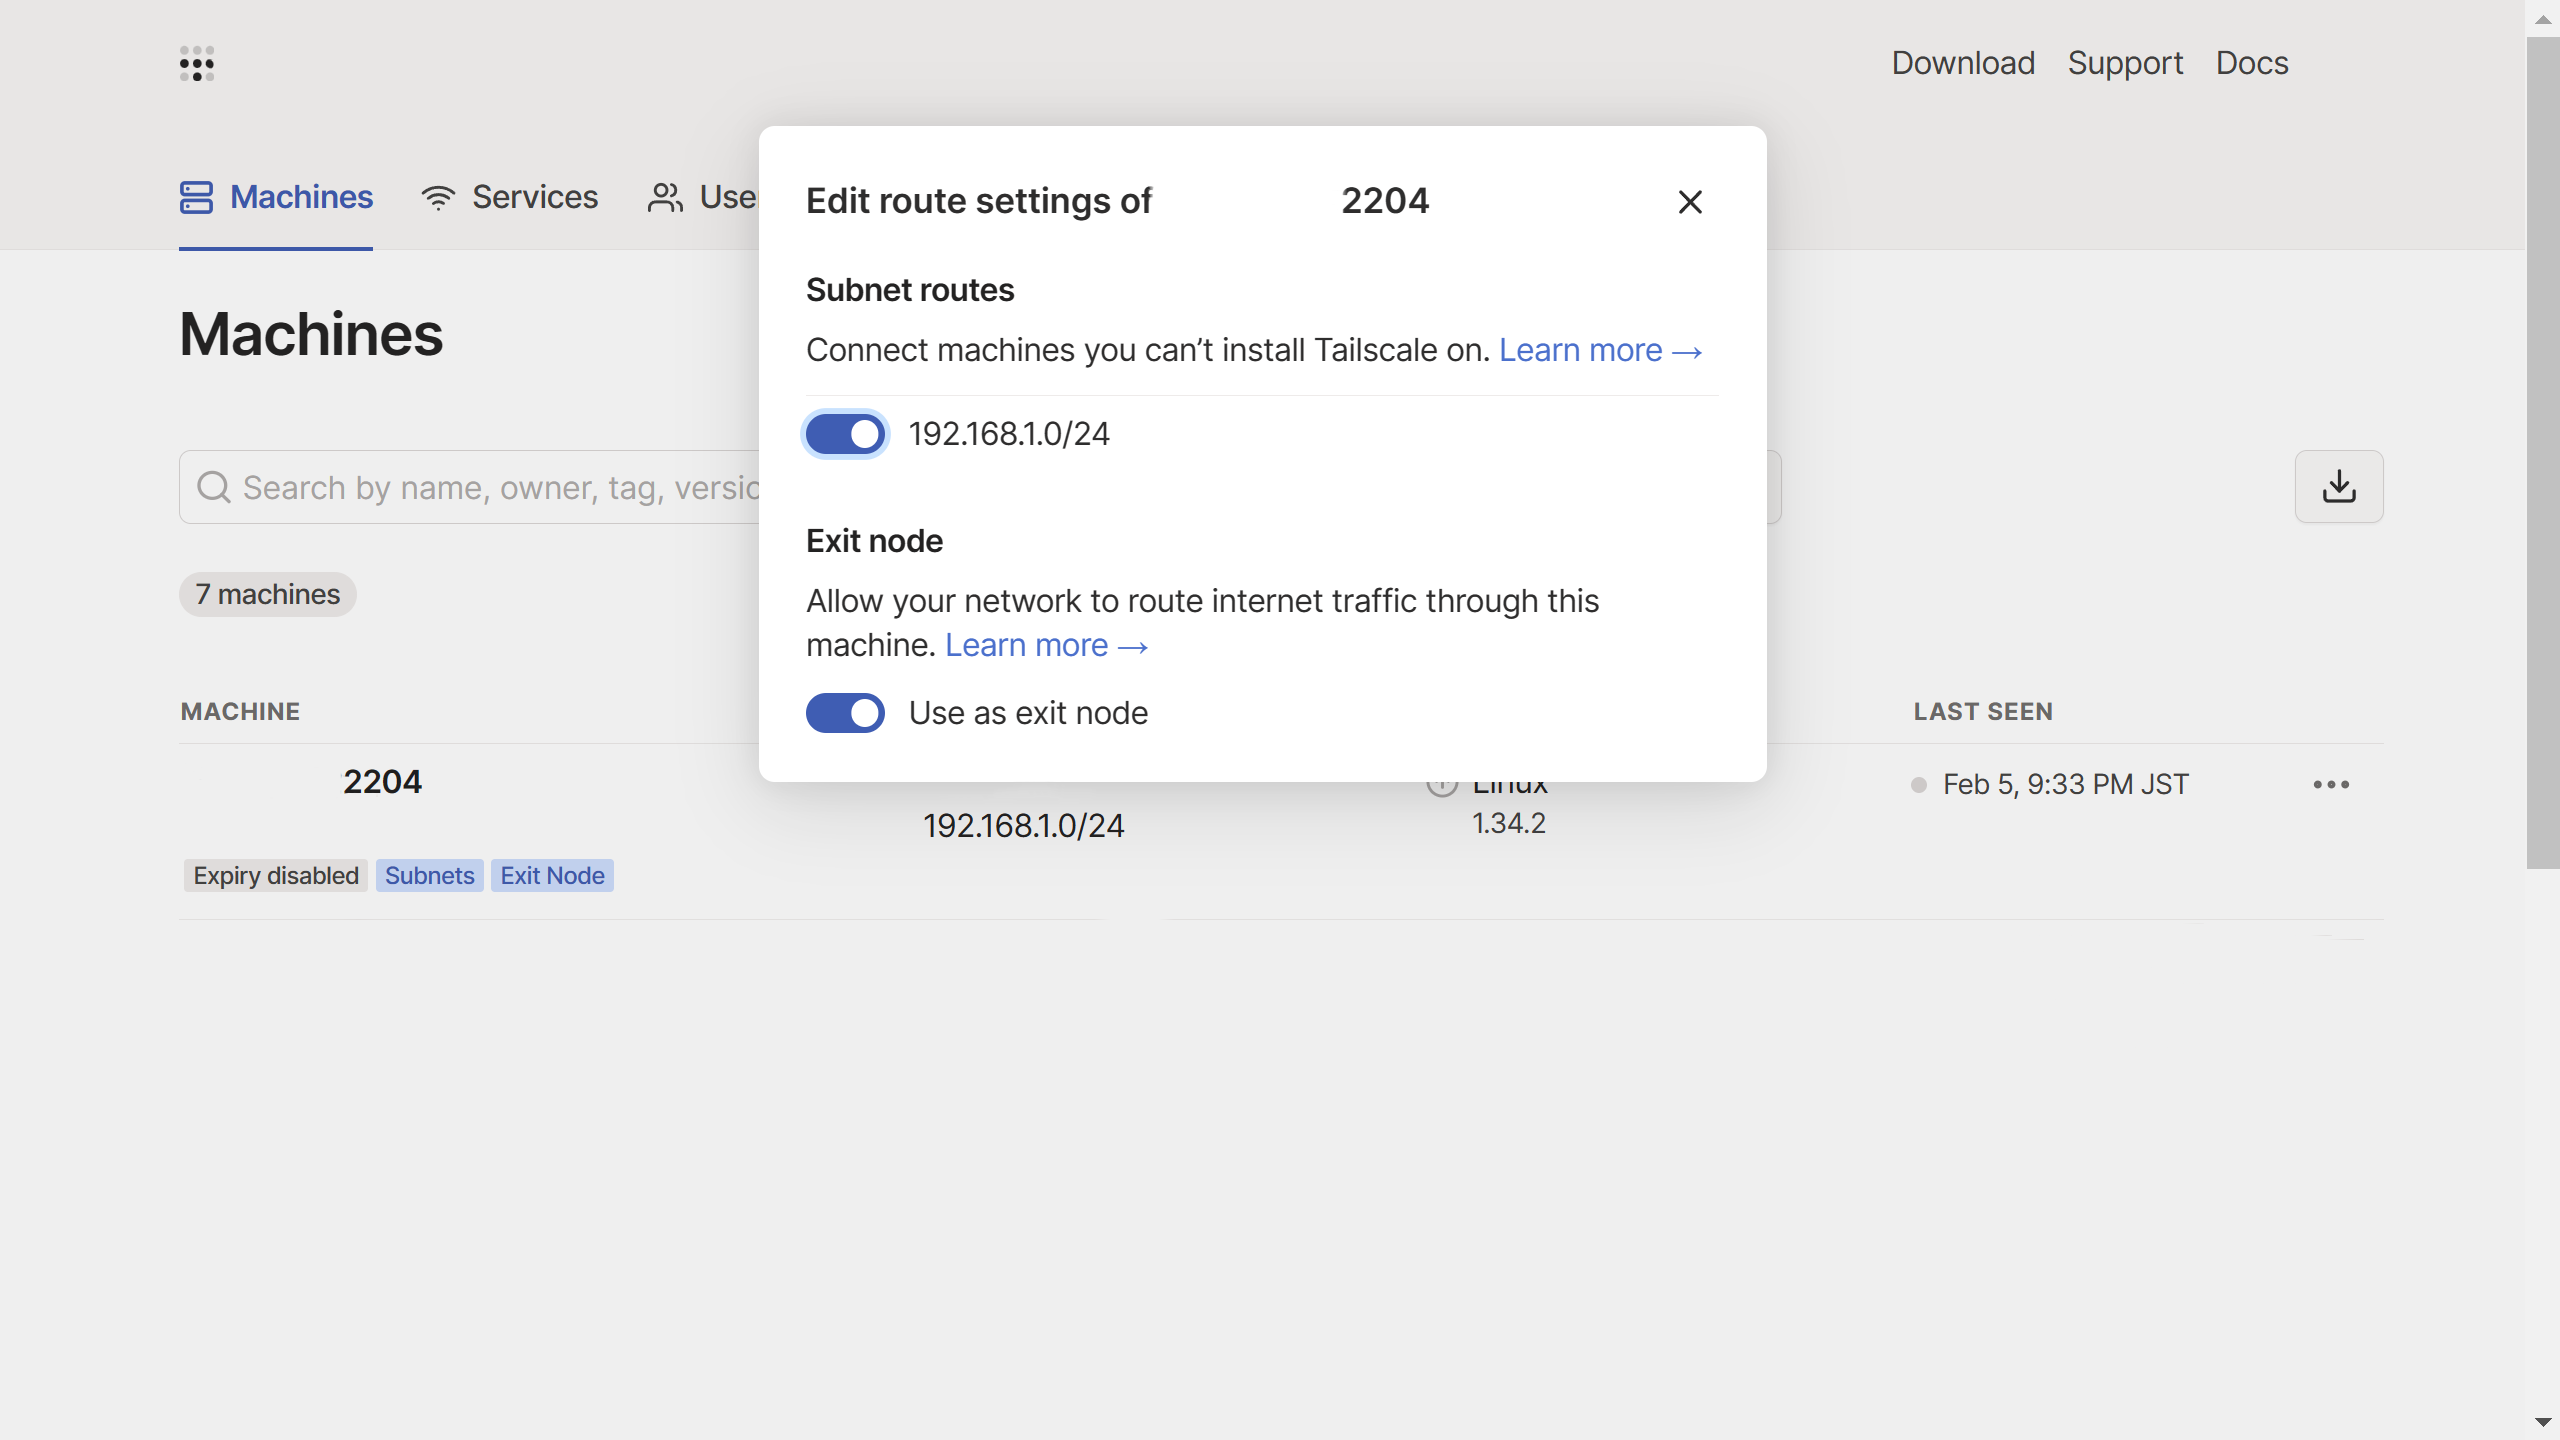
[出口ノードの有効化]
・"・・・" ⇒ "Edit route setting" ⇒ "Use as exit node"


その他の操作
Tailscale へのログイン、ログアウト、アカウントの追加、アカウントの切り替え
[ログイン、再ログイン(+起動)]
- 現在アクティブなアカウントがないときに認証 及び ログイン
sudo tailscale up - 再認証(現在アクティブなアカウントからログアウトし、再度ログインする)
sudo tailscale up --force-reauth
[ログアウト]
- 切断 及び 現在アクティブなアカウントからログアウト
sudo tailscale logout - 特定のアカウントからログアウト
sudo tailscale logout MailAddress@gmail.com
[アカウントの追加]
- アカウントの追加
sudo tailscale login - 追加されたか確認
sudo tailscale switch --list
[アカウントの切り替え]
- すべてのログインしているアカウントを表示(*が現在アクティブなアカウントを示す)
sudo tailscale switch --list - 指定したアカウントをアクティブに切り替える
sudo tailscale switch MailAddress@example.com
テールネット内にローカル サーバーを展開
"version 1.38.1" 以降
ーーー使い方ーーー
  # 末尾の off でアクティブなサーバーの一覧からサーバーを削除する
  tailscale serve https:<port> <mount-point> { local-IP:port / full-path / text } [off]
  tailscale serve tcp:<port> tcp://localhost:<local-port> [off]
  tailscale serve tls-terminated-tcp:<port> tcp://localhost:<local-port> [off]
  tailscale serve status [--json]

  echo "{ ... json ... }" | tailscale serve set-raw

  tailscale funnel <port> on/off
  tailscale funnel status [--json]
ーーーーーーーーー

※例)
# 展開したものを非公開にする
sudo tailscale serve https / off

# URL のカスタマイズの例("/Add_URL/" の部分)
sudo tailscale serve https /Add_URL/ text:"Hello, world!"
# アクセスは "https://ipアドレス.tail16進数.ts.net/Add_URL"

# 127.0.0.1:3000のWebサーバーへの接続をプロキシ
sudo tailscale serve https / 127.0.0.1:3000
# port:10000 で展開
sudo tailscale serve https:10000 / http://127.0.0.1:3000

# 単一のファイルまたはファイルをディレクトリごと展開(絶対パス)
sudo tailscale serve https / "/home/$(whoami)/File.txt"
sudo tailscale serve https /  /home/$(whoami)/Directory/

# シンプルに文字列を配信
sudo tailscale serve https / text:"Hello, world!"

# TCPパケットを、ローカルTCPサーバーの port:5432 に転送
sudo tailscale serve tcp:2222 tcp://localhost:22

# TCPパケットを、tailnet内でTLSでの接続を終端させ、ローカルTCPサーバーの port:80 に転送
sudo tailscale serve tls-terminated-tcp:443 tcp://localhost:80

# サーバーのステータス表示
tailscale serve status

# serve 設定の全消し
echo {} | sudo tailscale serve set-raw

# インターネット全体に公開 (<port> = 443, 8443, 10000)
sudo tailscale funnel 443 on

# 展開されているすべてのサーバーの funnel のステータスを出力
tailscale funnel status
以下は 2023/03/14 (version 1.36.2) までの方法
検証した翌日にコマンドが変わるとかウケる
### A ### / ### B ### / ### C ###

### A ###
tailscale serve [flags] "mount-point" {proxy|path|text} <arg>

  flags:
    [--remove] "mount-point"
    # <port> = 443(既定), 8443, 10000
    [--serve-port] <port>
  mount-point:
    "/"
    "/~~~"
  proxy|path|text:
    {proxy} <port OR ip:port>
    {path} <full-path>
    {text} "<some-text>"

※例)
sudo tailscale serve / proxy 80
sudo tailscale serve --remove /

sudo tailscale serve / path "/home/$(whoami)/File.txt"
sudo tailscale serve / path  /home/$(whoami)/Directory/
sudo tailscale serve --remove /

sudo tailscale serve /Add_URL/ text "Hello, world!"
sudo tailscale serve --remove /Add_URL/

sudo tailscale serve --serve-port 10000 / proxy 80
sudo tailscale serve --remove --serve-port 10000 /


### B ###
tailscale serve [flags] {sub-command} <arg>

  flags:
    [--remove] {tcp} <port>
    # <port> = 443(既定), 8443, 10000
    [--serve-port] <port>
  sub-commands:
    {status}
    {status --json}

    {tcp} <port>
    {tcp --terminate-tls} <port>

    # インターネット全体に 公開/非公開
    {funnel} <on/off>

※例)
tailscale serve status

sudo tailscale serve tcp 5432
sudo tailscale serve --remove tcp 5432

sudo tailscale serve tcp --terminate-tls 3706
sudo tailscale serve --remove tcp 3706

sudo tailscale serve --serve-port 8443 tcp --terminate-tls 555
sudo tailscale serve --remove --serve-port 8443 tcp 555

# "Settings → General → Funnel の有効化" が必要
sudo tailscale serve funnel on
sudo tailscale serve funnel off


### C ###
echo "{ ... json ... }" | tailscale serve set-raw

※例)
# serve 設定の全消し
echo {} | sudo tailscale serve set-raw
引用元、参照元、参考先
Tailscale 公式
・https://tailscale.com/kb/1080/cli/
・https://tailscale.com/kb/1103/exit-nodes/?tab=linux
・https://tailscale.com/kb/1187/install-ubuntu-2204/
・https://tailscale.com/kb/1225/fast-user-switching
・https://tailscale.com/kb/1242/tailscale-serve/
GiHub issue #
・https://github.com/tailscale/tailscale/issues/367
・https://github.com/tailscale/tailscale/issues/7086
reddit Posts
・/r/Tailscale/comments/z58wzt/more_funnel_questions/