10
10

Delete article

Deleted articles cannot be recovered.

Draft of this article would be also deleted.

Are you sure you want to delete this article?

More than 1 year has passed since last update.

【React】ReactをVSCodeでデバッグする方法

Posted at

はじめに

 本記事は、プログラミング初学者が、学習を進めていて疑問に思った点について調べた結果を備忘録も兼ねてまとめたものです。
 そのため、記事の内容に誤りが含まれている可能性があります。ご容赦ください。
 間違いを見つけた方は、お手数ですが、ご指摘いただけますと幸いです。

VSCodeでReactをデバッグする方法

VSCodeを開きます。
F5キーを押すと以下のようなリストが表示されます。
リストの中からChromeを選択します。
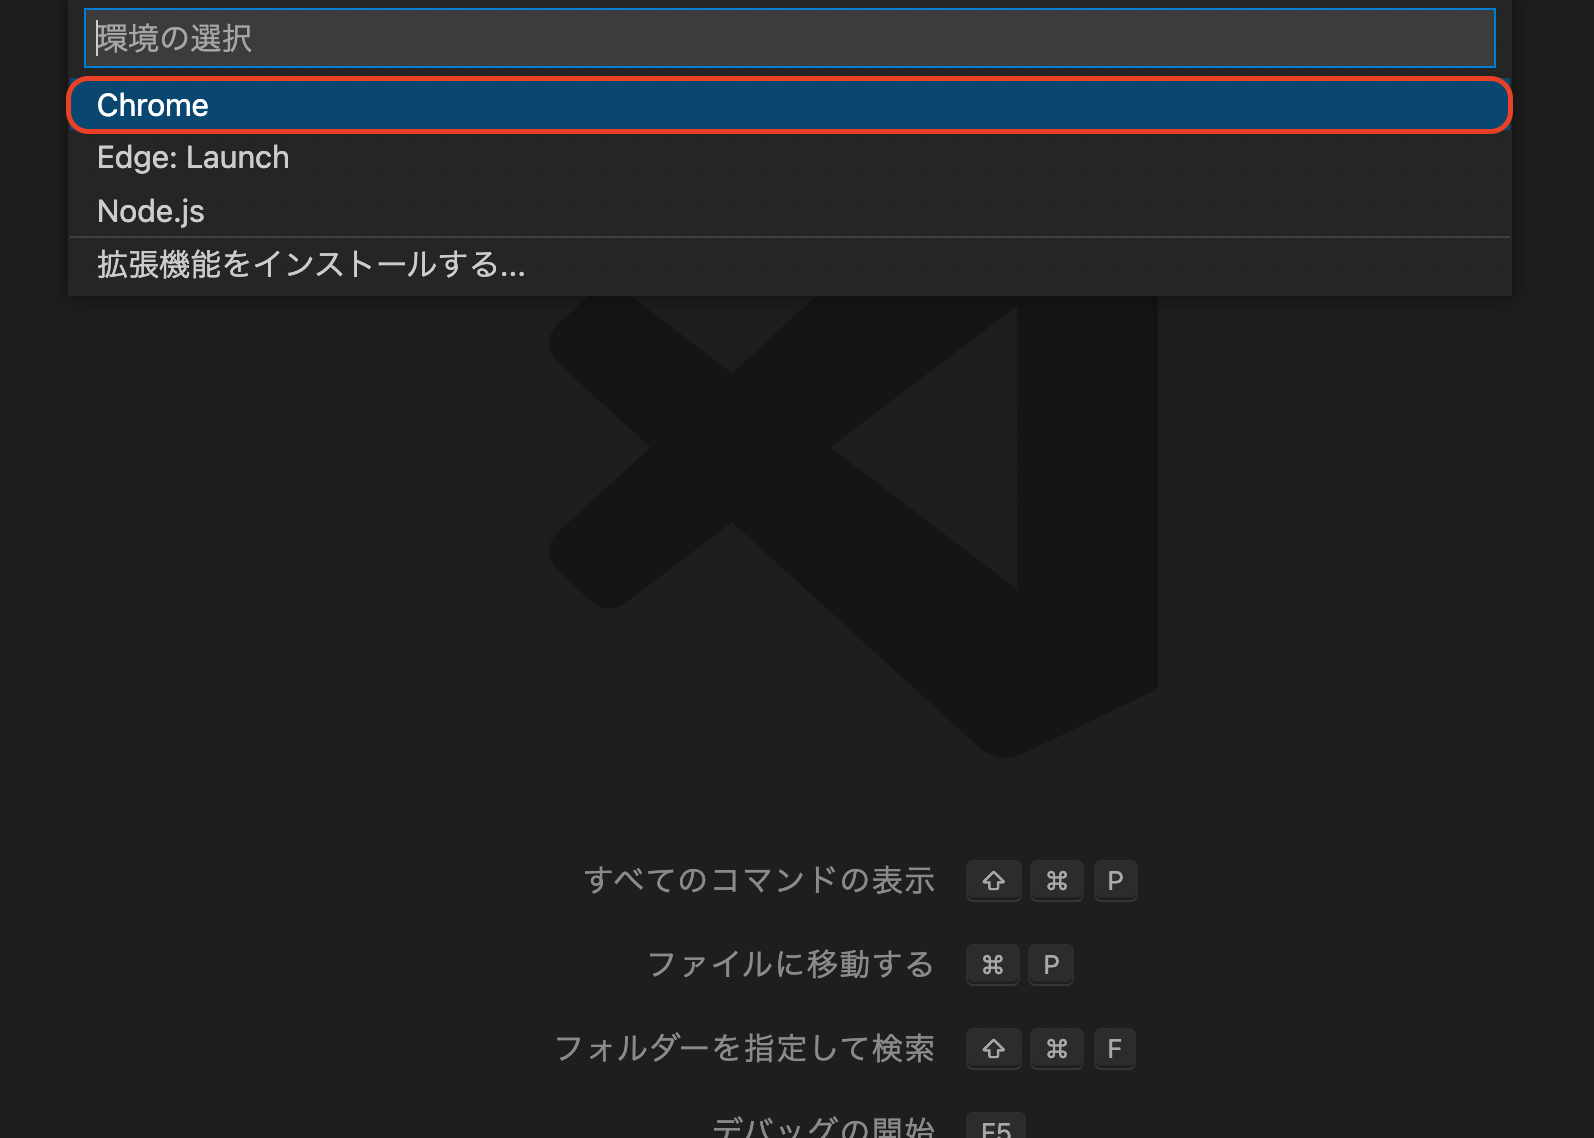
スクリーンショット!2022-02-27 22.50.51.png
すると、.vscodeディレクトリにlaunch.jsonファイルが作成されます。
スクリーンショット!2022-02-27 22.52.03.png
launch.jsonファイルの中身を以下のように書き換えます。

launch.json
{
  "version": "0.2.0",
  "configurations": [
    {
      "name": "Chrome",
      "type": "chrome",
      "request": "launch",
      "url": "http://localhost:3000",
      "webRoot": "${workspaceRoot}/src",
      "sourceMapPathOverrides": {
          "webpack:///src/*": "${webRoot}/*"
      }
    }
  ]
}

これでVSCode上のデバッグ準備は完了になります。

F5キーを押すと以下のような画面が表示されます。
スクリーンショット 2022-02-27 23.10.15.png

サーバーが起動されていないことが原因のため、ターミナルでnpm startを実行してください。

ターミナル
$ npm start

すると、 正常に画面が表示されるはずです。

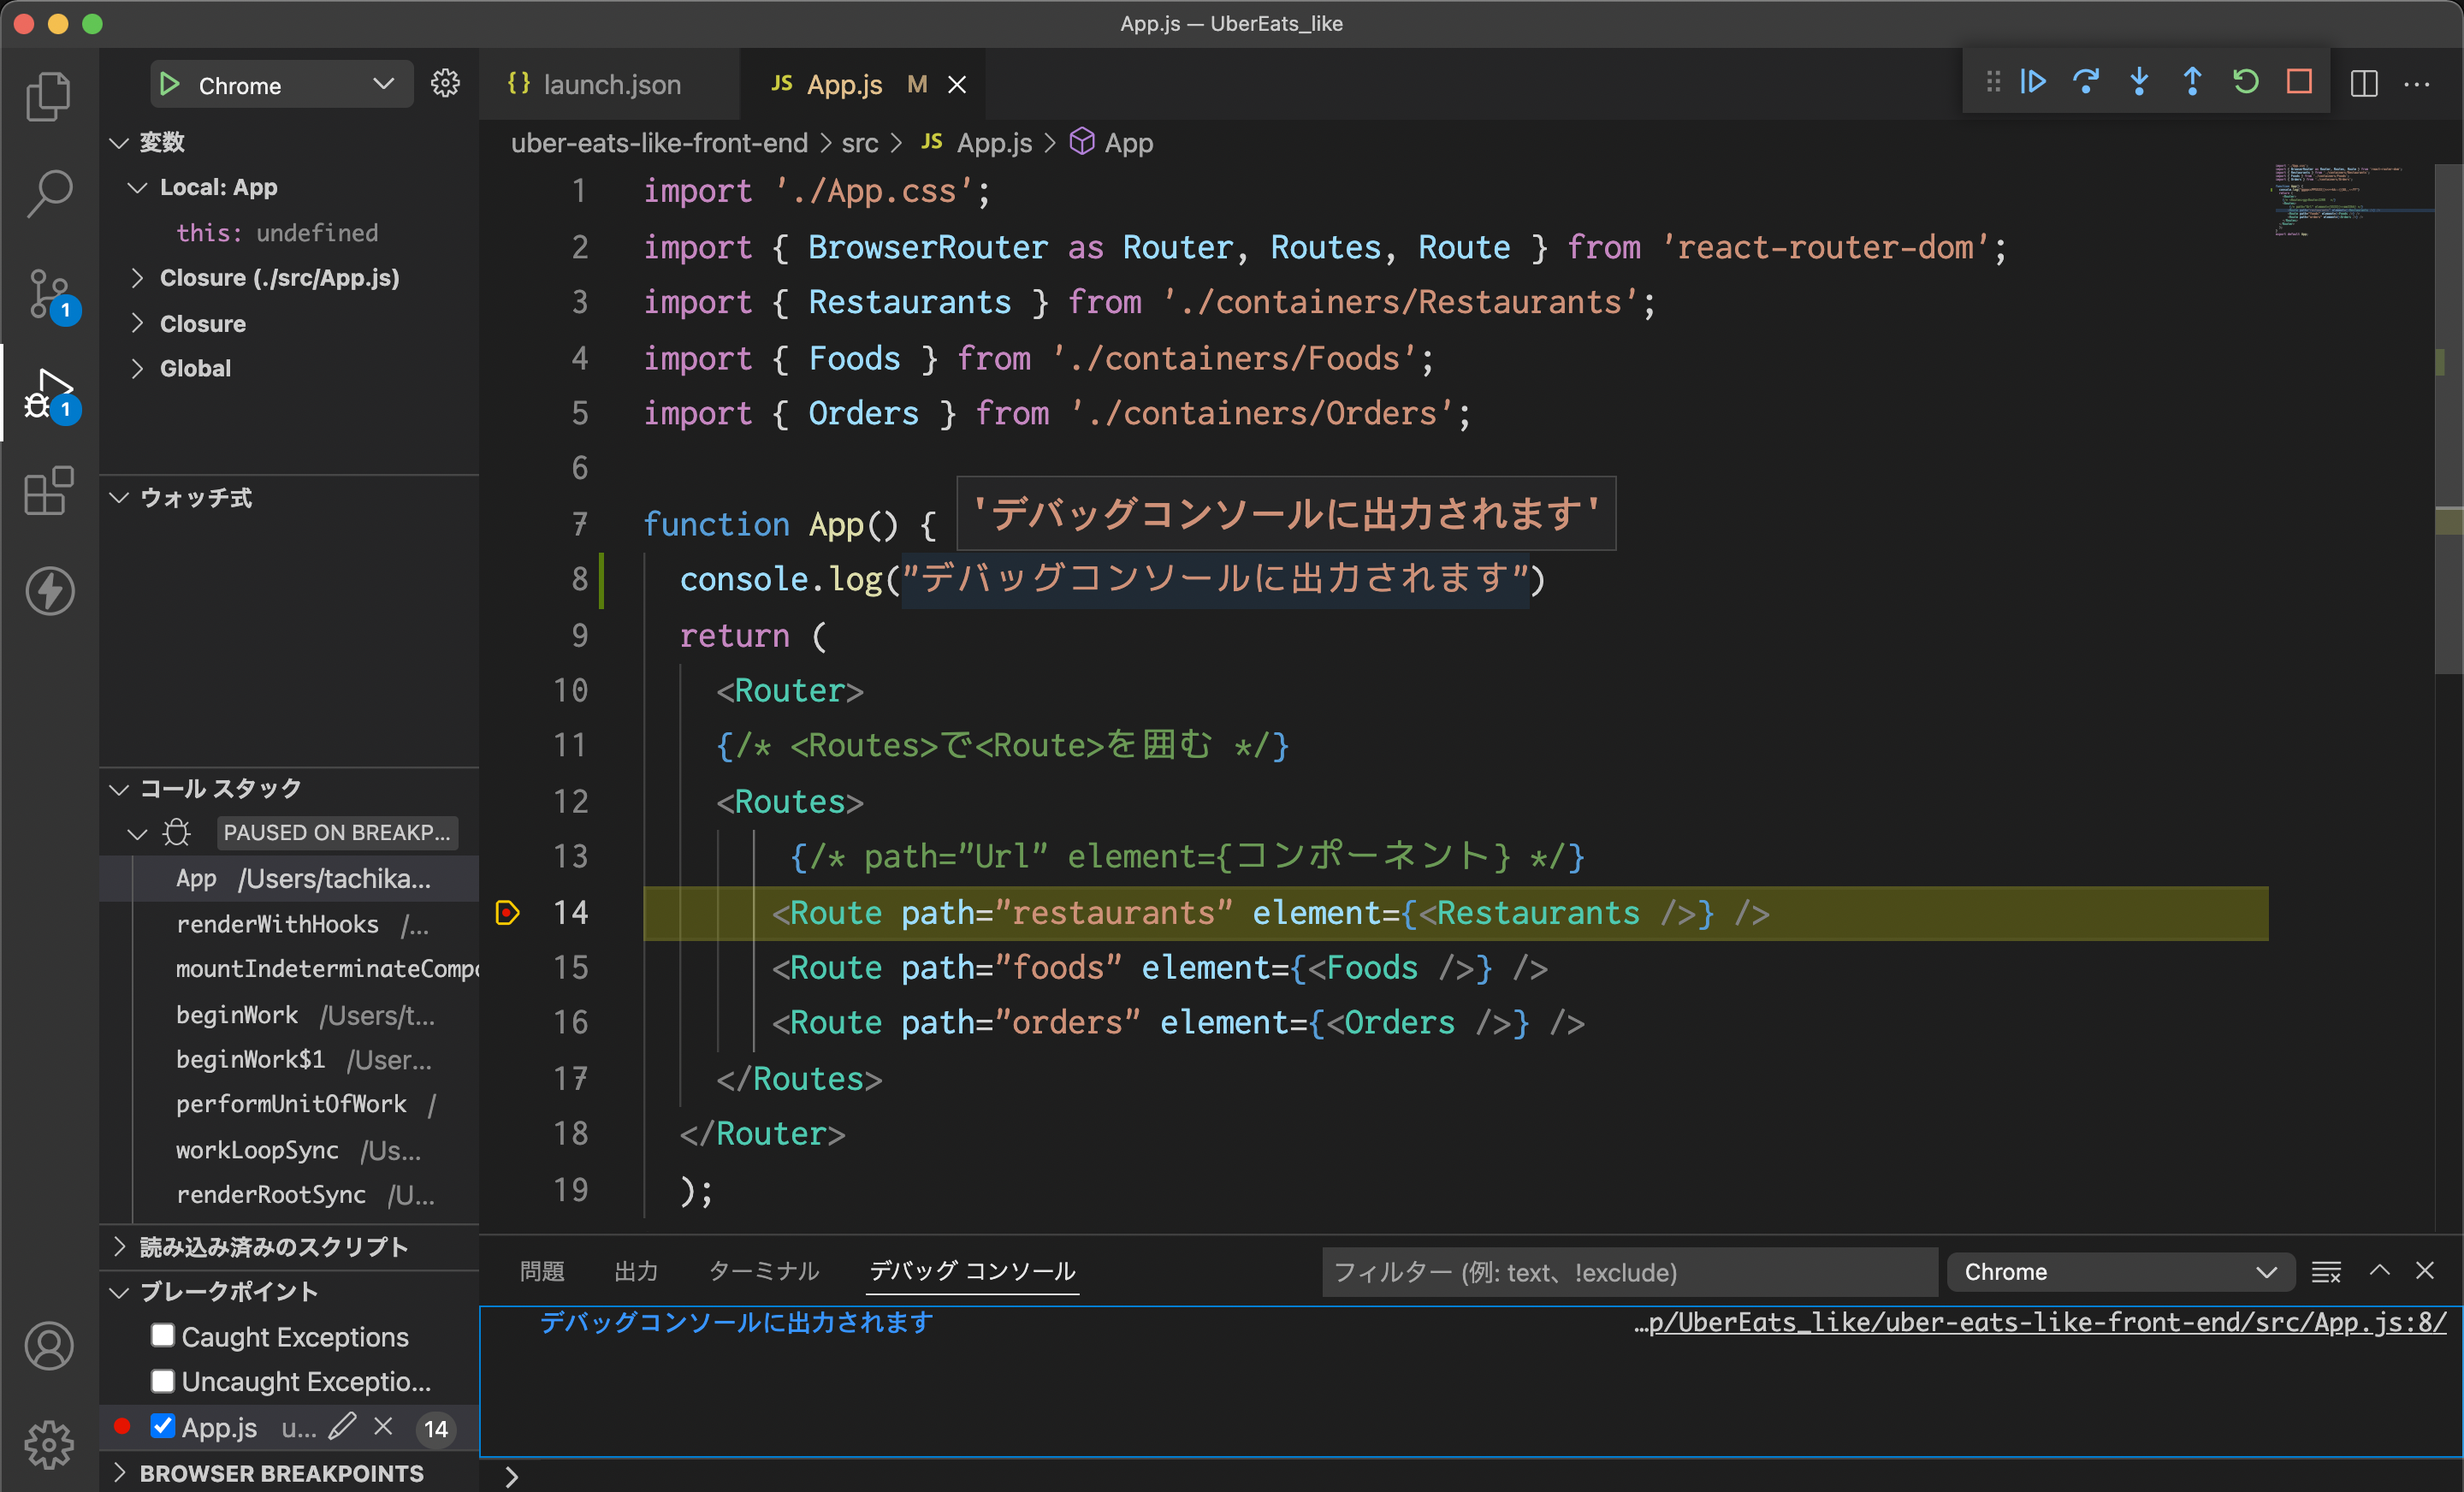
以上の操作をすることで以下の画像のようにブレークポイントで処理を止めたり、デバッグコンソールに出力させたりすることができるようになります。

スクリーンショット 2022-02-27 23.17.41.png

10
10
0

Register as a new user and use Qiita more conveniently

  1. You get articles that match your needs
  2. You can efficiently read back useful information
  3. You can use dark theme
What you can do with signing up
10
10

Delete article

Deleted articles cannot be recovered.

Draft of this article would be also deleted.

Are you sure you want to delete this article?