前回はMapboxにおけるAttributionについて取り扱いました。今回はMapbox GL JSにおけるAttributionのコントロールについて、Mapbox GL JS v1.13.0のソースを追いかけながら見ていきます。
Text attribution
オプションでの設定
Mapbox GL JSではMapクラスをインスタンス化する際のオプションでtext attributionのコントロールが行なえます。
このオプションによる制御はmap.jsの469,470行目で行われています。
 469         if (options.attributionControl)
 470             this.addControl(new AttributionControl({customAttribution: options.customAttribution}));
つまり、attributionControlがtrue(デフォルト) の場合のみ、AttributionControlをコントロールとして地図上に追加します。
AttributionControlクラスのオプションはattribution_control.jsの9-12行目に定義されています。
  9 type Options = {
 10     compact?: boolean,
 11     customAttribution?: string | Array<string>
 12 };
compactはattributionを折りたたむ表示をします。ただしこのオプションはMapクラスをインスタンス化する際には指定する方法がありません。使用したい場合には以下のようにattributionControl: falseとした上で、新たにAttributionControlインスタンスをaddControlします。
    var map = new mapboxgl.Map({
        container: 'map', // container id
        style: 'mapbox://styles/mapbox/streets-v11', // style URL
        center: [-74.5, 40], // starting position [lng, lat]
        zoom: 9, // starting zoom
        attributionControl: false
    });

    map.addControl(new mapboxgl.AttributionControl({
        compact: true,
        customAttribution: ['<a href="https://example.com/custom1">custom1</a>', 'custom2']}));
customAttributionは文字列か文字列の配列です。記載した内容がそのままattributionとして表示されます。HTMLによるリンクの設定も可能です。
また、SDKのドキュメントにも定義及び使用例が記載されています。
Attributionの追加処理
AttributionControlクラスの中で実際にattributionを追加する処理は以下の部分になります。
146         if (this.options.customAttribution) {
147             if (Array.isArray(this.options.customAttribution)) {
148                 attributions = attributions.concat(
149                     this.options.customAttribution.map(attribution => {
150                         if (typeof attribution !== 'string') return '';
151                         return attribution;
152                     })
153                 );
154             } else if (typeof this.options.customAttribution === 'string') {
155                 attributions.push(this.options.customAttribution);
156             }
157         }
文字列 / 文字列配列を判定して追加していく様子がわかります。
Mapboxのデフォルトtext attribution
何も指定しないのにデフォルトで表示されているMapboxのtext attributionはどこからやってくるのでしょうか?
スタイルを読み込んだ段階で、ソースの調査を行います。Style Specificationで定義されている通り、Styleにはソースに関する情報が記載されています。ベクタータイルであればTilesetの情報となります。これはベクタータイルではTileJSONと呼ばれるAPIで取得できます。以下のコードではloadTileJSONでTileJSON APIにアクセスし、tileJSONに結果を格納しています。
 99         this._tileJSONRequest = loadTileJSON(this._options, this.map._requestManager, (err, tileJSON) => {
100             this._tileJSONRequest = null;
101             this._loaded = true;
102             if (err) {
103                 this.fire(new ErrorEvent(err));
104             } else if (tileJSON) {
105                 extend(this, tileJSON);
106                 if (tileJSON.bounds) this.tileBounds = new TileBounds(tileJSON.bounds, this.minzoom, this.maxzoom);
107                 postTurnstileEvent(tileJSON.tiles, this.map._requestManager._customAccessToken);
108                 postMapLoadEvent(tileJSON.tiles, this.map._getMapId(), this.map._requestManager._skuToken, this.map._requestManager._customAccessToken);
109
110                 // `content` is included here to prevent a race condition where `Style#_updateSources` is called
111                 // before the TileJSON arrives. this makes sure the tiles needed are loaded once TileJSON arrives
112                 // ref: https://github.com/mapbox/mapbox-gl-js/pull/4347#discussion_r104418088
113                 this.fire(new Event('data', {dataType: 'source', sourceDataType: 'metadata'}));
114                 this.fire(new Event('data', {dataType: 'source', sourceDataType: 'content'}));
115             }
116         });
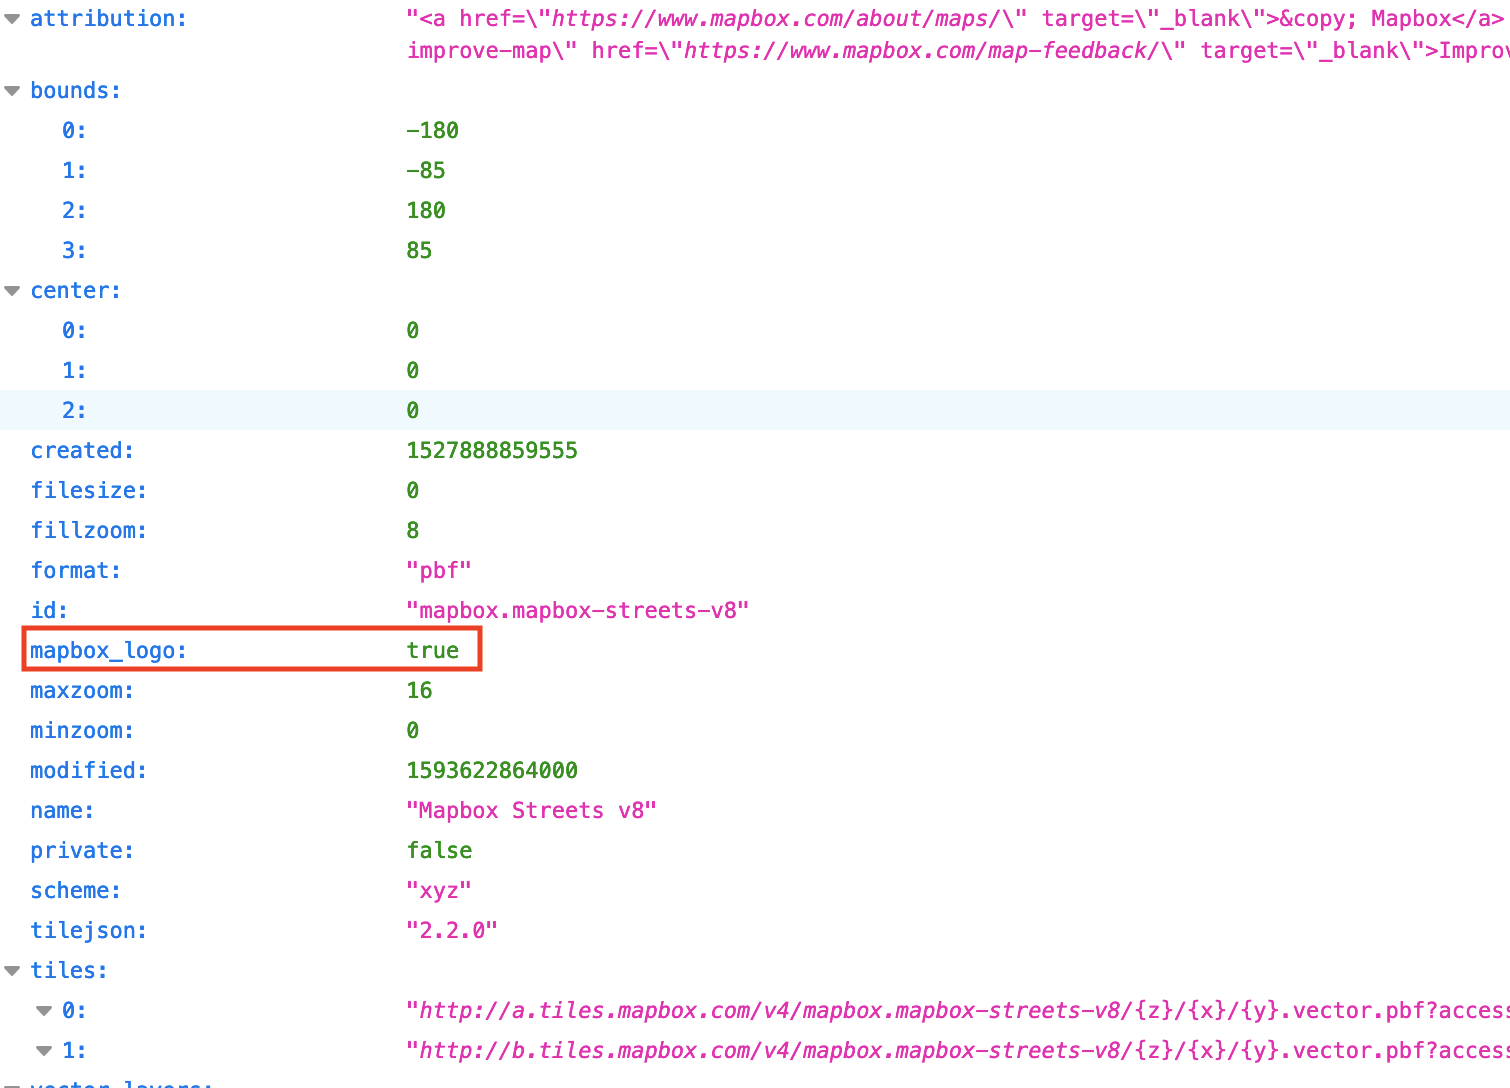
street-v8 tilesetの場合はこんなJSONが取得できます。Attributionが設定されているのがわかりますね。
{
"attribution": "<a href=\"https://www.mapbox.com/about/maps/\" target=\"_blank\">© Mapbox</a> <a href=\"http://www.openstreetmap.org/about/\" target=\"_blank\">© OpenStreetMap</a> <a class=\"mapbox-improve-map\" href=\"https://www.mapbox.com/map-feedback/\" target=\
"_blank\">Improve this map</a>",
"bounds": [
-180,
-85,
180,
85
],
"center": [
0,
0,
0
],
...
いつでもTileJSON APIを呼ぶの?
TileJSON APIを呼ぶかどうかはStyleの記述の仕方により異なります。
以下のようにurlで指定されている場合はTileJSON APIが呼ばれます。
sources: {
    street: {
        type: 'vector',
        url: 'mapbox://mapbox.mapbox-streets-v8'
    }
},
以下のようにtilesで指定されている場合はTileJSON APIは呼ばれません。
sources: {
    street: {
        type: 'vector',
        tiles: ['http://a.tiles.mapbox.com/v4/mapbox.mapbox-streets-v8/{z}/{x}/{y}.vector.pbf?access_token=pk.eyJ1IjoieW9jaGkiLCJhIjoiY2tjZThvdWExMDV2dDJxcDgxZzBwbzlxYSJ9.M0yRA6SXDMRgXzXGuYnvsg'],
        tileSize: 512
    }
},
これはloadTileJSONで実行される処理内でoptions.urlによる分岐が発生し、urlを指定しているときのみTileJSON APIを呼ぶ実装となっているためです。
 34     if (options.url) {
 35         return getJSON(requestManager.transformRequest(requestManager.normalizeSourceURL(options.url), ResourceType.Source), loaded);
 36     } else {
 37         return browser.frame(() => loaded(null, options));
 38     }
Styleでのattributionの指定
Style Specificationにあるように、styleのsourceでもattributionを指定できます。
TileJSON APIでattributionを取得したかどうかに関わらず、styleで指定されたattributionによる上書きが行われます(以下のextend(tileJSON, options)の処理)。
 14     const loaded = function(err: ?Error, tileJSON: ?Object) {
 15         if (err) {
 16             return callback(err);
 17         } else if (tileJSON) {
 18             const result: any = pick(
 19                 // explicit source options take precedence over TileJSON
 20                 extend(tileJSON, options),
 21                 ['tiles', 'minzoom', 'maxzoom', 'attribution', 'mapbox_logo', 'bounds', 'scheme', 'tileSize', 'encoding']
 22             );
 23
 24             if (tileJSON.vector_layers) {
 25                 result.vectorLayers = tileJSON.vector_layers;
 26                 result.vectorLayerIds = result.vectorLayers.map((layer) => { return layer.id; });
 27             }
 28
 29             result.tiles = requestManager.canonicalizeTileset(result, options.url);
 30             callback(null, result);
 31         }
 32     };
イベントチェーン
アトリビューション取得後は、イベントチェーンによりAttributionControlクラスへ処理が渡されます。
Styleロード時にMapクラスに対してイベントを発行します。
244     _load(json: StyleSpecification, validate: boolean) {
...
252         for (const id in json.sources) {
253             this.addSource(id, json.sources[id], {validate: false});
254         }
...
280         this.fire(new Event('data', {dataType: 'style'}));
...
これを受けてMapクラスはstyledataイベントを発行します
479         this.on('data', (event: MapDataEvent) => {
480             this._update(event.dataType === 'style');
481             this.fire(new Event(`${event.dataType}data`, event));
482         });
AttrubutionControlクラスはこのイベントを受けた際に、attributionの変更を行います。source.attributionにattributionが格納されています。
...
71         this._map.on('styledata', this._updateData);
...
136     _updateData(e: any) {
137         if (e && (e.sourceDataType === 'metadata' || e.sourceDataType === 'visibility' || e.dataType === 'style')) {
138             this._updateAttributions();
139             this._updateEditLink();
140         }
141     }
...
143     _updateAttributions() {
...
165         const sourceCaches = this._map.style.sourceCaches;
166         for (const id in sourceCaches) {
167             const sourceCache = sourceCaches[id];
168             if (sourceCache.used) {
169                 const source = sourceCache.getSource();
170                 if (source.attribution && attributions.indexOf(source.attribution) < 0) {
171                     attributions.push(source.attribution);
172                 }
173             }
174         }
Mapbox wordmark
Mapbox wordmark表示・非表示はMapクラスのオプションでコントールすることができません。
以下のコードでMapbox wordmarkを初期化しています。
362     constructor(options: MapOptions) {
...
472         this.addControl(new LogoControl(), options.logoPosition);
...
510     addControl(control: IControl, position?: ControlPosition) {
...
522         const controlElement = control.onAdd(this);
...
 27     onAdd(map: Map) {
 28         this._map = map;
...
 39         this._map.on('sourcedata', this._updateLogo);
 40         this._updateLogo();
...
 58     _updateLogo(e: any) {
 59         if (!e || e.sourceDataType === 'metadata') {
 60             this._container.style.display = this._logoRequired() ? 'block' : 'none';
 61         }
 62     }
 63
 64     _logoRequired() {
 65         if (!this._map.style) return;
 66
 67         const sourceCaches = this._map.style.sourceCaches;
 68         for (const id in sourceCaches) {
 69             const source = sourceCaches[id].getSource();
 70             if (source.mapbox_logo) {
 71                 return true;
 72             }
 73         }
 74
 75         return false;
 76     }
Styleを読み込んだ際、ソースにmapbox_logoがあるかどうかで表示・非表示を切り替えていることがわかります。つまりTileJSON APIもしくはStyleのSourceにmapbox_logo: trueが含まれていればMapbox wordmarkが表示されます(Style Specificationにmapbox_logoはありませんが…)。
次回はユーザーコードで実際に挙動を見ていきます。
