
はじめに
Node.js よりも高速に動作し、標準で TypeScript をサポートしているランタイム Bun を使用して、Discord Bot を作成する方法を解説します。
今回は最初のステップとして、index.ts 1ファイルのみで Bot の起動と簡単なメッセージ返信コマンドを実装します。
環境
- Bun: 1.0.0 以上
- discord.js: v14.14.0 以上
- OS: Windows / macOS / Linux
1. Discord Developer Portal での準備
Bot を動かす前に、Discord の開発者ポータルで Bot の作成とトークンの取得が必要です。
-
Discord Developer Portal にアクセス。


- New Application をクリックし、適当な名前を入力して作成。
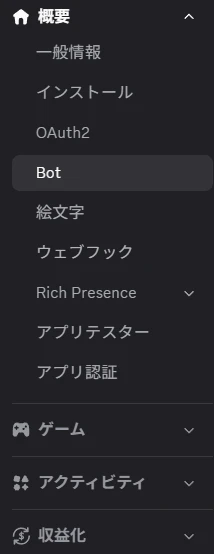
3. 左メニューの Bot セクションへ移動。

4. Reset Token(または Copy Token)をクリックして、トークンを控えておきます。
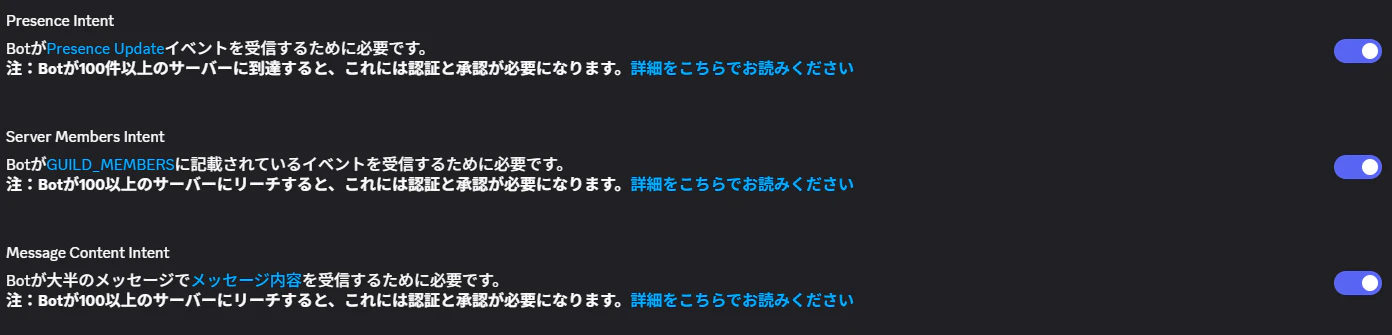
5. Privileged Gateway Intents の項目にある以下の3つを ON にします。
Presence IntentServer Members IntentMessage Content Intent
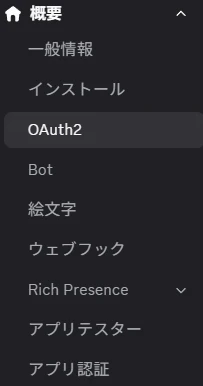
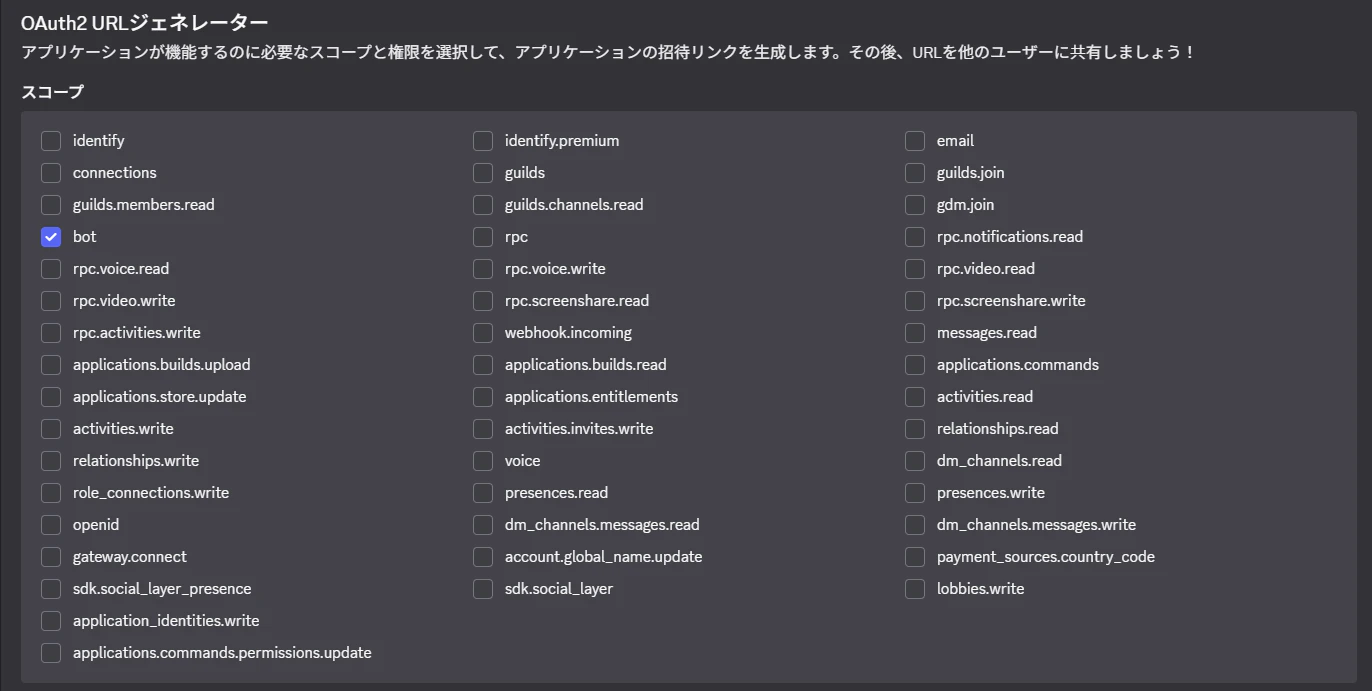
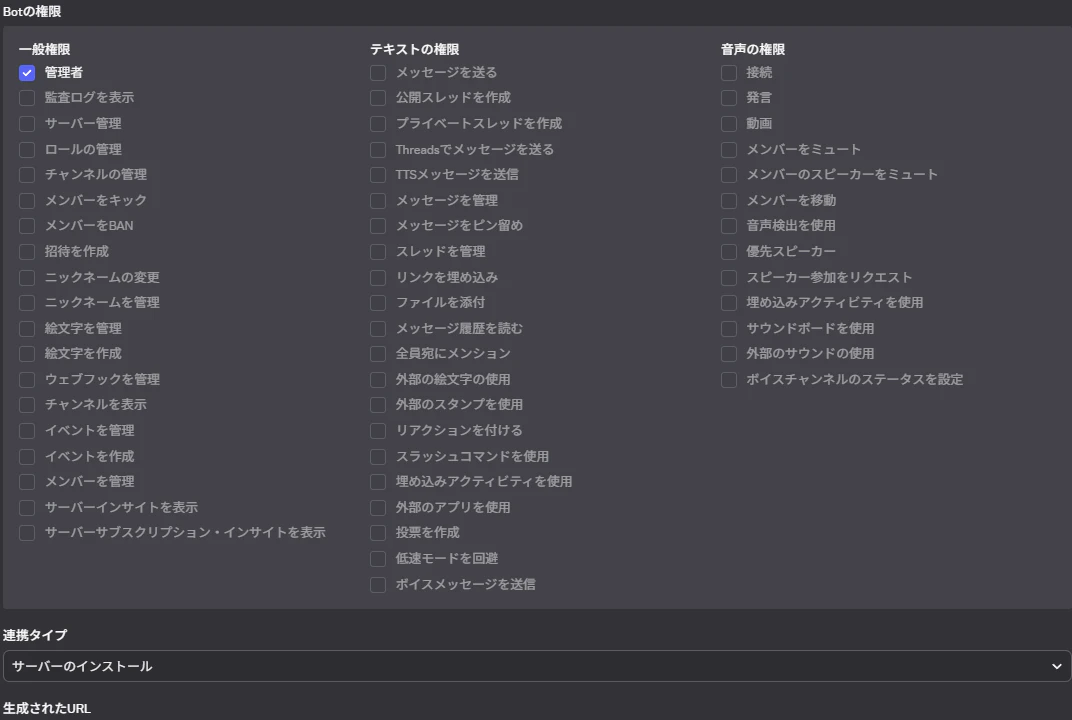
6. OAuth2 > URL Generator から bot と Administrator を選択し、生成された URL をブラウザで開いて Bot を自分のサーバーに招待します。
2. プロジェクトの初期化
次に、ローカル環境でプロジェクトを作成します。
# プロジェクトディレクトリの作成
mkdir my-discord-bot
cd my-discord-bot

# Bun の初期化(すべてデフォルトでOK)
bun init -y

# discord.js のインストール
bun add discord.js
3. 環境変数の設定
トークンをコードに直接書くのは危険なため、.env ファイルを作成します。Bun は標準で .env を読み込んでくれます。
DISCORD_TOKEN=ここに取得したトークンを貼る
4. index.ts の作成
メインとなる index.ts を記述します。今回はシンプルに !ping と打つと Pong! と返す機能を実装します。
import { Client, Events, GatewayIntentBits } from "discord.js";

// クライアントのインスタンスを作成
const client = new Client({
	intents: [
		GatewayIntentBits.Guilds, // ギルド(サーバー)に関するイベント
		GatewayIntentBits.GuildMessages, // ギルド内メッセージに関するイベント
		GatewayIntentBits.MessageContent, // メッセージの内容を読み取るためのインテント
	],
});

// Botが準備完了した時に実行されるイベント
client.once(Events.ClientReady, (readyClient) => {
	console.log(`準備完了! ${readyClient.user.tag} としてログインしました。`);
});

// メッセージが作成された時に実行されるイベント
client.on(Events.MessageCreate, async (message) => {
	// Bot自身のメッセージには反応しない
	if (message.author.bot) return;

	// 「!ping」というメッセージに反応
	if (message.content === "!ping") {
		await message.reply("🏓 Pong!");
	}
});

// Discordへログイン
client.login(process.env.DISCORD_TOKEN);
5. Bot の起動
Bun を使えば、ビルド不要でそのまま実行できます。
bun index.ts
ターミナルに 準備完了! [Bot名] としてログインしました。 と表示されれば成功です!
Discord サーバーで !ping と打ってみてください。Bot が反応するはずです。
解説:なぜ Bun なのか?
- 爆速: Node.js よりも起動が早く、開発体験が良い。
-
TypeScript 標準対応:
tscやts-nodeを設定しなくても、.tsファイルをそのまま実行可能。 - .env 標準対応: 追加のライブラリ(dotenvなど)なしで環境変数を扱える。
まとめ
今回は Bun を使って、最小構成で Discord Bot を作成しました。
index.ts 1ファイルだけで動くので、ちょっとしたツールを作るには最適です。
次回は、Slash Command(スラッシュコマンド)への対応や、コードの分割管理について解説します。
参考リンク
次の記事