Introduction
I am a member of Arcanain, a volunteer team working on autonomous driving robots in Japan. Recently, we decided to explore reinforcement learning for motion planning. To do this, we chose Unity ML-Agents as our simulation and training environment. Eventually, we hope to achieve something similar to what is described in this article, but in Unity.
In this post, we’ll focus on how to set up the environment for Unity ML-Agents. We’ll continue to build on this foundation and share updates as we progress toward our goal of autonomous driving simulation in Unity.
Prior Information
Environment
For this tutorial, we'll use either Ubuntu 22.04 or macOS 15.2 with the following key components on the table:
- Table
| name | version |
|---|---|
| Unity Editor | 2022.3.55f1 |
| Python | 3.10.8 |
| ML-Agents | ML-Agents Release 21 |
python packages
The result of the command $ pip list is bellow:
| Packages | version |
|---|---|
| mlagents | 0.30.0 |
| mlagents-envs | 0.30.0 |
| gym | 0.26.2 |
| gym-notices | 0.0.8 |
| numpy | 1.21.2 |
| protobuf | 5.29.2 |
| torch | 1.11.0 |
| tensorboard | 2.18.0 |
| tensorboard-data-server | 0.7.2 |
| PyYAML | 6.0.2 |
| attrs | 24.3.0 |
| cattrs | 1.5.0 |
| grpcio | 1.69.0 |
Note
It’s important that the versions of mlagents and mlagents-envs match the requirements for the specific ML-Agents Unity Toolkit release you’re using. In this article, we’ll install Release 21, so we’ll use mlagents and mlagents-envs at version 0.30.0. For more deteils see this release note.
1. Install Unity Hub
Reference1.
Add the public signing key, run the following command:
$ wget -qO - https://hub.unity3d.com/linux/keys/public | gpg --dearmor | sudo tee /usr/share/keyrings/Unity_Technologies_ApS.gpg > /dev/null
To add the Unity Hub repository, you need an entry in /etc/apt/sources.list.d. Run the following command to add the Unity Hub repository:
$ sudo sh -c 'echo "deb [signed-by=/usr/share/keyrings/Unity_Technologies_ApS.gpg] https://hub.unity3d.com/linux/repos/deb stable main" > /etc/apt/sources.list.d/unityhub.list'
Update the package cache and install the package:
Mac user can install it on this page: Start Your Creative Projects and Download the Unity Hub | Unity
$ sudo apt update
$ sudo apt-get install unityhub
Then, intsallation is complete.
Start Unity Hub by terminal command
$ unityhub
If the installation finished without any problems, you should see a window like this:

Create Account
If you don't have an Unity account, you have to create new one.

2. Install Unity Editor
After cretating an account or loggin, you can install the Unity Editor.
The minimum supported Unity version was updated to 2022.3. 2, make sure to select 2022.3 or newer when installing.

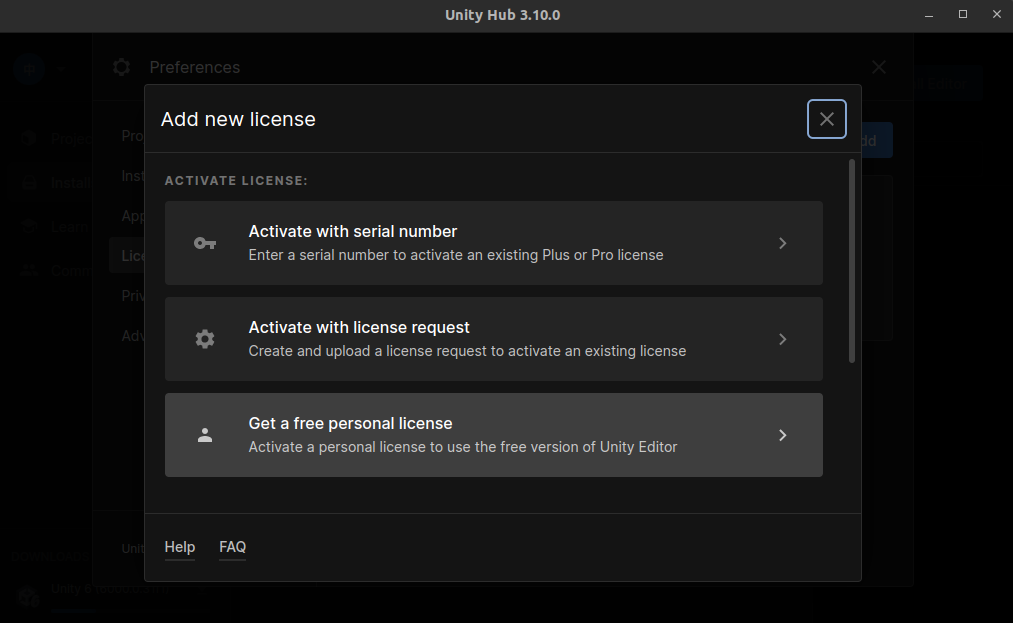
Licence (Optional)
Recently, you don't have to add a license for personal use. A Free Personal License is added by default.


2. Install ML-Agents
2.1 Install ML-Agents Tool Kit
First, clone the ML-Agents Toolkit from GitHub by running the following command:
$ git clone https://github.com/Unity-Technologies/ml-agents.git
After the cloning finished, checkout the branch to release 21.
$ cd ml-agents
$ git checkout release_21
2.2 Install the mlagents for python
The mlagents Python package provides the core training scripts and interfaces for communicating with the Unity environment.
Install it by running:
$ pip3 install mlagents
When the installation finishes, verify it with the following command:
$ mlagents-learn --help
If you see an output similar to:
usage: mlagents-learn [-h] [--env ENV_PATH] [--resume] [--deterministic]
                      [--force] [--run-id RUN_ID] [--initialize-from RUN_ID]
                      [--seed SEED] [--inference] [--base-port BASE_PORT]
                      [--num-envs NUM_ENVS] [--num-areas NUM_AREAS] [--debug]
                      [--env-args ...]
                      [--max-lifetime-restarts MAX_LIFETIME_RESTARTS]
                      [--restarts-rate-limit-n RESTARTS_RATE_LIMIT_N]
                      [--restarts-rate-limit-period-s RESTARTS_RATE_LIMIT_PERIOD_S]
                .
                .
                .
                .
then you have successfully installed the mlagents Python package!
3. Tutorial
Start unity hub with the following command:
$ unityhub
First, you have to create a new Project.
Push [Add] -> Add project from disk.
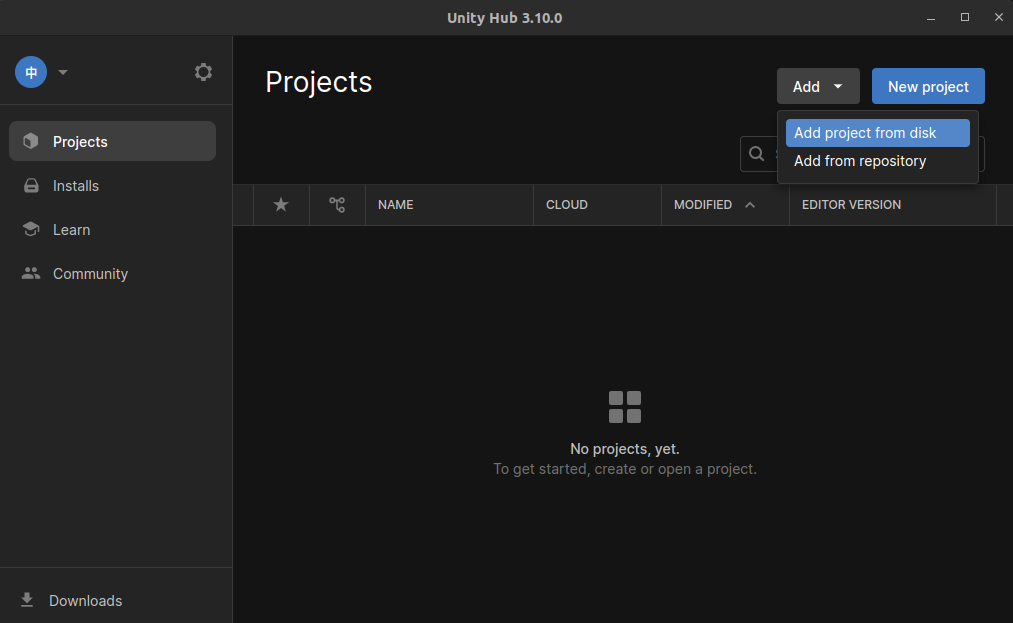
In this tutorial, we use cloened repository ml-agents.
Choose the directory which you have cloned before
-
.../ml-agents/Project-
ml-agentsis the cloned directory
-

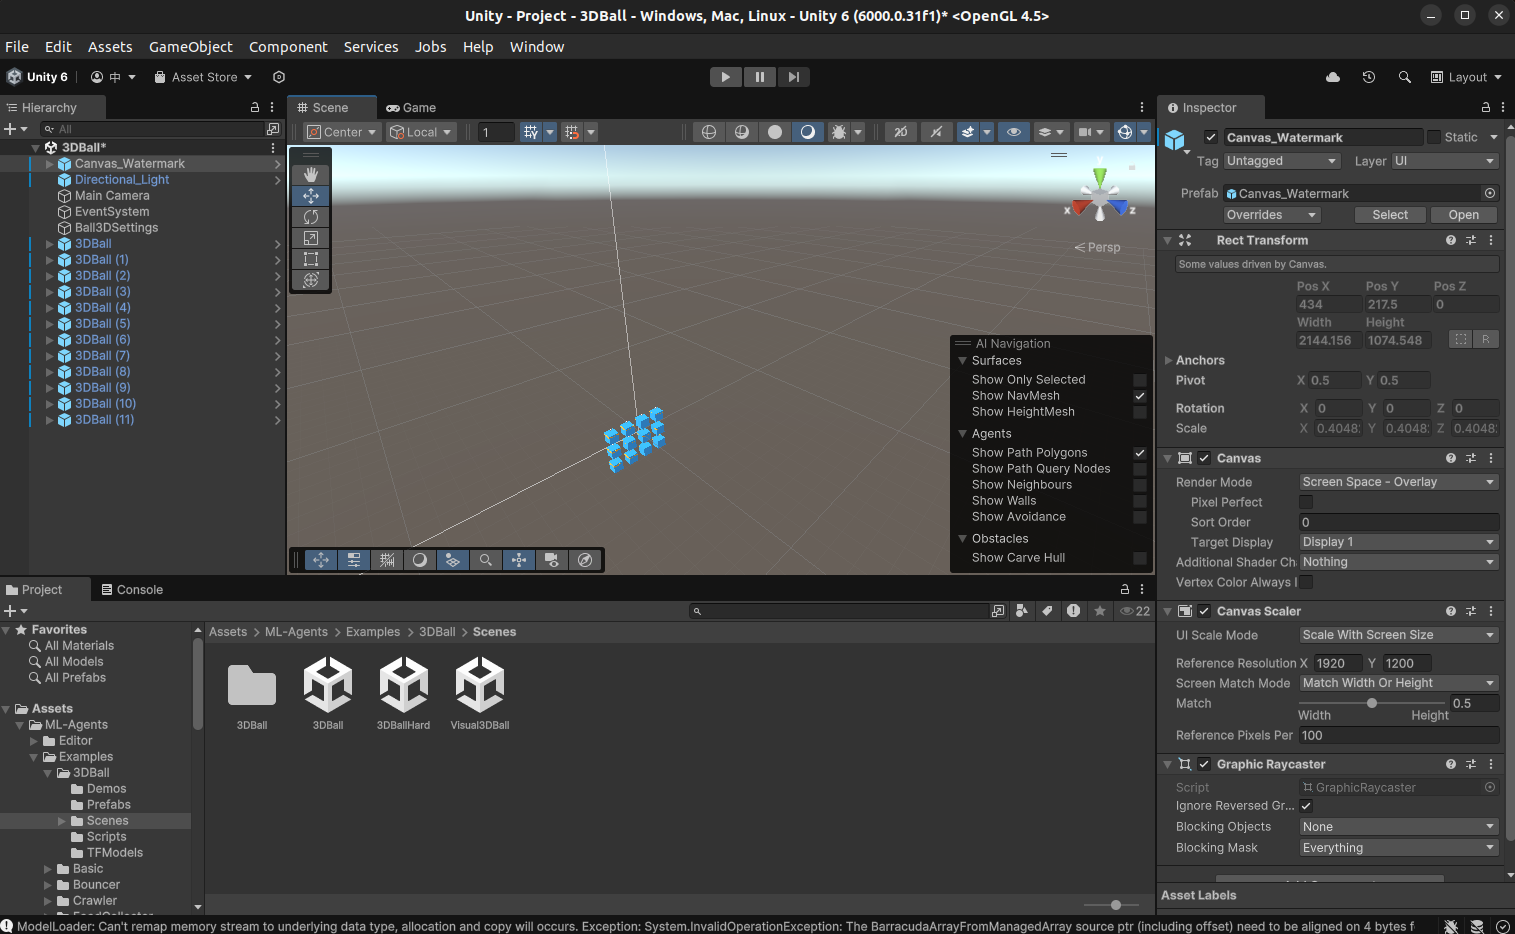
If you can see this window it is working.

demo
You can see Assets on the bottom of the previous window.
click "「ML-Agents」→「Examples」→「3DBall」→「Scenes」→「3DBall」"

If you can see these objects, loading has successed.
run this command:
$ cd /path/to/Unity/ml-agents
$ mlagents-learn config/ppo/3DBall.yaml --run-id=first3DBallRun
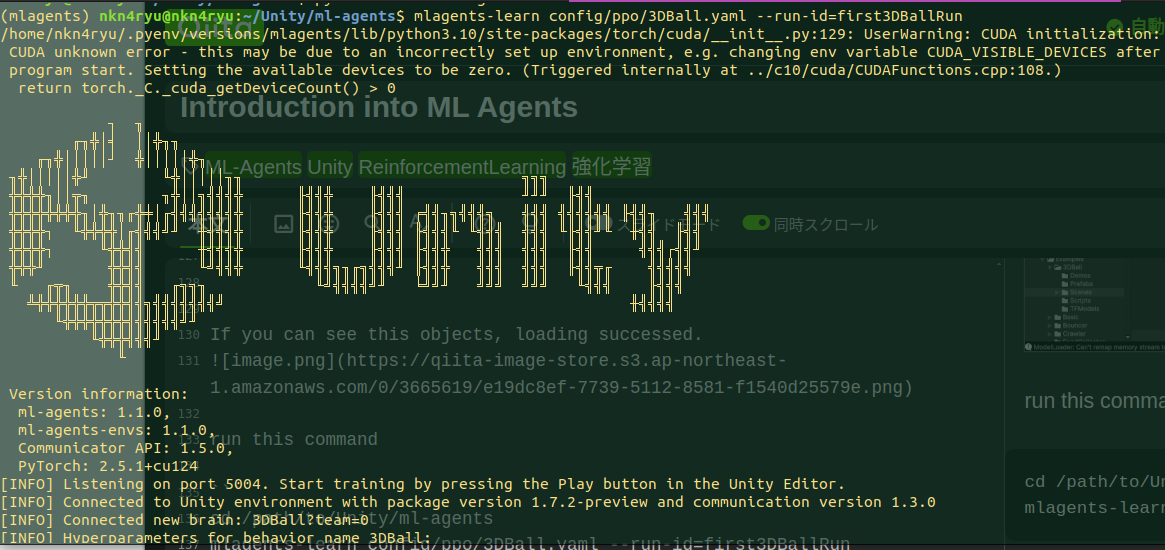
then, push "start botton" of Unity Editor.

Reinforcement learning starts!!
After a while the learning will finish and you can see the reslult of learned model.
Acknowledgements
This project is supported by GxP (Growth xPartners) Inc.. They have provided us with valuable advice and essential equipment for our robots. We extend our deepest gratitude for their support.