はじめに
Herokuアプリにカスタムドメインを設定したときの備忘録です。
Dyno
有料プラン(Hobby)で実施しました。
補足:無料プラン(Free)では本投稿に記載されている操作が行なえない可能性があります
目的
- ルートドメインでアクセス可能にする(例:https://xxx.com)
- httpsでアクセス可能にする
準備. ドメインを購入
自分の場合はGoogleDomainでxxx.comを購入しておきました
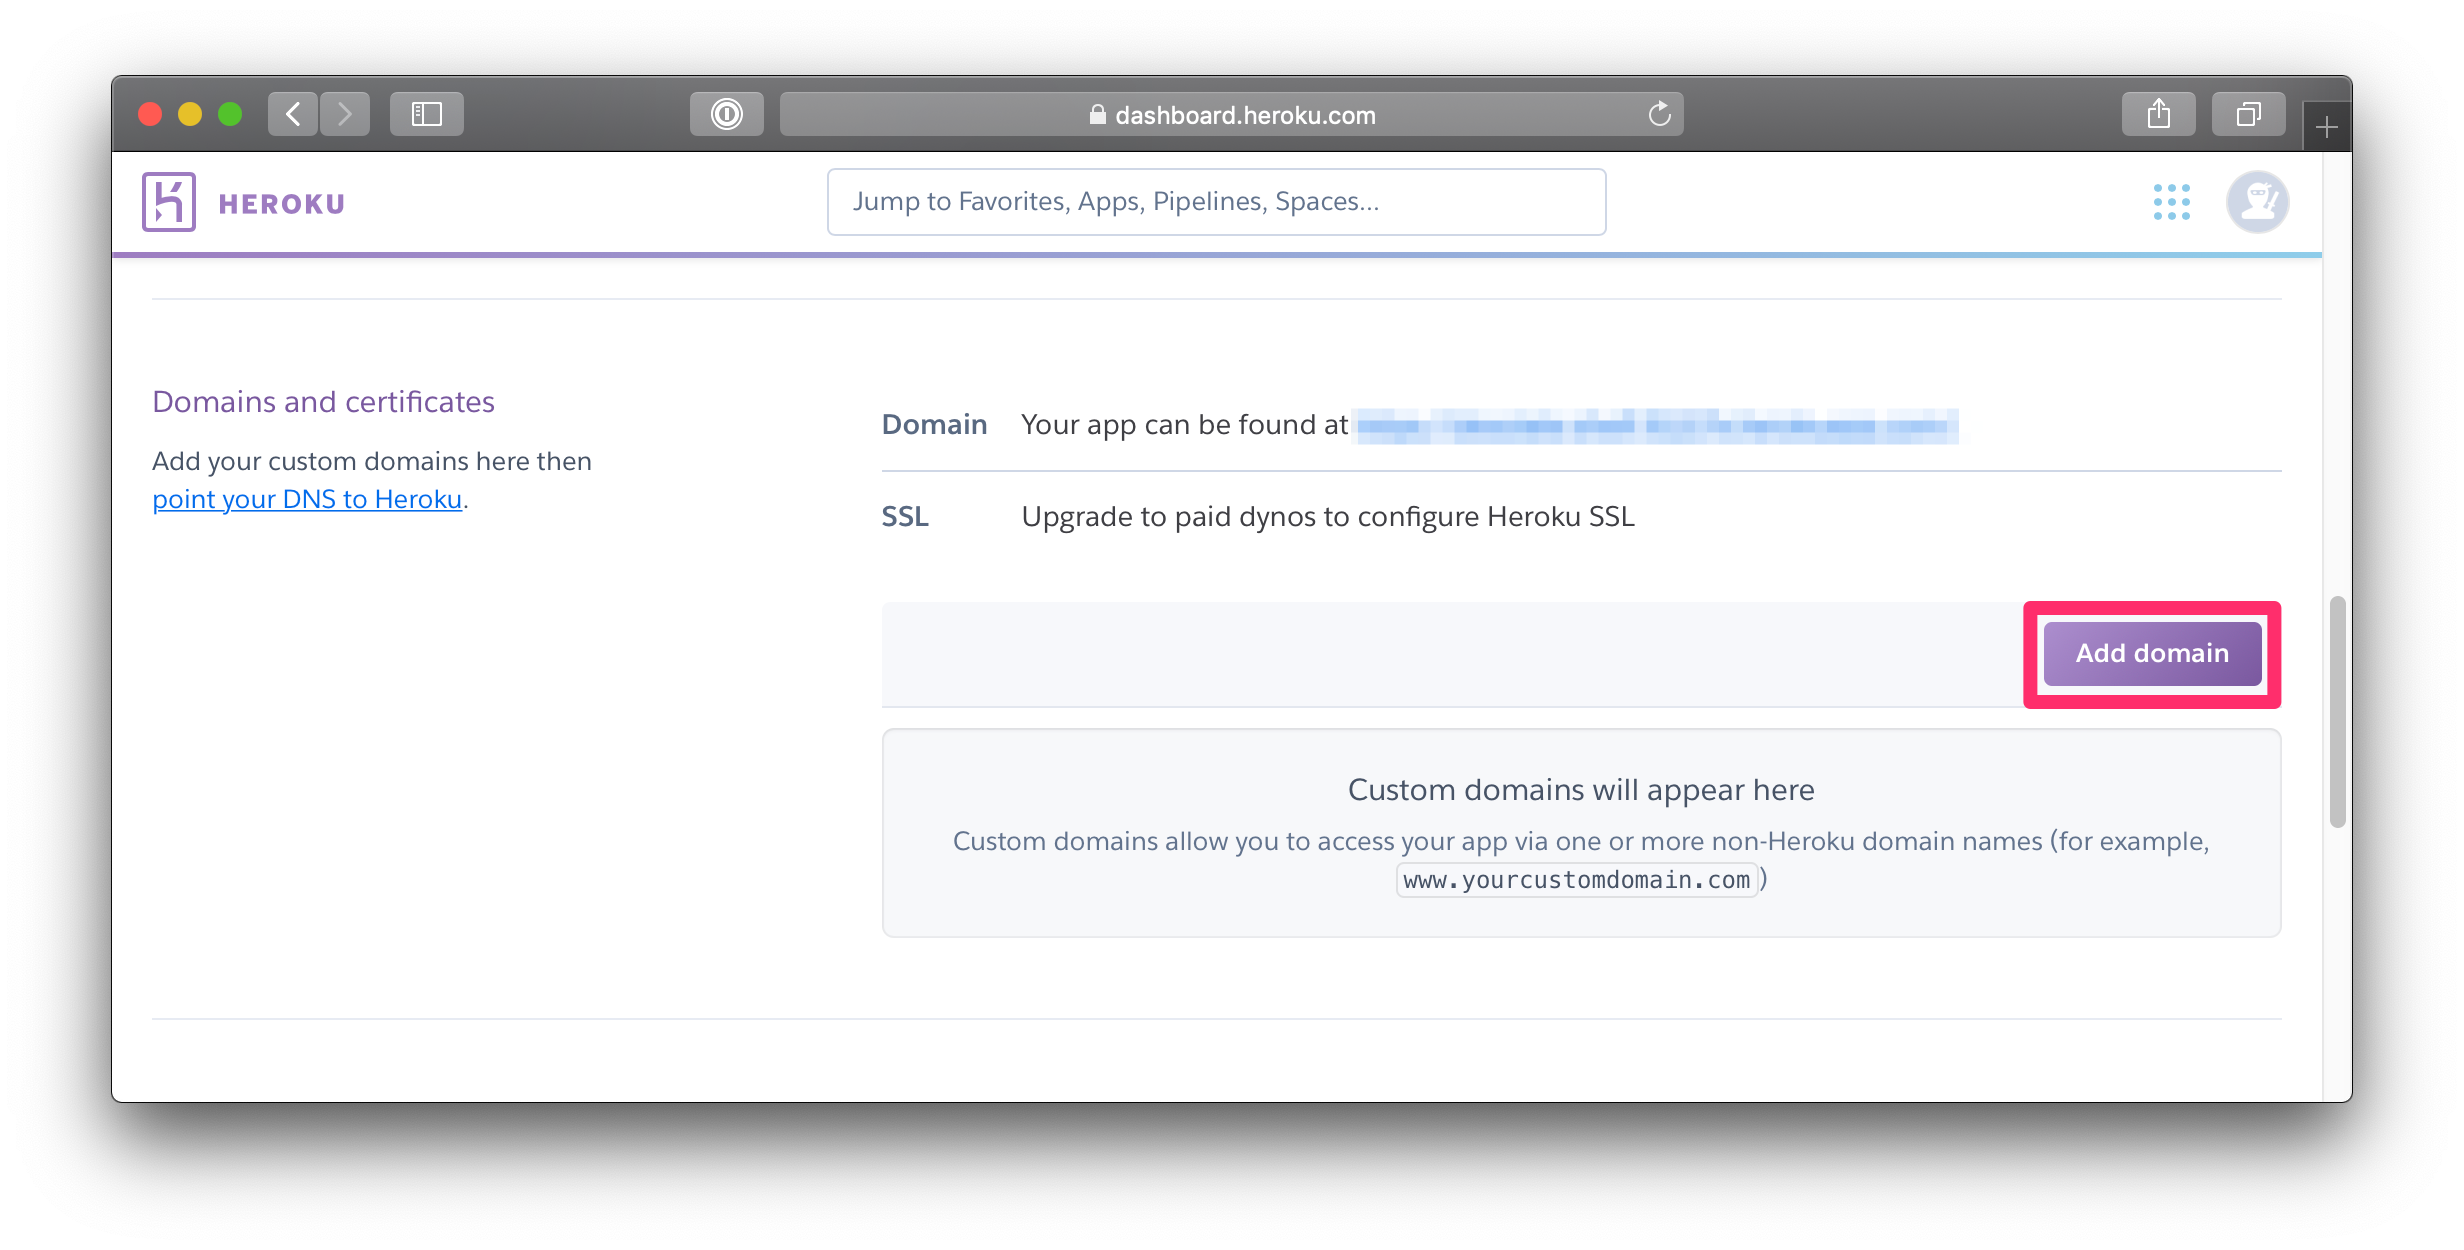
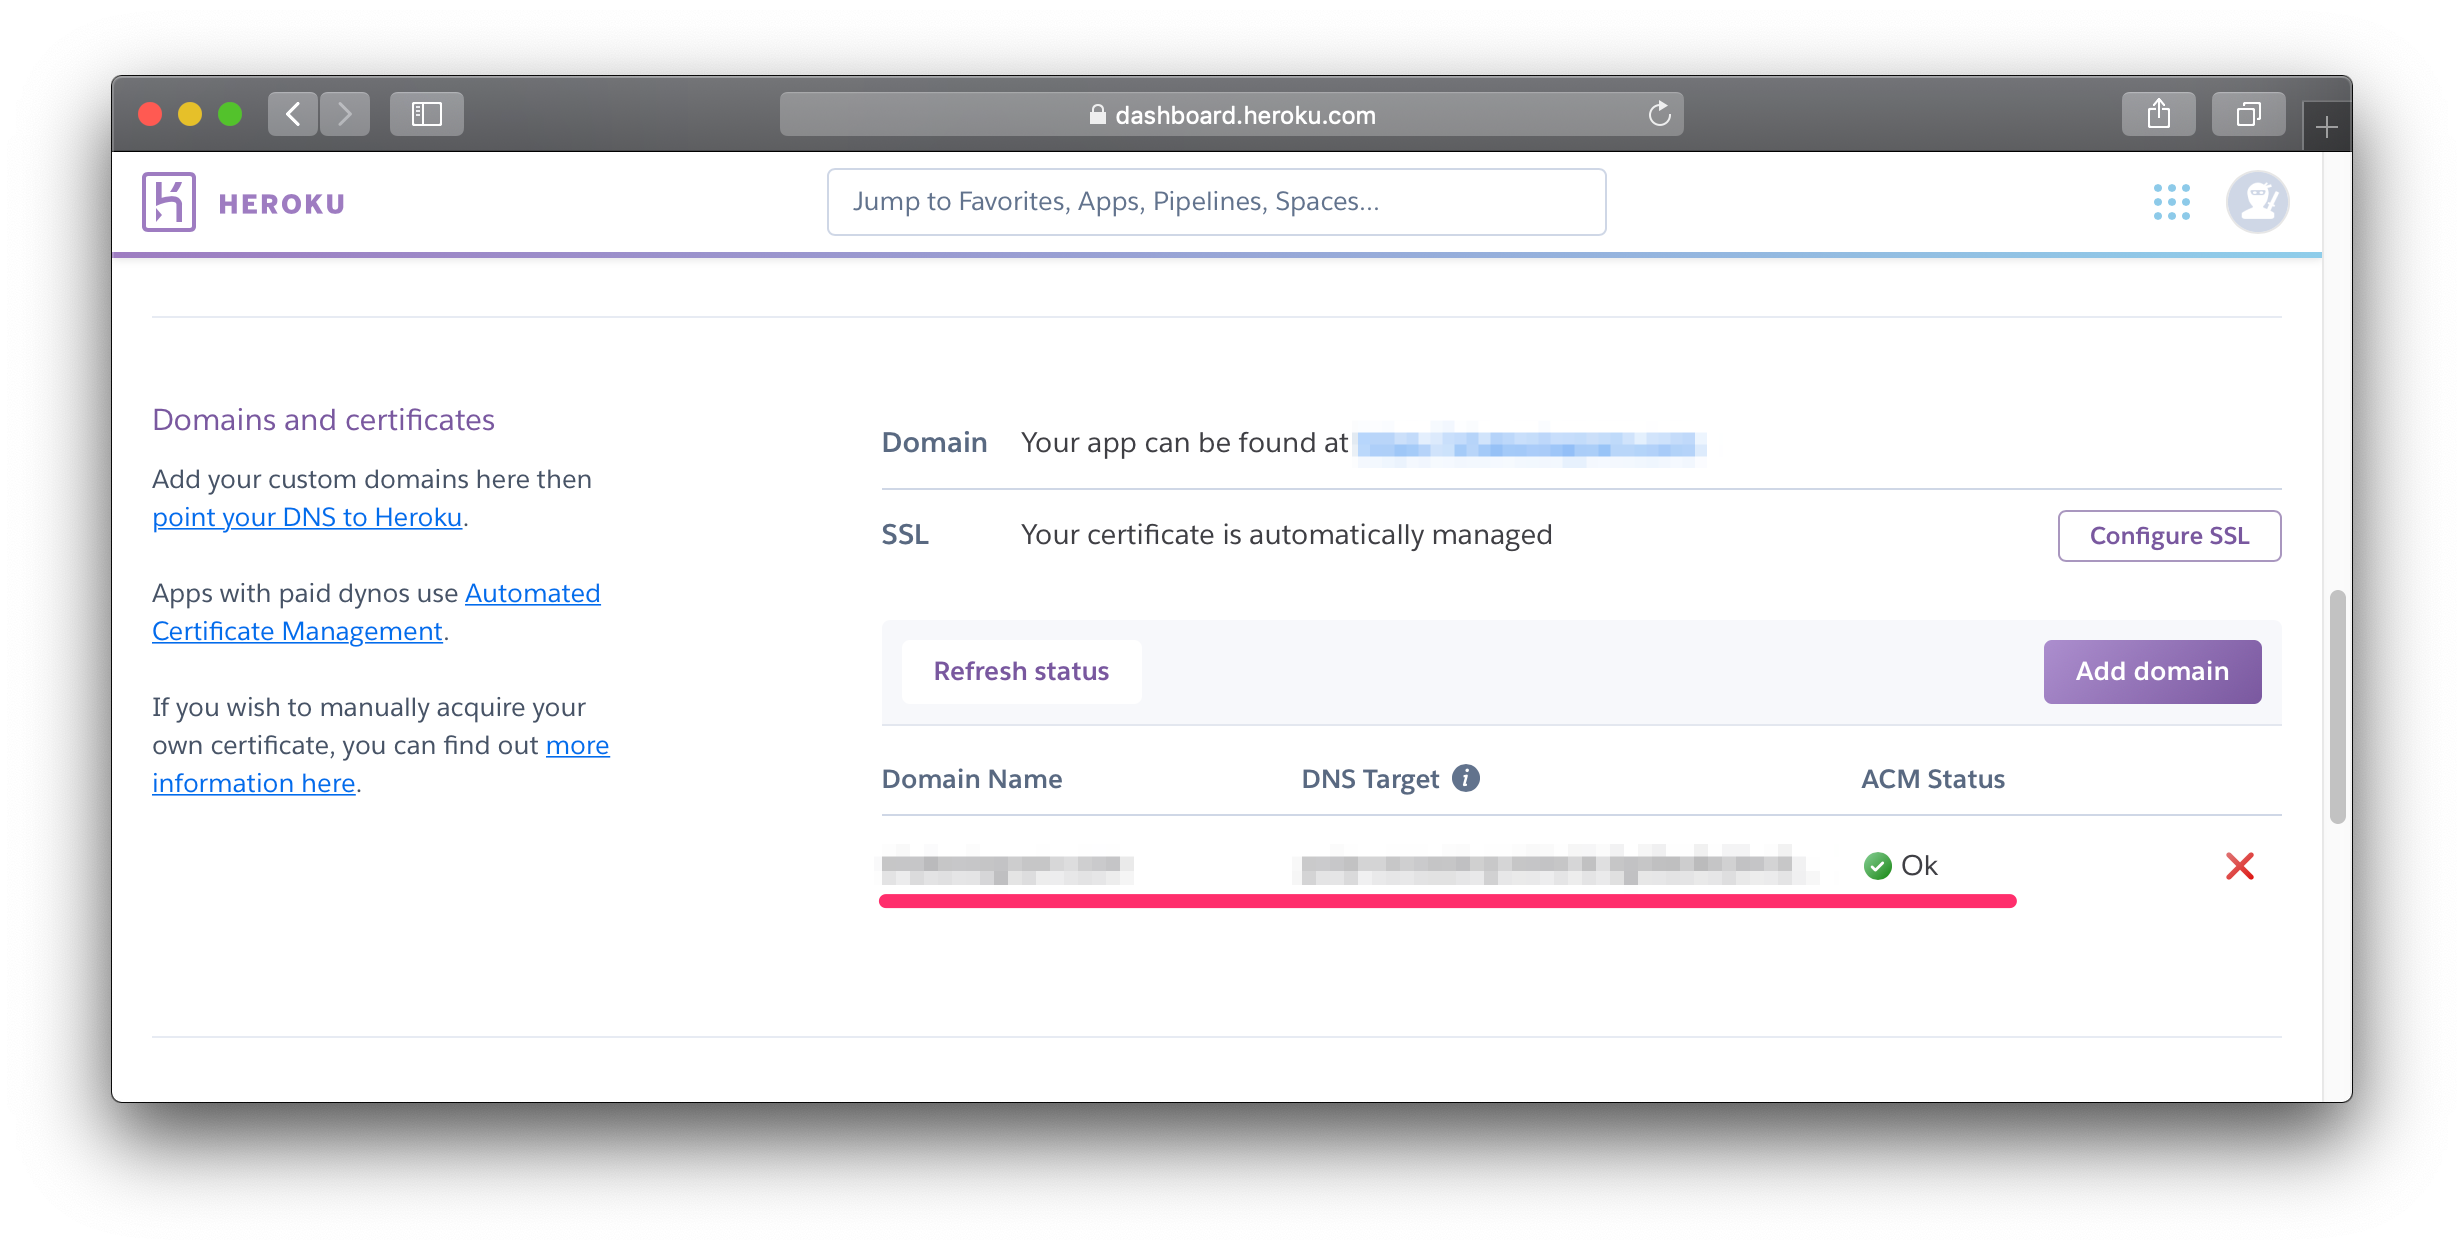
1. [Settings] ドメイン&SSL設定
SettingsのDomains and Certificatesでドメインを追加する


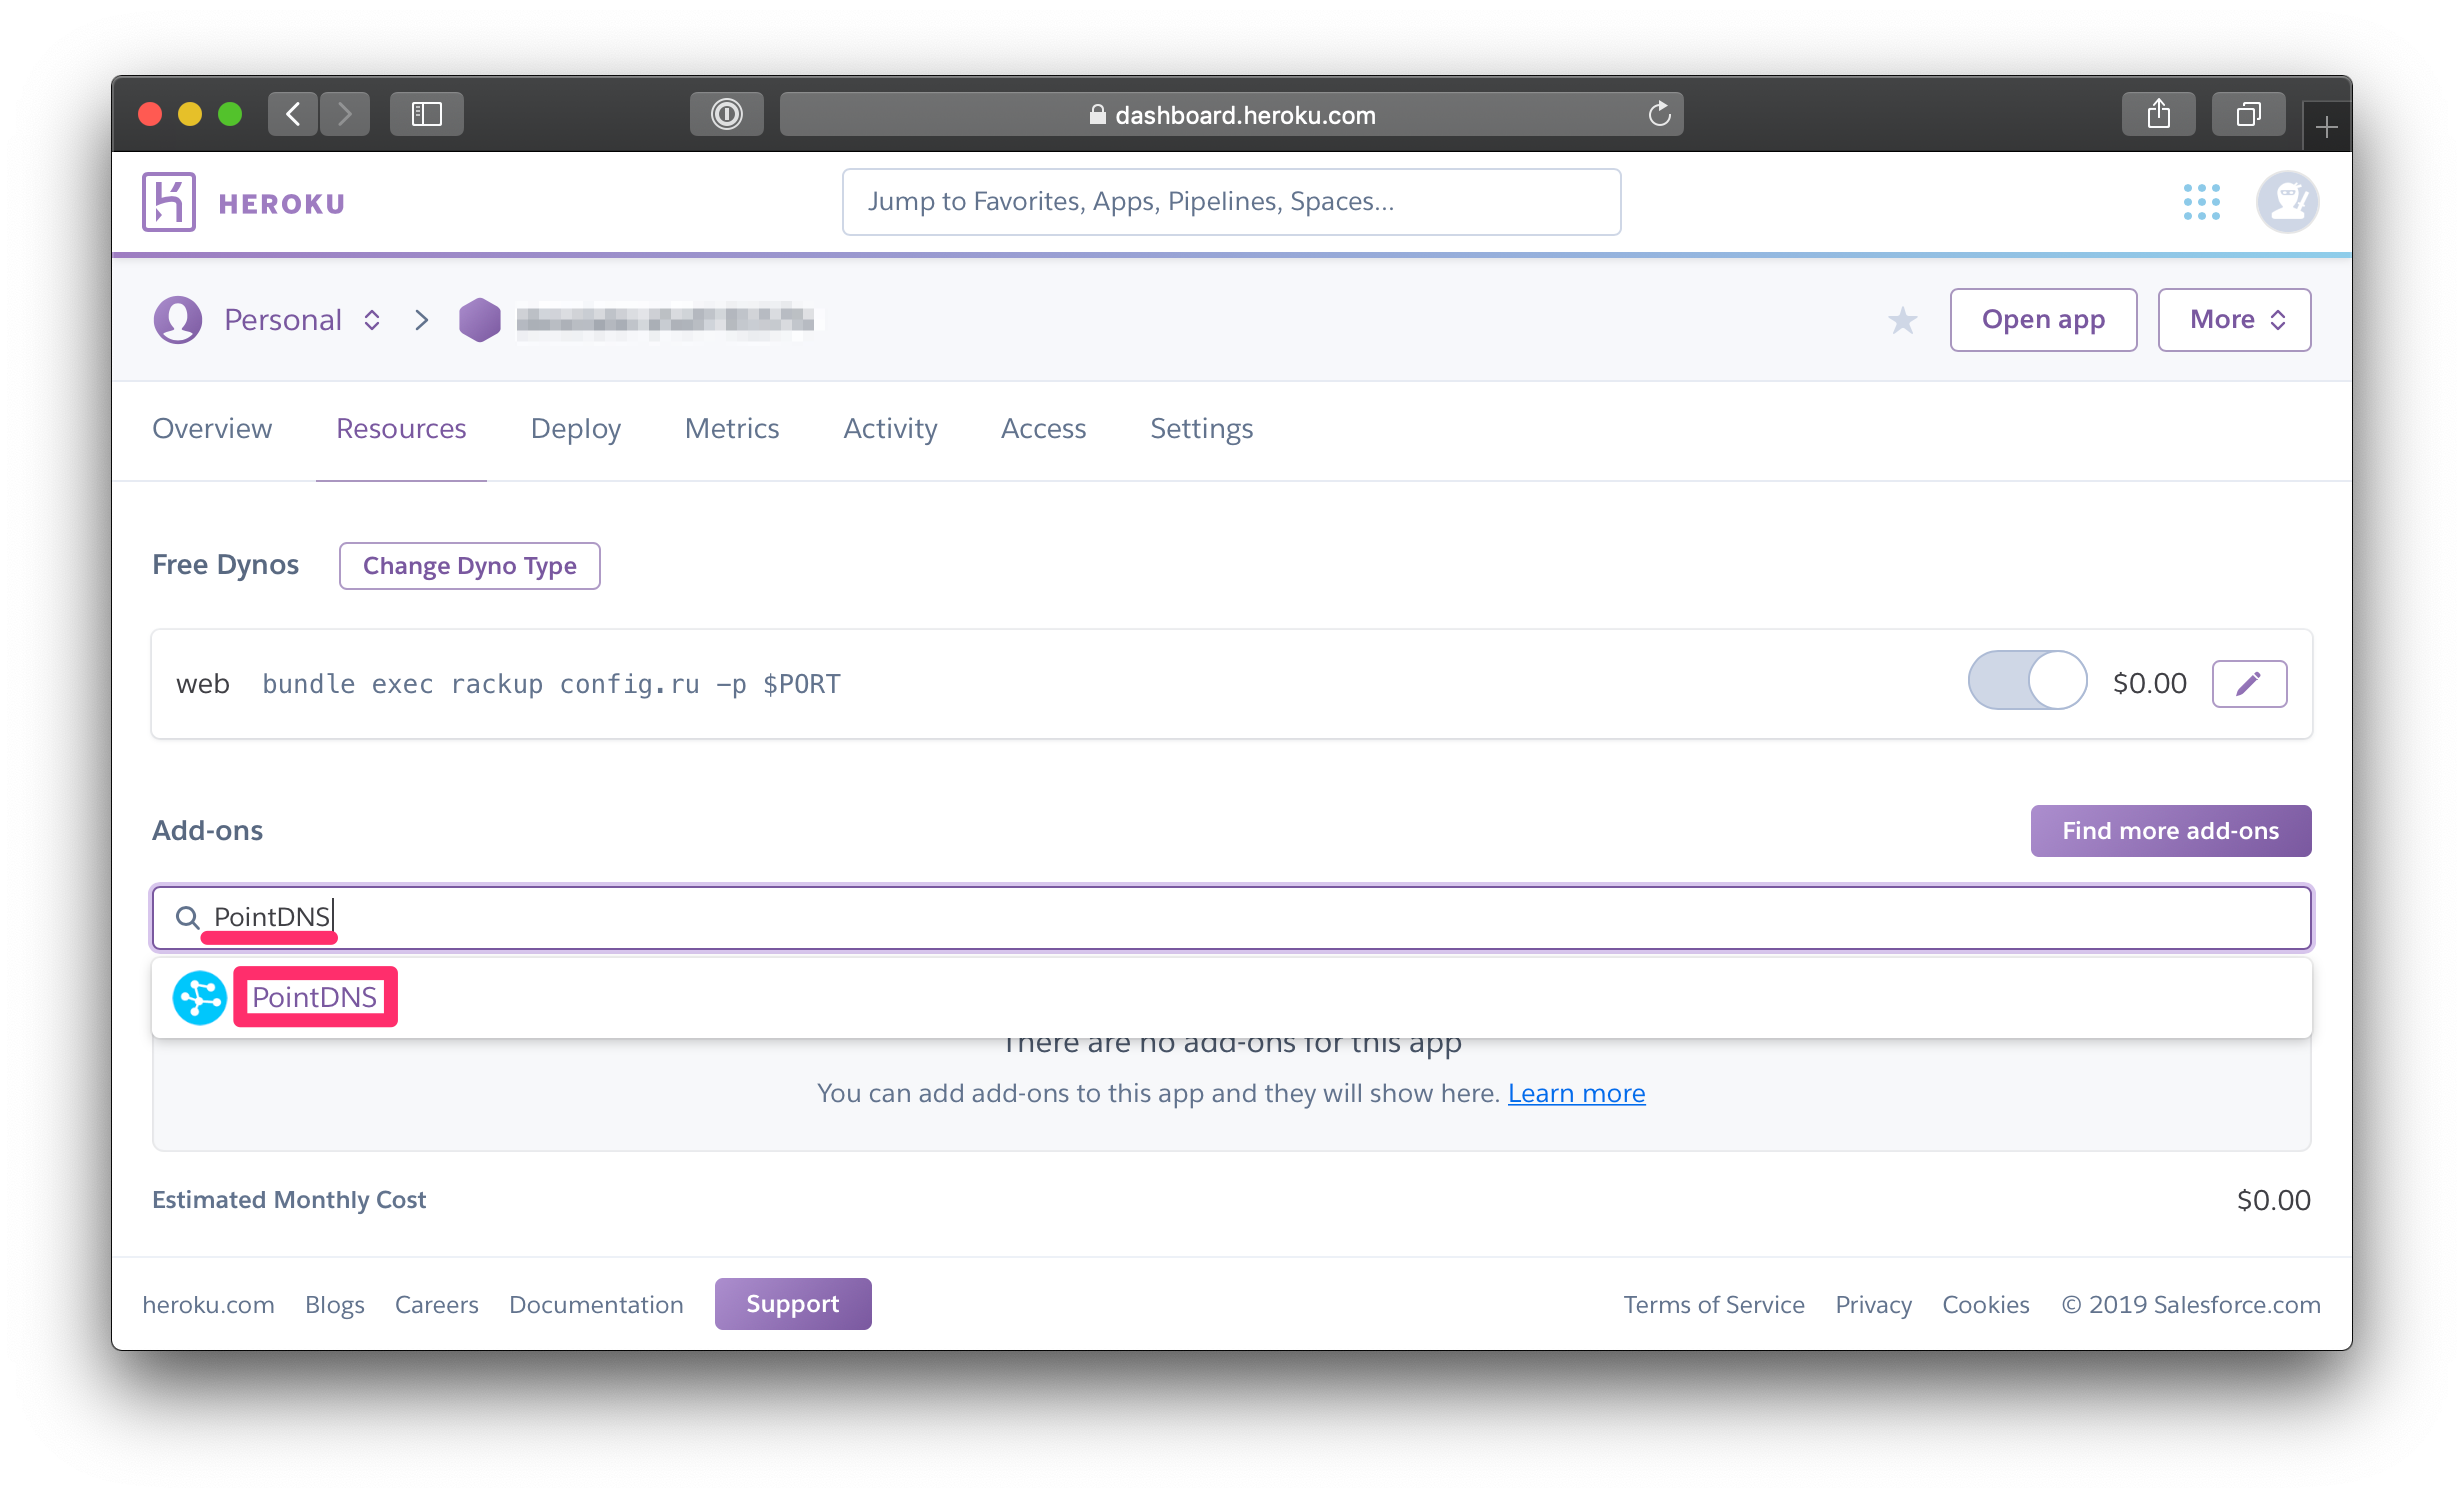
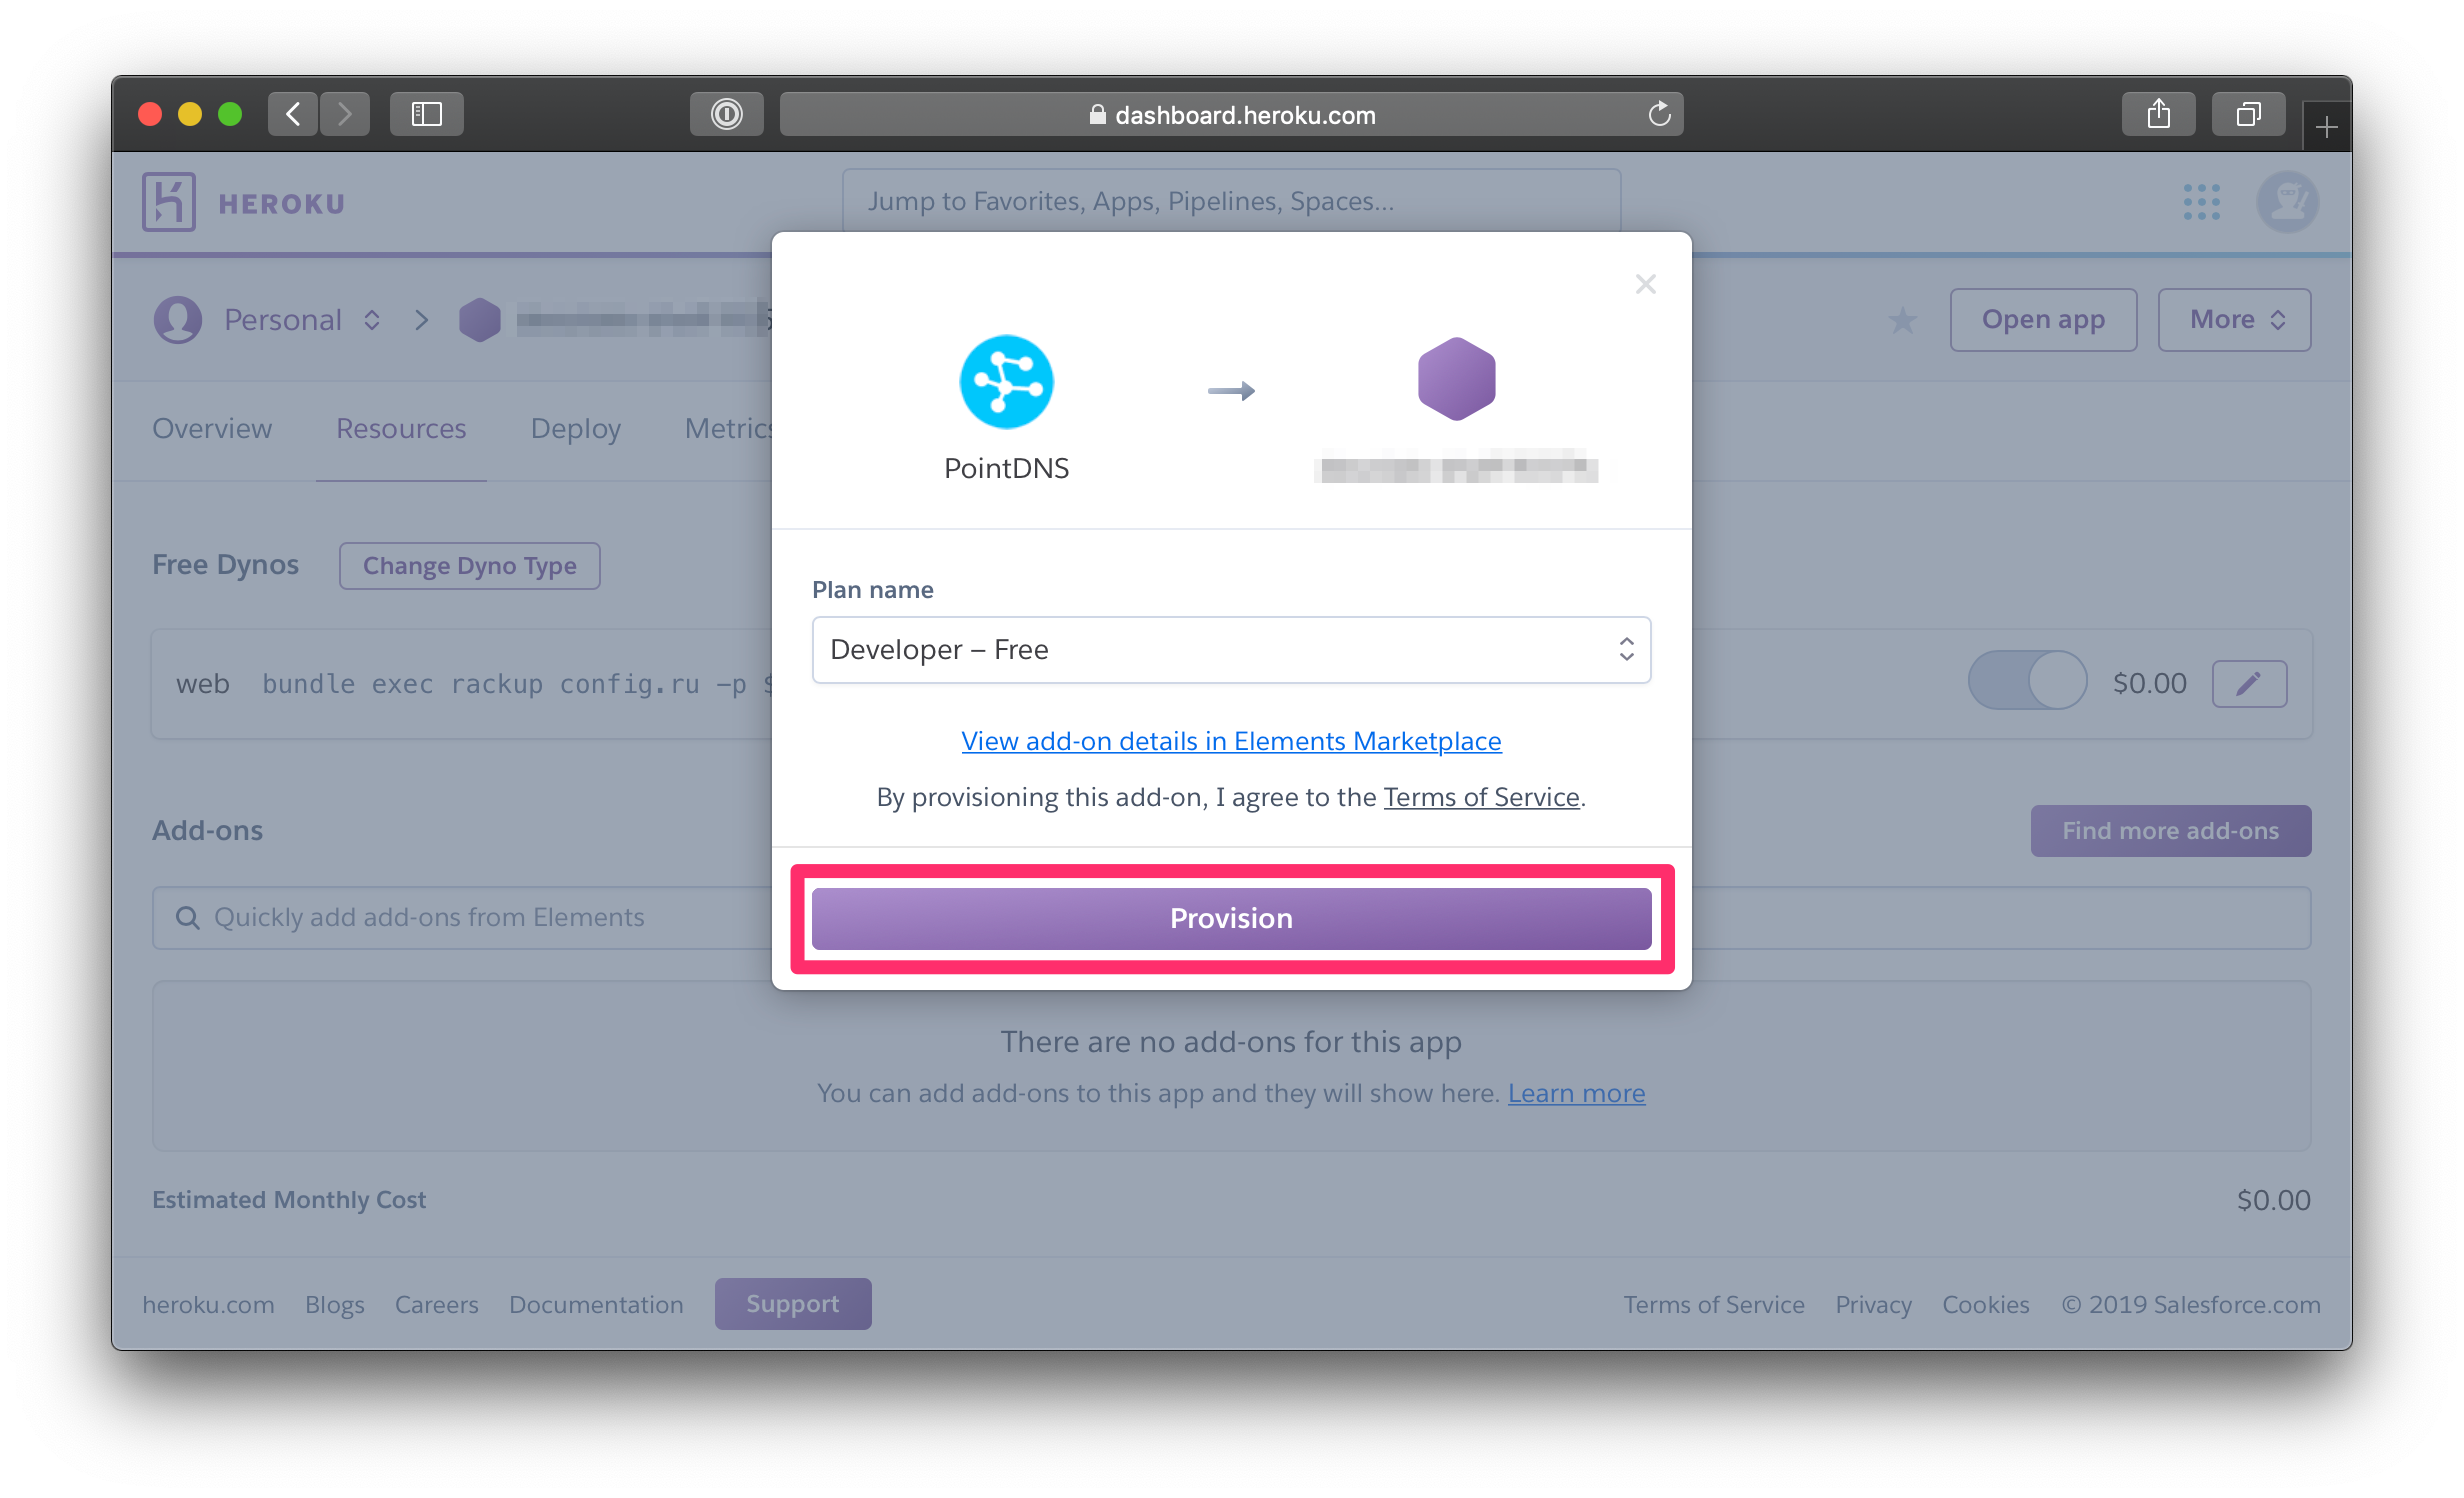
2. [Resources] PointDNSアドオン追加
ResourcesでPointDNSアドオンを追加する

3. [PointDNS] NSレコードの値を確認
PointDNSでNSレコードの値を確認する


4. [DNSサーバ] NameServerを設定
ドメインを管理しているDNSサーバのNameServerにPointDNSで確認したNSレコードの値を設定する
